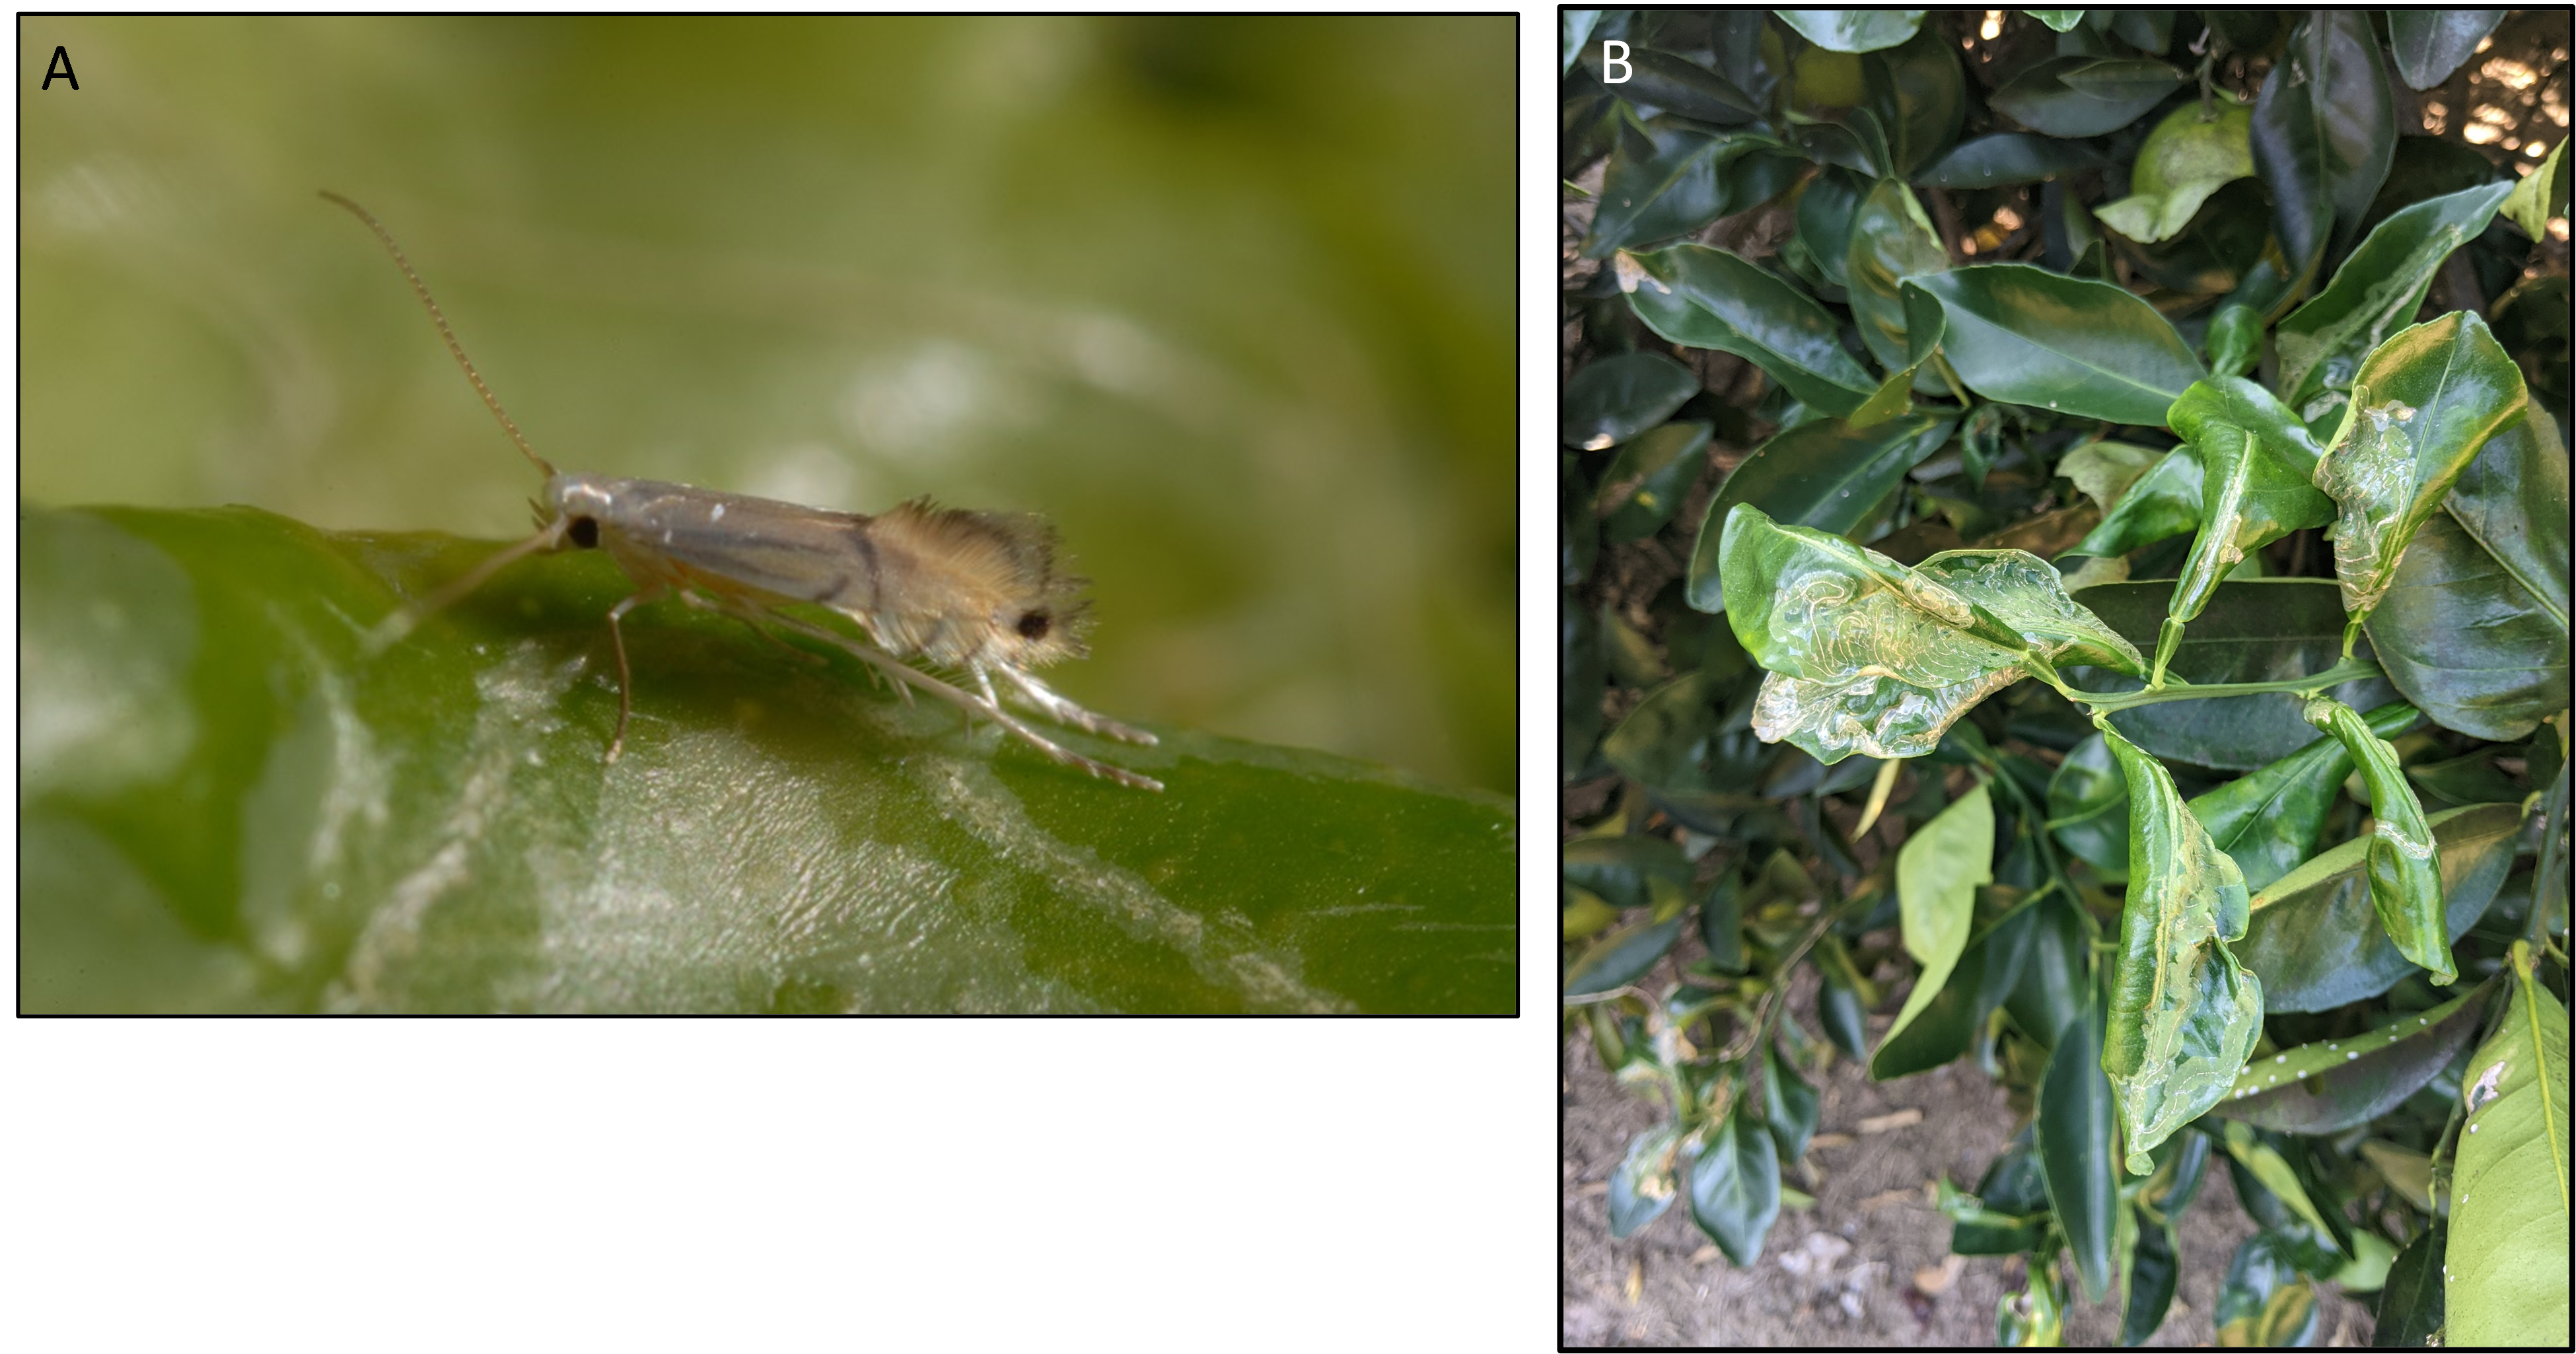
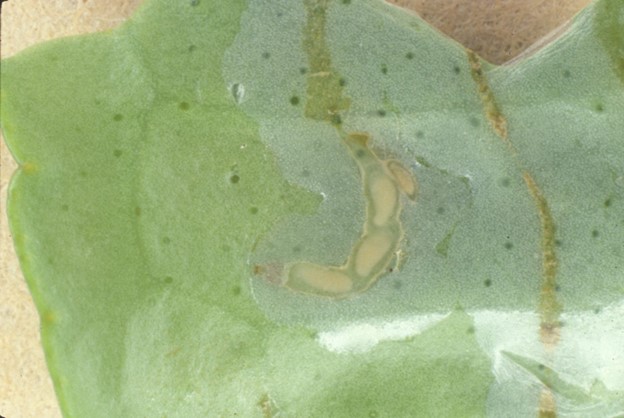
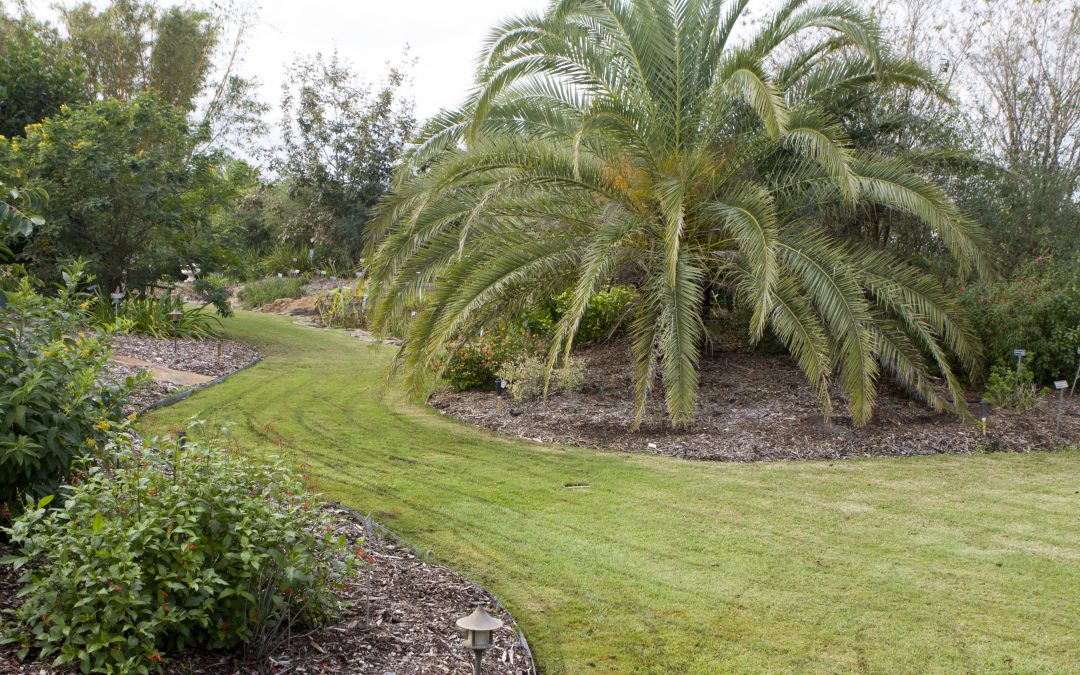
Citrus is one of the most cherished fruit trees in the Panhandle. Citrus owners are well aware that every year the main damage to their trees come from citrus leafminer (CLM). CLM is a small moth and its larvae feeds between the tissue layers of new leaf growth, causing serpentine mines to form under the leaf cuticle (Fig. 1). The feeding damage results in leaf curling and distortion, and severe infestations of CLM on young trees can retard the growth of trees. Another threat concerning CLM in Florida is that the mines provide an open wound for citrus canker to enter, a bacterial disease that has been found recently in the Florida Panhandle, Georgia, and Alabama.
Most commercial growers deal with CLM in young trees by a soil application of systemic insecticide before the flush season, followed by a foliar insecticide when the systemic drench’s toxicity is declining. Homeowners, however, have limited access to these chemistries. Garden systemic insecticides that include imidacloprid (Bayer’s Tree & Shrub Insect Control™, Merit®, etc.) and dinotefuran (Greenlight Tree and Shrub Insect Control™, Safari®, etc.) are among the few options for CLM control. For the best efficacy, those insecticides should be applied two weeks before the start of the flushing season to allow time for the insecticide to move from the roots into the canopy. To avoid leaching of insecticide away from the root zone, soil applications should be made within a 24-hour period without rain. Citrus trees usually have several flushes per year, depending upon cultivar, climate, and crop load. However, in the Florida Panhandle, most citrus cultivars have two major flushes in May and September.
Importantly, systemic insecticides are only efficient against CLM for small immature trees; therefore, the only products labeled for use against CLM on mature trees are foliar sprays. Horticultural oils or insecticides with spinosad (such as Monterey® Garden Insect Spray) are some options available for homeowners. However, achieving leafminer control with foliar applications on mature trees is challenging due to unsynchronized flushing of trees. Foliar applications should be timed with the appearance of the first visible leaf mines. In any case, be sure to READ THE LABEL and follow all the label directions.
Cultural practices, and non-insecticidal methods.
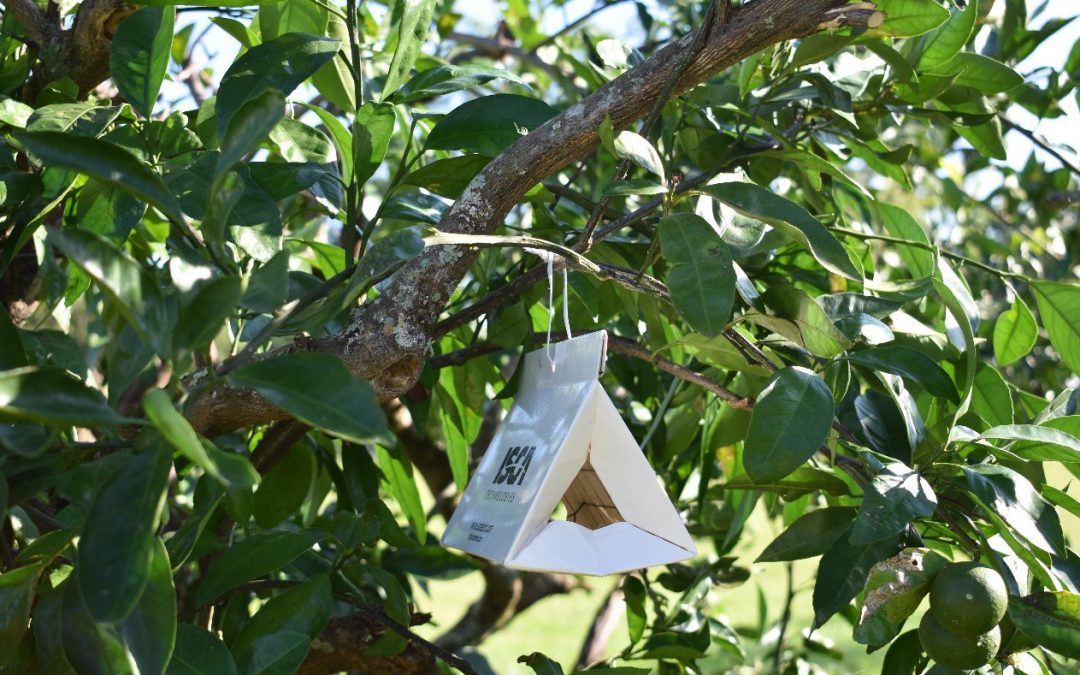
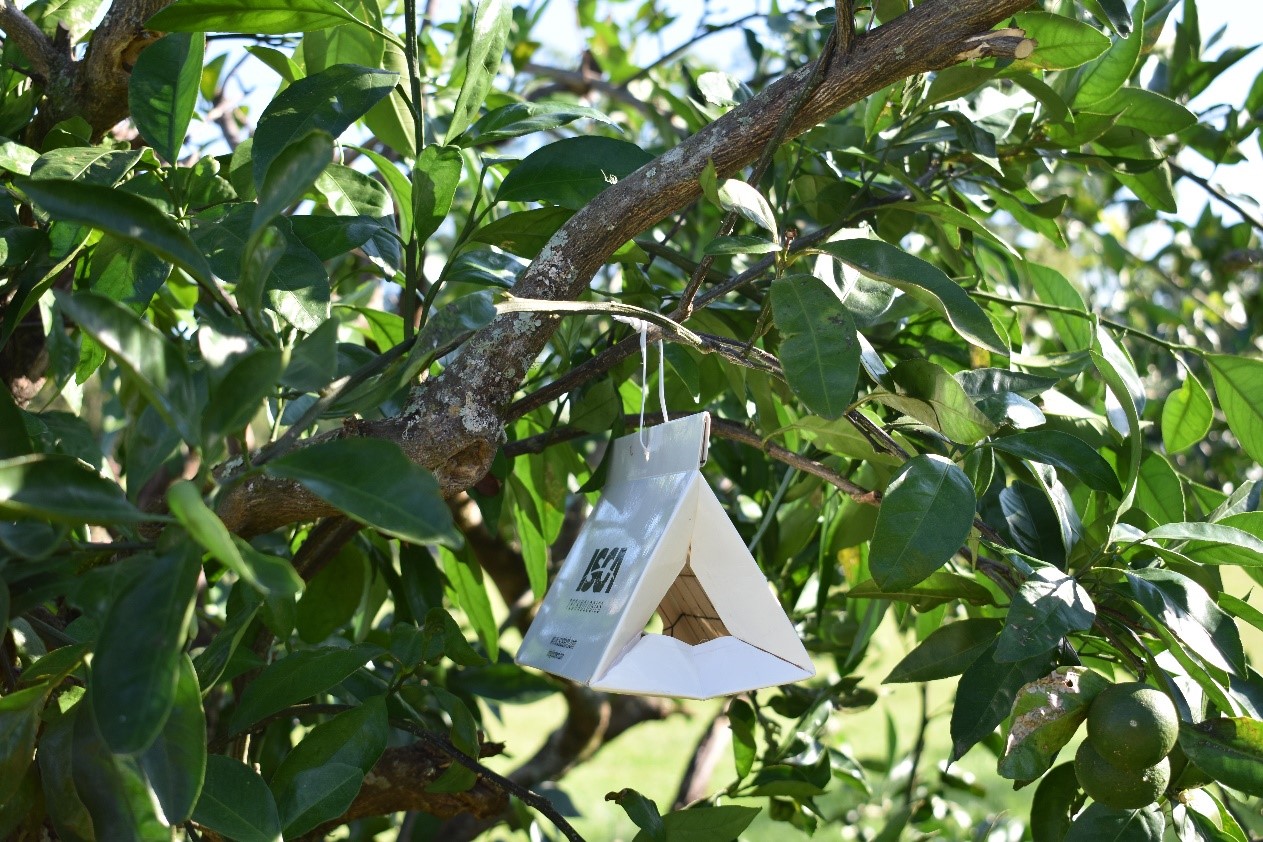
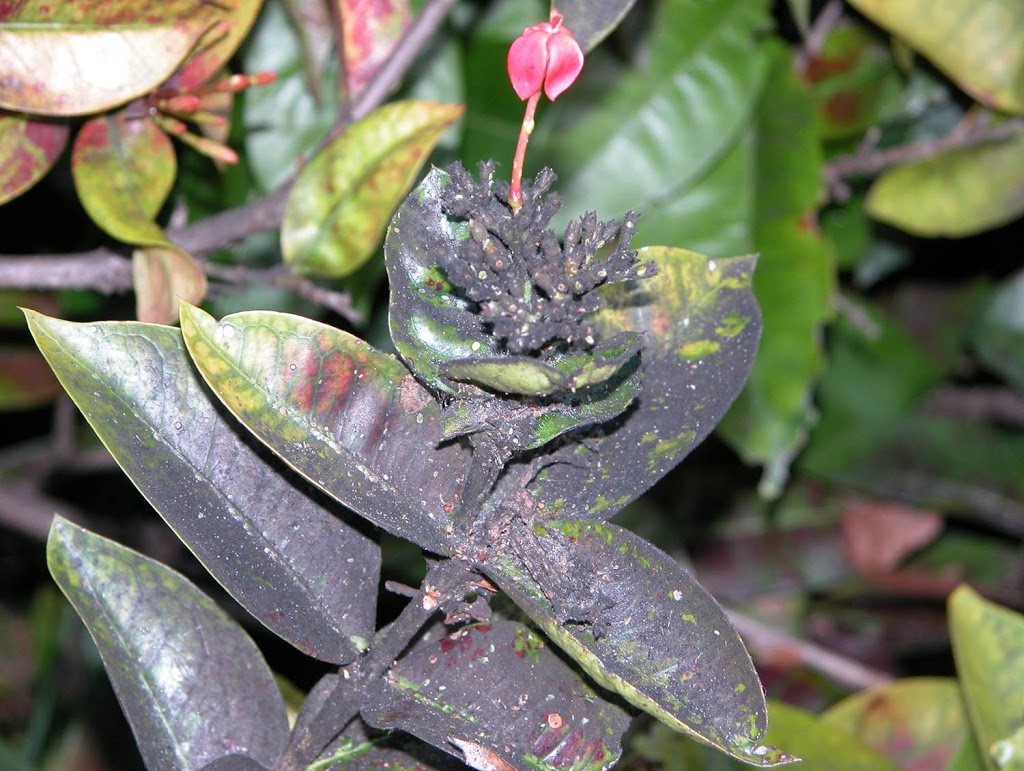
For isolated trees in a backyard, cultural practices and control through mass trapping are usually sufficient to control CLM and insecticide use is not recommended, especially for mature trees. One of the basic cultural practices is to remove any stems that grow below the bud union or from the rootstock, also called ‘suckers’ (Fig. 2). Those rootstock shoots compete with the scion shoots and are great reservoirs for CLM; removing them will help reducing CLM population. On isolated trees, mass trapping using CLM pheromone provide good results (Fig. 3). The mass trapping method is constituted of a delta trap baited with a lure that emits a large quantity of CLM sex pheromone. CLM males are attracted by the odor and are captured in the delta trap’s sticky liner. Those traps are commonly used by growers to monitor CLM populations, but for homeowners they are sufficient to control CLM on a single tree. This trap and a lure method should protect a single tree for approximately 3 months. Finally, the last option is the use of biological control. Several natural enemies are predators or parasitize CLM. In some case, biological control can reduce CLM populations by 90%. Primary predators of CLM include ants, lacewings, and spiders, as well as a parasitic wasp, Ageniaspis citricola that was introduced into Florida and has become established (Fig. 4).
New growth from the rootstock (called ‘suckers’, red arrow) are a source for CLM infestation and should be removed.
Baited pheromone trap for citrus leafminer (picture Danielle Sprague).
Biological control is a pillar of integrated pest management. It may seem a bit daunting the principle is simple. All things in nature have predators including insects. Biological control is simply building a conducive environment for the predators of undesired pests. One animal not often thought of in this capacity is bats. Insectivores by nature, these underutilized creatures have a big impact to your open spaces. Their steady diet of moths (Lepidoptera), beetles (Coleoptera) and flies (Diptera, which includes mosquitoes) reduce insect pressure to your gardens and landscaping.
I know what you are thinking. How effective can they possibly be? Pregnant females consume up to two thirds of their body weight through the summer months while rearing pups. Bats are small but keep in mind that these are not solitary animals. In south Texas, a single large colony consumes enough insects to save cotton farmers an estimated $741,000 per year in insecticides. That is just to illustrate the point as you won’t be able to attract huge colony. There is no reason to believe a smaller colony will not provide similar services in your gardens.
Habitat
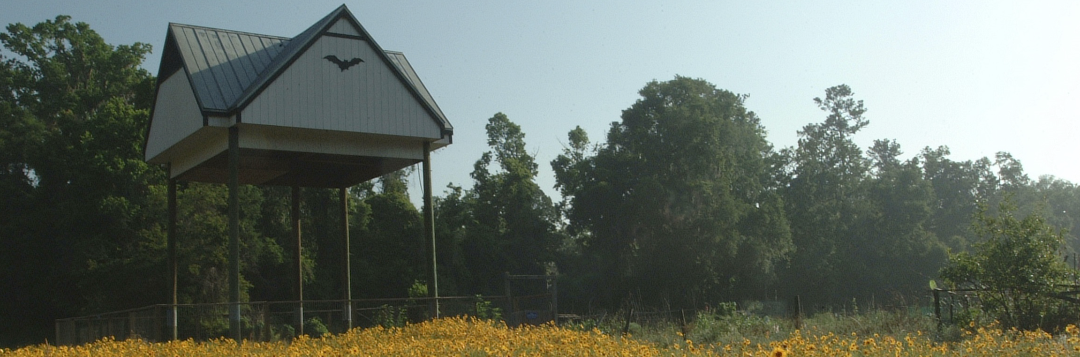
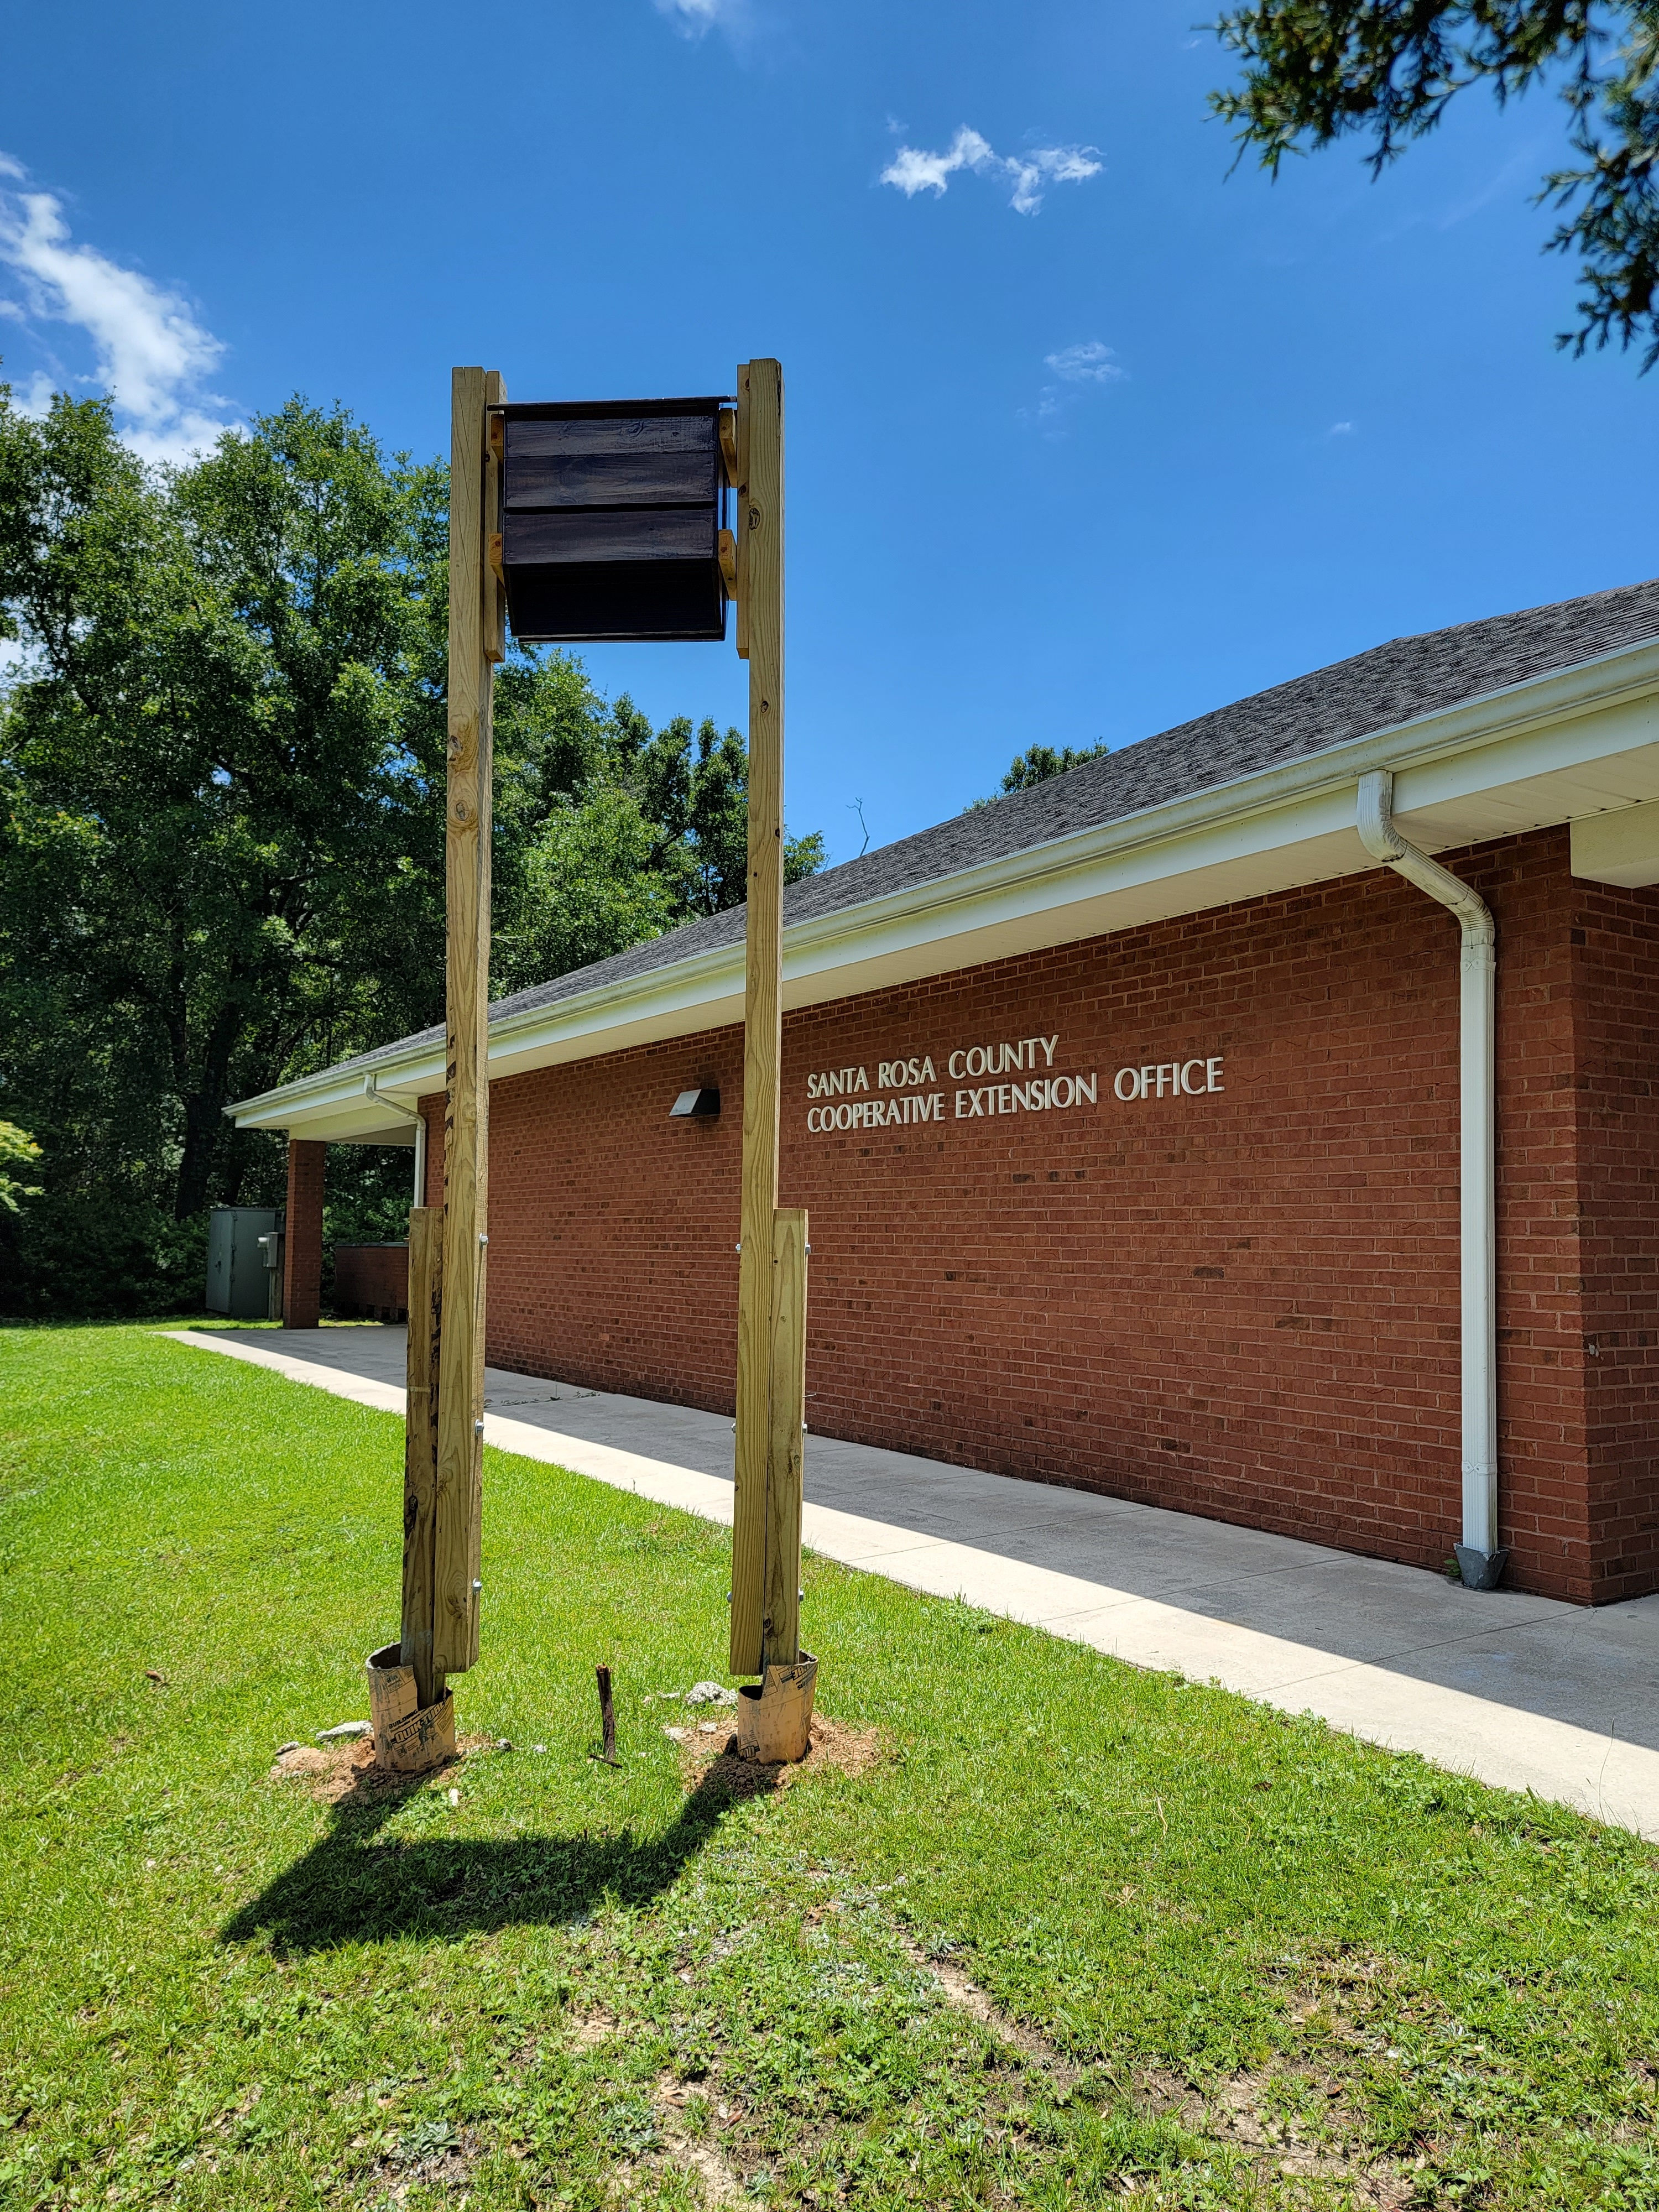
Now that your interest is piqued, how can you attract bats to your property? Installing a bat house is the easiest way. They are typically a two foot by one foot structure holding single or multiple chambers in which bats roost. It provides shelter from predation and weather while providing a place to rear pups. Though commercially available they may be built at home with minimal cost. Place the bat house in a location with morning sun at least 12 feet off the ground. Ensure there is enough airflow around the house to keep them cool, but that the structure is watertight. Mount houses on poles next to buildings and you’ll have better success attracting residents. With everything in place, it is time to discover who will most likely be your new neighbor.
photo: Joshua Criss
The Bats of North Florida
Florida is home to 13 species of bats statewide. Of these, 11 may be found in the Panhandle but only 3 are common enough to be routinely seen. The Brazilian free-tailed bat (Tadarida brasiliensis) is the most common. Medium sized with brown fur, they have a long tail, wrinkled cheeks, and roost in man-made structures.
Photo: IFAS
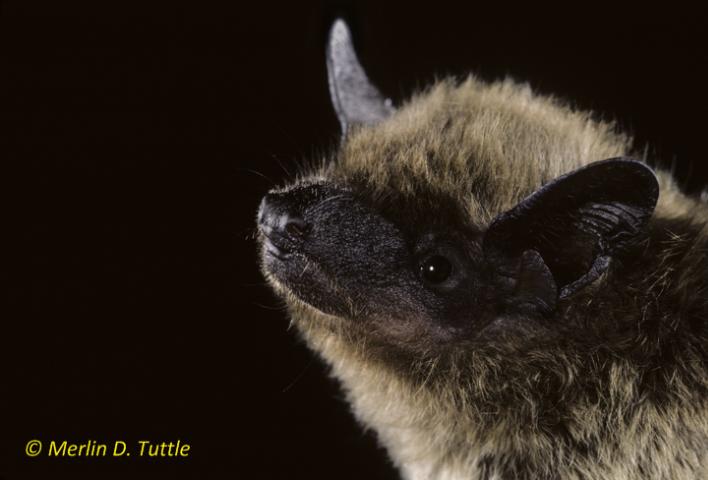
Second most common are Evening bats (Nycticeius humeralis). These dark brown to yellow bats have short ears with a broad hairless muzzle. They are tolerant of other bat species often roosting in tandem with them.
Photo: IFAS
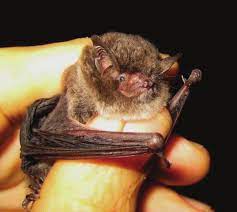
Finally, the panhandle is home to Southeastern Myotis (Myotis austroriparius). Easily the smallest of these bats, they are dull gray to brown with a lighter belly and long hairs between their toes. This species is the bat most likely to eat mosquitoes.
Photo: Jeff Gore, FWC
Finally, the panhandle is home to Southeastern Myotis (Myotis austroriparius). Easily the smallest of these bats, they are dull gray to brown with a lighter belly and long hairs between their toes. This species is the bat most likely to eat mosquitoes.
A Word of Caution
No article on wildlife would be complete without a word of caution. Bats are wild animals and should be treated as such. Never touch a bat on the ground as it most likely is not healthy. Bats do not generally cause issues but have been known to be disease vectors. Call a professional to collect the animal and never bring it into your home.
Bats can be a wonderful tool in controlling pests on your property. Creating habitat can help reduce pesticide need and cost to the homeowner. For more information on bats, see this Ask IFAS document, or contact your local extension agent for additional information on this and any topic regarding your gardens and more.
Getting your landscape set up in the spring is an in-depth process. Trees are pruned, soil amended, and the plantings have been accomplished. Now you have exactly the look you want. It would be easy to sit back, open a beverage of your choice, and watch it all come together. Don’t get comfortable just yet, there is a group of pests eyeing your plants. Insects come in many forms, looking to make a meal from your hard work. Do not fear though, there is a straightforward way to protect yourself from these creatures. Integrated pest management is a system of four control approaches designed to mitigate pest damage while minimizing impact on the environment.
Identification is Key
Before any of these steps may begin pests must be identified. This starts with scouting your landscape via visual inspection. Insects leave signs of their presence wherever they visit. Be sure to inspect every part of your plants including the underside of leaves. Here is where you will find insect eggs or frass (excrement) which are tell-tale signs of activity. Once discovered, you need to identify your specific pest. Insects are identified by their mouth parts when assessing plant damage. Chewing insects remove leaf material (think caterpillars and grasshoppers). Speckled leaves of brown and yellow is a symptom of piercing/sucking insects such as aphids. Other times you may only find damage after the fact where black leaves turn out to be covered in sooty mold. The sooty mold grows on the excreted honeydew of aphids, whiteflies. Once identified, it is up to you to decide if the level of damage is worth it and how you would like to approach limiting the damage.
Sooty mold on Ixora Photo Credits: UF/IFAS Kim Gabel
The First Three
The first strategy is cultural control wherein you optimize the environment in which your plant grows. Improved drainage and removal of plants susceptible to insect attack are excellent examples. You should also look into the lifecycle of insect pests to remove anything that will provide habitat. The next control is mechanical. This methodology is the most work intensive but comes with the least environmental impact as insects will be removed by hand. Biological control is like mechanical control except that removal of the pest is left to natural predators. There are many, but birds and lady beetles are best known. Creating habitat for these will help keep insect populations to an acceptable level with the bonus of falling into Florida friendly landscaping philosophies.
Chemicals are Not the Bad Guy
Chemical control is the final approach. Some may be surprised to find this here, but it is effective. With the above in place, you may find there are still insect issues. Chemicals will be your next step but do not feel put off by this approach. Research the best products for your situation and follow the instructions on the label to the letter. The label is designed to reduce risk to you and the environment while providing effective pest control.
Insect pests have plagued gardeners since the first person intentionally planted anything. Controlling these pests using a multipronged approach is the optimal way to reduce damage to your plants while minimizing environmental impact. Following the methodology in this post will bring a pest free landscape that you and your family will enjoy. For more information on integrated pest management, see these Ask IFAS documents, or contact your local extension agent for additional information on this and any topic regarding your gardens and more.
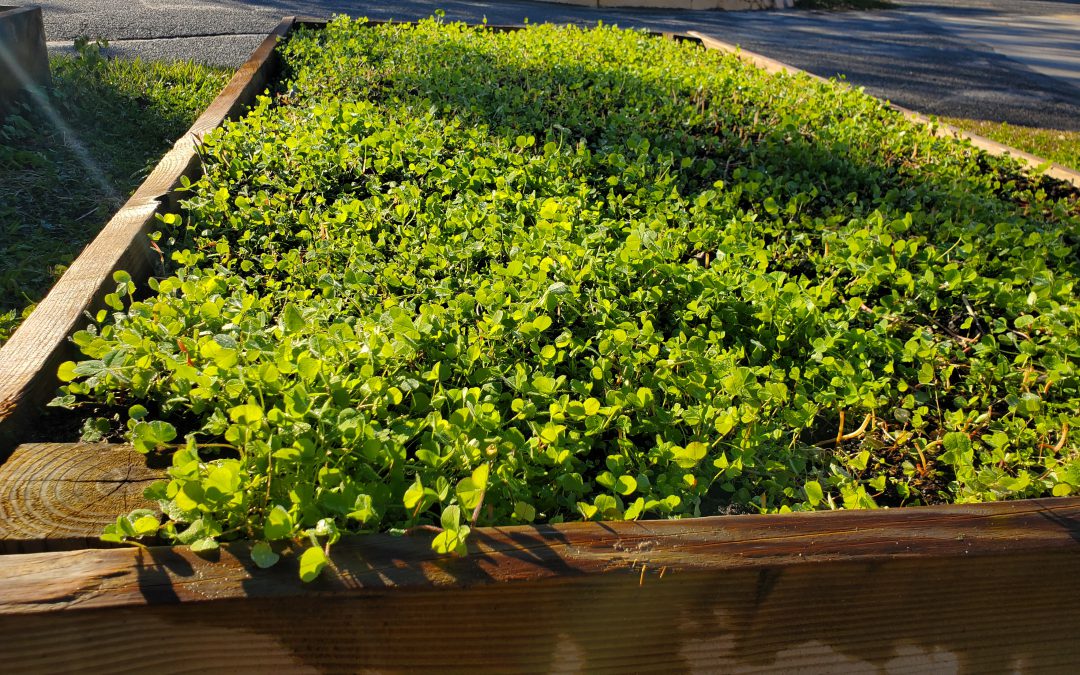
One of the major recent movements in production agriculture has been the widespread adoption of cover crops. This practice gives farmers a host of benefits, from erosion prevention to nutrient retention and recycling. However, using cover crops isn’t just for large scale farming operations. Hobby vegetable gardeners can absolutely employ similar systems on a smaller scale to reap the same benefits. For the past two years, I’ve used Buckwheat to provide a soil building cover during the heat of summer between spring and fall gardens. This winter, after my fall greens garden succumbed to frost, I decided to employ the same tactic with a mix of Red Clover (Trifolium pratense), White Clover (Trifolium Repens), and Crimson Clover (Trifolium incarnatum) to enhance my soil during the coldest months until spring tomato planting arrives!
Clover mix used as a cool season cover crop in raised beds. Photo courtesy Daniel Leonard.
While there are many different species of plants (rye, oats, wheat, various brassicas, etc.) that can be planted in November or December as cool season covers to deliver benefits like winter weed suppression, enhance soil organic matter, retain and harvest leftover nutrients, and provide habitat for beneficial insects, I chose Clover for an additional reason. In addition to the above benefits, Clover is a legume and also fixes atmospheric nitrogen, making it available for subsequent plantings! Not only is Clover an excellent soil cover, but it also provides some nitrogen fertilizer to the following vegetable garden!
Growing Clover, while not quite as simple as Buckwheat or small grain covers like oats and rye, is relatively easy for most gardeners. The first step is selecting which clover species and/or variety to grow. I chose a mix of Crimson, White, and Red Clover simply because I had several pounds of each left over from a previous field planting. However, any one of the three may be used by themselves or in various combinations. All are excellent choices for garden cover crops and have similar growing requirements. Crimson Clover is the most readily available, but all three species can be found at most farm and garden supply stores.
The next step is to prep your garden beds for clover seeding. I thoroughly remove weeds from my raised beds, lightly till the top couple of inches of soil, and rake to provide a level surface. Since clover seed is tiny, a smooth, clean seedbed is a must for excellent germination. Once this is done, your next should determine how much seed to plant. Recommended clover seeding rates are usually given on a per acre basis and range from 3-4 lbs/acre (White Clover) to 20-25 lbs/acre (Crimson Clover). Given these seeding rates, planting in a 4’x8’ (32 ft2) raised bed is only going to require a miniscule amount of seed.
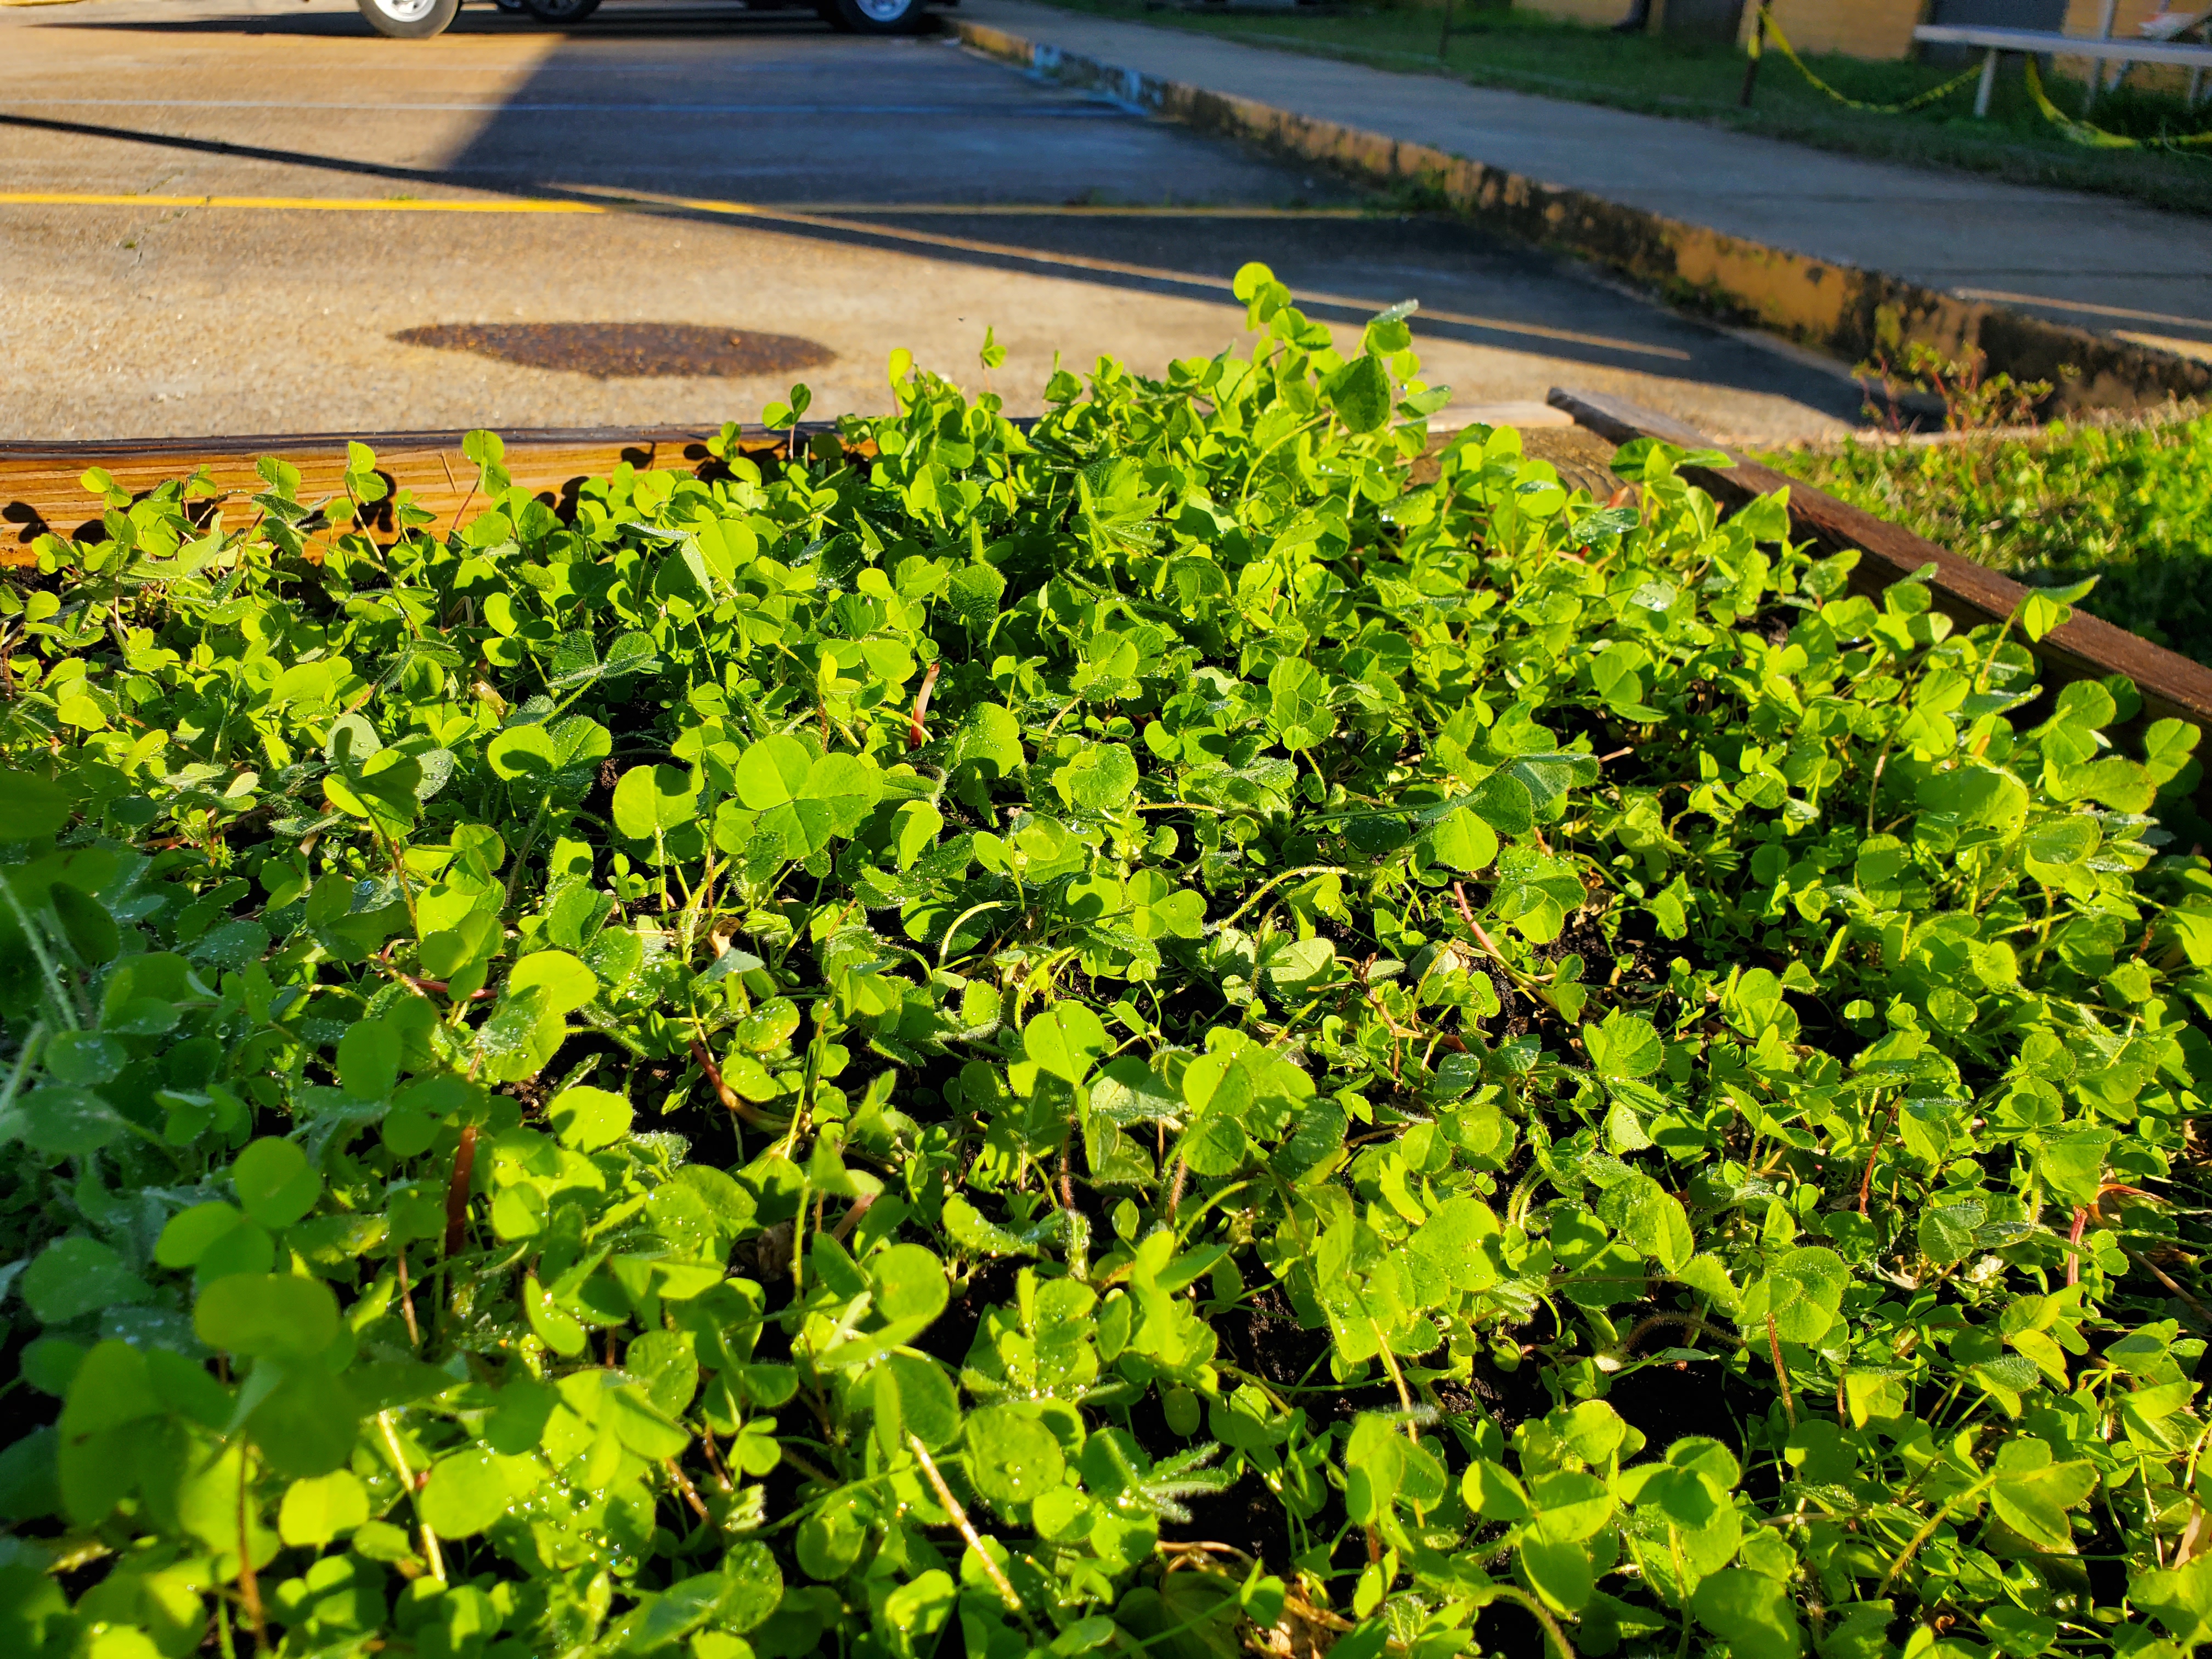
Clover mix used as a cool season cover crop in raised beds. Photo courtesy of Daniel Leonard.
To ensure a good stand while minimizing risk of overplanting, I mix equal parts clover seed and either sand, vermiculite, or other media similar in size to clover seed and hand scatter over the surface of my beds, making sure to uniformly cover the entire bed. If you think the stand is too thick, you can always hand-thin after emergence.
As a group, clovers prefer moist soil that is not allowed to dry out completely. This isn’t usually a problem given the Panhandle’s frequent rainy cold fronts in winter, but if rainfall is inconsistent, some irrigation will be required. Supplemental fertilizer isn’t normally necessary when planting a clover cover in vegetable gardens because nutrients remaining from the previous veggie crops are usually sufficient for growth and development (N especially is not needed as legumes produce their own through N fixation). 2-3 weeks before you’re ready to plant your spring veggies, chop the clover cover into the top few inches of your bed to terminate it and release its nutrients back into the garden. It’s that easy!
Planting a winter legume cover crop like clover is a great way to harness the benefits of cover crops for your spring veggies and enhance the aesthetics of your otherwise barren and drab garden beds! For more information about growing winter cover crops or any other horticultural topic, contact your local UF/IFAS County Extension office. Happy Gardening!
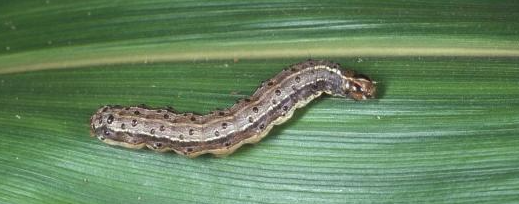
Chewing caterpillar damage on St. Augustinegrass Photo by: Steven Arthurs, UF
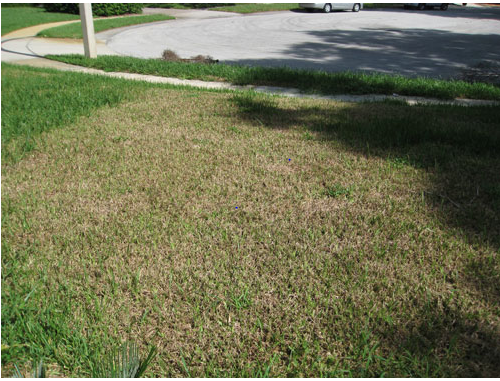
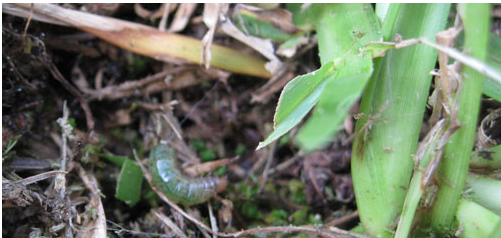
Tropical sod webworm larvae are destructive pests of warm season turfgrasses in the southeastern U.S. especially in the fall. Commonly referred to as a worm, they are truly caterpillars, the larvae of a moth. Larval feeding damage reduces turfgrass aesthetics, vigor, photosynthesis and density, which is very evident on finer-bladed grasses such as bermudagrass and zoysiagrass. Feeding damage is possible on all grass types however. Adults, a dull brown colored moth about ¾ inch long, rest in sheltered and shrubby areas during the day and are active at dusk. Females deposit clusters of 10-35 eggs on the upper surface of grass blades. The eggs hatch in 3-4 days and develop from a 1 mm long caterpillar to one over 11 mm long through six instars within 21 to 47 days, depending on temperature. Larval feeding occurs at night, leaving the grass looking ragged, shortened and missing.
Sod webworm on soil surface Photo by: Steven Arthurs, UF
Control should be against damaging larvae, not the flying moths. However, insecticidal soap applications to moth harboring areas can reduce re-population frequency. Soil-drenching soap flushes can be used to find the caterpillars, especially in dry and hot grass areas. Bacterial-based insecticides, such as Bt, Bacillus thuringiensis var. kurstaki or Spinosad, will control sod webworm caterpillars without impacting beneficial species as long as they are applied with each flush of grass growth.
Fall armyworms are also active when the weather turns cooler. They feed any time of the day or night, but are most active early in the morning or late in the evening. The 1 ½ inch long gray and white moth lays about 1,000 eggs in multiple masses on any vegetation. Two to 10 days later, the small caterpillar hatches and begins to grow to nearly 2 inches long over a two week period. The fall armyworm is easily recognized by its dark head marked with a distinct pale-colored inverted Y and the long black stripe running along each side of its body. These aggressive feeders “march” rapidly across grassed areas consuming every above-ground plant part. While bacterial-based insecticides will reduce the numbers, control of armyworms usually requires synthetic insecticides.
Armyworm Photo by: Jim Castner, UF
The good news is that grass “worms” can be controlled and the blades will grow back. The damage may be devastating to see, but usually not a permanent problem.