by Daniel J. Leonard | Aug 18, 2021
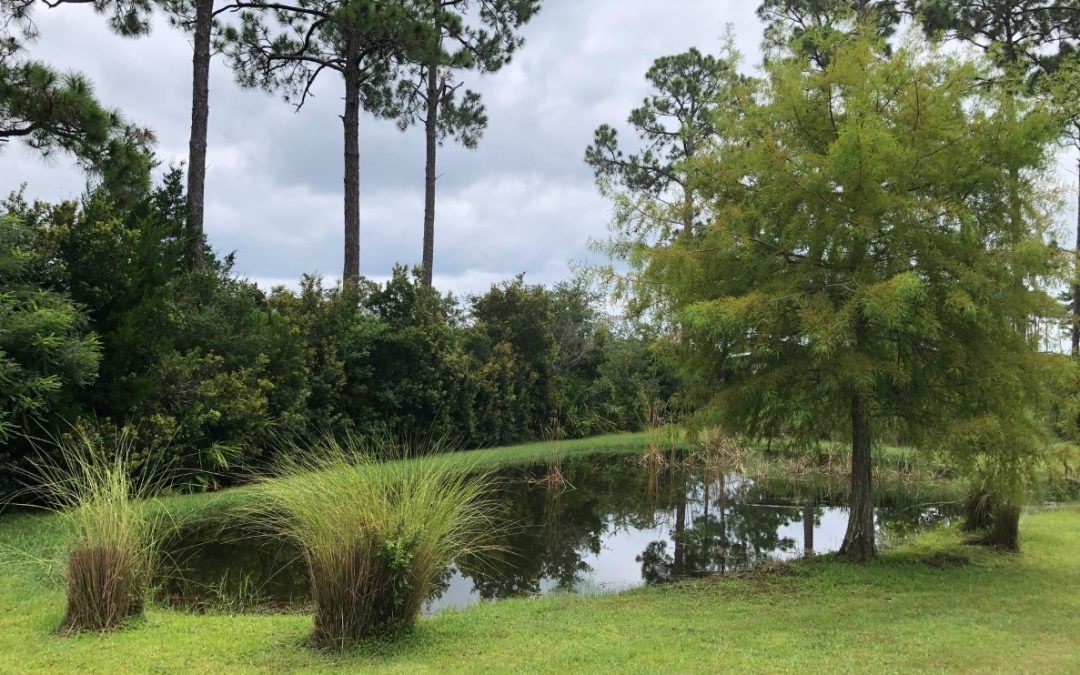
One of the most conspicuous outcomes from Hurricane Michael was the complete disruption of local lawns and landscapes. Giant holes where tree roots once existed, ruts and compacted ground from clean-up equipment, and formerly shaded acres flooded with fresh sunshine were three very common situations property owners suddenly found themselves faced with. An unforeseen consequence of all this newly bare ground ripe was the intrusion by a variety of very aggressive weeds. One invasive exotic weed that has made itself right at home in many county landscapes following Michael and that I’ve seen lots of lately is Torpedograss (Panicum repens).
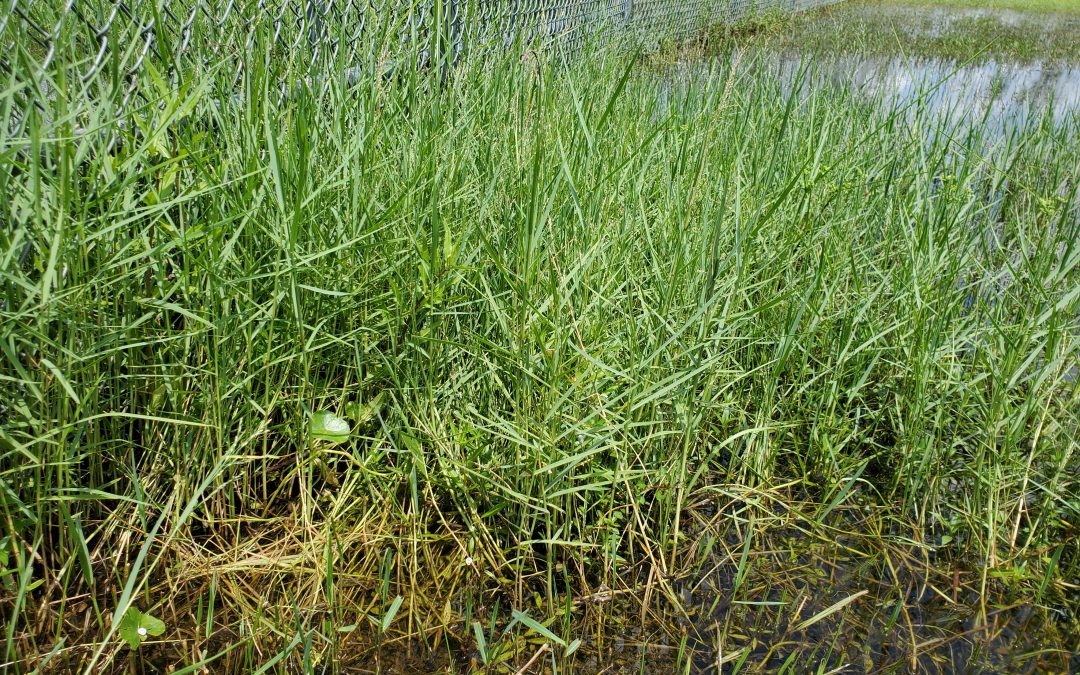
Often brought into landscapes with “fill-dirt” and “topsoil” applications or spread through mowing, Torpedograss is an aggressive perennial grass in the same plant family as Bermudagrass and Cogongrass. Like many invasive exotic species, Torpedograss was introduced into the United States in the late 1800’s from its native Africa and Asia as a potential forage crop. Unlike its cousin Cogongrass, the Torpedograss is highly palatable to cattle and so gained a quick following among the ranching community. Unfortunately, over the next century, Torpedograss had left the pasture and turned into one of the biggest pest plants in Florida, ruining many a lawn, taking over 70% of the state’s public waterways, disrupting native marshlands, and costing Florida over $2 million a year to control!
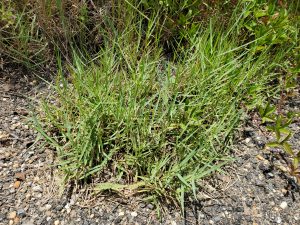
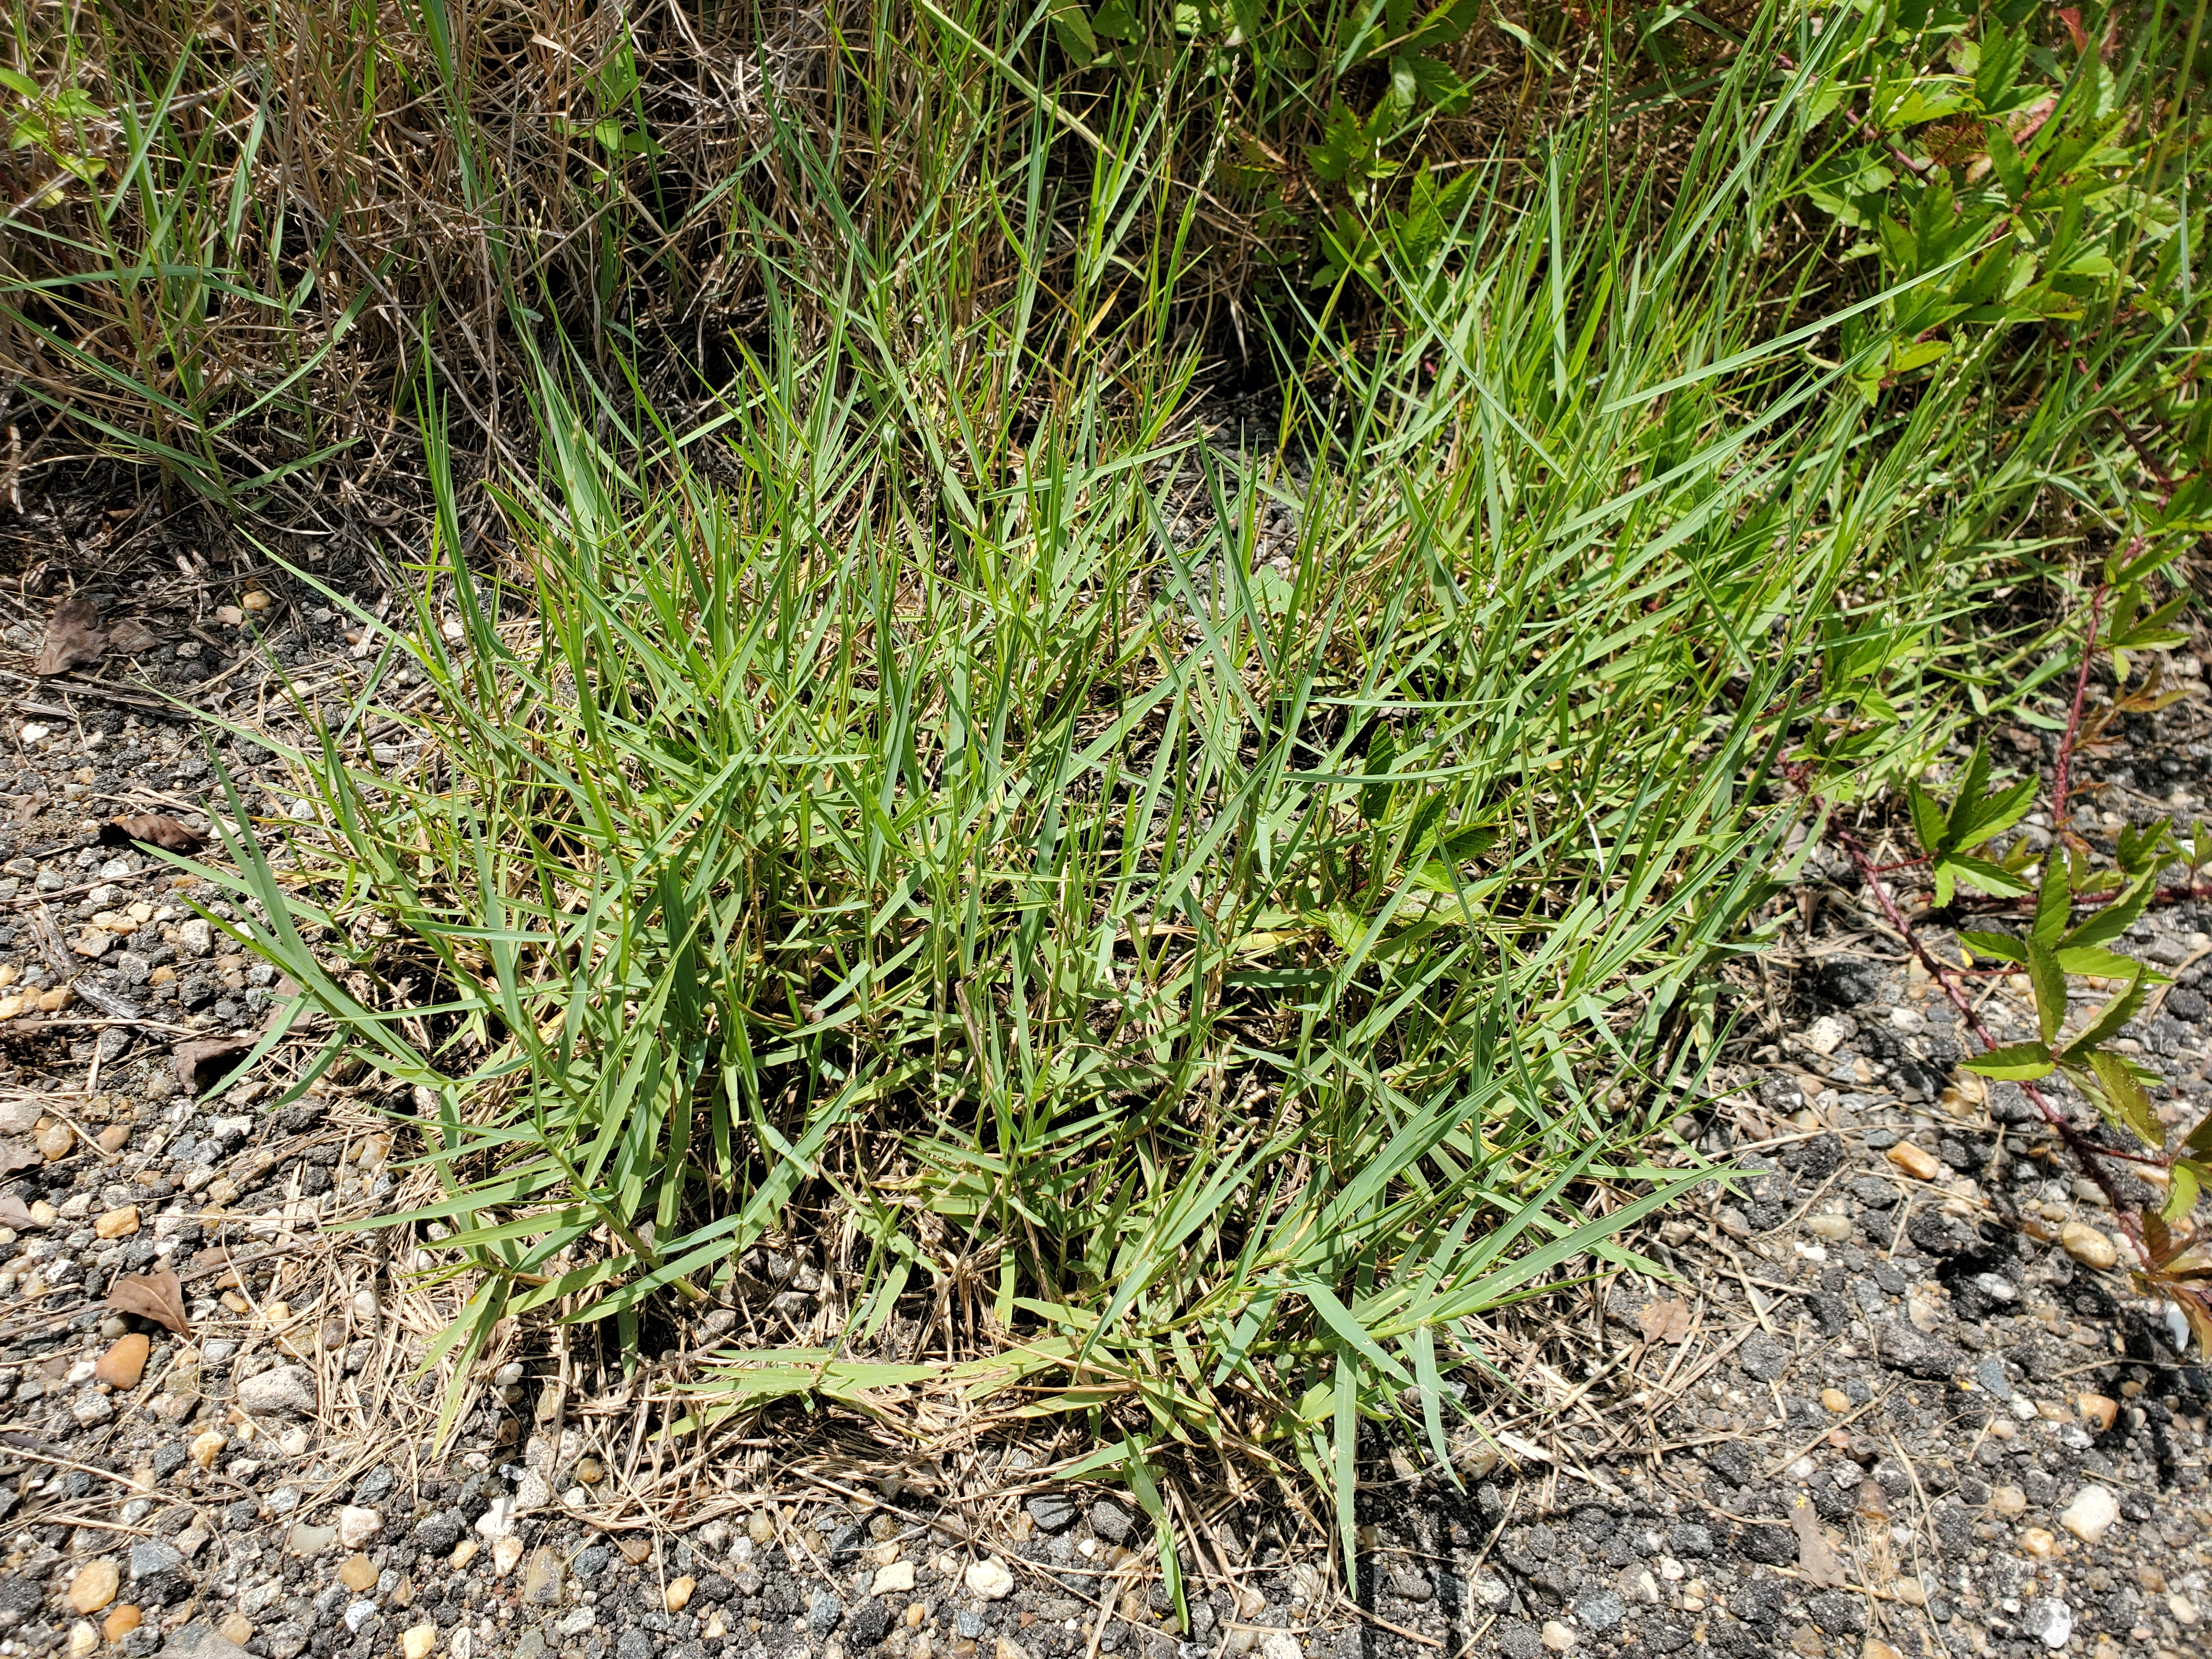
Torpedograss growing in a Calhoun County gravel driveway. Photo courtesy of Daniel Leonard.
Torpedograss spreads rapidly through underground, sharply pointed, white-colored, “torpedo-like” growing tips and can dominate wet or dry areas in short order. The species often hides in lawns when mixed in and mowed with other turfgrasses (especially Zoysiagrass, which it closely resembles), growing unnoticed until infestations are severe and control options are few. This makes scouting for the weed and accurate identification crucial! Torpedograss can be identified by its bluish-green leaf and stem color, hairy leaf edges, stiff overall appearance, distinctive panicle-type flowers, and can grow quickly to 3’ or so in height, spreading indefinitely. Though it initially can resemble other turf species, once you know what you’re looking for, Torpedograss stands out visually amongst its competitors.
After identifying Torpedograss, control methods can be chosen depending on the site it has infested. In lawns, options vary based on turf species. If infestation occurs in the common Centipedegrass and Bahiagrass lawns of the Panhandle, options are few. Products with the active ingredient Sethoxydim (Poast, Fertilome Over the Top, Southern Ag Grass Killer, etc.) can suppress Torpedograss growth in these situations but will not destroy it and are not permanent options. If the area infested is not large, killing the whole spot out with a non-selective herbicide like Glyphosate (Roundup and generics) and then resodding is probably a better option. In Bermudagrass or Zoysiagrass lawns, products with the active ingredient quinclorac (Drive and generics) are very effective at controlling Torpedograss without having to go the “nuclear” glyphosate route. Unfortunately, there are no effective controls for Torpedograss in St. Augustinegrass lawns.
In landscaped beds, Torpedograss is somewhat easier to control. Hand pulling in beds can be effective where new invasions occur but are impractical once the weeds gain a strong foothold. Once that occurs, chemical control is required. In bare or mulched areas away from plants, careful spot spraying in bare areas with a 2-3% glyphosate solution is extremely effective. Where the Torpedograss has grown into and through landscape plants, an “over-the-top” application of fluazifop (Fusilade) will take out the weed without harming most ornamental plant species! (Be sure to check the Fusilade label to make sure your ornamental plant species are safe to apply to!)
Torpedograss is one of the most serious, yet overlooked, invasive plants that occurs in Florida. However, through prevention and control techniques like cleaning mowers when mowing infested areas, accurate identification, and prompt, effective herbicide use, you can keep the weed from taking over your lawn and landscape! For assistance in identifying and controlling Torpedograss and other lawn weeds, contact your local UF/IFAS County Extension office! Happy gardening!
by Danielle S. Williams | Aug 11, 2021
Integrated Pest Management or ‘IPM’ is a sustainable approach to managing plant pests by using several different methods to cause the least harm to people, property, and the environment. IPM focuses on the management of problems rather than their eradication. Using IPM strategies in your garden is one way to ensure its productivity!
Avoiding Pest Problems
Prevention is key to IPM! It is important to select the right plant, for the right place at the right time. It’s also important to select pest-resistant plant varieties and maintain healthy plants through proper watering and fertilization.
- Plan before you plant. Be sure not to plant in a location not suited for a particular plant. Stressed plants are more susceptible to insects and disease.
- Start with healthy plants. Do not plant plants with insects or disease.
- Monitor the lawn and garden regularly. You’ll want to be able to detect a pest problem earlier rather than later.
- Water and fertilize properly. Too much of either can make plants vulnerable to insects and disease.
- Encourage beneficial insects in your garden. Learn to recognize the insects in your garden and let the good ones do the work for you!
Recognizing Pest Problems

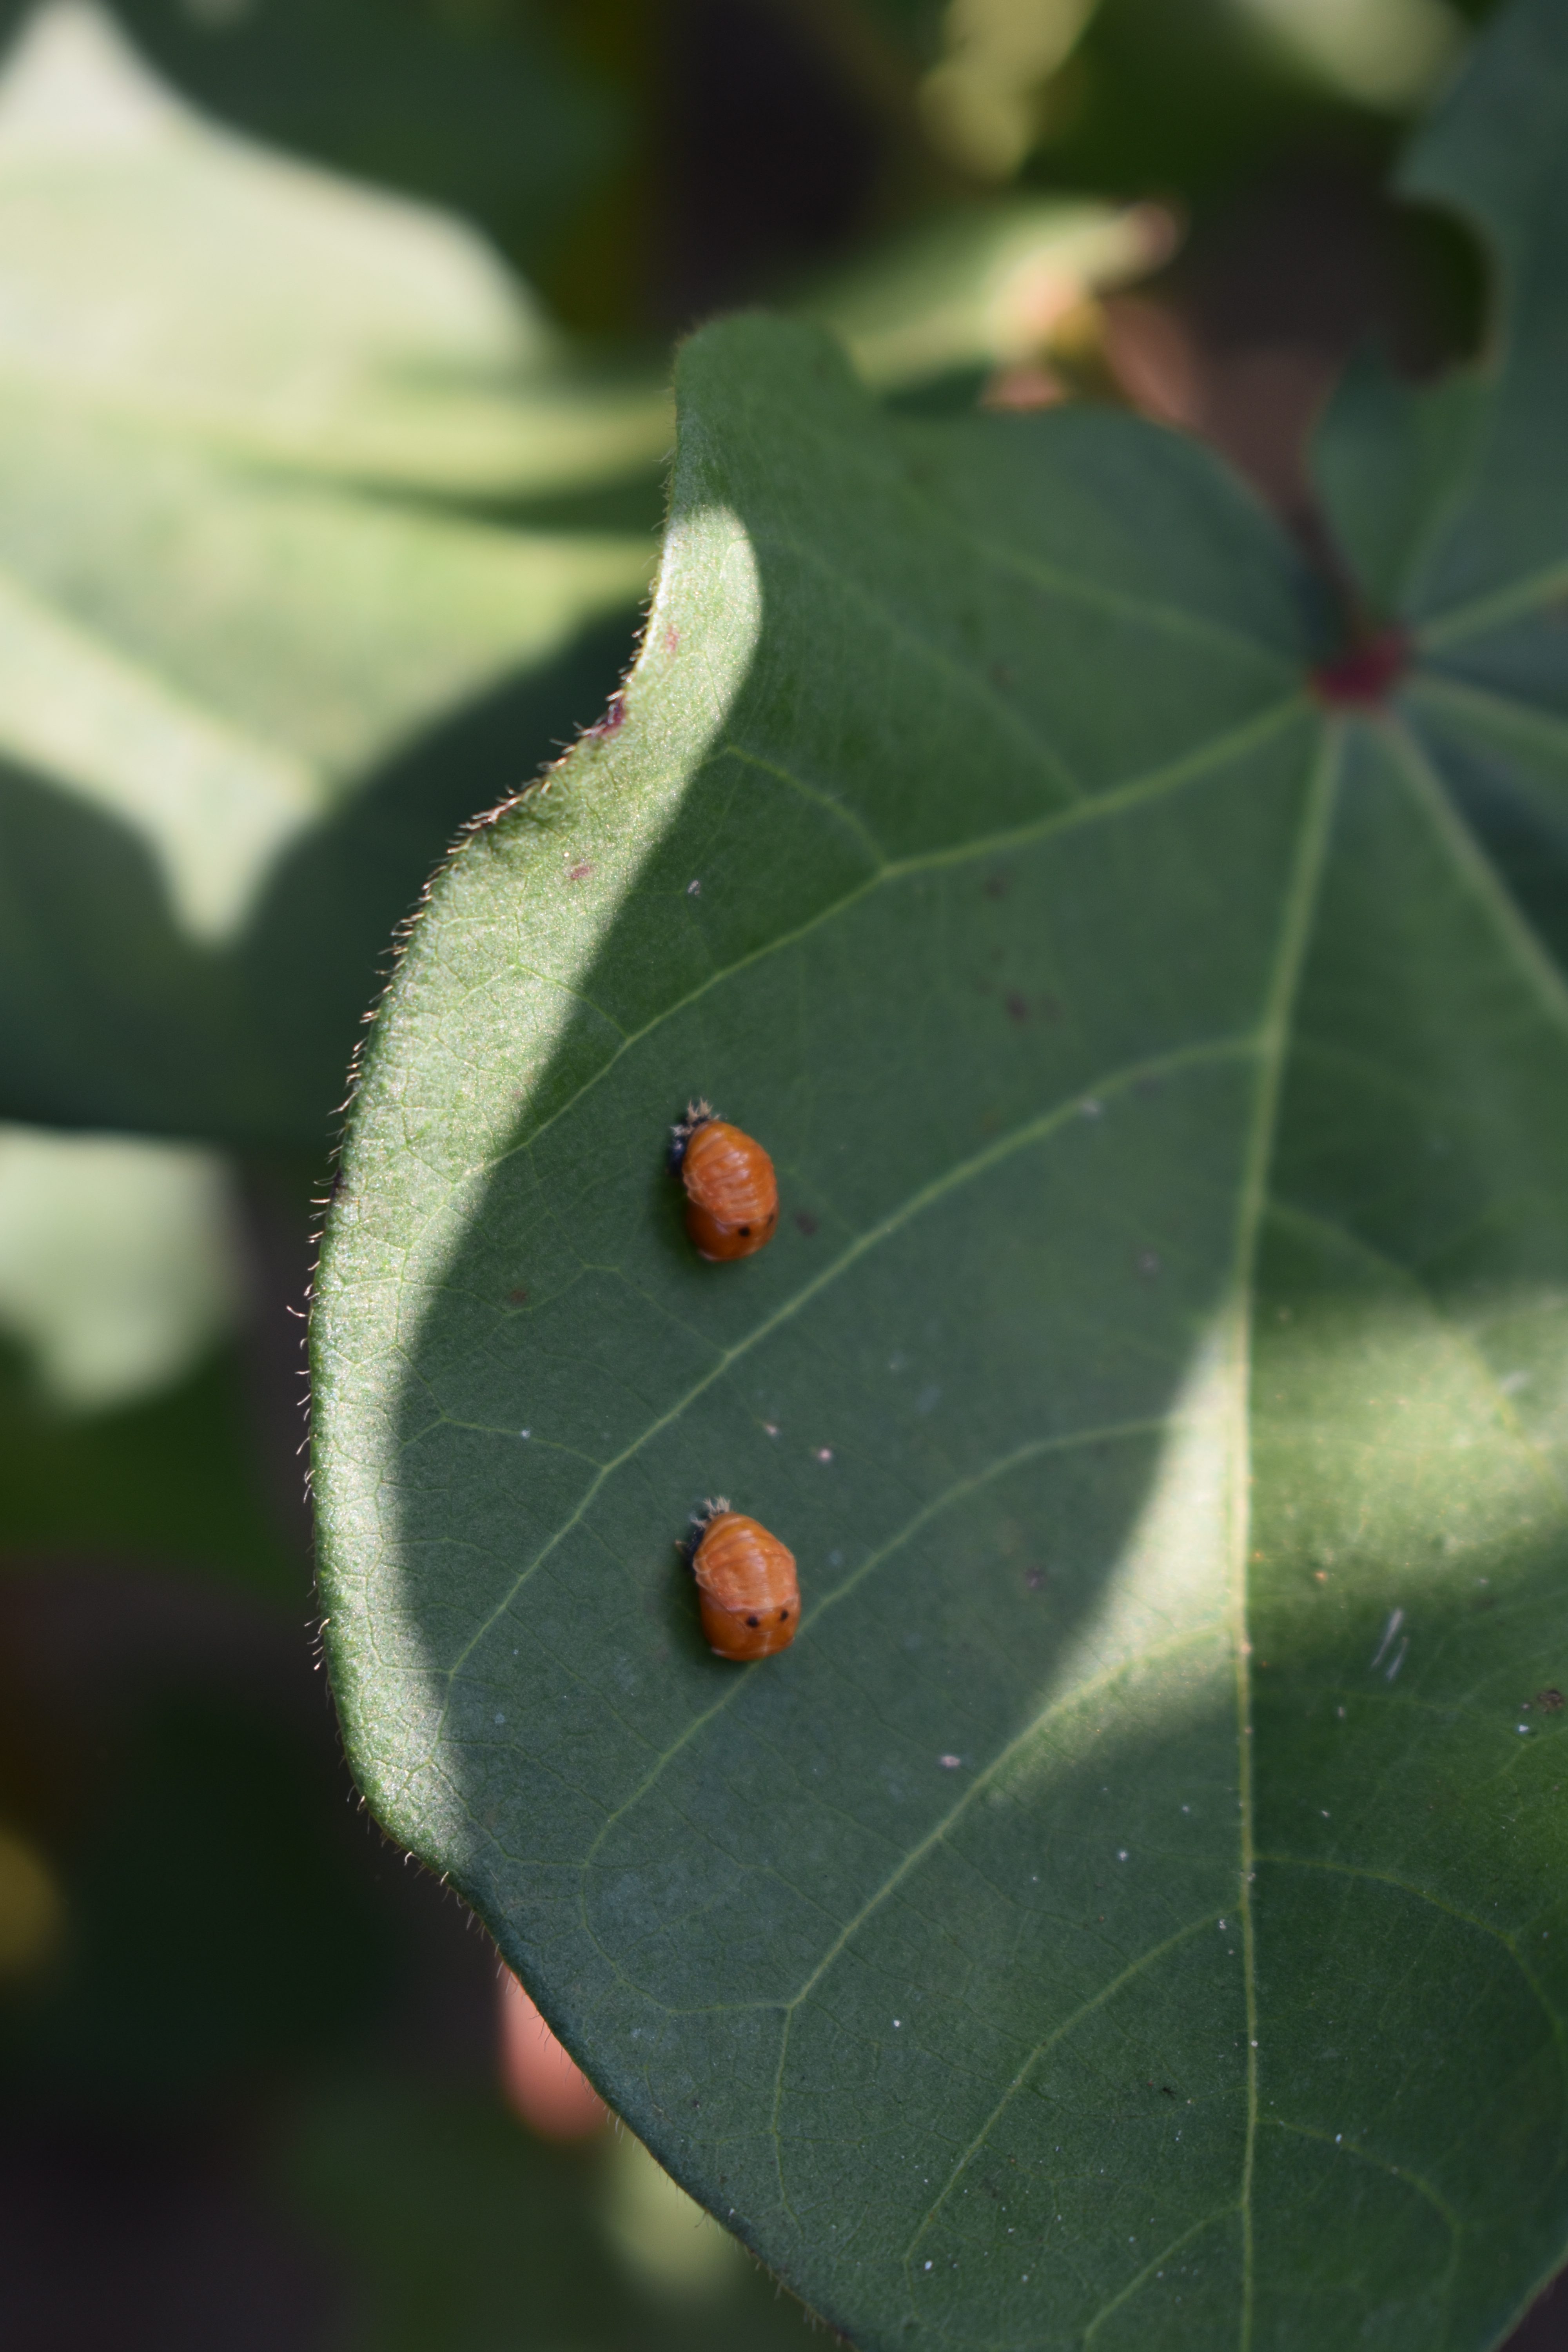
Depending upon the insect and the life cycle stage they are in, they may look different than we are used to! Here is a photo of the pupal stage of a lady beetle.
Scouting or monitoring the garden or plants in the yard frequently helps detect problems early. Some of the common insects you’ll find in your garden are: aphids, mealybugs, scales, whiteflies, thrips, mites, caterpillars, and stinkbugs. Often times you’ll find damage from the insect before you see the insect itself. Chewed or deformed leaves, sooty mold or a colony of ants scurrying up and down stems are all signs an insect may be present.
Treating Pest Problems
IPM is the best strategy for dealing with pests in the lawn and garden. IPM strategies:
- Remove affected plant leaves or parts. If an insect or disease is heavily concentrated in an area, you can reduce or eliminate the problem by simply removing it.
- Pick insects off by hand. Be sure to dispose of them so they don’t make it back into the garden.
- Look for beneficial insects. If you see a pest outbreak, try to determine if it is being managed by natural enemies. Many insects such as ladybugs and lacewings prey on pest insects and removing them will just help the pest insects. If you need help identifying insects, contact your local county Extension agent!
- Try the above strategies before pesticide use. If the problem persists and pesticides are needed, use products that have a reduced-risk to the environment such as insecticidal soaps, horticultural oils, botanicals, or microbials.
- Read and follow all pesticide label instructions. The label is the law!
For more information on integrated pest management, please visit:
by Stephen Greer | Aug 11, 2021
One big goal of establishing a home lawn and landscape is to enjoy an attractive setting for family and friends, while also helping manage healthy soils and plants. Soil compaction at these sites can cause multiple problems for quality plants establishment and growth. Soil is an incredibly important resource creating the foundation for plants and water absorption.

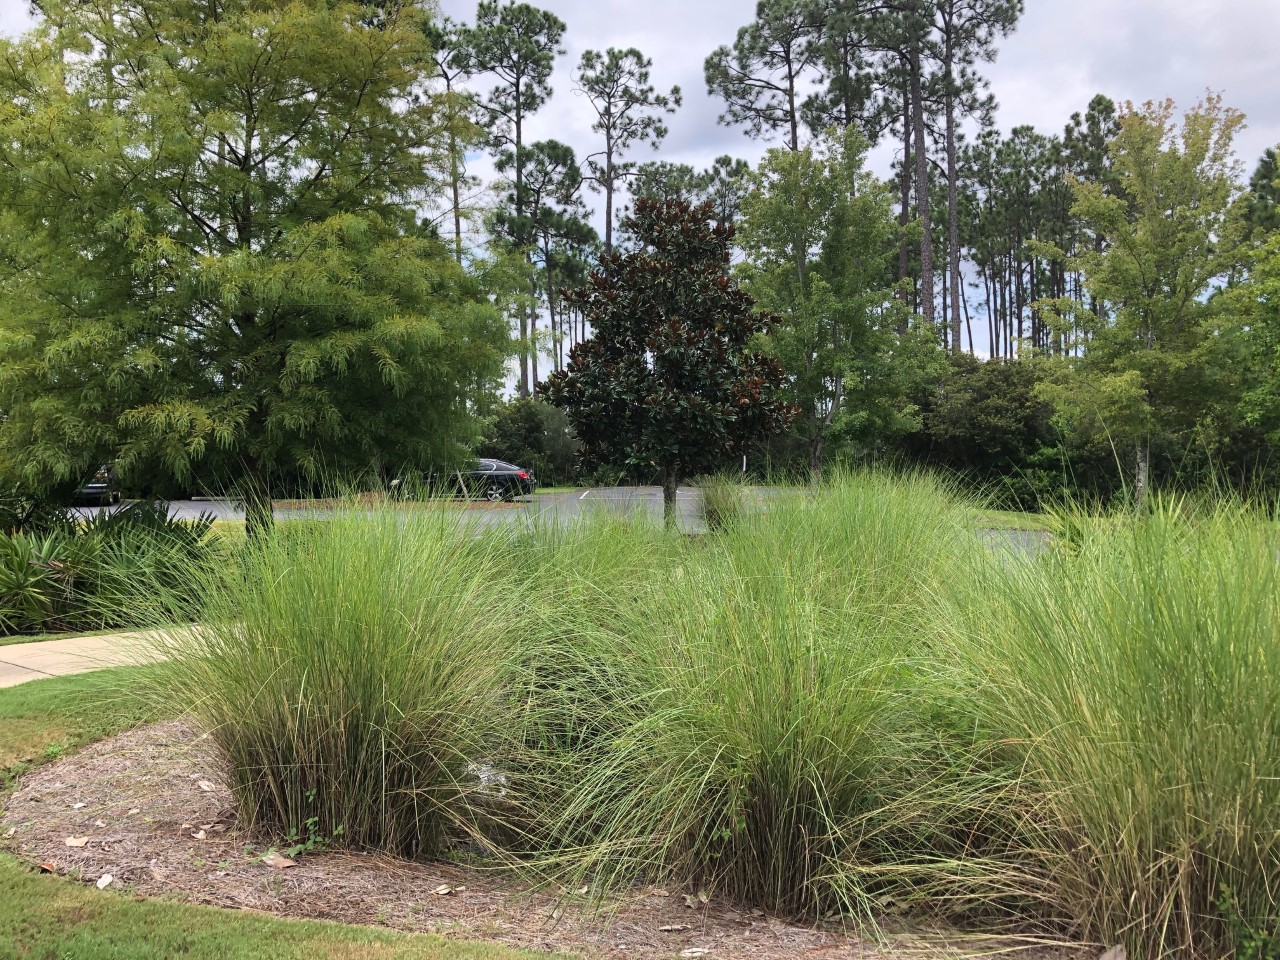
Photo courtesy: Stephen Greer, UF IFAS
Soils are composed of many different things, including minerals. In Florida, these minerals often include sand of differing sizes and clay in the northern area of the counties in the panhandle of Florida. Soil is also composed of organic matter, nutrients, microorganisms and others. When soil compacts, the air spaces between the sand or clay are compressed, reducing the space between the mineral particles. This can occur anytime during the landscape and lawn construction phase or during long term maintenance of the area with equipment that could include tractors, mowers, and trucks.
What can be done to reduce soil compaction? There are steps that can be taken to help reduce this serious situation. Make a plan on how to best approach a given land area with the equipment needed to accomplish the landscape of your dreams. Where should heavy equipment travel and how much impact they will have to the soils, trees, and other plants already existing and others to be planted? At times heavy plywood may be needed to distribute the tire weight load over a larger area, reducing soil compaction by a tire directly on the soil. Once the big equipment use is complete, look at ways to reduce the areas that were compacted. Incorporating organic matter such as compost, pine bark, mulch, and others by tilling the soil and mixing it with the existing soil can help. Anytime the soil provides improved air space, root will better grow and penetrate larger areas of the soil and plants will be healthier.
Even light foot traffic over the same area over and over will slowly compact soils. Take a look at golf course at the end of cart paths or during a tournament with people walking over the same areas. The grass is damaged from the leaves at the surface to the roots below. Plugging these areas or possibly tilling and reestablishing these sites to reduce the compacted soils may be necessary.
Photo courtesy: Stephen Greer, UF IFAS
Water absorption is another area to plan for, as heavy rains do occur in Florida. Having landscapes and lawns that are properly managed allow increased water infiltration into the soil is critically important. Water runoff from the site is reduced or at least slowed to allow the nutrient from fertilizers used for the plant to have more time to be absorbed into the soil and taken up by the plants. This reduces the opportunity for nitrogen, phosphorus, and other nutrients to enter water areas such as ponds, creeks, lagoons, rivers and bays. Even if you are miles from an open water source, movement of water runoff can enter ditches and work their way to these open water areas, ultimately impacting drinking water, wildlife, and unwanted aquatic plant growth.
Plan ahead and talk with experts that can help with developing a plan. Contact your local Extension office for assistance!
by Daniel J. Leonard | Jul 22, 2021
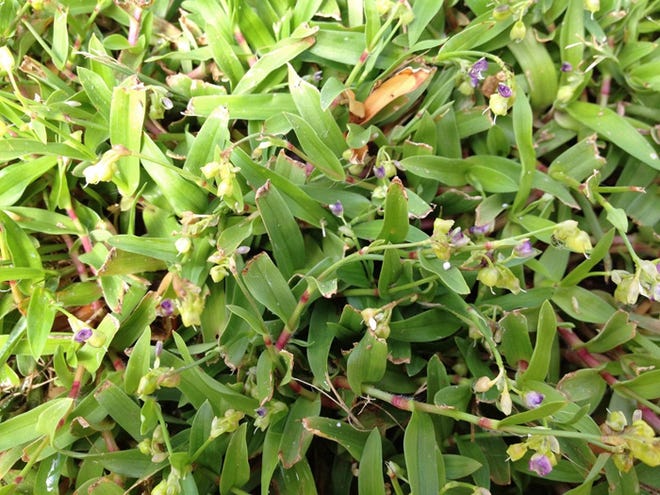
If you’ve taken care of your yard properly from spring green-up to now (mid-July), you might think you can comfortably coast into the cool temperatures of fall without any problems. You would be mostly right, save for one extraordinarily tough weed that waits until the depths of summer to rear its troublesome head: Doveweed (Murdania nudiflora).

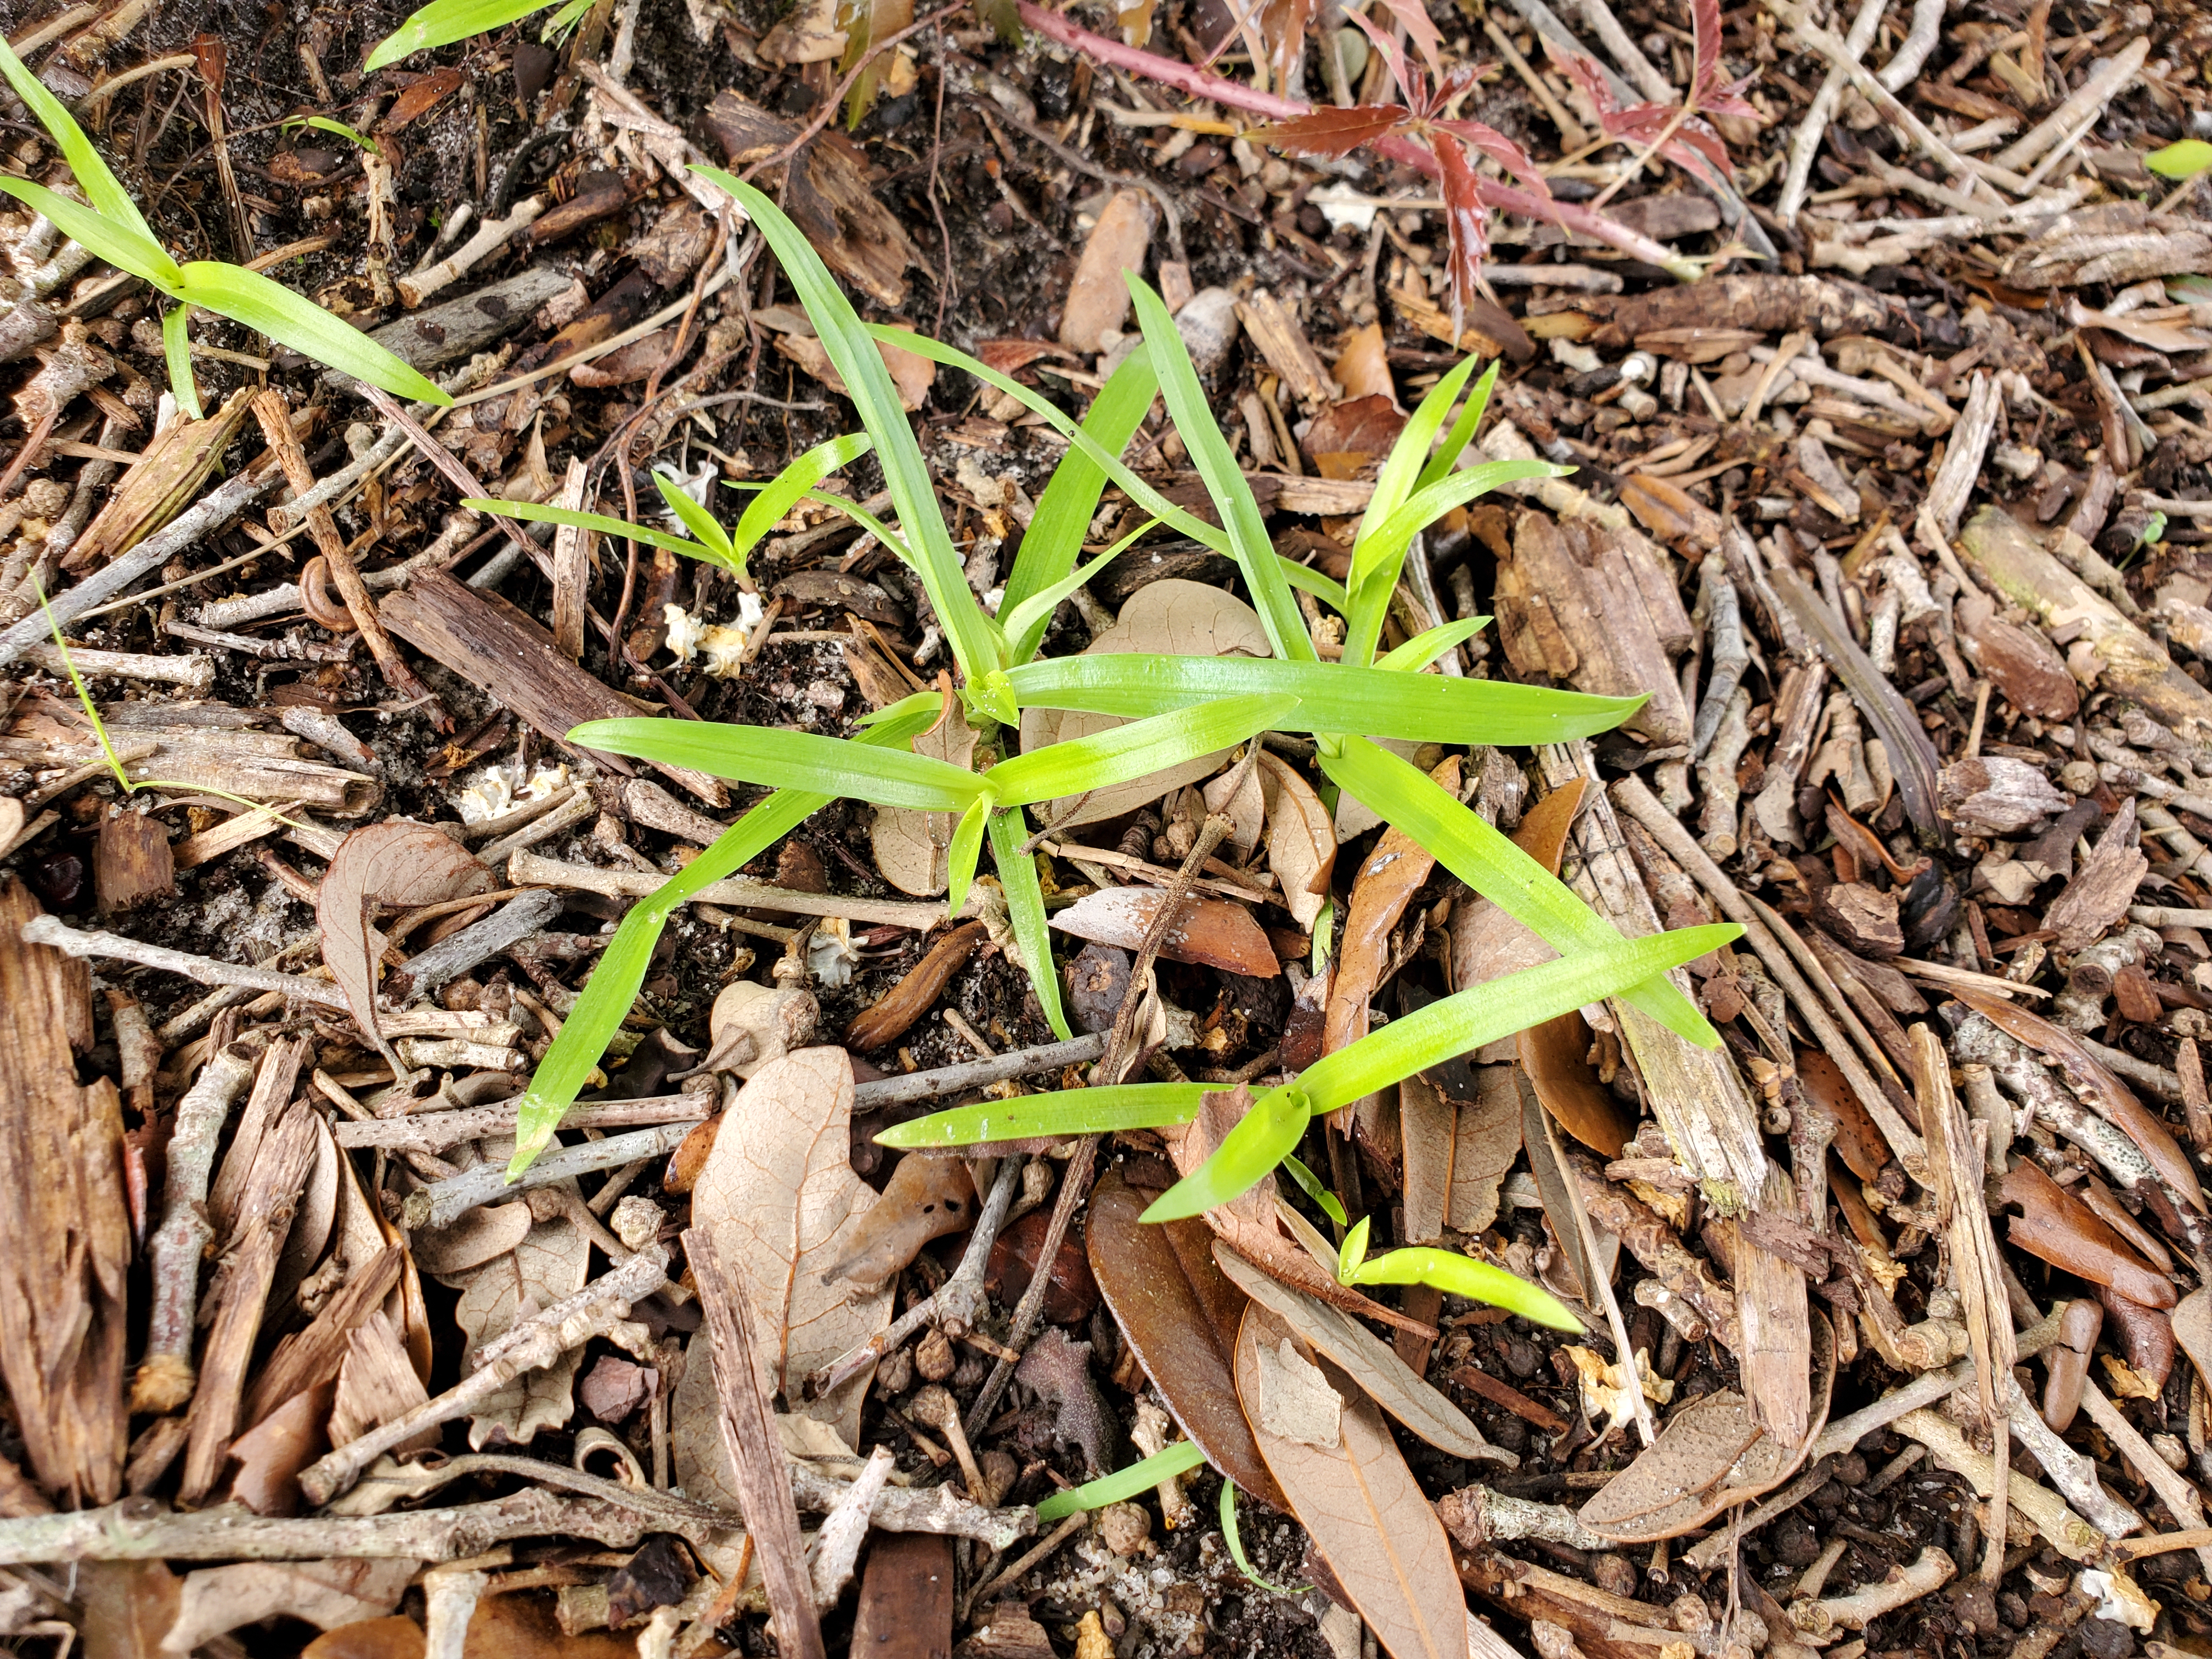
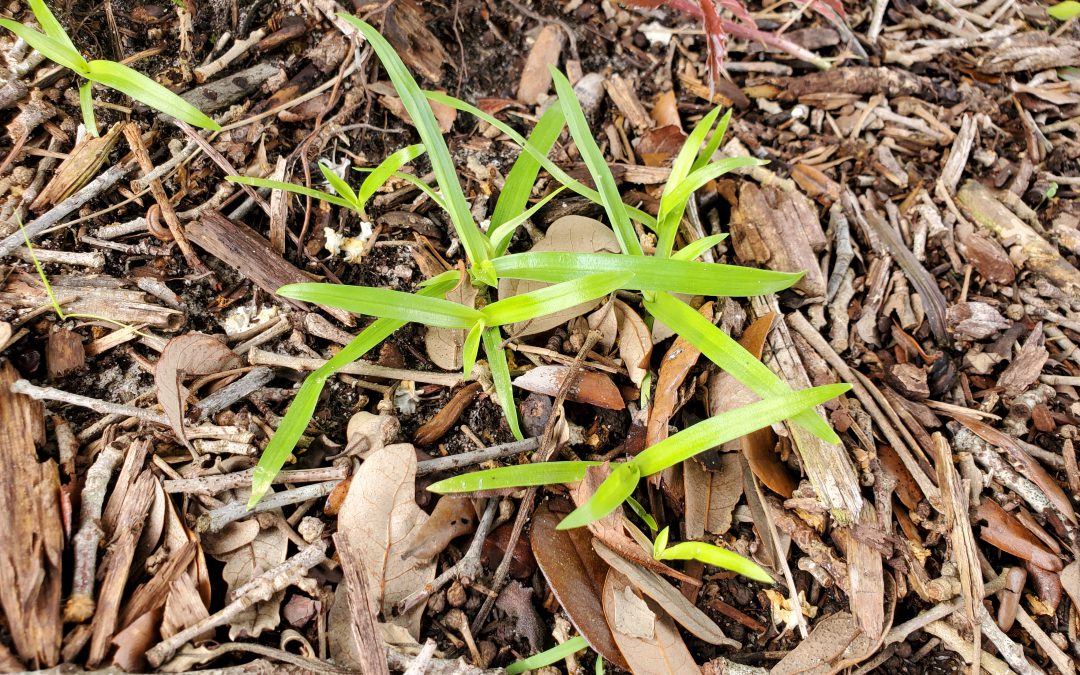
Doveweed seedlings just emerged on July 9, 2021. Photo courtesy of Daniel Leonard.
Doveweed is an insidious invader of Panhandle lawns. In the Panhandle, Doveweed germinates (sprouts) long after most other summer annual weeds, from late May-June when soil temperatures reach ~70°F. This allows it to sneakily avoid spring pre-emergent herbicide applications and even early summer post-emergent applications that target common weeds like Florida Pusley, Spurge species, and others. Doveweed also looks an awful lot like many of our common lawn turfgrasses, especially Centipede and St. Augustine Grass. It possesses thick, shiny, grass-like foliage and even grows in a spreading, low to the ground fashion. This mimicry causes many homeowners to not realize there is a problem until it’s too late. Once Doveweed is mature and displaying its characteristic purple flowers, it is very difficult to control. Finally, Doveweed is extremely tough and aggressive, particularly thriving in moist areas of the lawn. In these areas, Doveweed can easily outcompete the desirable turfgrass and, without intervention by you, will soon have the whole lawn to itself.
Controlling Doveweed is no easy task and requires a combination of practices to keep it out of your lawn. The first line of defense against any weed, Doveweed included, is through proper cultural practices. In turfgrass lawns, this means ensuring that you mow your lawn regularly and at the proper height (2.5” or so for Centipedegrass), keeping the lawn irrigated during droughty periods, fertilizing based on a soil test, etc. Being diligent in the above tasks will go a long way to ensuring that your turfgrass is healthy and better able to ward off a Doveweed invasion. However, even when homeowners maintain their turf perfectly, chemical herbicides are usually required to keep Doveweed at bay.

Doveweed patch in St. Augustine Sod.
While many commonly used homeowner herbicides are not effective on Doveweed, there are several quality options at your disposal.
- Doveweed is most easily controlled with preemergent herbicides, specifically one of the following: Atrazine, Pennant Magnum (S-metolachlor), Tower (dimethenamid), and Specticle (indaziflam). The issue with pre-emergents is that most folks shelve them after spring application in February or March. Since these products lose their efficacy after 4-6 weeks, Doveweed’s emergence in May is undeterred. To obtain control on Doveweed with these products, split the spring application and apply once in late Feb/early March and again in mid-late April.
- Doveweed can also be controlled by post-emergent herbicides after it is up and growing, though multiple applications may be required. The most effective formulations contain a combination of 2,4-D or Dicamba and other herbicides. While most of these products have at least fair efficacy on Doveweed, stronger, more expensive products like Celsius, Tribute Total and others provide better results.
- If Doveweed has already displaced turfgrass in large areas of your lawn, you may unfortunately be better off to make an application of a non-selective herbicide like glyphosate (Roundup), kill out the entire area of infestation and start over by resodding.
While Doveweed is a major problem in Panhandle lawns, it doesn’t have to be in yours! By keeping your turf healthy with proper cultural practices and making timely applications with effective herbicides, your lawn can be a Doveweed free zone! For assistance in Doveweed identification in your lawn, help choosing herbicides and calculating application rates, or any other horticultural information, contact us at the UF/IFAS Calhoun County Extension office! Happy Gardening!

by Sheila Dunning | Jul 15, 2021
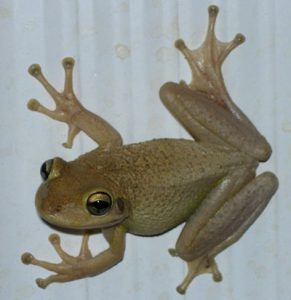
Photo by Dr. Steve Johnson
Treefrog calls are often heard with each rain event. But, how about a “snoring raspy” call that begins after a day time light rain? That may be a male Cuban treefrog trying to attract the girls. Cuban treefrogs breed predominately in the spring and summer. Reproduction is largely stimulated by rainfall, especially warm summer rains such as those associated with tropical weather systems and intense thunderstorms.
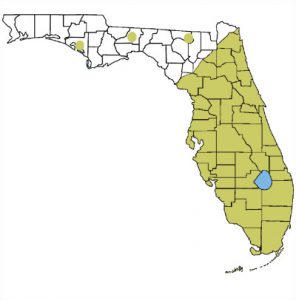
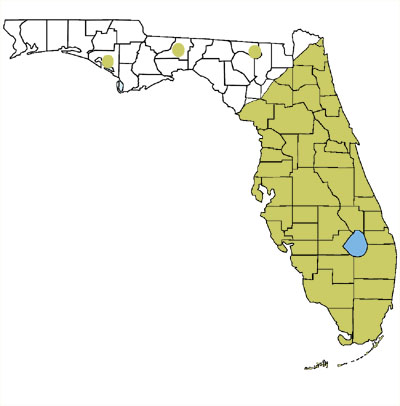
Range of Cuban treefrogs
The Cuban treefrog, Osteopilus septentrionalis, was accidently introduced to Florida in the 1920’s as a stowaway in shipping crates from the Caribbean. Over the last hundred years, the invasive frog has managed to spread throughout Florida and the Southeastern U.S. by hitchhiking on ornamental plants, motorized vehicles, and boats. Though occasional cold winters have created temporary population setbacks, new generations of Cuban treefrogs continue to be reported in north Florida, including the Panhandle.
An invasive species is generally defined as a plant, animal or microbe that is found outside of its native range, where it negatively impacts the ecology, economy or quality of human life. Cuban treefrogs come out at night to feed on snails, millipedes, spiders and a vast array of insects. But, they are also predators of several Florida native frogs, lizards and snakes. Tadpoles of the invasive Cuban treefrog have been shown to inhibit the growth and development of native Southern toad and green treefrog tadpoles when all of the species are in the same water body. Additionally, a large female Cuban treefrog can lay over 10,000 eggs per season in very small amounts of water.
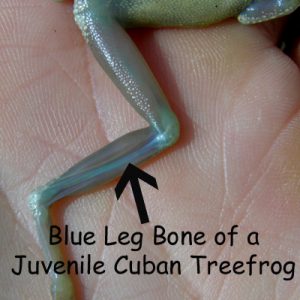 Panhandle citizens can help manage the invasive Cuban treefrog by learning to identify them and reduce their numbers. All treefrogs have expanded pads on the ends of their toes. Cuban treefrogs have exceptionally large toepads. They also have a “big eyed” appearance due to their oversized bulging eyes. Cuban treefrogs may exceed 6 inches in length, have warty-looking skin with possible blotches, bands or stripes, and vary greatly in color. However, they can be distinguished from other treefrogs. Cuban treefrogs have a yellowish wash where their front and rear legs are attached to their body. Juvenile Cuban treefrogs have red eyes and blue bones visible through the skin of their hind legs. The skin of the Cuban treefrog produces a sticky secretion that can cause a burning or itching sensation if it contacts the eyes or nose of certain individuals. It is recommended to wear gloves and wash your hands after handling Cuban treefrogs.
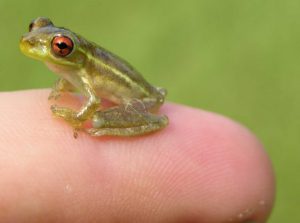
It is important to document the locations of Cuban treefrogs in the Panhandle. By placing short sections of PVC pipe in the ground around your home and garden will provide hiding places for treefrogs that enables you to monitor for Cuban treefrogs. Cut 10 foot sections of 1.5-inch-diameter PVC pipe into approximately three-foot-long sections and push them into the ground about 3-4 inches. To remove a frog from a pipe, place a clear sandwich bag over the top end, pull the pipe from the ground, and insert a dowel rod in the other end to scare the frog into the baggie. If you suspect you have seen one, take a picture and send it to Dr. Steve Johnson at tadpole@ufl.edu. Include your name, date, and location. Dr. Johnson can verify the identity. If it is a Cuban treefrog, upload the information by going to http://www.eddmaps.org/ and click the “Report Sightings” tab.
Once identified as a Cuban treefrog, it should be euthanized humanly. To do that, the Cuban treefrog in a plastic sandwich bag can be placed into the refrigerator for 3-4 hours then transferred to the freezer for an additional 24 hours. Alternatively, a 1-inch stripe benzocaine-containing ointment (like Orajel) to the frog’s back to chemically anesthetize it before placing it into a freezer. After freezing, remove the bagged frog from the freezer and dispose of in the trash. Ornamental ponds should also be monitored for Cuban treefrog egg masses especially after a heavy rain. The morning after a rain, use a small-mesh aquarium net to scoop out masses of eggs floating on the surface of the pond and simply discard them on the ground to dry out. Various objects that can collect water found throughout your yard need to be dumped out regularly to reduce breeding spots for both Cuban treefrogs and mosquitoes.