by Matthew Orwat | Mar 25, 2021
Stinkbugs and their relatives are not always problematic in the flower or vegetable garden, but when they become so, they can suck the life out of our fruits and vegetables, create ugly abrasions, and destroy flowers such as roses.
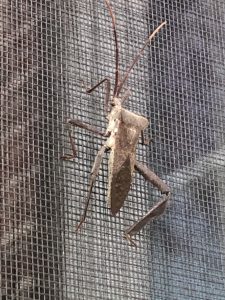
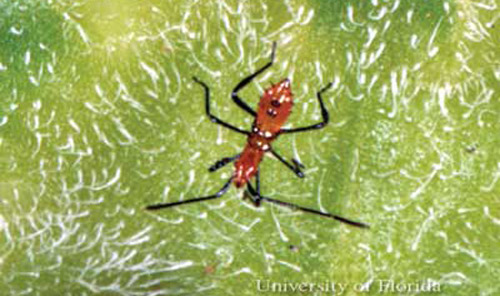
Over-wintering adult leaffooted bug emerging from hibernation . Image Credit Matthew Orwat, UF / IFAS Extension
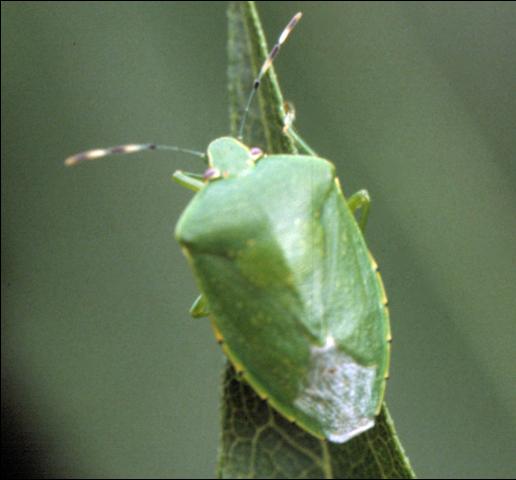
The green stink bug Acrosternum hilare (Say). Image and caption credit EDIS, Dr. Russ Mizell
What is a Stink Bug?
The stink bug (Pentatomidae family) is a major garden pest of a variety of fruits and vegetables including squash, peppers, tomatoes, peaches, plums, pecans and a variety of other edibles. They are known as a “piercing and sucking” insect because that’s the way they feed, by using their mouth, or proboscis, just like a needle to pierce the fruit and suck out the juices. This feeding leaves a damaged area of the fruit which may develop discoloration, rot or fungal disease and render the fruit unsaleable or inedible.
Who are “their relatives”
The leaf footed bug, Leptoglossus phyllopus (L), is a relative of the stinkbug and feeds in the same way, has a similar lifecycle and causes similar damage. They are usually slightly larger and have “leaf like” appendages on their legs which are their namesake.
What is their lifecycle?
In Florida, overwintering adult stink bugs will place a clutch, or tight group of eggs, on a host plant early in the growing season. If their preferred plant is not available, they use a variety of weeds and grasses to lay eggs upon and provide food for their young. After eggs hatch, they go through several nymph stages before they finally reach the adult stage. Stink bugs have multiple generations in a year, often four to five. They readily move to find preferable food sources and might appear in a garden without warning to feed and cause destruction.
Nymph of the leaffooted bug, Leptoglossus phyllopus (L.). Photograph by Lyle J. Buss, University of Florida.
How are they best controlled?
First of all, many stink bugs use weeds as host plants to gather and feed upon, so controlling weedy plants around vegetable and fruit gardens might limit their numbers. If stink bugs are a major problem, planting trap crops, such as sunflowers, is beneficial. Stink bugs prefer to feed on sunflowers more than some other vegetables. This situation can be used to the gardener’s advantage by mechanically killing or spraying stink bugs on trap crops while avoiding treating food crops with pesticides. More information on trap cropping can be found here.
Additionally, stink bug traps are available. These mechanically trap stink bugs, thus reducing their numbers in the garden, but need to be monitored and serviced regularly. Several species of parasitic Tachinid flies are also predators of stink bugs. These flies lay their eggs on adult stink bugs. The fly larva use the bug as a buffet, slowly killing the bug.
Stink bugs are difficult to control with insecticides, but some measure of control can be achieved at their nymph stage with various approved fruit and vegetable insecticides containing pyrethrins. These products are readily available at local garden centers and feed & seed stores.
For more information, please check out the following resources:
by Daniel J. Leonard | Feb 2, 2021
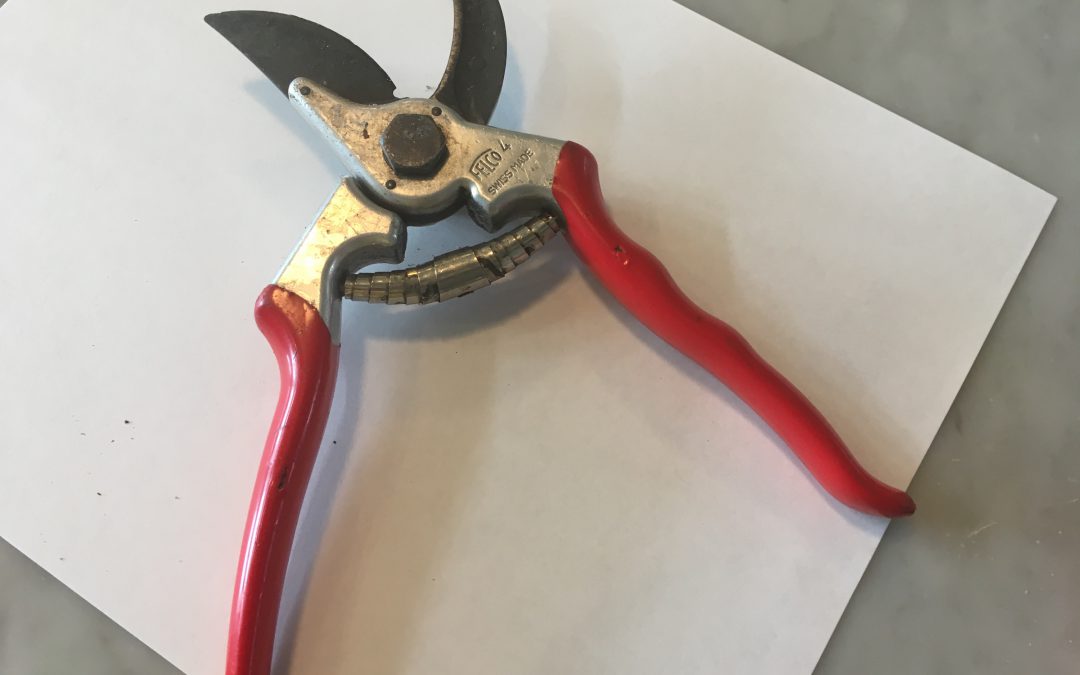
There is an old saying that rings true in pretty much any situation – “You get what you pay for.” Gardening tools, especially pruners, are no exception. We’ve all been there, fumbling around with a pair of rusty, dull, cheap garden pruners that just barely get the job done. Unfortunately, they can also do considerable harm to the plants you’re trying to improve, as anything short of a nice, sharp, clean cut introduces the potential for insect/disease infestation and will produce a wound that takes much longer to heal, if it ever heals properly at all. You wouldn’t want your doctor to start hacking away at you with a dirty, second-rate scalpel. Don’t subject your plants to the same treatment! While I’m not advocating blowing hundreds or thousands of dollars outfitting your garden tool shed with top of the line everything, investing in a pair of quality bypass hand pruners will pay dividends many years into the future and make your gardening experience much more enjoyable!

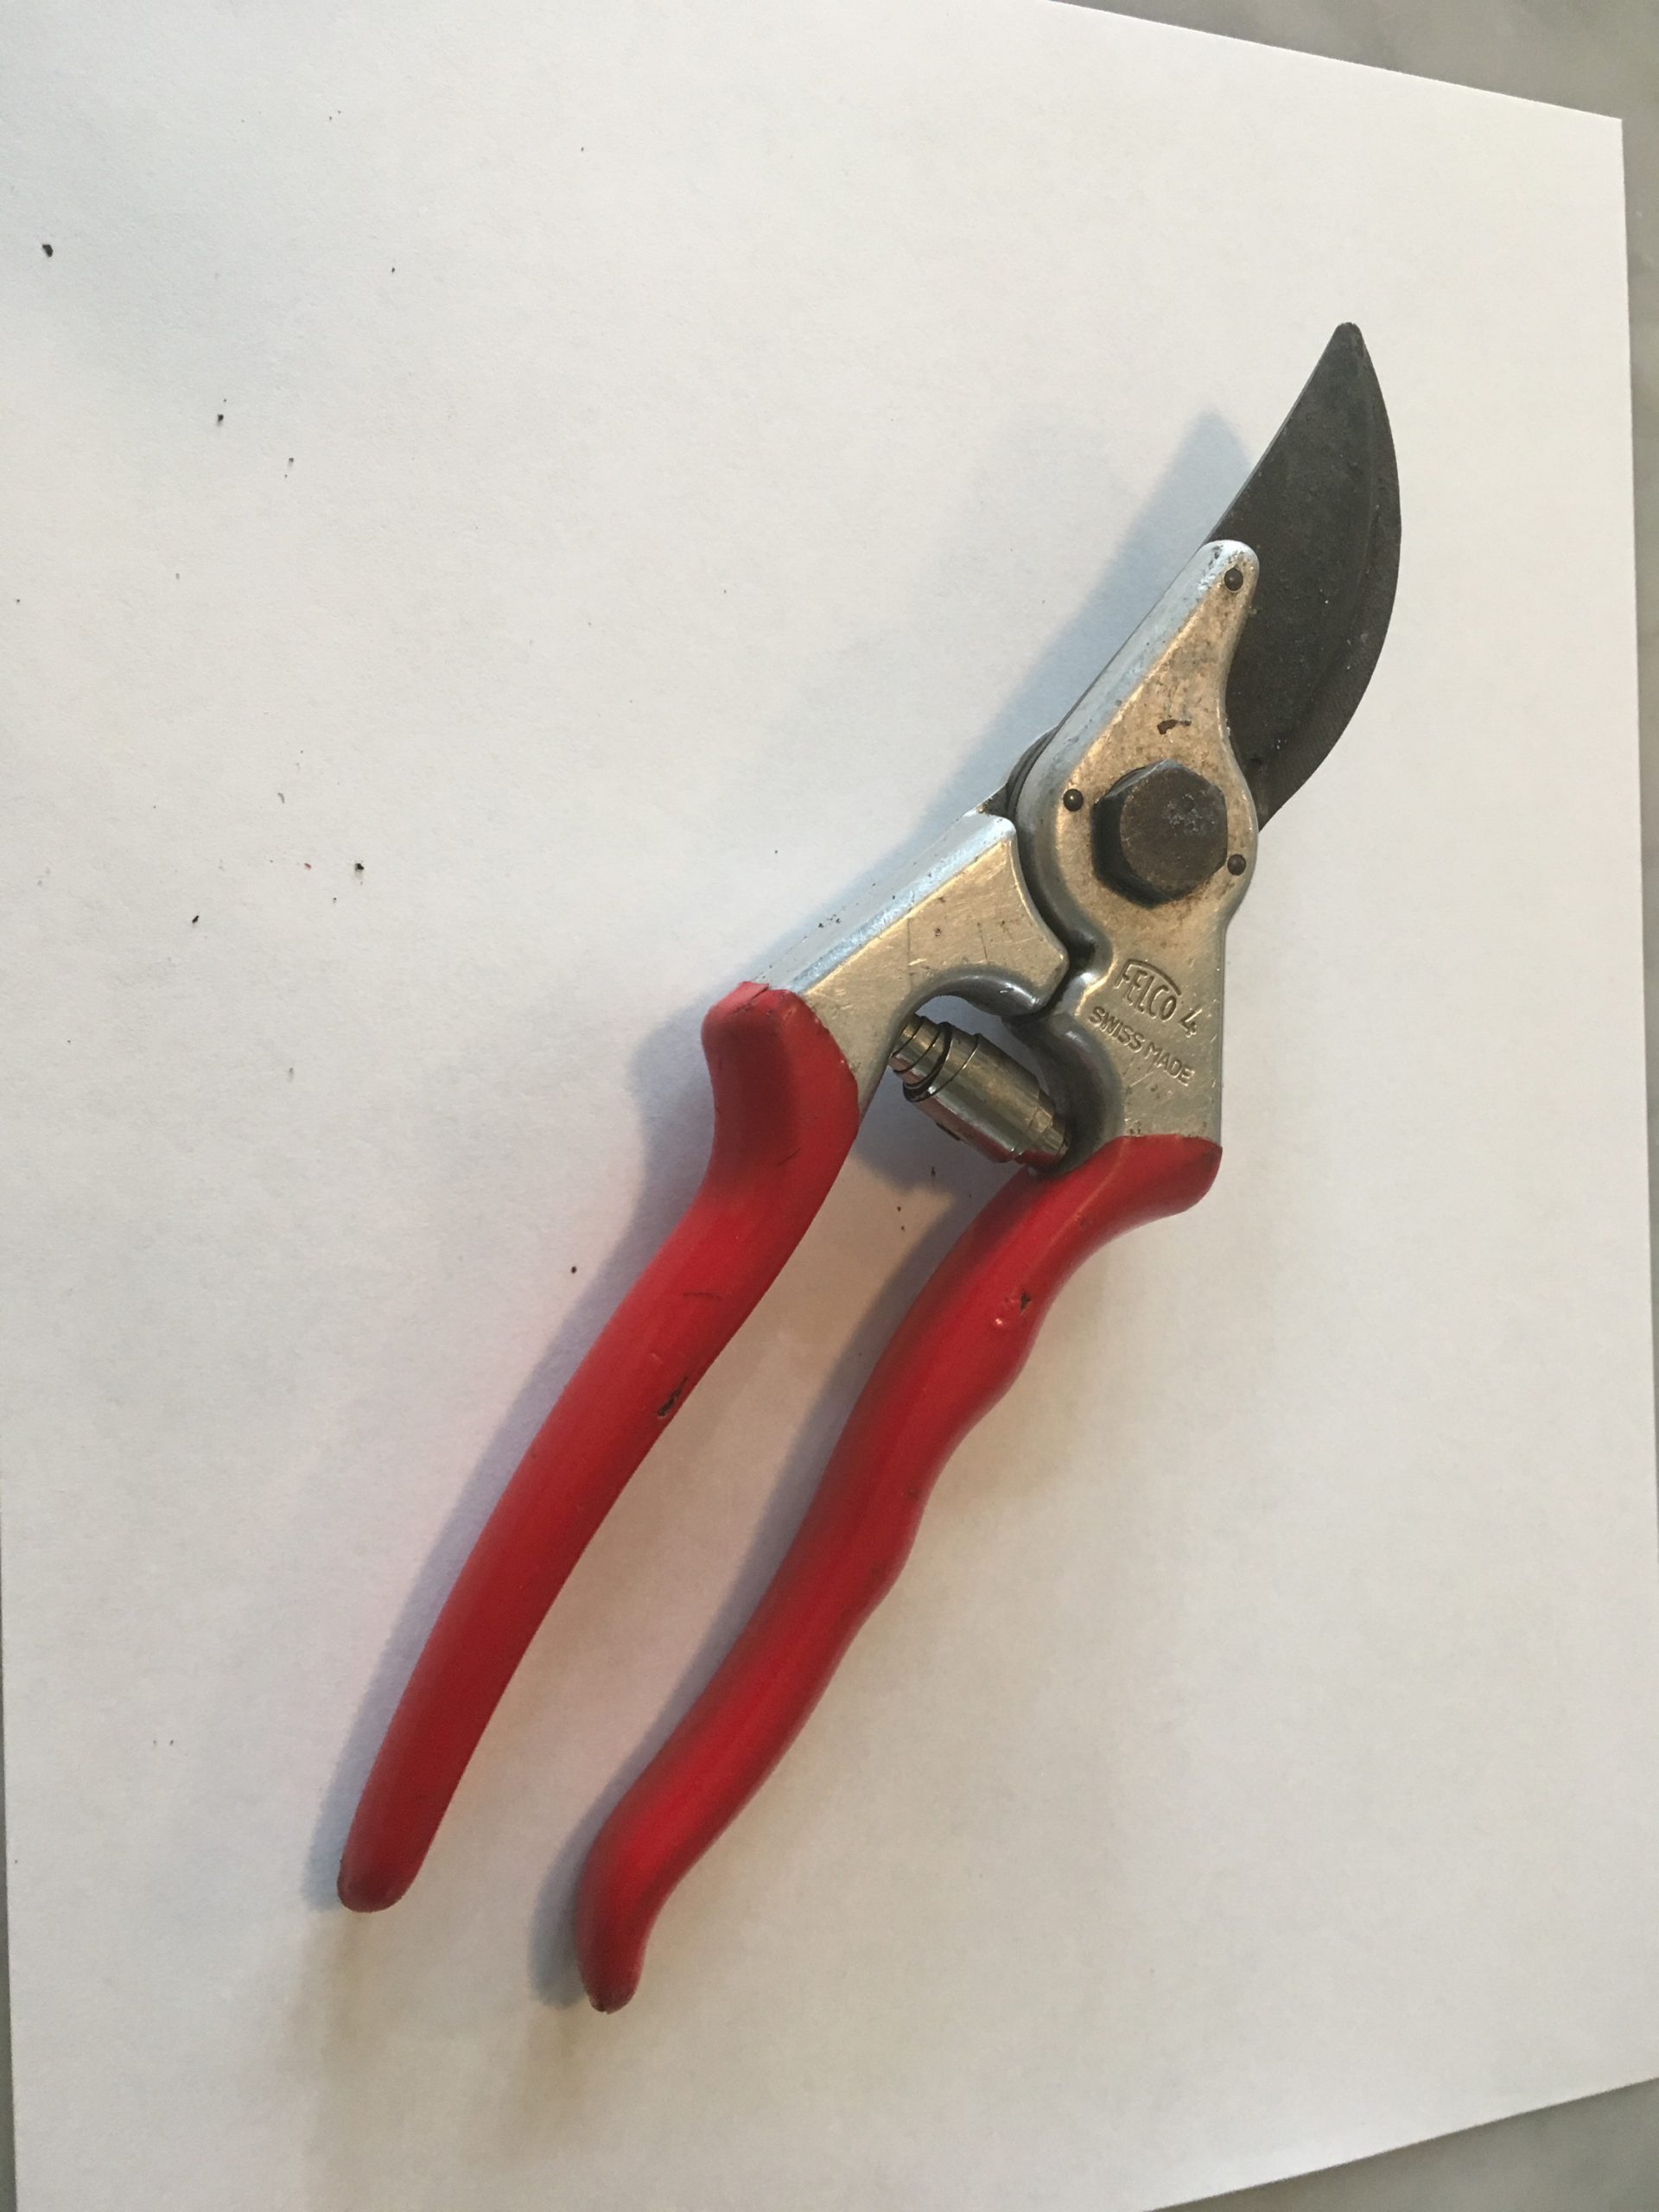
The classic Felco #4 bypass hand pruners. Photo courtesy of Walton County Master Gardener Andrea Schnapp.
Found in three designs, from old-fashioned anvil pruners that smush and smash their way to a cut, to ratcheting pruners that make short work of larger branches but tend to be cumbersome and complicated, to bypass pruners that produce clean cuts in a scissor-like manner, hand pruners accomplish many tasks in the landscape. From cutting small limbs, to harvesting vegetables, to deadheading annual flowers and everything in between, there isn’t a more frequently used, versatile tool. Therefore, it makes sense to buy a quality pair that will perform excellently, still be snipping long after your pruning days are over (if you take care of them), and that are comfortable enough you will enjoy using them. When shopping for your pair of “forever” pruners, there are a few things to look for.
- Only use bypass style pruners. Your plants will appreciate it.
- Look for heavy duty pruners with frames made from quality aluminum or stainless steel; they won’t rust and won’t easily bend or break.
- Buy pruners with replaceable parts. This is especially key because springs eventually rust and gum up and blades break and will eventually lose their ability to hold an edge over time (though you can and should resharpen them).
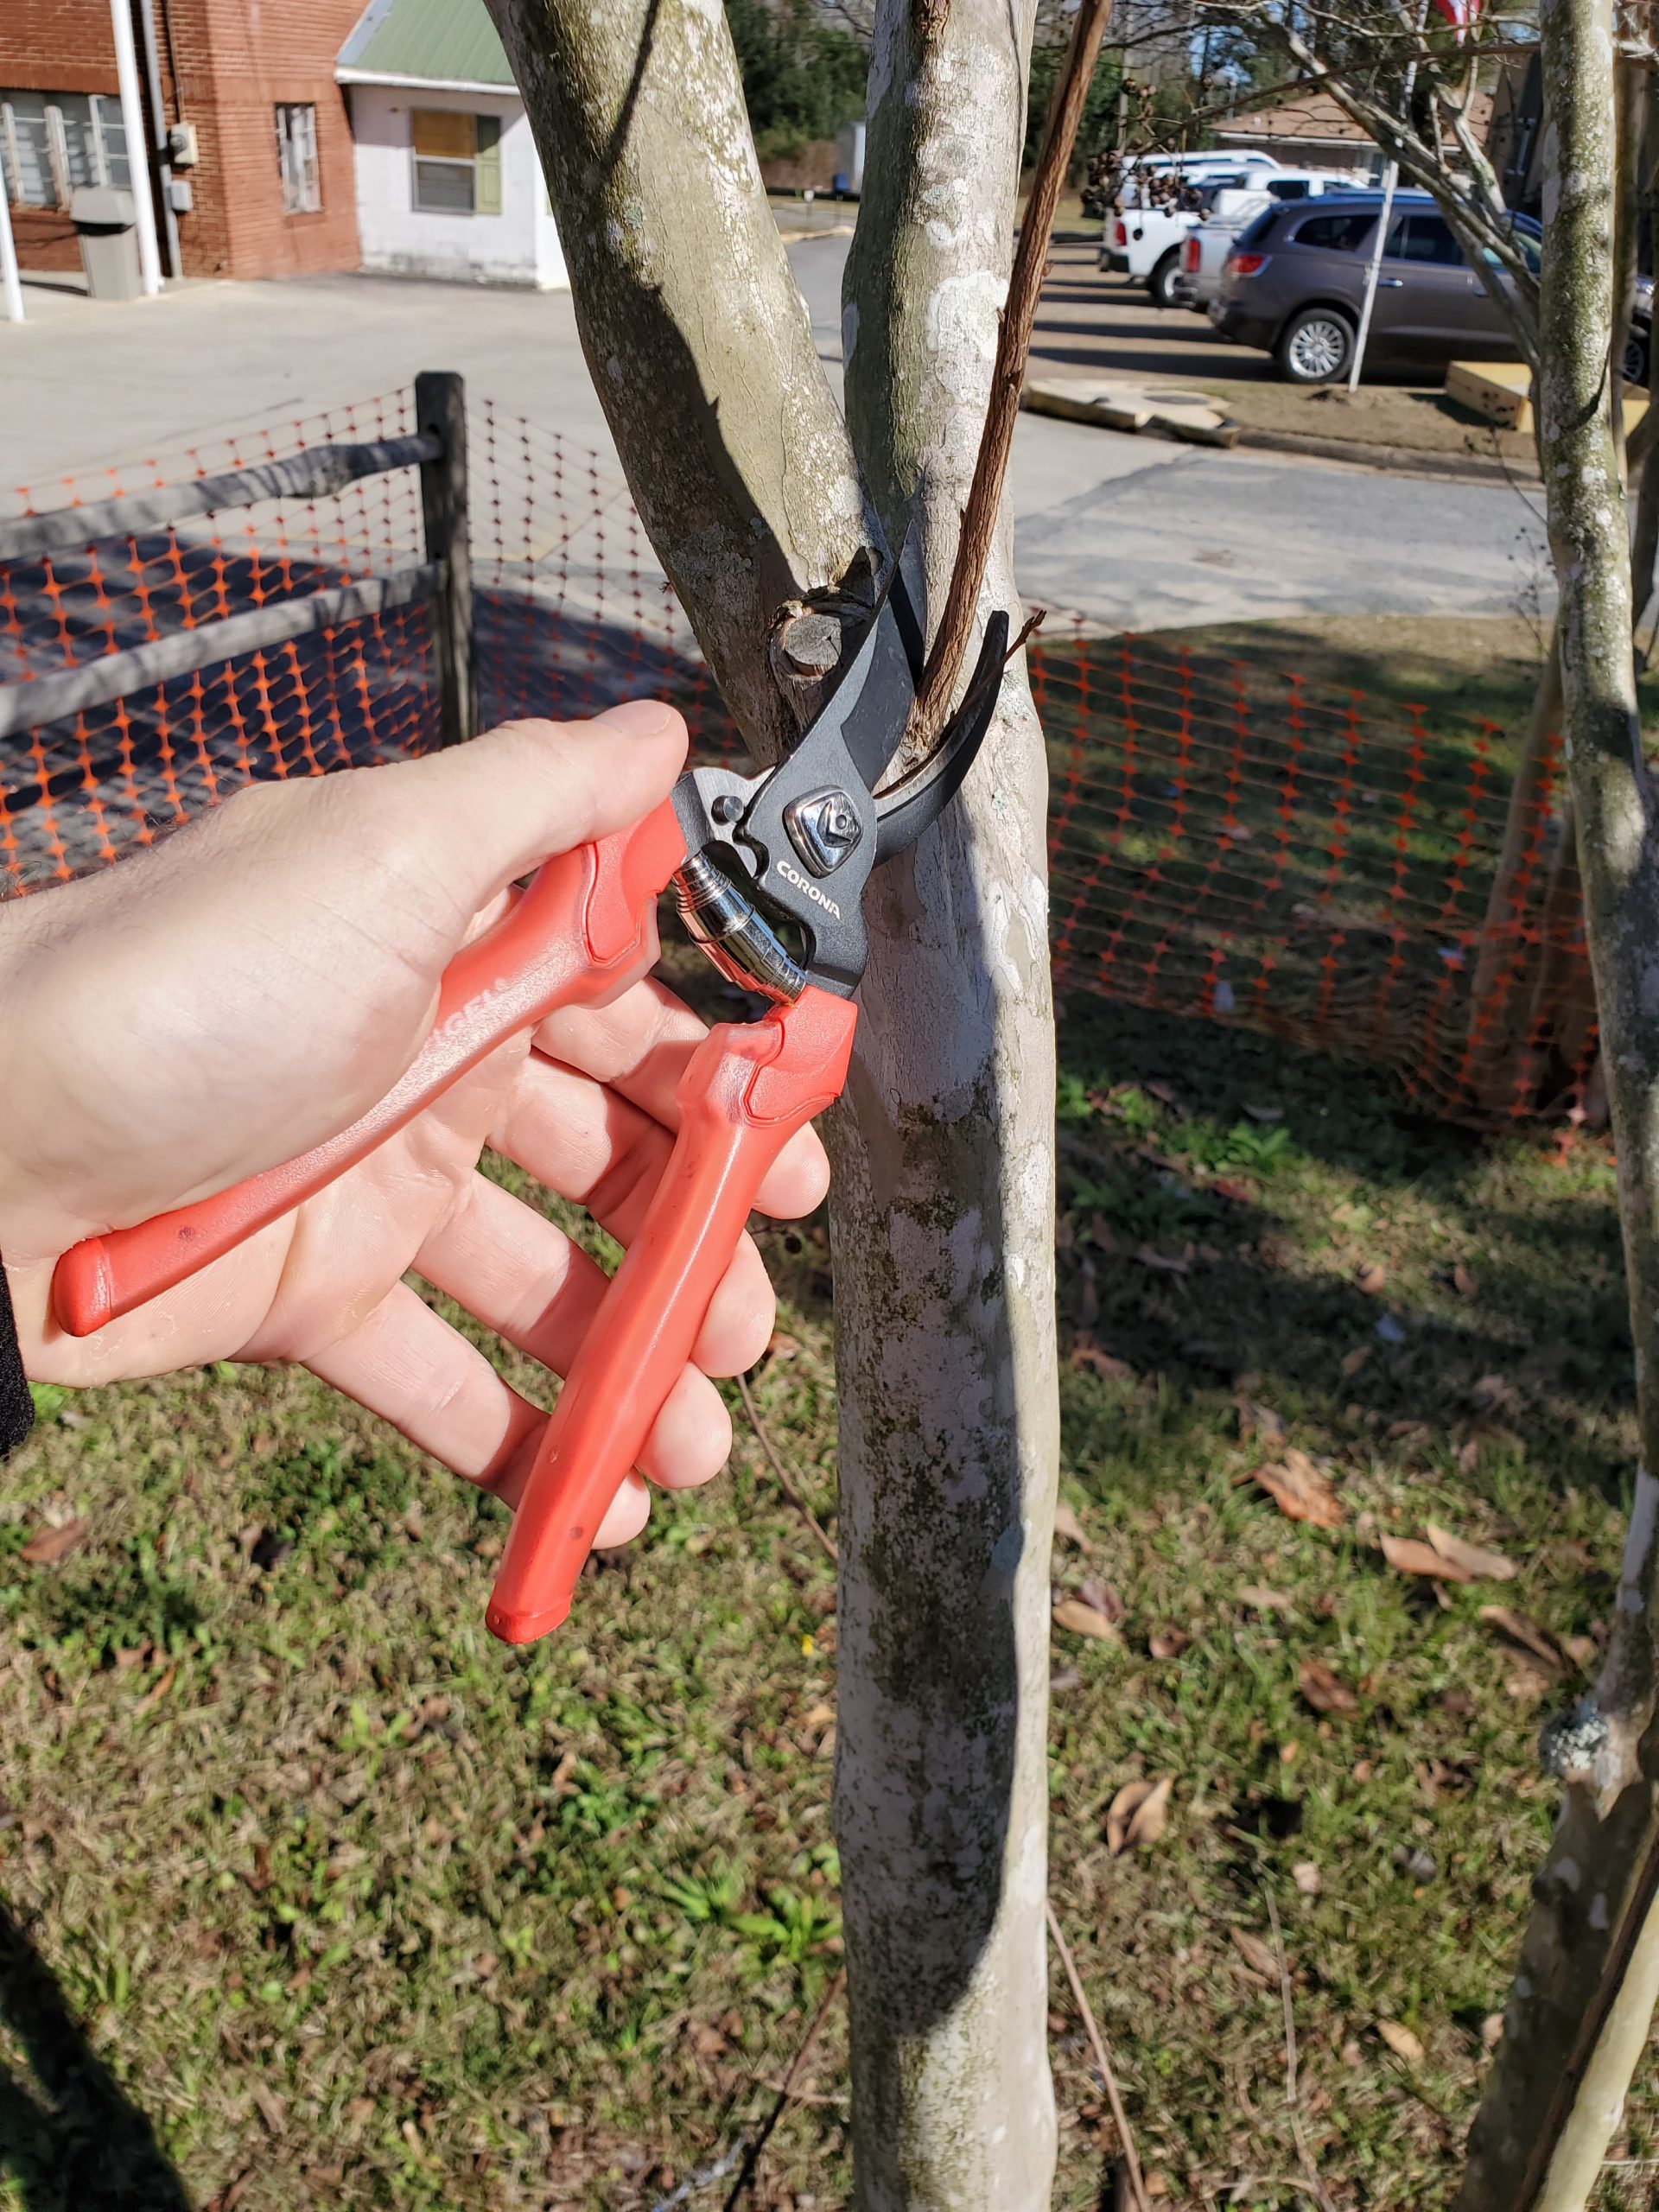
There are two commonly found brands that fit all three above criteria, albeit at different price points. For a high quality “budget” blade, various models from Corona do an excellent job for the money ($20-30) and won’t hurt your feelings too badly if you happen to lose a pair. Should you decide to splurge a little, Felco makes sharp, indestructible pruners, in multiple models around $50 to fit all size hands. Felco has become the horticulture industry standard and you’d be hard pressed to find a nursery owner or landscaper that didn’t own a pair (or two).

Corona ComfortGel bypass hand pruner. Photo courtesy of Daniel Leonard.
Regardless of which brand you buy (and there are many more than the two above listed) a pair of well-made pruners, if taken care of, should last a lifetime and make your gardening experience much more enjoyable for you and your plants! If you have any questions about gardening tools or equipment or any other horticulture or agronomic topic, feel free to contact your local UF/IFAS Extension Office. Happy Gardening!
by Pat Williams | Oct 21, 2020
Normally, you will have one of four answers: “yes”, “no”, “I don’t know” or “what are super bugs?” The answer to the last one is an insect or other pest that has become resistant to chemical treatments through either natural selection (genetics) or an adaptive behavioral trait.
The next question is do you treat insect or pest problems at home with a purchased EPA registered chemical (one purchased from the nursery or other retailer)? If you answered yes, then the next question is how many times in a row do you apply the same chemical? If you only use one chemical until the product is used up, then you might be creating super bugs. Do you ever alternate chemicals and if you answer yes, do you understand chemical Modes of Action (how the pesticide kills the pest)? If you do not, then chances are the rotating chemicals might act in the same way. Thus, you are creating super bugs because in essence you are applying the same chemical with different labels.
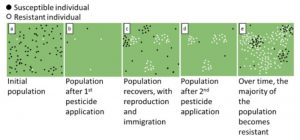
Click on image for a larger view. Taken from https://edis.ifas.ufl.edu/in714.
One of the first ways to reduce creating super bugs is to practice Integrated Pest Management (IPM). The very last step of an IPM philosophy is chemical control. You should choose the least toxic (chemical strength is categorized by signal words on the label: caution, warning, and danger) and most selective product. A chemical label advertising it kills many pests is an example of a non-selective chemical. You want to choose a chemical that kills your pest or only a few others. In Extension education, you will always hear the phrase “The label is the law.” To correctly purchase a chemical, you must first correctly identify the pest and secondly the plant you want to treat. If you need help from Extension for either of these, please contact us. Before purchasing the chemical, always read the whole label. You can find the label information online in larger print versus reading the small print on the container.

IRAC phone app.
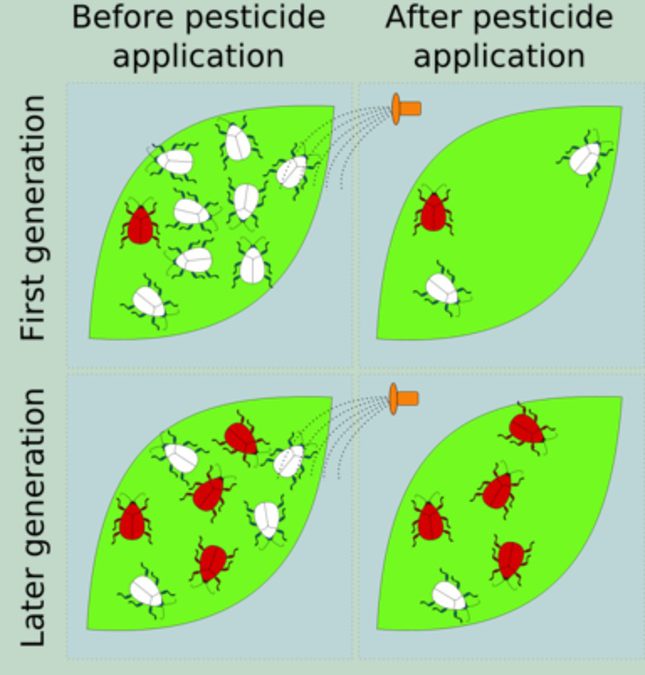
You now have the correct chemical to treat your pest. Wear the recommended personal protective equipment (PPE) and apply according to directions. If your situation is normal, the problem is not completely solved after one treatment. You might apply a second or third time and yet you still have a pest problem. The diagram explains why you still have pests or more accurately super bugs.
Now the last question is how do we really solve the problem given that chemicals are still the only treatment option? A bit more work will greatly help the situation. You need to download the Insecticide Resistance Action Committee (IRAC) guide and find the active ingredient on your chemical label (http://edis.ifas.ufl.edu/pi121 or https://irac-online.org/modes-of-action/ and select the pdf). If you are like me, you can just download the IRAC MoA smartphone app and type in the active ingredient; otherwise, Appendix 5 in the pdf has a quick reference guide. Either way, you will know the Group and/or Subgroup. A lot of commonly purchased residential chemicals fall within 1A, 1B or 3. The successful treatment option is to select chemicals from different group numbers and use them in rotation. If you start practicing this simple strategy, your treatment should be more successful. Then when someone asks if you are creating super bugs, your answer will be no.
If you have any questions about rotating your chemical Modes of Action, please contact me or your local county Extension agent. For more resources on this topic, please read Managing Insecticide and Miticide Resistance in Florida Landscapes by Dr. Nicole Benda and Dr. Adam Dale (https://edis.ifas.ufl.edu/in714).
by Daniel J. Leonard | Oct 14, 2020
Article by Jessica Griesheimer & Dr. Xavier Martini, UF/IFAS North Florida Research and Education Center, Quincy
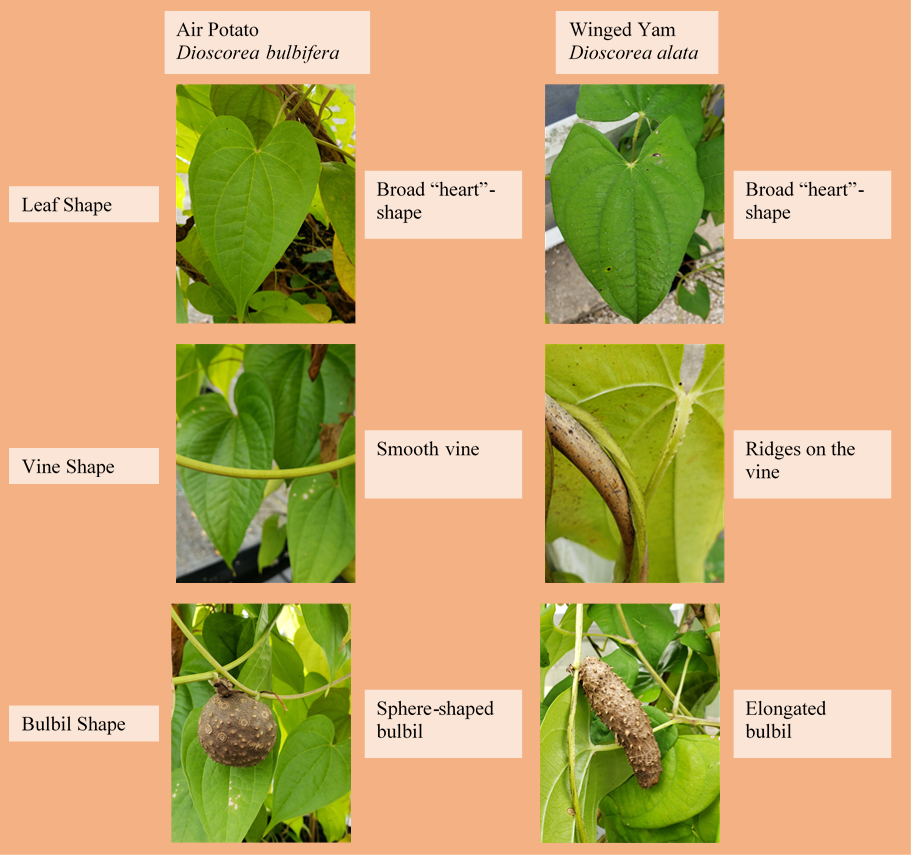
Dioscorea bulbifera, commonly known as the air potato is an invasive species plaguing the southeastern United States. The air potato is a vine plant that grows upward by clinging to other native plants and trees. It propagates with underground tubers and aerial bulbils which fall to the ground and grow a new plant. The aerial bulbils can be spread by moving the plant, causing the bulbils to drop to the ground and tubers can be spread by moving soil where an air potato plant grew prior. The air potato is commonly confused with and mistaken as being Dioscorea alata, the winged yam which is also highly invasive. The plants look very similar at first glance but have subtle differences. Both plants exhibit a “heart”-shaped leaf connected to vines. The vines of the winged yam have easily felt ridges, while the air potato vines are smooth. They also differ in their aerial bulbil shapes, the winged yam has a long, cylinder-shaped bulbil while the air potato aerial bulbil has a rounded, “potato” shape (Fig. 1).

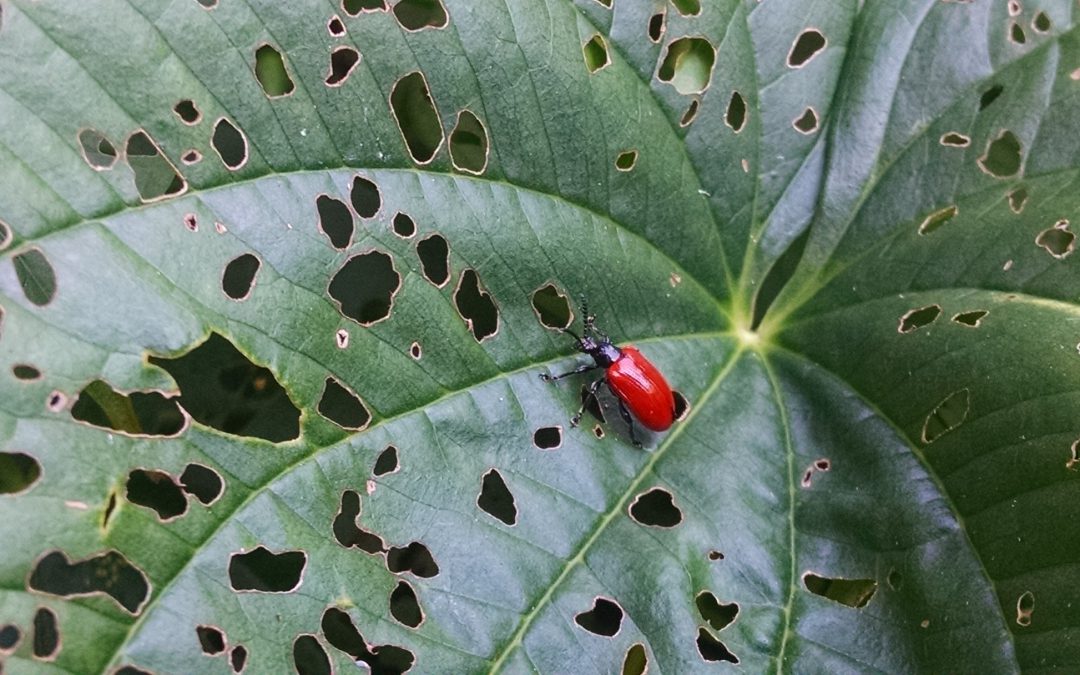
In its native range of Asia and Africa, the air potato has a local biocontrol agent, Lilioceris cheni commonly known as the Chinese air potato beetle (Fig. 2). As an adult, this beetle feeds on older leaves and deposits eggs on younger leaves for the larvae to later feed on. Once the larvae have grown and fed, they drop the ground where they pupate to later emerge as adults, continuing the cycle. The Chinese air potato beetle will not feed on the winged yam, as it is not its host plant.Current methods of air potato plant, bulbil, and tuber removal can be expensive and hard to maintain. The plant is typically sprayed with herbicide or is pulled from the ground, the aerial bulbils are picked from the plant before they drop, and the underground tubers are dug up. The herbicides can disrupt native vegetation, allowing for the air potato to spread further should it survive. If the underground tuber or aerial bulbils are not completely removed, the plant will grow back.
The Chinese air potato beetle is currently being evaluated as a potential integrated pest management (IPM) organism to help mitigate the invasive air potato. The beetle feeds and reproduces solely on the air potato plant, making it a great IPM organism choice. During 2019, we studied the Chinese air potato beetle and its ability to find the air potato plant. It was found the beetles may be using olfactory cues to find the host plant. Further research is conducted at the NFREC to increase natural aggregation of the beetles on air potato to improve biological control of the weed.
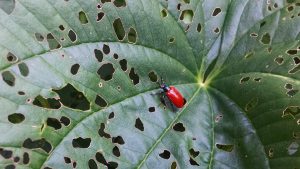
Chinese Air Potato Leaf Beetle.
If you have the air potato plant, or suspect you have the air potato plant, contact your local UF/IFAS Extension Agents for help!
by Daniel J. Leonard | Sep 28, 2020
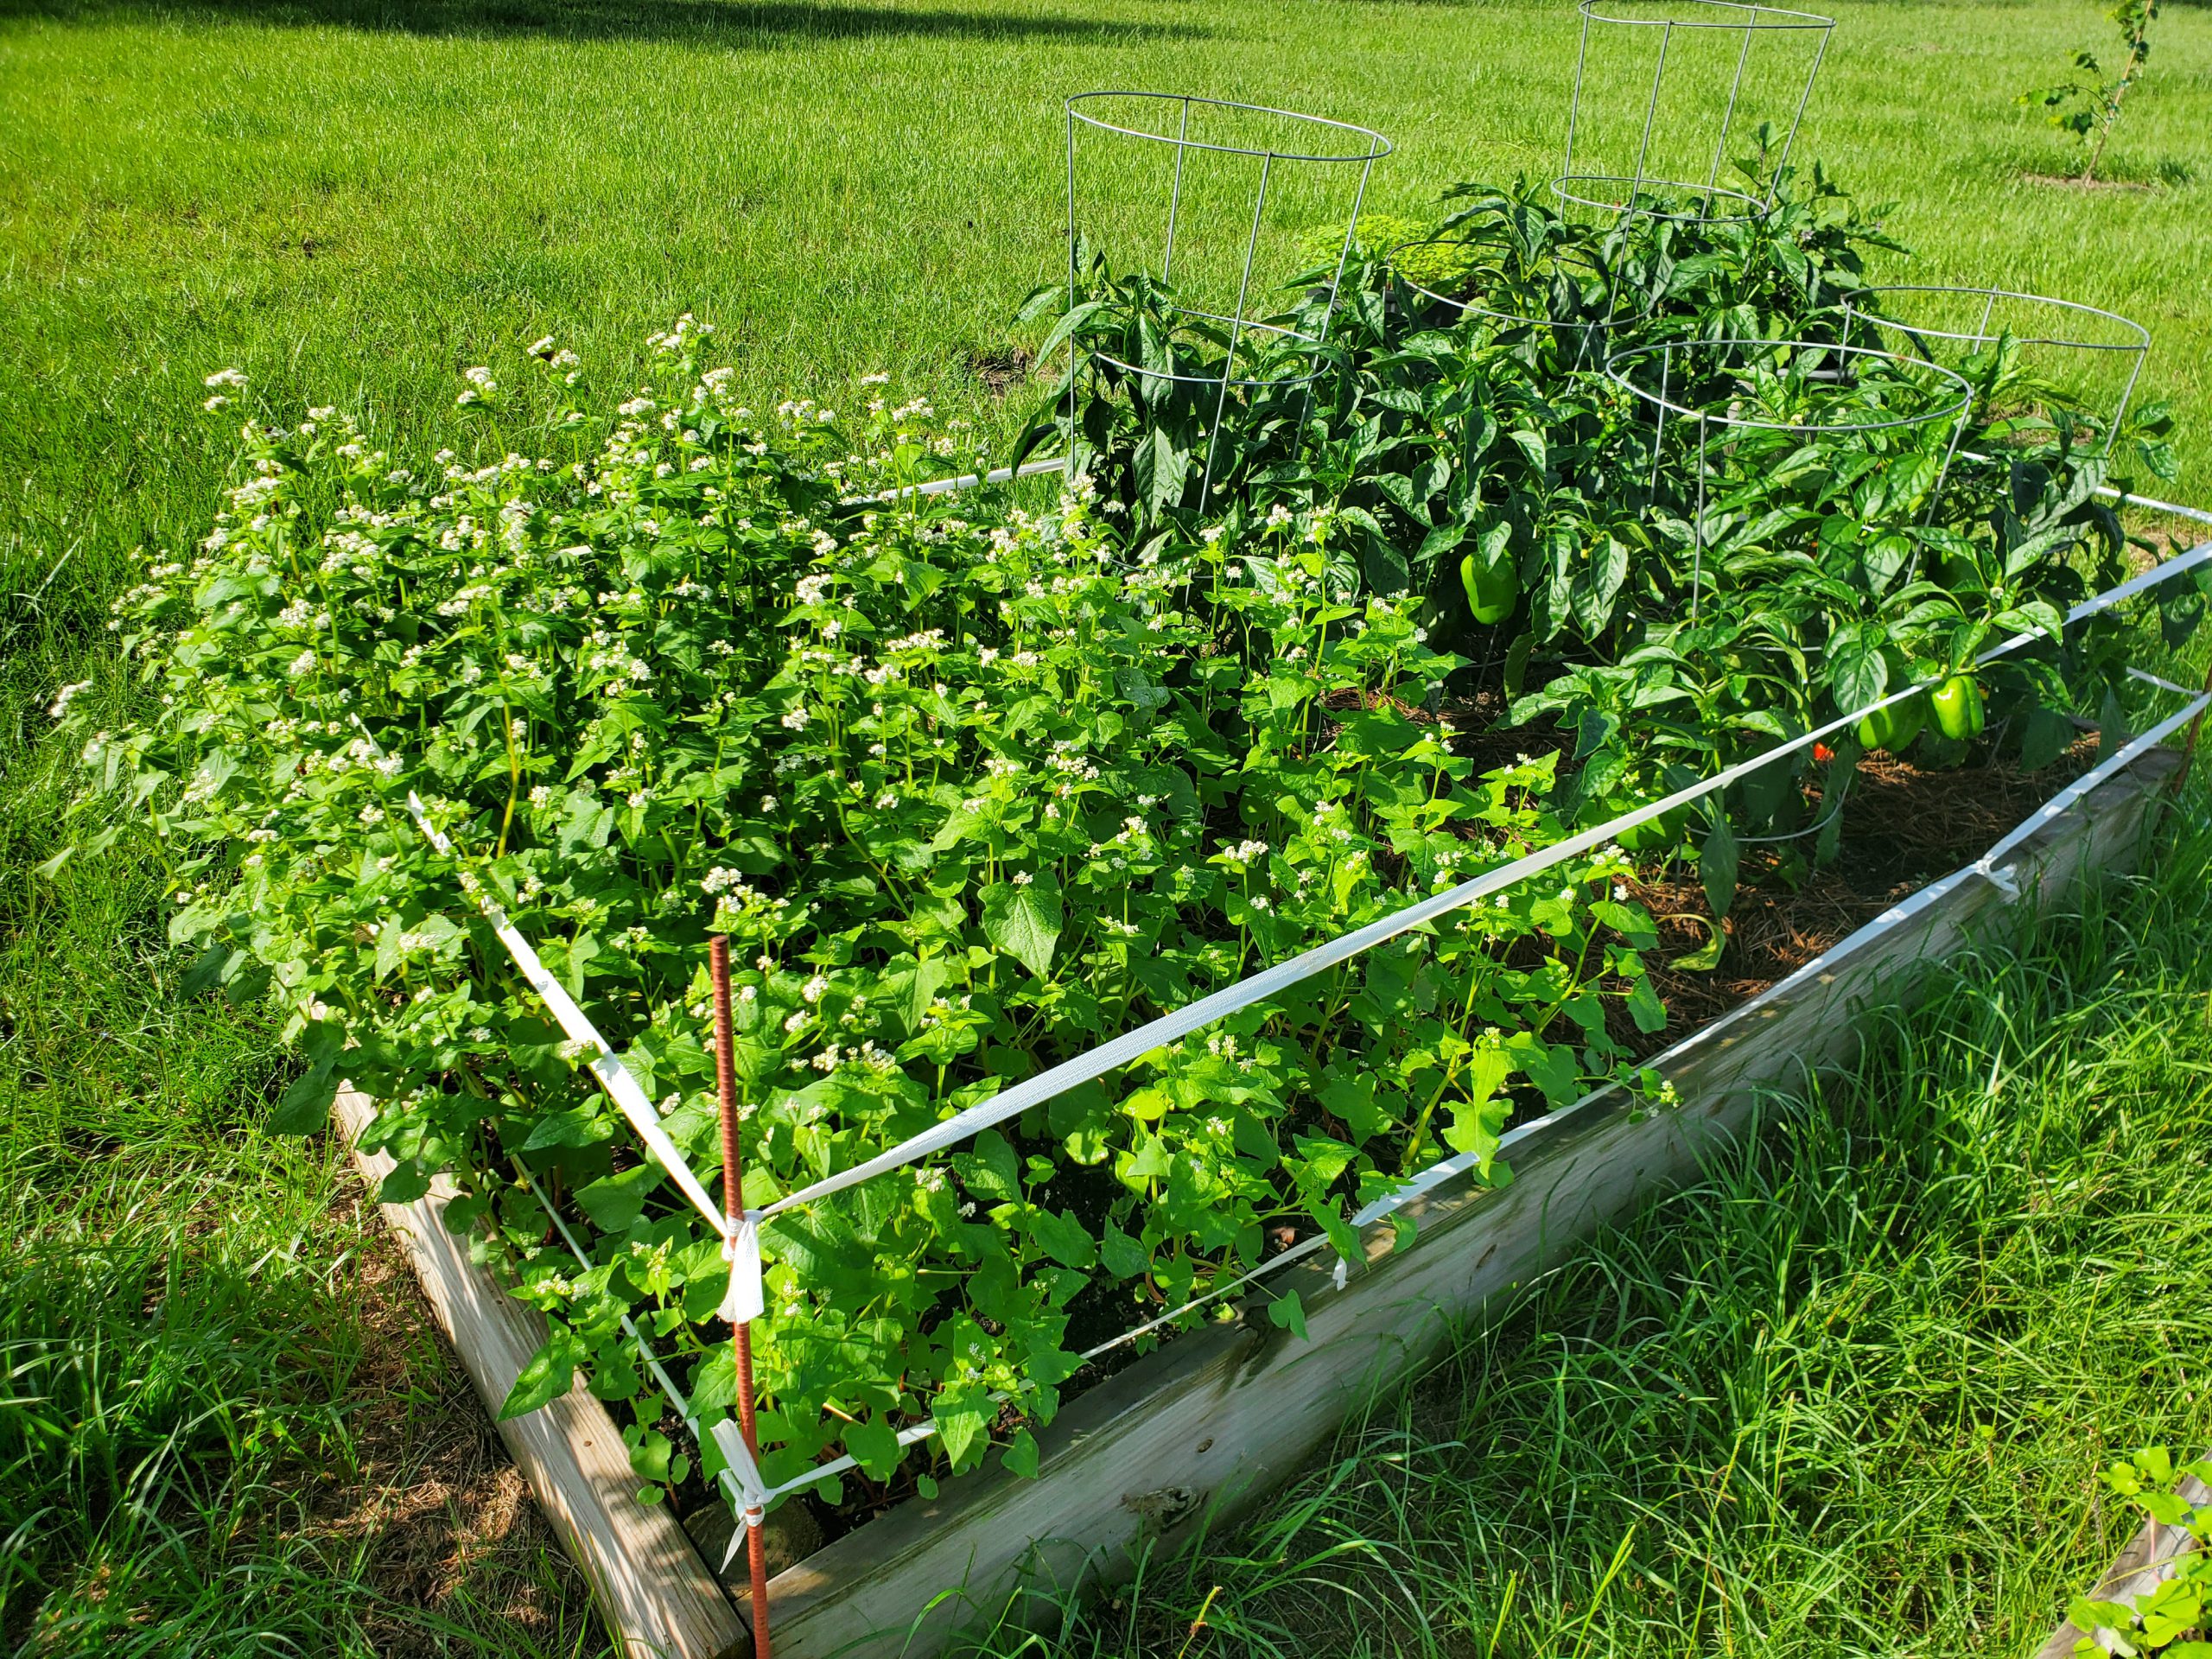
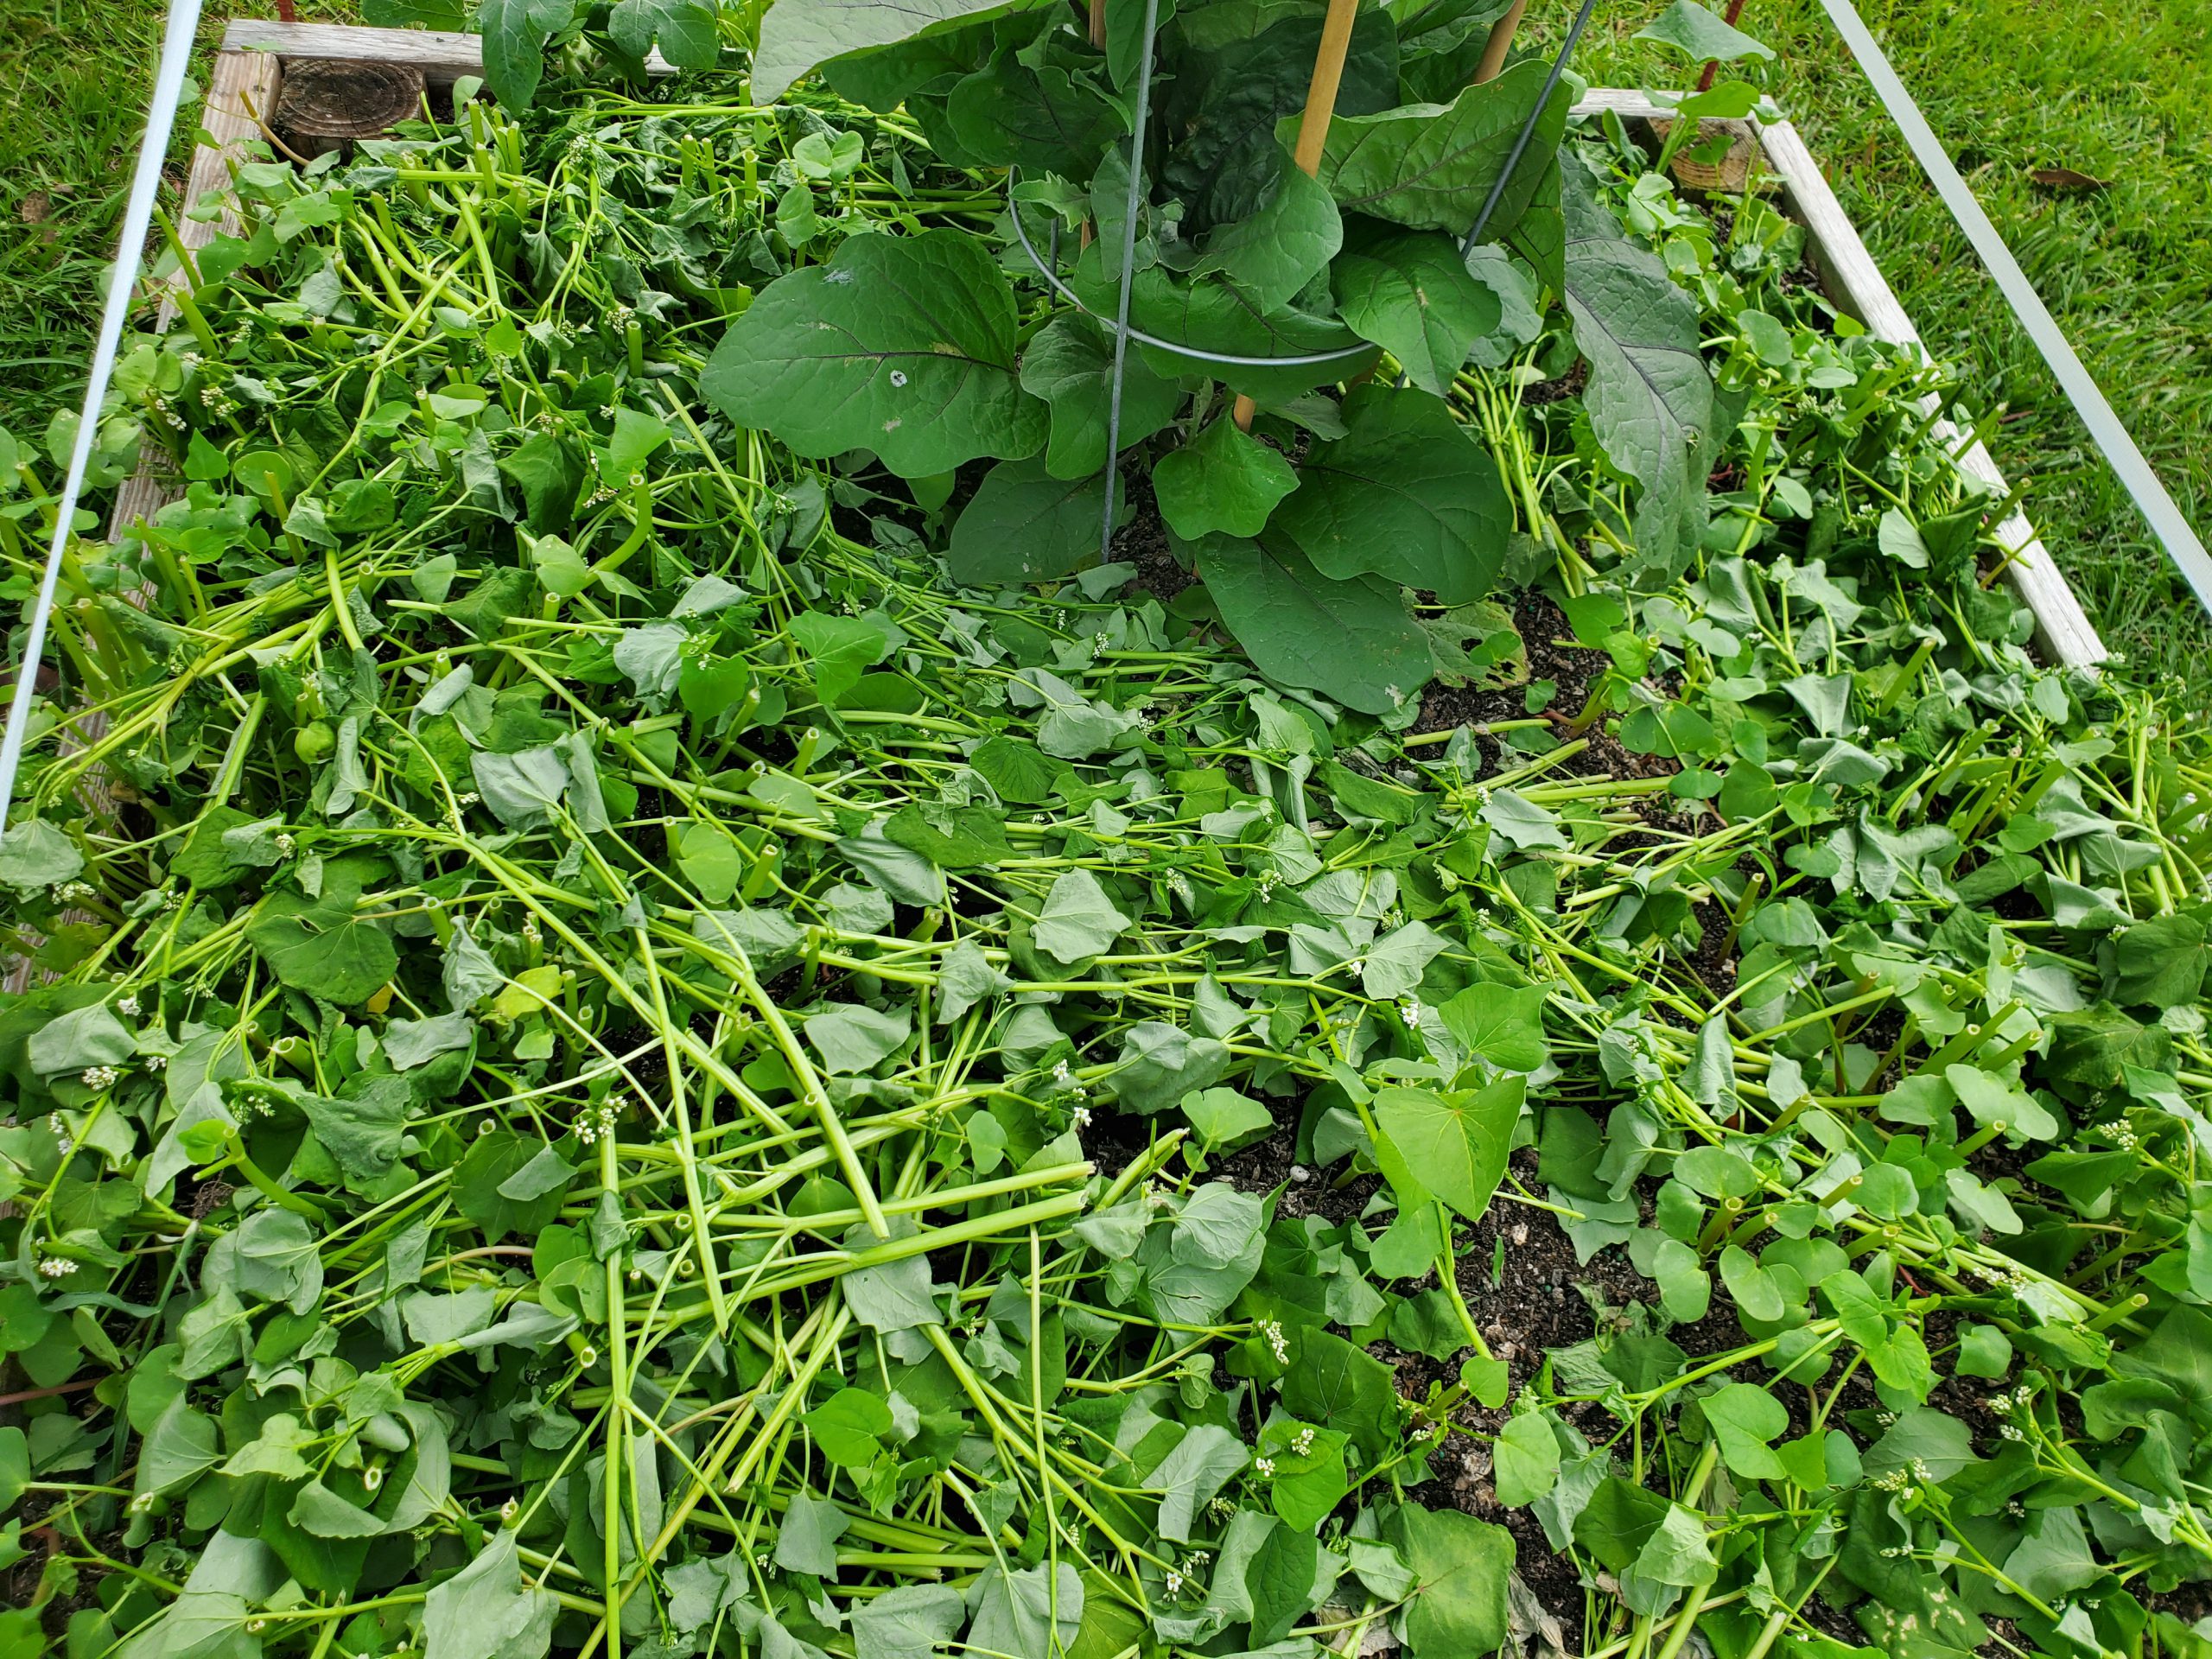
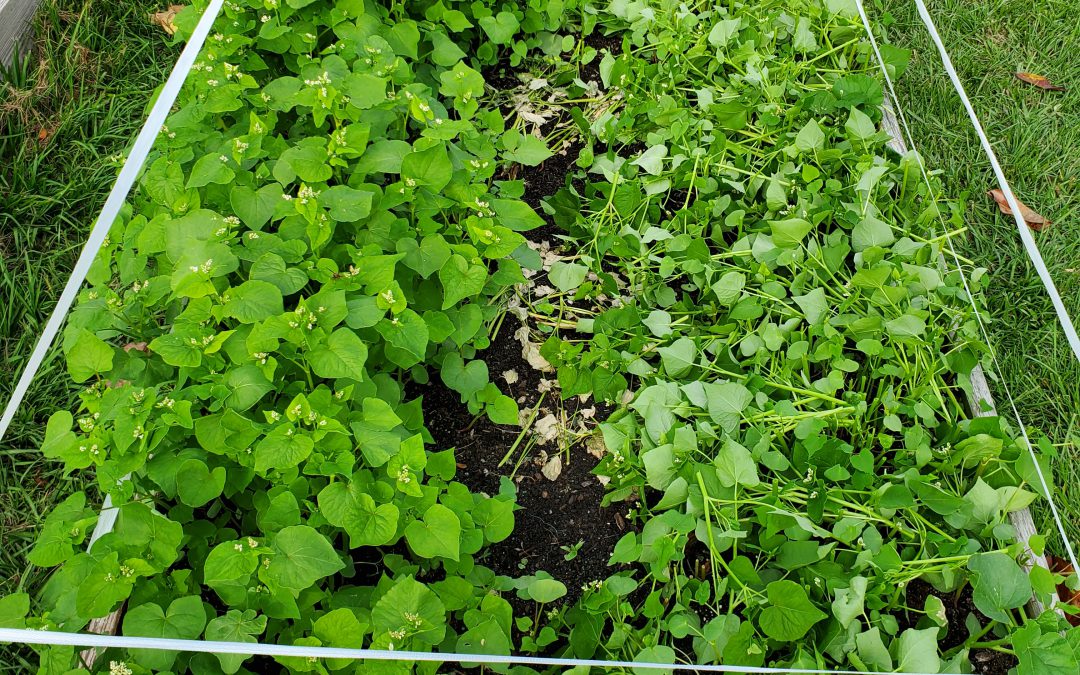
2020 has not been the most pleasant year in many ways. However, one positive experience I’ve had in my raised bed vegetable garden has been the use of a cover crop, Buckwheat (Fagopyrum esculentum)! Use of cover crops, a catch-all term for many species of plants used to “cover” field soil during fallow periods, became popular in agriculture over the last century as a method to protect and build soil in response to the massive wind erosion and cropland degradation event of the 1930s, the Dust Bowl. While wind erosion isn’t a big issue in raised bed gardens, cover crops, like Buckwheat, offer many other services to gardeners:
Buckwheat in flower behind summer squash. Photo courtesy of Daniel Leonard.
- Covers, like Buckwheat, provide valuable weed control by shading out the competition. Even after termination (the cutting down or otherwise killing of the cover crop plants and letting them decompose back into the soil as a mulch), Buckwheat continues to keep weeds away, like pinestraw in your landscape.
- Cover crops also build soil. This summer, I noticed that my raised beds didn’t “sink” as much as normal. In fact, I actually gained a little nutrient-rich organic matter! By having the Buckwheat shade the soil and then compost back into it, I mostly avoided the phenomena that causes soils high in organic matter, particularly ones exposed to the sun, to disappear over time due to breakdown by microorganisms.
- Many cover crops are awesome attractors of pollinators and beneficial insects. At any given time while my Buckwheat cover was flowering, I could spot several wasp species, various bees, flies, moths, true bugs, and even a butterfly or two hovering around the tiny white flowers sipping nectar.
- Covers are a lot prettier than bare soil and weeds! Where I would normally just have either exposed black compost or a healthy weed population to gaze upon, Buckwheat provided a quick bright green color blast that then became covered with non-stop white flowers. I’ll take that over bare soil any day.
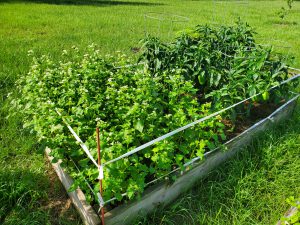
Buckwheat cover before termination (left) and after (right) interplanted with Eggplant. Photo courtesy Daniel Leonard, UF/IFAS Calhoun County Extension.
Now that I’ve convinced you of Buckwheat’s raised bed cover crop merits, let’s talk technical and learn how and when to grow it. Buckwheat seed is easily found and can be bought in nearly any quantity. I bought a one-pound bag online from Johnny’s Selected Seeds for my raised beds, but you can also purchase larger sizes up to 50 lb bags if you have a large area to cover. Buckwheat seed germinates quickly as soon as nights are warmer than 50 degrees F and can be cropped continuously until frost strikes in the fall. A general seeding rate of 2 or 3 lbs/1000 square feet (enough to cover about thirty 4’x8’ raised beds, it goes a long way!) will generate a thick cover. Simply extrapolate this out to 50-80 lbs/acre for larger garden sites. I scattered seeds over the top of my beds at the above rate and covered lightly with garden soil and obtained good results. Unlike other cover crops (I’m looking at you Crimson Clover) Buckwheat is very tolerant of imperfect planting depths. If you plant a little deep, it will generally still come up. A bonus, no additional fertilizer is required to grow a Buckwheat cover in the garden, the leftover nutrients from the previous vegetable crop will normally be sufficient!

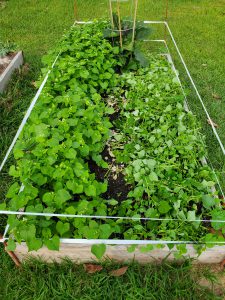
Buckwheat “mulch” after termination. Photo courtesy of Daniel Leonard, UF/IFAS Calhoun County Extension.
Past the usual cover crop benefits, the thing that makes Buckwheat stand out among its peers as a garden cover is its extremely rapid growth and short life span. From seed sowing to termination, a Buckwheat cover is only in the garden for 4-8 weeks, depending on what you want to use it for. After four weeks, you’ll have a quick, thick cover and subsequent mulch once terminated. After eight weeks or so, you’ll realize the plant’s full flowering and beneficial/pollinator insect attracting potential. This lends great flexibility as to when it can be planted. Have your winter greens quit on you but you’re not quite ready to set out tomatoes? Plant a quick Buckwheat cover! Yellow squash wilting in the heat of summer but it’s not quite time yet for the fall garden? Plant a Buckwheat cover and tend it the rest of the summer! Followed spacing guidelines and only planted three Eggplant transplants in a 4’x8’ raised bed and have lots of open space for weeds to grow until the Eggplant fills in? Plant a Buckwheat cover and terminate before it begins to compete with the Eggplant!
If a soil building, weed suppressing, beneficial insect attracting, gorgeous cover crop for those fallow garden spots sounds like something you might like, plant a little Buckwheat! For more information on Buckwheat, cover crops, or any other gardening topic, contact your local UF/IFAS County Extension Office. Happy Gardening!