by Sheila Dunning | Feb 18, 2021
The term “ornamental grass” is a catch-all phrase used to describe grasses and “grass-like” plants. Individual species are adapted to a wide variety of landscape sites (i.e., wet or dry, sun or shade, hot or cold climates, and varied salt tolerance). Growth habits range from low ground covers to intermediate shrub-like plants to very tall hedge-like plants. Ornamental grasses are very dynamic; the size, shape, texture, and color of grass changes with every season.
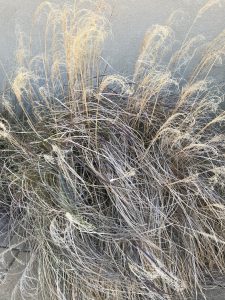
Deciduous Ornamental Grass
Grasses with foliage that dies in the winter and remains dormant until the weather warms in the spring are considered deciduous. The winter character of deciduous ornamental grasses adds tremendous interest to the winter garden when contrasted with evergreen plants or structures such as walls or fences. The dried foliage of deciduous grasses creates sound as it expands and contracts in response to changes in temperature or moisture, while interaction with wind creates movement in the garden. For these reasons, pruning of the dead foliage and inflorescences is not recommended at the time of the first frost.
Pruning of ornamental grasses should be done in late winter or early spring, just prior to new shoot growth. In Northwest Florida, gardeners should target the end of February to prune ornamental grasses. For deciduous grasses, such as Japanese silver grass (Miscanthus sinensis), the old foliage may be completely removed within inches of the soil. Be cautious to not remove the growth point by leaving the grass clump at least 4 inches high. For evergreen grasses, such as muhly grass (Muhlenbergia capillaris), the ragged leaves can be removed to neaten the appearance of the plant without shortening all the way to the ground. So, depending on the damaged portions, the remaining grass clump can be 6-18 inches high after pruning. Grasses recover quickly from a heavier pruning. Within a few months the plant will have completely regrown. If desired, old flower stalks and seed heads may be removed any time they no longer have a neat appearance. For more information on ornamental grass species and growing tips, please visit the EDIS Publication: Considerations for Selection and Use of Ornamental Grasses.
by Sheila Dunning | Mar 20, 2020
Until recently, rainfall has been plentiful. That’s great for the water table and preparing plants to wake up for spring. But, insects are also stirring. Bugs are affected by rain in many ways. When water is plentiful, they can grow faster, reproduce sooner and travel farther. Combine that with the fact that the insects’ homes are being flooded out and their normal food sources are displaced; and where do you think they are headed? Yes, into your house. Four bugs you can anticipate seeing after rain events include cockroaches, sowbugs, ants and centipedes.

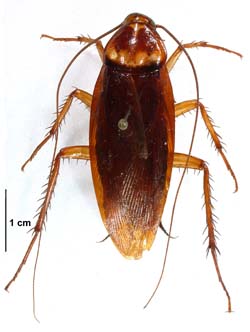
American Cockroach
Photo by: J.L. Castner
UF/IFAS
Roaches tend to live in places that flood easily, especially this time of year. To survive the cold nights, cockroaches need to find a warm place to rest. Typically those places would be drains, pipes, sewers, along foundations and in crawl spaces. But, when it rains, these locations are often flooded, forcing cockroaches to scurry for their lives to avoid drowning. A crack in weather stripping or window caulking makes a quick hideaway. Once inside, they may decide to stay. Frequent rainy days create the lingering humidity that makes all kinds of places more livable for roaches.
Sowbugs and his cousin, the pillbug, are very small, pill-shaped pests with multiple legs and a series of shell-like plates. Often referred to as roly-polys, these creatures are actually a form of land

Sowbug
Photo by: J.L. Castner UF/IFAS
crustacean related to lobsters, crabs, and crayfish. The sowbug’s breathing tubes require moisture to function properly, so they must stay near water. Typically this fact restricts the sowbug to living in moist soil or sand. Ending up inside a building is normally a terminal condition for them. However, due to the moisture left in the air after a rain event, sowbugs that seek refuge inside are able to survive for longer periods of time. Given the opportunity, sowbugs will reproduce indoors. If they have decaying organic material to feed on, they may stick around even longer; having time to create a multi-generational infestation.
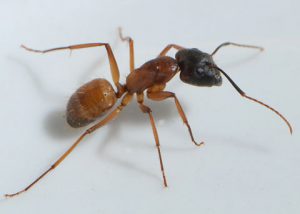
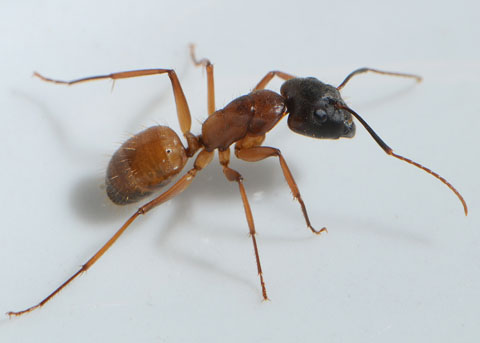
Carpenter Ant
Photo by: J.L.Castner
UF/IFAS
Ants are never too far away. They usually build their colonies in the soil near convenient sources of food and shelter. Being in the ground puts ant colonies at great risk for flooding out, even with short periods of rainfall. When this happens, ants are forces to find higher, drier ground quickly or risk being washed away. What better place than a house? Once inside, the ants get back to work looking for food and building the colony. Expect to see ants around kitchen sinks, on window sills and working their way into cupboards and pantry areas during and after a heavy rain. Unfortunately, if they find all the elements needed to make their home, the ants will be very reluctant to go back outside.
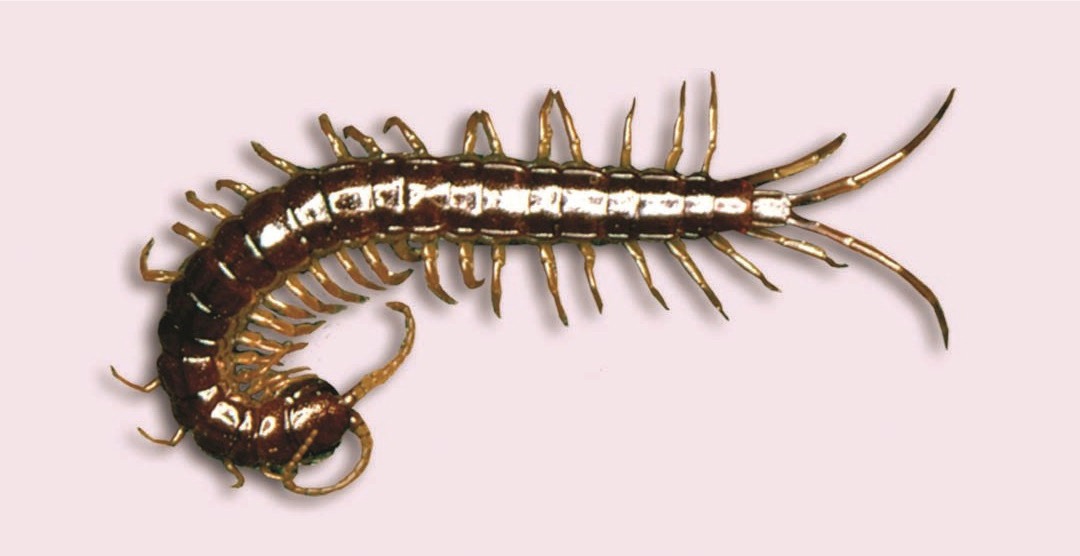
Centipede Photo by: J.L. Castner UF/IFAS
Like the other pests mentioned, centipedes are attracted to humid environments. But, centipedes are active hunting carnivores. They like to feed on roaches, sowbugs and ants. So, they follow them into the house, a well-stocked hunting ground. Centipedes typically only hunt late at night, but in dark areas they can hunt day and night. Finding centipedes if most likely an indication of another pest infestation.
These rain-displaced pests may need some help from a pest control product and/or operator to be discouraged from staying inside. We need the rain. But, keep a close watch for the unwanted visitors.
by Julie McConnell | May 17, 2019
Walking around my yard I’m always on the lookout for changes – both good and bad. I look to see which plants are leafing out or flowering. I scout for plant disease symptoms, insect damage, and weeds. I’ve learned over the years that when I spot a plant out-of-place before condemning it as a weed, I need to make sure it isn’t really a bonus plant!
This spring my yard has really changed. After losing numerous mature trees the sun is shining in new spots. Last fall I also had a bit of unexpected seed and vegetation dispersal to say the least, so I’m getting lots of surprises in the landscape. A few bonus plants I’m seeing and leaving alone are oak seedlings, black-eyed Susan, sunflowers, Angelina sedum, dotted horsemint, and verbena.
These plants might not be exactly where I would have placed them, but if they are not located somewhere that will be a maintenance problem, they can stay where they landed. Many of these plants are taking advantage of dry, non-irrigated sites and providing welcome vegetative groundcover that will help prevent erosion. The bonus is that they all provide food or shelter for birds and/or bugs!
How do you tell the difference between a weed and a plant you would like to keep? The key is to pay attention to plant features other than flowers. Start looking at foliage shape, texture, color, growth habit, and how leaves are arranged on the plant. Other characteristics are stem color and shape – some plants have square stems, others have ridges we refer to as “wings” in horticulture terms, tendrils on vines, all of these can be distinctive and recognizable before the obvious flowers form. Keep notes with pictures of plants at different life stages until you commit them to memory. Eventually you’ll be able to walk through your landscape and quickly note the differences which will help conserve those bonus plants and get weeds under control before they get too prolific.
Below are links to sites that might be outside your regular bookmarks. These resources show more than just the pretty flowers and have detailed information on life cycle and growing conditions.
by Matt Lollar | Feb 5, 2019
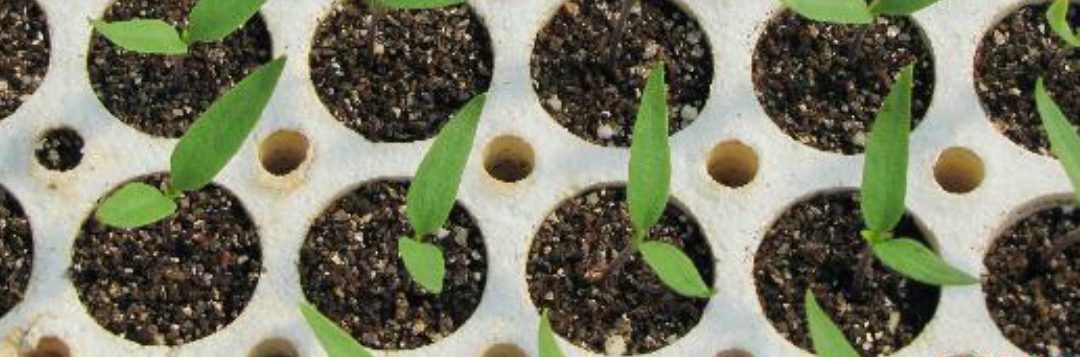
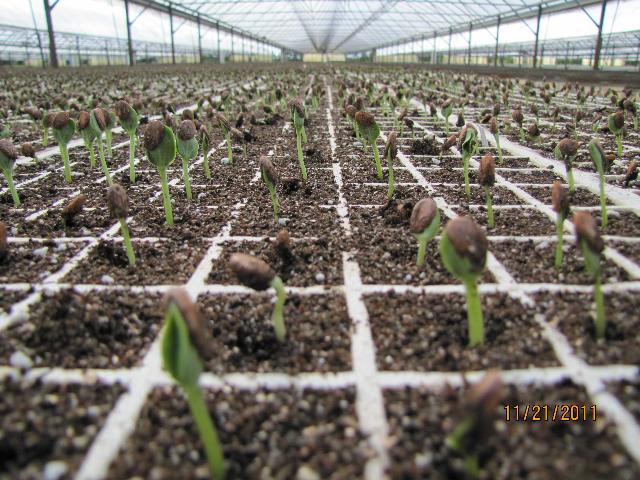
Winter is in full swing and home grown produce is probably not the first thing that comes to mind. But it should be! It’s time again to start thinking about spring vegetable gardening. While a number of crops can be started by direct seeding in the soil, success rates are higher when plants are started indoors or in a covered structure. In order to be successful, it’s important that you follow some simple steps.
Seedless watermelons planted in a 128-cell flat. Photo Credit: Gene McAvoy, University of Florida/IFAS Extension – Hendry County
- Transplant Trays/Flats – Trays are made from different materials such as plastic, polystyrene, and compostable materials. Different cell sizes are also available. Generally, smaller cells are used for smaller seeds and larger cells are used for larger seeds. It’s important to think of the life cycle of the crop. For example, lettuce and other leafy greens have much shorter life cycles compared to tomatoes. Because of this, they have smaller root systems at transplant time and may not develop a good rootball in a large cell. Therefore, lettuce would perform better in a smaller cell.
- Media – It’s important that you choose a germination mix instead of a potting mix. Definitely don’t use garden soil! Germination mixes are typically a combination of finely ground peat, perlite, and other soiless substrates.
- Seed – Purchase seed from a reputable source with a germination guarantee. If you save seeds for future gardening, then store them in a cool, dry place. Seed can be stored in the refrigerator. However, do expect the germination rate of stored seeds to diminish over time. Coated seed is recommended for smaller seeds to make seeding easier and more efficient. Seeds should be planted in media at a depth of approximately 3 times the diameter of the seed. Check the seed package for additional planting recommendations. For more germination and storage information please see this publication from the University of Nebraska.
- Fertilizer – Too much fertilizer can result in leggy and possibly burned plants. A 20-10-10 (or similar ratio N-P-K) water-soluble product is generally used in commercial production. Rates are dependent on crop, sunlight, and temperature. The media should be kept moist, but not continually wet.

Well-grown kale transplants ready for field planting. Photo Credit: Gene McAvoy, University of Florida/IFAS Extension – Hendry County
Seeds can take up to 14 days to germinate depending on species and conditions. Most transplants are ready for the garden by 6 to 8 weeks. To improve success rate and accelerate production time, most farmers harden off their transplants before planting. Hardening off is the process of stressing the transplants for about a week. Generally, transplant trays are taken out of the greenhouse (or other transplant area such as a window sill) and set outside. Watering frequency is reduced and fertilization is halted. It’s important that the plants aren’t completely neglected, but just stressed enough to prepare them for the elements. A good place to put the trays is under a tree in partial shade. After this hardening off period, the transplants are ready for your garden. Hopefully these tips will make you a more successful gardener!
by Ray Bodrey | Mar 21, 2018
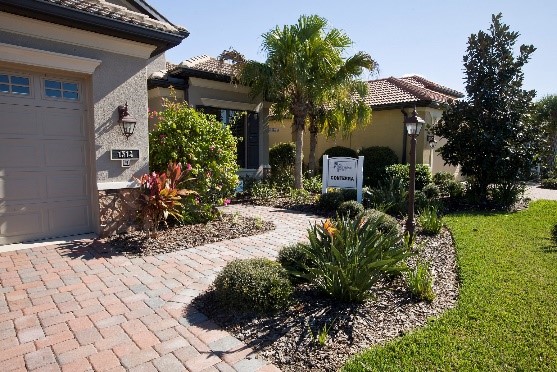
I imagine many of you have had plant loss due to this recent cold snap. Like myself, you’ll be busy this spring replanting areas. Want to have a more sustainable landscape and attract birds & butterflies? Consider a Florida-Friendly Landscape.

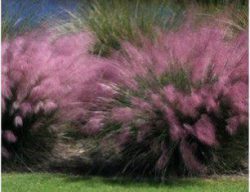
Figure 1: Florida-Friendly Landscaping.
Credit: Tyler Jones, UF/IFAS Communications.
So, what is “Florida-Friendly”? These are plants that are either native to Florida or non-invasive species, and are low maintenance. One can convert their landscape to “Florida-Friendly” simply by changing the way you take care of your yard. A Florida-Friendly Landscape has 9 major principles:
- Right plant, right place – Select plants that match a site’s soil, light, water, and climatic conditions. Buy quality plants that welcome wildlife, consider plant size when you make your purchase, and aim for a diversity of trees, shrubs, groundcovers, and flowers.
- Water efficiently – Watch for signs of wilt before you irrigate, be a weather watcher (don’t irrigate if it’s going to rain), and water early in the morning if you can, following any restrictions in your area. Check your irrigation system regularly; repair any leaks, clogs, or breaks; and make sure all sprinklers are irrigating your plants, not the sidewalk!
- Fertilize appropriately – Fertilize according to UF/IFAS recommended rates and application timings to prevent leaching—fertilizer leaking down through the soil rather than being absorbed by plant roots. Look for fertilizers with slow-release nitrogen and little or no phosphorous, unless your soil test indicates need (as many Florida Panhandle soils are phosphorous poor). Never fertilize within 10 feet of any water body, and don’t fertilize before a heavy rain.
- Mulch – Retains soil moisture, protects plants, and inhibits weed growth. It gives your landscape a neat, uniform appearance and is a great Florida-Friendly choice for hard-to-mow slopes and shady spots. Keep a 2- to 3-inch-deep layer of mulch on plant beds. Always leave at least 2 inches of space around tree trunks to prevent rot. Create self-mulching areas under your trees by letting fallen leaves lie.
- Attract wildlife – By providing food, water, and shelter for birds, butterflies, bats, and others, you can help these displaced Floridians while bringing beauty and benefits to your home landscape. Select plants with seeds, fruit, foliage, flowers, or berries that animals can eat.
- Manage yard pests responsibly – Concerns for human and environmental health have led scientists to recommend Integrated Pest Management (IPM), a strategy that helps gardeners manage pests with as few chemicals as possible. Don’t treat by default—some of the insects you see may be beneficial, actually helping to control pest insect populations. Spot-treat only, rather than blanket spraying, and use selective rather than broad-spectrum insecticides.
- Recycle – Landscape maintenance activities like mowing, pruning, and raking generate yard waste that you can recycle to save money. Decomposed organic matter, like pruned branches or grass clippings, releases nutrients back to the soil in a form that plants can easily use. Try composting, combining “green” (nitrogen-rich) and “brown” (carbon-rich) materials, such as grass clippings, weeds, plant trimmings, egg shells, coffee grounds, tea bags, twigs and branches, pine needles, corncobs, and shredded cardboard.
- Reduce Stormwater – Florida’s waterways are vulnerable to everything we put on our home landscapes. Fertilizers and pesticides can leach through the soil or run off into storm drains. Along with landscape debris and eroded soil, these can wreak havoc on our water quality and the fragile ecosystems our water resources support. Creating shallow rain gardens, or shaping the earth on slopes with berms (rises) and swales (dips), can help slow runoff from heavy rains and allow the water time to soak into the ground. Make sure your downspout is pointed into the garden, not towards a sidewalk or driveway. Wherever possible, maintain permeable walkways, driveways, and patios of brick, gravel, earth, or crushed shell, to allow rain to soak into the ground.
- Protect the waterfront – Florida boasts over 10,000 miles of rivers and streams, about 7,800 lakes, more than 700 freshwater springs, and the U.S.’s second-longest coastline. Even if you don’t live immediately on one of these water bodies, you do live in what’s known as a watershed (a drainage area). What you do in your home landscape has much further-reaching consequences than you might think. One of the most important steps you can take to protect any water body is maintaining a 10-foot “maintenance-free zone” around it. Do not mow, fertilize, or use pesticides in this zone. A stormwater pond or canal can become an aesthetically pleasing and lively place, edged with plants and home to wildlife. Work with your neighbors or homeowner association to make your stormwater pond a Florida-Friendly neighborhood amenity.
For more information on Florida-Friendly Landscaping please contact your local county extension office.
The information for this article can be found in the following the UF/IFAS publication, “The Florida Yards & Neighborhoods Handbook”: & website.