by Julie McConnell | Jan 3, 2019

Storm debris turned into holiday cheer in Bayou George. Photo: J_McConnell, UF/IFAS
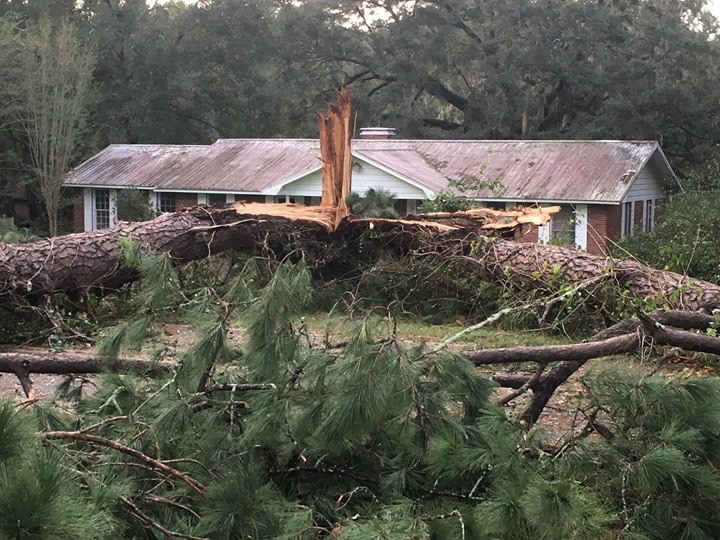
By the time this article publishes, we will be more than 70 days since Hurricane Michael toppled or damaged an incredible number of trees in the Panhandle. Enormous piles of once stately shade trees line the streets in neighborhoods and business districts in. The cleanup efforts have been phenomenal, over 4 million cubic yards of storm debris picked up in Bay County to date, but there is still a long way to go in the recovery process.
So, as gardeners, how can you help our community get back on track amidst your own struggles to recover? A few Florida Friendly Landscaping™ Principles come to mind.
- #1 Right Plant, Right Place – as you rebuild your landscapes, make sure to choose the appropriate plant for the location. Consider mature size and give those plants space to thrive!
- #4 Mulch – do you have bare ground that will eventually become landscape beds or turf but no resources or time to replant yet? Consider mulching the area to keep soil from eroding and to help improve soil though decomposition of natural products. Hint – see Recycling for free sources!
- Mulch tips https://sfyl.ifas.ufl.edu/media/MulchBrochure.pdf
- keep mulch 12 inches from tree trunks
- recommended depth in beds or under dripline of tree canopy (excluding within 12” of trunk) is 2-3 inches
- leave an 18-24 inch buffer around building foundations mulch free to reduce conducive termite conditions
-
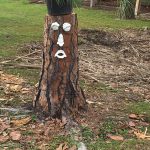
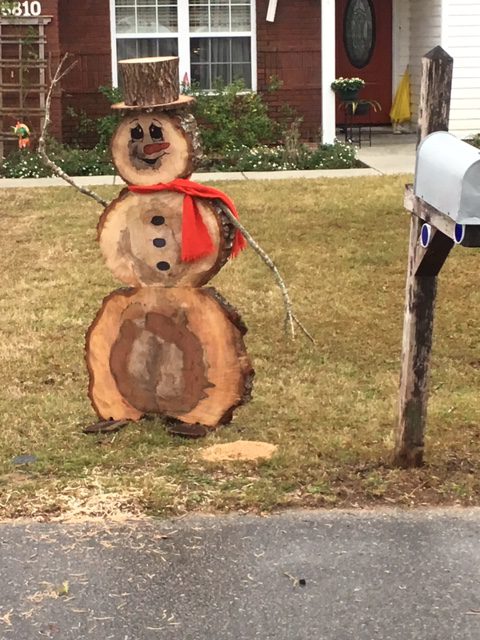
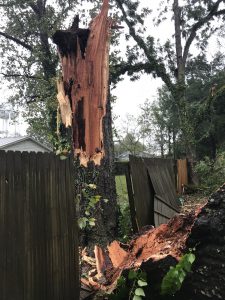
Dress up stumps with plants and whimsical designs. Photo: D_VanderMeer, UF/IFAS Master Gardener
#7 Recycle – driving around town I have seen some really creative uses for stumps, trunks, and branches that homeowners have constructed and messages of hope that bring a smile to my face. Another method of recycling is to use the chipped vegetative debris as mulch, either available as “utility mulch” by cities and counties or you may have some in your own yard right now.
- Utility mulch does come with some words of caution because there is an increased risk of introducing weeds to your landscape with untreated storm debris. However, if you need mulch for pathways or planting beds you will be helping your community’s cleanup effort by reducing waste accumulation. Just watch for “volunteer” plants and manage as needed.
In Bay County, there are 4 locations where you can load and haul off your own utility mulch from storm debris
- Under the Oaks Park – 5843 E. U.S. 98, Panama City, FL 32404
- G. Harder’s Park – 8110 John Pitts Rd., Panama City, FL 32401
- Chapman Park – 2526 Rollins Ave., Bayou George, FL 32404
- Laird Park – 6310 Laird Park Rd., Panama City, FL 3240
For sources in your county, check with your Solid Waste Department for utility mulch availability.
by Daniel J. Leonard | Nov 21, 2018
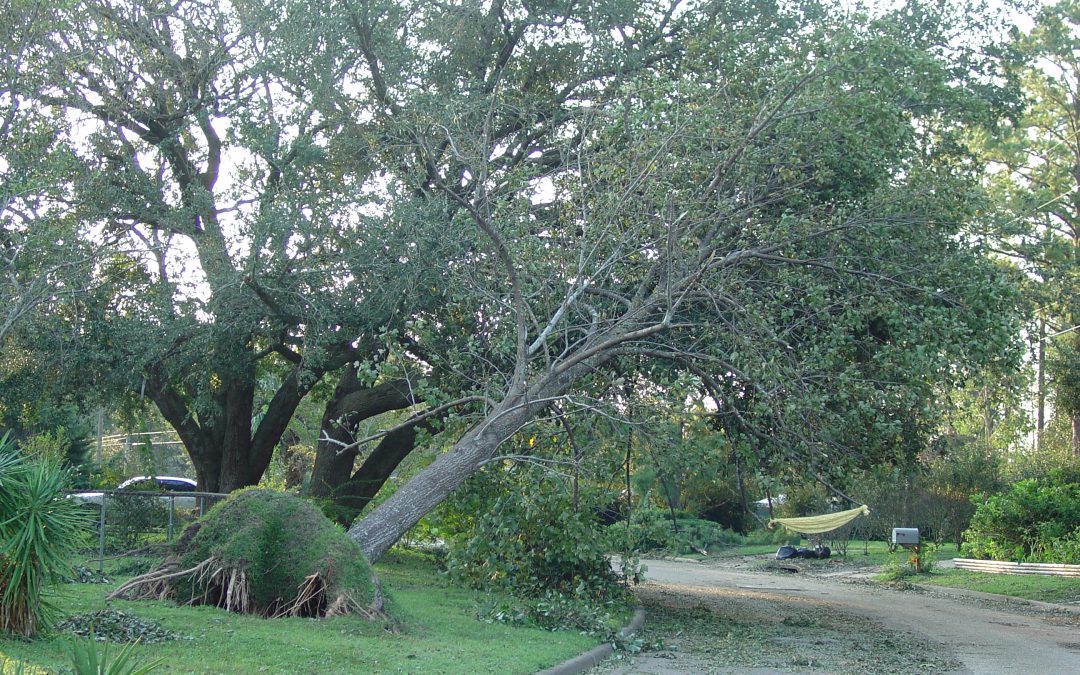
After a devastating windstorm, as we just experienced in the Panhandle with Hurricane Michael, people have a tendency to become unenamored with landscape trees. It is easy to see why when homes are halved by massive, broken pine trees; pecan trunks have split and splayed, covering entire lawns; wide-spreading elms were entirely uprooted, leaving a crater in the yard. However, in these times, I would caution you not to rush to judgement, cut and remove all trees from your landscape. On the contrary, I’d encourage you, once the cleanup is over and damaged trees rehabilitated or disposed of, to get out and replant your landscape with quality, wind-resistant trees.
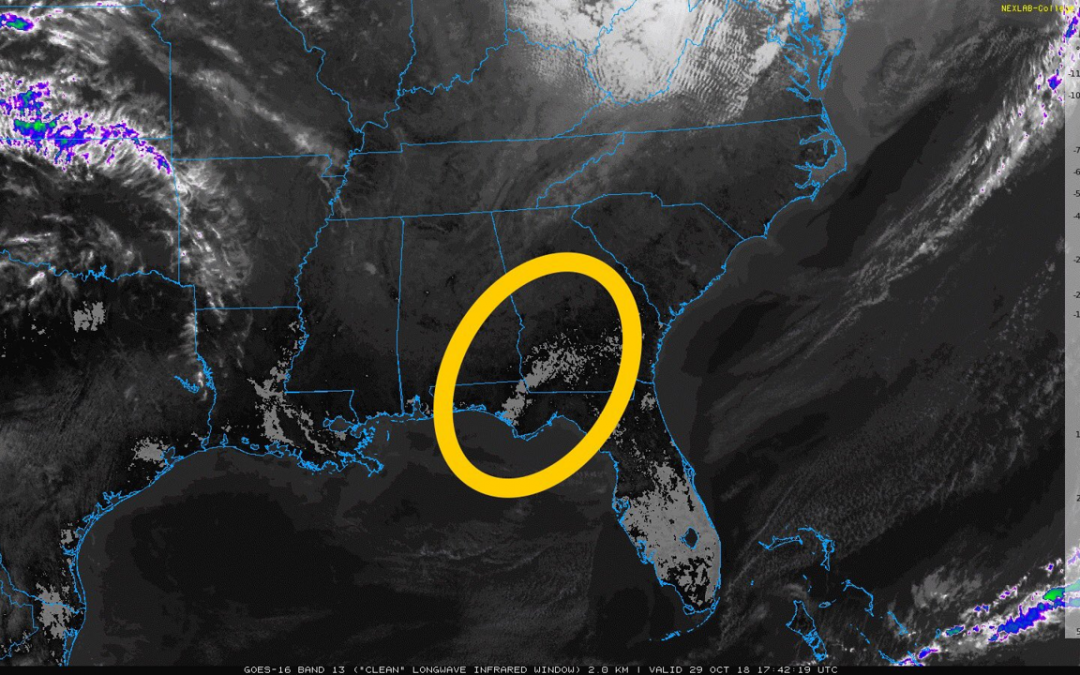
First, it’s helpful to take a step back and remember why we plant and enjoy trees and the important role they play in our lives. Beyond the commercial aspect of farmed timber, there are many reasons to be judicious with the chainsaw in the landscape and to plant anew where seemingly sturdy trees once stood. For example, trees provide enormous service to homes and landscapes, from massive cooling effects to aesthetic appeal. Take this thermal satellite image of Hurricane Michael’s path that simultaneously shows the devastation of a major hurricane and the role trees play in the environment.
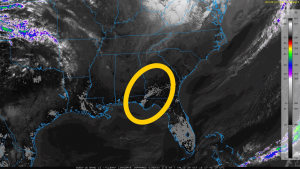
Lightly shaded area showing higher ground temperatures from loss of vegetation.
In the lighter colored areas where the wind was strongest and catastrophic tree damage occurred, the ground temperatures are much higher than the unaffected areas. Lack of plant life is entirely to blame. Plants, especially trees, provide enormous shading effects on the ground that moderate ground temperatures and the process of transpiration releases water vapor, cooling the ambient air. Trees also lend natural beauty to neighborhood settings. There is a reason people termed the hardest hit areas by Michael “hellscapes”, “warzones”, etc. Those descriptions imply a lack of vegetation due to harsh conditions. In this respect, trees soften the landscape with their foliage colors and textures, create architecture with their height and shape, and screen people from noise, unpleasant sights and harsh heat.
Though all trees give us the benefits outlined above, research conducted by the University of Florida over a span of ten major hurricanes, from Andrew to Katrina, shows that some trees are far more resistant to wind than others and fare much better in hurricanes. In North Florida, the trees that most consistently survived hurricanes with the least amount of structural damage were Live Oaks, Cypresses, Crape Myrtle, American Holly, Southern Magnolia, Red Maple, Black Gum, Sycamore, Cabbage Palm and a smattering of small landscape trees like Dogwood, Fringe Tree, Persimmons, and Vitex. If one thinks about these trees’ growth habits, broad resistance to disease/decay, and native range, that they are storm survivors comes as no surprise. Consider Live Oak. This species originated along the coastal plain of the Southeastern United States and have endured hurricanes here for several millennia. Possessing unusually strong wood, they have also developed the ability to shed the majority of their leaves at the onset of storms. This defense mechanism leaves a bare appearance in the aftermath but allows the tree to mostly avoid the “umbrella” effect other wide crowned trees experience during storms and retain the ability to bounce back quickly. Consider another resistant species, Bald Cypress. In addition to having a strong, straight trunk and dense root system, the leaves of Bald Cypress are fine and featherlike. This leaf structure prevents wind from catching in the crown. Each of the other listed species possess similar unique features that allow them to survive hurricanes and recover much more quickly than other, less adapted species.
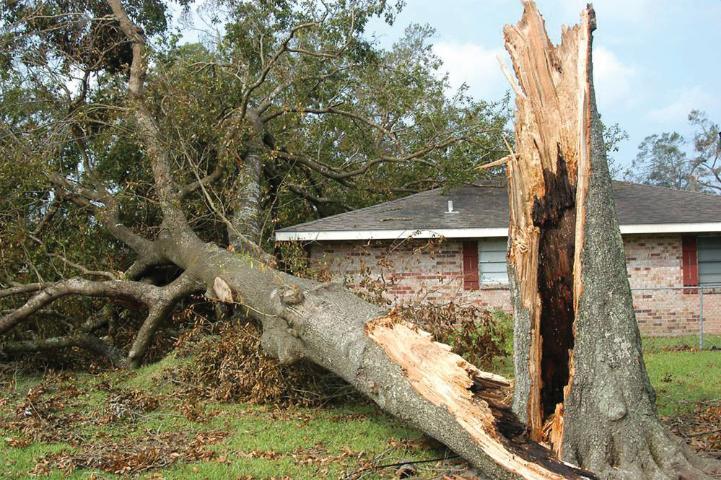
Laurel Oak split from weak branching structure.
However, many widely grown native trees and exotic species simply do not hold up well in tropical cyclones and other wind events. Pine species, despite being native to the Coastal South, are very susceptible to storm damage. The combination of high winds and beating rains loosens the soil around roots, adds tremendous water weight to the crown high off the ground, and puts the long, slender trunks under immense pressure. That combination proves deadly during a major hurricane as trees either uproot or break at weak points along the trunk. In addition to pines, other widely grown native species (such as Pecan, Laurel Oak and Water Oak) and exotic species (such as Chinese Elm) perform poorly in storms. Just as the trees that survive storms well possess similar features, so do these poor performers. We’ve already mentioned why pines and hurricanes don’t mix well. Pecan, Laurel Oak, and Water Oak tend to have weak branch angles and break up structurally in wind events. The broad spreading, heavy canopy of trees like Chinese Elm cause them to uproot and topple over. It would be advisable when replanting the landscape, to steer clear of these species or at least site them a good distance from important structures.
This piece is not a warning to condemn planting trees in the landscape; rather it is a template to guide you when selecting trees to replant. Many of our deepest memories involve trees, whether you first climbed one in your grandparent’s yard, fished under one around a farm pond, or carved your initials into one in the forest. Don’t become frustrated after a once in a lifetime storm and refuse to replant your landscape or your forest and deprive your children of those experiences. As sage investor Warren Buffett once wisely said, “Someone is sitting in the shade today because someone planted a tree a long time ago.”
For these and other recommendations about how to “hurricane-proof” your landscape, contact your local UF/IFAS Extension Office. Plant a tree today.
by Mark Tancig | Nov 8, 2018
Trees have a pretty bad reputation in north Florida these days. They’re on our homes, cars, streets, power lines, and all over the yard causing a lot of grief. While my heart goes out to all of those dealing with trees in places they shouldn’t be, now’s a good time to remember all the reasons we should want trees around. It’s also a good time to review how to minimize tree impacts from future storms.

An older, poorly branched loblolly pine in Tallahassee. Credit: Mark Tancig
Benefits of Trees
Beyond being a huge source of oxygen, necessary for many organisms to live, trees provide other benefits such as well. According to a recent analysis of Tallahassee’s urban trees, approximately three million pounds of pollutants, such as carbon monoxide, nitrogen dioxide, ozone, sulfur dioxide, and particulate matter, are reportedly removed each year. The same report calculated that half a billion gallons of precipitation was intercepted by these trees rather than becoming stormwater runoff, reducing impacts of erosion and non-point source pollution. These trees also saved citizens an estimated one million dollars. Total annual benefits to the citizens was over $15 million per year! Researchers have found that trees increase residential or commercial property values an average of 7%!
Ways to Minimize Tree Failure
Select Replacement Trees Wisely
While very few trees could make it through sustained winds of 155 mph, replanting trees sooner will help communities see the benefits mentioned above and help them return to their former beauty. Even the most wind-resistant trees are likely to fail in a storm like Hurricane Michael. UF/IFAS researchers have studied wind-thrown trees following hurricanes and have found these trees to be some of the most wind-resistant – hollies (Ilex spp.), southern magnolia (Magnolia grandiflora), live oak (Quercus virginiana), cypress (Taxodium spp.), cabbage palm (Sabal palmetto), and, interestingly, sparkleberry (Vaccinium arboreum).
The least wind-resistant trees include pecan (Carya illinoiensis), tulip poplar (Liriodendron tulipifera), laurelcherry (Prunus caroliniana), laurel oak (Quercus laurifolia), water oak (Quercus nigra), southern red oak (Quercus falcata), red cedar (Juniperus virginiana), pines (Pinus spp.), and Chinese elm (Ulmus parvifolia).
When replanting, consider planting at least three trees in a group rather than an individual tree, as researchers found that trees in groups fared better.
An older water or laurel oak. Credit: UF/IFAS.
Tree Care
With existing trees and newly planted trees, taking good care of the tree can help it withstand high winds. In addition to proper pruning techniques and providing adequate root zone space, paying close attention to minimize soil compaction and root zone disturbances will help create a stronger root system. Older trees should be regularly monitored for potential signs of decay.

An older oak with decay in trunk. Credit: UF/IFAS.
UF/IFAS has many great resources related to tree health and recovery after hurricanes. A search for Urban Forest Hurricane Recovery Program at our EDIS website (https://edis.ifas.ufl.edu) has several publications to help decide how to move forward and create a healthy urban forest. Let’s not allow our frustration with the tree on the roof to prevent us from recognizing that trees are good.
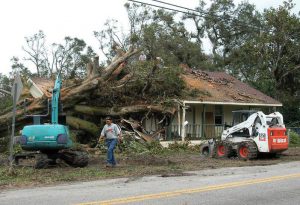
by Larry Williams | Oct 20, 2018
Partly uprooted tree from hurricane. Photo credit: Larry Williams
Hurricane damaged plants should be cared for as soon as possible. Partially uprooted small trees and shrubs should be securely staked in their original positions. Until plants are reset, protect exposed roots and prevent drying. Soil, moist burlap sacks or moist sphagnum moss can be put on exposed roots. Remove damaged roots so the tree can be reset at ground level.
Once reset, trees should be secured. Two or three, four-foot long, 2 x 2 inch wood stakes can usually anchor trees with trunk diameters less than two inches. Stakes should be placed about a foot outside root ball and inserted eighteen inches into soil. Secure stakes to trunk with ties made from wide, smooth material or hose-covered wire. Trees two inches or larger in diameter should be guyed with three or four wires or cables. Guy wires are secured to deeply driven short stakes evenly spaced outside the root ball. Guy wires should be run through rubber hose and secured to trunk at only one level. Mark support wires with bright materials to prevent accidents.
Guy wires should be adjusted several times during growing season to minimize trunk injury. Support stakes and wires should stay in place for one year.
Soil should be filled around root area once the tree is staked into position. Firm around roots to eliminate air pockets and provide support. Excess soil over the normal root area can be damaging. Only replace soil that has been washed or worked away from roots.
In cases where all branches were destroyed, remove the tree. This is especially important for trees such as pine that do not normally regain their natural form. You may be able to keep other trees such as oaks, where strong bottom limbs still exist. However, emerging sprouts from ends of large, cut limbs will be poorly secured to the tree and are likely to fall from the tree during a storm. In addition, decay organisms usually enter these large wounds. Trees and shrubs that lost their leaves from high winds can usually be saved and should resume growth.
Any tree work, including tree removal should be done by a professional arborist, preferably a certified arborist. To find a certified arborist in your area contact the International Society of Arboriculture (ISA) at 217 355-9411 or at http://www.isa-arbor.com/. You also may contact the Florida Chapter of ISA at 941-342-0153 or at http://www.floridaisa.org/.
Reset plants should be watered twice a week and fertilizer should not be applied. Until re-established, fertilizer will be of no benefit and may injure new roots.
Plants exposed to saltwater, including lawns, should be irrigated with fresh water as soon as possible. Apply water more frequently than under normal conditions.
For additional information, visit http://sfyl.ifas.ufl.edu/disaster-prep-and-recovery or contact the UF/IFAS Extension Office in your county.
by Matthew Orwat | Sep 13, 2018
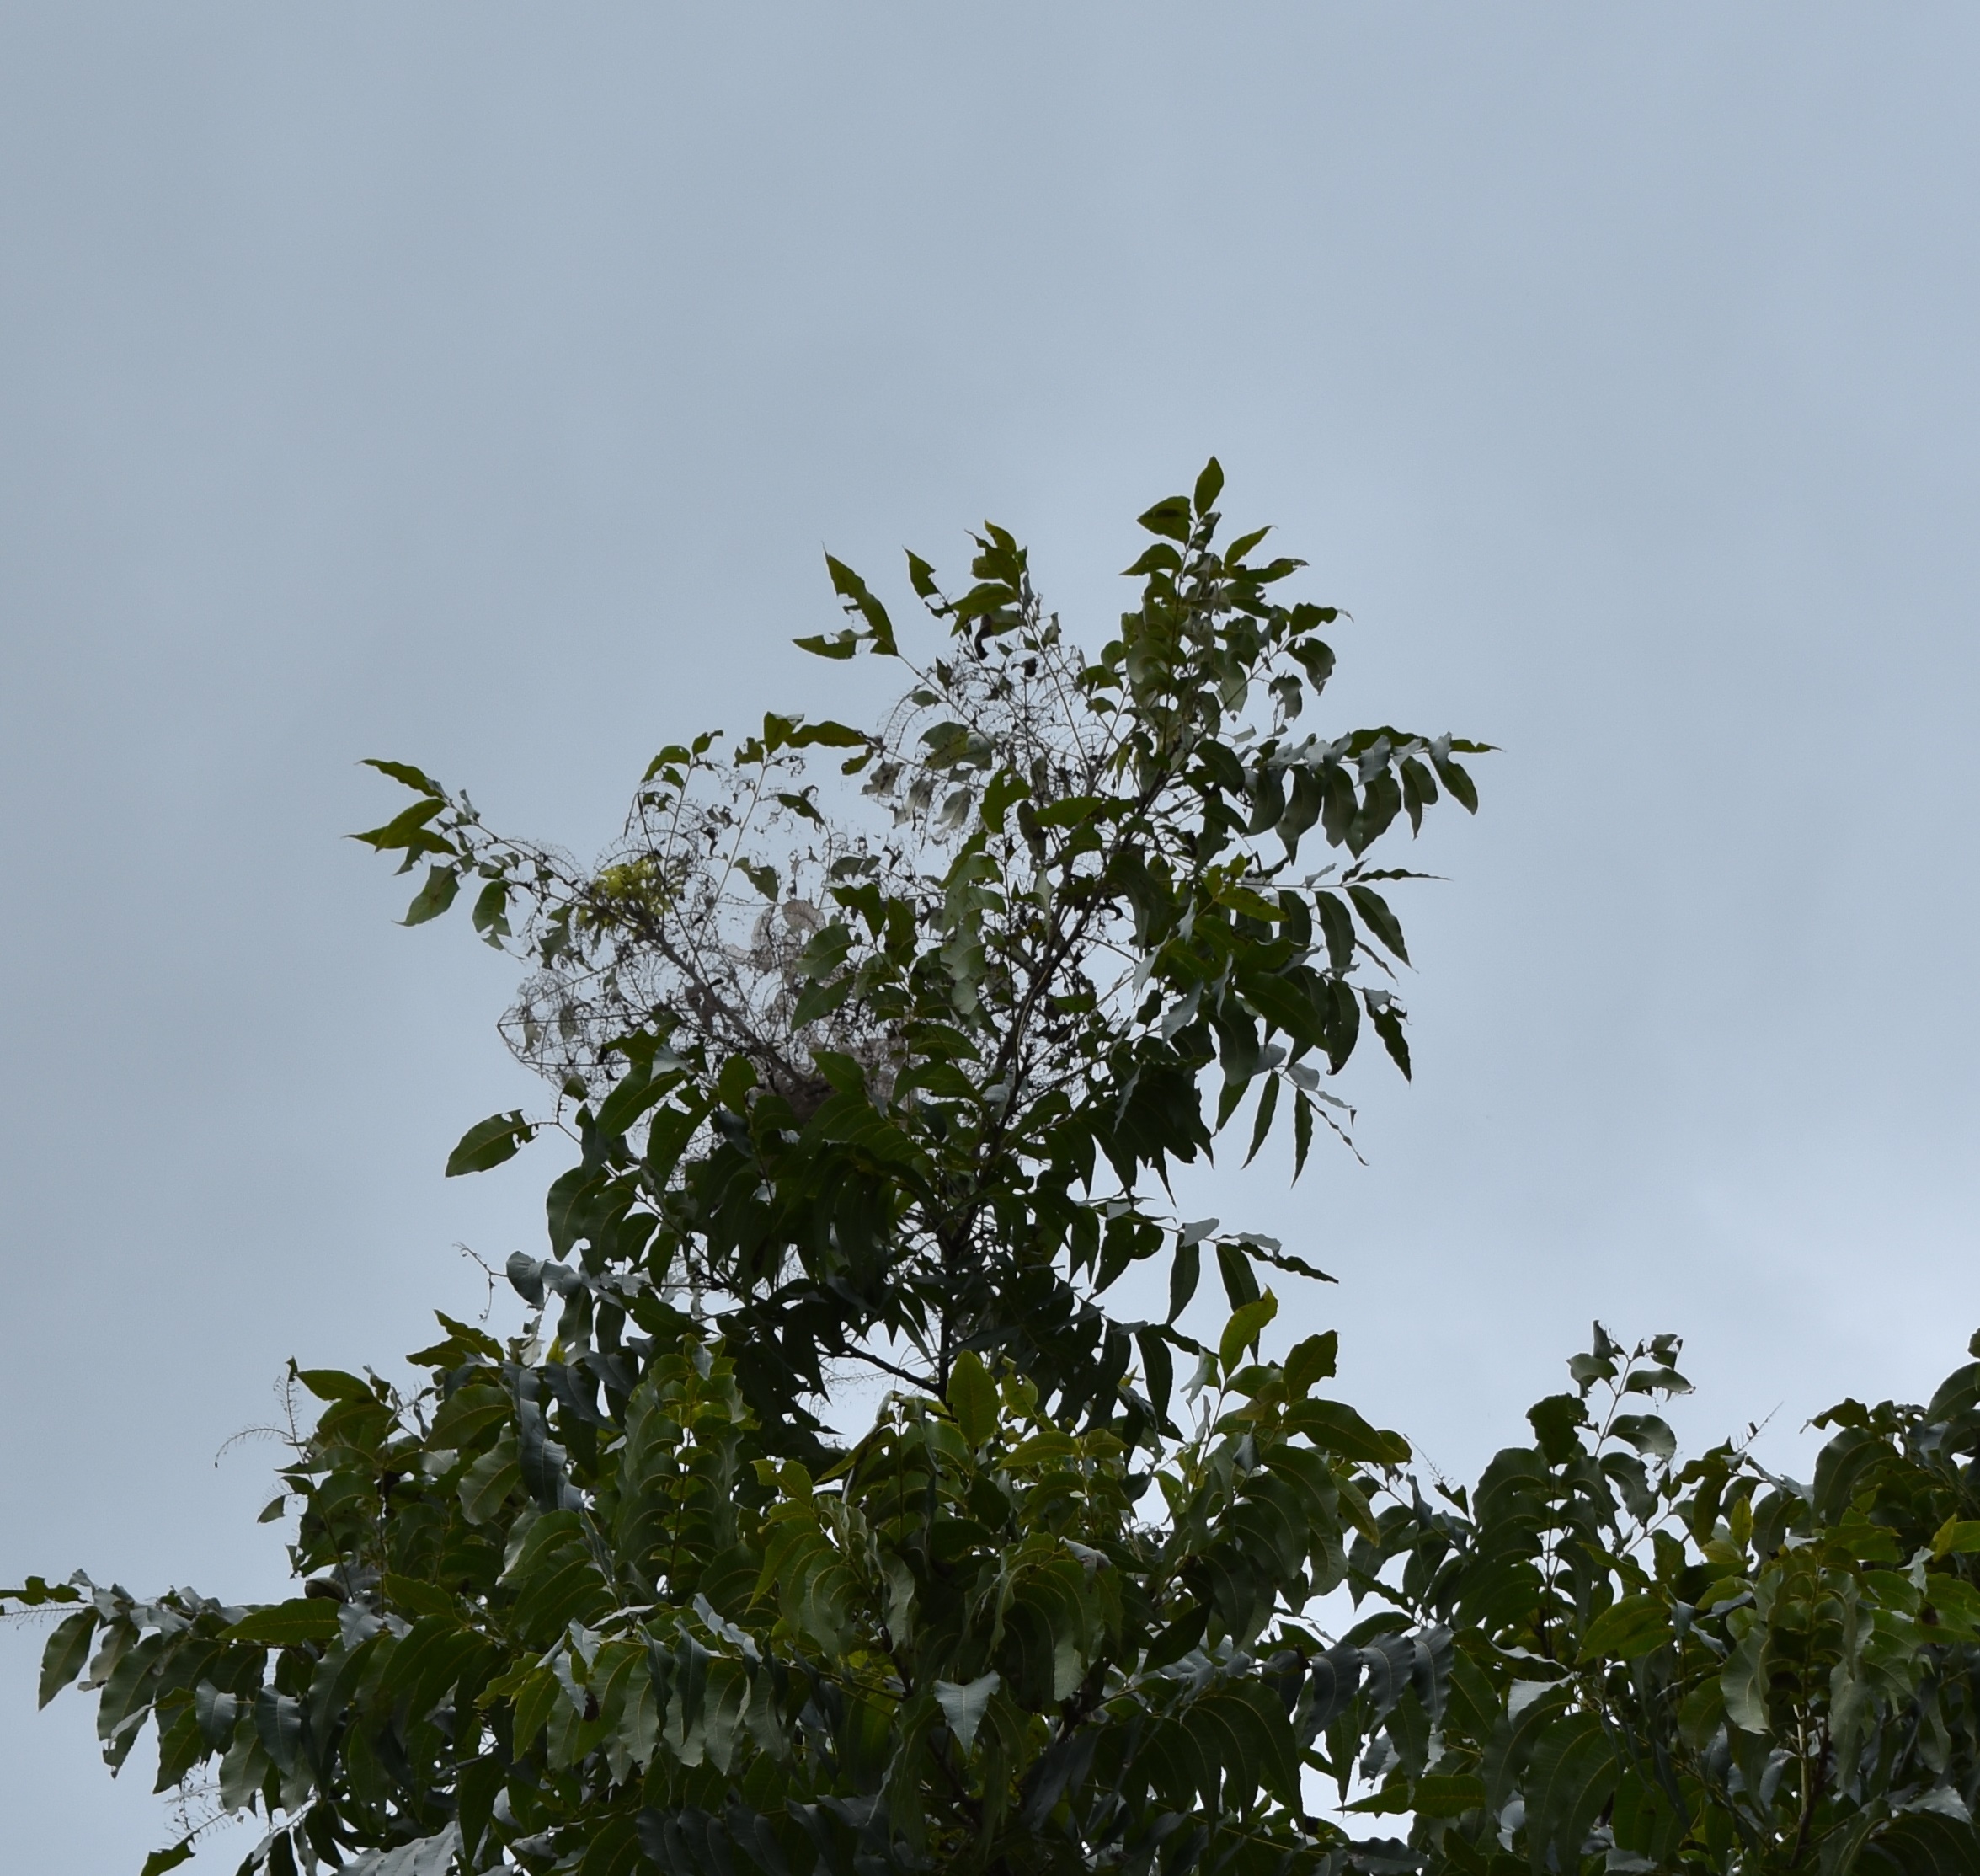
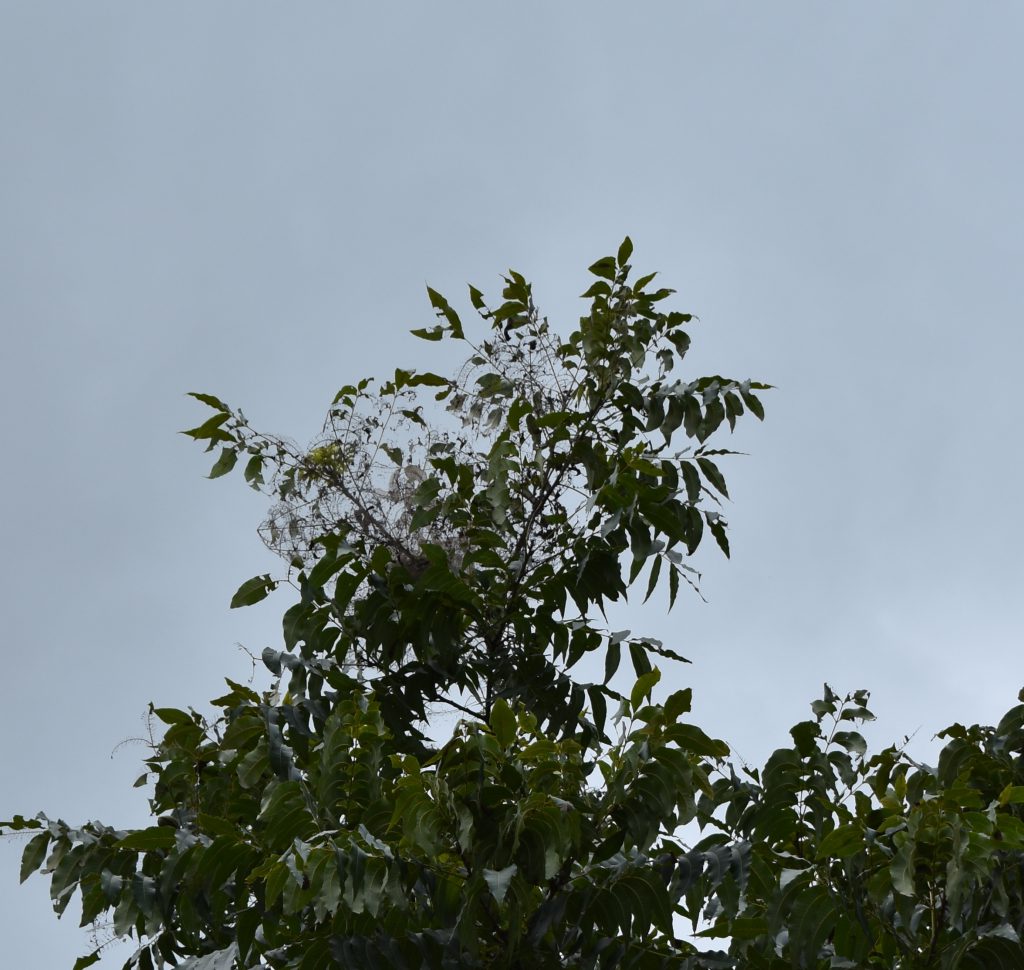
Bare limb tips and clusters of webbing in pecan trees are often the first sign that fall is right around the corner.
This webbing is caused by clusters of the larvae of the Fall Webworm (Hyphantria cunea (Drury)) which is often also called Pecan Webworm. “Fall Webworm” is a bit of a misnomer in our region since they are able to strike in spring and summer thanks to our long growing season. They are most noticeable in the fall thanks to cumulative effects of earlier feeding.
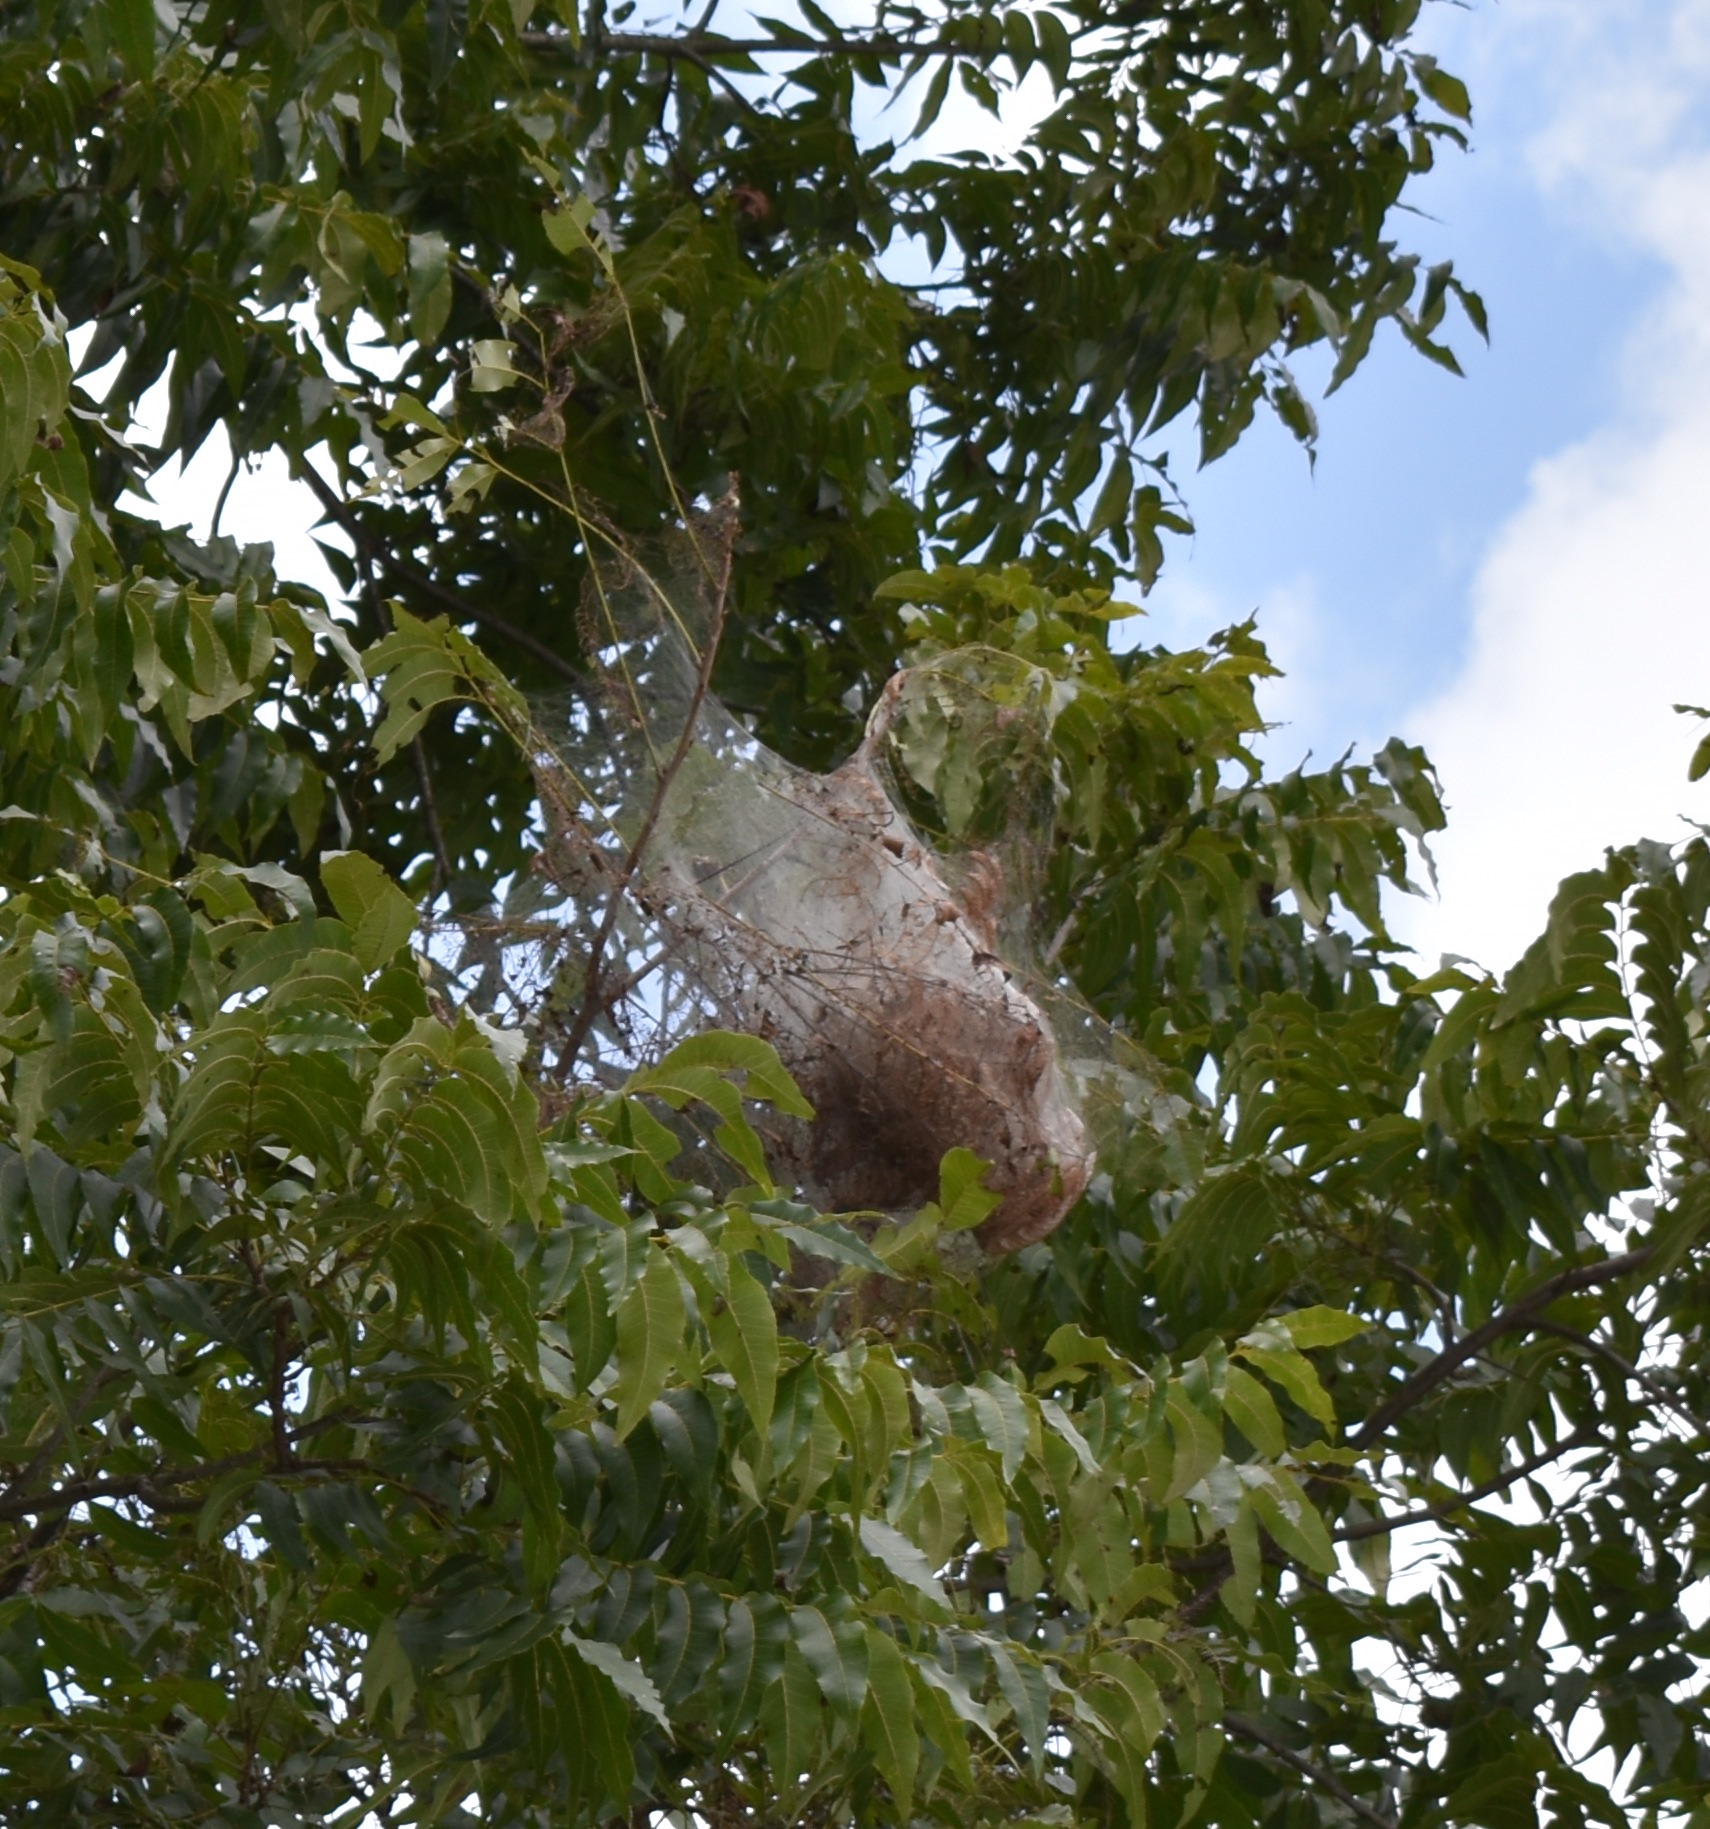
The adult form of the fall webworm is a solid white or white and brown spotted moth that emerges in late March through August in southern climates. After mating they lay orderly clusters of green eggs, usually May through August. Soon after emergence, the larvae begin creating silk webs to protect themselves as they voraciously feed on their various host plants, of which Pecan is most common in Northwest Florida gardens.
Although they are capable of defoliating complete trees, especially smaller ones, most seasons they are kept in check by beneficial insects such as the paper wasp. It is beneficial for small orchards or home growers to scout their trees from June through August. If small webs are observed in young trees, it is best to prune them out with a pole saw or pole pruner and dispose of the branch. Pruning of small branches does not harm the tree, but it may be of no benefit to remove small webs in larger trees, if they are being controlled by natural enemies.
 Most home gardens don’t have a practical ability to spray for this insect. For homeowners it is difficult to spray for control, due to the cost of the equipment required to get the spray into the tree canopy. If spraying is an option, many insecticides containing spinosad or Bacillus thuringiensis (Bt) exist. Both of these products target caterpillars while not harming beneficial insect predators that feed on these worm populations. Several more toxic insecticide products exist that will control fall webworm, but they often exacerbate insect problems by killing off beneficial insects that might be controlling other insect pests.
Fall webworm is not usually a serious problem for home gardens. Let natural enemies take care of the problem in most cases.
Supplemental Material: