by Sheila Dunning | Jan 4, 2019
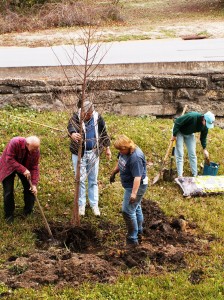
Tree planting in Mary Esther
The best time to plant a tree is twenty years ago. The second best time is for Arbor Day. Florida recognizes the event on the third Friday in January, but planting any time before spring will establish a tree quickly. Arbor Day is an annual observance that celebrates the role of trees in our lives and promotes tree planting and care. As a formal holiday, it was first observed on April 10, 1872 in the state of Nebraska. Today, every state and many countries join in the recognition of trees impact on people and the environment. Trees are the longest living organisms on the planet and one of the earth’s greatest natural resources. They keep our air supply clean, reduce noise pollution, improve water quality, help prevent erosion, provide food and building materials, create shade, and help make our landscapes look beautiful. A single tree produces approximately 260 pounds of oxygen per year. That means two mature trees can supply enough oxygen annually to support a family of four. The idea for Arbor Day in the U.S. began with Julius Sterling Morton. In 1854 he moved from Detroit to the area that is now the state of Nebraska. J. Sterling Morton was a journalist and nature lover who noticed that there were virtually no trees in Nebraska. He wrote and spoke about environmental stewardship and encouraged everyone to plant trees. Morton emphasized that trees were needed to act as windbreaks, to stabilize the soil, to provide shade, as well as, fuel and building materials for the early pioneers to prosper in the developing state. In 1872, The State Board of Agriculture accepted a resolution by J. Sterling Morton “to set aside one day to plant trees, both forest and fruit.” On April 10, 1872 one million trees were planted in Nebraska in honor of the first Arbor Day. Shortly after the 1872 observance, several other states passed legislation to observe Arbor Day. By 1920, 45 states and territories celebrated Arbor Day. Richard Nixon proclaimed the last Friday in April as National Arbor Day during his presidency in 1970. Today, all 50 states in the U.S. have official Arbor Day, usually at a time of year that has the correct climatological conditions for planting trees. For Florida, the ideal tree planting time is January, so Florida’s Arbor Day is celebrated on the third Friday of the month. Similar events are observed throughout the world. In Israel it is the Tu B Shevat (New Year for Trees). Germany has Tag des Baumes. Japan and Korea celebrate an entire week in April. Even, Iceland one of the most treeless countries in the world observes Student’s Afforestation Day. The trees planted on Arbor Day show a concern for future generations. The simple act of planting a tree represents a belief that the tree will grow and some day provide wood products, wildlife habitat erosion control, shelter from wind and sun, beauty, and inspiration for ourselves and our children.

Trees provide us with benefits including serving as a sound barrier, stormwater abatement, and of course fresh air and oxygen
“It is well that you should celebrate your Arbor Day thoughtfully, for within your lifetime the nation’s need of trees will become serious. We of an older generation can get along with what we have, though with growing hardship; but in your full manhood and womanhood you will want what nature once so bountifully supplied and man so thoughtlessly destroyed; and because of that want you will reproach us, not for what we have used, but for what we have wasted.”
~Theodore Roosevelt, 1907 Arbor Day Message

by Sheila Dunning | Dec 19, 2018
 Throughout history the evergreen tree has been a symbol of life. “Not only green when summer’s here, but also when it’s cold and dreary” as the Christmas carol “O Tannenbaum” says. After such devastating tree losses in the Panhandle this year, this winter is a prime time for installing more native evergreens.
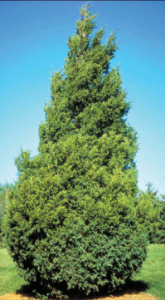
While supporting the cut Christmas tree industry does create jobs and puts money into local economics, every few years considering adding to the urban forest by purchasing a living tree. Native evergreen trees such as Redcedar make a nice Christmas tree that can be planted following the holidays. The dense growth and attractive foliage make Redcedar a favorite for windbreaks, screens and wildlife cover. The heavy berry production provides a favorite food source for migrating Cedar Waxwing birds. Its high salt-tolerance makes it ideal for coastal locations. Their natural pyramidal-shape creates the traditional Christmas tree form, but can be easily pruned as a street tree.
Two species, Juniperus virginiana and Juniperus silicicola are native to Northwest Florida. Many botanists do not separate the two, but as they mature, Juniperus silicicola takes on a softer, more informal look. For those interested in creating a different look, maybe a Holly (Ilex,sp.) or Magnolia with full-to-the-ground branches could be your Christmas tree.
When planning for using a live Christmas tree there are a few things to consider. The tree needs sunlight, so restrict its inside time to less than a week. Make sure there is a catch basin for water under the tree, but never allow water to remain in the tray and don’t add fertilizer. Locate your tree in the coolest part of the room and away from heating ducts and fireplaces. After Christmas, install the new tree in an open, sunny part of the yard. After a few years you will be able to admire the living fence with all the wonderful memories of many years of holiday celebrations. Don’t forget to watch for the Cedar Waxwings in the Redcedar.
by Sheila Dunning | Nov 9, 2018
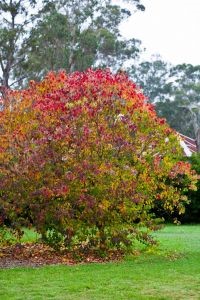
 As the trees begin to turn various shades of red, many people begin to inquire about the Popcorn trees. While their autumn coloration is one of the reasons they were introduced to the Florida environment, it took years for us to realize what a menace Popcorn trees have become. Triadica sebifera, the Chinese tallowtree or Popcorn tree, was introduced to Charleston, South Carolina in the late 1700s for oil production and use in making candles, earning it another common name, the Candleberry tree. Since then, it has spread to every coastal state from North Carolina to Texas, and inland to Arkansas. In Florida it occurs as far south as Tampa. It is most likely to spread to wildlands adjacent to or downstream from areas landscaped with Triadica sebifera, displacing other native plant species in those habitats. Therefore, Chinese tallowtree was listed as a noxious weed by the Florida Department of Agriculture and Consumer Services Noxious Weed List (5b-57.007 FAC) in 1998, which means that possession with the intent to sell, transport, or plant is illegal in the state of Florida. The common name of Florida Aspen is sometimes used to market Popcorn tree in mail-order ads. Remember it’s still the same plant.
Although Florida is not known for the brilliant fall color enjoyed by other northern and western states, we do have a number of trees that provide some fall color for our North Florida landscapes. Red maple, Acer rubrum, provides brilliant red, orange and sometimes yellow leaves. The native Florida maple, Acer floridum, displays a combination of bright yellow and orange color during fall. And there are many Trident and Japanese maples that provide striking fall color. Another excellent native tree is Blackgum, Nyssa sylvatica. This tree is a little slow in its growth rate but can eventually grow to seventy-five feet in height. It provides the earliest show of red to deep purple fall foliage. Others include Persimmon, Diospyros virginiana, Sumac, Rhus spp. and Sweetgum, Liquidambar styraciflua. In cultivated trees that pose no threat to native ecosystems, Crape myrtle, Lagerstroemia spp. offers varying degrees of orange, red and yellow in its leaves before they fall. There are many cultivars – some that grow several feet to others that reach nearly thirty feet in height. Also, Chinese pistache, Pistacia chinensis, can deliver a brilliant orange display.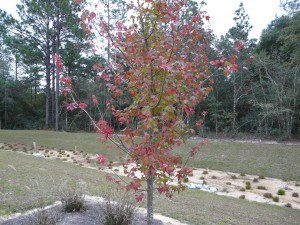
Young Trident maple with fall foliage. Photo credit: Larry Williams
There are a number of dependable oaks for fall color, too. Shumardi, Southern Red and Turkey are a few to consider. These oaks have dark green deeply lobed leaves during summer turning vivid red to orange in fall. Turkey oak holds onto its leaves all winter as they turn to brown and are pushed off by new spring growth. Our native Yellow poplar, Liriodendron tulipifera, and hickories, Carya spp., provide bright yellow fall foliage. And it’s difficult to find a more crisp yellow than fallen Ginkgo, Ginkgo biloba, leaves. These trees represent just a few choices for fall color. Including one or several of these trees in your landscape, rather than allowing the Popcorn trees to grow, will enhance the season while protecting the ecosystem from invasive plant pests.
For more information on Chinese tallowtree, removal techniques and native alternative trees go to: http://edis.ifas.ufl.edu/ag148.
by Les Harrison | Oct 26, 2018
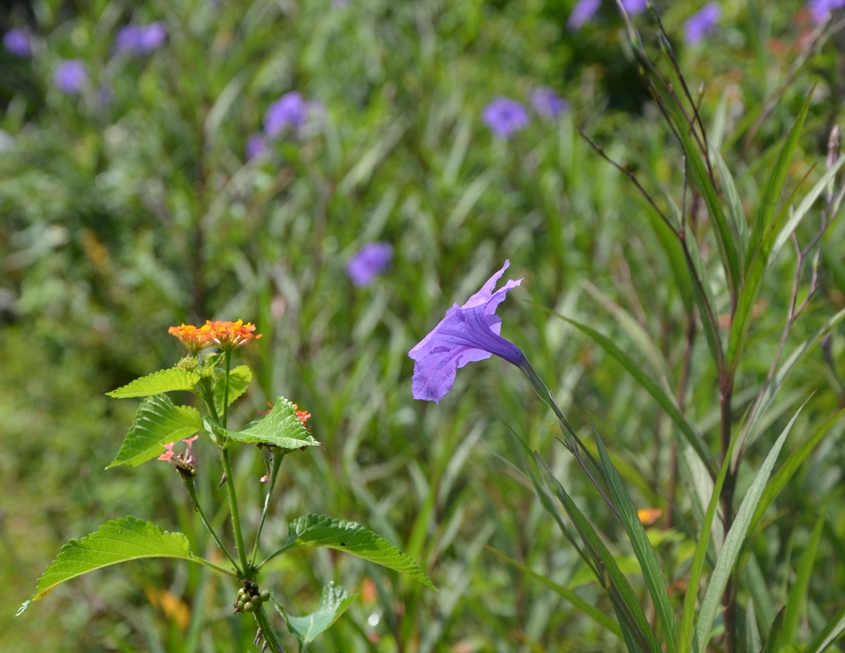
Lantana, on the left, and Mexican Petunia, on the right, are both exotic invasive plants which can displace many native species and disrupt the natural balance.
Autumn is usually considered the season of colors in the natural parts of north Florida, and other locations in North America. This tonal attribute is commonly credited to the foliage changes as the growing season ends.
Maples, sweet gums, hickory and many others make their contributions to the natural palette of shades and hues which have existed since long before human habitation in the area. Even some of the native plants add to the display.
Goldenrod and dogfennel add highlights to the brilliant display as winter, believe it or not, approaches. Unfortunately there are some attractive shades in the exhibition which are an indication of exotic invasive plants which have pushed out native.
Both lantana and Mexican petunias are currently blooming, but an indication of problem species. Both were introduces as ornamental plants, but quickly escaped into the wild where they could colonize unchecked.
Lantana (Lantana camara) is a woody shrub native to tropical zones of North and South America. It flowers profusely throughout much of the growing season.
Because of the plant’s ornamental nature, many different flower colors exist, but the most frequent color combinations are red and yellow along with purple and white. Lantana is now commonly found in naturalized populations throughout the southeastern United States from Florida to Texas.
It is currently ranked as one of the top ten most troublesome weeds in Florida and has documented occurrences in 58 of 67 counties. Curiously, despite the bad reputation it is still found in home and commercial landscapes.
As part of its arsenal of conquest, Lantana produces allelochemicals, or plant toxins, in its roots and stems. These allelochemicals have been shown to either slow the growth of other plants or totally remove them.
Some of these same chemicals give lantana an acrid taste and deter insects or other animals from consuming the leaves. Of importance to pet and livestock owners, these leaf toxins are damaging to animals.
If animals consume the leaves, they often begin to show symptoms of skin peeling or cracking. Once animals show these symptoms, there is little or no treatment that can reverse the process.
Although lantana’s leaves are poisonous, its berries are not. Birds readily consume the fruit and are responsible for much of the seed’s distribution over wide areas.
Mexican petunia (Ruellia simplex) is a native of Mexico, but also the Antilles and parts of South America. Its tolerance of varying landscape conditions makes it a common choice for difficult to plant areas and has contributed to it popularity and wide use.
Mexican petunia tolerates shade, sun, wet, dry, and poor soil conditions. It is a prolific bloomer with flowers in shades of purple and pink peaking in the summer, but with the potential to also bloom in spring and fall in some parts of Florida.
Environmental tolerance, abundant seed production, and an ability to easily grow from plant cuttings have all promoted the spread into natural areas bordering developments. The Mexican petunia has been credited with “altering native plant communities by displacing native species, changing community structures or ecological functions, or hybridizing with natives” according to the Florida Exotic Pest Plant Council in 2011.
Given the continued popularity of both species, plant breeders have developed sterile, non-reproducing cultivars which do not have the negative characteristics of these problem plants. It is recommended using only the sterile type so autumn’s colors continue to be natural.
To learn more about north Florida’s colorful invasive plants, contact the local UF/IFAS County Extension Office. Click here for contact information.

by Rick O'Connor | Jun 8, 2018
We have been posting articles discussing some of the issues our estuaries are facing; this post will focus on one of the things you can do to help reduce the problem – a Florida Friendly Yard.
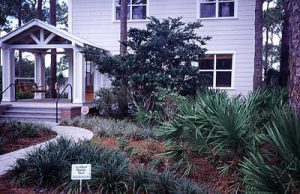
Florida Friendly Landscaping saves money and reduces our impact on the estuarine environment.
Photo: UF IFAS
The University of Florida IFAS developed the Florida Friendly Landscaping Program. It was developed to be included in the Florida Yards & Neighborhoods (FYN) program, HomeOwner and FYN Builder and Developer programs, and the Florida-Friendly Best Management Practices for Protection of Water Resources by the Green Industries (GI-BMP) Program in 2008.
A Florida Friendly Yard is based on nine principals that can both reduce your impact on local water quality but also save you money. Those nine principals are:
- Right Plant, Right Place – We recommend that you use native plants in the right location whenever possible. Native plants require little fertilizer, water, or pesticides to maintain them. This not only reduces the chance of these chemicals entering our waterways but also saves you money. The first step in this process is to have your soil tested at your local extension office. Once your soil chemistry is known, extension agents can do a better job recommending native plants for you.
- Water Efficiently – Many homeowners in the Florida panhandle have irrigation systems on timers. This makes sense from a management point of view but can lead to unnecessary runoff and higher water bills. We have all seen sprinkler systems operating during rain events – watering at that time certainly is not needed. FFY recommends you water only when your plants show signs of wilting, water during the cooler times of day to reduce evaporation of your resource, and check system for leaks periodically. Again, this helps our estuaries and saves you money.
- Fertilize Appropriately – No doubt, plants need fertilizer. Water, sunlight, and carbon dioxide produce the needed energy for plants to grow, but it does not provide all of the nutrients needed to create new cells – fertilizers provide needed those nutrients. However, plants – like all creatures – can only consume so much before the remainder is waste. This is the case with fertilizers. Fertilizer that is not taken up by the plant will wash away and eventually end up in a local waterway where it can contribute to eutrophication, hypoxia, and possible fish kills. Apply fertilizers according to UF/IFAS recommendations. Never fertilize before a heavy rain.
- Mulch – In a natural setting, leaf litter remains on the forest floor. The environment and microbes, recycling needed nutrients within the system, break down these leaves. They also reduce the evaporation of needed moisture in the soil. FFY recommends a 2-3” layer of mulch in your landscape.
- Attract Wildlife – Native plants provide habitat for a variety of local wildlife. Birds, butterflies, and other creatures benefit from a Florida Friendly Yard. Choose plants with fruits and berries to attract birds and pollinators. This not only helps maintain their populations but you will find enjoyment watching them in your yard.
- Manage Yard Pests Responsibly – This is a toughie. Once you have invested in your yard, you do not want insect, or fungal, pests to consume it. There is a program called the Integrated Pest Management Program (IPM) that is recommended to help protect your lawn. The flow of the program basically begins with the least toxic form of pest management and moves down the line. Hopefully, there will not be a need for strong toxic chemicals. Your local county extension office can assist you with implementing an IPM program.
- Recycle – Return valuable nutrients to the soil and reduce waste that can enter our waterways by composting your turfgrass clippings, raked leaves, and pruned plants.
- Reduce Stormwater Runoff – ‘All drains lead to the sea’ – this line from Finding Nemo is, for the most part, true. Any water leaving your property will most likely end in a local waterway, and eventually the estuary. Rain barrels can be connected to rain gutters to collect rainwater. This water can be used for irrigating your landscape. I know of one family who used it to wash their clothes. Rain barrels must be maintained properly to not produce swarms of mosquitos, and your local extension office can provide you tips on how to do this. More costly and labor intensive, but can actually enhance your yard, are rain gardens. Modifying your landscape so that the rainwater flows into low areas where water tolerant plants grow not only reduces runoff but also provides a chance to grow beautiful plants and enhance some local wildlife.
- Protect the Waterfront – For those who live on a waterway, a living shoreline is a great way to reduce your impact on poor water quality. Living shorelines reduce erosion, remove pollutants, and enhance fisheries – all good. A living shoreline is basically restoring your shoreline to a natural vegetative state. You can design this so that you still have water access but at the same time help reduce storm water runoff issues. Planting below the mean high tide line will require a permit from the Florida Department of Environmental Protection, since the state owns that land, and it could require a breakwater just offshore to help protect those plants while they are becoming established. If you have questions about what type of living shoreline you need, and how to navigate the permit process, contact your local county extension office.

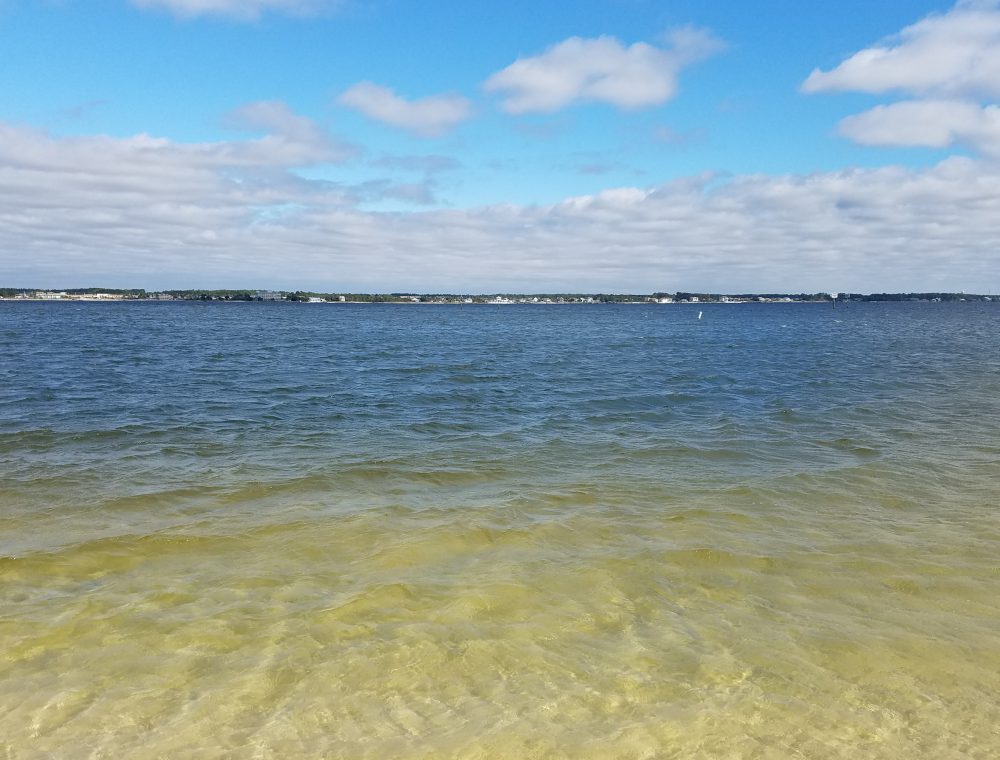
Santa Rosa Sound
Photo: Dr. Matt Deitch
These nine principals of a Florida Friendly Yard, if used, will go a long way in reducing our communities’ impact on the water and soil quality in our local waterways. Read more at http://fyn.ifas.ufl.edu/about.htm.
by Erik Lovestrand | Jun 8, 2018
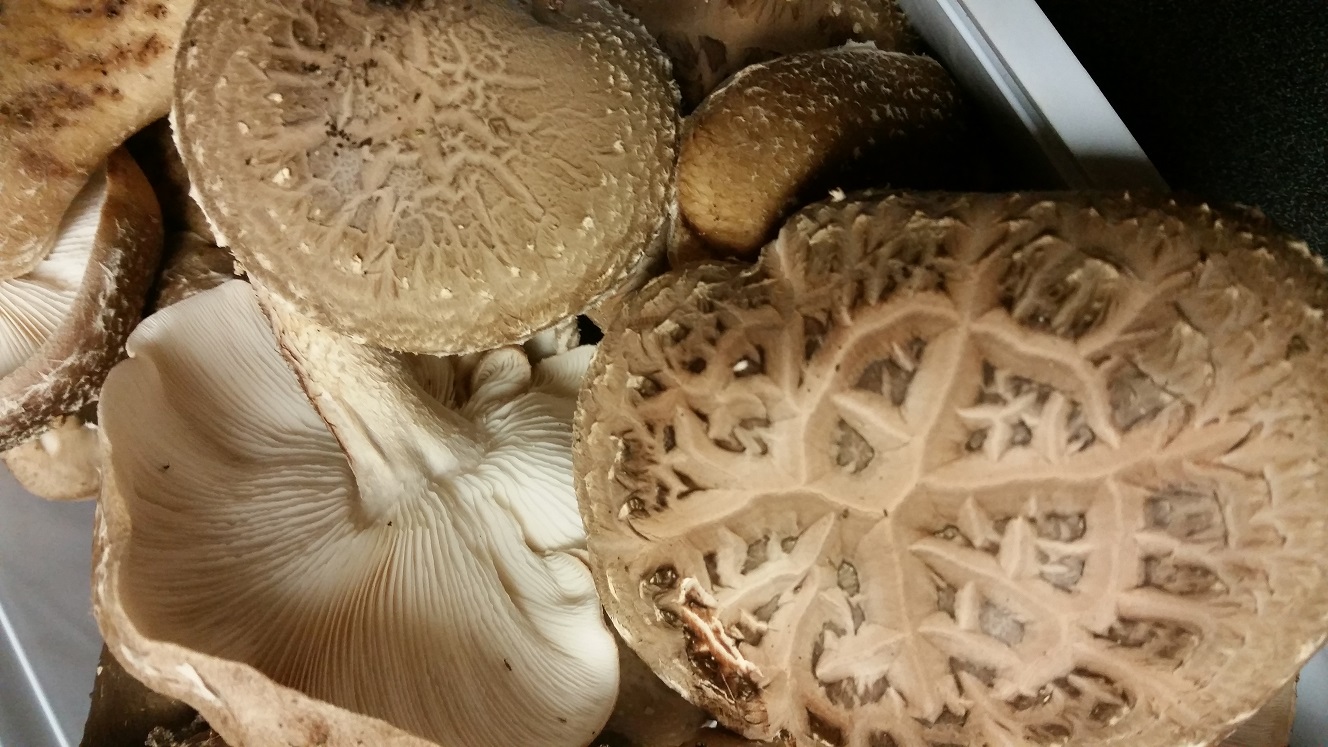
Have you ever eaten a wild mushroom and then wondered afterwards if you might have made a mistake? If you are prone to forage outdoors for tasty treats from nature, I’ll bet you have. The problem is, unless you are harvesting one of a few “foolproof” species of edible fungi, positive identification can be very challenging. Oft-times wild mushroom harvesters take a notion to branch out and seek new varieties that are outside of the identification capabilities of the novice mycologist. This is where folks begin treading on dangerous ground and may be at risk for gastrointestinal distress;
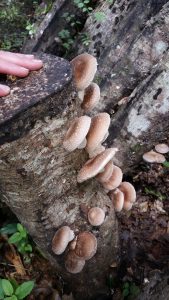
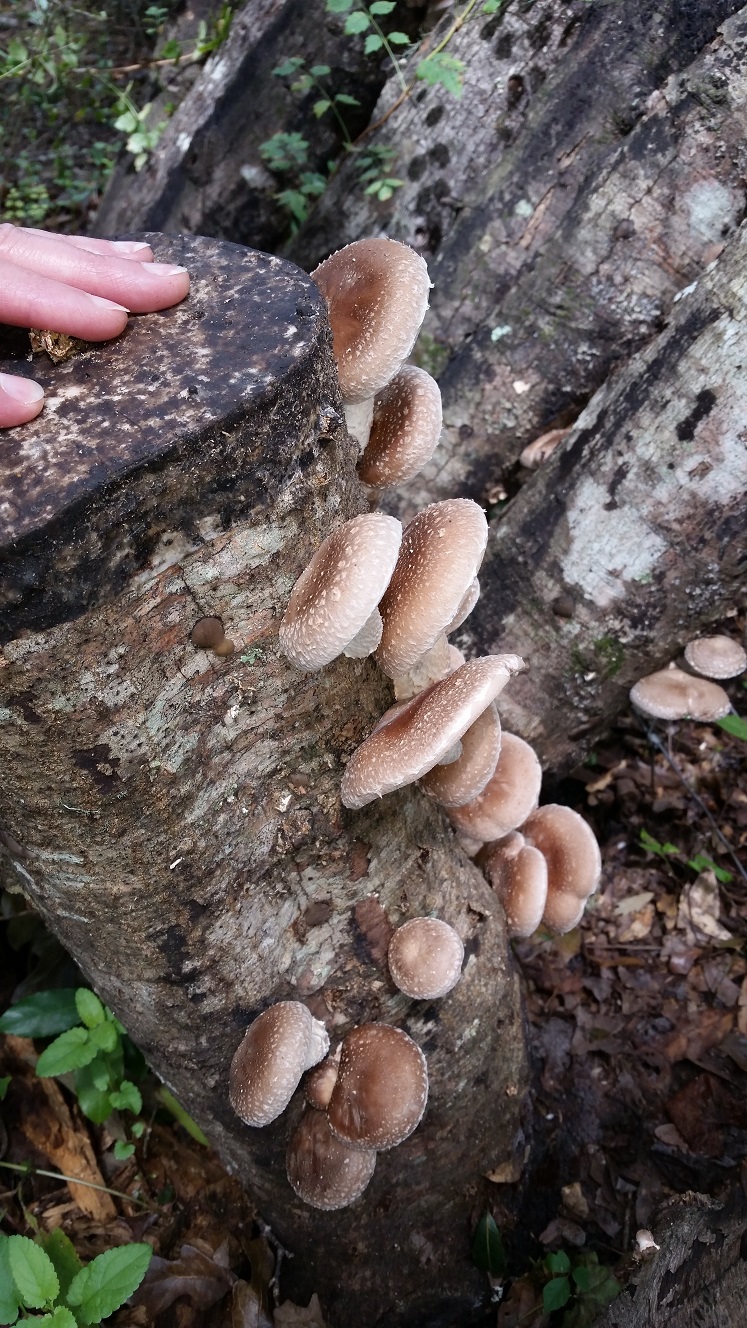
Properly inoculated shiitake logs can be quite productive
with symptoms that may range from a mild upset stomach to permanent damage or death.
Yes, death!
Everyone has heard about poisonous mushrooms but few people realize that some of the deadliest species are look-alikes for some of the tastiest species. And you would not be able to distinguish the difference by nibbling a sample. Even a small sample of some of the “bad actors” can be lethal, leading to painful symptoms and organ failure. If this scares you out taking a risk then this article has served a good purpose.
If you wish to enjoy a safe, tasty experience with a highly-prized mushroom species, just take up the hobby of growing your very own shiitake mushrooms. Shiitake comes from the root Japanese “shii” (meaning oak) and “take” (for mushroom). Shiitake mushrooms are a billion dollar industry in Asia with 92% of the world production coming from Japan. Many culinary and medical uses have been identified. This species was only available as dried mushrooms in the US until 1972 but with the removal of a ban on importing live fungi a commercial industry has blossomed.
Hardwood logs are the key, with oak being a preferred tree species. There are six considerations if you are to be successful:
1. You must acquire living Shiitake inoculum (the mycelial or rooting stage) already growing on a wood medium, usually hardwood dowels or sawdust (internet search will yield many providers).
2. Proper cutting and handling of the logs to be inoculated is important. Cut trees close to the time of inoculation (2 weeks max.), 4-8 inch diameter and 3-4 feet long.
3. Inoculate by drilling holes in the logs, inserting the living inoculum/spawn and seal the holes with melted wax to retain moisture. A single log may have 30-40 holes drilled in it.
4. Place logs in a shady/moist environment (i.e. under the canopy in a woodlot with at least 75% shade).
5. Maintain logs by wetting during dry spells. A sprinkler or mister run for a couple of hours a day works well.
6. Proper harvesting and storage is most important and information is available in many places online.
Shiitake fruiting is usually triggered by changes in temperature and humidity so spring and fall are key times to check your logs. It does not take long for a mushroom to go from the early “pinning” stage to mature, so weekly checks are advised. Significant tropical weather events will also stimulate fruiting. Logs produce mushrooms for at least two years, until the nutrients in the wood are used up.
Don’t be in a hurry though, as the full colonization of the log by the mushroom mycelium will take up to 9 months before mushrooms begin to appear. Remember, beware the risks of harvesting wild fungi. A small-scale shiitake growing operation is a safe alternative for getting your “mushroom-fix.” Also, be ready to compete with a squirrel or two for your crop as they know a good thing when they see it too.