by Abbey Smith | Apr 24, 2025
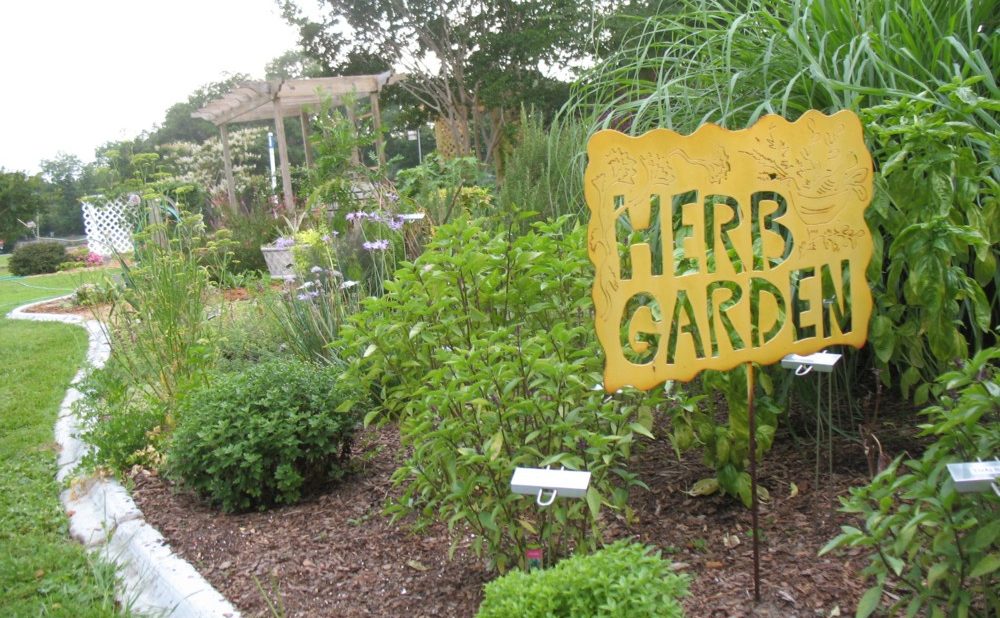
Herbs are one of the best ways to add diversity to your garden or patio in the summer as they have many uses and unique traits. Summer is the season where herbs truly shine. There are many benefits of growing and using herbs at home, such as adding flavor to foods and beverages. Throughout this article, you will learn about different types of herbs and their uses.
The use of herbs has dated back almost 5,000 years, specifically in what we know today as modern Asia and the Middle East. “The Age of Exploration” enhanced the herb and spice trade in many European countries when Christopher Columbus set sail in 1492 to discover the trade route to India. Three hundred years later in 1715, Spanish explorers were pushed to the east coast of Florida in the area we know today as St. Augustine, Florida. They introduced various herbs and spices such as vanilla, annatto, and sassafras. Herbs have a unique history, and you can read more from the book Herbs and Spices in the Florida Garden written by Charles R. Boning.

Photo Credit: Abbey Smith, UF/IFAS Extension Jackson County
There are many key things to consider when growing herbs at home, such as your growing location. Gardeners need to consider how easily their herbs can be accessed from the garden to the kitchen, the exposure of sunlight, and whether they will be grown in the ground or in containers. Most herbs like ample sunlight and well-drained soil. Herbs can be attractive additions to most flower beds and container pots. They can also be a great pollinator source as most will bloom. However, some herbs can grow quite aggressively and may be better suited for a container in order to control their growth.
There are various ways herbs can be propagated. The most common ways are by stem cuttings or germinating seeds. There are many herbs one can grow, but the best herb varieties acclimated for the summer heat are basil, chives, cilantro, cumin, lemon grass, marjoram, mint, oregano, rosemary, and thyme. Most herbs are used for culinary purposes like adding fresh flavor to a recipe or creating a spice rub for meat. When harvesting herbs to cook with, look for leaves that are younger and tender with good coloration to them. The younger leaves harbor more flavor and are better suited for fresh use.
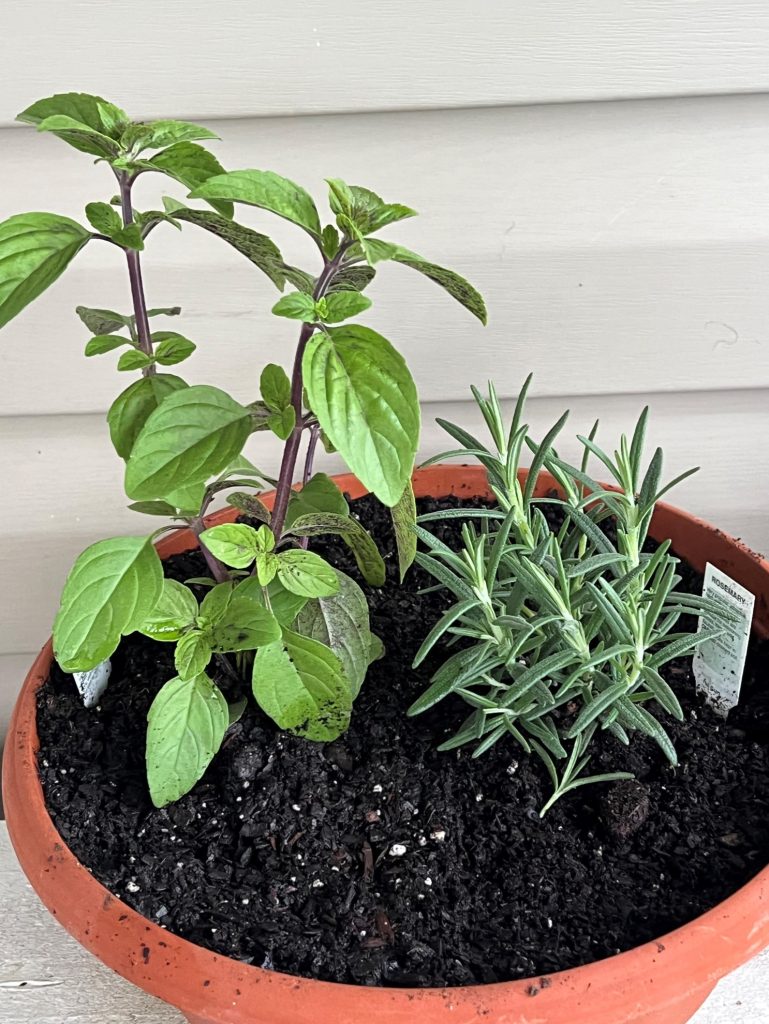
Container grown herbs. Photo Credit: Abbey Smith, UF/IFAS Jackson County Extension
Some of the most common herbs that gardeners keep on hand are basil, chives, and mint. See below the growing information for each type.
Basil
Basil belongs to the mint family, with many varying types that have a wide selection of scents and flavors. Sweet Italian basil is most used in Italian recipes, like pesto or marinara sauce. Basil is classified as an annual herb but can last for several seasons if it is winterized properly. You can plant basil in the early spring or fall and it prefers morning sun to afternoon shade. It is best to pinch off the flowers to produce more leaves, as the flowers can alter the flavor profile.
Chives
Chives are classified as a perennial herb that will flower between April and May. There are two different types of chives: garlic and onion. Both have obvious different culinary flavors but have the same growing requirements. Chives prefer full sun and a well-drained soil and will go dormant during the winter months. This herb will need to be divided every so many years to prevent overcrowding.

Onion Chives, Photo Credit: Abbey Smith, UF/IFAS Extension Jackson County
Mint
Mint is an easy to grow perennial herb that has hundreds of varieties to choose from. Some commonly recognized ones are Spearmint, Peppermint, and Chocolate Mint. It is commonly used in beverages and foods and is a great natural insect repellent. Mint has dark green levels and can grow in either shade, partial sun, or full sun. It likes plenty of moisture so heavy watering is needed. This is an herb that can quickly become a weed if not properly maintained so growing in a container is best.
To learn more about different herbs and their growing requirements, you can sign up for the UF/IFAS Jackson County Extension Garden to Table Workshop: Summer Herbs on May 9 at the Jackson County Extension Office from 6:00 pm to 8:00 pm. You can register on Eventbrite at: https://www.eventbrite.com/e/garden-to-table-summer-herbs-registration-1111961539899?aff=erelexpmlt
For more information please visit:
https://gardeningsolutions.ifas.ufl.edu/plants/edibles/vegetables/herbs/
https://gardeningsolutions.ifas.ufl.edu/plants/edibles/vegetables/herbs-for-pollinator-gardens/
by Matt Lollar | Jan 30, 2025
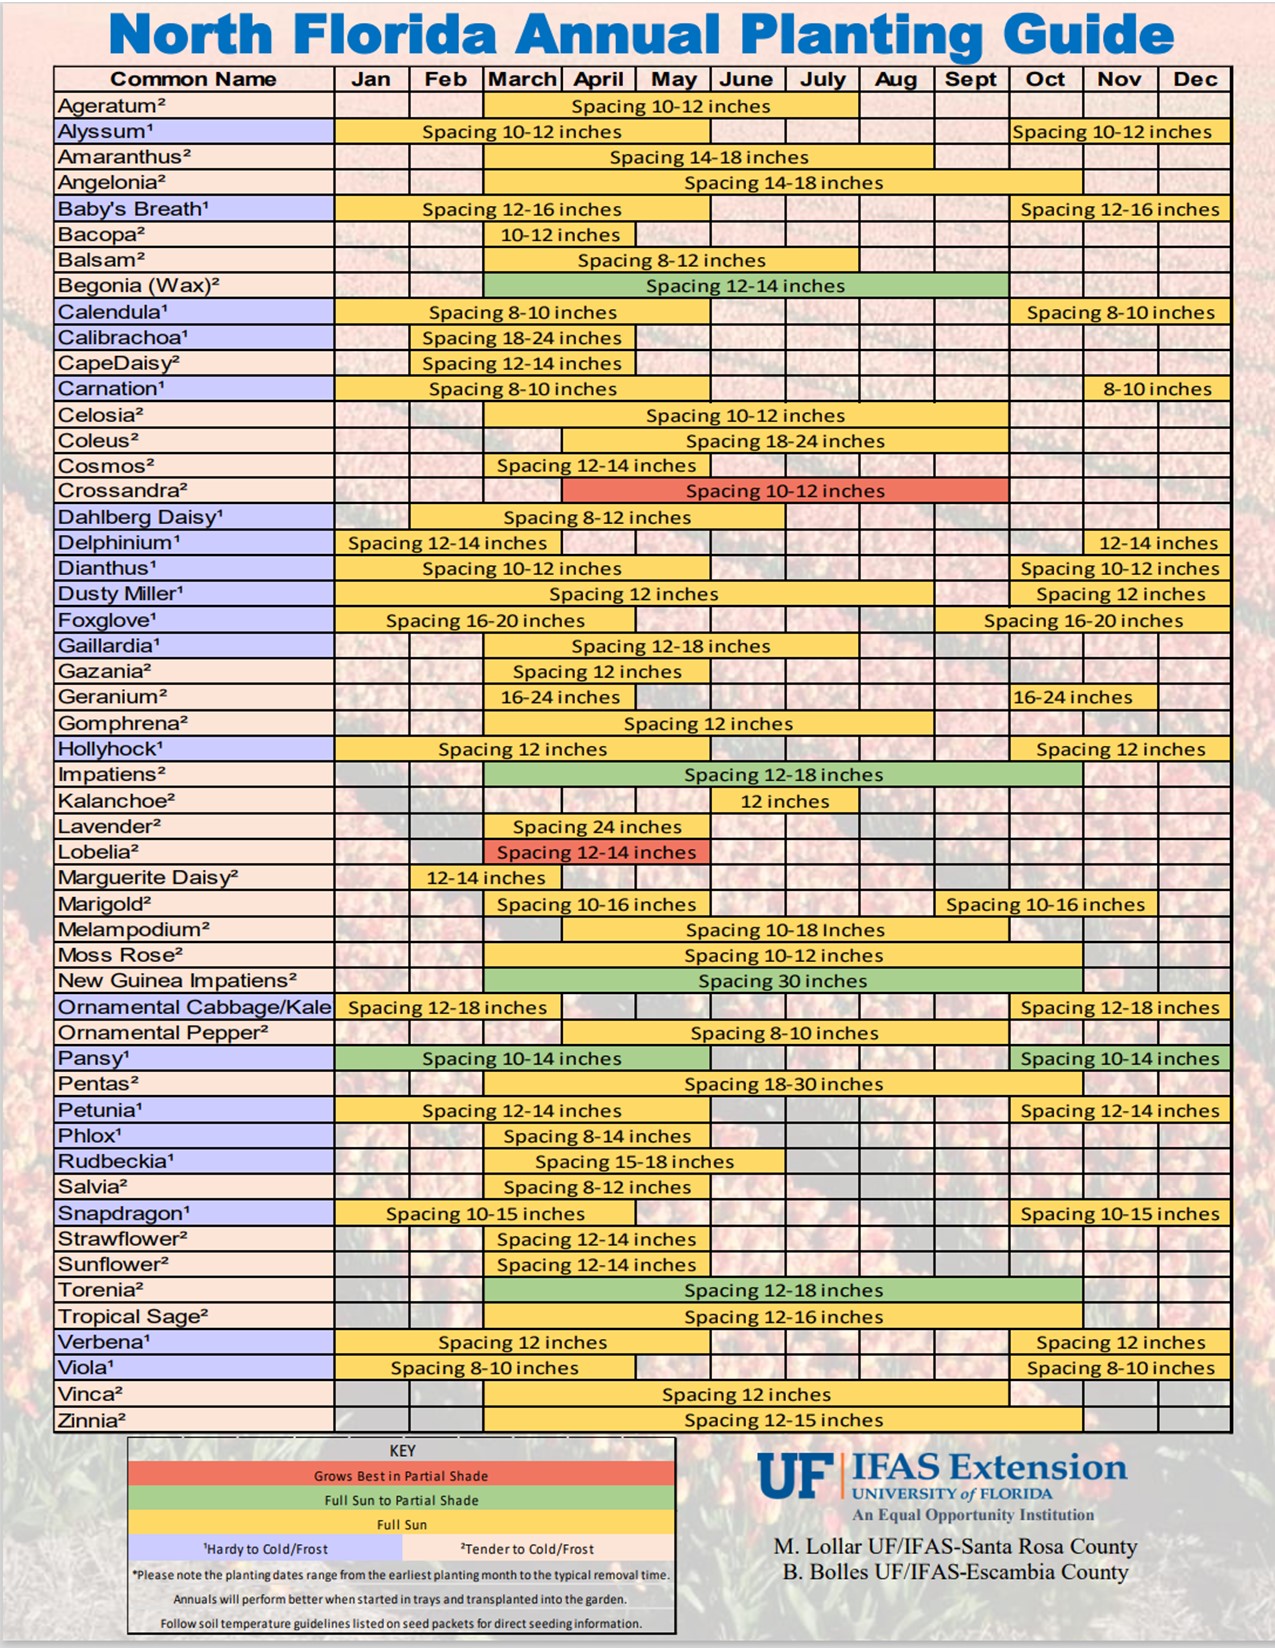
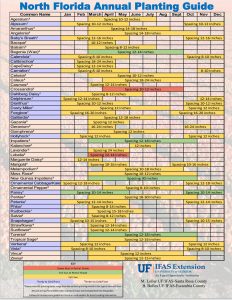
Planting annuals is a great way to add color and texture to the landscape. Annuals can provide an added visual component to the garden regardless of if they’re planted in the ground or in containers, or even better—both. An annual plant completes its life cycle (growing, flowering, seed set, and death) in a single growing season. Annuals can stay in good health and last longer if they are pruned back when they get leggy and by pinching off any fading flowers (deadheading). To help plan your garden beds and container plantings please click below to enlarge the image of the handy “North Florida Annual Planting Guide”. Please note the suggested planted dates in this guide are based on average monthly temperatures, but every year is different. Some years we may have a late frost around Easter, other years we won’t have a cold front after February.
by Sheila Dunning | Aug 7, 2024
The “Dog Days” are the hottest, muggiest days of summer. In the northern hemisphere, they usually fall between early July and early September. The actual dates vary greatly from region to region, depending on latitude and climate. It is miserable right now, but fall is coming.
In ancient times, when the night sky was not obscured by artificial lights, the Romans used the stars to keep track of the seasons. The brightest constellation, Canis Major (Large Dog), includes the “dog star”, Sirius. In the summer, Sirius used to rise and set with the sun, leading the ancient Romans to believe that it added heat to the sun. Although the period between July 3 and August 11 is typically the warmest period of the summer, the heat is not due to the added radiation from a far-away star, regardless of its brightness. The heat of summer is a direct result of the earth’s tilt.
Spending time outdoors this time of year is uncomfortable, potentially dangerous, due to the intense heat. However, the chinch bugs are very active in St. Augustine grass (for more information: http://edis.ifas.ufl.edu/lh036), and the summer flowers need water. So, take care of those tasks early in the day and then retreat to the air conditioning to plan your fall planting.
Plant tomato plants in August for fruit in October. Varieties such as Phoenix, Florida 91, Solar Set and Heat Wave II are good selections for setting fruit in high temperatures, should summer temperatures continue. Otherwise, try some of the newer UF/IFAS recommended varieties for fall planting in North Florida such as Bella Rosa, Tribute or Finishline. For more information on tomato selection refer to: http://edis.ifas.ufl.edu/in756. For information on other vegetables for fall gardening refer to the Florida Vegetable Gardening Guide: http://edis.ifas.ufl.edu/vh021.
Many bedding plants flower quickly and can add color to the fall landscape. These include pentas, African marigolds, torenia, zinnias, melampodium and scaevola. Other can be planted in October for blooms all winter-long. Plan spaces and color themes for calendulas, pansies, snapdragons and violas. Add in ornamental cabbage or kale and some dusty miller to accent the garden. They too will perform through the cold. For more information on Annuals for the Florida Garden refer to: http://edis.ifas.ufl.edu/mg319.
Dependable fall blooming perennials include lion’s ear (Leonotis leonurus), pineapple sage (Salvia elegans), firebush (Hamelia patens), cigar plant (Cuphea micropetala), yellowbells (Tecoma stans) and firespike (Odontonema strictum). Also, garden mums (Chrysanthemum sp.) and many different Irises will add color again in the spring. To gain information on perennials for Florida refer to: http://edis.ifas.ufl.edu/mg035.

Webster’s second definition of “dog days” is a period of stagnation or inactivity. But, even when the heat forces you to slow down on the labor-intensive work, there is plenty of gardening “activity” to do. Stay in the air conditioning and plan that spectacular fall and winter yard.
by deanthonyprice | Apr 11, 2024
Zinnias are well-known annual flowers, primarily recognized for their easy and fast growth. Their wide range of growing habits contributes to their popularity, as they can range from short and bushy to tall with a singular stalk. Regardless of their growing habit, Zinnias are prolific bloomers. They belong to the aster family and are native to Mexico and Central America, thriving particularly well throughout the South.
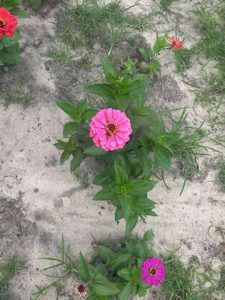
Photo: De’Anthony Price
Zinnia Characteristics
There are three distinct types of Zinnias based on floral structure: single, double, and semi-double. The different floral structures do not necessarily correlate with plant habits. ‘Single’ refers to flowers that have only a single row of petals, with the center of the flower clearly visible. ‘Double’ Zinnias have multiple rows of petals, and the center is not clearly visible. ‘Semi-double’ cultivars exhibit a combination of traits, with flowers having multiple rows of petals while still maintaining a clearly visible center.
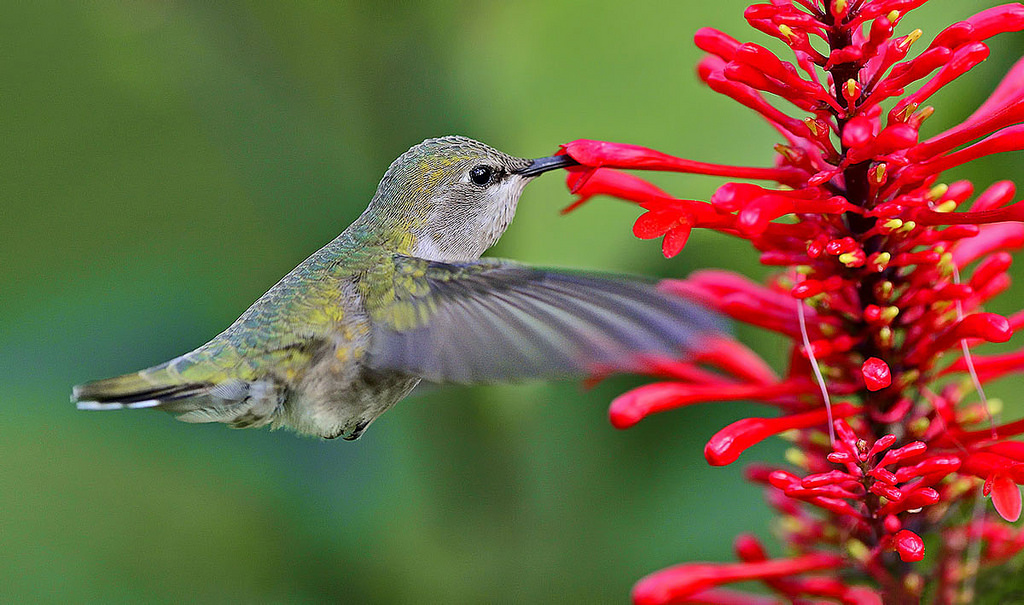
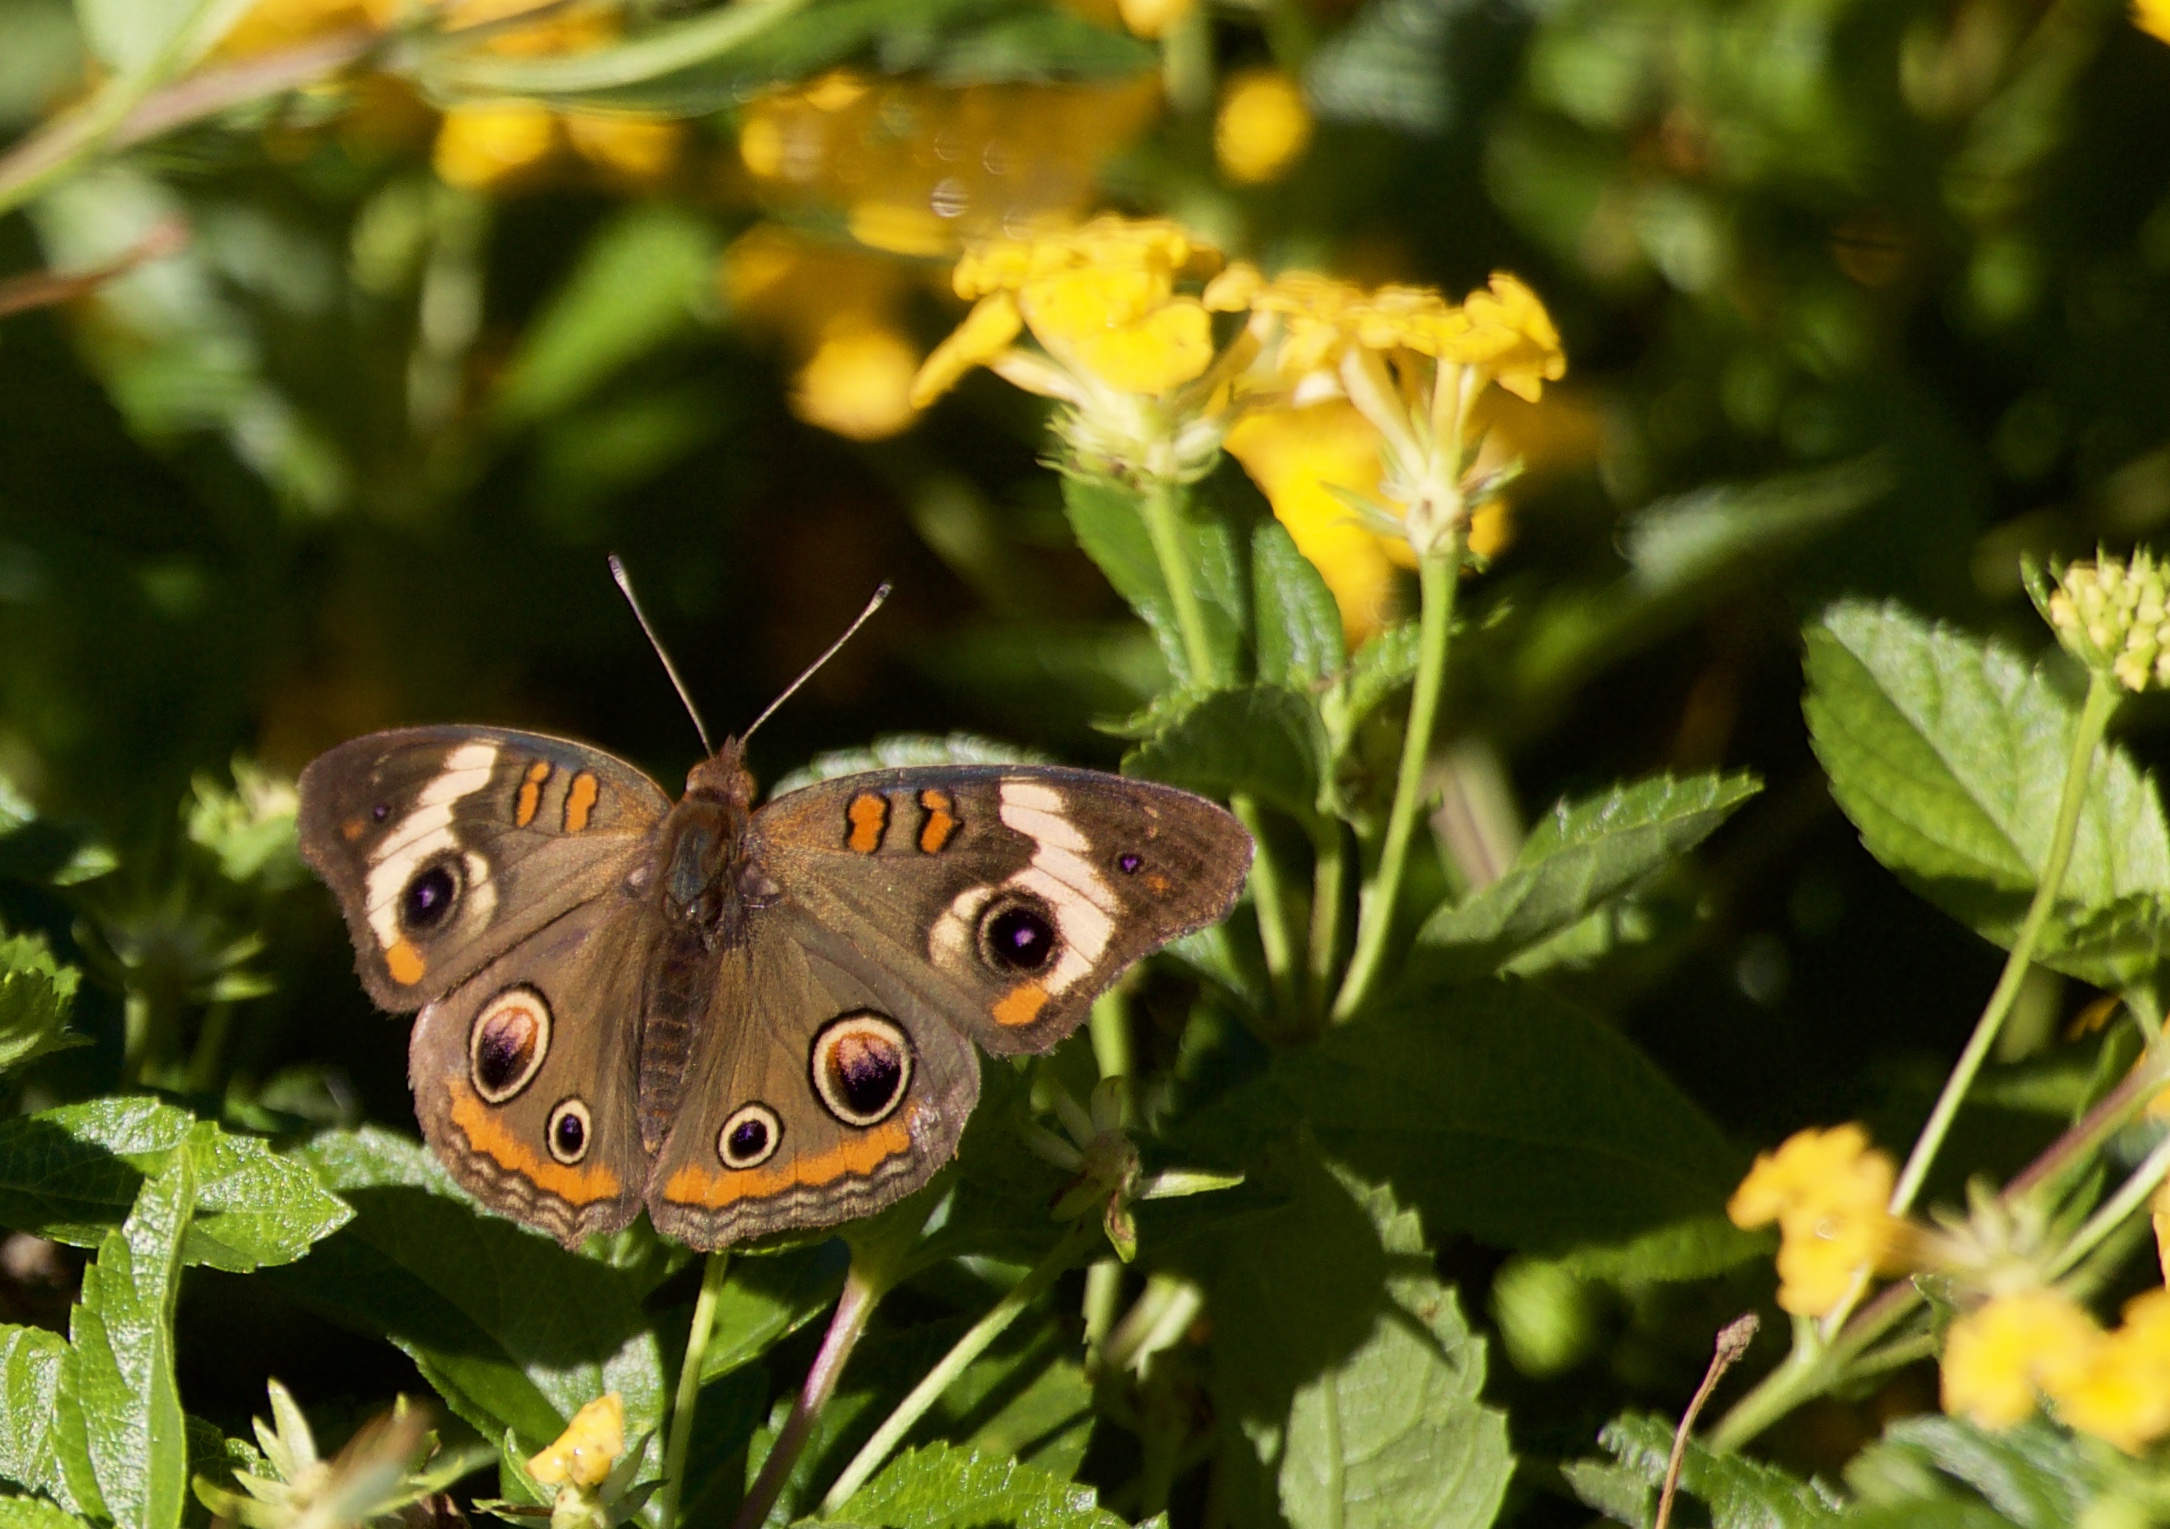
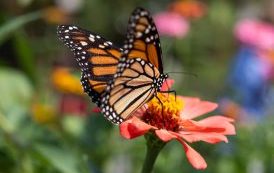
Pollinators and Zinnias
Zinnias are great for attracting pollinators, especially butterflies. Interplanting zinnias between rows of vegetables or as a border around vegetables is a great way to attract more pollinators to your garden. There are a few guidelines available for attracting butterflies to your yard using zinnias. The taller varieties are better than dwarf or compact cultivars, and those with wide, flat blooms provide a larger landing surface. Flowers should have prominent yellow centers (disc floret); double bloom varieties make it difficult for butterflies to access nectar. It is also possible that some varieties attractive to butterflies produce a larger quantity of and/or better-quality nectar than others.
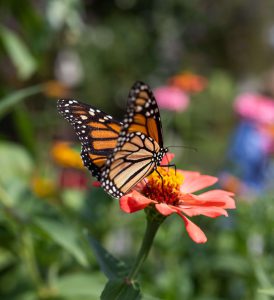
Photo: UF/IFAS
Planting Zinnias
Zinnias perform better in garden beds than containers and, due to their ability to grow so quickly, can be direct seeded. To direct seed, the soil temp should be at least 70 degrees and plant the seeds at 1/4’” deep. Zinnias can also be planted as transplants and should be done once the soil warms to 60 degrees. Plant spacing can be anywhere from 8 to 12 inches depending on the plant’s habit. Singular stalk varieties can be planted closer together and bushier varieties should be given more space. Zinnias prefer full sun and well-drained soil. For longer flowering, remove the old blooms.
Zinnia Management
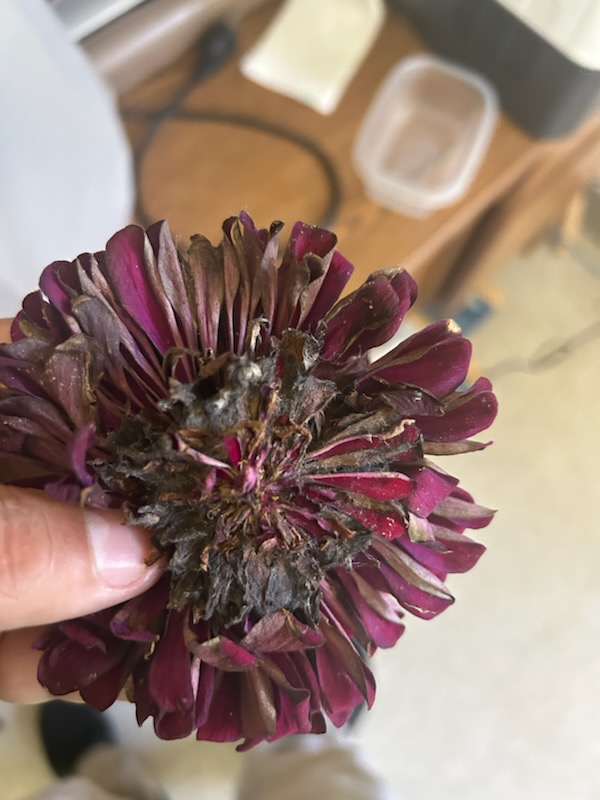
When planting zinnias, it’s recommended to incorporate a general-purpose fertilizer with equal parts nitrogen, phosphorus, and potassium into the soil. Following planting, monthly fertilization with a phosphorus-rich fertilizer is advisable to encourage continuous blooming. Maintaining adequate moisture is crucial for zinnias but avoid overwatering as they thrive in moderately dry conditions. To prevent fungal diseases, water only when the top 1-2 inches of soil are dry, focusing on watering the base of the plant rather than the foliage whenever possible. Powdery mildew is a common issue with zinnias, but it can be managed by applying a fungicide when necessary. However, it’s best to prevent this problem by ensuring good air circulation and avoiding wet foliage.

Photo: De’Anthony Price
Diseased Zinnia
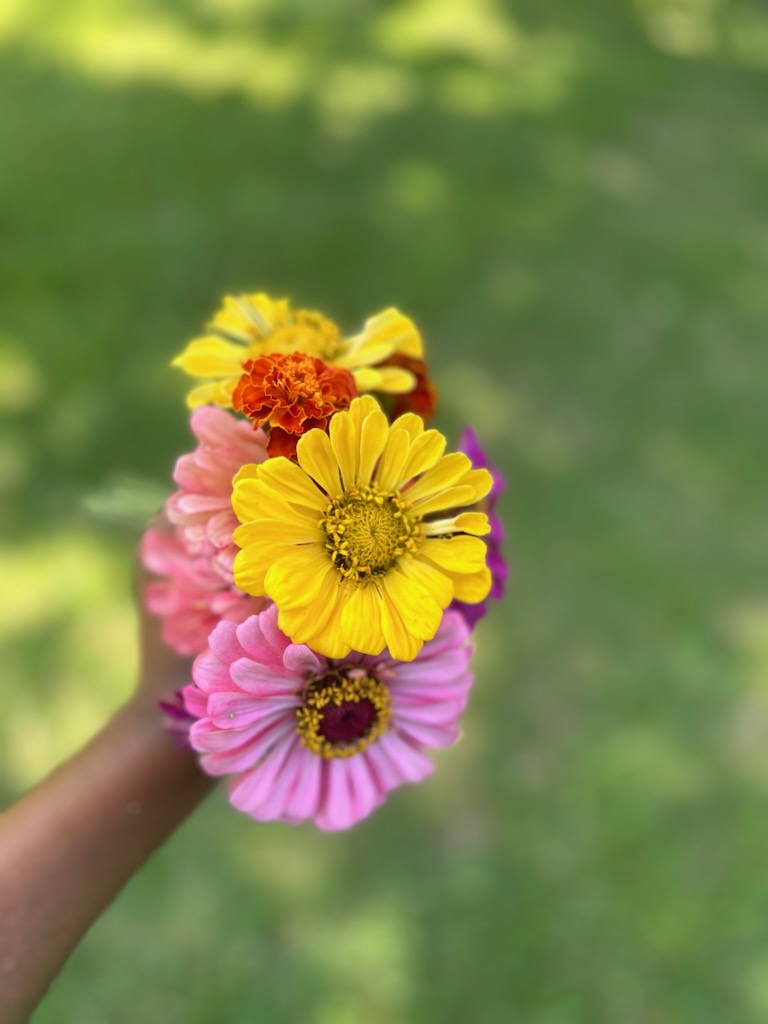
Zinnias as Cut Flowers
Zinnias, known for their vibrant charm, make delightful cut flowers that can brighten up indoor spaces for a week or longer. For optimal longevity, harvest the blooms when their centers are just beginning to unfurl fully. Trim away lower leaves and promptly place the cut ends into water-filled vases. Regularly refreshing the water helps prevent the growth of algae. When it comes to drying zinnias, double-flowered varieties are preferred as they tend to maintain their shape better than single forms. While all colors undergo slight changes during drying, cutting stems at their peak, removing leaves, and hanging them upside down in bundles away from direct sunlight facilitates the drying process effectively.

Photo: DeAnthony Price
Zinnia – University of Florida, Institute of Food and Agricultural Sciences (ufl.edu)
FPS-623/FP623: Zinnia spp. Zinnia (ufl.edu)

by Evan Anderson | Jun 23, 2022
Unlike areas with cooler climates, North Florida’s weather is a bit of a rollercoaster. Where the traditional four seasons allow for one growing season, the panhandle’s temperature changes create two growing seasons – spring and fall. During the winter, temperatures fall too low to keep plants happy, so those who expect to grow tropical plants in Florida may be disappointed. During the summer, the heat and humidity climb to levels that even plants can find stressful! Many of our vegetable crops simply can’t handle the extremes and wither away.
There are a few edible plants we can grow, however, that don’t seem to mind the hot weather. If you simply can’t live without a productive garden during the summer, you might consider trying these:
Cowpeas
Also called Southern peas, black-eyed peas, or field peas, these are known for their ability to produce a crop despite the harshest of conditions. Actually a bean rather than a pea, they take 65 to 125 days to grow to full maturity, depending on variety. Because they are a nitogen-fixing legume, they have also been used as a cover crop.
Malabar Spinach

Malabar Spinach. Photo Credit: James M. Stephens, UF/IFAS
Popular in Asian countries, Malabar spinach is actually a vining plant unrelated to true spinach. It grows quickly and is edible both raw and cooked, though some people may not appreciate its mucilaginous texture. Similar to okra’s sliminess, this quality does make it useful for thickening soups. Malabar spinach may be propagated from seed or by cuttings, which root easily. The plant also produces berries which, while not toxic, have very little flavor and tend to stain whatever they touch.
Okra
A traditional Southern favorite, okra takes the heat and keeps producing. Related to cotton and hibiscus, it grows pods that are ready to harvest after 60-70 days. Seeds have a tough exterior and need to be soaked overnight before planting. Harvest every couple of days at least for best results, as pods that grow too large become tough and fibrous.
Seminole Pumpkin
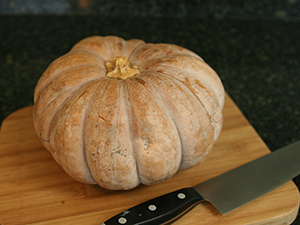
A Seminole pumpkin. Photo credit: UF/IFAS
Though they may need extra attention paid to them due to their attractiveness to pests, Seminole pumpkins are a great option for a summer planting. Similar to butternut squash, these cucurbits aren’t your traditional carving pumpkin, but they make great eating. Give them plenty of room to spread out in a sunny space. They take 120 days after planting before they’re ready to harvest, and their thick skin allows them to be stored for a long time after.
Sweet Potato
Does well in sandy soil? Check. Doesn’t mind the heat? Check. Sweet potatoes are great for our neck of the woods. Start out with disease-free slips for best results, and pick varieties such as ‘Beauregard’ that do well in our area.
Yardlong Beans
Related to cowpeas, yardlong beans grow on a climbing vine. The beans themselves, as the name suggests, are contained in a pod that can reach 36 inches in length. These can be picked and cooked much like green beans while the pods are still tender.