2020 has not been the most pleasant year in many ways. However, one positive experience I’ve had in my raised bed vegetable garden has been the use of a cover crop, Buckwheat (Fagopyrum esculentum)! Use of cover crops, a catch-all term for many species of plants used to “cover” field soil during fallow periods, became popular in agriculture over the last century as a method to protect and build soil in response to the massive wind erosion and cropland degradation event of the 1930s, the Dust Bowl. While wind erosion isn’t a big issue in raised bed gardens, cover crops, like Buckwheat, offer many other services to gardeners:
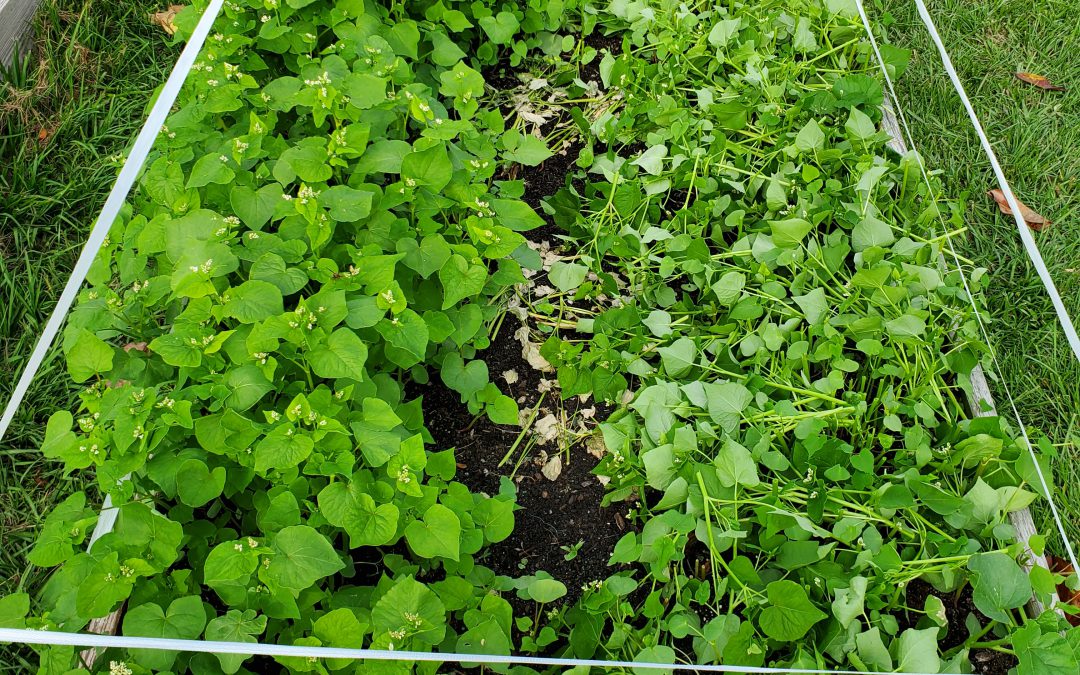
Buckwheat in flower behind summer squash. Photo courtesy of Daniel Leonard.
Covers, like Buckwheat, provide valuable weed control by shading out the competition. Even after termination (the cutting down or otherwise killing of the cover crop plants and letting them decompose back into the soil as a mulch), Buckwheat continues to keep weeds away, like pinestraw in your landscape.
Cover crops also build soil. This summer, I noticed that my raised beds didn’t “sink” as much as normal. In fact, I actually gained a little nutrient-rich organic matter! By having the Buckwheat shade the soil and then compost back into it, I mostly avoided the phenomena that causes soils high in organic matter, particularly ones exposed to the sun, to disappear over time due to breakdown by microorganisms.
Many cover crops are awesome attractors of pollinators and beneficial insects. At any given time while my Buckwheat cover was flowering, I could spot several wasp species, various bees, flies, moths, true bugs, and even a butterfly or two hovering around the tiny white flowers sipping nectar.
Covers are a lot prettier than bare soil and weeds! Where I would normally just have either exposed black compost or a healthy weed population to gaze upon, Buckwheat provided a quick bright green color blast that then became covered with non-stop white flowers. I’ll take that over bare soil any day.
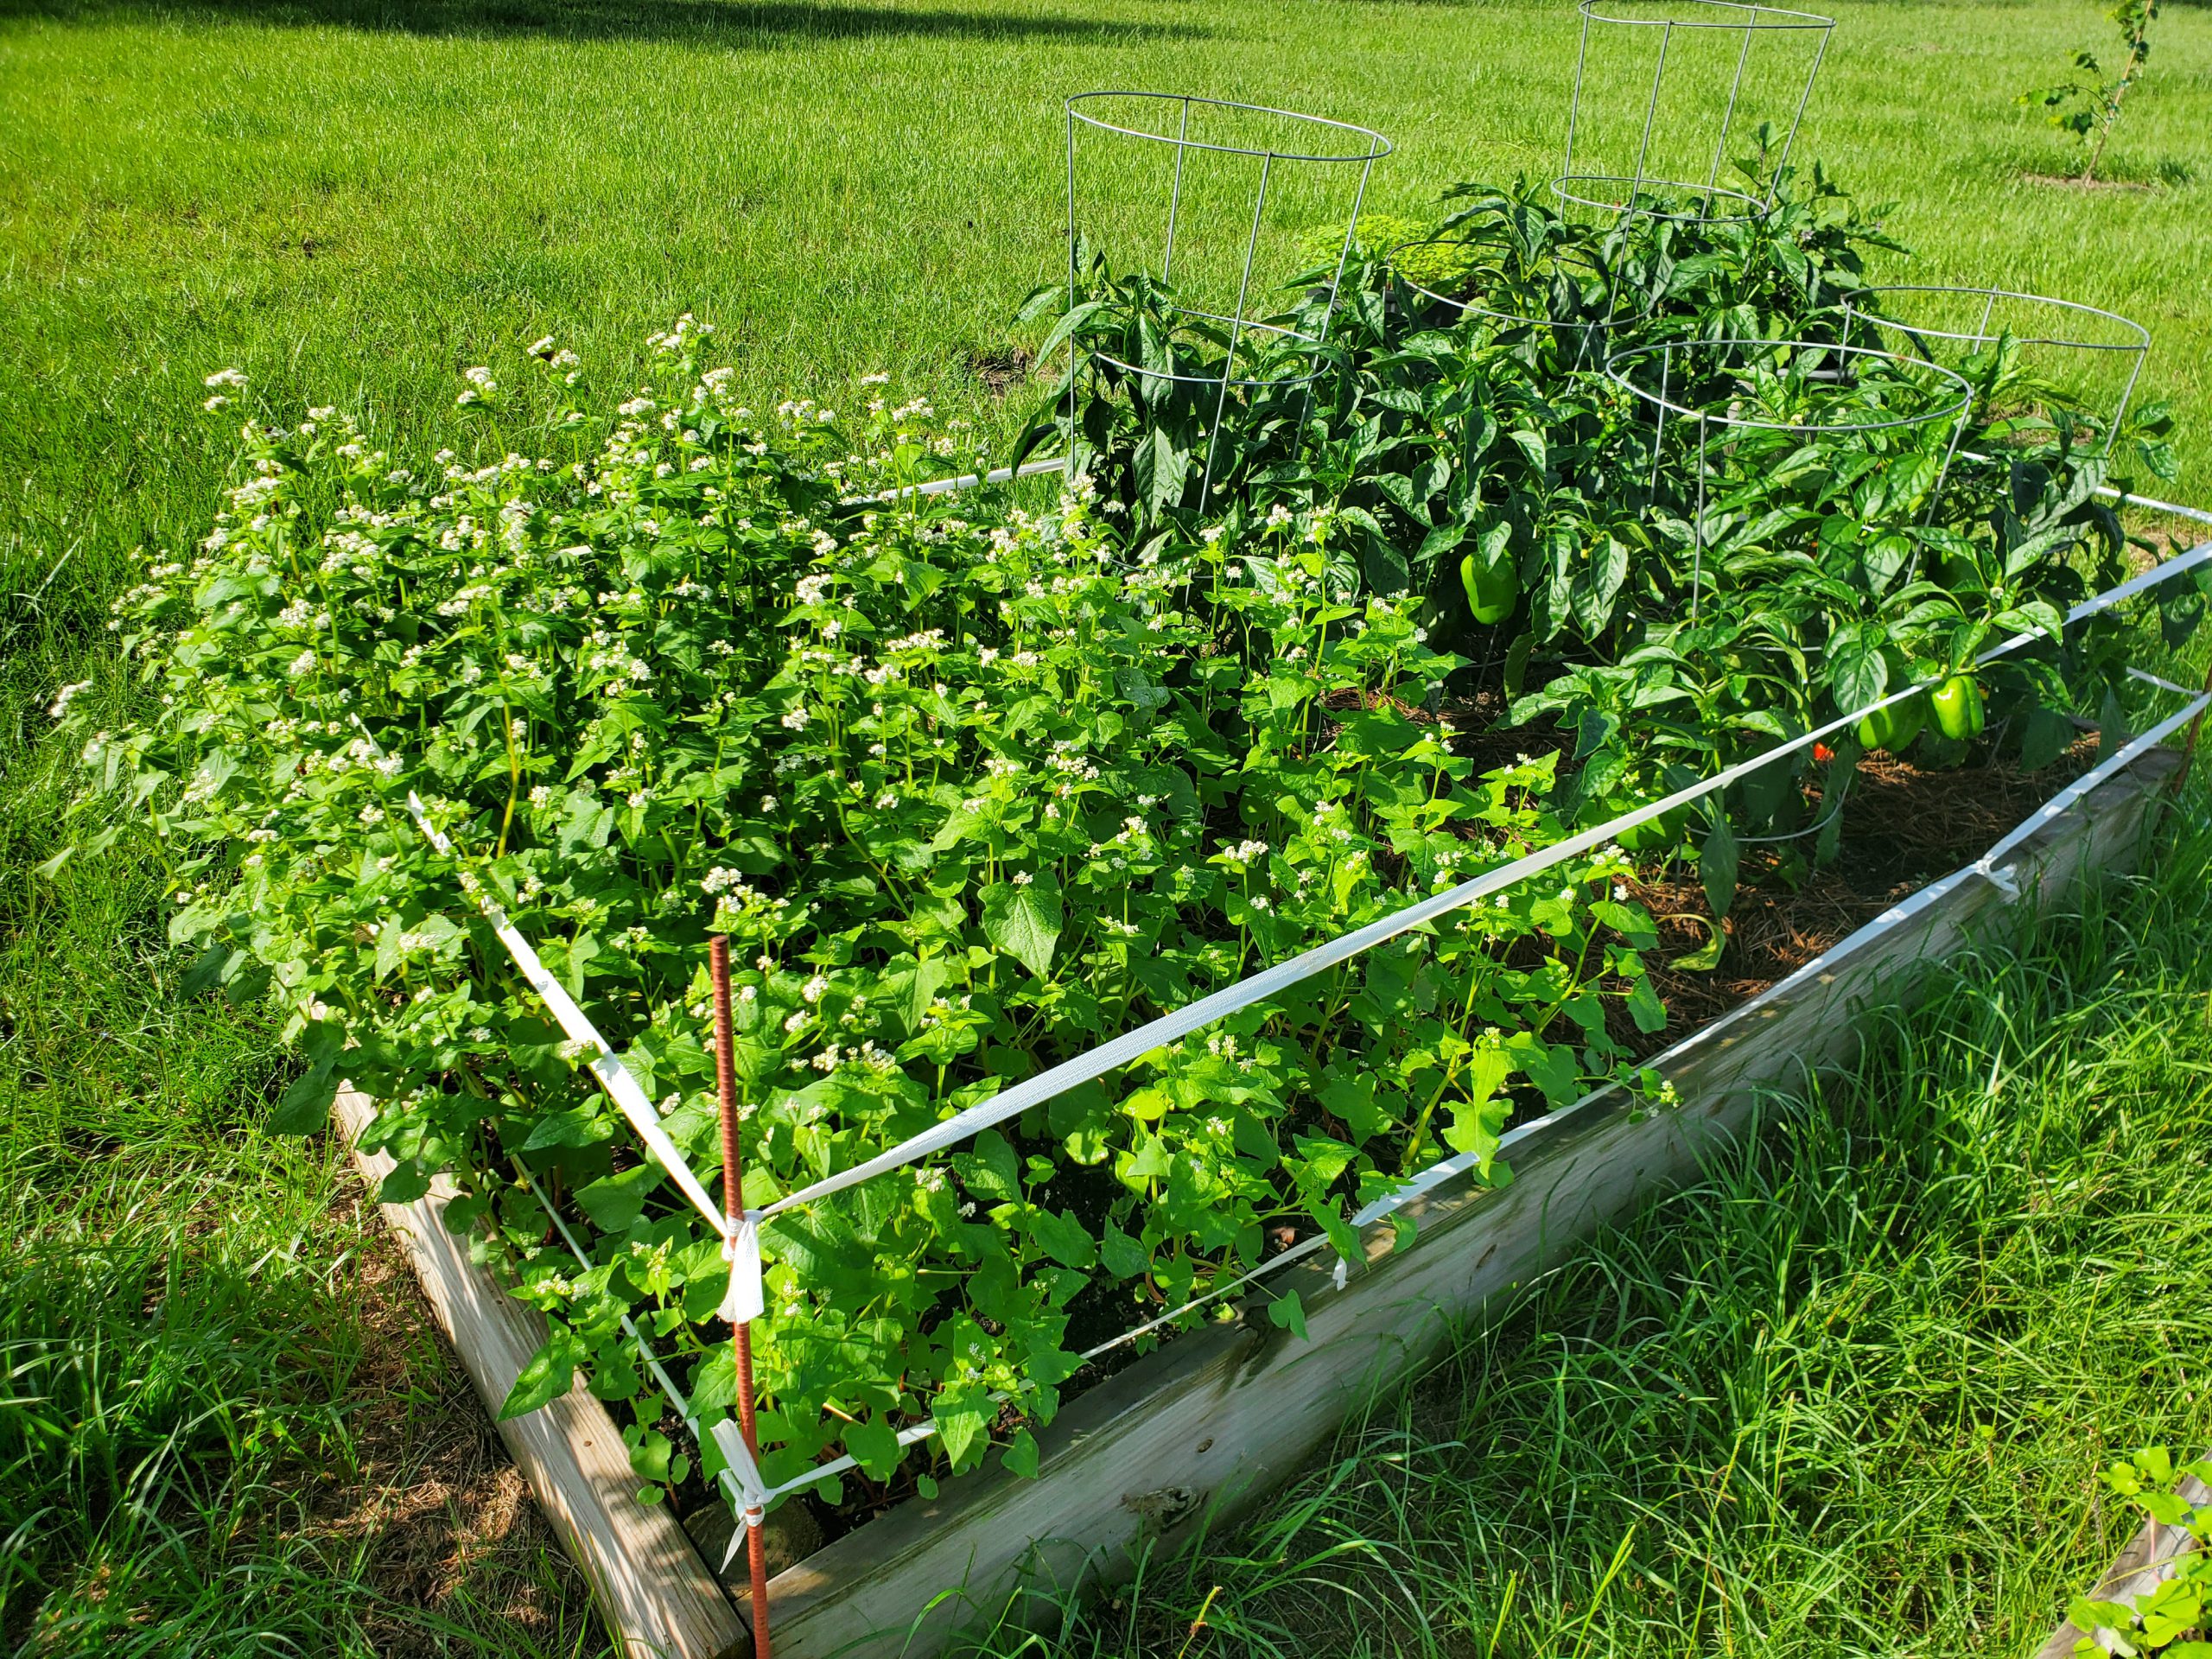
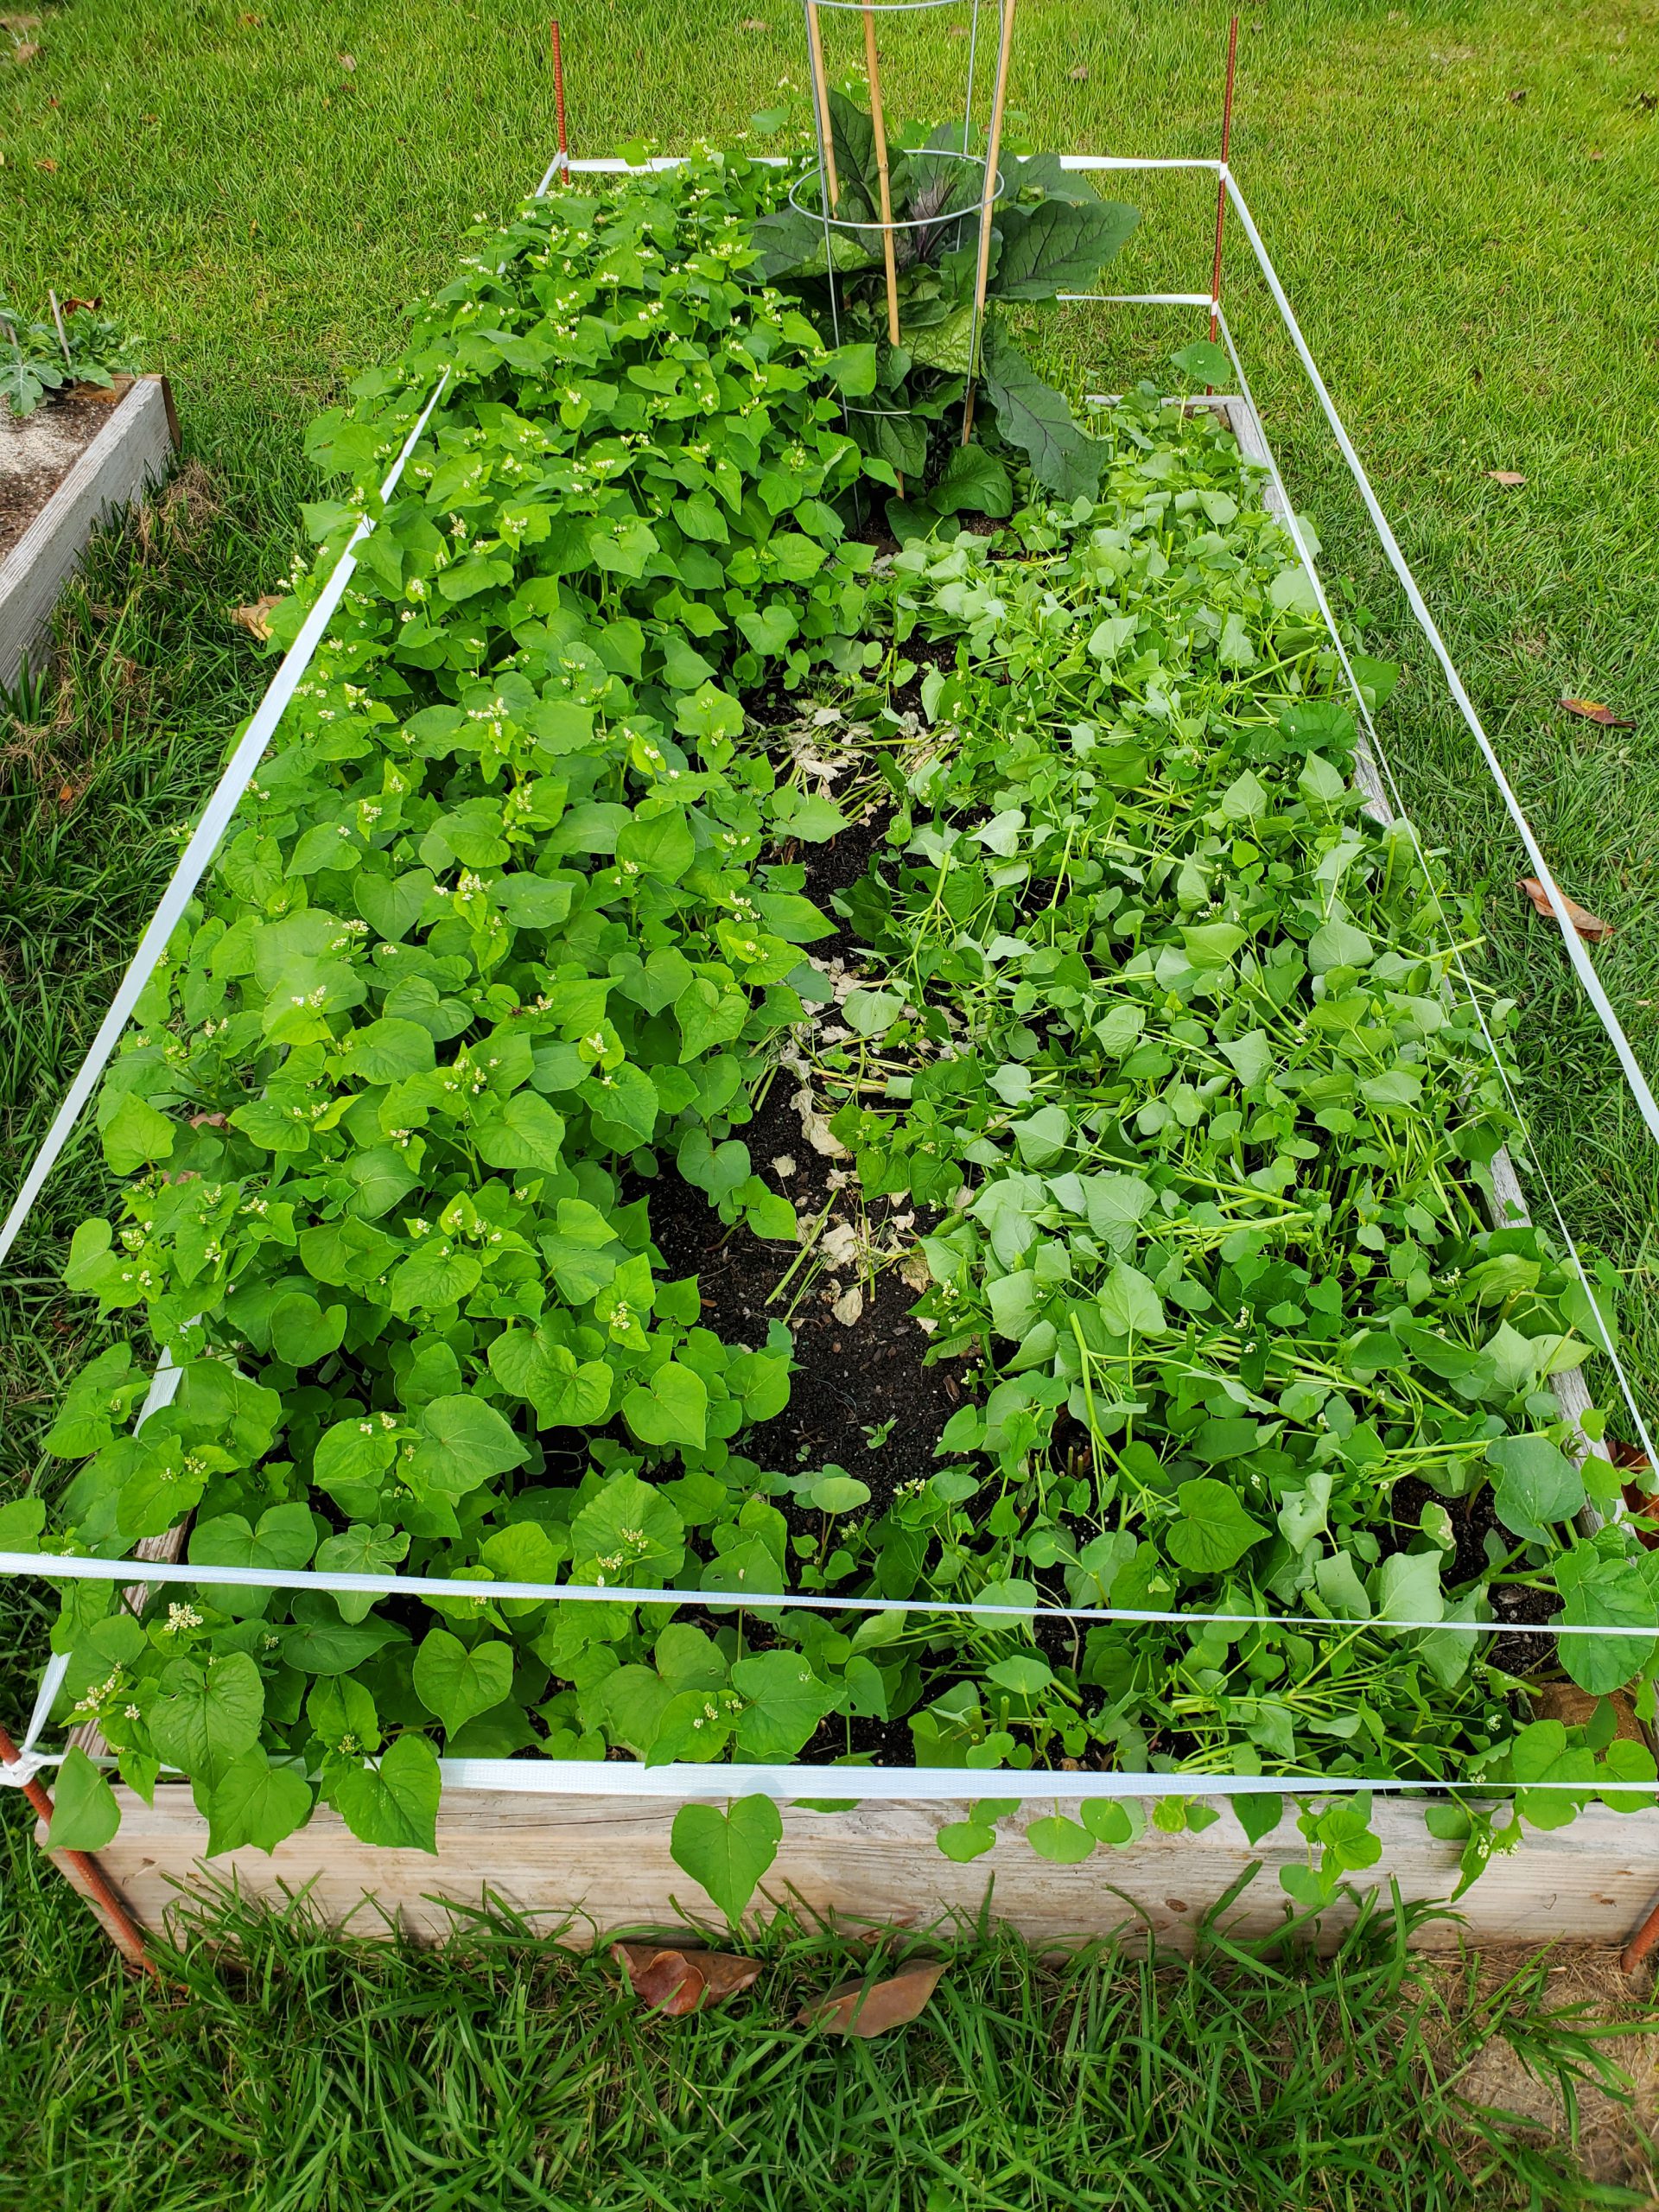
Buckwheat cover before termination (left) and after (right) interplanted with Eggplant. Photo courtesy Daniel Leonard, UF/IFAS Calhoun County Extension.
Now that I’ve convinced you of Buckwheat’s raised bed cover crop merits, let’s talk technical and learn how and when to grow it. Buckwheat seed is easily found and can be bought in nearly any quantity. I bought a one-pound bag online from Johnny’s Selected Seeds for my raised beds, but you can also purchase larger sizes up to 50 lb bags if you have a large area to cover. Buckwheat seed germinates quickly as soon as nights are warmer than 50 degrees F and can be cropped continuously until frost strikes in the fall. A general seeding rate of 2 or 3 lbs/1000 square feet (enough to cover about thirty 4’x8’ raised beds, it goes a long way!) will generate a thick cover. Simply extrapolate this out to 50-80 lbs/acre for larger garden sites. I scattered seeds over the top of my beds at the above rate and covered lightly with garden soil and obtained good results. Unlike other cover crops (I’m looking at you Crimson Clover) Buckwheat is very tolerant of imperfect planting depths. If you plant a little deep, it will generally still come up. A bonus, no additional fertilizer is required to grow a Buckwheat cover in the garden, the leftover nutrients from the previous vegetable crop will normally be sufficient!
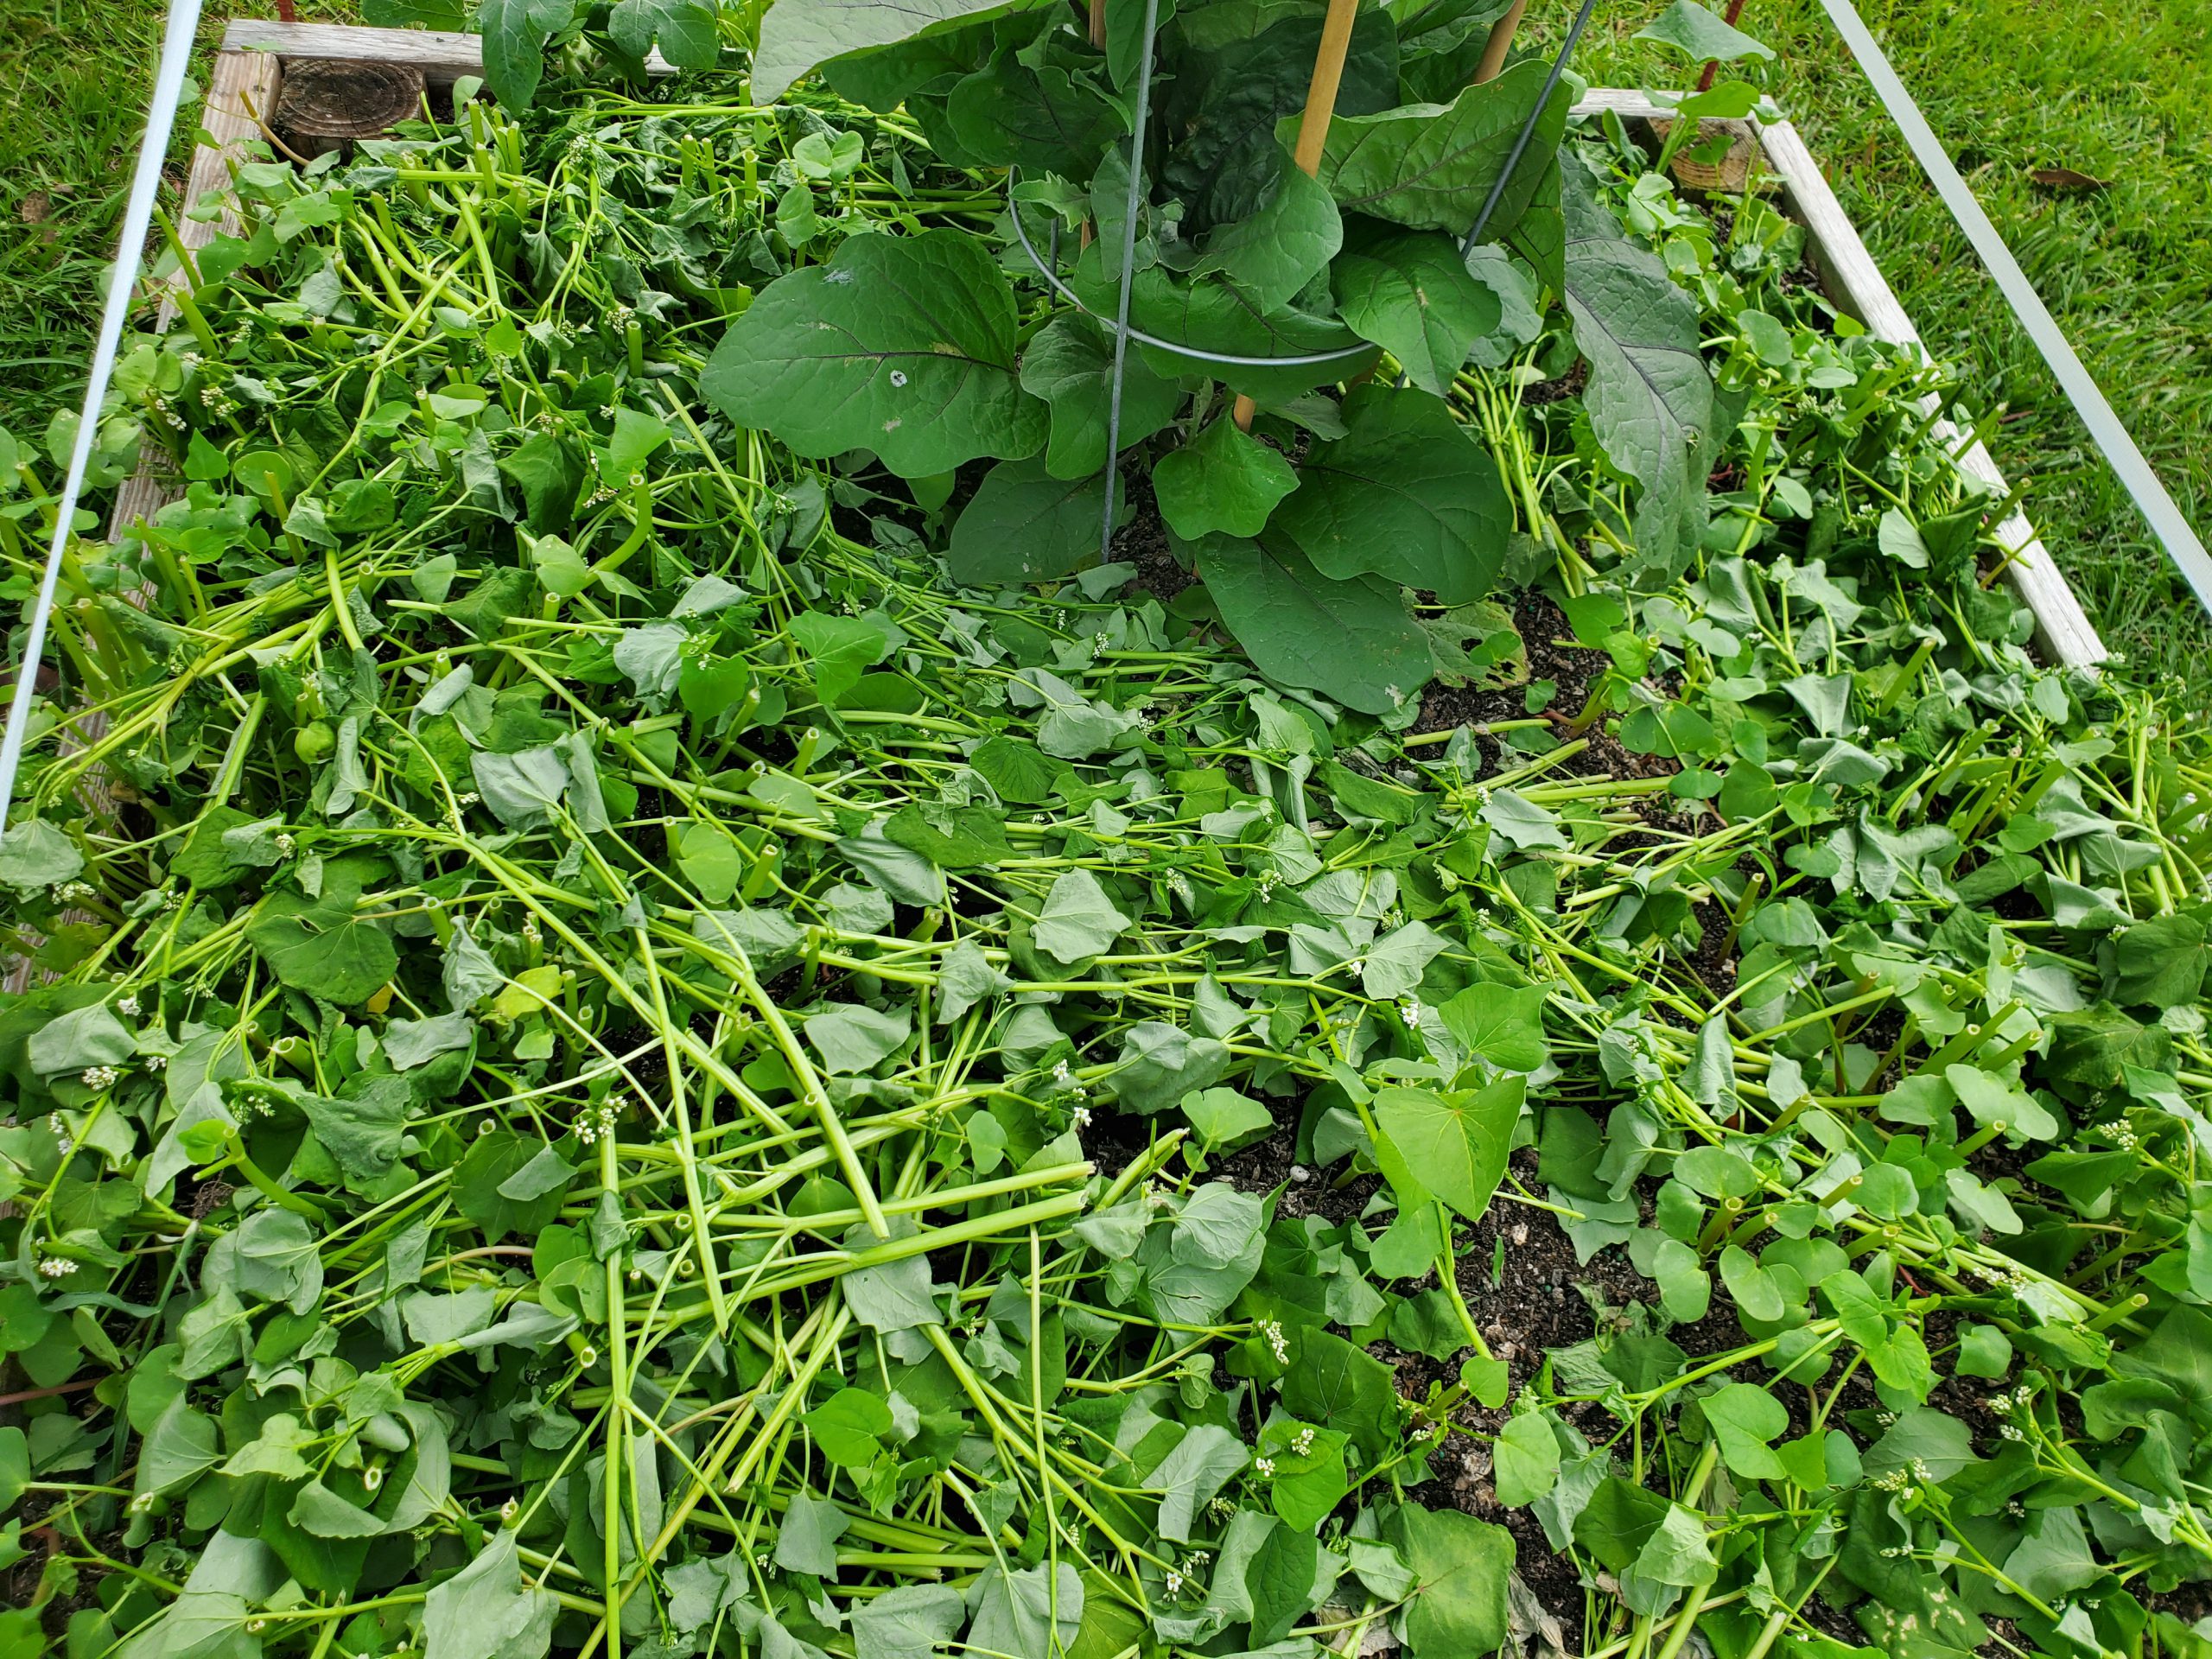
Buckwheat “mulch” after termination. Photo courtesy of Daniel Leonard, UF/IFAS Calhoun County Extension.
Past the usual cover crop benefits, the thing that makes Buckwheat stand out among its peers as a garden cover is its extremely rapid growth and short life span. From seed sowing to termination, a Buckwheat cover is only in the garden for 4-8 weeks, depending on what you want to use it for. After four weeks, you’ll have a quick, thick cover and subsequent mulch once terminated. After eight weeks or so, you’ll realize the plant’s full flowering and beneficial/pollinator insect attracting potential. This lends great flexibility as to when it can be planted. Have your winter greens quit on you but you’re not quite ready to set out tomatoes? Plant a quick Buckwheat cover! Yellow squash wilting in the heat of summer but it’s not quite time yet for the fall garden? Plant a Buckwheat cover and tend it the rest of the summer! Followed spacing guidelines and only planted three Eggplant transplants in a 4’x8’ raised bed and have lots of open space for weeds to grow until the Eggplant fills in? Plant a Buckwheat cover and terminate before it begins to compete with the Eggplant!
If a soil building, weed suppressing, beneficial insect attracting, gorgeous cover crop for those fallow garden spots sounds like something you might like, plant a little Buckwheat! For more information on Buckwheat, cover crops, or any other gardening topic, contact your local UF/IFAS County Extension Office. Happy Gardening!
Earlier this summer I talked about getting to know your weeds, so they’ll be easier to control. If you missed that article you can review it here “Why Can’t I Kill Weeds?”
Today we will look at the types of herbicides available so your selection will fit your situation.
Understand your herbicide options. Picking out the appropriate herbicide can be overwhelming. The options seem unlimited when you are standing in the store looking at aisles of containers. By preparing yourself before you shop you can save time and increase your chances of making the most effective selection. Here are some herbicide basics:
Label interpretation. The pesticide label is a multipage document that describes ingredients, how a pesticide works, application instructions, safety requirements, and other important information for the user. Before applying any pesticide (yes, herbicides are pesticides!) you should read the entire label. Pulling the label off the package in the store may be frowned upon and the print is very small. For this reason, I would recommend looking up a few options before you go shopping and reading the labels online. This allows you to take your time to be sure you understand if it is the appropriate product and you can make your shopping list for personal protective and application equipment before you leave the house. Three important things to look for when selecting your product are active ingredient, labeled site (site includes the location such as residential landscape vs. agricultural crops and the plants it is safe to use on), and targeted pest.
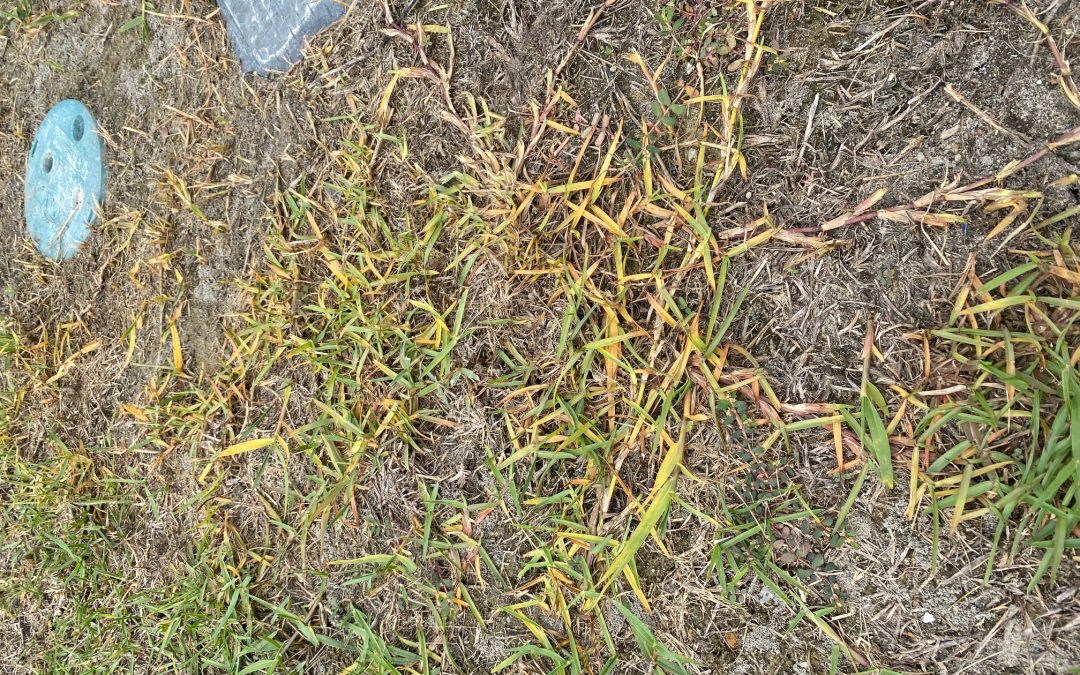
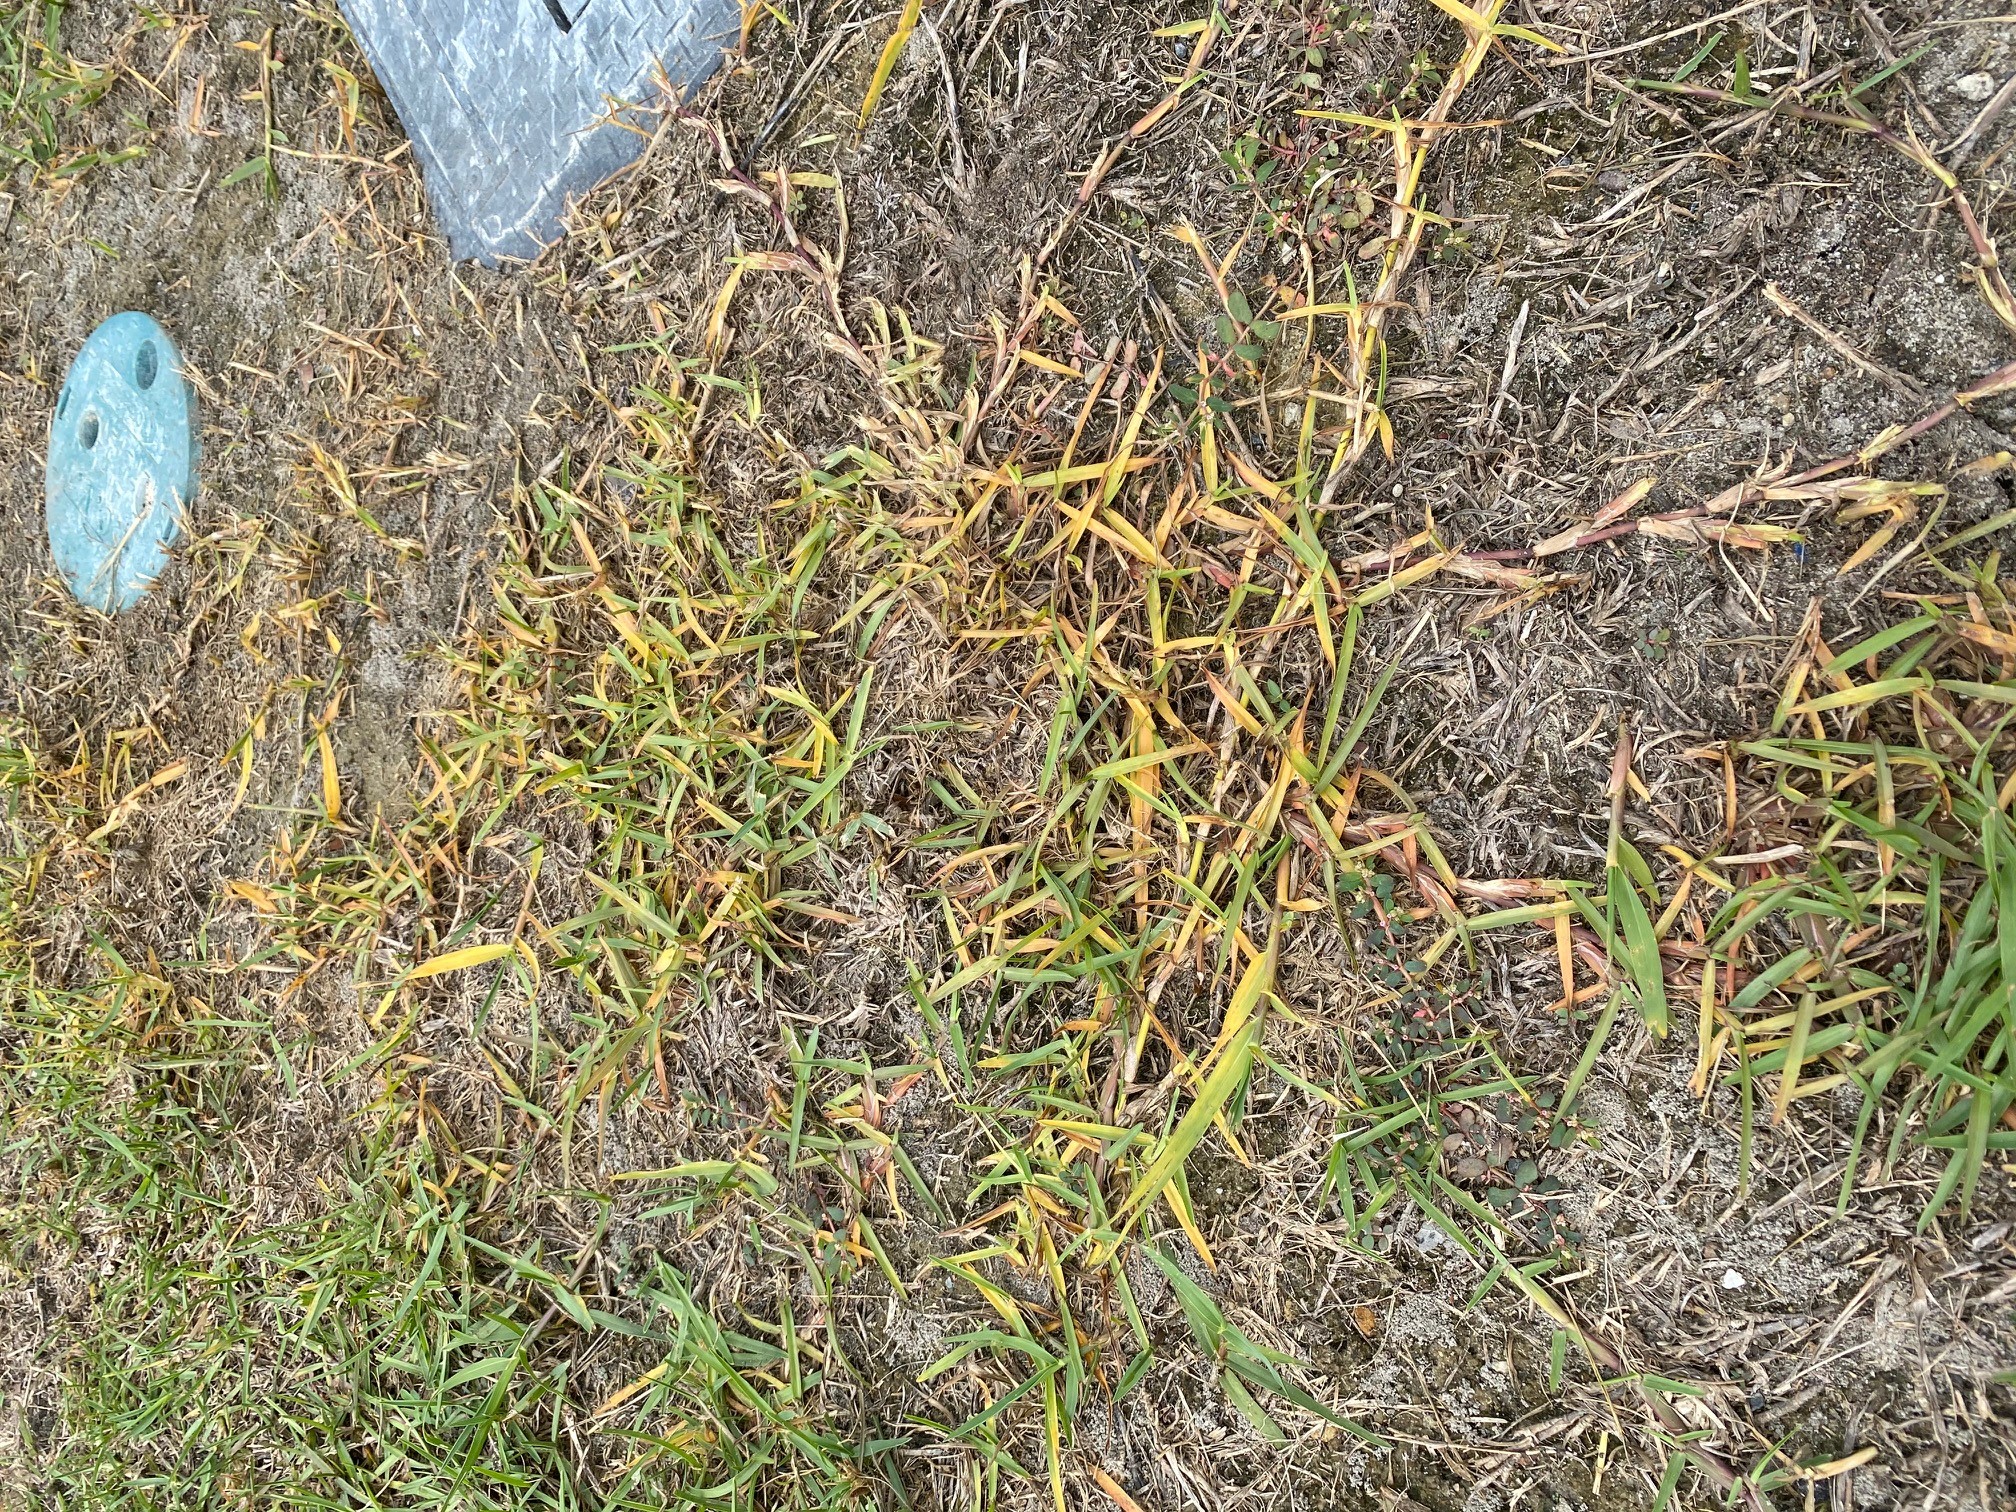
Non-selective, systemic herbicide damage on grass. Photo: J_McConnell, UF/IFAS
Pre-emergent herbicides. Pre-emergent herbicides provide control when applied BEFORE seed germination of your target weed. They do not prevent germination, rather they prevent emergence of shoots and roots essentially inhibiting normal plant growth which eventually results in plant death. It is important to have your product in place during the correct window of time. Typically, 1-2 weeks before germination of your target weed is ideal.
For warm season annual weeds (crabgrass, goosegrass, sandspur, and spurge are examples) apply pre-emergent herbicides when day temperatures in early spring reach 65-70°F for 4-5 consecutive days. This may be mid-February or as early as January.
For winter annual weeds (henbit, black medic, geranium, and chickweed are examples) watch for night temperatures in the Fall to reach 55-60°F for several nights in a row to indicate proper application timing.
Some products are selective to plant types such as grasses, sedges or broadleaf weeds. Other products are more broad-spectrum and are effective on multiple weed types.
Pre-emergent herbicide should not be used if you intend to plant seed – it will affect your desired plant in addition to the weed! There may also be effects on newly planted lawns or plants, so be sure to read the label closely to avoid damage to non-target plants.
Post-emergent herbicides. These products are used on weeds that have already emerged, regardless of life cycle (annual, perennial, biennial). This type of herbicide will be applied directly to the weed you are trying to kill. There are a few categories within this group.
Selective or non-selective.
Selective herbicides work on particular categories of plants: broadleaf, sedge, grass, or woody plant.
Non-selective herbicides can kill any type of plant regardless of category.
Contact or systemic. Contact herbicides kill the plant tissue it comes into contact with and does not translocate to the rest of the plant.
Systemic herbicides are translocated throughout the plant to affect more than just the place of absorption. These are ideal for perennial weeds that would regenerate from roots, bulbs, or tubers if the top is damaged or killed.
Effective weed management requires some preparation and research for the best outcome. For help with weed identification and control recommendations, contact your local UF/IFAS Extension Office.
In late July, Larry Kinsolving, a Jackson County Master Gardener, noticed an insect pest in the beautiful, large azalea bushes that frame the front entrance to his home in Marianna, Florida. The azalea caterpillar is found in Florida from late summer to early fall on azaleas and other plants including blueberries. If left undetected, the caterpillars can defoliate (eat up the leaves) of much of a plant. In general, caterpillars seldom kill the plants they feed on, but the stress caused by defoliation can reduce flowering or fruiting the following spring, if it becomes a serious problem. Larry shows you how easy it is to find and remove this pest from your azalea bushes. While the caterpillar appears hairy, it is harmless to humans and can be handled without concern.
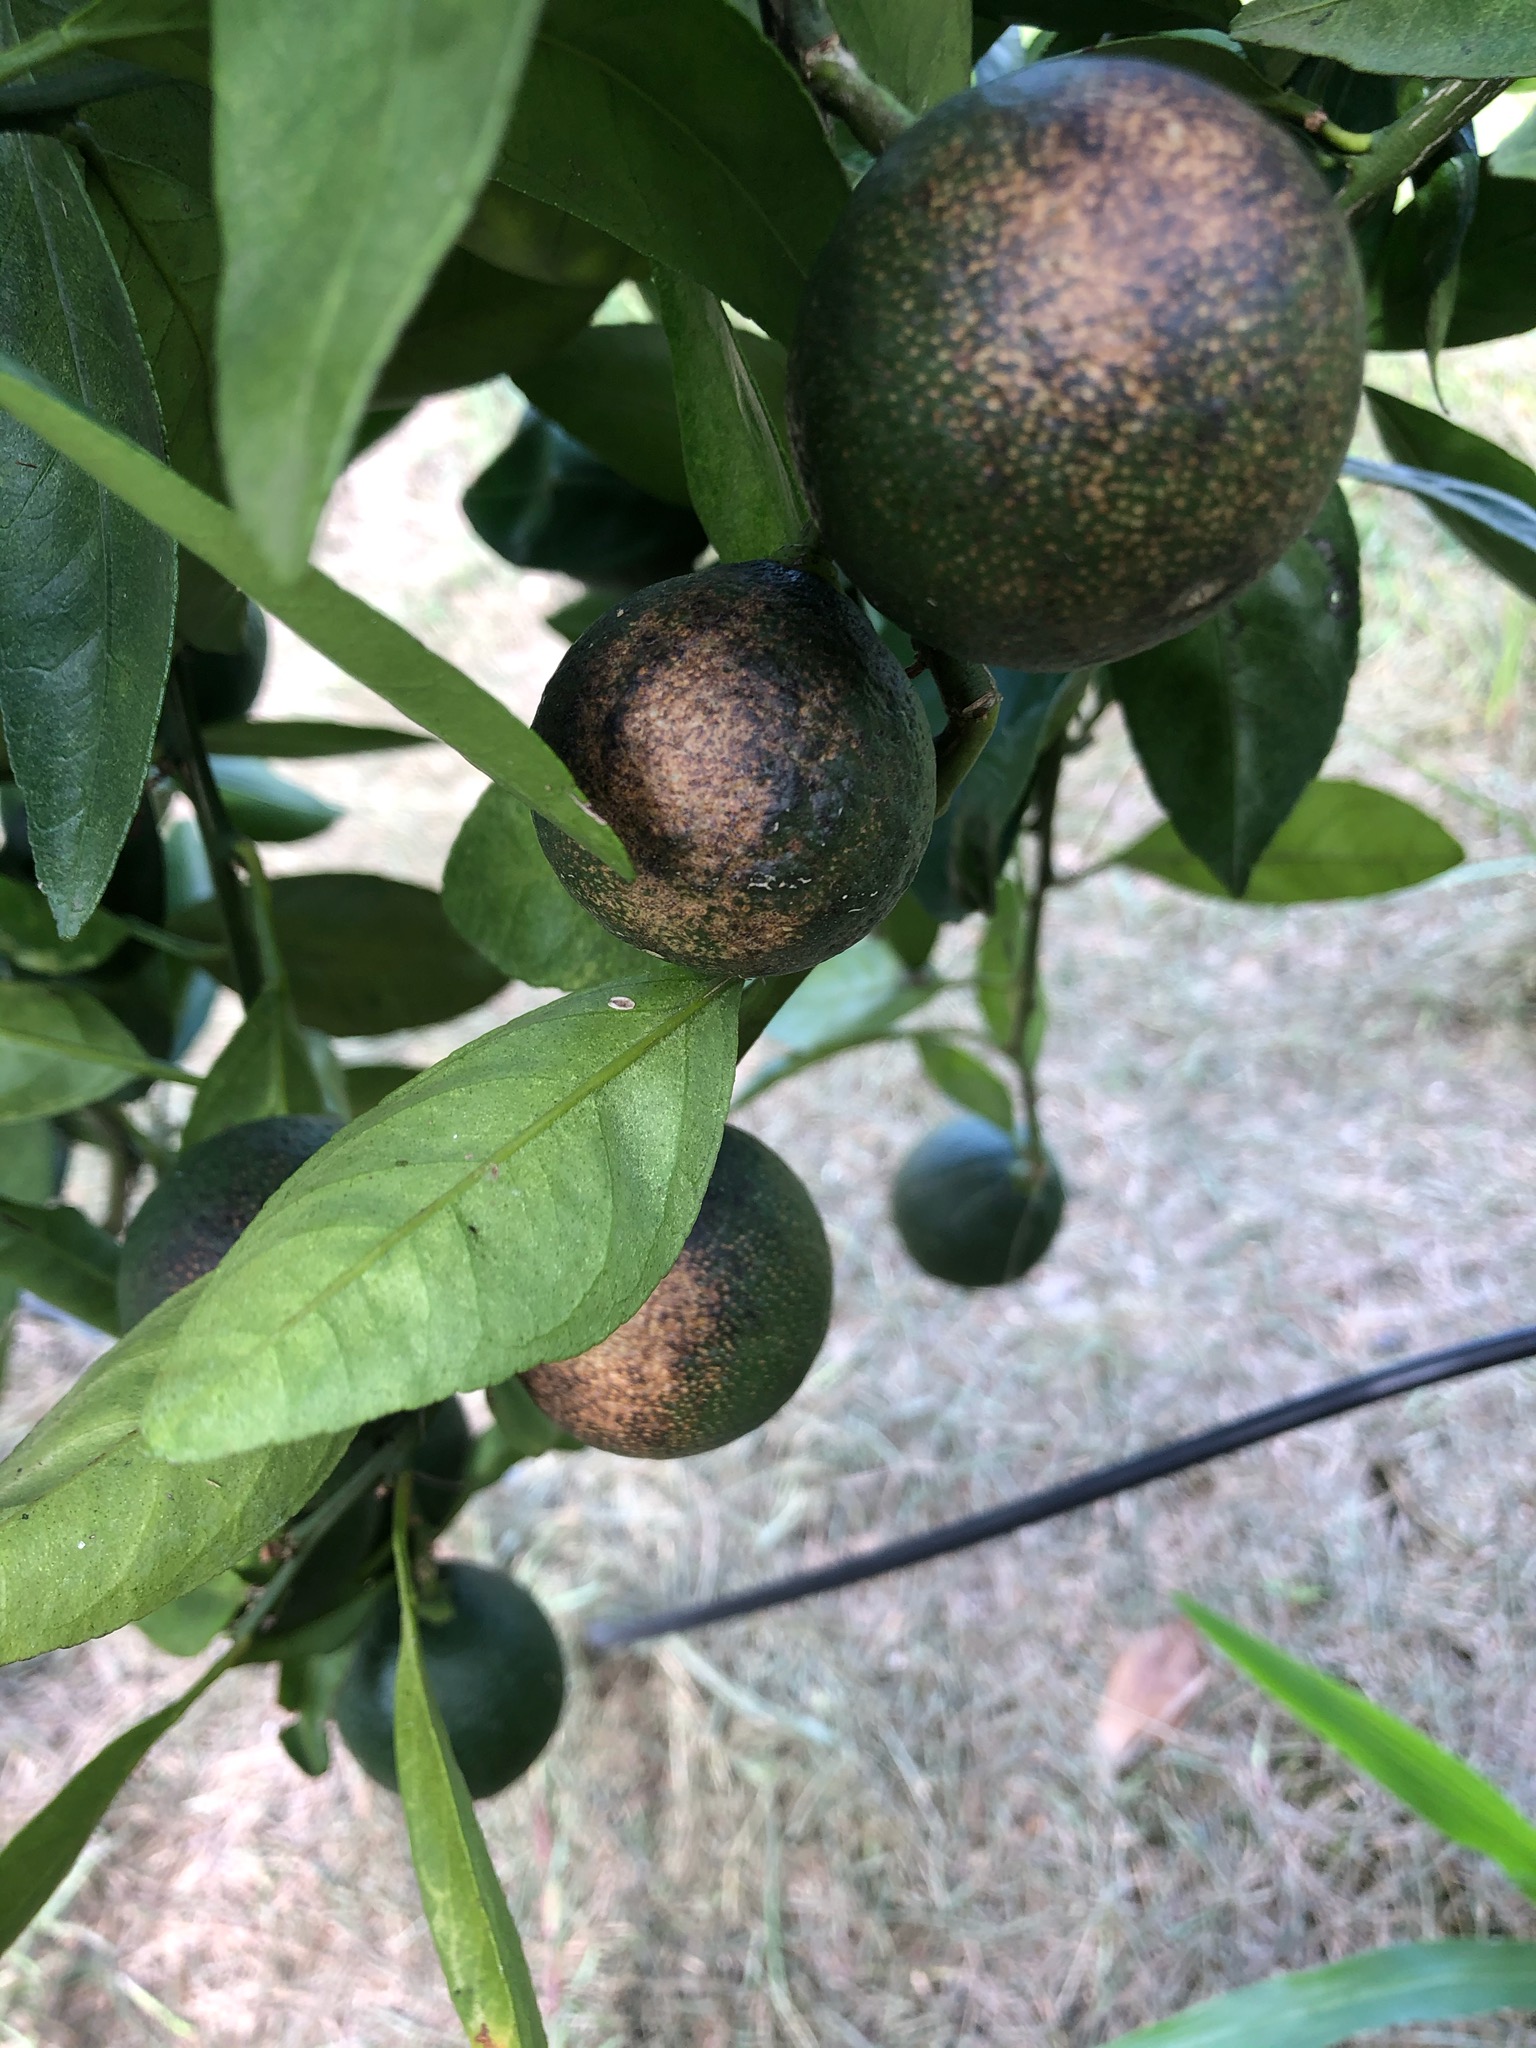
In recent years, not a summer has gone by in which I did not see citrus rust mite (CRM) damage in a garden. I thought this year would be the first. Unfortunately, recently I saw my first rust mite damage of the year.
Unlike the myriad of pests that have been recently introduced into Florida from abroad, the citrus rust mite (Phyllocoptruta oleivora) has been documented as present in Florida since the late 1800s. Along with its companion, pink citrus rust mite (Aculops pelekassi) It can be a major summer pest for satsuma mandarins grown in the Florida Panhandle gardens.
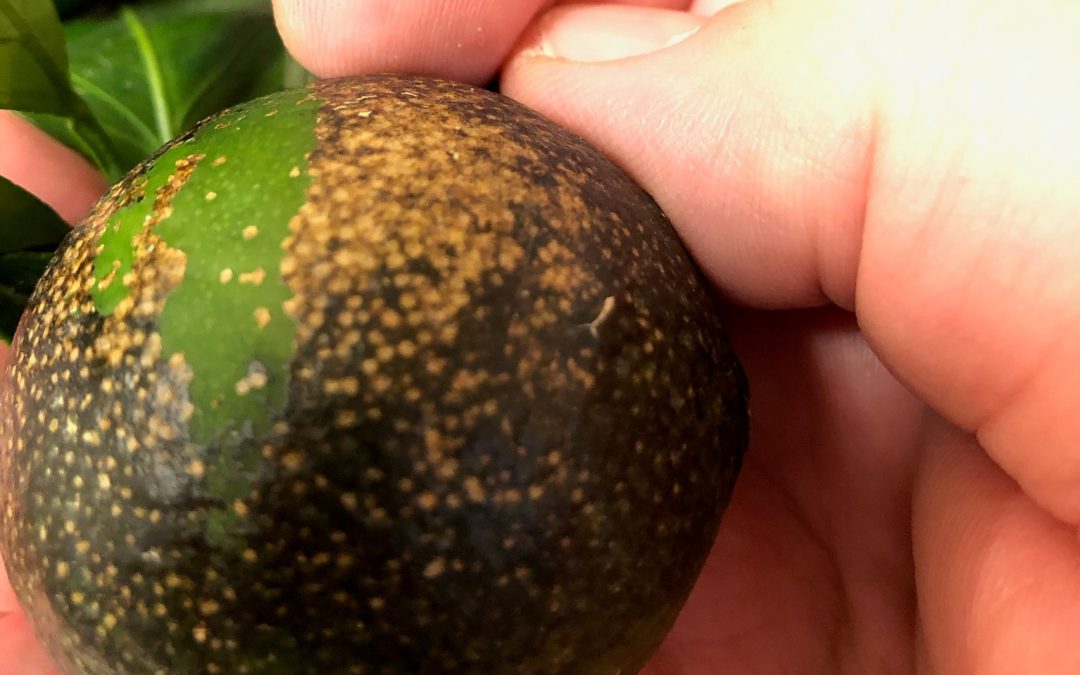
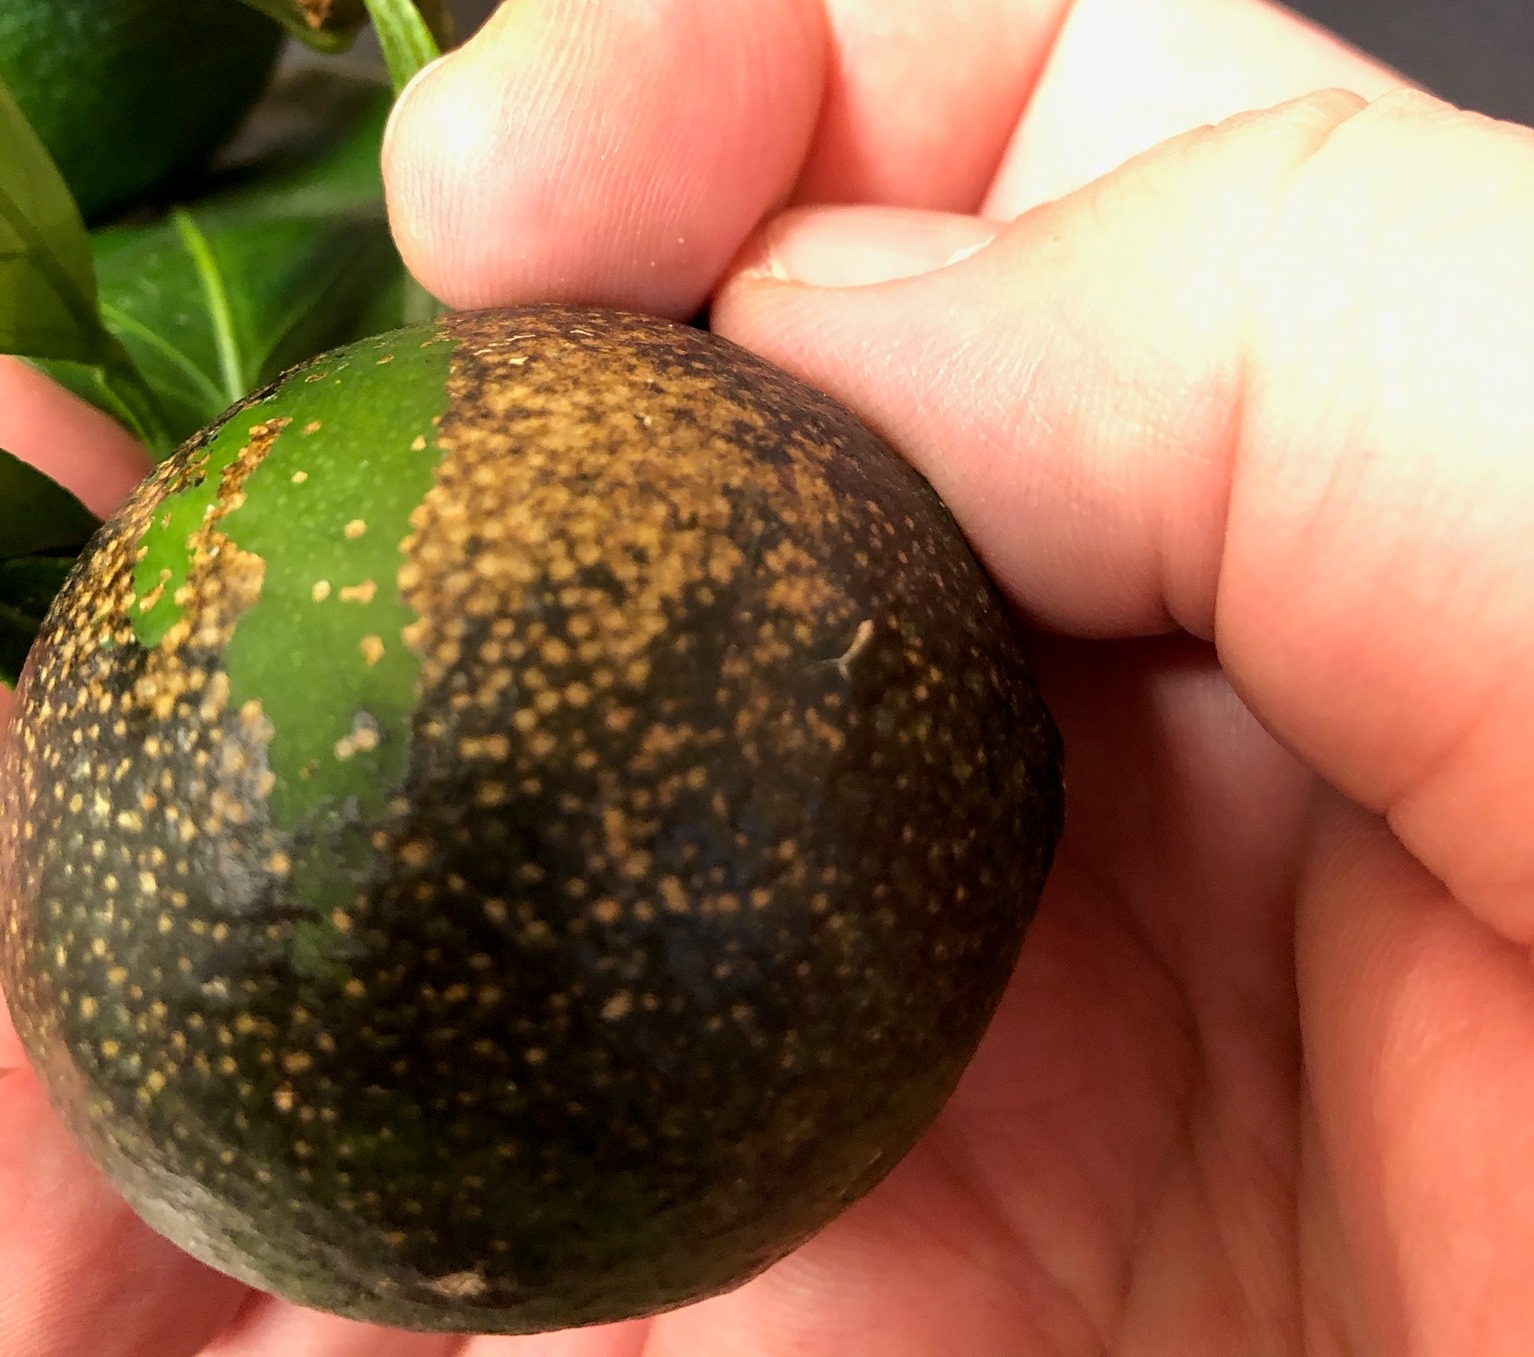
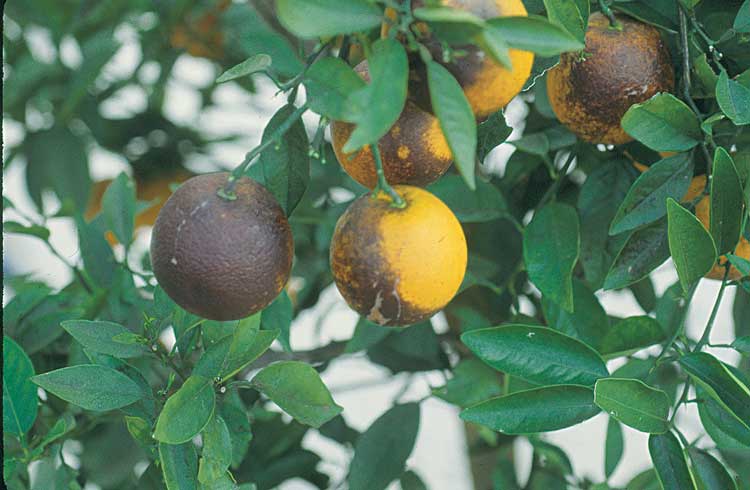
Citrus Rust Mite (CRM) damage manifests itself on fruit in two ways, “sharkskin” and “bronzing“. Sharkskin is caused when mites have fed on developing fruit, and destroyed the top epidermal layer. As the fruit grows, the epidermal layer breaks and as the fruit heals, the brown “sharkskin” look develops. Bronzing occurs when rust mites feed on fruit that’s nearer to mature size. Since the skin is not fractured by growth, the fruits develop a polished bronze look. In both cases, the interior of the fruit may remain undamaged. However, extreme damage can cases cause fruit drop and reduced fruit size. Regardless of the condition of the interior, damaged fruit is not aesthetically pleasing, but fine for slicing or juicing.
“Sharkskin Damage” to fruit caused by past feeding by the Citrus Rust Mite. Image Credit, Matthew Orwat
If a CRM population is present, they will begin increasing on fresh spring new growth in late April, and usually reach peak levels in June and July. By August the damage has often already been done, but is first noticed due to the increased growth of the fruit. Depending upon weather conditions, CRM can have a resurgence in October and November, just as Satsuma and other citrus is getting ready to be harvested, so careful monitoring is necessary. For more information, check out this publication: Guide to Citrus Rust Mite Identification.
Sun spot resulting from where citrus rust mite avoids feeding on most sun exposed portion of the fruit. Image and Caption courtesy of EDIs publication HS-806
If control of CRM is warranted, there are several miticides available for use, but it is not advisable for home gardeners to use these on their citrus plants since they will also kill beneficial insects. Horticultural oil is an alternative to miticide, which is less damaging to beneficial insects. Several brands of horticultural oil are formulated to smother CRM, but care must be taken to not apply horticultural oil when daytime temperatures will reach 94 degrees Fahrenheit. Application of oils at times when temperatures are at this level or higher will result in leaf and fruit damage.
Although Citrus Rust Mite (CRM) has the potential to be aesthetically unsightly on citrus fruit in the Florida Panhandle, strategies of monitoring and treatment in homeowner citrus production have been successful in mitigating their damage.
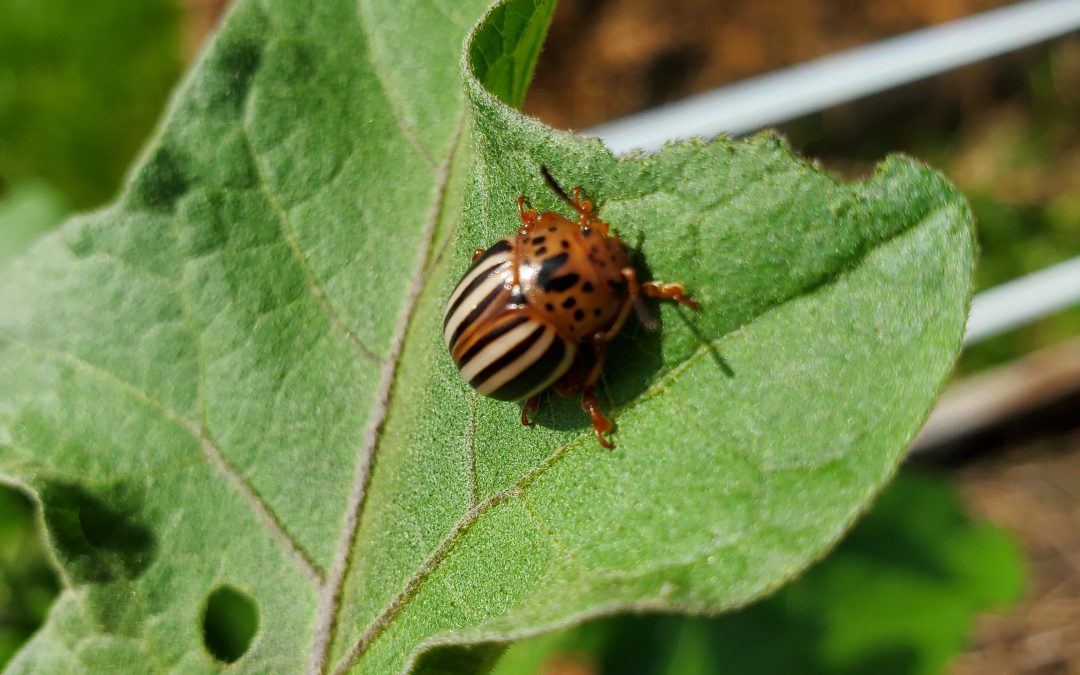
August is awful. Its heat makes one miss the relative cool of July. Its rain is so sporadic that it invokes nostalgia for the rainy afternoons of early summer. But if there is a silver lining in August for gardeners, it is the simplicity that it brings. The weaker spring crops, tomatoes, squash and the rest, are all gone now, destroyed or rendered fruitless by insects, disease, and heat. This leaves only the hardened, usually pest and disease-free survivors Okra, Pepper, Sweet Potato and Eggplant. I say usually because, this year, my eggplant bed is under attack by a new-to-me pest, the False Potato Beetle!
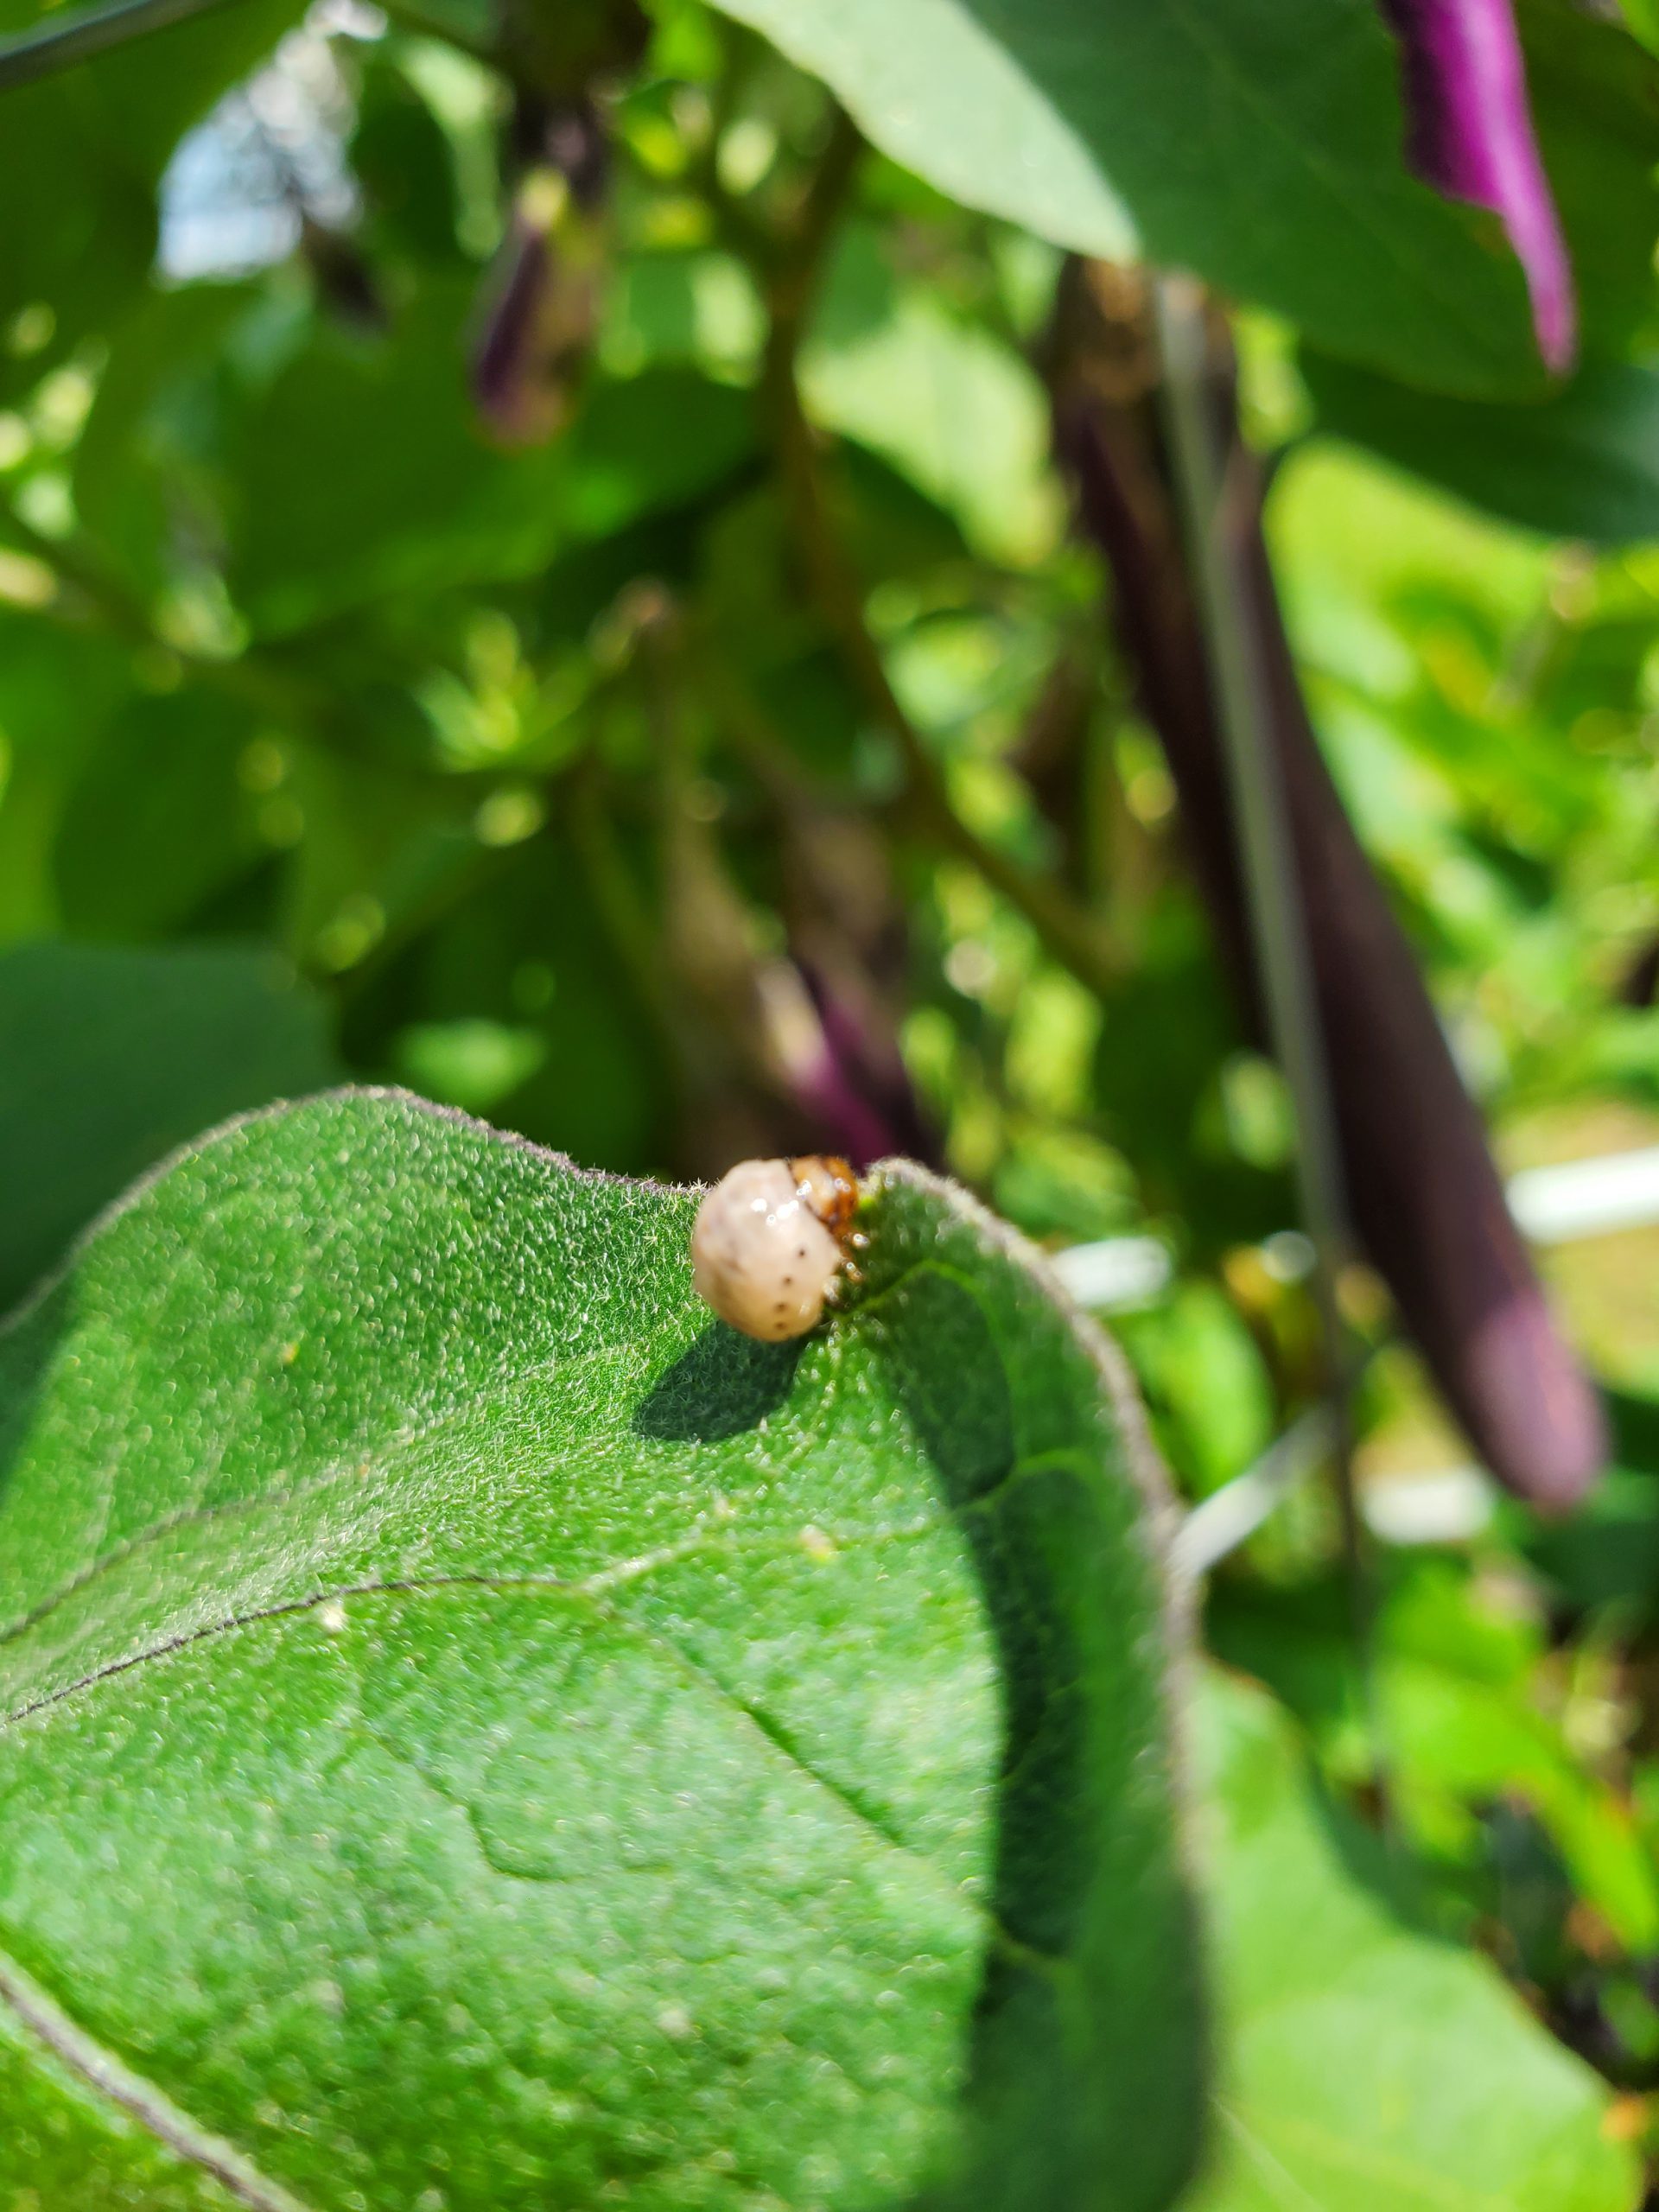
I’ve dealt with Colorado Potato Beetles (CPB) before. Those orangish, black-striped terrors often attack my spring potato crops and occasionally bother early tomatoes. However, I’ve never seen them in late summer on Eggplant. This raised suspicion. Also, I spotted unusual, round, whitish purple creatures munching on leaves from the same plants; these appeared to be the larval stage of the unidentified beetle. A little digging led me to identify these garden pests as the lesser known, lookalike cousin of CPB, the False Potato Beetle.
False Potato Beetle munching on an Eggplant leaf in the author’s garden.
False Potato Beetle (FPB) looks nearly identical to its cousin in the adult stage. They are similarly shaped and colored, though a close look reveals subtle differences between species. While both have yellowish-orange heads and pale-yellow backs with dark stripes, the FPB’s back is slightly lighter hued, more of a whitish, cream color. Also, the CPB’s underside and legs are a very dark orange to brown, with the False Potato Beetle having lighter colored legs and underside. If you’re saying, “These old eyes will never be able to tell the difference, County Agent. Cream and light-yellow look the same to me.”, I get it. Fortunately for those of us with poor vision, the larval stage (babies) of the two beetles looks very different and is the key to correct ID! FPB larvae are larger and have a whitish coloration. CPB larvae, in contrast, are a similar burnt orange color to the adult beetle. I promise, the difference is very distinguishable!
False Potato Beetle is considered a minor garden and agronomic pest as they typically only bother Eggplant, and they don’t usually destroy entire plants. However, if you get a FPB outbreak in your Eggplant garden, they can still be pretty destructive. These beetles feed in the same manner as caterpillar pests, chewing away entire sections of leaves and stems. Unchecked infestations can defoliate entire sections of plants. So, if you find these little beetles eating away at your eggplant garden, what can you do?
False Potato Beetle larvae. Photo courtesy of the author.
First, if you scout regularly, you’ll notice the beetles and their larvae in relatively small numbers before outbreaks become widespread. I had pretty good success this year just catching infestations early and picking off the beetles I saw and squishing them. Continue scouting and squishing for a few days and pretty soon, the population is reduced to a manageable level. However, if squishing makes you squeamish, you also have some common pesticide options at your disposal. I normally encourage clients to start their chemical pest control strategy with “softer” products like Pyganic, a pyrethrin make from an extract from the Chrysanthemum plant. Pyganic works great but is a little harder to find; you may have to order online or ask your local retailer if they can get it for you. If you are unable to find Pyganic or it doesn’t perform for you, the old standby products with carbaryl or pyrethroids (Sevin, Ortho Bug-B-Gone, and others) also work well.
False Potato Beetle can be a late summer garden pain, but with regular scouting, proper insect ID, lots of squishing, and maybe a timely pesticide application or two, you should be able to continue to harvest eggplant deep into fall! If you have FPB in your garden or have another horticultural question, give your local UF/IFAS County Extension office a call! Happy Gardening!
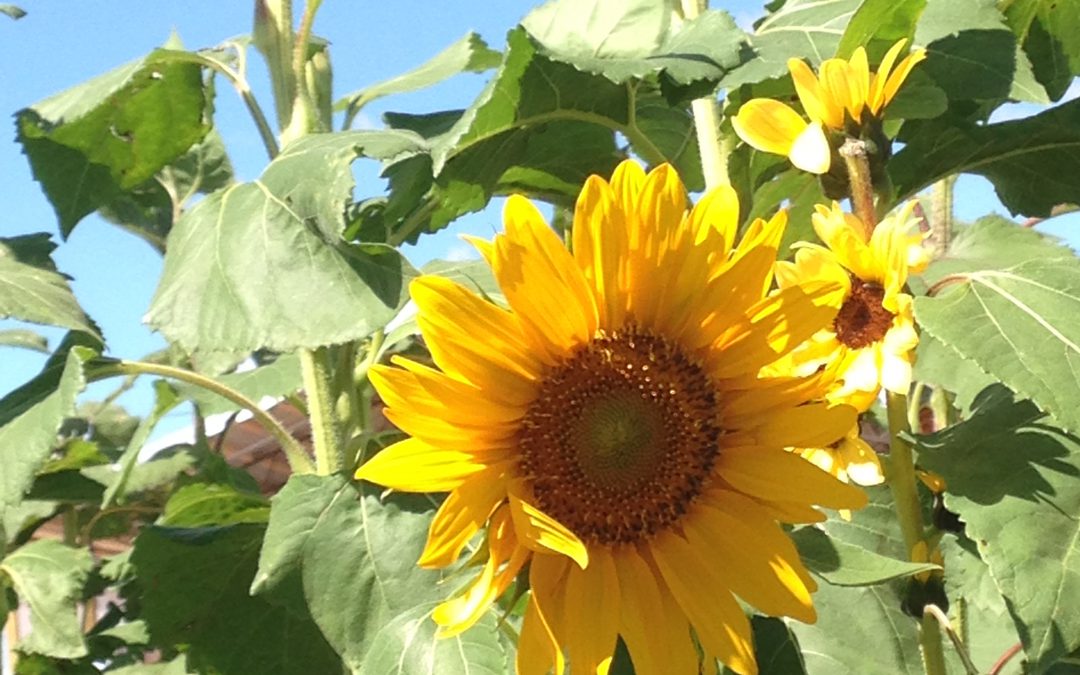
Veteran Master Gardener, Les Furr shares an idea he and his wife had to hide an ugly debris pile following Hurricane Michael. He planted a temporary sunflower screen to block something ugly with something beautiful. Sunflowers can be planted along a road or fence, and provide a lovely addition to your property. The seed can be saved and frozen to provide beauty to your property year after year.