by Beth Bolles | Aug 7, 2019
We are always on the lookout for an attractive plant for our landscape. At the nursery, some plants have a more difficult time gaining our attention. They may not be as showy, possessing neither colorful flowers nor bold foliage. In these cases, we could be missing out on low maintenance plant that offers its own form of beauty in the right landscape spot.
One plant that I love is the Japanese plum yew (Cephalotaxus harringtonia), especially the spreading form ‘Prostrata’. In the nursery container, this plant is nothing special but once established in the landscape it performs well. The conifer type leaves are an attractive dark green and the ‘Prostrata’ selection is low growing to about 2 to 3 feet. An advantage too is that growth is slow so it won’t take over or require routine pruning.
Japanese plum yews grow best in partial shade and once established will be fine with rainfall. For a shadier side of the home, the spreading plum yew has a place as an evergreen foundation plant too.
Japanese plum yew in a shaded garden. Photo by Beth Bolles, UF IFAS Extension Escambia County
If the ‘Prostrata’ selection is too low growing for you, consider the ‘Fastigiata’ cultivar that will grow upright to about 8 feet with a 5 foot spread.
A year old planting of upright Japanese plum yew in filtered light. Photo by Beth Bolles, UF IFAS Extension Escambia County
by Matt Lollar | Aug 1, 2019
Large patch Rhizoctonia solani (known as brown patch in cool season grasses) is a common disease of many turfgrass species. It usually occurs during the cooler months from October through May when temperatures are below 80 degrees Fahrenheit. However, signs and symptoms of large patch and other Rhizoctonia diseases can be observed throughout the summer. Less common Rhizoctonia species that occur during the summer months are Rhizoctoni zeae and Rhizoctonia oryzae. Extended periods of turf wetness from excessive rainfall or overwatering provide ideal conditions for the disease to develop and spread.
Rhizoctonia in a zoysiagrass lawn. Photo Credit: Matt Lollar, University of Florida/IFAS Extension – Santa Rosa County
This summer in Santa Rosa County, Rhizoctonia has been positively diagnosed in both St. Augustinegrass and zoysiagrass lawns and suspected in a number of centipedegrass lawns. The disease usually starts as small, yellow patches (about a foot in diameter) that turn reddish brown, brown, or straw colored as the leaves start to die. Patches often expand to several feet in diameter. It is common to see rings of yellow or brown turf with otherwise healthy turf in the center. The fungus infects portions of the blades closest to the soil, eventually killing the entire leaf. Grass blades can easily be pulled off their stems, but roots are not affected by the disease.
Rhizoctonia in a St. Augustinegrass lawn. Photo Credit: John Atkins, University of Florida/IFAS Extension – Santa Rosa County
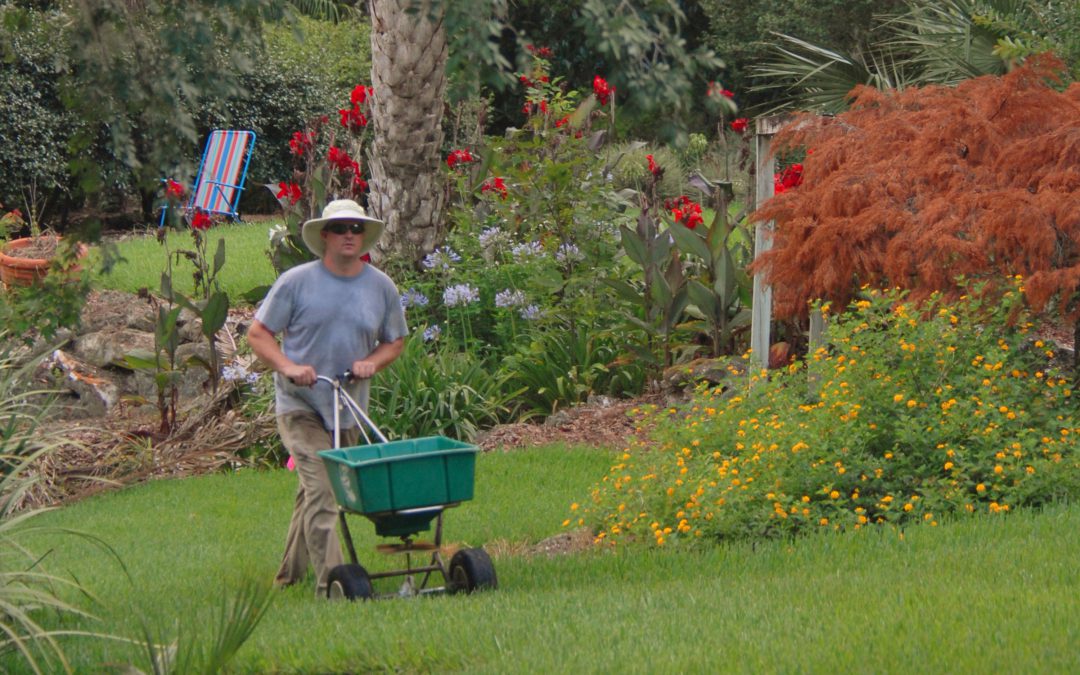
Overwatering and excessive fertilization can both contribute to the development of Rhizoctonia disease. Improper timing of fertilizer application can also promote disease development. In the Florida Panhandle, turfgrass is actively growing from April to October. Slow-release fertilizers are recommended to allow for a more even distribution of nutrients over the course of multiple months. Recommended fertilizer rates are based on turfgrass species, geographical location, and fertilizer analysis. Please refer to the UF/IFAS Publication: “Urban Turf Fertilizer Rule for Home Lawn Fertilization” for rate recommendations.
Chart excerpted from Florida-Friendly Landscaping publication.
If large patch or another Rhizoctonia disease is confirmed in your lawn, then chemical controls are necessary to keep the disease from spreading. Fungicide products containing the active ingredients azoxystrobin, chlorothalonil, fludioxonil, flutolanil, iprodione, mancozeb, metconazole, myclobutanil, polyoxin D, propiconazole, thiophanate-methyl, thiram, triadimefon, trifloxystrobin, or triticonazole are viable options for keeping the disease from spreading. For best results, follow the fungicide label for application instructions. It’s important to not only treat the affected areas, but also the healthy turf surrounding these areas in order to keep the diseased spots from growing in size.
Unfortunately, turf diseases are often not noticed until large patches of declining and dead turf are noticed. In these cases when large dead patches exist in the lawn, it is usually necessary to resod these areas. As with most problems that arise in the landscape, good cultural practices are the most proactive way to mitigate the chances with turfgrass diseases. The UF/IFAS Florida Friendly Website provides up-to-date solutions and recommendations for caring for Florida landscapes.
by Sheila Dunning | Jul 11, 2019
The Irrigation Association (IA) kicks off the official start of this year’s campaign on Tuesday, July 9, 2019. The initiative promotes the social, economic and environmental benefits of efficient irrigation technologies, products and services in landscape, turf and agricultural irrigation.
Irrigation (agricultural and turf/landscape) accounts for 65-70% of total freshwater use in the United States. According to the Environmental Protection Agency’s (EPA) WaterSense program, the average American family household uses more than 300 gallons of water per day; roughly 30% of this occurs outdoors. Efficient landscape irrigation systems and practices dramatically reduce water being lost or wasted.
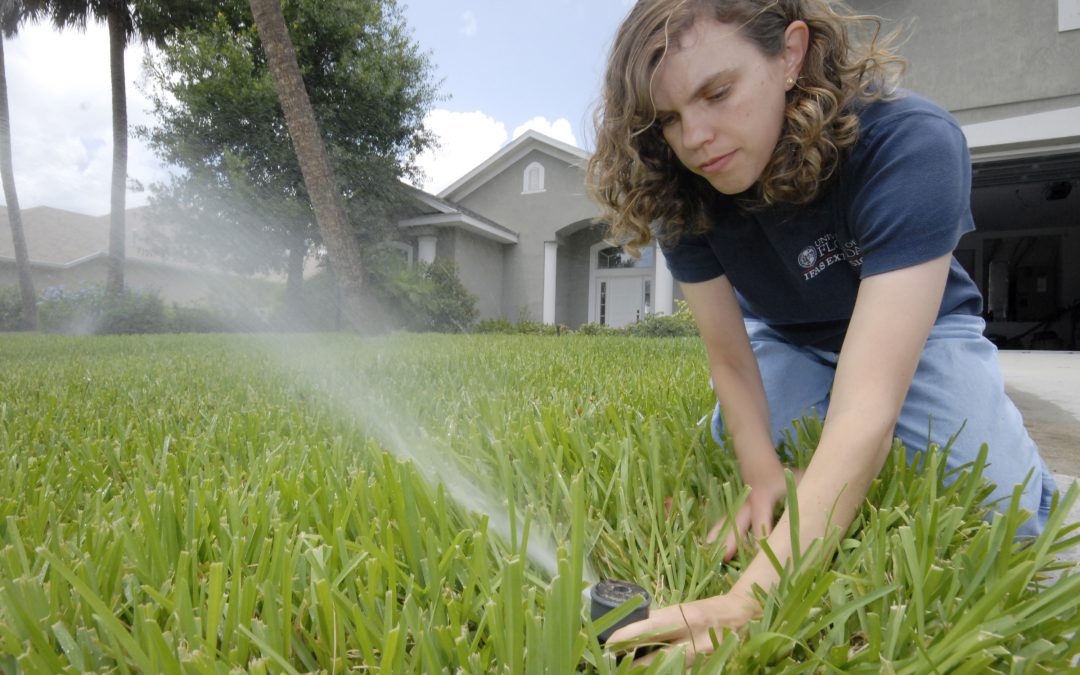
The starting point for improving the efficiency of a home landscape sprinkler system is to calibrate each zone (http://ufdc.ufl.edu/IR00003389/00001) and make adjustments and repairs. That includes the rain shut-off device.
Florida is one of the few states with a rain sensor law. The most recent version of the statute (2010) states the following: “Any person who operates an automatic landscape irrigation system shall properly install, maintain, and operate technology that inhibits or interrupts operation of the system during periods of sufficient moisture.” (Florida Statute 373.62). Regardless of the water source or age of the system, all in-ground irrigation systems must be connected to a functioning rain sensor of some kind.
Expanding disk Rain Sensor
Expanded disk devices are the most popular rain sensor due to their low cost, ease of installation, and low maintenance. Traditionally, they are wired into the controller, but a wireless version allows for quicker installation and mounting up to 300 feet from the controller. These “mini-click” sensors contain disks made of cork that absorb rainfall and expand, triggering a pressure switch. The disk cover is rotated to adjust for the predetermined amount of rainfall required to trigger the switch. It should be set on ½ – ¾ inch, depending on soil type and rooting depth of irrigated plants. The switch continues to interrupt the scheduled controller as long as the disks are swollen. When the rain stops, the disks begin to dry out. Once they have contracted, the switch closes and the regularly scheduled irrigation cycle begins where it left off before the interruption. These small cork disks wear out in Florida’s heat and need to be replaced. By checking and repairing the sensor parts, the sprinkler system will operate much more efficiently. We have all seen irrigation systems running in pouring rain. Keep yours maintained to avoid this needless waste of water.
So, join the kids this summer. Go outside and play in the water. Turn on the sprinkler system and check it out. July is Smart Irrigation Month. Let’s see how efficient you can make your system and reduce the water waste in Florida.
by Molly Jameson | Jun 25, 2019
Although blackberries are well adapted to North Florida, many different biotic and abiotic factors can impact fruit production. Photo by Molly Jameson.
Diagnosing Abiotic Blackberry Fruit Disorders
Whether it be wild blackberries you’ve foraged or a prized cultured variety you’ve oh-so-carefully sustained, we are now in prime blackberry season, and there are many sweet, tangy delectable fruits to be eaten.
Blackberry bushes are well adapted to the Florida Panhandle and the plants can be found growing all over – along roadways, in ditches, throughout open fields, and also within forests.
Although wild blackberries and domesticated cultivars thrive in our climate, there is a wide range of factors that could affect blackberry fruiting. When diagnosing plant problems, we tend to blame insects and diseases, but there are many abiotic (non-living) factors that could negatively impact blackberry fruit production. If your blackberry drupelets (the small subdivisions that comprise a blackberry fruit) are compromised, you may be experiencing one or more of the following abiotic blackberry disorders.
Although blackberries can self-pollinate, insect pollination is critical for forming the best blackberries. Photo by Johnny N. Dell, Bugwood.org.
Poor Pollination. Blackberries, strangely enough, are not true berries botanically. True berries only have one ovary per flower (such as bananas, watermelons, and avocados!). Each blackberry flower contains over 100 female flower parts, called pistils, that contain ovaries. To form a fully sized blackberry with many drupelets, at least 75% of the ovaries need to be pollinated. While blackberries can self-pollinate, pollinator insects, such as bees, are very important to ensure adequate drupelet formation. When weather conditions are overly cloudy and rainy, bees are less active. If this coincides with blackberry flowering, you may end up with some blackberries that are nearly drupe-less.
White Drupe. If you notice patches of white and brown drupelets on your most sun-exposed canes, you might have white drupe disorder. When humidity drops and temperature heats up, solar radiation contacting your berries is more powerful, as there is less moisture in the air to deflect the intense heat. Berries that are not protected by leaf coverage, and those on trellises oriented for maximum sun exposure, are most vulnerable to white drupe damage.
Sunscald. Often associated with white drupe, sunscald is most common when temperatures are extreme. Daytime highs in the Florida Panhandle in June and July regularly reach 90°F, if not higher. At these times, fruit exposed to the sun can be hotter than the air temperature around them, which essentially cooks the fruit. As I suspect you’d prefer to cook your fruit after harvest in preparation for blackberry pie, orient your trellis so it gets shade relief during the hottest part of the day and harvest often.
Diagnosing a blackberry issue can be challenging, as there can be more than one culprit impacting the fruit. Photo by Molly Jameson.
Red Cell Regression. One of the not-so-well understood abiotic blackberry disorders is red cell regression, or red drupelet disorder. If you’ve ever harvested blackberry fruit and stored them in the refrigerator for later munching, you may think your eyes are deceiving you when you discover your fruit doesn’t appear as ripe as when you picked it. This regression in color is linked to rapid temperature change, but rest assured, it does not affect the sugar content of the fruit. There are a few things you can do if you think this is affecting your berries, such as harvesting in the morning when the berries are still cool, harvesting when the sky is overcast, or shading your berries pre-harvest. You can also try to cool your berries in stages, perhaps moving from the field, to shade, to A/C, and then to the fridge.
Beyond abiotic stresses, blackberries can also suffer from insect, pest, and disease damage, such as from stink bugs, beetles, mites, birds, anthracnose, leaf rust, crown gall, and beyond. For domesticated blueberry bushes, proper cultivar selection, site selection, planting technique, fertilization, irrigation, propagation, and cane training is important and will allow the plants to grow healthy to defend themselves against any abiotic or biotic nuisance that comes their way.
For more information about growing blackberries, check out the EDIS publication, The Blackberry (https://edis.ifas.ufl.edu/hs104).
by Larry Williams | Jun 25, 2019
Adult and nymphs of mole crickets. Photo: Julie McConnell, UF/IFAS
The best time to treat for mole crickets is during June through July. But don’t treat at all if mole crickets have not been positively found and identified in the affected lawn areas.
Don’t worry about the adults that are seen flying around lights in the evenings or about the mole crickets found dead in swimming pools this time of year. They are in a mating phase and are doing very little to no damage to lawns during late winter and spring.
We can take advantage of the fact that there’s only one generation per year in North Florida. The eggs will have all hatched by mid to late June. At that time, you’re dealing with young mole crickets that can’t fly and that are much more susceptible to the insecticides designed to kill them. Mole crickets spend winter as adults in the soil. In late February and March, adults emerge and begin mating. Shortly after mating, males die and females fly to suitable areas for egg laying. Mated females deposit eggs in tunnels. After depositing her eggs the female dies. Attempting to control adult mole crickets during this mating period a waste of time, money and product. Plus, adult mole crickets are difficult to control and can easily fly out of treated areas.
You can easily determine if mole crickets are the cause for your lawn problem by flushing them out with a soap and water mixture.
Mix 1½ ounces of a lemon scented liquid dish-washing soap in two gallons of water in a sprinkling can or bucket. Pour the soapy water over an area approximately four square feet and count the number of mole crickets that emerge. It only takes several minutes for mole crickets to crawl to the surface after the soap treatment if they are present. Repeat the process around the yard where you suspect mole cricket problems. If you flush an average of two to four crickets are flushed out per site, control may be needed.
There are a number of insecticides on the market to control mole crickets. But before using any product, first identify the problem as mole cricket damage by using the soap flush technique. Then choose a lawn insecticide that lists mole crickets on its label. And finally read the label carefully for use directions, application techniques, irrigation requirements and precautions.
For more information on mole crickets, including recommended insecticides and other non-chemical control options, contact the UF/IFAS Extension Office in your County or access the following links.
Insect Pest Management on Turfgrass
Shortwinged Molecricket
Mole Cricket IPM Guide for Florida
by Daniel J. Leonard | May 27, 2019
Talk to nearly any Panhandle gardener and one of the first things brought up in conversation is the difficulty growing large, beefsteak/slicing tomatoes (Solanum lycopersicum) in their home garden. Large tomatoes are indeed among the more challenging garden vegetables in North Florida, affected by myriad pests, pathogens and abiotic issues. However, giving up growing this garden favorite is unwarranted as success can be had by following a couple of often overlooked, simple steps to ward off potential problems.
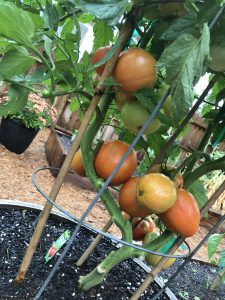
Choose Resistant Cultivars – One of the major recent gardening trends is the rise of heirloom veggies, particularly heirloom tomatoes. While many of these varieties certainly are interesting and often possess superior flavor/texture, heirlooms are, as a group, extraordinarily susceptible to disease in our climate. Fortunately for gardeners, there are a number of excellent varieties available with large resistance profiles to many common diseases and a similar taste profile to heirloom favorites! ‘Big Beef’ (pictured), ‘Better Boy’, ‘Celebrity’, and ‘Skyway’ are just a few of the many great cultivars with extensive disease resistance available as transplants at garden centers or as seed from quality online seed vendors.
Tomato ‘Big Beef’ in 15 gallon decorative container
Start Early – Once, you’ve selected the proper cultivar, the next key is to get them in the ground early! I’m convinced one of the primary reasons folks fail with tomatoes is waiting for “traditional” garden planting dates. For instance, an old tradition in the South is to plant your garden on Good Friday before Easter. However, according to Johnny’s Selected Seeds Southeast Sales Representative Blake Thaxton, tomatoes should be germinated and growing in the garden no later than March 15. Mr. Thaxton notes two primary reasons for this, the most important being pest/disease avoidance. Beefsteak tomato varieties take around 70 days from planting to harvest, so a March 15th planting date yields ripe tomatoes around the third or fourth week of May, when pest/disease pressure is still manageable. Pests and disease occurrence becomes exponentially worse in the Panhandle as May trickles into June and July, therefore it is critical that your fruit begin ripening prior to this onslaught. An important second motivation to plant early is that tomatoes stop setting fruit when nighttime temperatures rise above 75°F. At these temperatures, tomato pollen is rendered sterile and though the plant will continue flowering, no fruit will be set.
Mulch – Another overlooked best management practice in backyard veggie gardening is mulching! Those of us who tend flower beds already know many benefits of mulch like soil temperature moderation, weed prevention, and moisture conservation. But for tomato growers, mulch has another benefit – disease prevention! Several serious diseases that affect tomato are soil-borne pathogens (i.e. Early Blight, Late Blight, Bacterial Spot, etc.). These pathogens find their way onto plants either indirectly via water splashing from soil onto leaves or direct contact from leaves and fruit resting on the soil. To prevent these pathogens from infecting plant tissue, apply an organic mulch (preferably wheat straw or tree leaves) under and around plants. This simple step goes a long way toward season-long, yield-saving disease prevention.
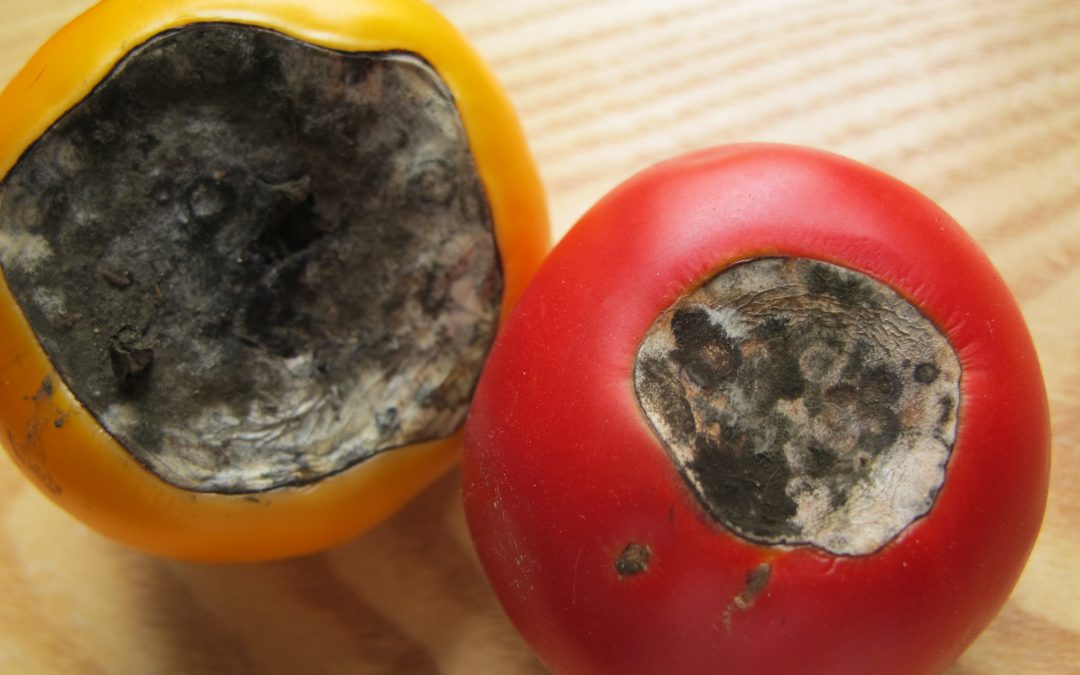
Consistent Watering – Everyone knows plants need water but what you might not know is that irrigation consistency makes a huge difference in plant health, particularly tomatoes. Consistent watering is key in helping ward off one of the most frustrating tomato maladies, blossom end rot (BER) – you know, the one where the bottom end of your perfectly good tomato fruit turns to a brownish mush! Though BER is caused by calcium deficiency, the condition is commonly induced by creation of distinct wet and dry periods from non-regular watering, interfering with calcium uptake and availability to the plant. So, while you may have adequate soil calcium, if you don’t water correctly, the condition will happen anyway! It’s also good to keep in mind that mature tomato plants use large quantities of water daily, so during the heat of summer, plants in containers may need to be watered multiple times daily to maintain consistently moist soil. Think about it, you don’t drink 8 glasses of water when you wake up and then never drink again throughout a hot day. A tomato is no different. Allowing your plants to wilt down before providing additional water ruins productivity and can induce BER.
Tomato ‘Big Beef’ demonstrating pruning for soil clearance and airflow.
Pruning – I get it. Once you’ve nursed your baby tomato from a wee transplant or seed into a rapidly growing and flowering plant, it seems counter-intuitive to break out the pruners, but to keep your tomato plant as healthy as possible for as long as possible, that is what you must do! Pruning tomatoes should accomplish two things. First, remove the bottom layer of foliage from the plant base, so that water will not readily splash onto the lowest remaining leaves. (I tend to remove all leaves up to the second set of flowers 8-12” from the soil’s surface.) As with mulching, this prevents bacterial and fungal pathogens from spreading easily from the soil surface onto your plant. Second, tomato plants, especially the vigorous indeterminate varieties, often grow more foliage than is necessary for fruit production. This excess foliage can prevent airflow and trap moisture in the canopy of the plant, promoting disease. To open up the canopy and allow for more airflow, I prune off leaves that grow from the primary stems inward to the center of the plant. The idea is to keep the inside of the plant open while allowing enough leaves to power photosynthesis and shade the developing fruit below.
Tomatoes are notoriously hard to grow, but by following a few easy preventative practices, gardeners can greatly increase their chances of realizing harvestable fruit come summer. Please keep in mind that this is not an exhaustive list that will ensure disease-free plants over the entire growing season (you should also get a soil test to make sure your pH and soil fertility are correct and ideally you’d never work in your tomatoes when they are wet, etc., but this is a good place to start!). However, a little bit of planning and prevention early in the season can make growing tomatoes a lot less frustrating! As always, if you have questions regarding tomatoes or any other horticultural topic, please contact your local UF/IFAS Extension Office. Happy gardening!