by Beth Bolles | Feb 27, 2020
Landscape activities have already begun in our Panhandle counties with cleanup, mulching, raking, and pruning. Our mild temperatures and days with sunshine spur us to jump into our landscape preparations for the spring growing season.
This year before you send all your debris to the compost pile or patch up thinning turf areas, consider that some landscape imperfections may actually be good for local wildlife.
We all know how important it is to plant nectar attracting plants for bees but there are other easy practices that can help promote more native bees in local landscapes. There are some solitary native bee pollinators that will raise young in hollow stems of plants. Instead of cutting all your old perennial or small fruit stems back to the ground, let some stay as a home to a native pollinating bee. This does not have to detract from the look of the landscape but can be on plants in the background of a border garden or even hidden within the regrowth of a multi stemmed plants. Plants that are especially attractive to native bees have a pithy or hollow stems such as blackberry, elderberry, and winged sumac.
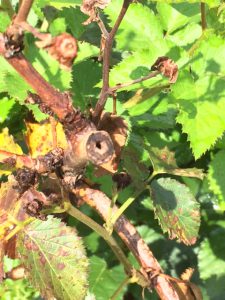
The hollow stems of upright blackberries can be home to solitary bees. Photo by Beth Bolles, UF IFAS Extension Escambia County
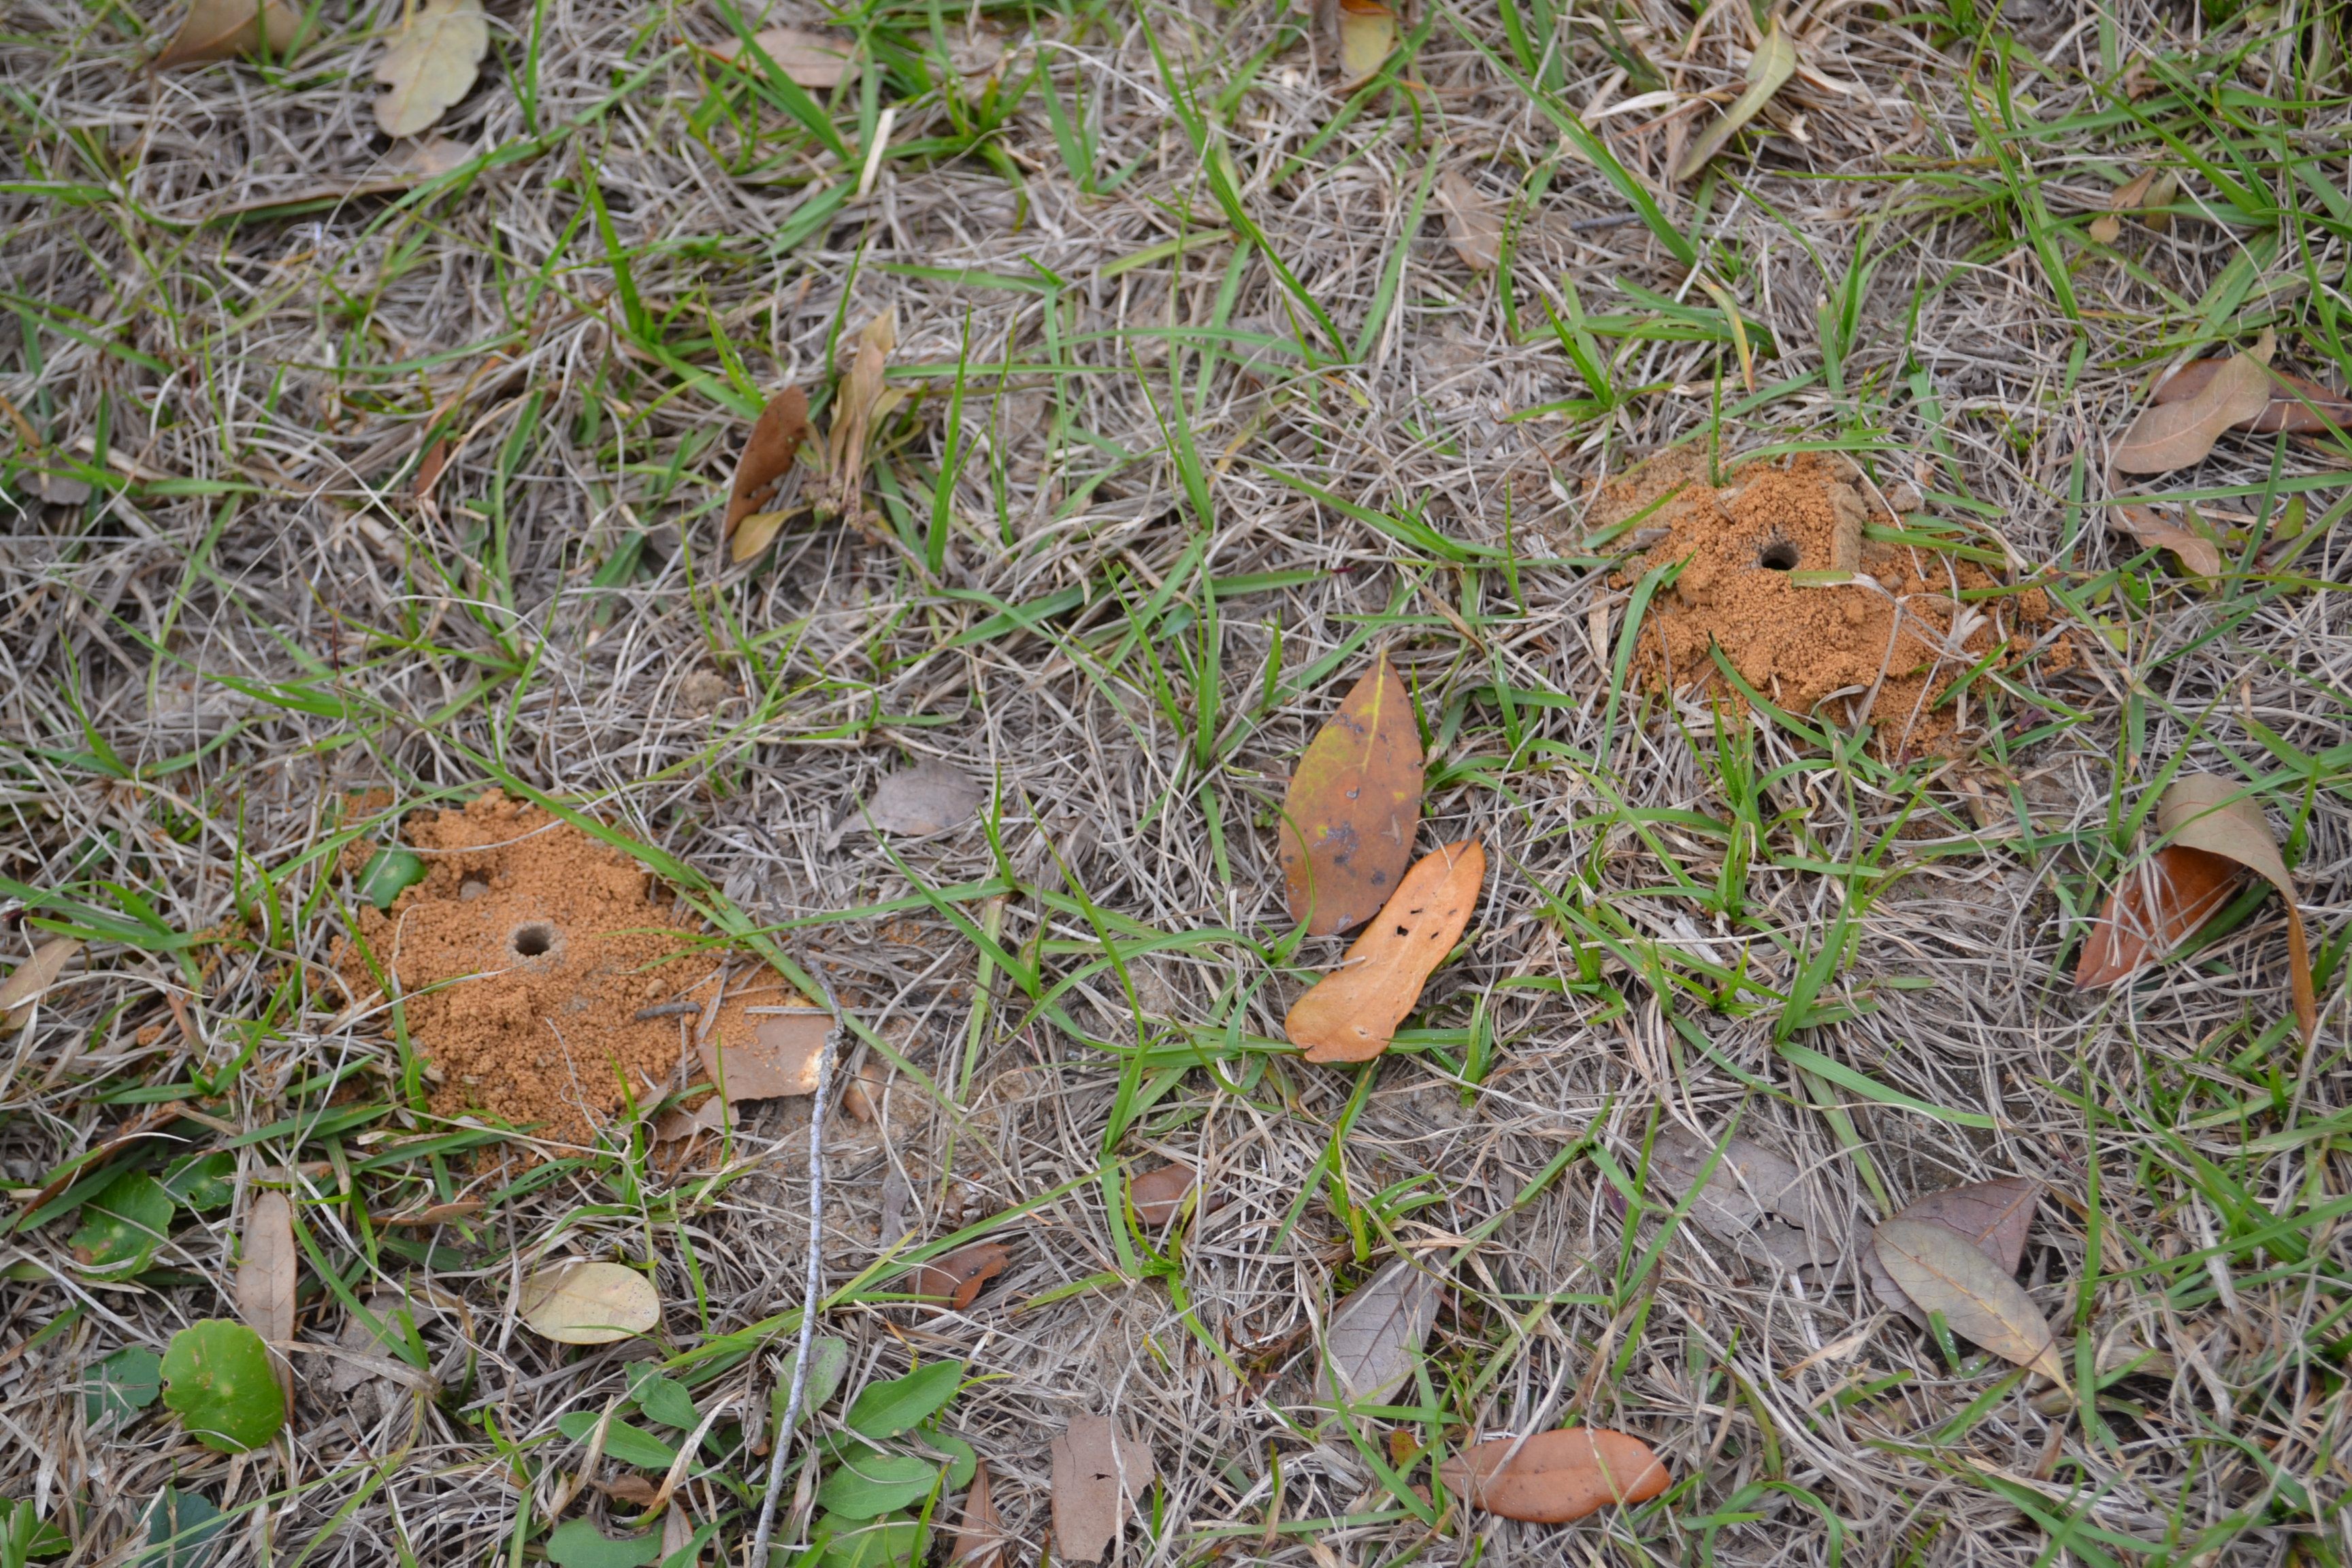
Another favorite site for solitary bees is in the ground. These ground nesting solitary bees should not be compared to yellow jacket wasps. Solitary bees are not aggressive. Mining or digger bees need some bare soil surfaces in order to excavate small tunnels for raising a few young. Maybe you have an area that does not need a complete cover of turf but is fine with a mixture of turf and ‘wildflowers’. A few open spaces, especially in late winter and early spring will be very attractive to solitary bees.

Beneficial solitary bee mounds in the ground of a winter centipedegrass lawn area. Photo by Beth Bolles, UF IFAS Extension Escambia County
One of our fastest disappearing homes for wildlife are natural cavities. In residential sites, we often prune or remove limbs or trees that are declining or have died. If the plant or tree is not a hazard, why not leave it to be a home for cavity nesting birds and mammals. If the dying tree is large, have a professional remove hazard pieces but leave a trunk about 10-15 feet tall for the animals to make a home. You may then get to enjoy the sites and/or sounds of woodpeckers, bluebirds, owls, flying squirrels, and chickadees.

by Sheila Dunning | Jan 13, 2020
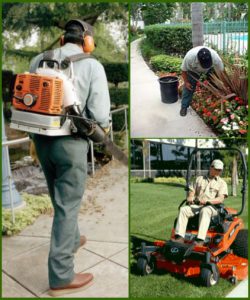 No previous experience or accreditation it required to be a landscaper in the state of Florida. So when homeowners are searching for service providers, it is important that they question potential companies about their skills. One good measure is completion of voluntary certifications such as the Florida Nursery, Growers and Landscape Association (FNGLA) Certified Horticulture Professional (FCHP). The FCHP program has been the industry’s standard for measuring horticulture and landscape knowledge since 1984. The training is also useful for property managers, homeowner associations and retail garden center employees, or anyone that wants to know more about Florida’s plants and their care.
Plants are complex and variable living things that range from microscopic to the largest of living organisms. With steady population growth in the state of Florida, environmental damage risks created by the use of improper products and practices has continually risen. State and federal natural resource protection agencies have restricted certain horticultural practices, as well as, fertilizer and pesticide application. It takes scientific knowledge to maintain lawns and landscapes, not just a “green thumb” in order to keep plants healthy while reducing contamination to the soil, air and water that we all need.
The Florida Certified Horticulture Professional training covers 16 areas, including identification, fertilization, irrigation, pest management, safety and business practices. Lecture and hands-on activities are utilized at each session. The 70-hour course will enhance anyone’s knowledge and will provide the basis for professionals to deliver a skilled service to clientele.
If you are a green industry worker or a concerned citizen interested in attending a FCHP preparatory course, there is an opportunity here in Crestview. Beginning Thursday, January 16, 2020 and continuing for 10 weeks to March 19, 2020, the Okaloosa County Extension office will be providing training for $175, which included the newest hard copy manual. Contact Sheila Dunning, 850-689-5850, sdunning@ufl.edu for more information.
by Matt Lollar | Oct 8, 2019
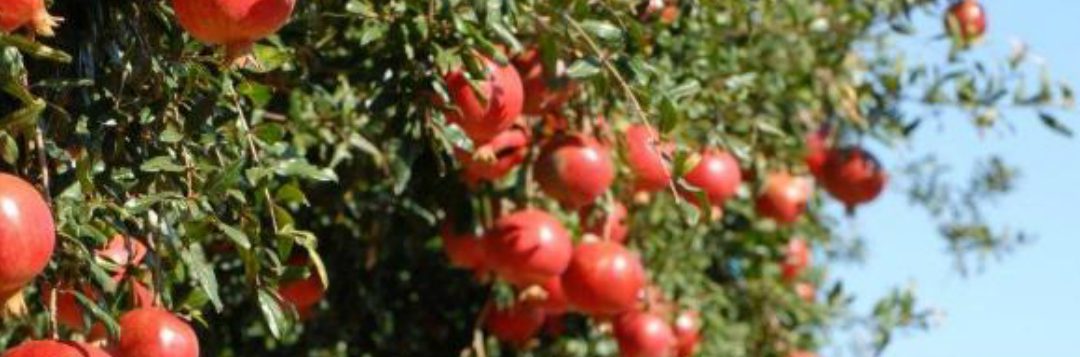
Last week at the Panhandle Fruit and Vegetable Conference, Dr. Ali Sarkhosh presented on growing pomegranate in Florida. The pomegranate (Punica granatum) is native to central Asia. The fruit made its way to North America in the 16th century. Given their origin, it makes sense that fruit quality is best in regions with cool winters and hot, dry summers (Mediterranean climate). In the United States, the majority of pomegranates are grown in California. However, the University of Florida, with the help of Dr. Sarkhosh, is conducting research trials to find out which varieties do best in our state.
In the wild, pomegranate plants are dense, bushy shrubs growing between 6-12 feet tall with thorny branches. In the garden, they can be trained as small single trunk trees from 12-20 feet tall or as slightly shorter multi-trunk (3 to 5 trunks) trees. Pomegranate plants have beautiful flowers and can be utilized as ornamentals that also bear fruit. In fact, there are a number of varieties on the market for their aesthetics alone. Pomegranate leaves are glossy, dark green, and small. Blooms range from orange to red (about 2 inches in diameter) with crinkled petals and lots of stamens. The fruit can be yellow, deep red, or any color in between depending on variety. The fruit are round with a diameter from 2 to 5 inches.
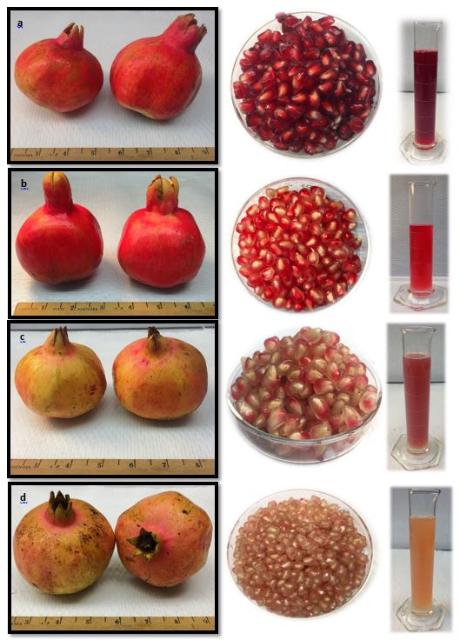
Fruit, aril, and juice characteristics of four pomegranate cultivars grown in Florida; fruit harvested in August 2018. a) ‘Vkusnyi’, b) ‘Crab’, c) ‘Mack Glass’, d) ‘Ever Sweet’. Photo Credit: Ali Sarkhosh, University of Florida/IFAS
A common commercial variety, ‘Wonderful’, is widely grown in California but does not perform well in Florida’s hot and humid climate. Cultivars that have performed well in Florida include: ‘Vkusnyi’; ‘Crab’; ‘Mack Glass’; and ‘Ever Sweet’. Pomegranates are adapted to many soil types from sands to clays, however yields are lower on sandy soils and fruit color is poor on clay soils. They produce best on well-drained soils with a pH range from 5.5 to 7.0. The plants should be irrigated every 7 to 10 days if a significant rain event doesn’t occur. Flavor and fruit quality are increased when irrigation is gradually reduced during fruit maturation. Pomegranates are tolerant of some flooding, but sudden changes to irrigation amounts or timing may cause fruit to split.

Two pomegranate training systems: single trunk on the left and multi-trunk on the right. Photo Credit: Ali Sarkhosh, University of Florida/IFAS
Pomegranates establish best when planted in late winter or early spring (February – March). If you plan to grow them as a hedge (shrub form), space plants 6 to 9 feet apart to allow for suckers to fill the void between plants. If you plan to plant a single tree or a few trees then space the plants at least 15 feet apart. If a tree form is desired, then suckers will need to be removed frequently. Some fruit will need to be thinned each year to reduce the chances of branches breaking from heavy fruit weight.
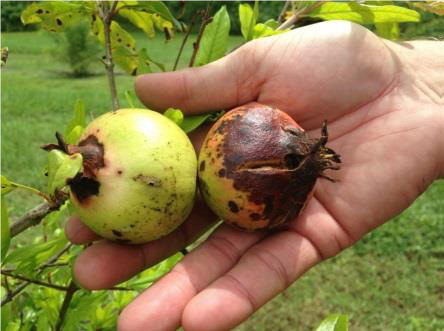
Anthracnose caused by Colletotrichum sp. to pomegranate fruit. Photo Credit: Gary Vallad, University of Florida/IFAS
Anthracnose is the most common disease of pomegranates. Symptoms include small, circular, reddish-brown spots (0.25 inch diameter) on leaves, stems, flowers, and fruit. Copper fungicide applications can greatly reduce disease damage. Common insects include scales and mites. Sulfur dust can be used for mite control and horticultural oil can be used to control scales.
by Matt Lollar | Sep 7, 2019
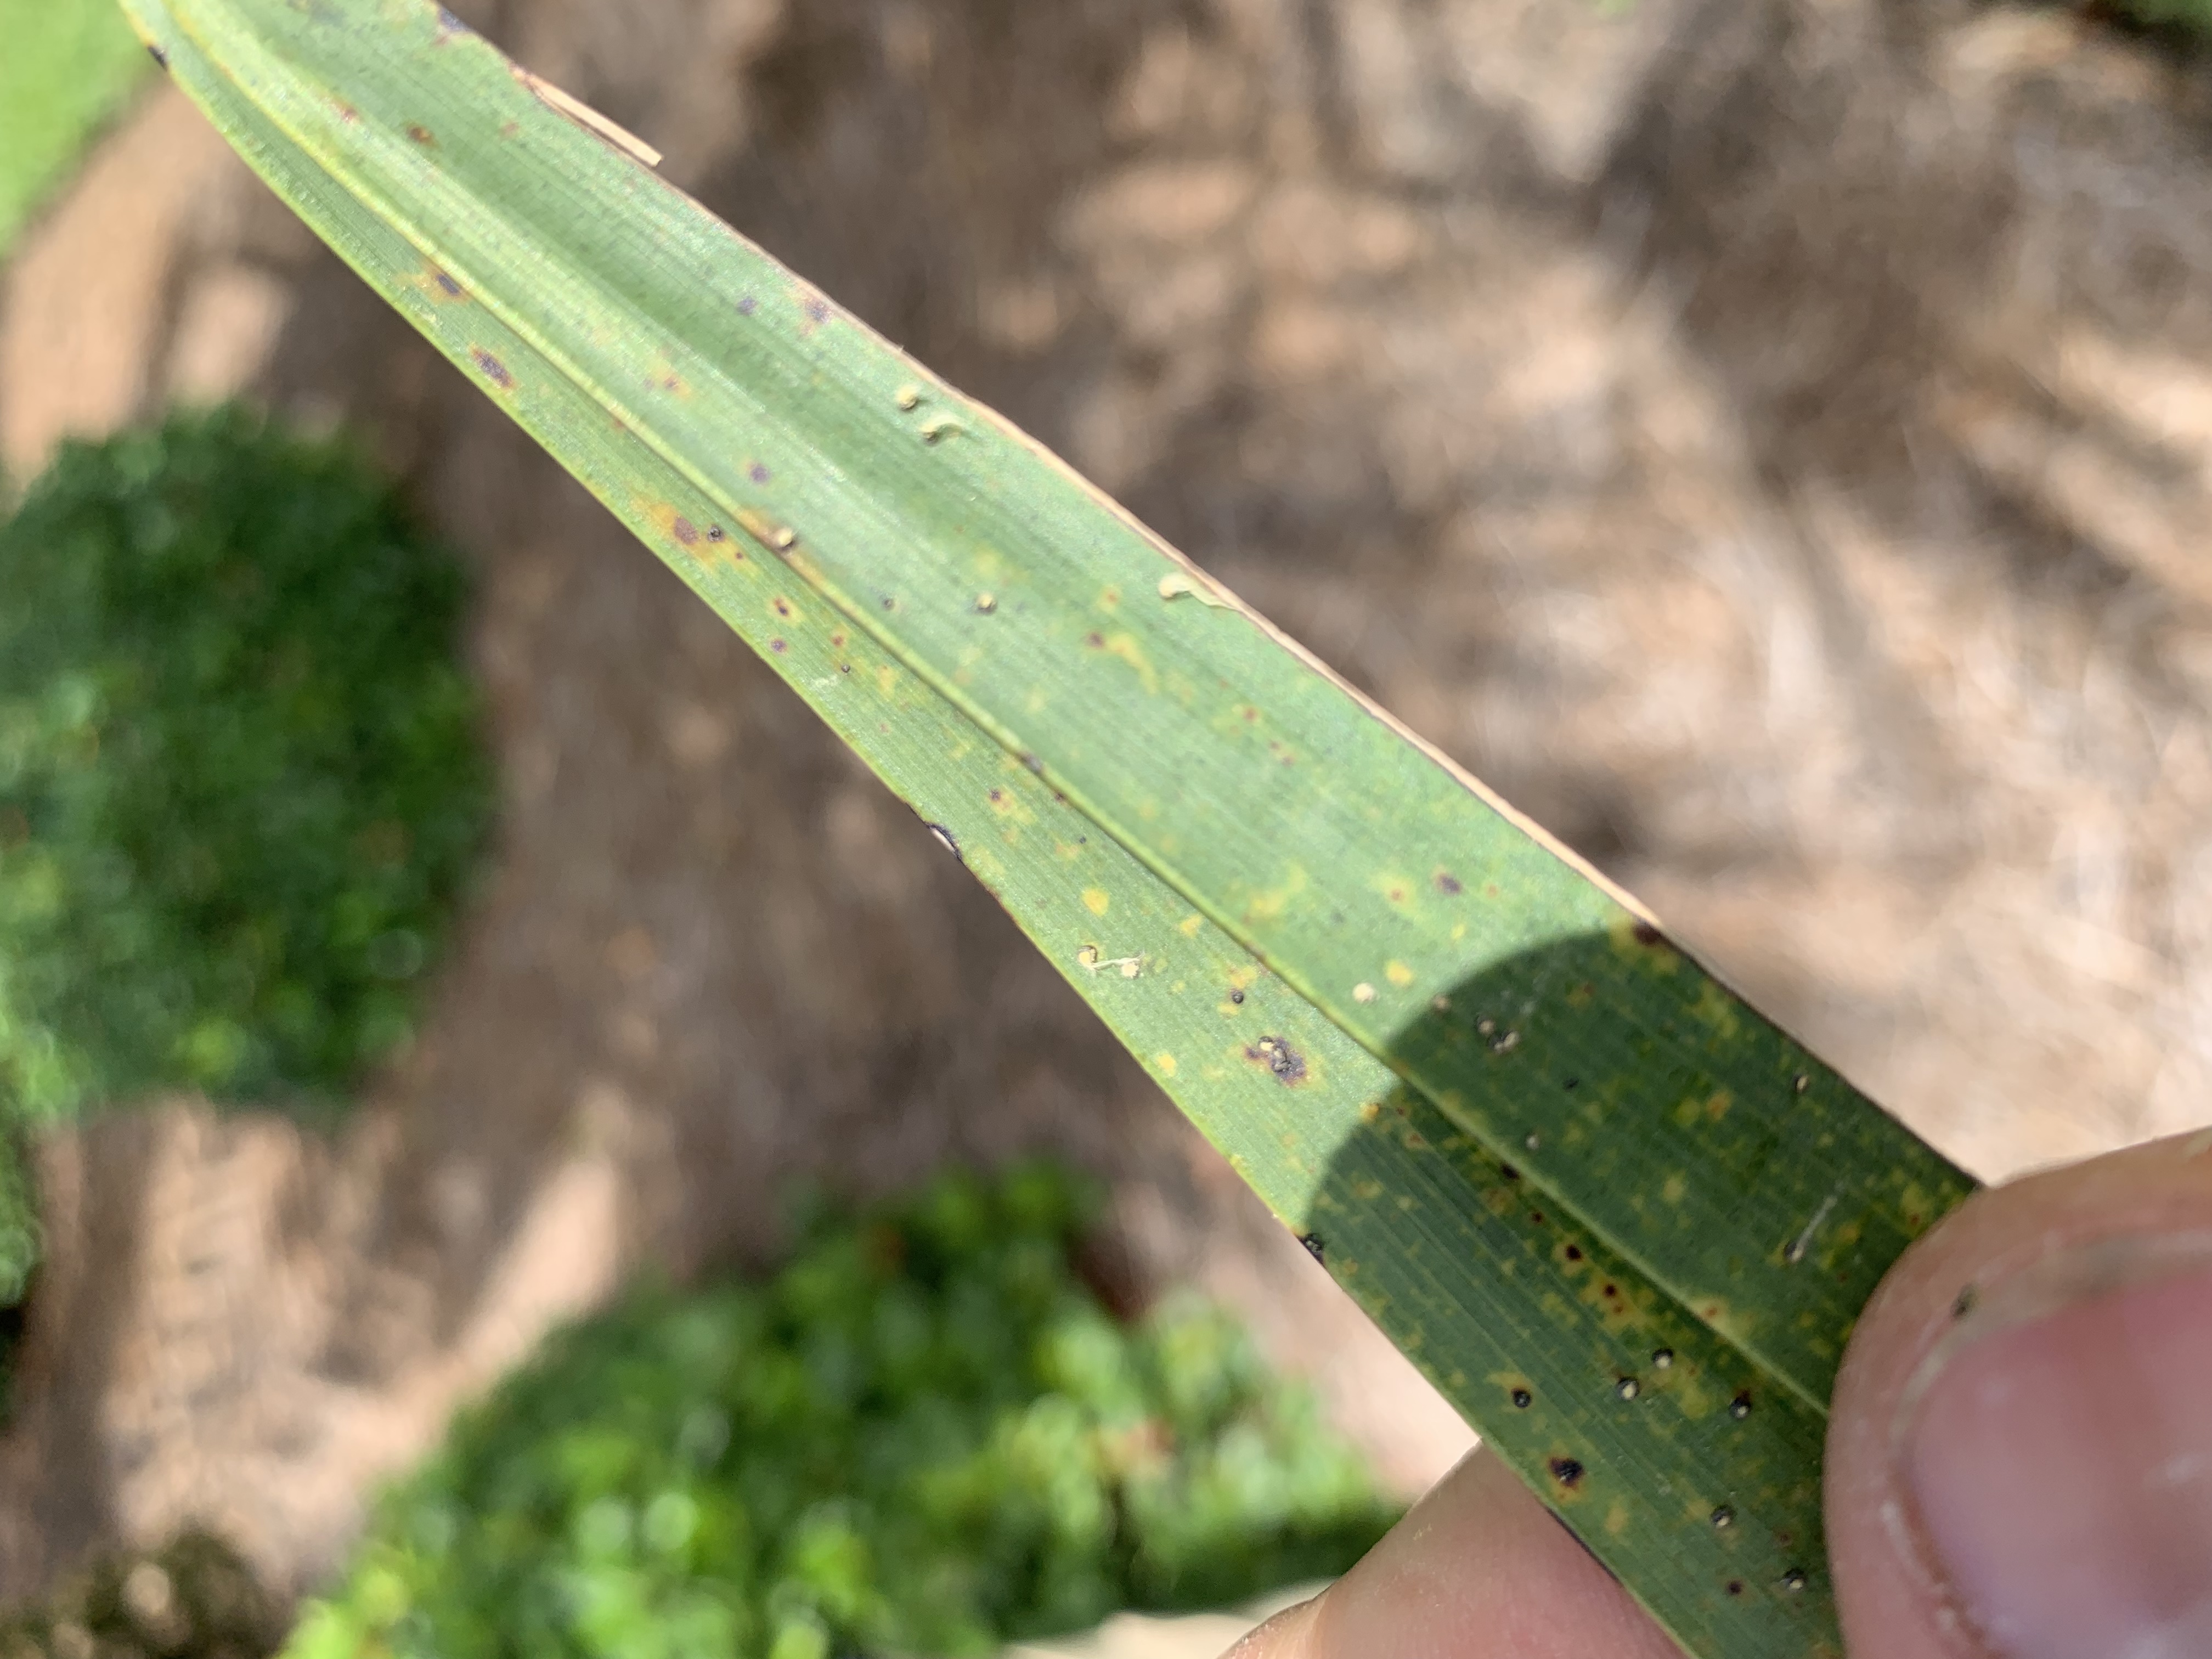
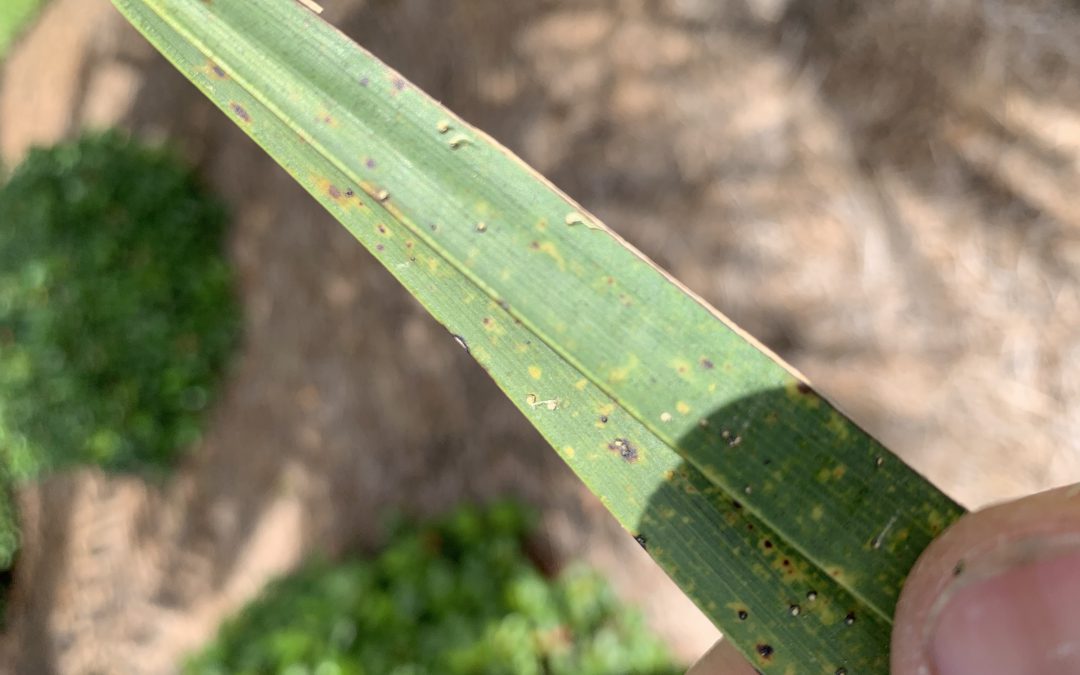
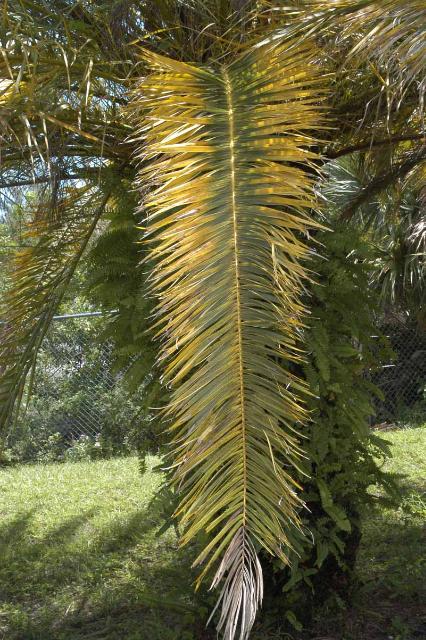
A couple weeks ago, I was on a site visit to check out some issues on Canary Island Date Palms. The account manager on the property requested a site visit because he thought the palms were infested with scale insects. He noticed the issue on a number of the properties he manages and he was concerned it was an epidemic. From a distance, lower fronds were yellowing from the outside in and the tips were necrotic. These are signs of potassium deficiency with possible magnesium deficiency mixed in.
Transitional leaf showing potassium deficiency (tip) and magnesium deficiency (base) symptoms. Photo Credit: T.K. Broschat, University of Florida/IFAS Extension
Nutrient deficiencies are slow to correct in palm trees. It’s much easier to prevent deficiencies from occurring by using a palm fertilizer that has the analysis 8N-2P2O5-12K2O+4Mg with micronutrients. Even if the palms are part of a landscape which includes turf and other plants that require additional nitrogen, it is best to use a palm fertilizer with the analysis previously listed over a radius at least 25 feet out from the palms. However, poor nutrition wasn’t the only problem with these palms.
Upon closer look, the leaflets were speckled with little bumps. Each bump had a little white tail. These are the fruiting structures of graphiola leaf spot also known as false smut.

Graphiola leaf spot (false smut) on a Canary Island Date Palm. Photo Credit: Matt Lollar, University of Florida/IFAS Extension – Santa Rosa County
Graphiola leaf spot is a fungal leaf disease caused by Graphiola phoenicis. Canary Island Date Palms are especially susceptible to this disease. Graphiola leaf spot is primarily an aesthetic issue and doesn’t cause much harm to the palms infected. In fact, the nutrient deficiencies observed in these palms are much more detrimental to their health.
Graphiola leaf spot affects the lower fronds first. If the diseased, lower fronds are not showing signs of nutrient deficiencies then they can be pruned off and removed from the site. All naturally fallen fronds should be removed from the site to reduce the likelihood of fungal spores being splashed onto the healthy, living fronds. A fungicide containing copper can be applied to help prevent the spread of the disease, but it will not cure the infected fronds. Palms can be a beautiful addition to the landscape and most diseases and abiotic disorders can be managed and prevented with proper pruning, correct fertilizer rates, and precise irrigation.

by Sheila Dunning | Aug 7, 2019
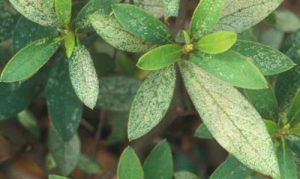
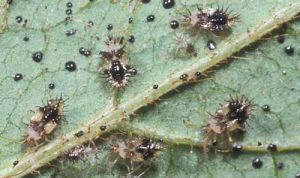
Damage caused by azalea lace bug, Stephanitis pyrioides (Scott), feeding. Photograph by James. L. Castner, University of Florida. Severely damaged leaves become heavily discolored and eventually dry or fall off. Symptoms may sometimes be confused with mite injury, but the presence of black varnish-like excrement, frequently with cast skins attached, suggest lace bug damage (Johnson and Lyon 1991).
You may be noticing the color disappearing from your azaleas right now. Do your azaleas look bleached out from a piercing-sucking insect. The culprit is probably azalea lace bug, Stephanitis pyrioides. This pest overwinters in eggs on the underside of infested leaves. Eggs hatch in late March and early April. The insect then passes through five nymphal instars before becoming an adult. It takes approximately one month for the insect to complete development from egg to adult and there are at least four generations per year. Valuable plants that are susceptible to lace bug damage should be inspected in the early spring for the presence of overwintering lace bug adults, eggs and newly-hatched nymphs. Inspect these plants every two weeks during the growing season for developing lace bug infestations.
Both adults and nymphs have piercing-sucking mouthparts and remove sap as they feed from the underside of the leaf. Lace bug damage to foliage detracts greatly from the plant’s beauty, reduces the plant’s ability to produce food, decreases plant vigor and causes the plant to be more susceptible to damage by other insects, diseases or unfavorable weather conditions. The azalea can become almost silver or bleached in appearance from the feeding lace bug damage.
However, lace bugs often go undetected until the infested plants show severe damage sometime into the summer. By then several generations of lace bugs have been weakening the plant. Inspecting early in the spring and simply washing them off the underside of the leaves can help to avoid damage later and the need for pesticides.
Adult lace bugs are flattened and rectangular in shape measuring 1/8 to 1/4 inch long. The area behind the head and the wing covers form a broadened, lace-like body covering. The wings are light amber to transparent in color. Lace bugs leave behind spiny black spots of frass (excrement).
Adult azalea lace bug, Stephanitis pyrioides (Scott), and excrement. Photograph by James. L. Castner, University of Florida.
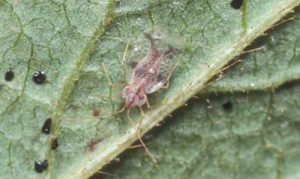
Lace bug nymphs are flat and oval in shape with spines projecting from their bodies in all directions. A lace bug nymph goes through five growth stages (instars) before becoming an adult. At each stage the nymph sheds its skin (molts) and these old skins often remain attached to the lower surface of infested leaves.
Nymphs of the azalea lace bug, Stephanitis pyrioides (Scott), with several cast skins and excrement. Photograph by James. L. Castner, University of Florida.
Azalea lace bug eggs are football-shaped and are transparent to cream colored. Lace bug eggs are found on the lower leaf surface, usually alongside or inserted into a leaf vein. Adult females secrete a varnish-like substance over the eggs that hardens into a scab-like protective covering.
Other plant species, such as lantana and sycamore, may have similar symptoms. But, realize that lace bugs are host specific. They feed on their favorite plant and won’t go to another plant species. However, the life cycle is similar. Be sure to clean up all the damaged leaves. That’s where the eggs will remain for the winter. Start next spring egg-free.
For more information go to: http://entomology.ifas.ufl.edu/creatures/orn/shrubs/azalea_lace_bug.htm
by Beth Bolles | Aug 7, 2019
We are always on the lookout for an attractive plant for our landscape. At the nursery, some plants have a more difficult time gaining our attention. They may not be as showy, possessing neither colorful flowers nor bold foliage. In these cases, we could be missing out on low maintenance plant that offers its own form of beauty in the right landscape spot.
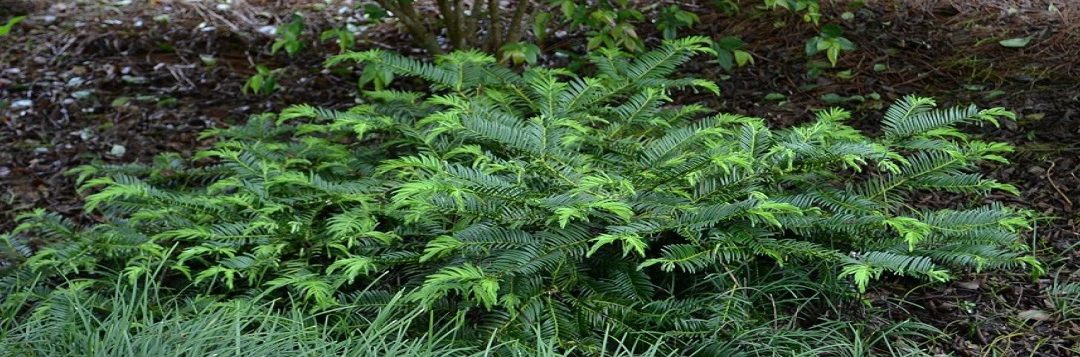
One plant that I love is the Japanese plum yew (Cephalotaxus harringtonia), especially the spreading form ‘Prostrata’. In the nursery container, this plant is nothing special but once established in the landscape it performs well. The conifer type leaves are an attractive dark green and the ‘Prostrata’ selection is low growing to about 2 to 3 feet. An advantage too is that growth is slow so it won’t take over or require routine pruning.
Japanese plum yews grow best in partial shade and once established will be fine with rainfall. For a shadier side of the home, the spreading plum yew has a place as an evergreen foundation plant too.
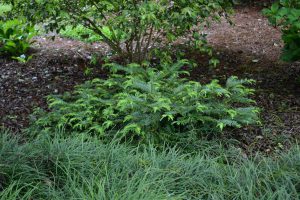
Japanese plum yew in a shaded garden. Photo by Beth Bolles, UF IFAS Extension Escambia County
If the ‘Prostrata’ selection is too low growing for you, consider the ‘Fastigiata’ cultivar that will grow upright to about 8 feet with a 5 foot spread.
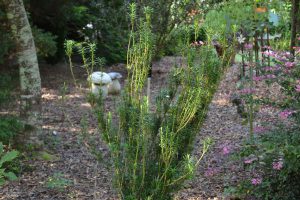
A year old planting of upright Japanese plum yew in filtered light. Photo by Beth Bolles, UF IFAS Extension Escambia County