It’s getting close to that time of year again! You may be the giver or receiver of a wonderful holiday plant soon. Dish gardens, potted flowering plants (such as azalea, begonia, poinsettia, or chrysanthemum), plants with attractive foliage, and even patio citrus make great gifts. However, special care is needed to keep them healthy throughout the holiday season and beyond!
For plants intended to be “house plants”, over watering, over fertilizing and poor placement are the most common problems encountered by caretakers. The first thing you need to keep in mind about gift plants is that most of them have been growing in a carefully controlled greenhouse environment for some time. These types of plants are acclimated to a specific temperature & humidity level. Therefore, they’re sensitive. When they’re moved into your home atmosphere, they typically go into a level of shock. If you received a gift plant, you’ll have to help it overcome this shock by paying careful attention to the important factors- light, temperature, water, and fertilization.
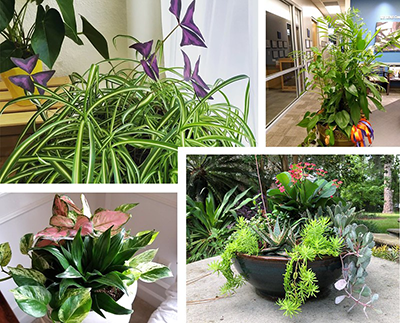
House Plants & Indoor Garden Examples Credit: UF/lFAS Communications
Indoor areas often restrict light and provide very low humidity. Plants with dense foliage prefer light, but not continuous direct light all day. Placing a plant near a window or near light fixtures should suffice for photosynthesis requirements. However, flowering plants such as mums and poinsettias will stand more light than most foliage plants and should be placed in very bright areas. Most indoor plants grow well in temperatures of 60 to 70 degrees. Be careful to not place plants in drafty locations where sudden changes in temperature occur. Also, don’t place plants close to radiators or air conditioner vents/returns. These areas typically dry soil excessively and could cause plants to wilt.
Watering is one of the major causes of failure with plants in the home, especially for containers which don’t have drainage holes. Most house plants will require a thorough soaking once a week. Water only when necessary and don’t let the pots stand in saucers of water unless the plants are very tolerant to excess water. Overwatering can kill plant roots, increase chances of disease, and eventually kill the entire plant.
Proper fertilization is another important part of growing healthy plants. Fertilizer labeled for house plants or 10-10-10 are good, general-purpose, complete fertilizers to use. Always follow all the directions on the bag or container, so that you don’t over fertilize, causing the plant’s demise.
Following these basic practices to keep house plants healthy should keep your gift plant looking attractive for the remainder of the holiday season and beyond.
For more information on house plants, please visit:
While the Florida Panhandle isn’t considered a true tropical climate, now that the summer rains have started, it sure feels tropical outside. To create high performing colorful containers in these conditions, it’s wise to pick plants that hail from tropical climes – one of my favorites is Crossandra (Crossandra infundibuliformis).
Native to tropical Sri Lanka and India, Crossandra is built for hot, humid conditions. An evergreen subshrub growing about 3’ tall in its native range, Crossandra sports glowing orange flower clusters held high on stems that rise above deep green, glossy foliage – a very striking combination. These showy orange flowers arrive once temperatures heat up in the early summer and continue emerging en masse until cool nights stop the show in fall. While deadheading spent flowers can enhance Crossandra’s free-flowering nature, I haven’t found it totally necessary to ensure consistent flowering. In addition to being beautiful, Crossandra’s flower clusters are also attractive to a wide variety of pollinators, including butterflies and dragonflies.
Crossandra growing in partial shade on a patio. Photo courtesy of Daniel Leonard.
Adding to Crossandra’s appeal, the species couldn’t be easier to grow if you give it the right conditions. Crossandra prefers to be sited in areas that receive ample sunlight but also get a reprieve from the hottest afternoon rays. This year, I grew one on a deck that receives sun from about 10 am – 2 pm and is then provided filtered shade from a large tree the rest of the afternoon; these conditions seem to be ideal. Crossandra performs best in moist, well-drained soil, making potting mix an excellent option. Daily watering in the summer combined with our (hopefully) frequent rainfall in July and August keeps it wilt-free. I also apply slow-release fertilizer at planting and then supplement with liquid fertilizer periodically throughout the summer. This, combined with regular irrigation, promotes healthy, vigorous growth, and allows the flower show to continue uninterrupted until cool weather finally draws the curtains.
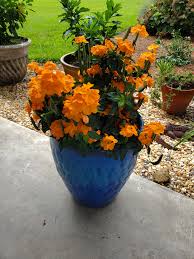
Crossandra is a versatile plant in container gardens, shining in either the role of filler in larger containers or as a solo specimen plant in its own container. In mixed containers, play off of Crossandra’s orange flowers with partial sun foliage plants like Coleus, Elephant Ears, or Hawaiian Ti, or flowering annuals like Browallia ‘Endless Illumination’, Torenia (Wishbone Flower), Blue Daze, or Purple Heart Plant. While Crossandra does well in mixed containers, as a UF graduate, I prefer to stick it in my favorite blue pot for an orange and blue Gator themed solo container!
Regardless of how you choose to incorporate Crossandra into your garden’s design, it will reward you with summer-long orange flowers in a low-maintenance package. Simply place it in morning to early afternoon sun, give it ample water and adequate fertilizer, and enjoy this Florida Friendly Landscaping approved species. Plant one today!
For those of us that don’t have the best landscape conditions or the time, money, or inclination to invest into a vibrant yard display of annual flowers, growing our flowers in containers is a great option! Growing in containers has several advantages over growing flowers in the ground. It gives gardeners control over the soil, fertility, and water conditions that the plants are grown in and the ability to add pops of color/texture anywhere – in an existing planting bed, patio, deck, porch, or even indoors. Let’s explore some simple tips to create containers that will offer low-maintenance explosions of color all summer long.
The easiest way to create full, colorful containers is by using the design scheme known as the “thriller, filler, spiller” arrangement. This design first utilizes a dramatic “thriller” in the back of the container, usually a plant that has a taller, upright growth habit and striking flowers or foliage. Commonly used thrillers are plants like Purple Fountain Grass, Salvia, Canna, and Hawaiian Ti. Next come the fillers. Fillers are plants that possess a mounding habit and generally provide the floral firepower in the container. Popular fillers include Vinca, Begonia, ‘Diamond Frost’ Euphorbia, Lantana, Pentas, Impatiens (for shady containers), and even foliage plants like Coleus, Caladiums, and Ferns. Finally, spillers round out the containers by “spilling” over the sides. These are typically vining or trailing plants and add a final dramatic touch to the overall container style. Some of my most-used spiller plants are Creeping Jenny, ‘Silver Falls’ Dichondra, ‘Gold Dust’ Mecardonia, Torenia (aka Wishbone Flower), and Sweet Potato Vine.
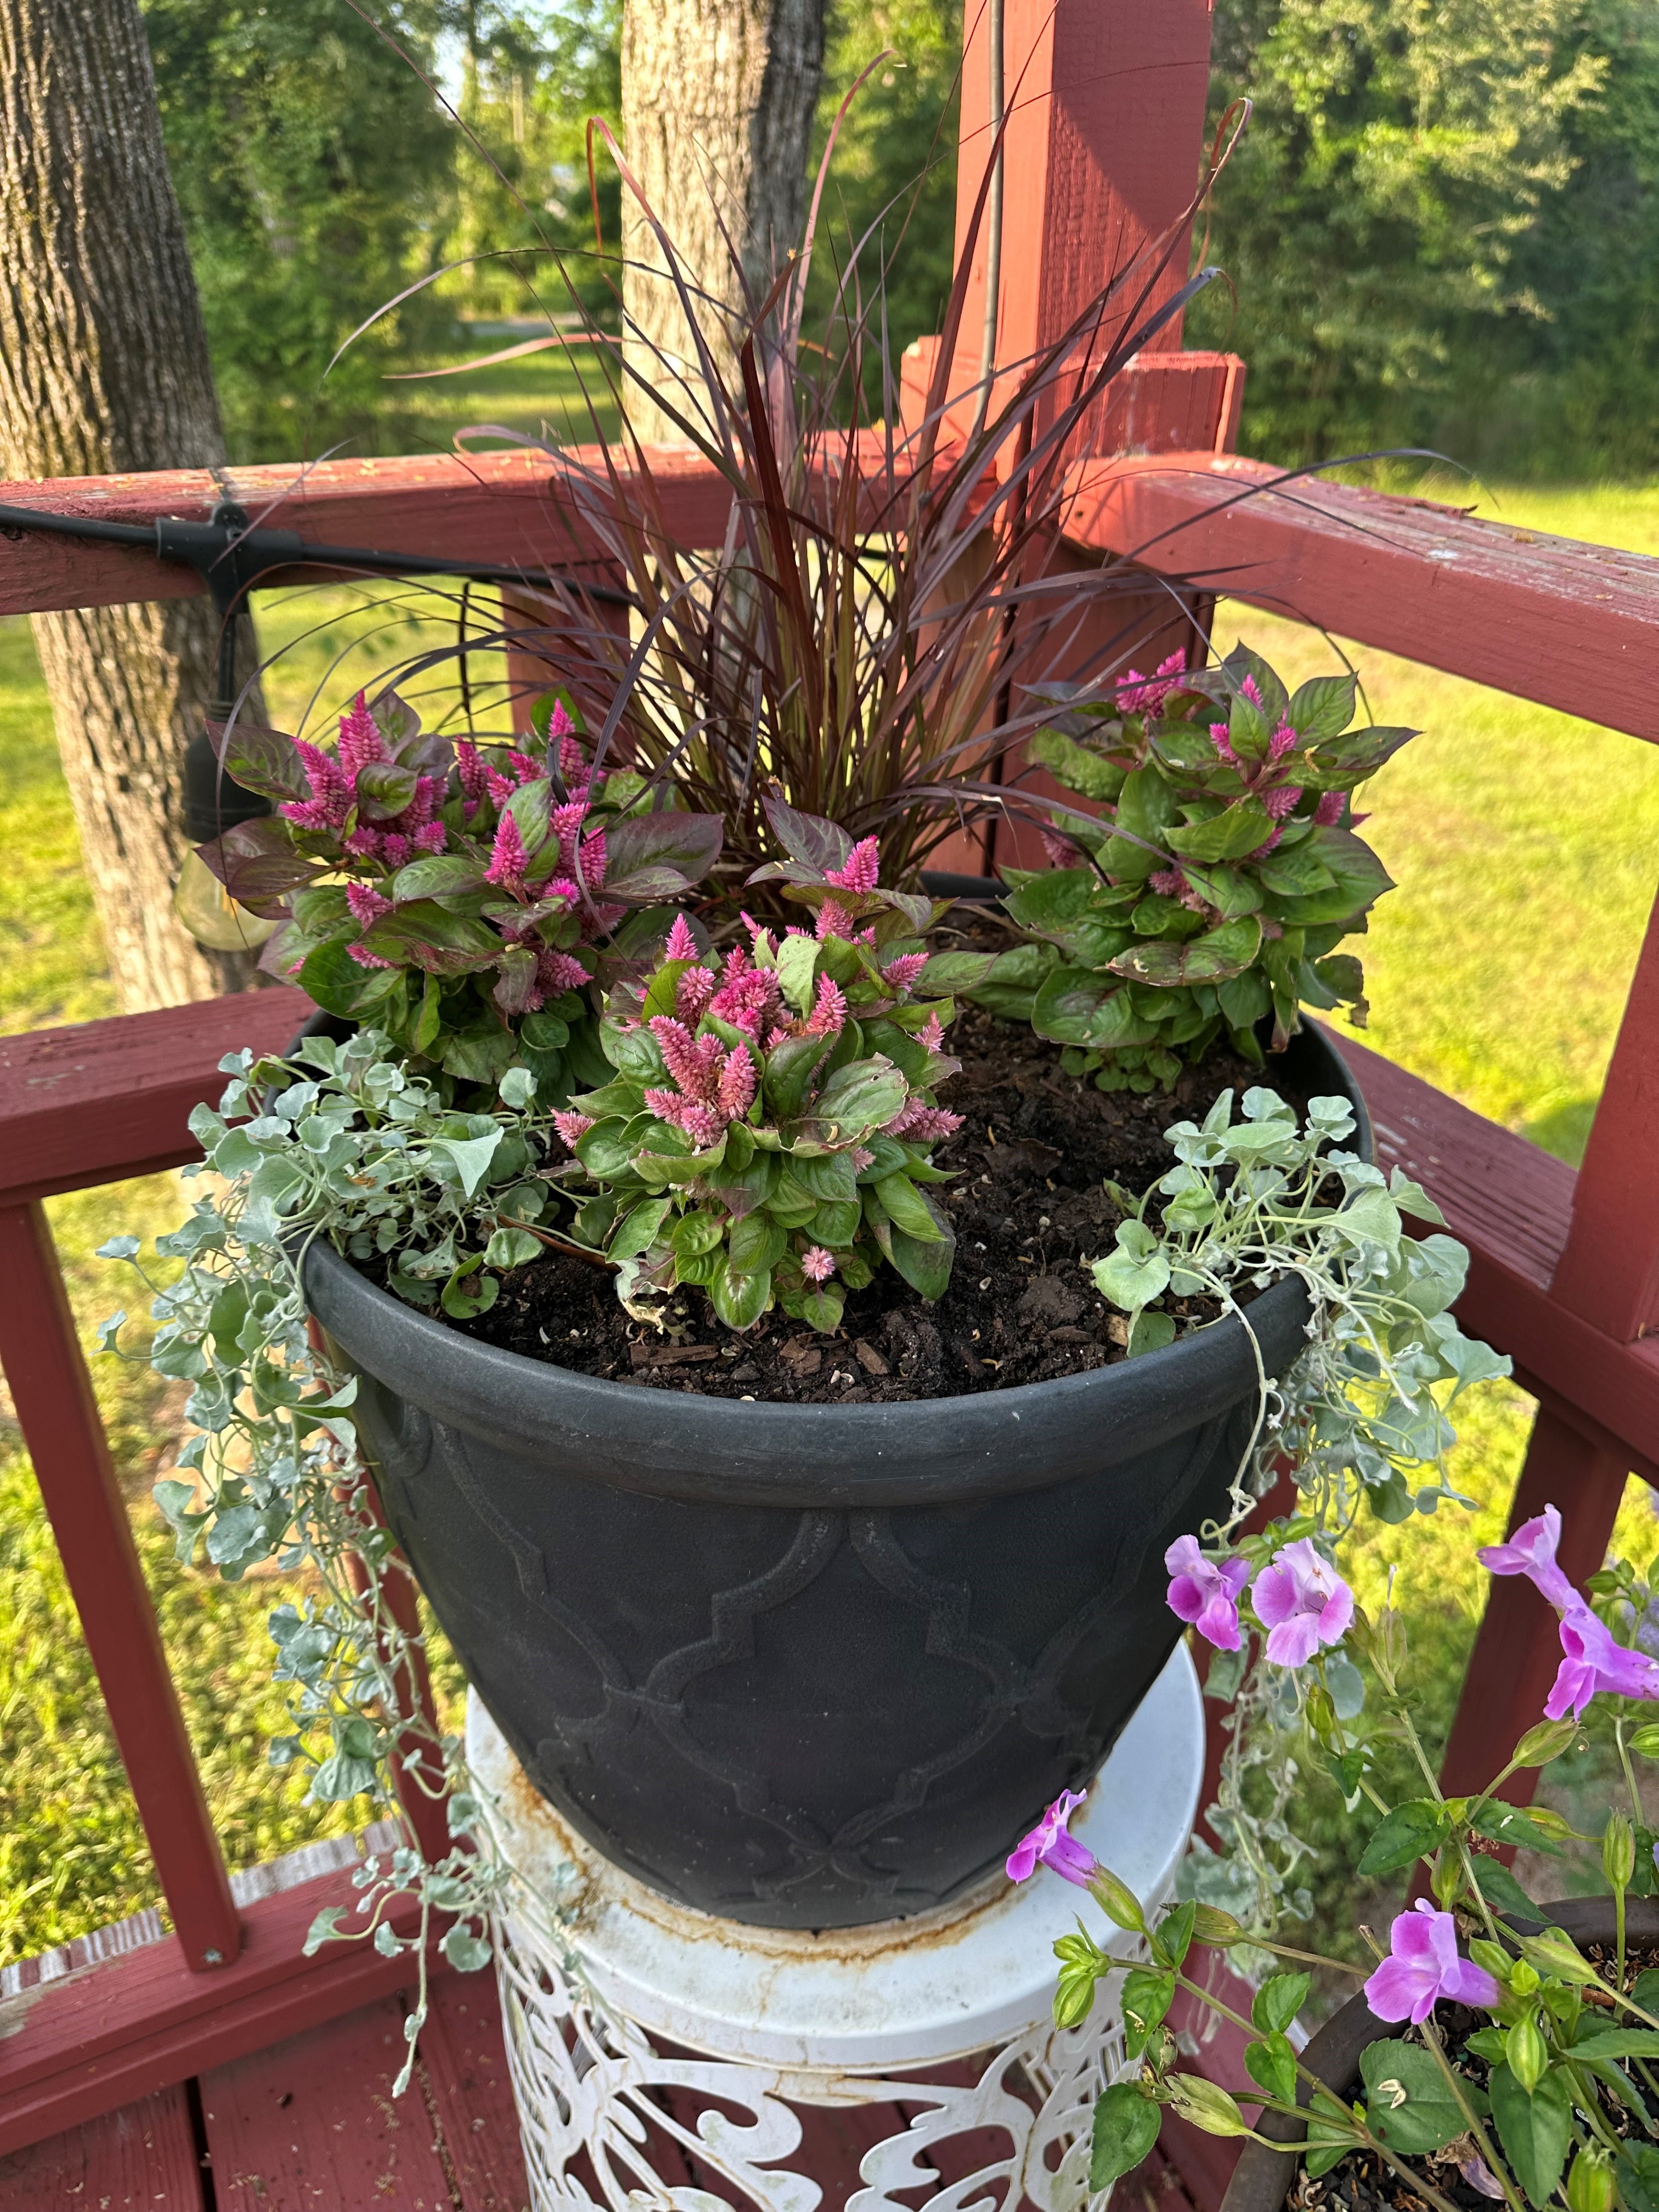
Example container using a thriller (Purple Fountain Grass), filler (Celosia), and spiller (‘Silver Falls’ Dichondra). Photo courtesy of Daniel Leonard.
Will all those plant options, how does one choose plants to combine in containers? When perusing the nursery to pick thriller, filler, and spiller plants, all you need to remember to be successful is the basic layout of the color wheel and the phrase “right plant, right place”. Knowing the color wheel is important because some colors look better than others in combination! For instance, most classic color combos are known as “contrasting colors”, just meaning opposite each other on the color wheel – think the Orange and Blue of the Florida Gators or the Purple and Gold of the LSU Tigers. It’s hard to go wrong pairing plants of contrasting foliage or flower colors. Another option is to use different shades or hues of the same color, this is known as a monochromatic color arrangement. Monochromatic arrangements create a stunning punch of color and can even be used to highlight colors or features around the container, like the brick or siding color of your home.
After choosing your color palette, it’s critical to make sure you have the right plant in the right place. For container gardening, this just means pairing plants with like needs. For instance, you wouldn’t want to grow shade loving Impatiens in the same container as sun loving Purple Fountain Grass. Likewise, pairing a succulent with a heavy water user like Coleus is a bad idea. Combine plants with like growing condition preferences and you’ll save yourself a major gardening headache!
Maintaining your summer containers is also relatively easy. At planting, fertilize with a slow-release fertilizer like Osmocote or other similar product at the label rate and water in. After the first month or so, I begin supplemental fertilizing every couple of weeks with a liquid fertilizer. As your container grows, the days get hotter, and there are more roots to suck up water, your watering frequency will increase from once every couple of days to every day, and, on very hot days, twice a day (morning and late afternoon/evening). All this watering and fertilizing sounds like a lot of work, but I enjoy getting out and spending a few minutes with my plants! It’s a great way to start your day/wind down after work and allows you to spot any issues before they become major problems!
Gardening with containers is without a doubt the easiest way to create summer long color on your deck, patio, or landscape. Giving us the ability to control soil, water, sun, and fertilizer conditions, growing our annual color in containers removes many of the variables that makes gardening difficult and provides pops of color and texture in any setting – design and plant a few containers this summer! For more questions about container gardening or any other horticultural topic, contact us at the UF/IFAS Calhoun County Extension office. Happy gardening this summer!
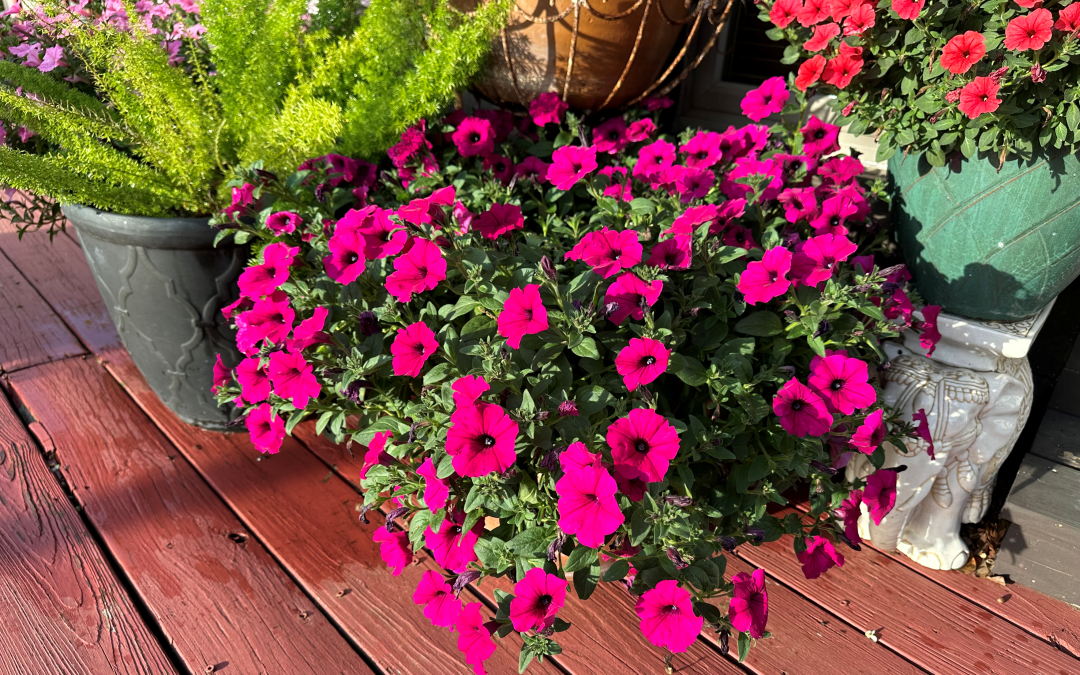
Florida is a fun state to live in for many reasons. You are never more than an hour or two away from a great beach, it never gets bitterly cold, and the fishing is phenomenal. I could go on. More than all that though, my favorite thing about living in Florida is the ability to have something blooming year-round, even in the cool months. This year, the stars of the spring show in my backyard container garden have been new selections of an old favorite, the Petunia.
Petunias, a close relative of Tobacco, originally hail from South America. And while the original petunia species were not a valuable crop like Tobacco, enterprising European explorers realized the group had horticultural potential. By the late 1800s, plant breeders had begun hybridizing wild petunia and the petunias gardeners now recognize took shape! Fast forward to today and petunias are the most popular bedding plants in the US, with annual petunia sales topping $260 million (USDA’s Census of Horticultural Specialties). More than 700 petunia cultivars have received plant patents, comprising all manners of sizes and flower colors. This year, there is even a controversial genetically modified petunia called ‘Firefly’ hitting the market that displays bioluminescence – it literally glows in the dark!
Petunia ‘Jazzberry’ growing in a container. Photo Credit: Daniel Leonard, University of Florida/IFAS Extension – Calhoun County
In the past, petunias struggled in the Deep South, as they were often ravaged by various fungal pathogens induced by our too-warm weather. These old-fashioned petunia cultivars, while pretty on store shelves, don’t perform as well in the heat as newer varieties bred for warmer, wetter conditions and that possess enhanced vigor and disease resistance. When shopping for petunias in the Panhandle, avoid anonymous petunia varieties of questionable quality and look for modern named hybrids, for example the Supertunia Series, the SuperCal series, and the Wave series. These improved hybrid petunias are resilient to pesky diseases like Botrytis Rot, flower heavily over a longer period, and tolerate temperature extremes better. Within these series, individual cultivars vary in flower color, flower size, and overall plant size (ranging from mounding monsters growing 4’ in diameter to tiny dwarfs that barely span 18”). I grew several varieties from each of these series this year and all performed wonderfully. There’s a petunia variety for every garden!
Petunia ‘Supertunia Royal Magenta’. Photo Credit: Daniel Leonard, University of Florida/IFAS Extension – Calhoun County
Once you’ve picked a quality cultivar, petunias are relatively easy to grow! In the Panhandle, petunias are grown as cool season annuals – planted in the fall (October-November) and grown through about May, finally playing out once the summer heat arrives. Petunias prefer full sun and are at home in containers filled with a quality potting mix (container size will vary from medium to large depending on the growth habit and mature size of the petunia). Petunias are not particularly drought tolerant and prefer regular water and fertilizer to look their best. I water my containers each day during sunny and warm conditions, backing off to every other day or less during cooler, cloudy weather. Because of their floriferous nature, petunias are also relatively heavy feeders and appreciate supplemental fertilizer. I top dress petunia containers with Osmocote or similar slow-release fertilizer at planting and supplement with liquid fertilizer every week to ten days during the peak of the flowering season.
Petunia ‘Supertunia Mini Vista Scarlet’. Photo Credit: Danial Leonard, University of Florida/IFAS Extension – Calhoun County
Though it’s past petunia planting time this season, be on the lookout for petunias to hit nursery shelves next fall. Simply pick a good hybrid cultivar, plant in a container in full sun, water and fertilize regularly, and you’ll be rewarded with no-fuss, months-long color until the summer heat finally draws the curtain on the show! For more information about petunias or any other horticultural topic, feel free to contact us at the UF/IFAS Calhoun County Extension office. Happy gardening!
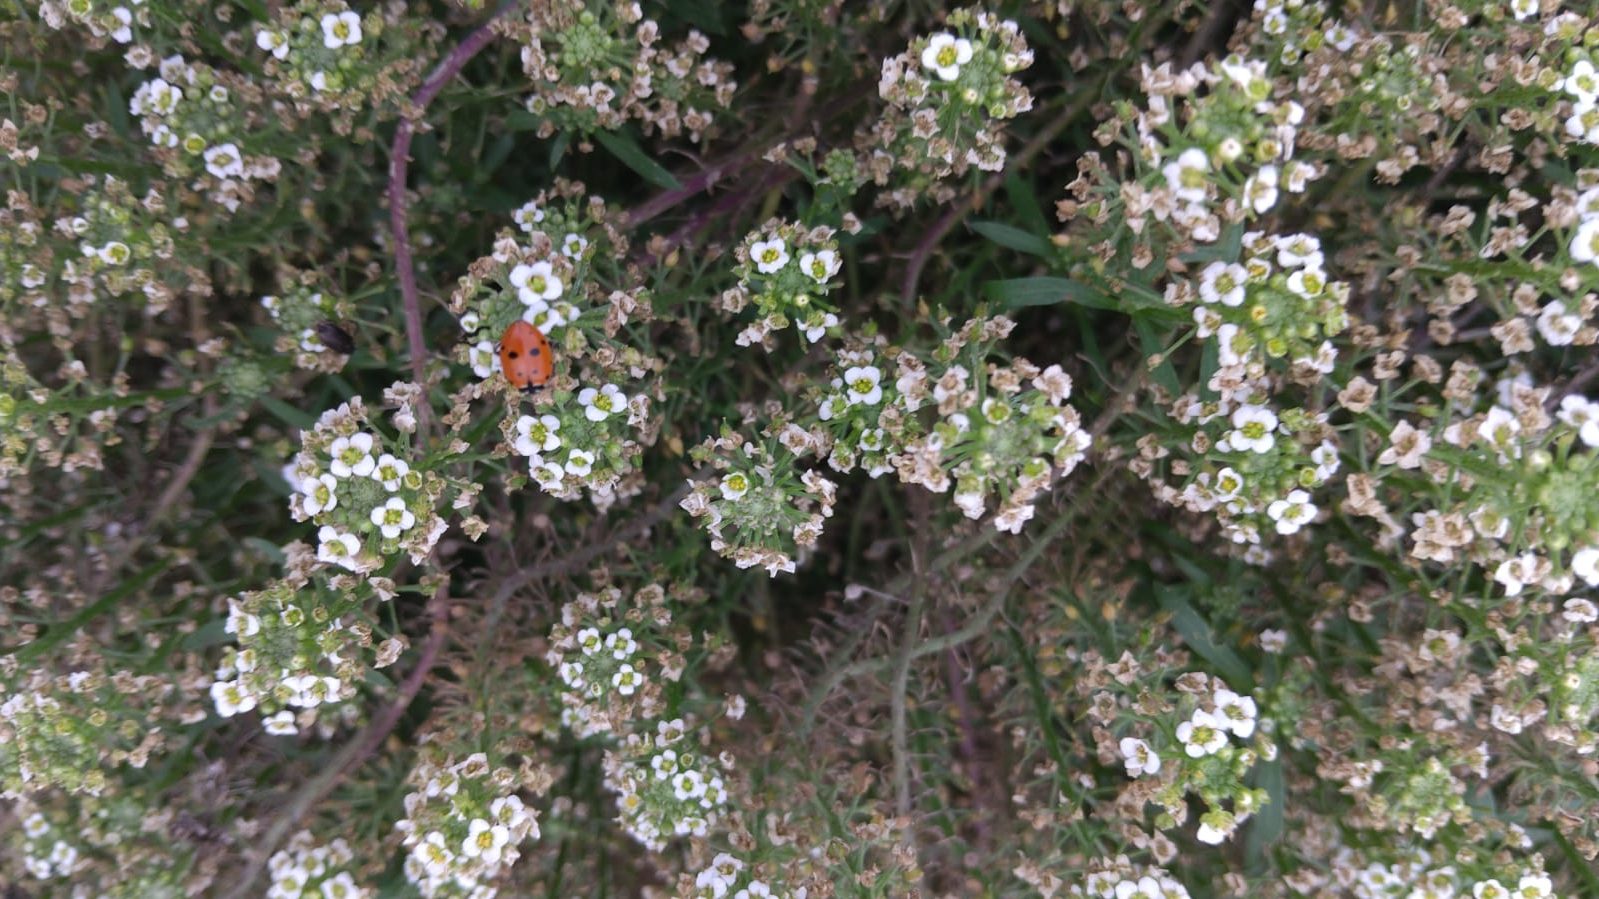
In the realm of pollinator-friendly plants, Sweet Alyssum (Lobularia maritima) often flies under the radar despite its remarkable qualities. This delicate flowering plant, with its clusters of tiny blooms, not only adds beauty to gardens but also serves as a vital resource for pollinators.
An exemplary instance is the hybrid series, Easy Breezy™, known for its compact size and remarkable heat tolerance, allowing it to thrive well beyond the spring season. Available in white, pink, and purple variations, this cultivar stands out. Another hybrid, known for its exceptional heat tolerance, is the white-flowering Lobularia ‘Inlbusnopr’, frequently marketed under the trademarked name Snow Princess®.
Let’s explore the many benefits of sweet alyssum as a pollinator crop and why it deserves a place in every garden.
Attractiveness to Pollinators
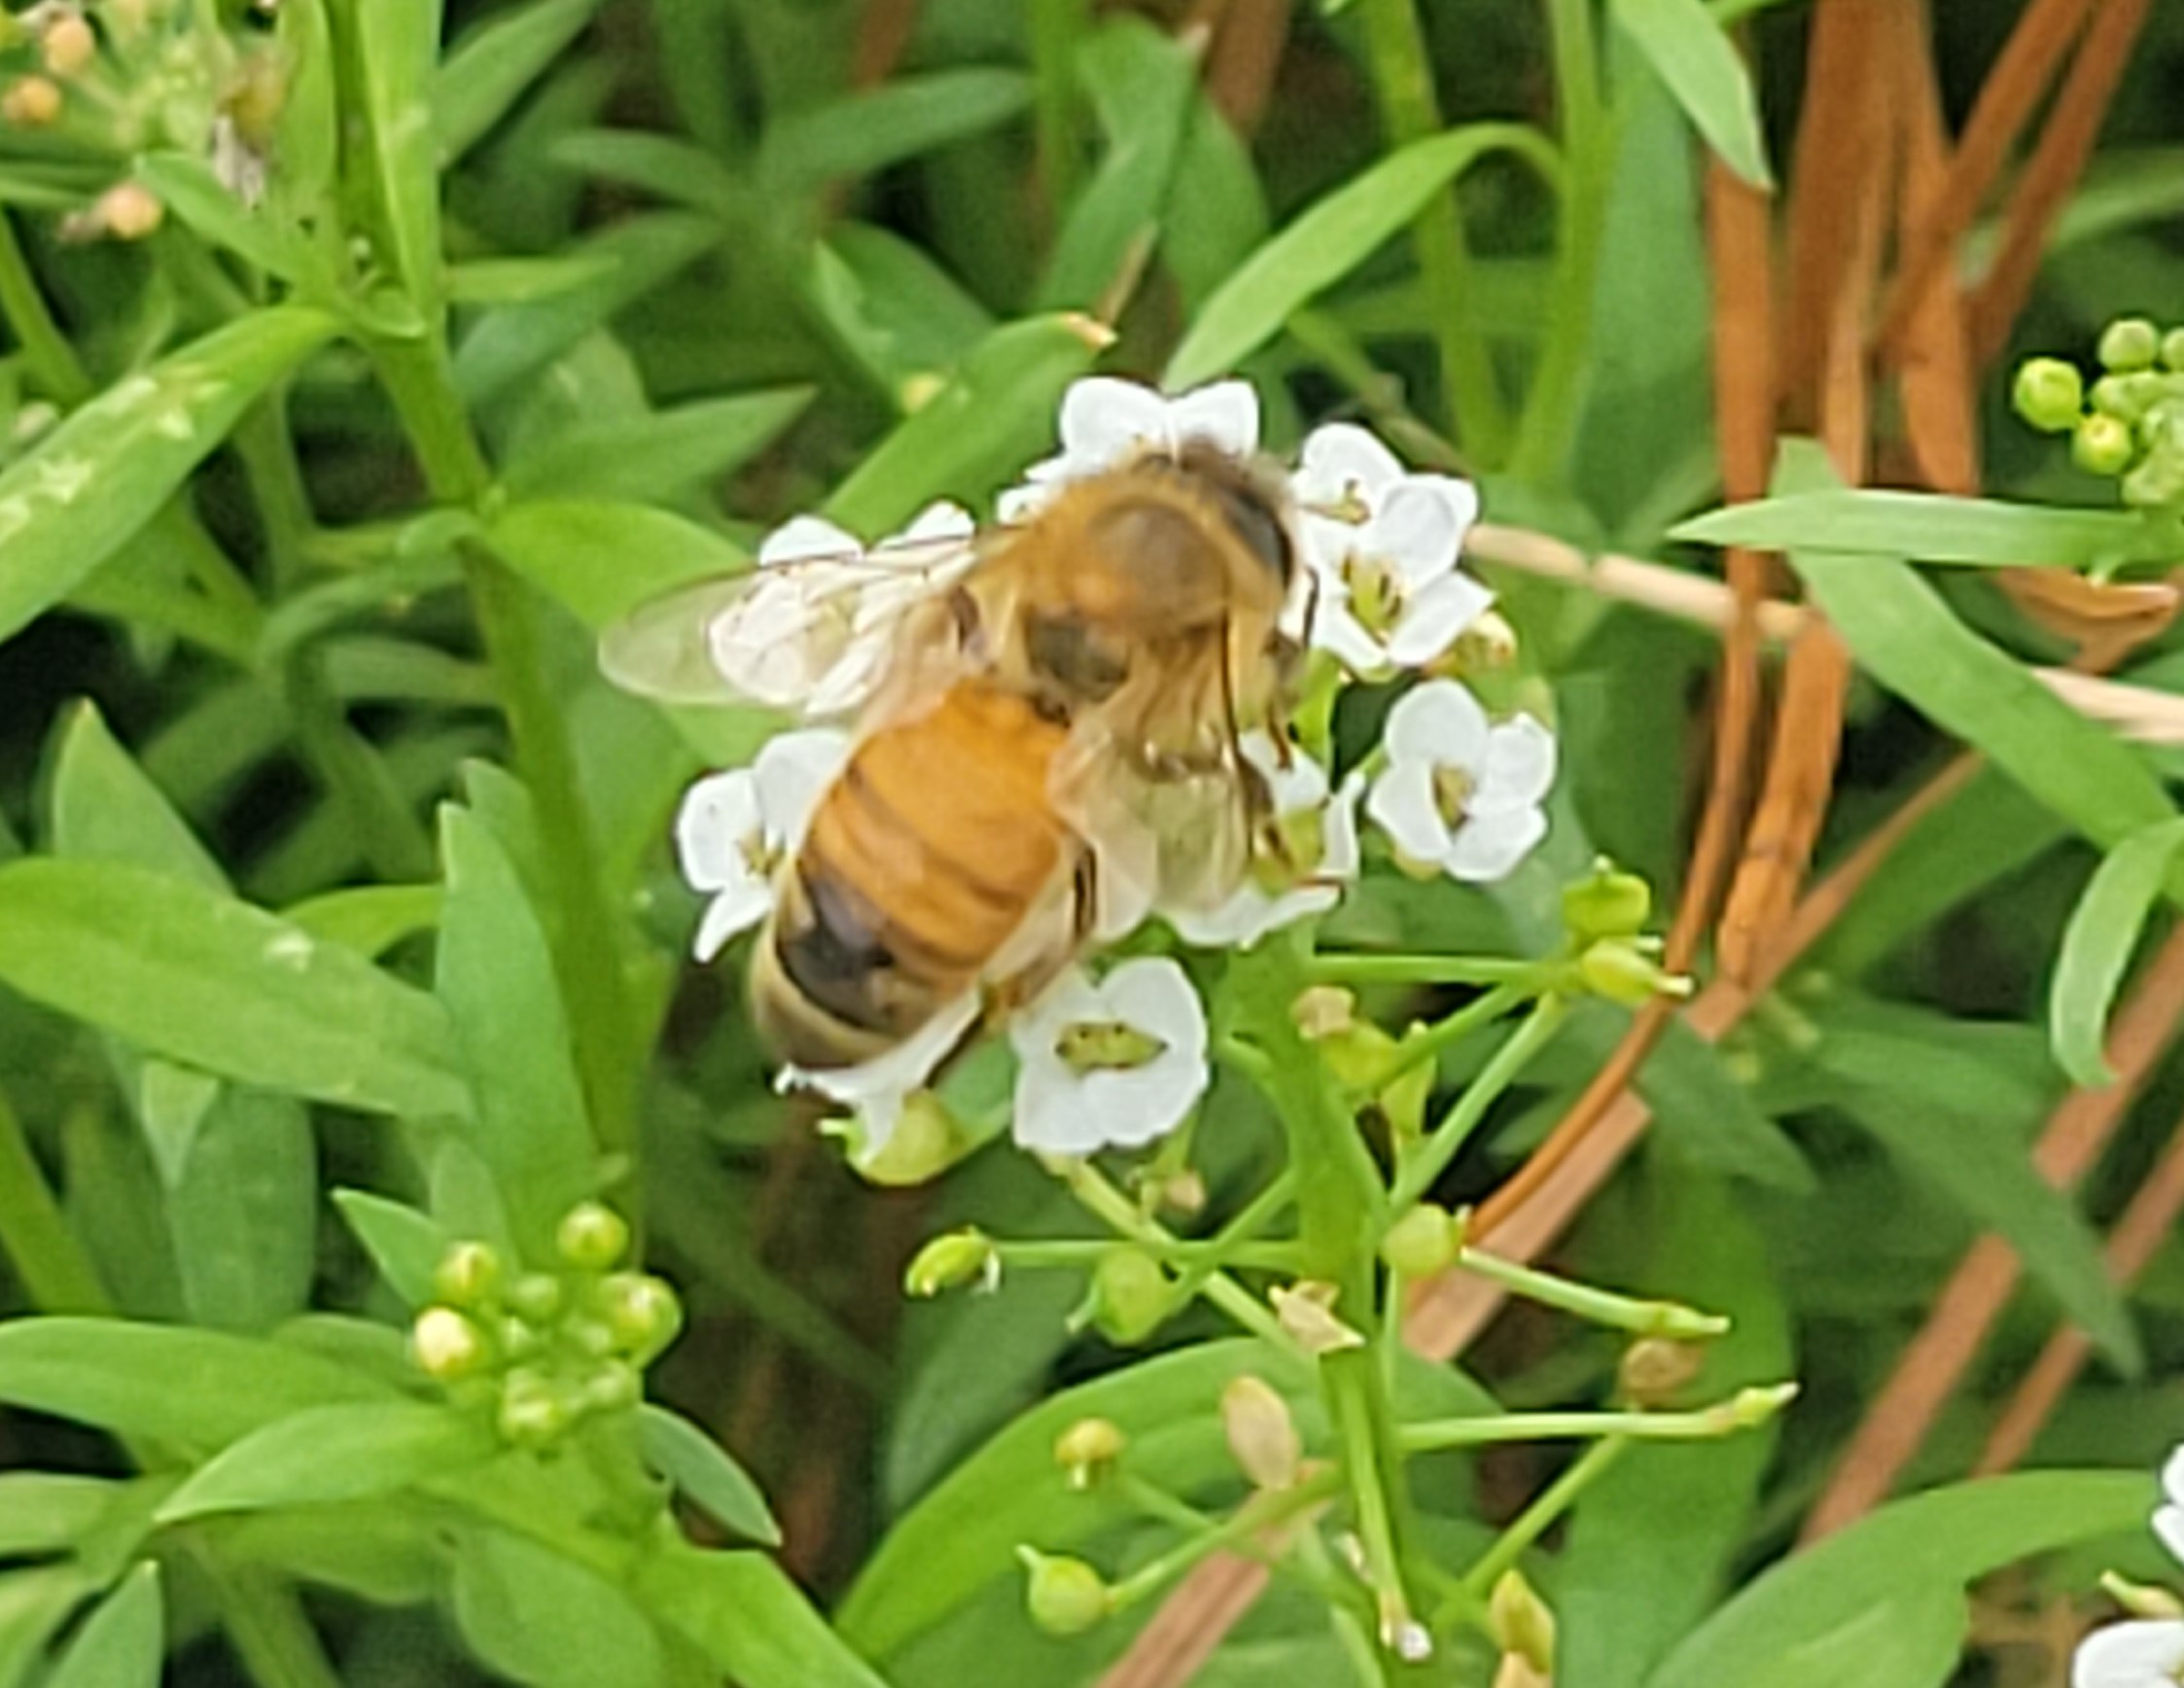
Sweet alyssum’s petite blossoms, exude a sweet fragrance that acts as a magnet for bees, butterflies, and other pollinating insects. Its nectar-rich flowers provide a vital food source for these creatures throughout the growing season.
Honey bee on sweet alyssum, photo by Worrel Diedrick
Extended Blooming Period
One of the standout features of sweet alyssum is its prolonged blooming period, which often lasts from spring through fall in favorable climates. This extended flowering season ensures a consistent supply of nectar for pollinators, especially during times when other floral resources may be scarce.
Low Maintenance and Versatility
Sweet alyssum is renowned for its adaptability and ease of cultivation. It thrives in a variety of soil types and is tolerant of both drought and heat, making it an excellent choice for gardeners seeking low-maintenance pollinator-friendly plants. Whether grown in garden beds, containers, or hanging baskets, sweet alyssum adds charm and functionality to any landscape.
Companion Planting Benefits
Beyond its role as a pollinator crop, sweet alyssum offers additional benefits to gardeners through companion planting. Its compact growth habit and dense foliage act as a natural ground cover, suppressing weeds and conserving soil moisture. Furthermore, sweet alyssum is known to attract beneficial insects such as hoverflies and predatory wasps, which help control garden pests.
Encouraging Urban Pollination
In urban environments where green spaces may be limited, incorporating sweet alyssum into landscaping projects can play a significant role in supporting local pollinator populations. Whether in public parks, rooftop gardens, or community plots, the addition of sweet alyssum provides essential forage for pollinators and contributes to urban biodiversity conservation efforts.
Sweet alyssum’s unassuming beauty and pollinator-friendly characteristics make it an excellent educational tool for teaching about the importance of pollination and ecosystem dynamics. They may be small in stature, but its impact as a pollinator crop is undeniable. By incorporating this humble yet vital plant into our landscapes, we can create havens for pollinators and contribute to the preservation of biodiversity for generations to come. Let us embrace sweet alyssum as the unsung hero of pollinator crops.
For more information on sweet alyssum, contact your county Extension office.
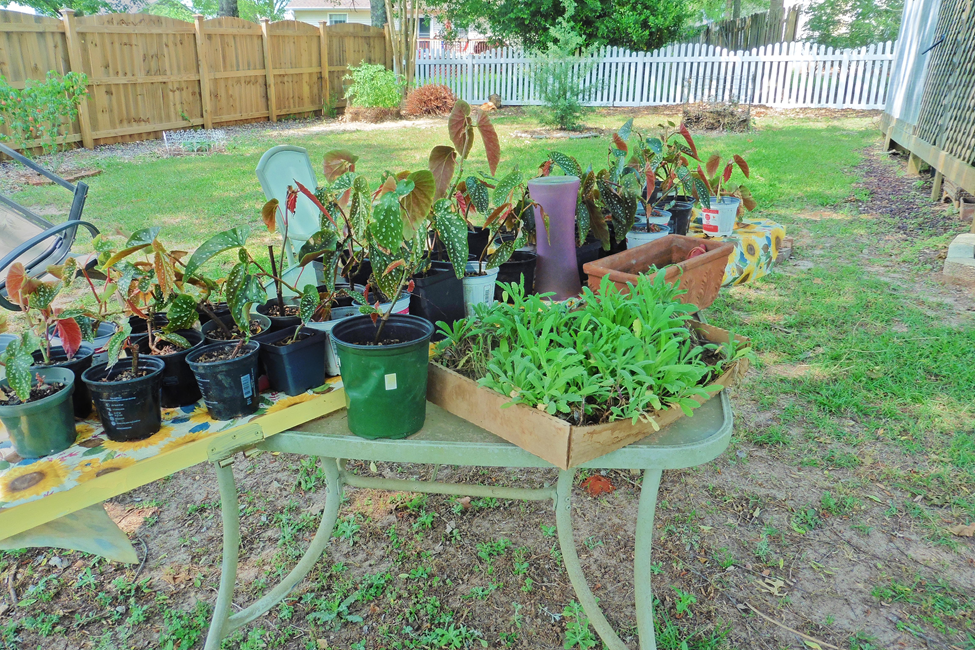
The subject of plant propagation by leaf and cane is a continuation from my article on propagating plants by layering, written in late October. Plants can be generated in multiple ways with leaf and cane techniques emerging as a possible indoor winter and early spring project. Not all plants can be propagated with a leaf or parts of leaves. Fortunately, some of the plants that can are ones we all enjoy growing indoors or in protected areas outdoors, like a covered porch and other similar locations. Do an assessment of indoors windows with bright light and a few hours of sunlight for the best success. If you are fortunate to have a backyard greenhouse that is heated, you may want to try it there.
One of the simplest ways to grow a new plant is by clipping a leaf and petiole section off an existing plant that has certain characteristics you like (bloom color or the growth of the plant). African violets and sedum are plants that can be easily propagated in this manner. The length of petiole connected to the leaf should be around 1 ¼ – 1 ½ inches in length, this portion of the leaf will be planted in potting mix. I would suggest planting two in a small to medium sized container to increase the chance of a successful rooting and the new plant establishing. When the new plant leaves have emerged, usually in 6 – 10 weeks, they are clipped away from the original leaf and petiole. Some will reuse the original and replant, but I tend to discard and begin with a new one.
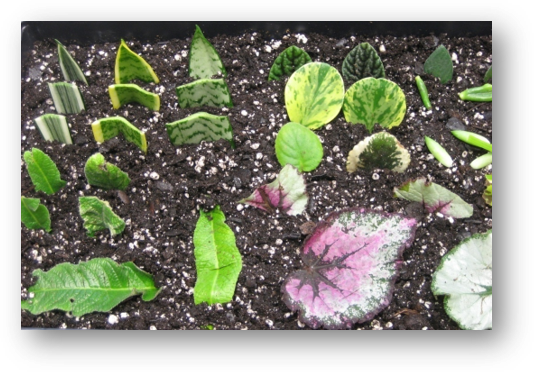
Plants being propagated by leaf cuttings. Photo Credit: University of Florida/IFAS
Next up is trying to propagate using a leaf without the petiole. This form of propagation can occur with plant that possess fleshy leaves that are thicker, with more energy to produce a new plant. The jade plant, snake plant and African violet are examples of plants that root and form new plants successfully in this way. Place a leaf or a piece of leaf vertically into a container filled with slightly damp plant media. Be sure the leaf midvein is placed into the soil as this will likely be the site of the new plant’s emergence.
Cane cuttings are yet another process for propagating a new plant. If you have ever grown a Dieffenbachia, better known as dumb cane or corn plant, they can become leggy and require staking to keep limbs from bending away from the center of the plant. If you look closely, you may see dormant adventitious buds (nodes). These buds will be the future leaf emergence area for the new plant. With a sharp clean knife cut remove a 6 – 10-inch section of the stem. The top leaf areas and smaller stem section can be removed and discarded.
Next, cut so that two stem sections are together with at least 2 nodes. Place the sections horizontally or vertically with the bottom third of the section indented into the potting media for go plant to soil contain. Make sure the node is facing upward. Once rooted with new leaves emerging, you may transplant them into a selected pot for future growth and establishment.
As mid to late spring arrives and the danger of frost passes, you can move the plants to a covered porch or under tall shade trees with filter sunlight for the summer and early fall. Enjoy creating new plants and maybe share a few with family and friends!