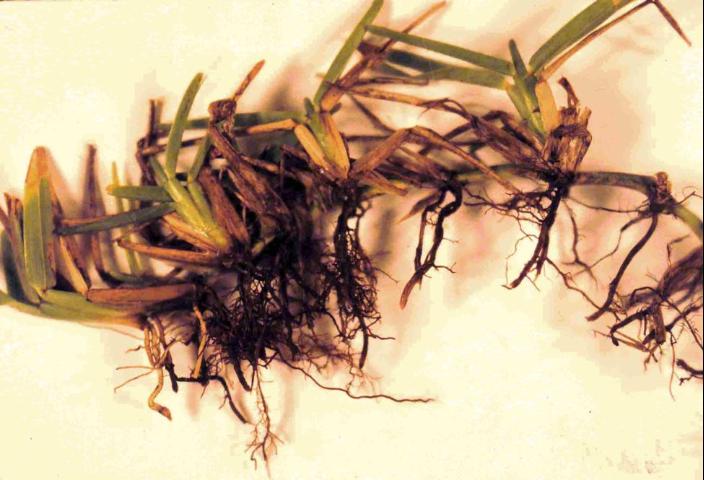
St. Augustinegrass roots rotted due to take-all root rot. (Photo Credit: IFAS Photos)
The crisp air of fall is upon us. Maybe. We live in northwest Florida and we are not experiencing the change in weather just yet. With the change in weather coming, we are having specific issues in turfgrass lawns and are sure to have others in the near future. Extension agents in the western panhandle have come into contact with several St. Augustine lawns with symptoms and signs of take-all root rot (Gaeumannomyces graminis var. graminis) and we can soon expect with cooler temperatures for Large Patch to be rearing its ugly head.
Early aboveground symptoms of take-all root rot. (Photo Credit: IFAS Photos)
Take-all root rot is sometimes referred to as a “stress disease”, as it is brought on by stressful weather conditions and improper management. Periods of rainfall can provide conditions for the disease to affect all warm season grasses. Other stresses such as improper mowing height, improper irrigation, and improper fertilization can worsen the situation. For example, St. Augustinegrass, except dwarf cultivars, should be mowed at 3.5 to 4 inches and the mower should never remove more than 1/3 of the leaf blade at any cutting. With the current high temperatures and prolonged periods of rainfall it can be difficult to follow this practice. When a homeowner does not mow the lawn in a timely manner and lets the lawn grass get much too high and cuts more than 1/3 of the grass blade, this can become a stress to the lawn. Fungicide sprays can be made during favorable environmental conditions, before symptoms are seen to protect from infection with take-all root rot for high valued properties. To learn more about take-all root rot refer to this University of Florida/IFAS Extension publication: Take-all Root Rot
With the fall weather coming, please be sure to read and learn about large patch disease as well. This can brought on by temperatures of less than 80 degrees and high humidity or extended periods of rainfall. Read the University of Florida/IFAS Extension publication for more information: Large Patch
For any other information needed regarding proper lawn management, please visit Your Florida Lawn or contact your local UF/IFAS Extension office.
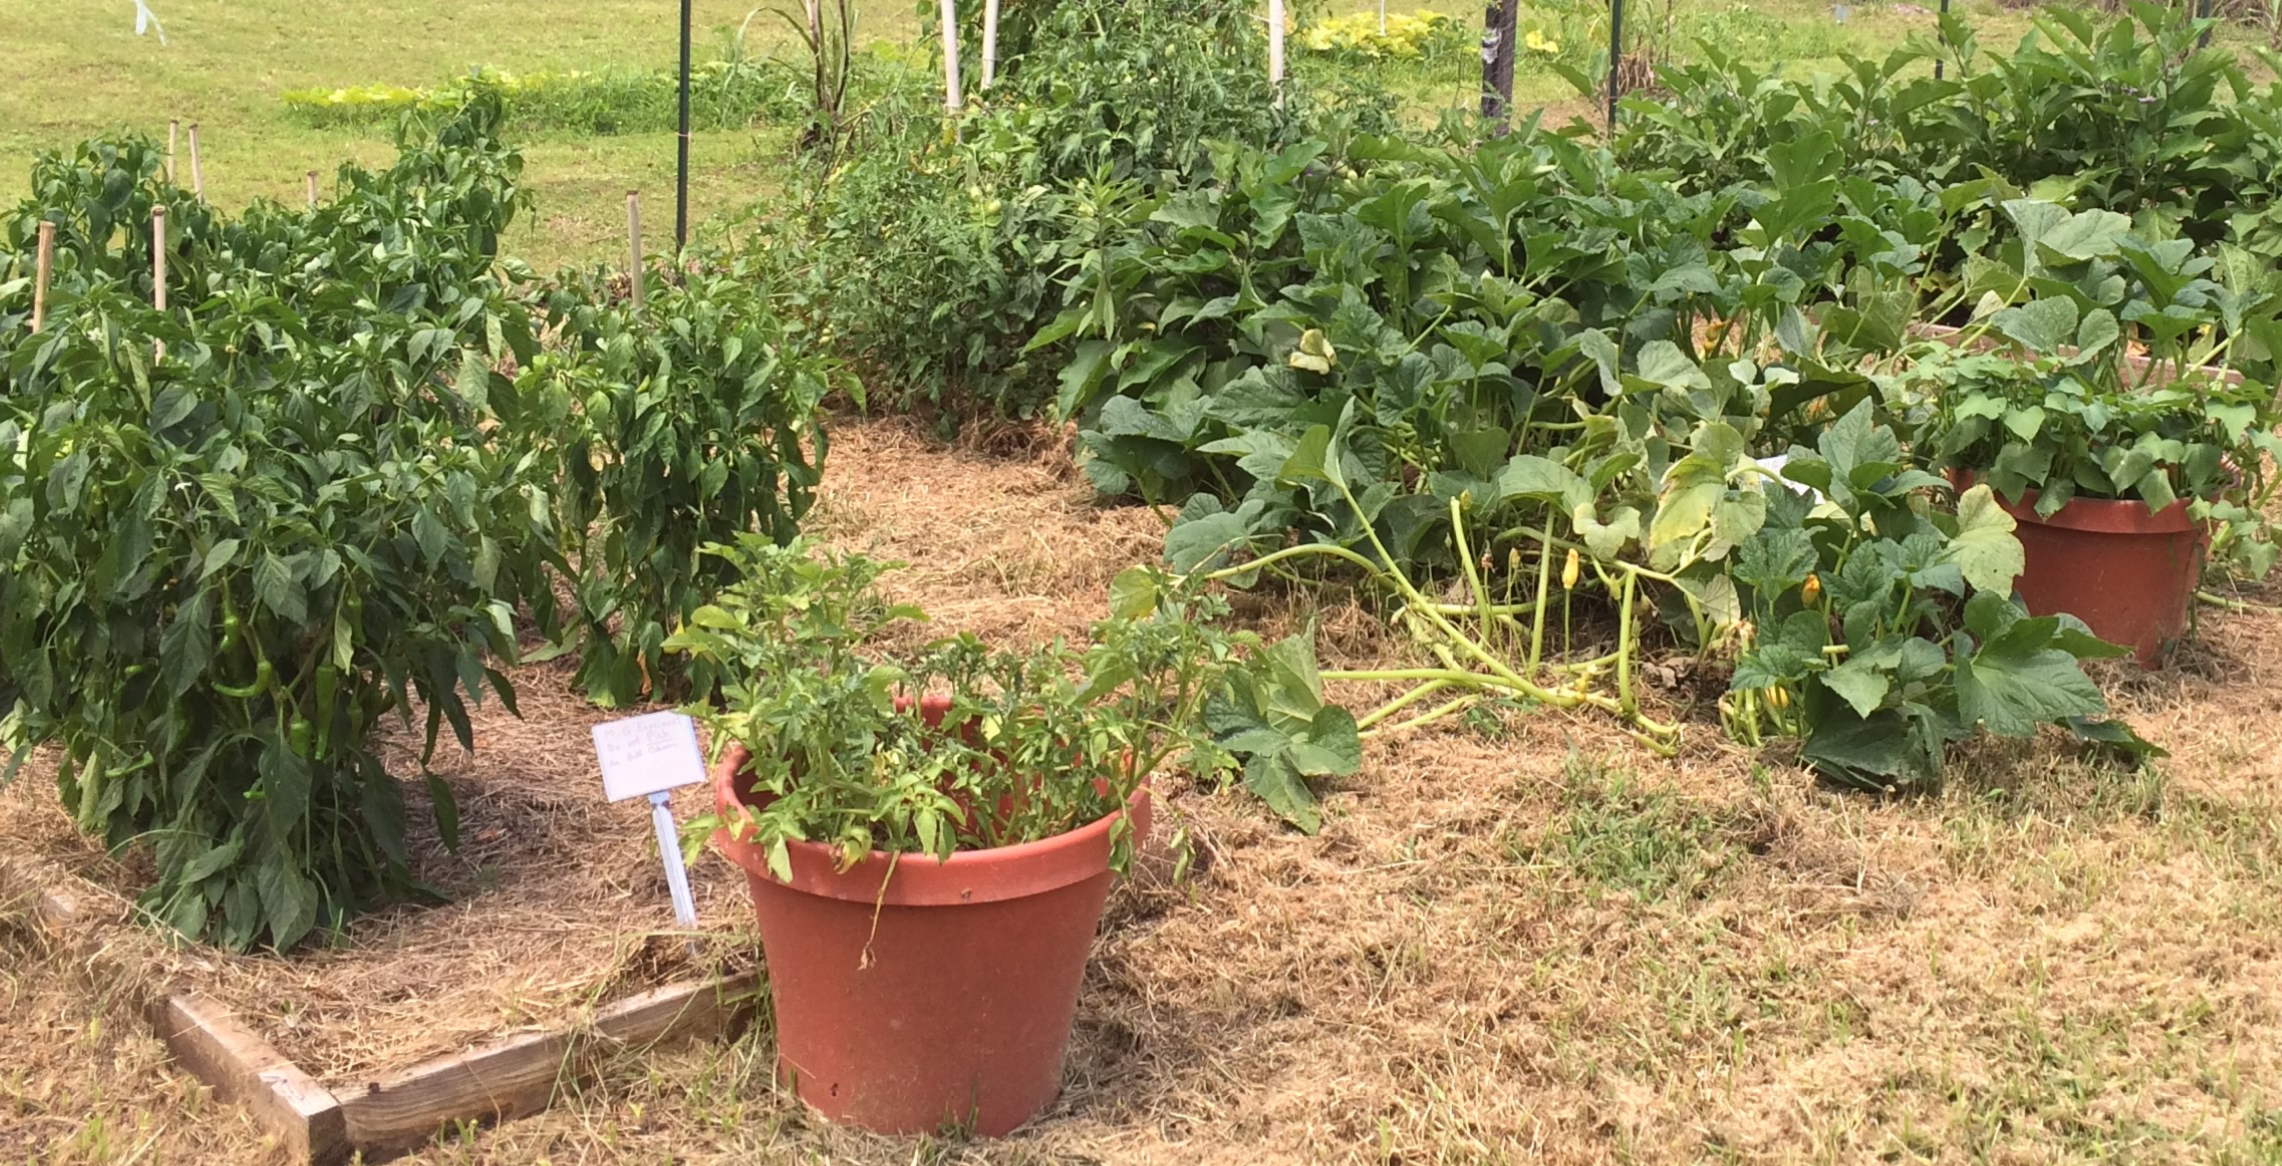
Being a gardener in the panhandle has its advantages. We’re able to grow a tremendous variety of vegetables on a year-round basis. However, in this climate, plant diseases, insects and weeds can often thrive. Usually, chemical measures are applied to thwart these pests. Some panhandle gardeners are now searching for techniques regarding a more natural form of gardening, known as organic. With fall garden planting just ahead, this may be an option for conventional vegetable gardeners looking for a challenge.
Vegetable Garden at UF/IFAS Extension Wakulla County. Photo credit: Ray Bodrey UF/IFAS.
So, what is organic gardening? Well, that really depends on who you ask. A broad definition is gardening without the use of synthesized fertilizers and industrial pesticides. Fair warning, “organic” does not translate into easier physical gardening methods. Laborious weeding and amending of soil are big parts of this gardening philosophy. This begs the question, why give up these proven industrial nutrient and pest control practices? Answer: organic gardening enthusiasts are extremely health conscious with the belief that vigorous outdoor activity coupled with food free of industrial chemicals will lead to better nutrition and health.
As stated earlier, the main difference between conventional and organic gardening is the methods used in fertilization and pest control. In either gardening style, be sure to select a garden plot with well-drained soil, as this is key for any vegetable crop. Soil preparation is the most important step in the process. To have a successful organic operation, the garden will require abundant quantities of organic material, usually in the form of animal manures and compost or mixed organic fertilizer. These materials will ensure water and nutrient holding capacity. Organic matter also supports microbiological activity in the soil. This contributes additional nutrients for plant uptake. Organic fertilizers and conditioners work very slowly. The vegetable garden soil will need to be mixed and prepped at least three weeks ahead of planting.
Effective organic pest management begins with observing the correct planting times, selection of the proper plant variety and water scheduling. Selecting vegetable varieties with pest resistant characteristics should be considered. Crop rotation is also a must. Members of the same crop family should not be planted repeatedly in the same organic garden soil. Over watering can be an issue. Avoid soils from becoming too wet and water only during daylight hours.
For weed management, using hand tools to physically removing weeds is the only control method. As for insect management, planting native plants in the immediate landscape of the organic garden will help draw in beneficial insects that will feast on garden insect pests. The use of horticultural oil or neem oil is useful. However, please read the product label. Some brands of oils are not necessarily “organic”. Nematodes, which are microscopic worms that attack plant roots, are less likely an issue in organic gardens. High levels of organic matter in soil causes an inhospitable environment for nematodes. Organic disease management unfortunately offers little to no controls. Sanitation, planting resistant varieties and crop rotation are the only defense mechanisms. Sanitation refers to avoiding the introduction of potential diseased transplants. Disinfecting gardens tools will also help. Hydrogen peroxide, chlorine and household bleach are disinfecting chemicals allowed in organic gardening settings as these chemicals are used in organic production systems for sanitation. Staking and mulching are also ways to keep plants from diseases by avoiding contact with each other and the soil.
Organic gardening can be a challenge to manage, but better health and nutrition could be the reward. Please take the article recommendations into consideration when deciding on whether to plant an organic garden. For more information, contact your local county extension office.
Supporting information for this article can be found in the UF/IFAS EDIS publication, Organic Vegetable Gardening in Florida, by Danielle D. Treadwell, Sydney Park Brown, James Stephens, and Susan Webb.
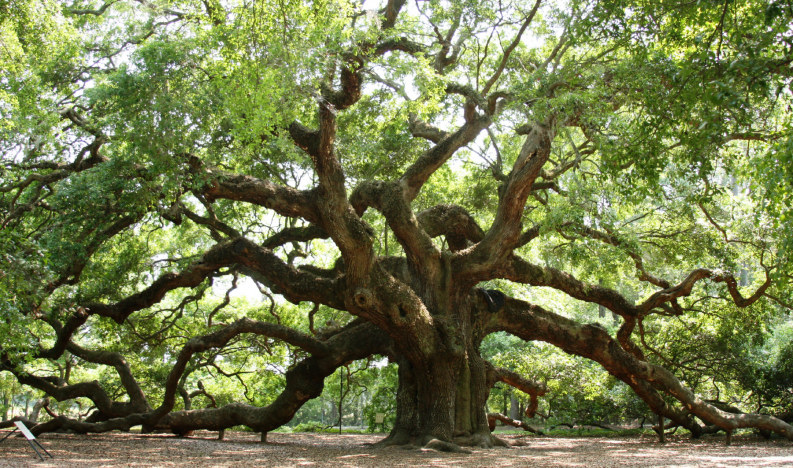
The Live Oak (Quercus virginiana) is one of the most iconic figures of the Deep South. Mentioning the words Live Oak invokes all sorts of romantic nostalgia of yesteryear and the reputation is not unearned. In fact, many Live Oaks still stand that were growing on American soil when the first English settlers set foot on Plymouth Rock. They are long-lived, picturesque trees that also happen to be nearly bulletproof in the landscape. Given these factors, it is not surprising that Live Oak is far and away the most common tree included in both residential and commercial landscapes in the Coastal South. However, even the venerable Live Oak is not without its problems; this article will discuss a few of the more common issues seen with this grand species.
The Angel Oak near Charleston, SC
Few conditions afflict live oak but when they do, improper planting or cultural practices are usually at play. Observing the following best management practices will go a long way toward ensuring the long-term health of a planted Live Oak:
Remember to always plant trees a little higher than the surrounding soil to prevent water standing around the trunk or soil piling up around it, both of these issues frequently cause rot to occur at the base of the tree.
If planting a containerized tree, remember to score the rootball to prevent circling roots that will eventually girdle the tree. If planting a B&B (Balled and Burlap) specimen, remember to remove the strapping material from the top of the wire basket, failure to do this can also result in the tree being girdled.
Live Oak has few insect pests but there are some that prove bothersome to homeowners. The following are two of the most common pests of Live Oaks and how to manage them:
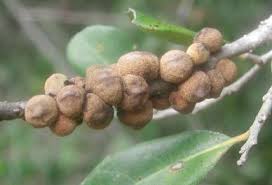
Typical galling on Live Oak
Galls are cancerous looking growths that appear on the leaves and twigs of Live Oak from time to time and are caused by gall wasps that visit the tree and lay their eggs inside the leaf or stem of the plant. The larvae hatch and emerge from the galls the following spring to continue the cycle. These galls are rarely more than aesthetically displeasing, however it is good practice to remove and destroy gall infected stems/leaves from younger trees as gall formation may cause some branch dieback or defoliation. Chemical control is rarely needed or practical (due to the very specific time the wasps are outside the tree and active) in a home landscape situation.
Black Twig Borers can also be problematic. These little insects seldom kill a tree but their damage (reduction of growth and aesthetic harm) can be substantial. Infestations begin in the spring in Northwest Florida, with the female twig borer drilling a pen-head sized hole in a large twig or small branch and then laying her eggs in the ensuing cavity. She then transmits an ambrosia fungus that grows in the egg-cavity, providing food for the borer, other borer adults, and her offspring that take up residence and over-winter in the twig. The activity of the insects in the twig has an effect similar to girdling; the infected twig will rapidly brown and die, making removal and destruction of the infected branches a key component
In conclusion, though there are a few problems that can potentially arise with Live Oak, its premier status and continued widespread use in the landscape is warranted and encouraged. It should be remembered that, relative to most other candidates for shade trees in the landscape, Live Oak is extremely durable, long-lived, and one of most pest and disease free trees available. Happy growing!
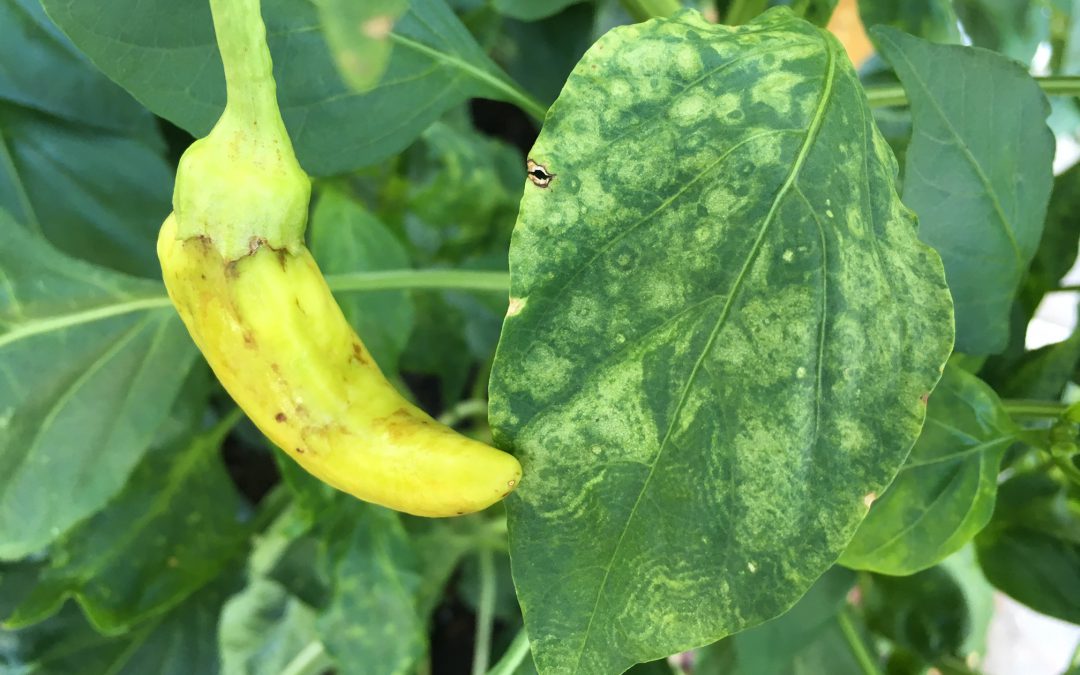
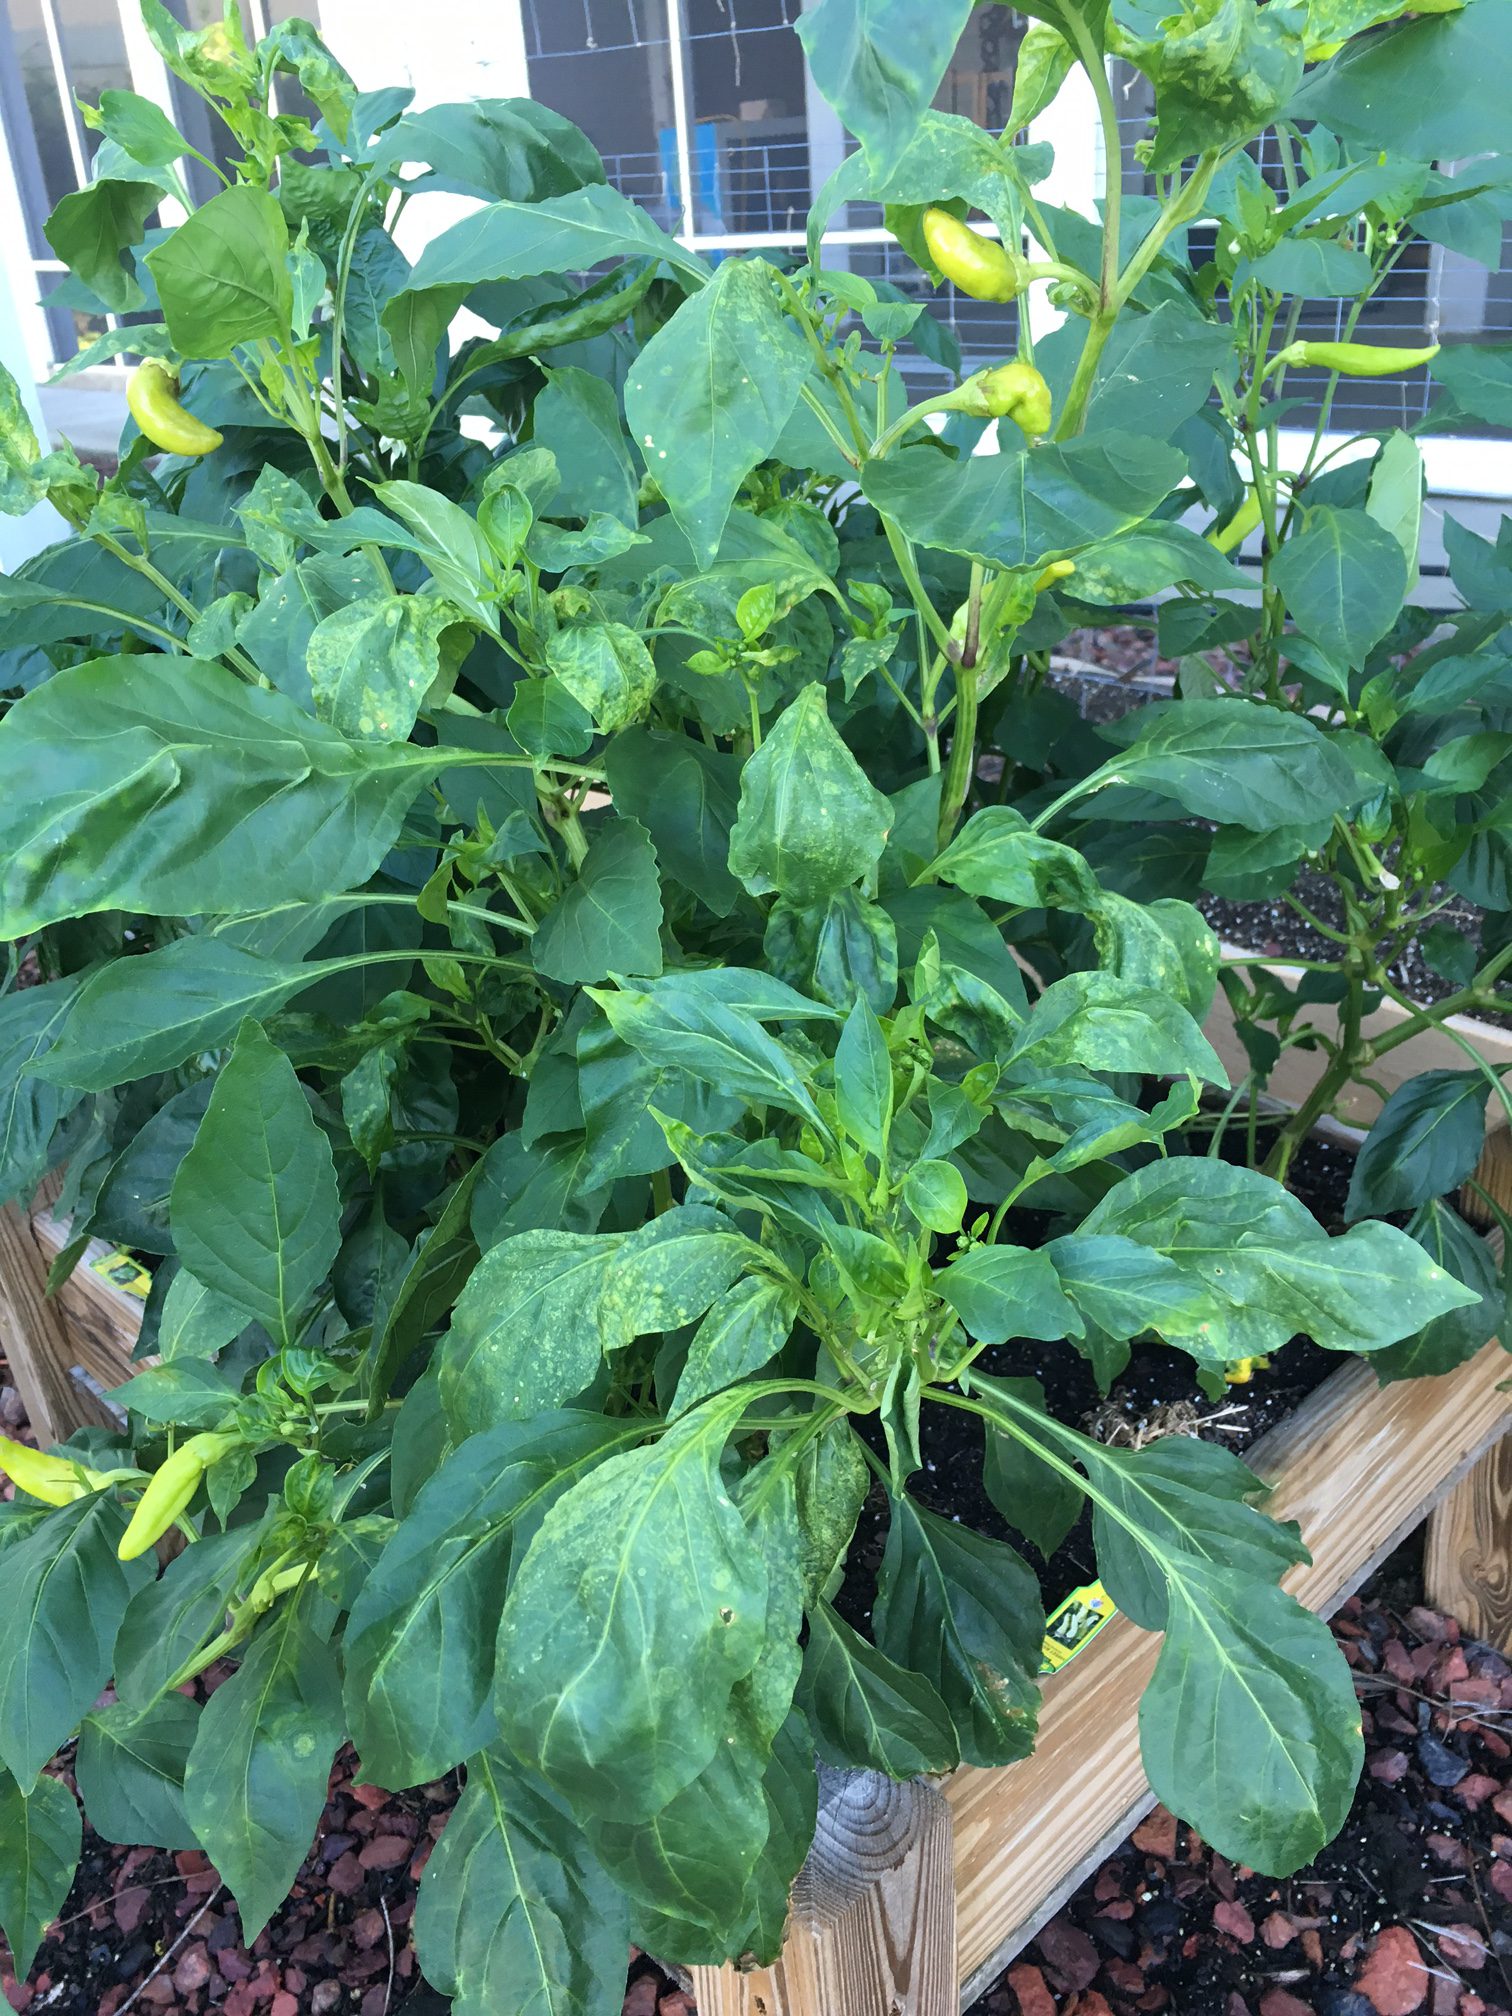
Peppers and tomatoes are in the same plant family – solanaceae or more commonly known as the nightshade family – and can be susceptible to some of the same diseases. This is true of Tomato Spotted Wilt Virus (TSWV). The solanaceae family includes potatoes, eggplant, tobacco, petunia, tomatillo and deadly nightshade in addition to pepper and tomato.
Pepper with TSWV. Photo credit: Mary Derrick, UF IFAS Extension.
This virus is spread by very small insects known as thrips. They acquire the virus as larvae when feeding on an infected plant and then transmit the disease when they fly to other susceptible plants as adults.
Initial symptoms are yellowing and distortion of the leaves. The leaves can also display yellow or brown circular ring spots. The severity of the virus can depend on the particular cultivar of pepper, its age and the environmental conditions in which the pepper is growing. Fruit can develop yellow, brown or ring spots as well.
TSWV infection showing ring spot on leaves and lesions on fruit. Photo credit: Mary Derrick, UF IFAS Extension.
If you think your pepper has TSWV, consult your local extension agent to confirm the diagnosis. But once infected, there is no treatment for the plants and they should be pulled up and disposed of in the trash to prevent other susceptible plants from becoming infected.
Homeowners and businesses will often send in plant and insect pictures to the Extension Office. This is a convenient practice for both clientele and Extension Agents, but sometimes it may make diagnosis more difficult and more time-consuming. More often though, a fresh or living specimen is necessary for proper identification.
In an age when high quality pictures can be taken and viewed within milliseconds, plant, disease and insect ID can still take time. Often it is due to the fact we simply don’t know the answer right away and research is required. Sometimes poor picture quality and scale can make the diagnostic process more difficult. To improve identification turnaround time follow these basic steps:
When it comes to taking pictures for diagnostic purposes, more is better. The more pictures depicting angles and magnifications received for a sample the better. If you want a plant identified, take a picture of the entire plant including flowers, leaves, and roots. Take pictures of various stages of spots on leaves, stems, and fruits if you suspect a disease or nutritional disorder. Take pictures from multiple angles and of various body parts for insect identification.
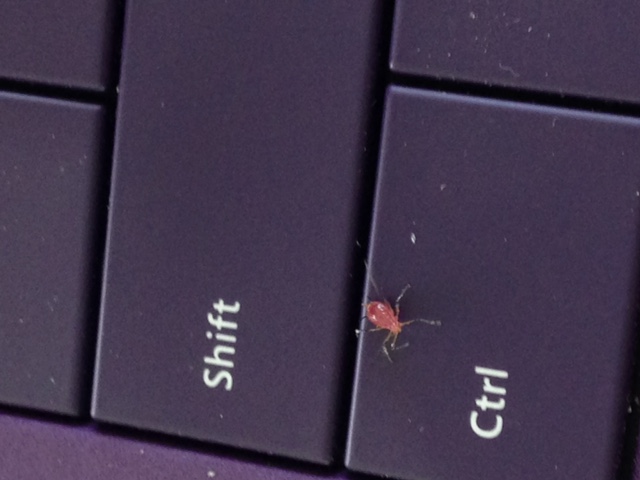
Place an item in the frame of the picture to give a good idea of the size of the specimen through the concept of scale. You could use a ruler, a coin, or even a ballpoint pen. Objects such as coins work well for tiny insects when the measurements on a ruler may be too hard to see in the photo. You can even place the insect on the coin.
A computer keyboard used to show scale for a photo of an aphid. Photo Credit: Julie McConnell – UF/IFAS Extension Bay County
Pay attention to focus on the subject. This is especially true when taking closeup photos and photos of small things with a cell phone camera. Cell phone cameras tend to focus on the background instead of the foreground. Sometimes the quickest solution is to place your hand behind the subject to change the automatic focus and then either leave it in the picture for scale or remove it and snap the picture quickly. It is also important to have a contrasting background such as placing a white or black paper or plastic card behind the subject.
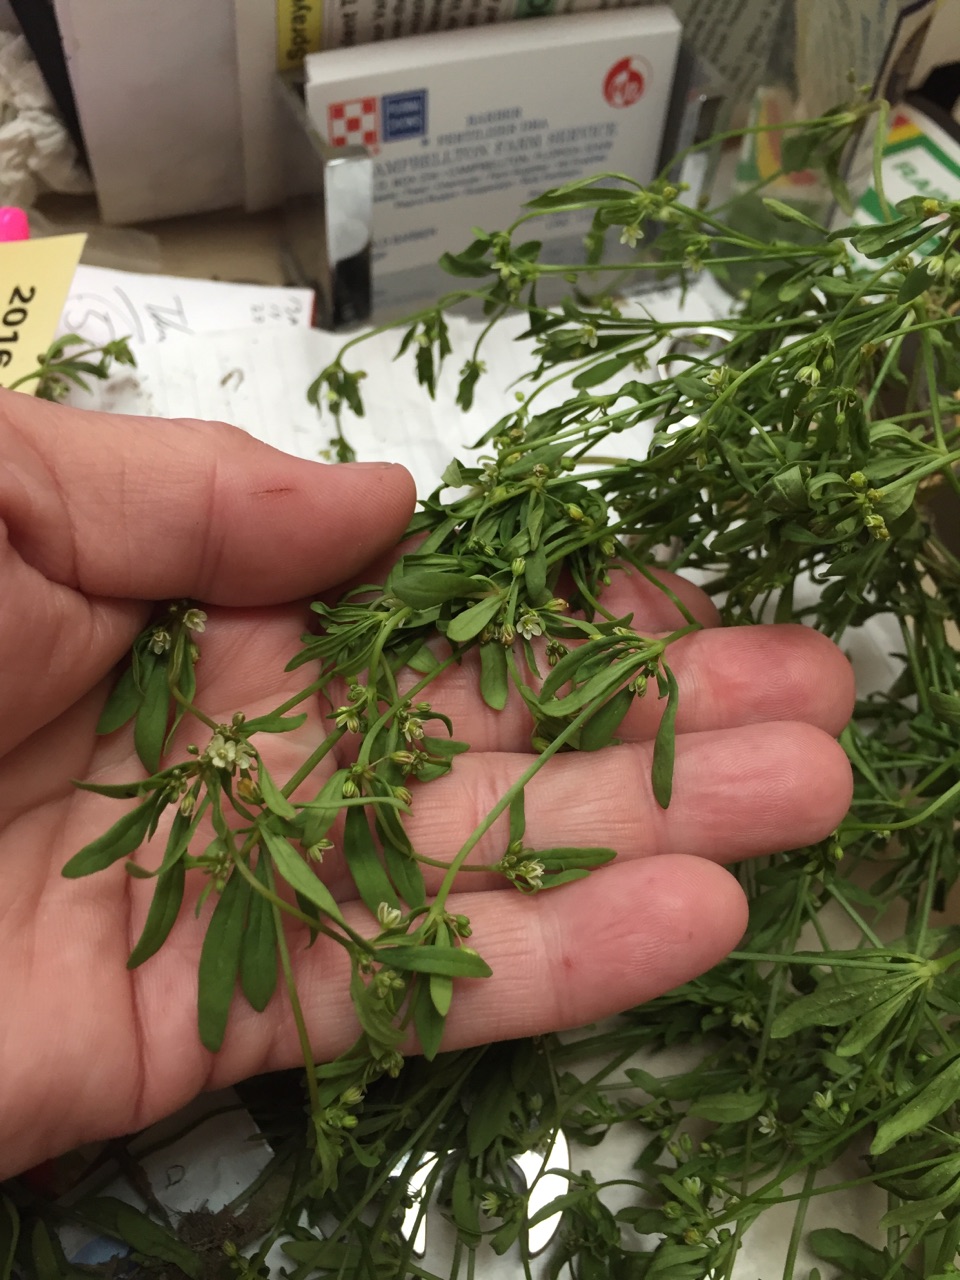
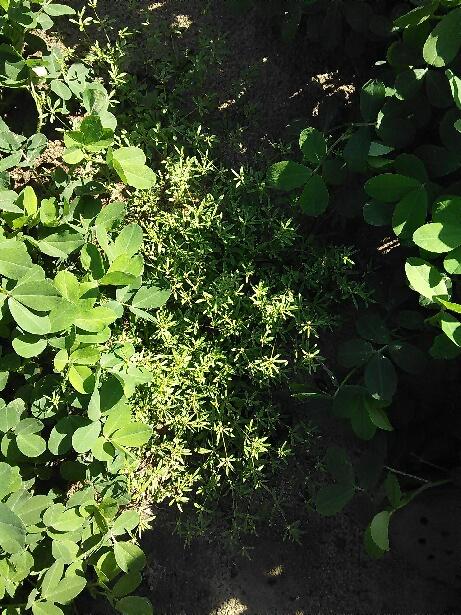
A poor picture of carpetweed growing in a peanut crop.
A good picture of carpetweed using a hand for focus and perspective.
Although it is quicker and easier to email or text plant and insect pictures, the most accurate identification can be accomplished with a fresh sample. Whether you are bringing a sample into your local Extension Office or one of the diagnostic clinics located throughout the state, it is important to follow the guidelines detailed in this publication http://edis.ifas.ufl.edu/sr007.
Extra Credit – If you want to improve you ability to take magnified photos, you may want to build the device featured in the following video “Turn Your Smartphone Into a Digital Microscope”.
When you don’t know what’s ailing your plant, ask an expert.
Many gardeners get stumped when a favorite plant of theirs comes down with a strange “something”. Many of these gardeners know about UF/IFAS Extension and call their local horticulture and agriculture agents for assistance in figuring out what’s going on. However, even these experts are often stumped by what they see. Fortunately, the agents have another layer of experts to fall back on. In addition to the resources in Gainesville, we have the Plant Disease Diagnostic Clinic, located at the North Florida Research Center in Quincy. Plant pathologists here can help determine what fungus, bacteria, virus, or viroid may be the problem.
Plant pathologists are basically plant doctors. They use all sorts of sophisticated techniques to determine what is the cause of a particular plant problem, from growing out fungal spores to examining DNA. Not only do these plant doctors tell us what the ailment is, they also provide recommended cures, or control options. They are also doing research to prevent different diseases from taking hold in our area and reduce the impact on our local growers.
Plant pathologist at work!
At a recent workshop in Quincy, we learned that plant pathology researchers are working on a fungus that affects watermelons, virus and bacteria that can wipe out a farmer’s tomato crop, and a virus that could impact our local roses. Working as a team of scientists, they study these pathogens in the lab and conduct controlled field experiments to figure out which techniques are most effective. Some of this research is leading to different methods and/or products that can help growers and gardeners alike keep their fields and landscapes healthy.
So, if your plants have problems, please contact your local Extension Office. If they don’t know the answer, then the network of scientists, including plant pathologists, in the UF/IFAS Extension family can be called on for backup to provide you with the best possible answer.