by Daniel J. Leonard | Oct 1, 2020
In my ongoing search for low-maintenance vegetable varieties that perform well in small spaces, like my raised bed garden, I decided to try a newish Eggplant variety called ‘Patio Baby’ this summer. Developed by PanAmerican Seed and winner of the 2014 All-American Selections Vegetable- edible category, I was drawn to ‘Patio Baby’ due to the advertising claims made that it was a true miniature variety, perfect for growing in containers, only reaching 20” or so in height and producing both “early” and abundant fruit. I’ve been very pleased with the performance of this extremely unique variety so far in my informal backyard trial and definitely think it deserves consideration in your garden too!
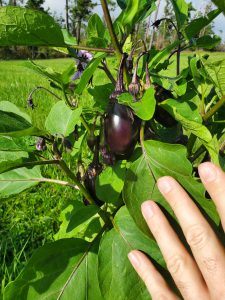
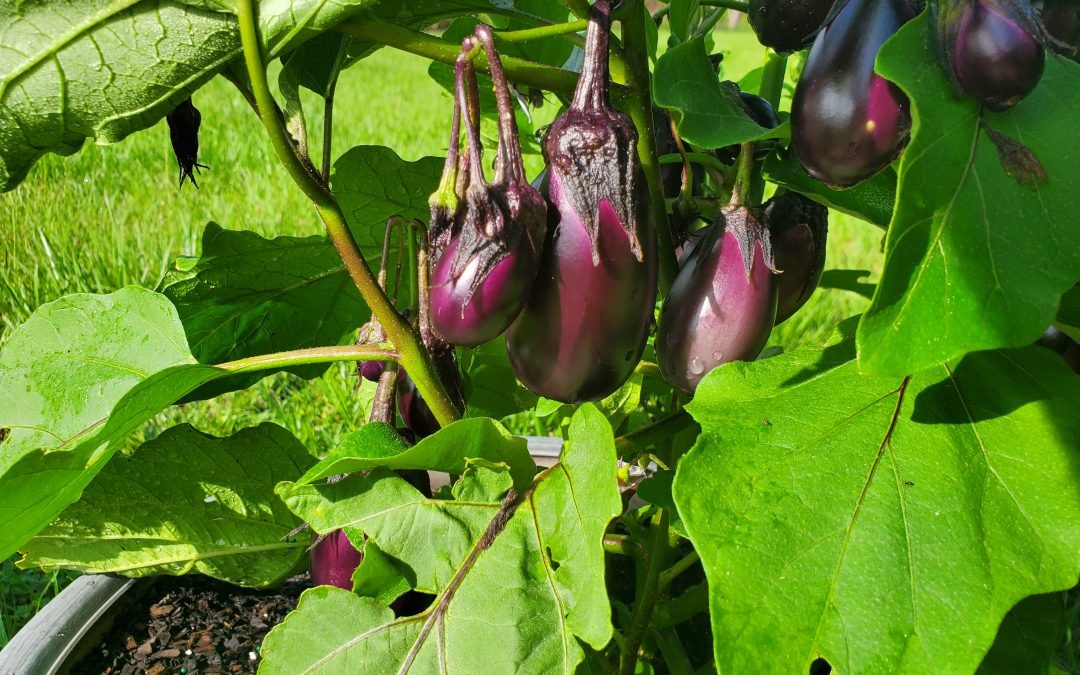
‘Patio Baby’ fruit ready for harvest in September 2020. Photo courtesy of Daniel Leonard.
The first observation when seeing a mature ‘Patio Baby’ is how small the plant is, leaves, flowers, fruit, everything. Compared to a standard ‘Black Beauty’ variety, ‘Patio Baby’ plants measure maybe a third as tall and wide. Where a “normal” eggplant fruit might be slightly larger than a softball and often have spines on their calyxes (the green part that connects the purple fruit to the stems), ‘Patio Baby’ fruit are roughly the size of a large chicken egg and totally spineless! I find this smaller plant and fruit size to have several perks. Vegetable plants that grow 2’ tall and wide are just about perfect for raised bed gardening. If you don’t require a large quantity of eggplant, you won’t have to sacrifice an entire bed’s space to ‘Patio Baby’ like you would with the standard varieties. Also, ‘Patio Baby’ fruit won’t bend or break branches and are held strongly on the plants, with no need for staking, another bonus when space is at a premium. Finally, I find it much easier to harvest, handle and prepare the small, spineless ‘Patio Baby’ fruit in the kitchen. Think of them as a “personal pan” eggplant. As I’m the only one in my house who eats much eggplant, I waste a lot less fruit cooking these little guys!
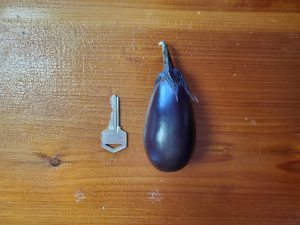
‘Patio Baby’ mature fruit. Standard house key used as a size reference. Photo courtesy of Daniel Leonard.
‘Patio Baby’ Eggplant also lives up to its reputation of being exceedingly easy and quick to grow. I purchased a packet of ‘Patio Baby’ seed from Johnny’s Selected Seeds in June and planted three in a 20” diameter decorative pot next to my raised bed garden during the first week of July, behind summer squash that had recently expired in the heat of late June. After sprouting, the plants grew strongly and, true to form for most Eggplant varieties, were bothered by no serious pest or disease issues other than the normal stinkbugs and occasional caterpillar that plague summer gardens in Florida. Around 8 weeks from sowing seed in the soil, cute, egg-shaped fruit were ready for harvest! Over the next three or four weeks, my single plant produced around 50 of the cute little fruit. More than enough for me and plenty to share, the goal of my gardening endeavors.
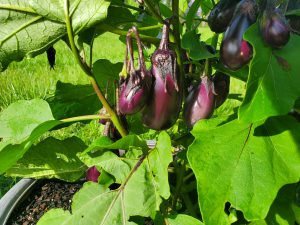
‘Patio Baby’ produces lots of fruit in a small package! Photo courtesy of Daniel Leoanrd.
If you’ve run out of space in your raised bed garden, just want a single plant for your back porch or simply want to try a novelty vegetable variety, my experience this summer deems ‘Patio Baby’ Eggplant is an excellent option! For an eggplant that is space-efficient, very early and heavy producing, and comes in a more easily harvestable, kitchen-friendly package, try ‘Patio Baby’. For more information about raised bed gardening, vegetable varieties or any other horticultural topic, contact your local UF/IFAS County Extension Office. Happy Gardening!
by Beth Bolles | Sep 8, 2020
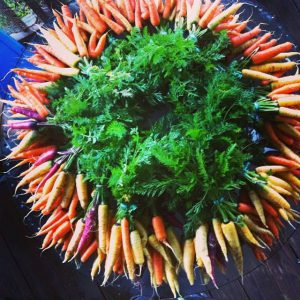
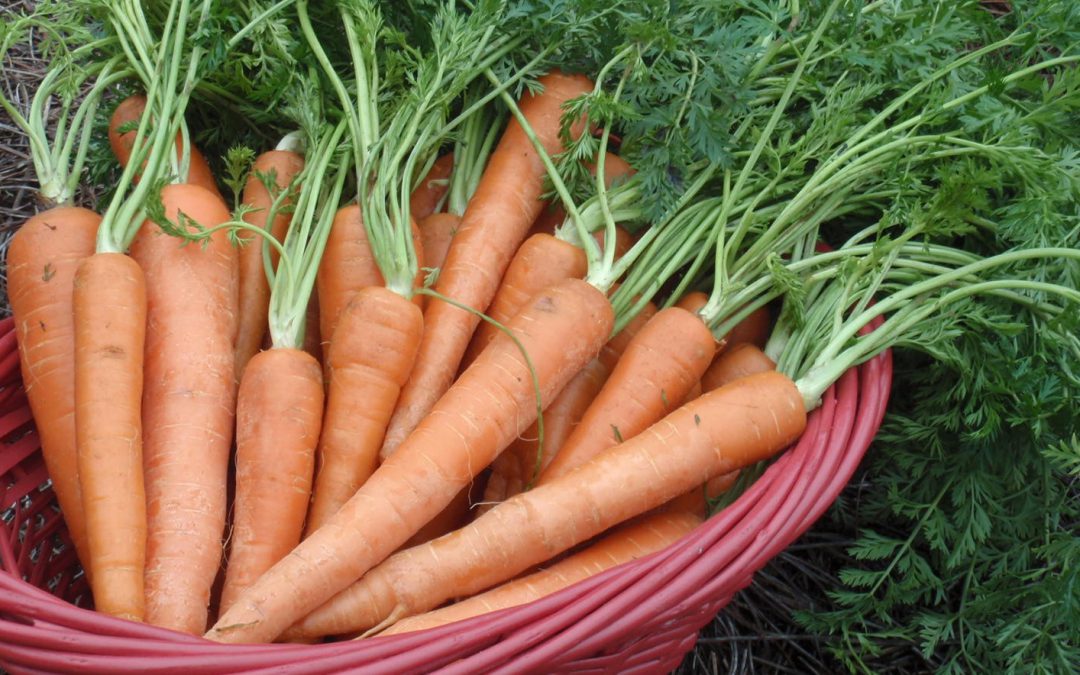
The modern carrot is available in many sizes, colors, and flavor profiles thanks to thousands of years of plant breeding. Photo by Kelly Thomas.
The University of Florida Vegetable Gardening Guide is a wonderful resource for those who are getting started gardening and growing some edible plants. As you look through the publication, you will see a chart for the different portions of Florida about when to start different fruits and vegetables. Remember this is just a guide. We may have to adjust some of our starting dates depending on local temperatures and other weather patterns.
A good example is that the guide states to start carrots beginning in August. For many years now our August temperatures are just too hot for starting carrots. Portions of September in North Florida may also be too warm for carrots. The ideal temperatures for growing carrots are 75 degree F. days and 55 degree F. nights. We need to at least wait until our temps are in the low to mid 80’s before even trying carrot seeds.
When you plant your carrot seeds, they will need good moisture to germinate. Be patient. Carrots are not always the fastest to come up. It normally takes at least 7 days for germination to occur and can take a little longer at times.
Use the Florida Vegetable Gardening Guide as a way to help you plan for your next fun gardening experience. Add in the expertise of your local county Extension Agent, along with local observations about current weather, and you will have success in your home garden.
by Daniel J. Leonard | Aug 6, 2020
I know this is going to come as a shock to some readers, but not all bugs are bad. In fact, while there are over 1 million species of insects worldwide, less than 1% are problem pests! This problem 1%, composed of common garden pests, including aphids, stinkbugs, nuisance caterpillars, and scales, get all the attention and for good reason; they can be extremely destructive to home and commercial crops. However, the good guys, beneficial predatory insects, are out there too, providing valuable pest control day and night and should be considered in part of a quality garden pest management strategy.
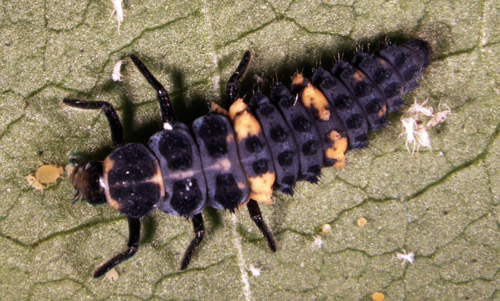
 Beneficials come in many shapes and sizes. Some are commonly known predators, such as spiders, Lady Beetles and Praying Mantids, while others are lesser known pest nemeses, like Paper Wasps, Pirate Bugs, and Lacewings. Regardless, gardeners should do their homework and be able to identify beneficials when they see them and allow them to do their jobs. The presence, or not, of a handful of Lady Beetles or Lacewings on the attack can be the difference between needing to treat with insecticides for an aphid outbreak or just letting nature take its course. Studies have shown that just one individual Lady Beetle in the larval stage can consume as many as 500 aphids; adult Lady Beetles are even hungrier aphid eaters! Paper Wasps, you know the ones who make the large “papery” nests around eaves of house and other structures, play an important beneficial role, frequently preying on caterpillars. If their nests aren’t near highly trafficked areas around your home and you don’t have family members allergic to wasp stings, your garden will thank you for leaving a few paper wasp colonies as caterpillar insurance!
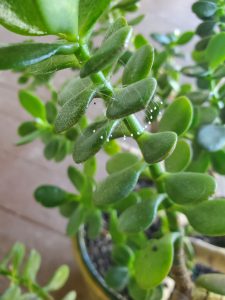
Lacewing eggs on a Jade plant in close proximity to the author’s vegetable garden.
In many instances, beneficial insects can keep pest insect infestations at bay, allowing gardeners to spot treat outbreaks when they get out of hand or even prevent the problem from needing chemical intervention altogether.
As helpful as they are, beneficial insects in the garden won’t totally negate the need for chemical treatment entirely. From time to time, garden pest populations outpace the beneficials’ abilities to kill them and intervention from humans is needed. In these times, it is advisable to use a couple of best practices to limit exposure to beneficial insects. First, try to use selective insecticides that only target specific pests and are nontoxic to other bugs, like the product Bt for caterpillar pests (sold under many brands like Dipel, Garden Safe Bt Worm and Caterpillar Killer, Thuricide, etc). However, if a nonselective, general insecticide, like the Pyrethroids (many common homeowner insecticide brands) and carbamates (Sevin and others), is needed, timing these broad spectrum sprays for early in the morning and late in the evening when many beneficials are not very active can help reduce friendly fire casualties. Care should also be taken to only spot treat infested plants and not the entire garden, this helps reduce beneficial exposure to these broadly toxic pesticides.
Every gardener should have a plan for pest control and beneficials can play an important role in this overall strategy. Gardeners can help ensure that nature pulls its weight in controlling problem pests by taking a little time to scout for beneficial insect populations, keeping a close eye on developing pest outbreaks, using selective insecticides when you can, and only spraying broad spectrum products as spot treatments when necessary and timing those applications for very early or late in the day. If you have a question about whether or not a garden insect is a good guy or a pest or want more information on garden pest control strategies, contact your local UF/IFAS County Extension Office! Happy Gardening!
The following resources were used in the development of this article:
https://gardeningsolutions.ifas.ufl.edu/care/florida-friendly-landscapes/beneficial-insects.html
https://sfyl.ifas.ufl.edu/sarasota/gardening-and-landscaping/horticulture-commercial/integrated-pest-management/beneficial-insects/
http://www.missouribotanicalgarden.org/gardens-gardening/your-garden/help-for-the-home-gardener/advice-tips-resources/pests-and-problems/other/beneficial-insects.aspx

by Molly Jameson | Jul 23, 2020

Join us via Zoom on Saturday, August 8, for our Leon County Seed Library Virtual Workshop. Graphic by Molly Jameson.
Leon County’s Seed Library Program Continues On
The COVID-19 pandemic has changed many aspects of our lives. In Extension, we have learned new ways to be innovative in our programs, and we have made adaptations to continue to reach the community through technology. While these technologies have allowed us the opportunity to connect with clientele and continue to allow important discussions related to the life sciences, there is no substitute for hands-on learning.
For this reason, I am thankful that the Leroy Collins Leon County Public Library System is proceeding with the Leon County Seed Library Program this fall. Since the spring of 2015, the Leon County Public Library has provided Leon County community members with sample vegetable seed packets to take home and plant in their gardens. While many aspects of the Seed Library Program will be altered this season, seeds will still be available to be “checked-out” from all Leon County library branches.

While face coverings and other safety precautions will be required, Leon County residents can still “check-out” seeds starting August 8. Photo by the Leon County Public Library.
As we continue to strive to keep ourselves and our community safe, many of us have used gardening as a way to relax and find some peace during these turbulent times. Planting vegetable seeds is a great way to learn about agriculture and our natural environment and gives us an opportunity to spend some time outdoors.
As an Extension Agent in Leon County, I have had the pleasure of partnering with the Leon County Library to help pick out the Seed Library Program seed selections, plan kickoff events, and provide hands-on workshops at various library branches. While “checking-out” seeds at the library this season will be a socially distanced activity, we still want to provide an opportunity for the community to engage with UF/IFAS Extension and learn about planting seeds, growing vegetables, and how to incorporate vegetables into snacks and meals to stay healthy.
Whether you are located in Leon County or not, everyone is welcome to join us Saturday, August 8, from 10:00 a.m. to 12:00 p.m., our Leon County Seed Library Virtual Workshop. Via Zoom, agents with UF/IFAS Extension Leon County will discuss vegetable gardening techniques and the importance of eating healthfully. We will also be doing a live virtual cooking demonstration featuring vegetables available in the Fall 2020 Seed Library Program.
For more information about the Leon County Seed Library Virtual Workshop, please visit our Eventbrite page: https://seedlibraryworkshop2020.eventbrite.com. There is no cost to attend the workshop, but registration is required.
If you are a resident of Leon County, all you need is your Leon County library card to check-out the vegetable seeds. Don’t have a library card? No problem! Leon County residents can apply online at the LeRoy Collins Leon County Public Library online card application page here: https://lcpl.ent.sirsi.net/custom/web/registration/.
Here is the list of the vegetable seeds that will be available starting August 8: Calabrese Broccoli, Cosmic Purple Carrots, Georgia Green Collards, Lacinato Kale, Buttercrunch Bibb Lettuce, Giant of Italy Parsley, Easter Egg Radishes, and Silverbeet Swiss Chard.
by Sheila Dunning | Jul 16, 2020

Dog Star nights Astro Bob
The “Dog Days” are the hottest, muggiest days of summer. In the northern hemisphere, they usually fall between early July and early September. The actual dates vary greatly from region to region, depending on latitude and climate. Life is so uncertain right now. But, fall is coming.
In ancient times, when the night sky was not obscured by artificial lights, the Romans used the stars to keep track of the seasons. The brightest constellation, Canis Major (Large Dog), includes the “dog star”, Sirius. In the summer, Sirius used to rise and set with the sun, leading the ancient Romans to believe that it added heat to the sun. Although the period between July 3 and August 11 is typically the warmest period of the summer, the heat is not due to the added radiation from a far-away star, regardless of its brightness. The heat of summer is a direct result of the earth’s tilt.
Spending time outdoors this time of year is uncomfortable, potentially dangerous, due to the intense heat. However, the chinch bugs are very active in St. Augustine grass (for more information: http://edis.ifas.ufl.edu/lh036), and the summer flowers need water. So, take care of those tasks early in the day and then retreat to the air conditioning to plan your fall planting.
Plant tomato plants in August for fruit in October. Varieties such as Phoenix, Florida 91, Solar Set and Heat Wave II are good selections for setting fruit in high temperatures, should summer temperatures continue. Otherwise, try some of the newer UF/IFAS recommended varieties for fall planting in North Florida such as Bella Rosa, Tribute or Finishline. For more information on tomato selection refer to: http://edis.ifas.ufl.edu/in756. For information on other vegetables for fall gardening refer to the Florida Vegetable Gardening Guide: http://edis.ifas.ufl.edu/vh021.
Many bedding plants flower quickly and can add color to the fall landscape. These include pentas, African marigolds, torenia, zinnias, melampodium and scaevola. Other can be planted in October for blooms all

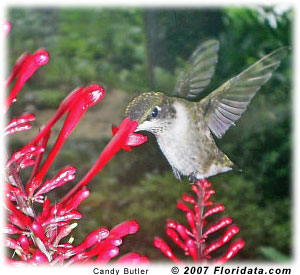
Hummingbird at Firespike flower
winter-long. Plan spaces and color themes for calendulas, pansies, snapdragons and violas. Add in ornamental cabbage or kale and some dusty miller to accent the garden. They too will perform through the cold. For more information on Annuals for the Florida Garden refer to: http://edis.ifas.ufl.edu/mg319.
Dependable fall blooming perennials include lion’s ear (Leonotis leonurus), pineapple sage (Salvia elegans), firebush (Hamelia patens), cigar plant (Cuphea micropetala), yellowbells (Tecoma stans) and firespike
(Odontonema strictum). Also, garden mums (Chrysanthemum sp.) and many different Irises will add color again in the spring. To gain information on perennials for Florida refer to: http://edis.ifas.ufl.edu/mg035.
Webster’s second definition of “dog days” is a period of stagnation or inactivity. But, even when the heat forces you to slow down on the labor-intensive work, there is plenty of gardening “activity” to do. Stay in the air conditioning and plan that spectacular fall and winter yard.
by Ray Bodrey | Jul 1, 2020
Sunflowers, Helianthus spp., are a great choice for gardeners who are looking for some cheerful color in their landscape. Here in Florida, we have the main ingredient for success, lots of sunshine!

‘Skyscraper’ Sunflower bloom. Photo courtesy of Ray Bodrey.
Sunflowers are short-lived annuals. The average time between planting and bloom is roughly 65 days. You can typically plant sunflowers in Florida beginning in late winter until early fall. Only the coldest months cause problems, and for most years that’s only November – January. Sunflowers can be planted almost anywhere there is full sun. The major selling point with sunflowers is, of course, the impressive blooms (figure 1). These yellow to sometimes orange or red-petaled flowers develop a central seed disc, with most variety’s flowers having approximately an 8” diameter.
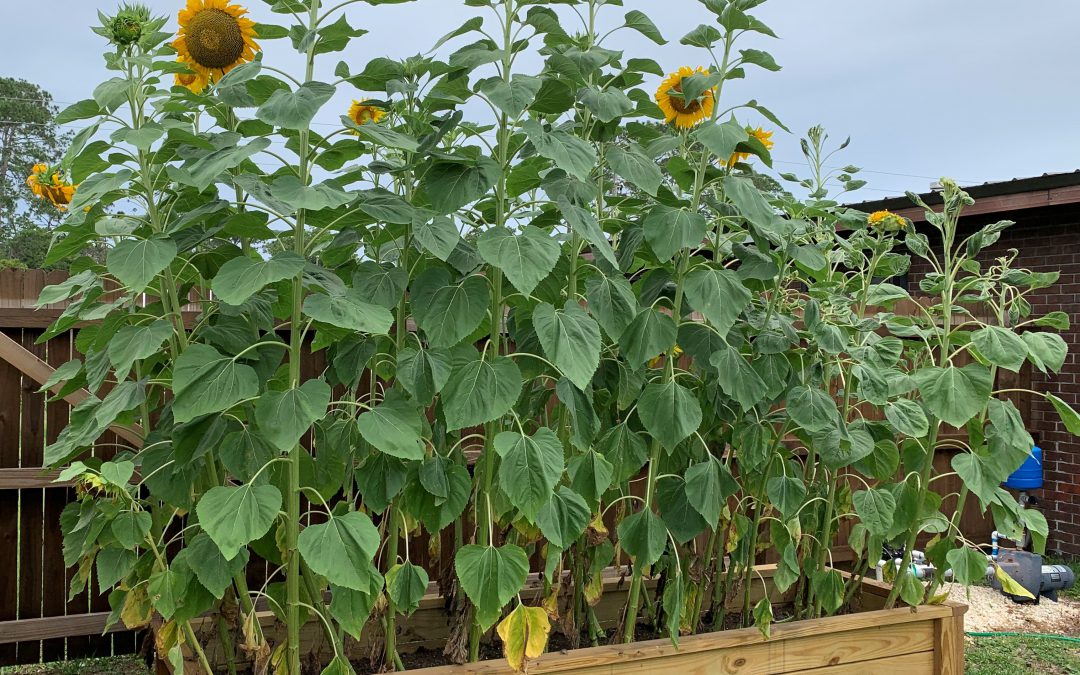
When planting, you may choose to plant in narrow rows with close seed spacing in order to cull weaker plants later. A final row and seed spacing of 2’-3’ is recommended for full height and development of most varieties. However, you may also choose to plant in a bed, using a close pattern as seen in the photo below. In any event, sunflowers are easy to propagate by seed and are very low maintenance. Occasionally, powdery mildew and spittle bugs can be a nuisance. A general garden fungicide and insecticide will help if problems occur.
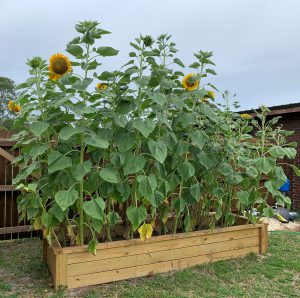
‘Skyscraper’ sunflowers planted on close spacing. Photo courtesy Ray Bodrey.
Sunflowers are available in many varieties, consisting of different color blooms and plant sizes. These sizes range from dwarf (1’-3’) to tall (10’-15’) varieties. You may wish to stake taller varieties at some point, as plants will tend to lean with no wind break in place. Here’s a few garden variety common names to look for: ‘Sunbright’, ‘Sonja’, ‘Sunrich Lemon’, ‘Sunrich Orange’ and ‘Autumn beauty’. Seed companies also have mixes available in packets. For tall plants, ‘Mammoth’ or ‘Skyscraper’ varieties will do the trick.
If you are fond of the sunflower bloom and looking for a groundcover, there are a couple of native perennials that fit this category. Beach sunflower, Helianthus debilis or swamp sunflower, Helianthus angustifolius, are groundcovers/ornamentals for landscapes and thrive in dry, hot climates and in a range of soil types. They also are great pollinator attractors.
For more information on growing sunflowers, contact your local county extension office.
Supporting information for this article and links to other publications on sunflowers can be found at the UF/IFAS Gardening Solutions website: https://gardeningsolutions.ifas.ufl.edu/plants/ornamentals/sunflowers.html
UF/IFAS Extension is an Equal Opportunity Institution.


