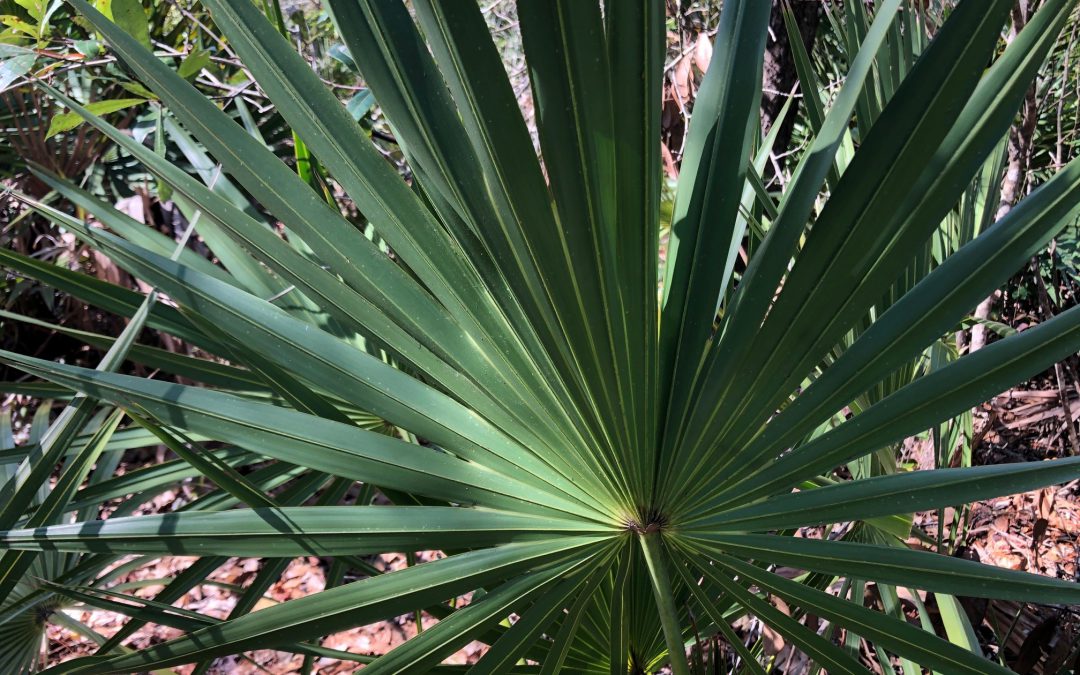
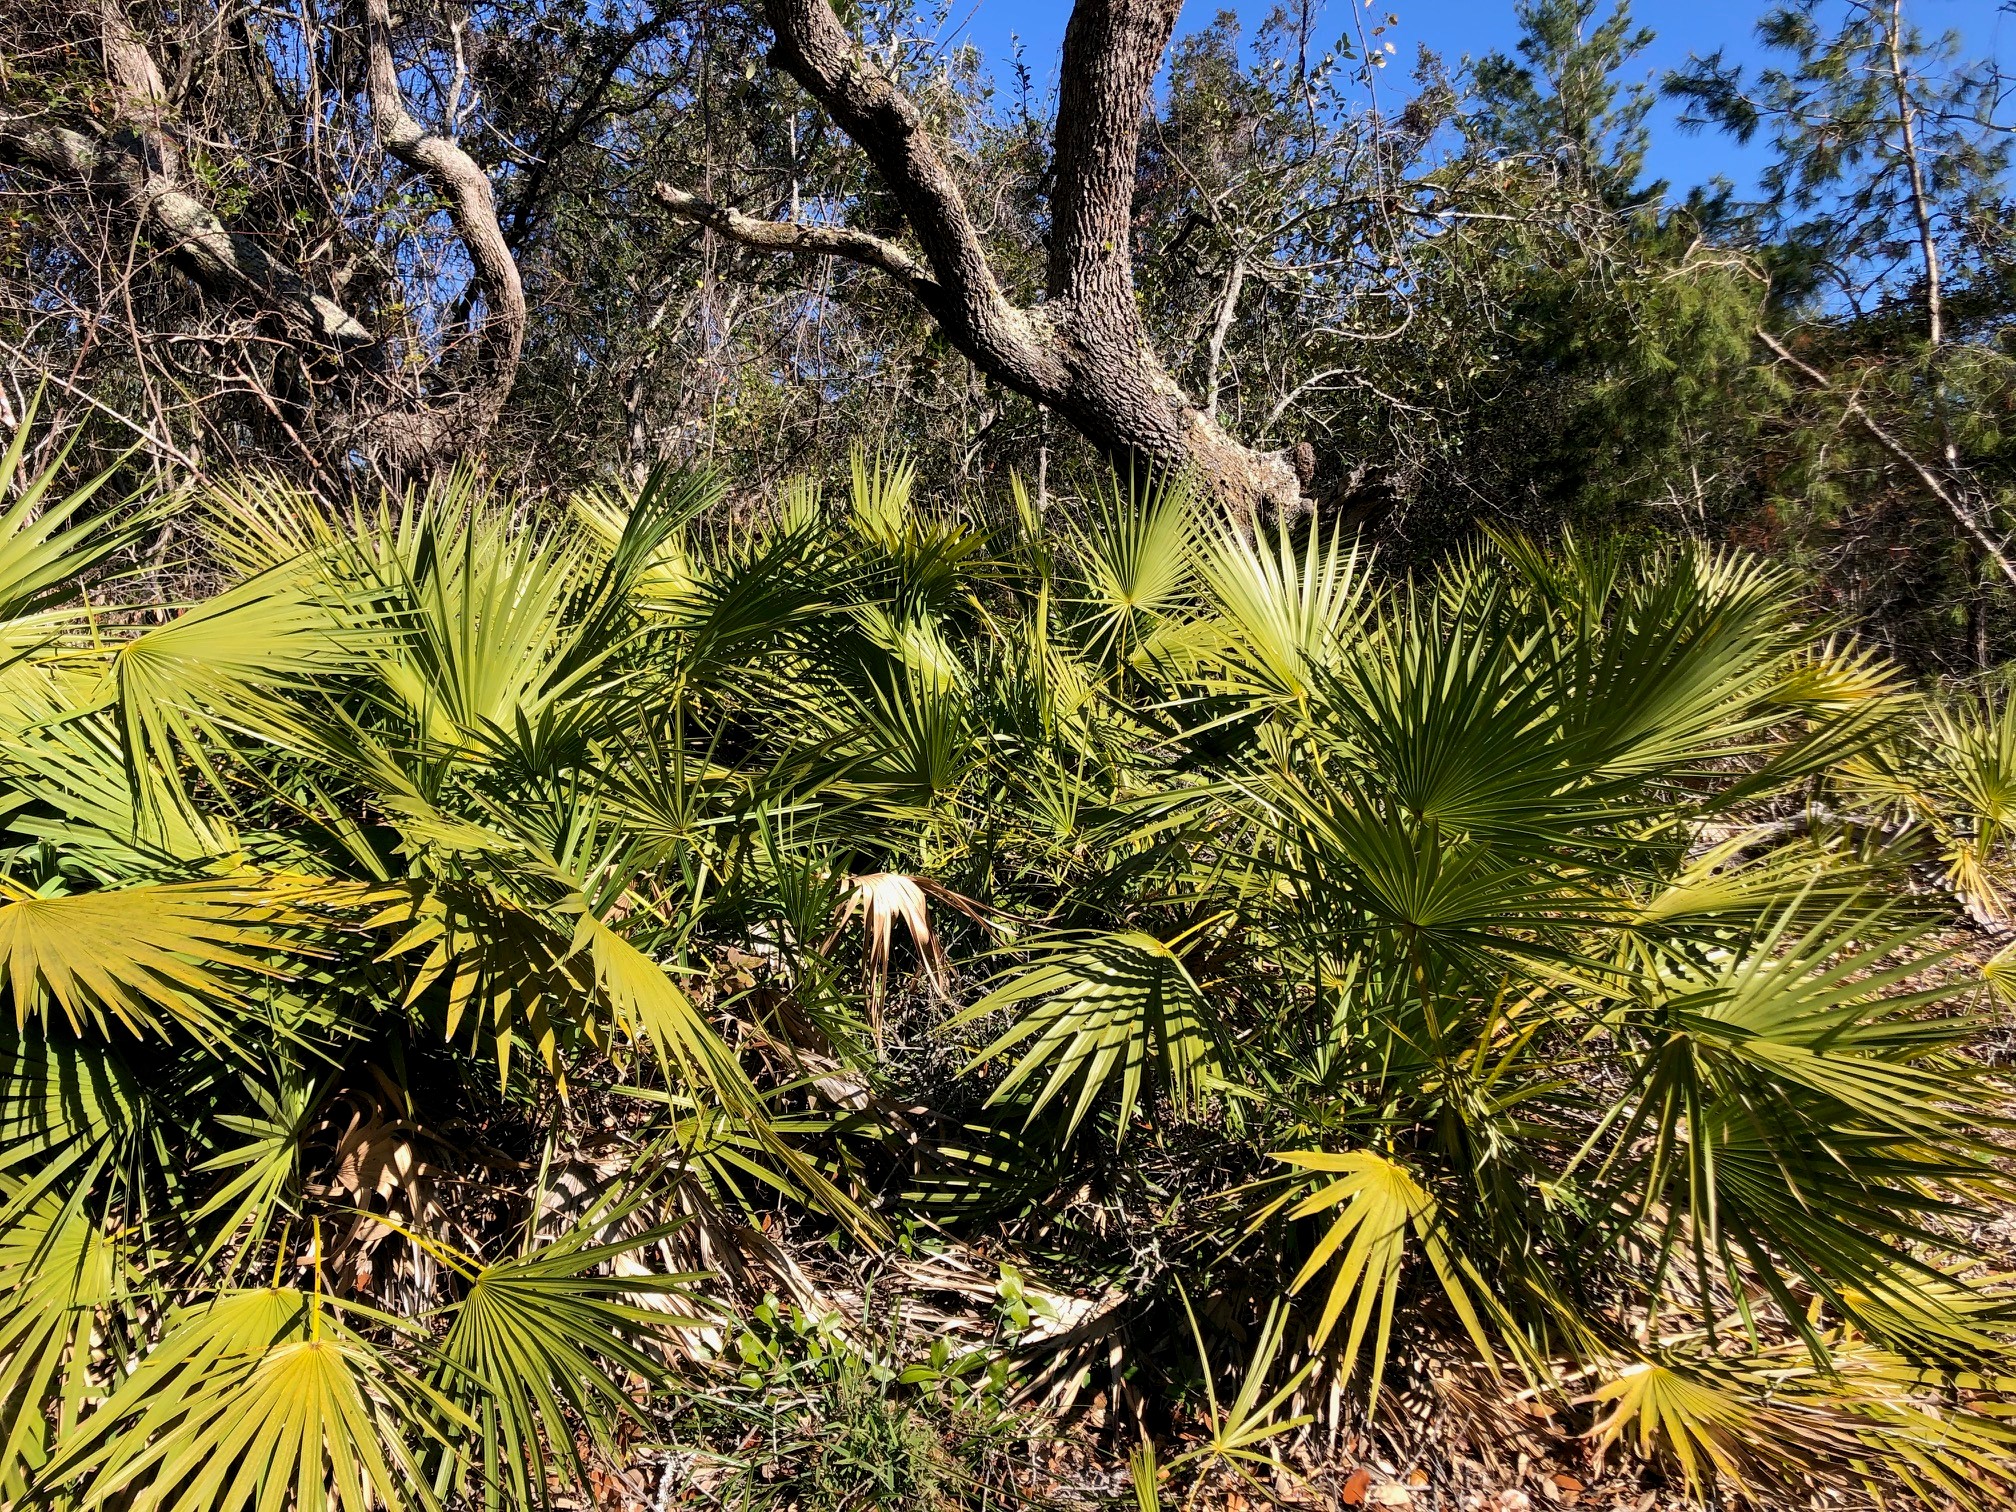
Saw palmettos provide crucial ecosystem services for the forests of Florida. Photo credit: Carrie Stevenson, UF IFAS Extension
The saw palmetto (Serenoa repens) is a classic symbol of Florida. Found in upland habitats and just to the edge of wetlands, their brilliant green fronds stand out in the mostly brown pine flatwoods and oak hammocks to which they are endemic. The shrublike saw palmetto thrives in sandy soils, is highly salt tolerant, and is tough as nails. The plant’s root is one of the sturdiest in nature. Imagine the trunk of a palm tree laid horizontally and just underground—this is the plant’s base. This root system lends stability and tolerance to nearly every tough Florida growing condition, including drought, floods, and fire. Saw palmettos are extremely slow growing, and there are stands in south Florida in which botanists have found individual plants and clonal colonies several thousand years old. Saw palmettos are one of the few members of the palm family that thrive in the panhandle. While many palm trees are planted here, most are native to more southern climates with warmer winters and karst geology—a higher pH soil composed of limestone and often prone to springs and sinkholes.
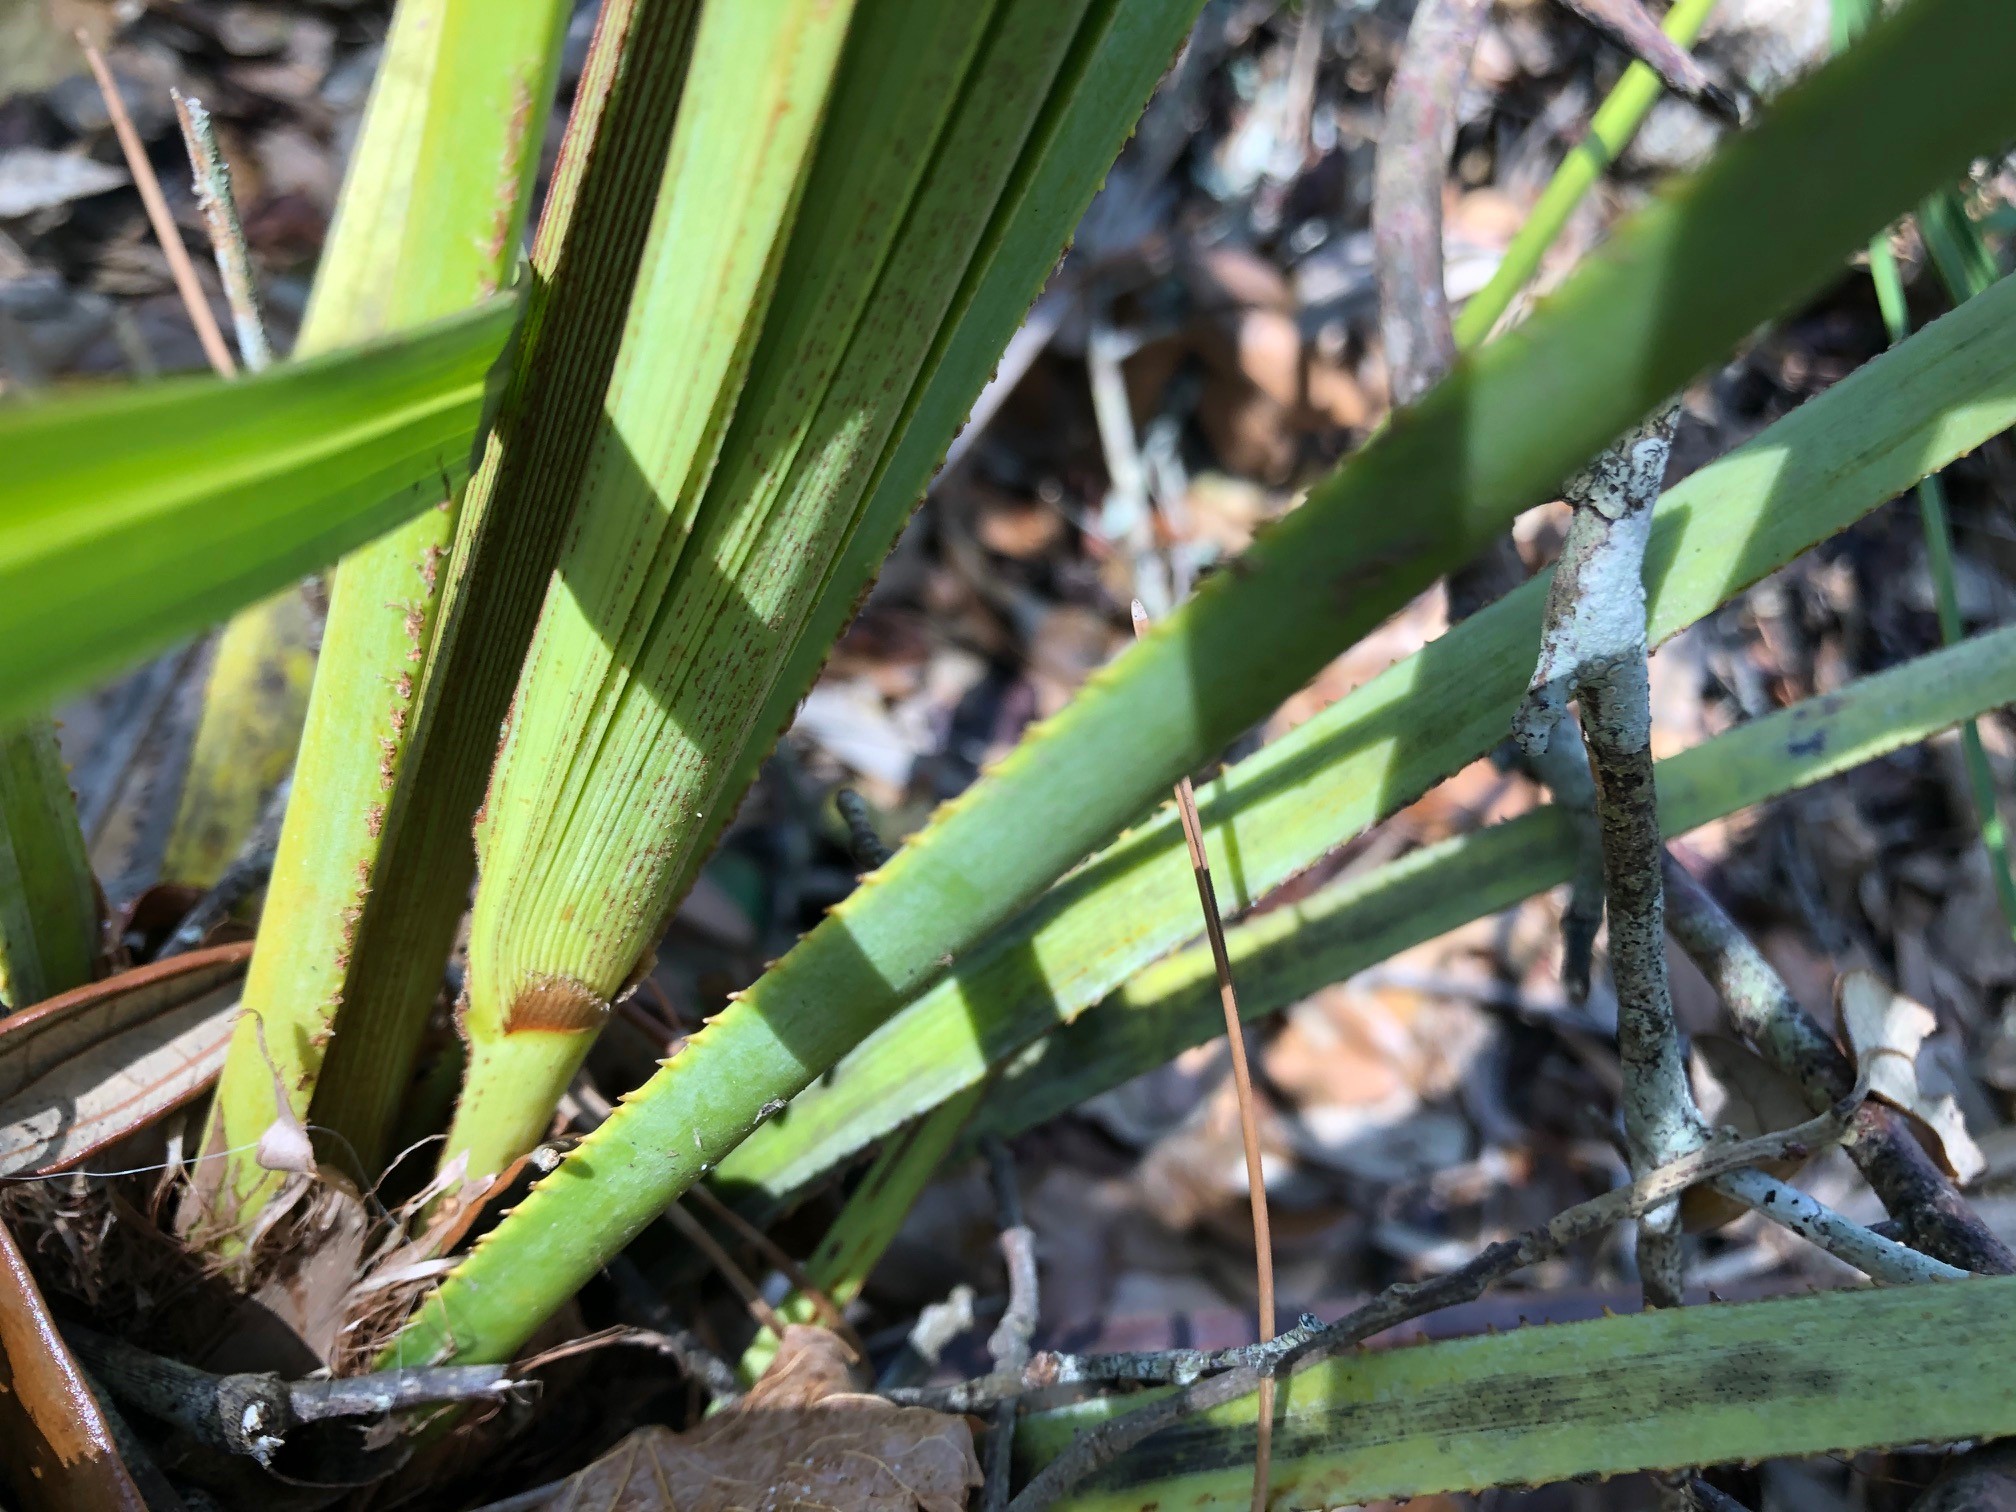
The tough, serrated edges of the saw palmetto gave it its name. Photo credit: Carrie Stevenson, UF IFAS Extension
The saw palmetto’s name comes from the serrated, saw-like edges of the stem. These are quite tough and can cut your skin and clothing if not careful. A very similar palmetto, the bluestem, grows in wetter soils. It can be differentiated from the saw palmetto because its stems are smooth—no serrated edges—and the whole plant has a bluish cast to it.
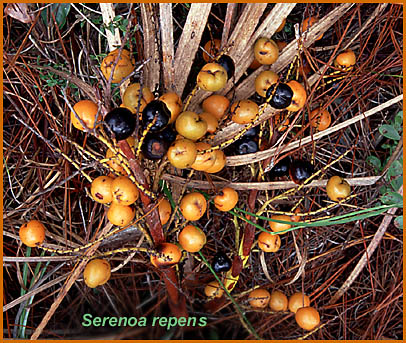
The saw palmetto has long been prized by humans for its practical uses. The “ethnobotanical” history of this plant has ties to Native American tribes who used the fronds for roofing and building material, brooms, fishing nets, and fans. The leaves were utilized for rope, and multiple plant parts for food and medicine. The dark blue/black fruit of the saw palmetto was considered an aphrodisiac and has been used to treat prostate problems for centuries. According to a UF publication on the saw palmetto, “Modern day development of a purified extract from the berries greatly improves symptoms of enlarged prostate. Florida is the biggest source and producer of saw palmetto products. With about 2,000 tons harvested from South Florida and exported to Europe each year, the fruit crop estimate is $50 million a year in the state.”
Saw palmetto berries are a staple of Florida wildlife diets. Photo credit: UF School of Forest Resources & Conservation
Besides the human uses, saw palmetto serves as a crucial component in the diet of native wildlife. Florida black bears, panthers, 20 other species of mammals, over 100 types of birds, 25 amphibians, over 60 reptiles, and countless insects depend on saw palmetto berries as part of their diet. The wild harvest of saw palmettos is regulated by the state to prevent overharvesting and negative impacts to the wildlife food supply.
Saw palmettos also make a great home landscape plant, as they can grow in a wide variety of conditions, provide wildlife food and habitat, and add visual interest. There are few plants more “low-maintenance” than an established saw palmetto. A mature one is so difficult to remove, that it’s best to leave it where it is anyway!
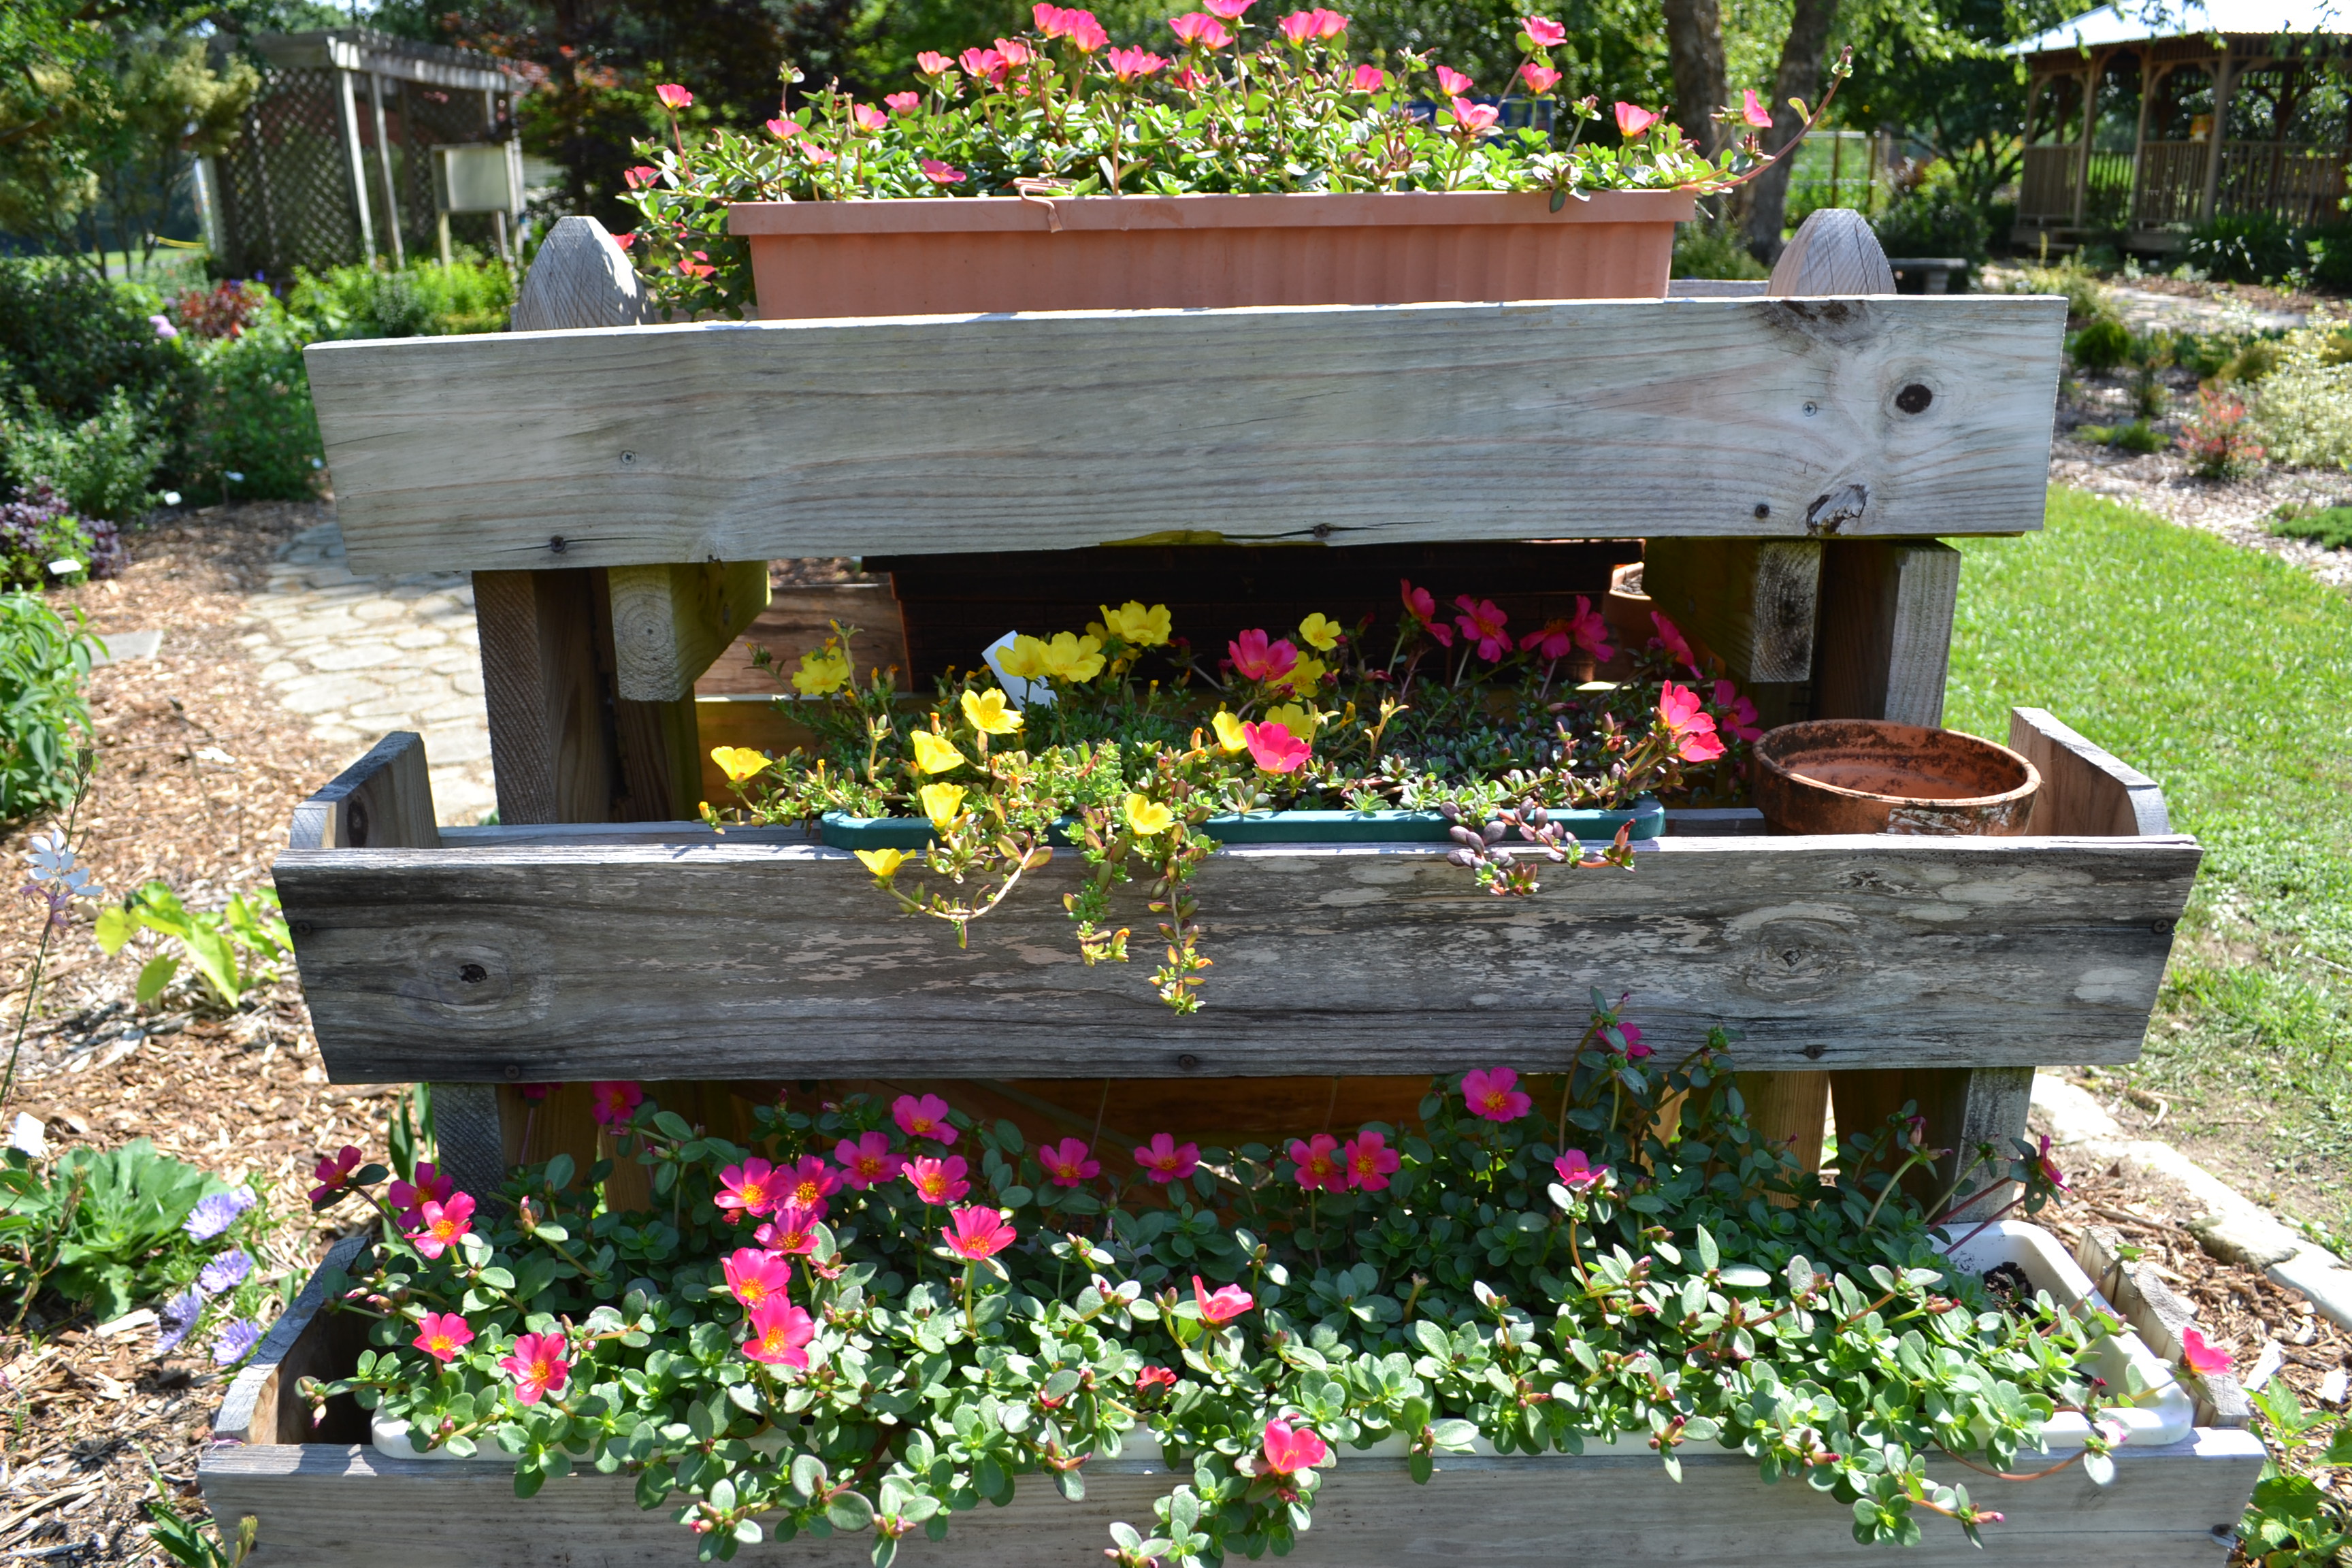
Last spring, we were all ready to host another Open House and Plant Sale on Mother’s Day weekend. When the realities of the pandemic became clear, we canceled the event for the safety of everyone involved. We typically have more than 500 visitors and dozens of volunteers on site. This year we are happy to announce we have adapted our annual fundraiser to a monthly learning and growing opportunity for the whole community.
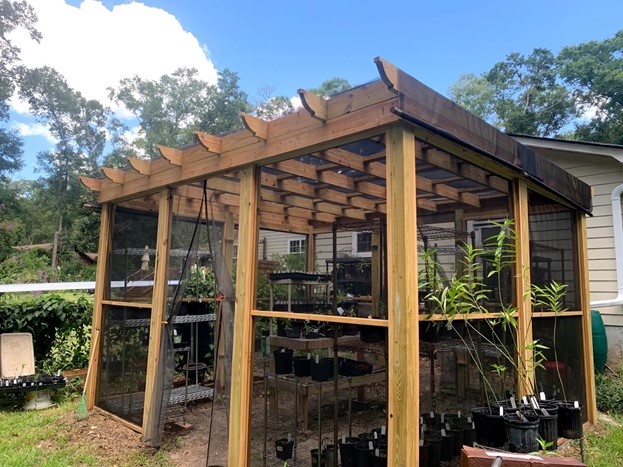
Master Gardener Volunteer Jeanne Breland is growing native milkweed in her monarch exclusion fortress for a Plant with Purpose talk and sale in the spring. Previous years’ milkweed have been eaten by monarch caterpillars before the sale so Jeanne has built her fortress to get the best results. Photo by Rachel Mathes
Our Master Gardener Volunteers will be teaching Thursday evening classes on particular plant groups throughout the year in our new series: Plant with Purpose. Topics will range from milkweed to shade plants to vegetables and herbs for different seasons. Attendees can attend the talks for free and grow along with us with the purchase of a box. These boxes are modeled after community supported agriculture (CSA) boxes you can purchase from local farms. Buyers will get a variety of the plants discussed in the plant lesson that week. For example, in our first event, Growing a Pizza Garden, we will have two tomato plants, two pepper plants, and one basil plant available for $20. Throughout the year, prices and number of plants will vary depending on the topic.
We hope with this new model of presentations and plant sales will enable us to remain Covid-safe while still bringing horticulture education to the community. Classes will be held on Thursday evenings from 6-7 pm via Zoom. Register on our Eventbrite to get the Zoom link emailed to you before each talk. Plant pick up will be the following Saturday from 10 am to noon. Master Gardener Volunteers will load up your plant box in a contact-free drive thru at the UF/IFAS Leon County Extension Office at 615 Paul Russell Rd.
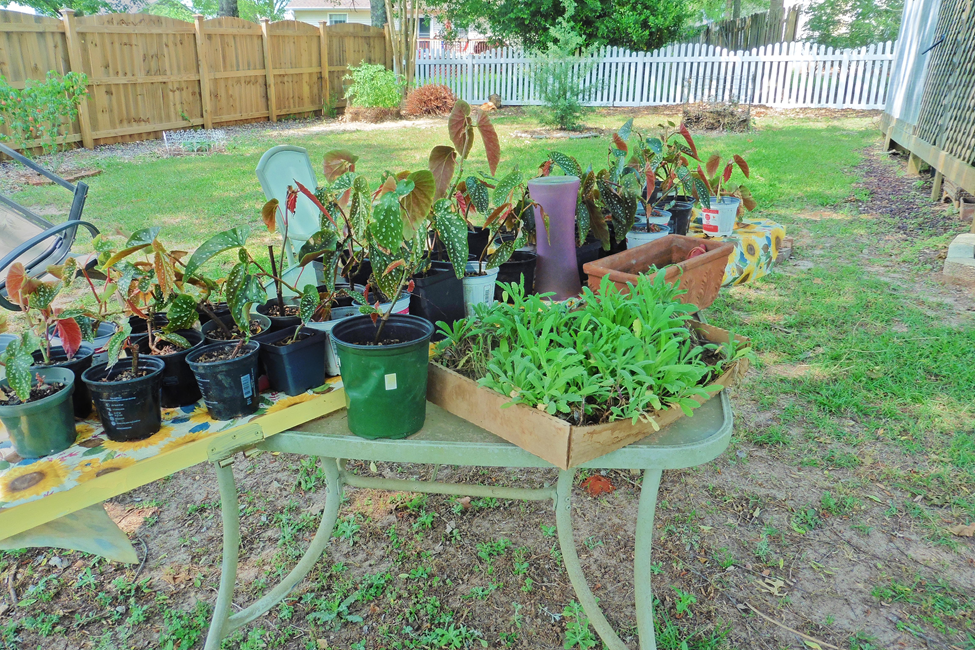
Propagation of angel wing begonia and other plants by Joan Peloso, Master Gardener Volunteer.
Master Gardener Volunteers are already growing plants for you to purchase throughout the year. Landscape plants, herbs, vegetables, shrubs and even trees will be available later in the year. Funds raised from this series help fund our Horticulture programming. Some notable programs that will benefit from Plant with Purpose include our Demonstration Garden, 4-H Horticulture Club, the Veterans’ Garden Group at the VA Tallahassee Outpatient Clinic, and various school gardens we help support throughout Leon County.
In the last year, we have adapted many of our programs to meet virtually, and even created new ones like our Wednesday Webinar series where we explore different horticulture topics twice a month with guest speakers from around the Panhandle. While we still can’t meet in person to get down in the dirt with all of our community programs, we hope that the Plant with Purpose series will help fill the hole left by our cancelled Open House and Plant Sale. Join us for the first installment of Plant with Purpose on Thursday March 18th from 6-7pm. Pick up for purchased plant boxes will be Saturday March 20th from 10am-noon.
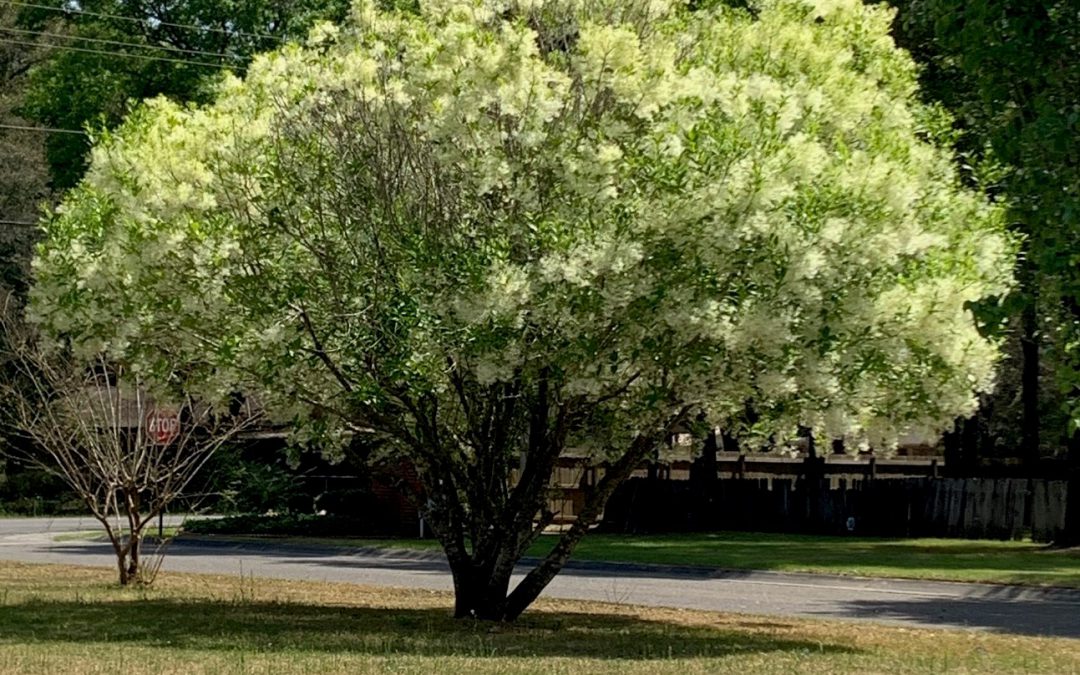
American fringetree Chionanthus virginicus), a native deciduous small tree with delicate blooms in spring. Photo credit: Mary Salinas, UF/IFAS Extension.
January and February are ideal months for adding a tree or two to your landscape in the Florida panhandle. In the cooler weather, the ground stays moist for a longer time, which helps prevent drought stress and the drying out of the rootball. Also, the winds are generally milder, and the tree will have a chance to get established and anchored in before the wilder winds of summer roll in.
Before investing time and money in a tree, take a few minutes and be sure that the species you choose is right for your particular landscape.
Here are some things to consider:
Whether the area can accommodate the ultimate size of the tree, both height and width, and not grow into overhead wires, streetlights, or your house.
Are there any underground utilities or septic? A call to 811 can check on where your utilities are.
The hardiness zone for the tree. Be aware that zone 8 or 9 in the western United States is a different climate with respect to moisture than the same zone 8 or 9 in Florida.
Whether the tree can thrive in your soil – sandy, loam or clay, loose or compacted, high and dry, or wet and low.
The amount of sun it requires.
Whether you want native species that provide food and habitat for native birds and animals.
Salt-tolerance if located on the coast.
Wind tolerance, especially if located on the coast. Many fast-growing trees are brittle and susceptible to breakage.
Whether you prefer an evergreen or deciduous tree. Evergreen trees, like hollies, provide a natural screen all year while some deciduous trees, like maple and bald cypress, provide fall color.
Is the tree messy, dropping large seed pods, fruit, or leaves?
The color and shape of leaves and flowers and other ornamental qualities.
Whether the tree species has known disease or pest issues.
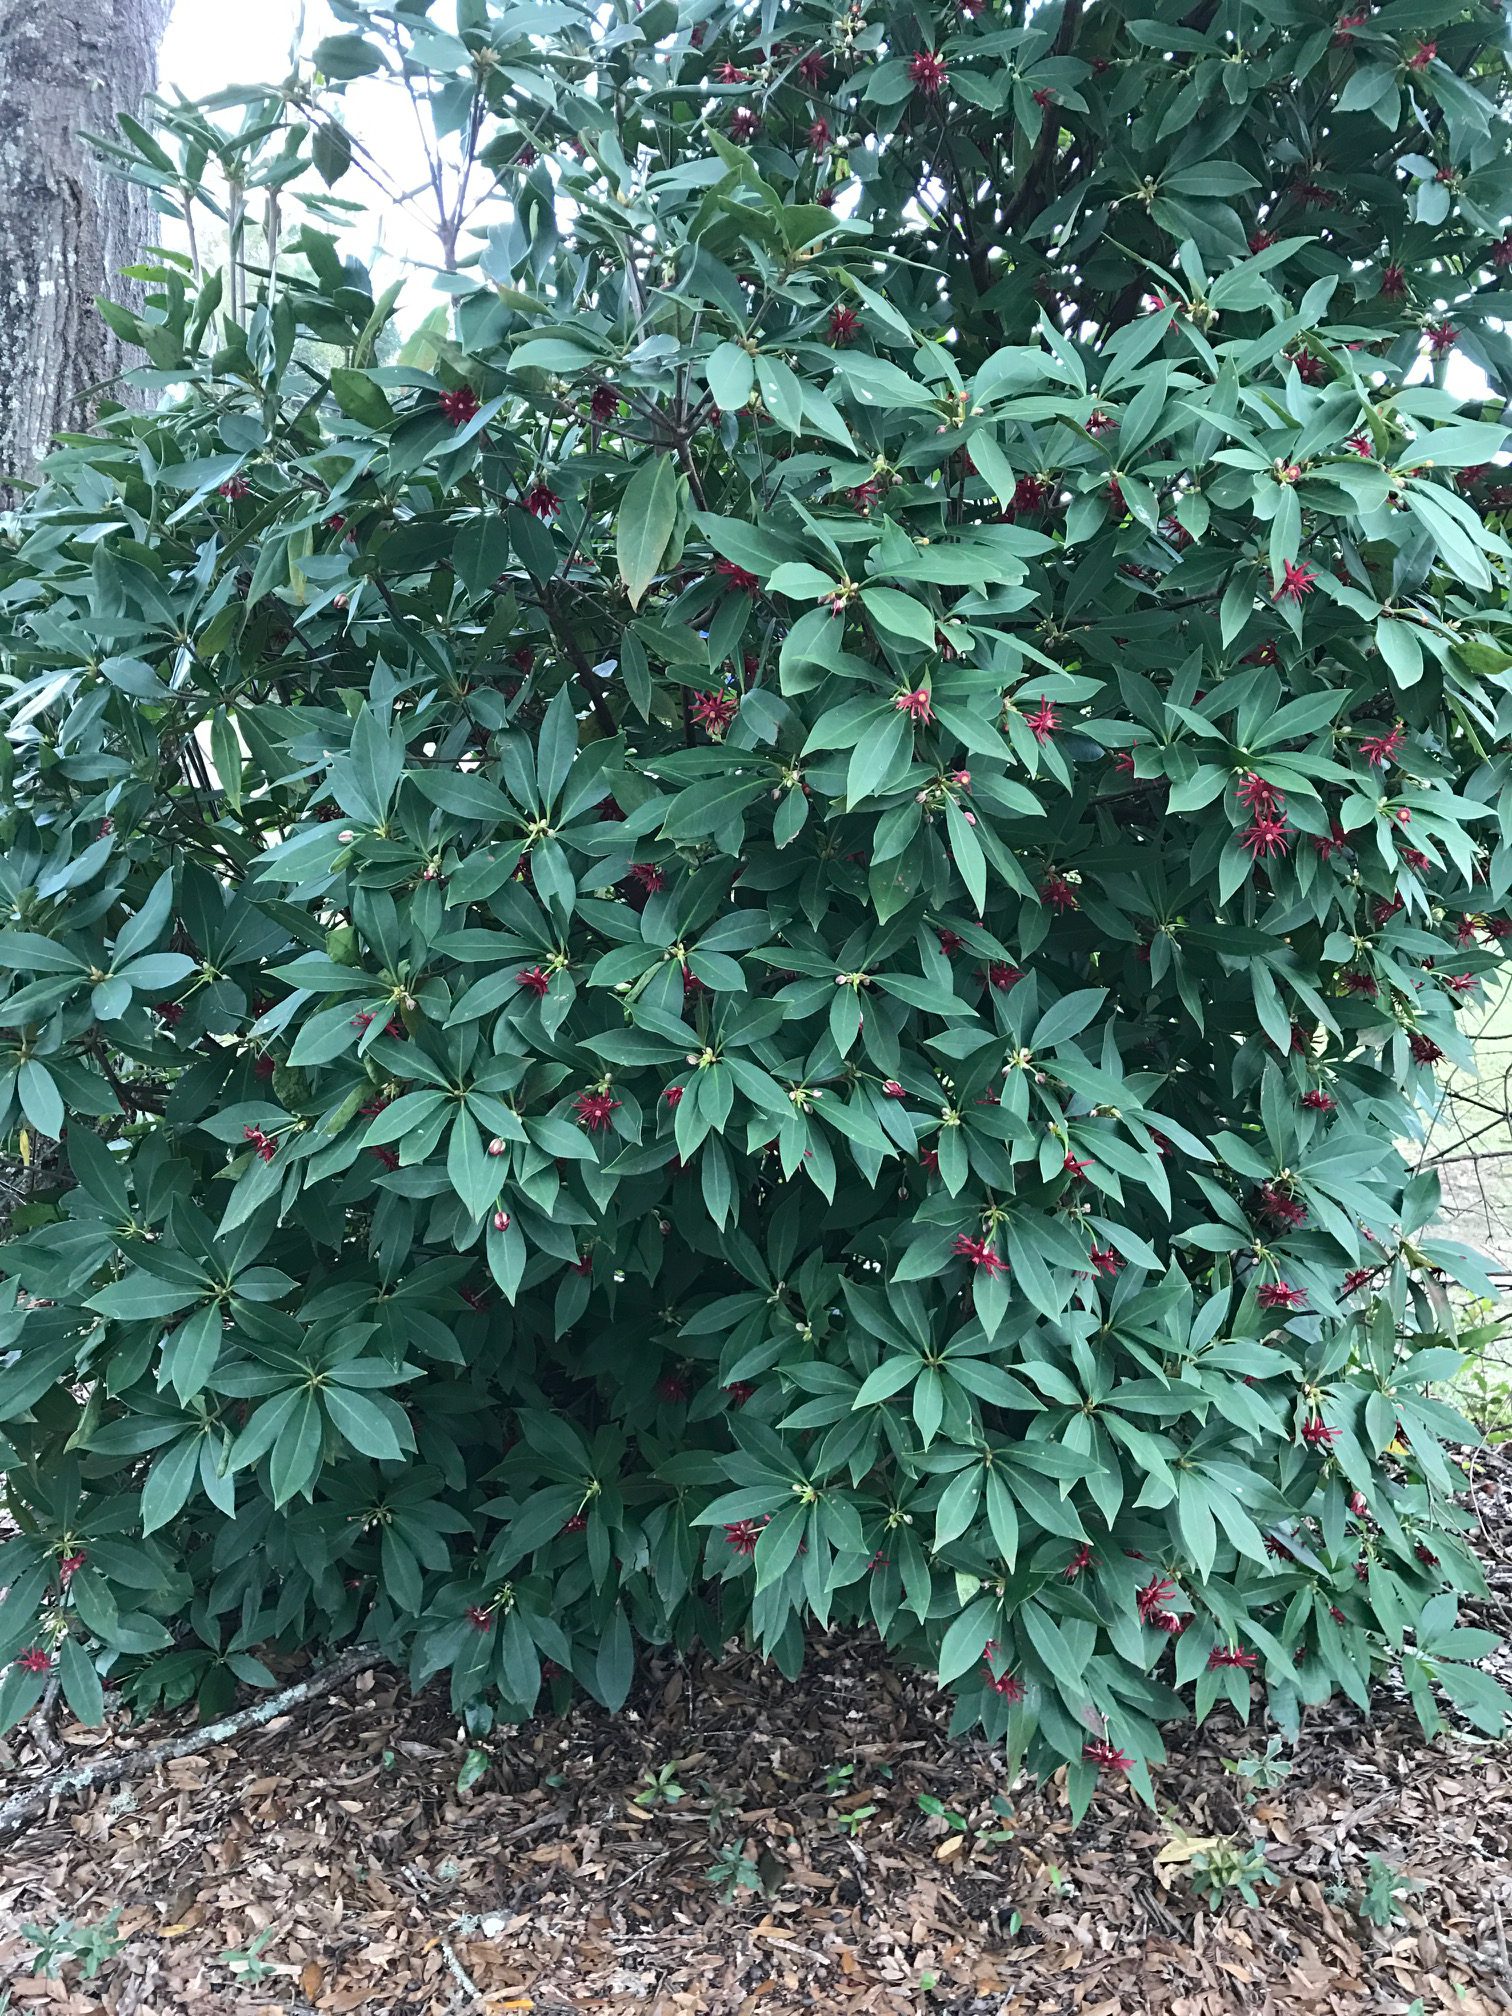
Florida red anise (Illicium floridanum), a small tree/large shrub for shady locations. Photo credit: Mary Salinas UF/IFAS Extension.
Escambia County Master Gardener Volunteer Carol Perryman shares information for you to consider growing your own Bay laurel tree.
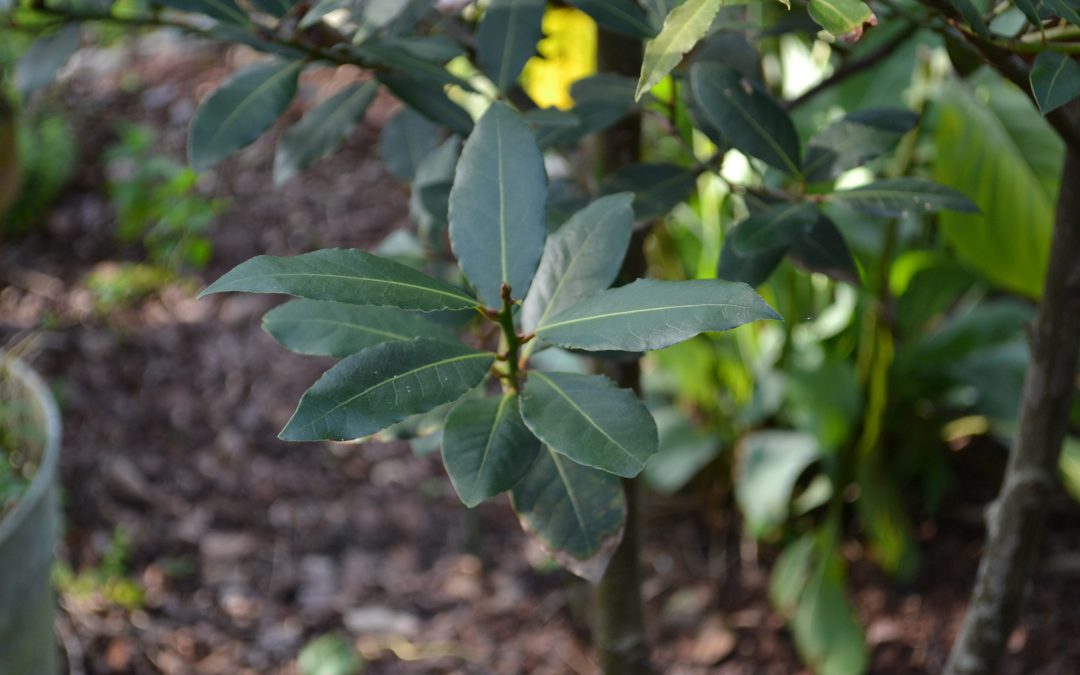
Laurus nobilis, commonly known as bay laurel, is an aromatic tree native to the western Mediterranean and it yields the bay leaves used in cooking. Mature leaves are leathery and dark green. Most are 3 to 4 inches in length with minute margin serrations. Small, inconspicuous yellowish-white blooms may appear in summer followed by a tiny fruit which turns black as it dries. Bay laurel is salt tolerant and can be grown on barrier islands.
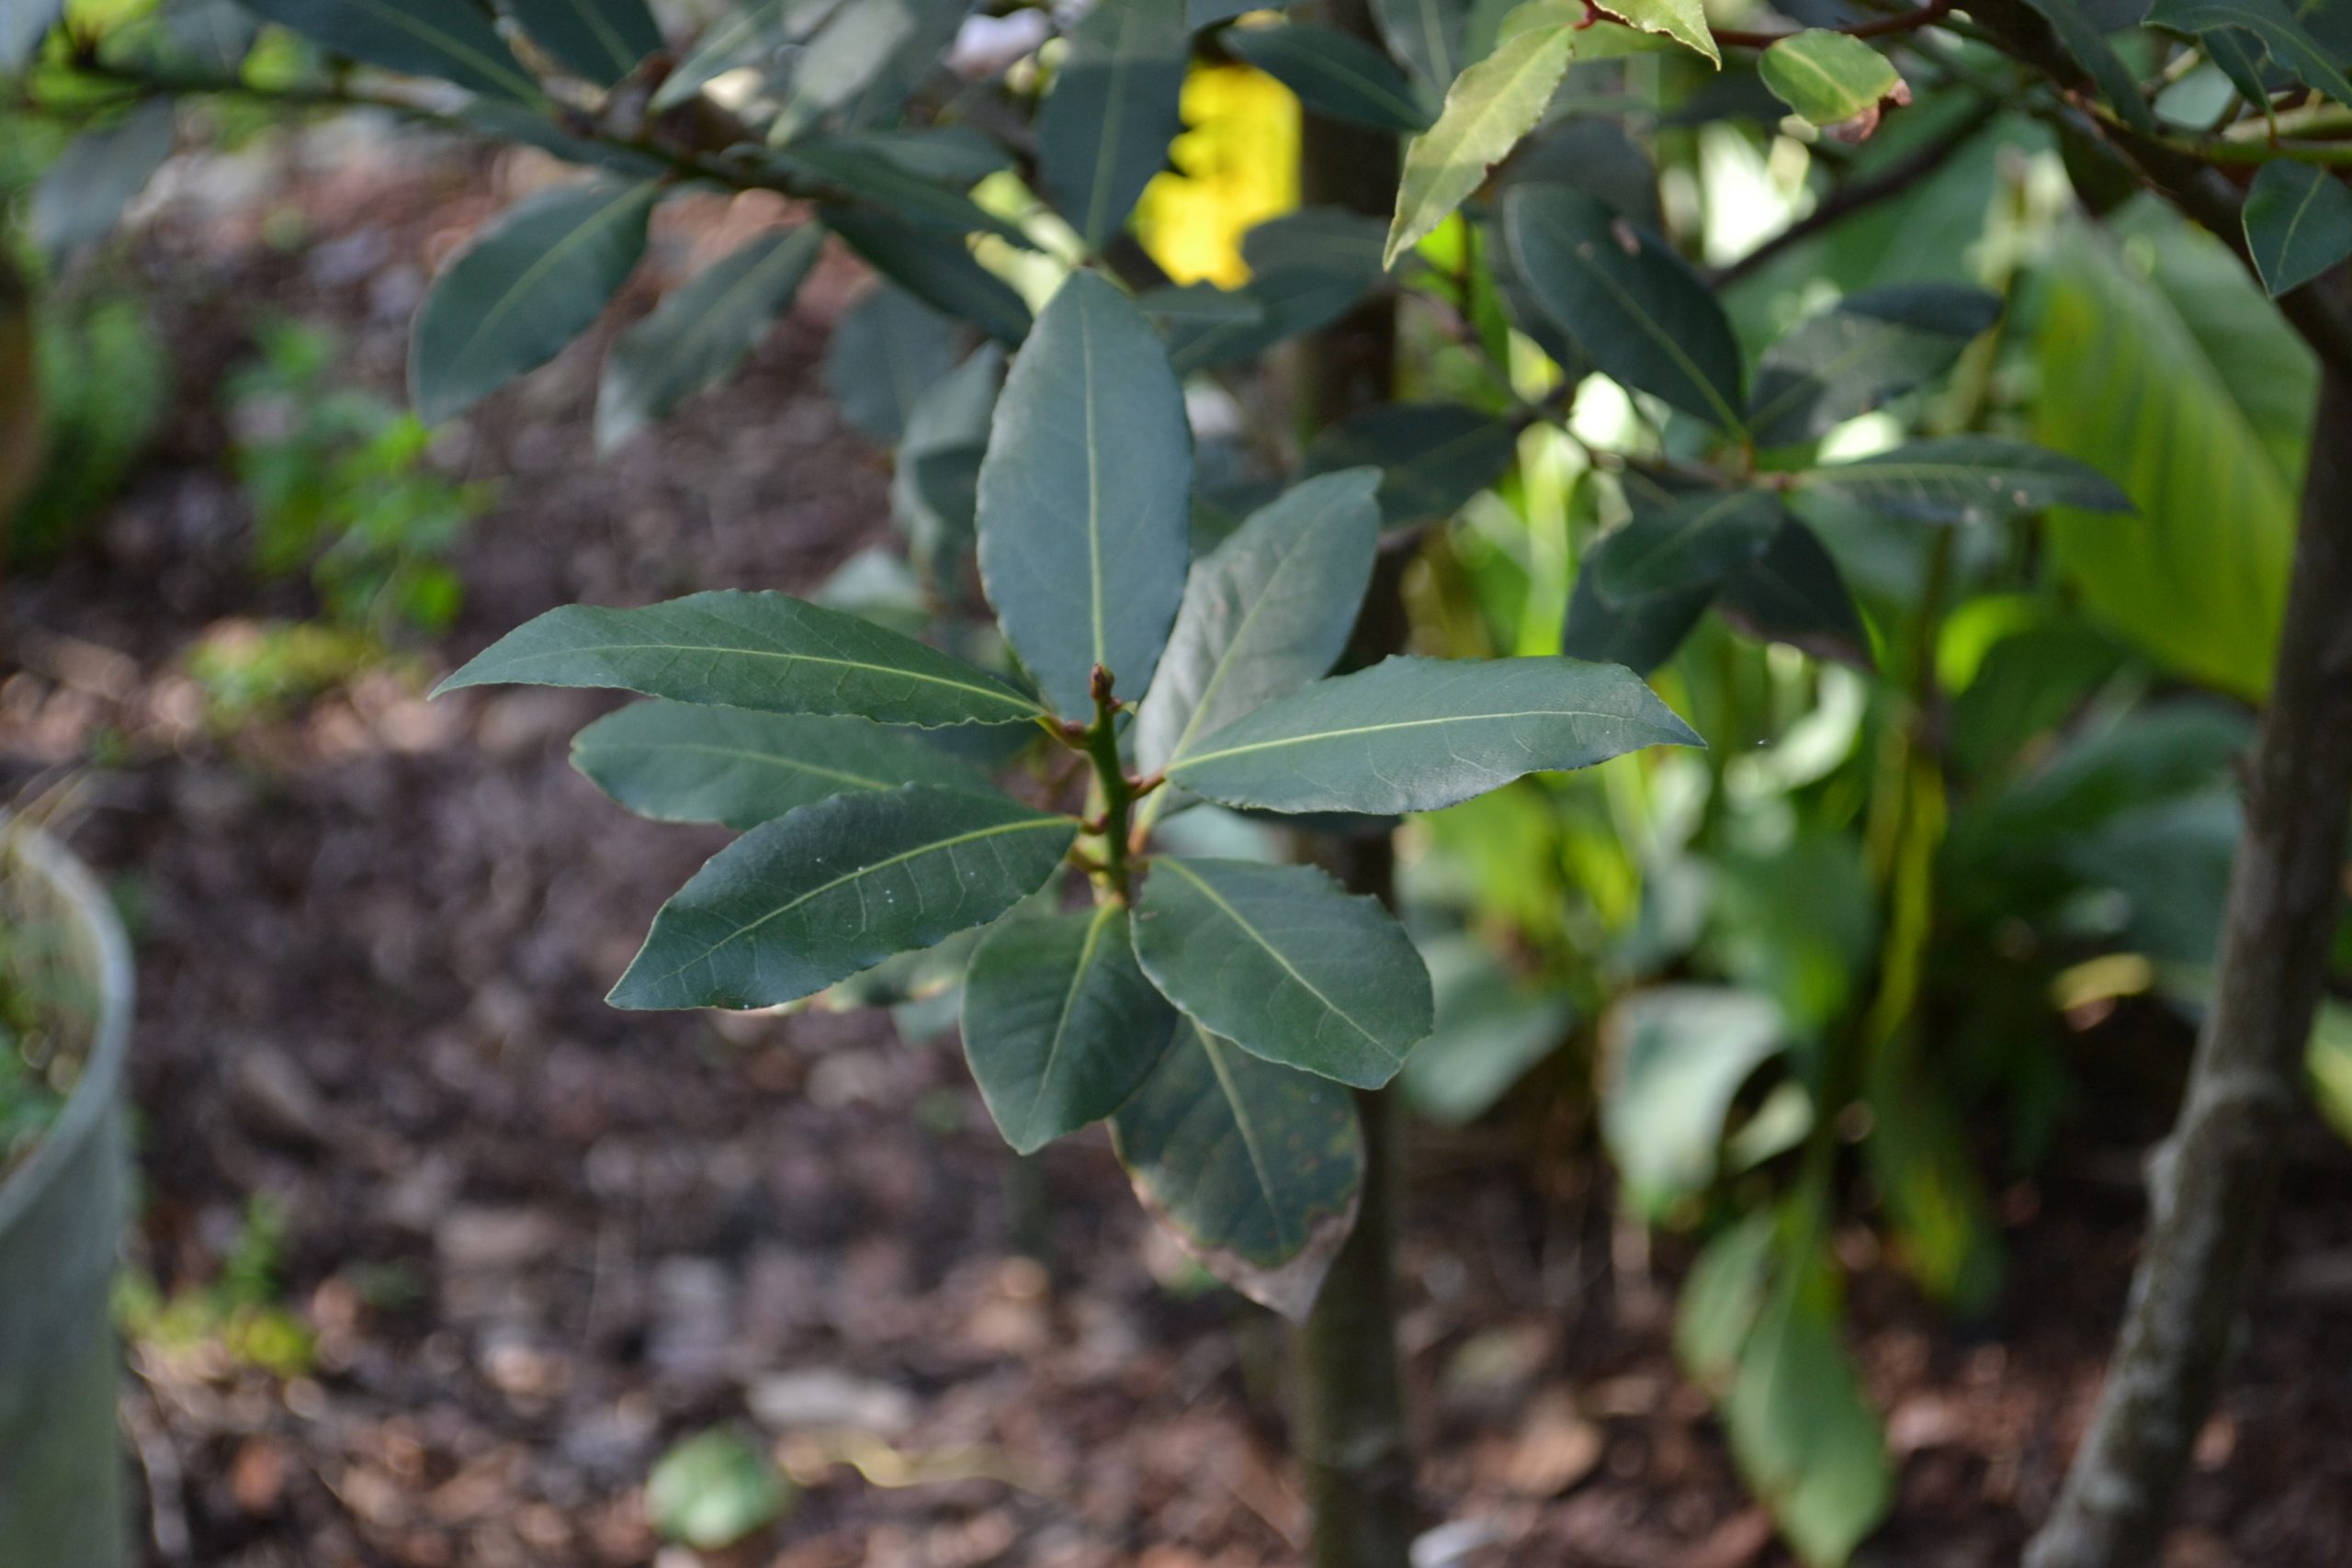
Dark green bay leaves. Photo by Beth Bolles, UF IFAS Extension Escambia County.
The bay laurel tree is called daphne in Greece. Greek mythology says that Apollo, the sun god, fell in love with the nymph Daphne. Her father took action and turned her into a laurel tree. To remember Daphne, Apollo wore a laurel wreath and the tree came to represent honor and glory. Greek and Roman heroes and scholars were crowned with laurel wreaths. The earliest Olympic champions in 776 BC wore garlands of fragrant bay leaves. The tree was considered good luck, but the death of a bay tree was considered an omen of things to come.
Bay laurels are slow-growing and show variation in growth habits. Most have a dense and shrubby appearance with multiple shoots from the base while some have a single trunk. Under ideal conditions, planted in the ground, the bay tree can reach 25 feet or higher, but most commonly grow to about 6 feet. In our zone, 8B, bay laurels can grow in the ground if planted in a sunny southern or eastern exposure location near a wall or building for cold protection.
Bay laurel plants like well-drained, rich soil. If the bed is properly prepared, additional fertilizer is rarely needed. Bay laurels will survive light frosts and the infrequent hard freeze if it is not for a prolonged period. More mature trees can also freeze to the ground and come back from the rootstock. Young trees should be protected from cold stress for several years until they are at least a foot tall before planting in the ground.
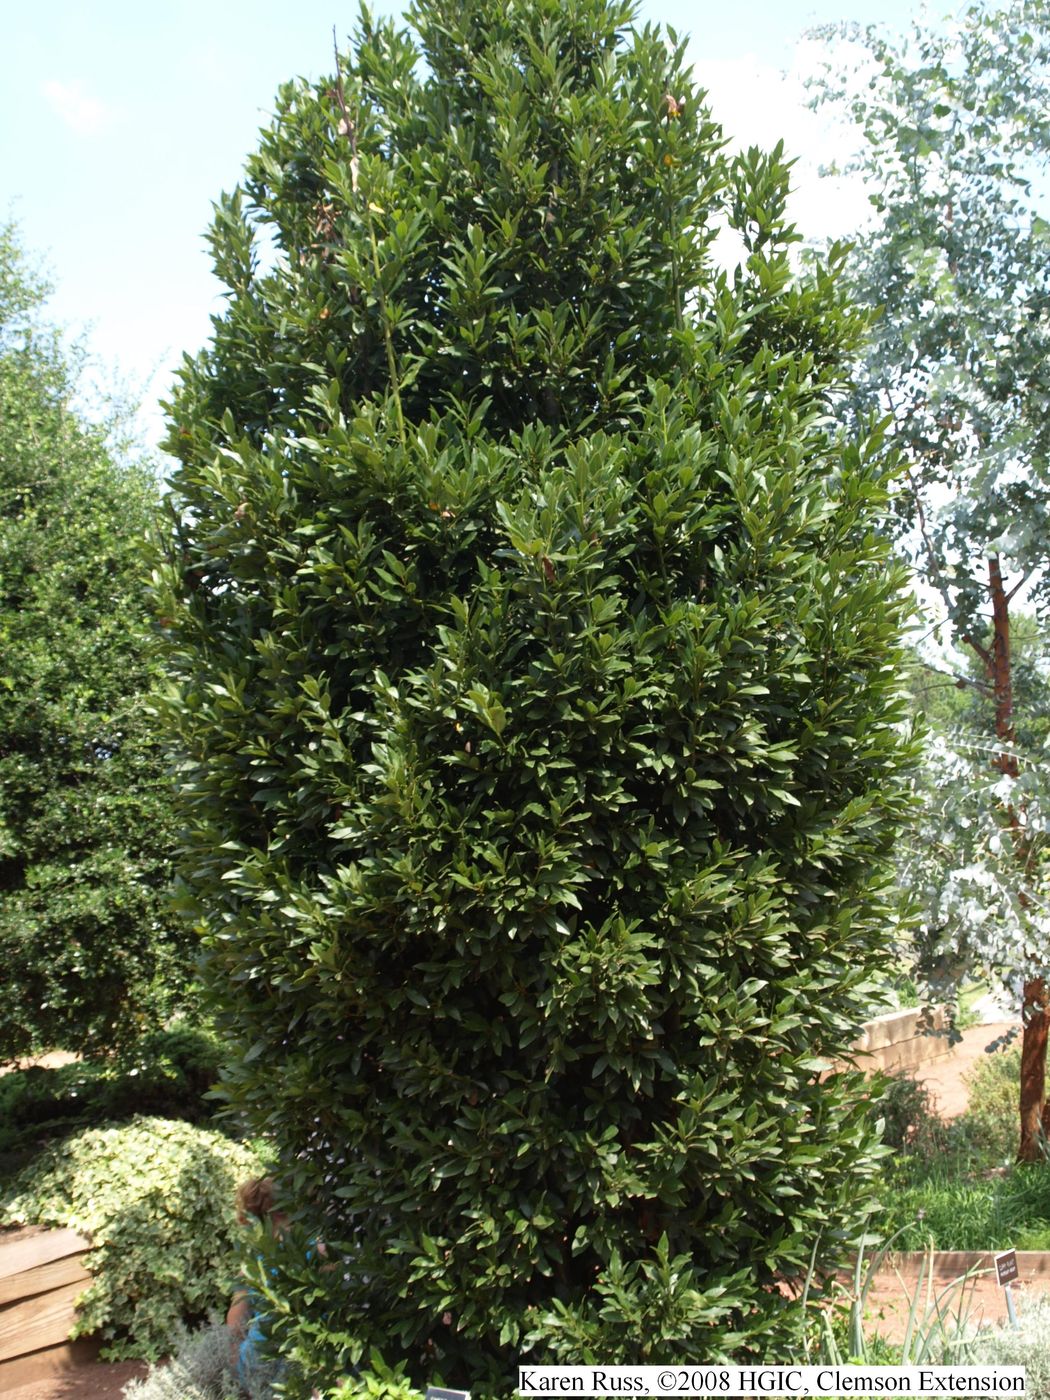
A bay laurel trained as a tree. Photo Credit: Karen Russ, Clemson University Extension
Bay laurels can also be grown indoors in containers in areas with strong natural lighting. Clay or wooden containers with many drainage holes are preferred. Plants should be fertilized regularly with complete fertilizer. In the summer, time-release fertilizer works best due to frequent watering. However, fertilizers too high in nitrogen will produce lush foliage with little flavor.
Bay laurel is a favored container-grown street plant in Europe. It has historically been found in gardens as a tree, a hedge, a topiary, or a focal point in an herb garden. Bay trees are only now gaining popularity in the United States. It was awarded the herb of the year in 2009.
Bay laurel has a reputation of being frustrating and difficult to propagate which results in very high prices for starter plants. To propagate use semi-hard wood cuttings and snap from branches rather than clipping. Strip the lower leaves and dip cutting in a rooting hormone. Stick in small pots filled with a fine-textured medium. If a knob forms at the end in a few weeks, then roots may form within a few weeks to several months. In recent years, plants have been more readily available in nurseries and even at large box stores.
Bay laurel is one of the primary culinary herbs in the garden. The culinary history has been documented for thousands of years. The leaves are treasured and used in many cuisines. Fresh leaves are tough but dried leaves are hard and brittle. Leaves are added at the beginning of cooking. Both fresh or dried are usually removed after cooking before food is served to prevent the risk of choking. Much is said about fresh versus dried bay leaves. I usually use fresh leaves because I have them available. I think they have a wonderful flavor. I use equal amounts of fresh or dried. Soft fresh leaves (petioles and midribs removed) are great chopped in salad dressings. Chopped leaves are also good in butters and cheeses with other herbs. Cajun cuisines use bay leaves to flavor rice and seafood. Bay is a primary element of bouquet garni, a bouquet of herbs, used in French cuisine. Bay goes in meats, soups, stews, vegetables, pasta, potatoes, and sometimes in custards and dessert sauces. Like parsley and marjoram, bay laurel is called a “liaison” herb which helps contrasting herb flavors blend rather than fight each other.
There are many plants that look like and smell like the bay laurel. Red bay, Persea borbonia, is native throughout our region and a substitute for bay laurel. Red bay is best used fresh. Its fragrance and flavor dissipate quickly if dried. This is one of the only substitutes. Others are poisonous or have little to no flavor. Madalene Hill and Gwen Barclay, authors of Southern Herb Growing, wrote, “A word to the wise: Be wary of collecting and using any wild plant as flavoring or food unless you’re absolutely sure of its safety. Just because a plant is called some type of bay or laurel does not mean it is edible.” Some are highly poisonous.
If you enjoy good food, you have enjoyed bay laurel, Laurus nobilis, whether you knew it or not. It’s time to grow your own beautiful and fragrant bay laurel tree. This will be a wonderful addition to your garden and to your kitchen.
There is an old saying that rings true in pretty much any situation – “You get what you pay for.” Gardening tools, especially pruners, are no exception. We’ve all been there, fumbling around with a pair of rusty, dull, cheap garden pruners that just barely get the job done. Unfortunately, they can also do considerable harm to the plants you’re trying to improve, as anything short of a nice, sharp, clean cut introduces the potential for insect/disease infestation and will produce a wound that takes much longer to heal, if it ever heals properly at all. You wouldn’t want your doctor to start hacking away at you with a dirty, second-rate scalpel. Don’t subject your plants to the same treatment! While I’m not advocating blowing hundreds or thousands of dollars outfitting your garden tool shed with top of the line everything, investing in a pair of quality bypass hand pruners will pay dividends many years into the future and make your gardening experience much more enjoyable!
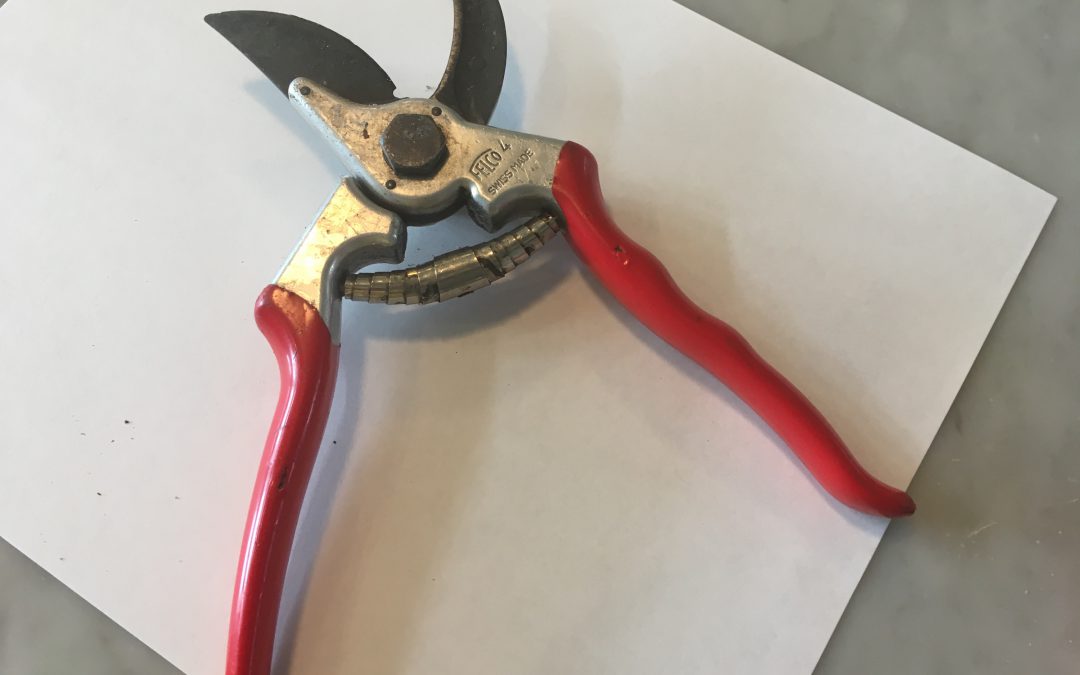
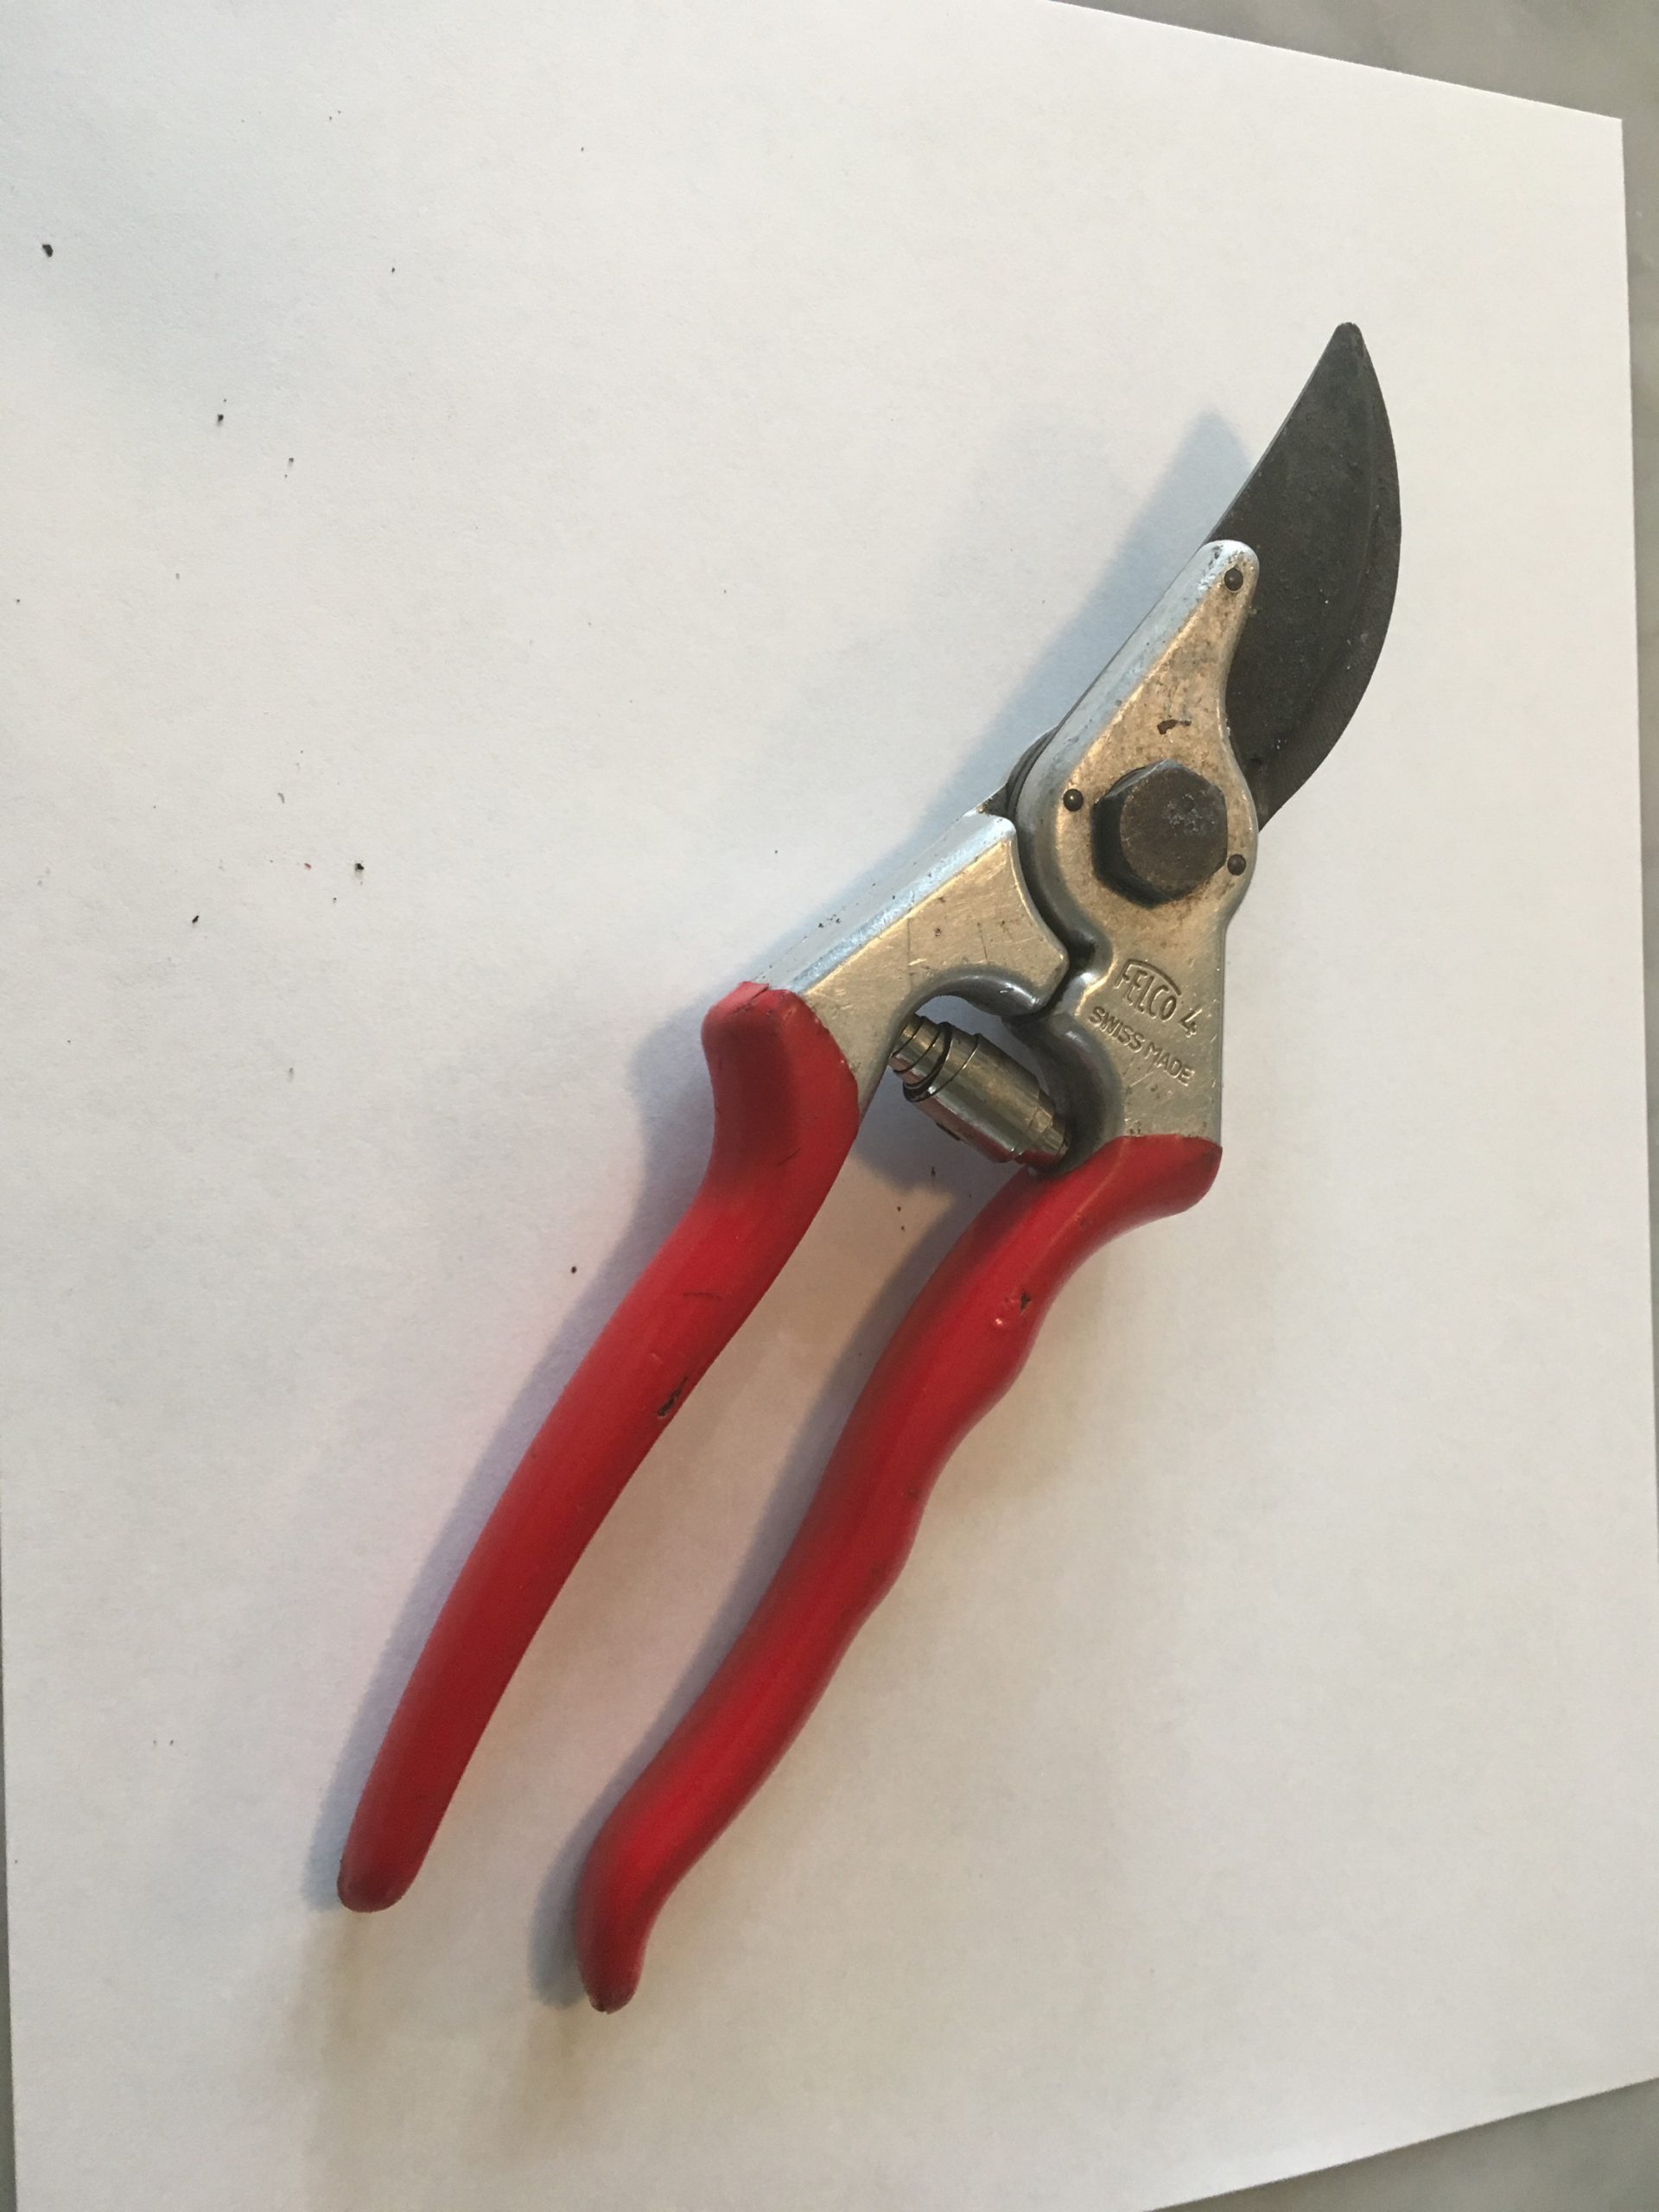
The classic Felco #4 bypass hand pruners. Photo courtesy of Walton County Master Gardener Andrea Schnapp.
Found in three designs, from old-fashioned anvil pruners that smush and smash their way to a cut, to ratcheting pruners that make short work of larger branches but tend to be cumbersome and complicated, to bypass pruners that produce clean cuts in a scissor-like manner, hand pruners accomplish many tasks in the landscape. From cutting small limbs, to harvesting vegetables, to deadheading annual flowers and everything in between, there isn’t a more frequently used, versatile tool. Therefore, it makes sense to buy a quality pair that will perform excellently, still be snipping long after your pruning days are over (if you take care of them), and that are comfortable enough you will enjoy using them. When shopping for your pair of “forever” pruners, there are a few things to look for.
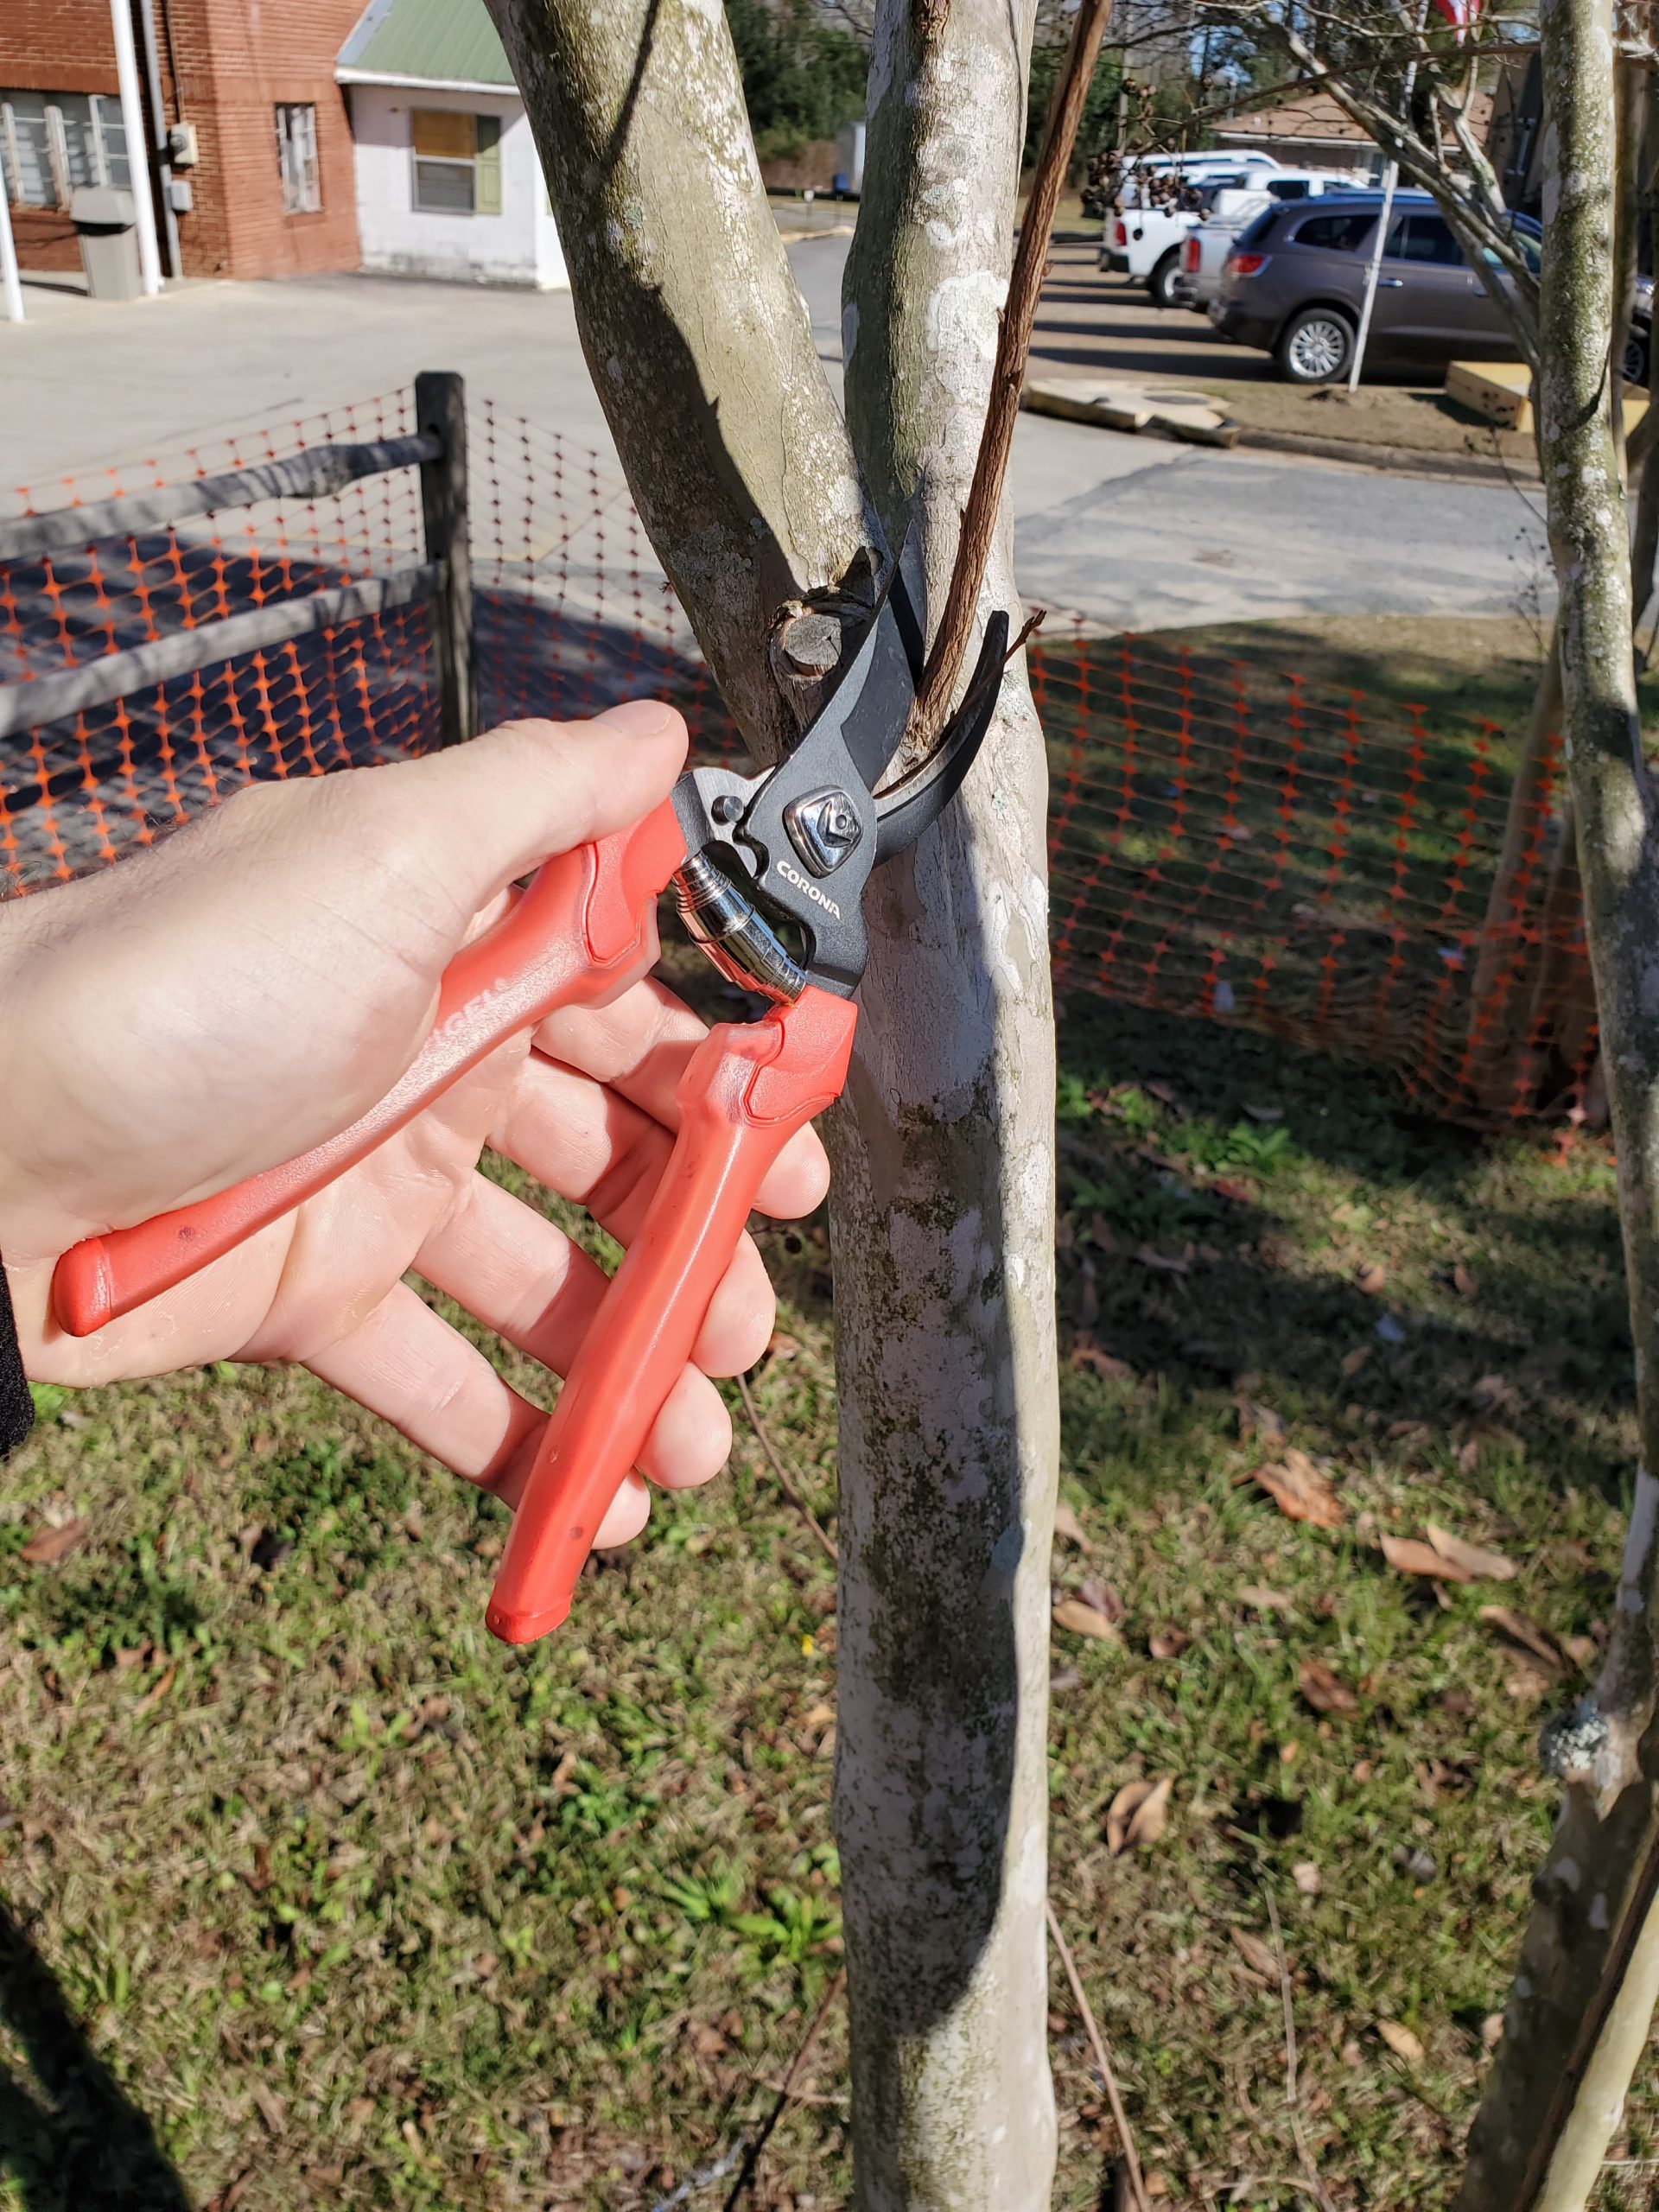
Only use bypass style pruners. Your plants will appreciate it.
Look for heavy duty pruners with frames made from quality aluminum or stainless steel; they won’t rust and won’t easily bend or break.
Buy pruners with replaceable parts. This is especially key because springs eventually rust and gum up and blades break and will eventually lose their ability to hold an edge over time (though you can and should resharpen them).
There are two commonly found brands that fit all three above criteria, albeit at different price points. For a high quality “budget” blade, various models from Corona do an excellent job for the money ($20-30) and won’t hurt your feelings too badly if you happen to lose a pair. Should you decide to splurge a little, Felco makes sharp, indestructible pruners, in multiple models around $50 to fit all size hands. Felco has become the horticulture industry standard and you’d be hard pressed to find a nursery owner or landscaper that didn’t own a pair (or two).
Corona ComfortGel bypass hand pruner. Photo courtesy of Daniel Leonard.
Regardless of which brand you buy (and there are many more than the two above listed) a pair of well-made pruners, if taken care of, should last a lifetime and make your gardening experience much more enjoyable for you and your plants! If you have any questions about gardening tools or equipment or any other horticulture or agronomic topic, feel free to contact your local UF/IFAS Extension Office. Happy Gardening!
We are back with new topics and guest speakers for 2021! All sessions are Thursdays at noon CDT or 1:00 p.m. EDT.
There are two ways to join the Gardening in the Panhandle LIVE! webinars:
1. Facebook Live – Follow us on Facebook and follow individual webinar Events.
2. Zoom Webinar – Pre-registration is required for Zoom. Users must have an authenticated account (free at Zoom Link). Be sure you have security settings up to date to prevent connection delays. Links to Zoom registration will be added to the topic one week before the webinar and a closed captioned recorded link to YouTube will be available approximately one week after the program. (Underlined words have active links!)