by Daniel J. Leonard | Oct 28, 2020
In the Panhandle, fall is the prettiest season for wildflowers. Our roadsides and woodlands are covered with pinks, whites, yellows, blues, purples, and even a little red here and there. Pretty as it may be, the beautiful wildflower look isn’t super appropriate for most yards. It would look unkempt, a little “wild” if you will, would be hard to manage and is probably best enjoyed in natural areas. However, we can bring some of the native colors of fall into our landscapes in a much lower maintenance, refined manner with two Panhandle species that pair excellently together, Muhly Grass (Muhlenbergia capillaris) and Darrow’s Blueberry (Vaccineum darrowii).
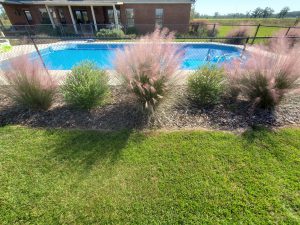
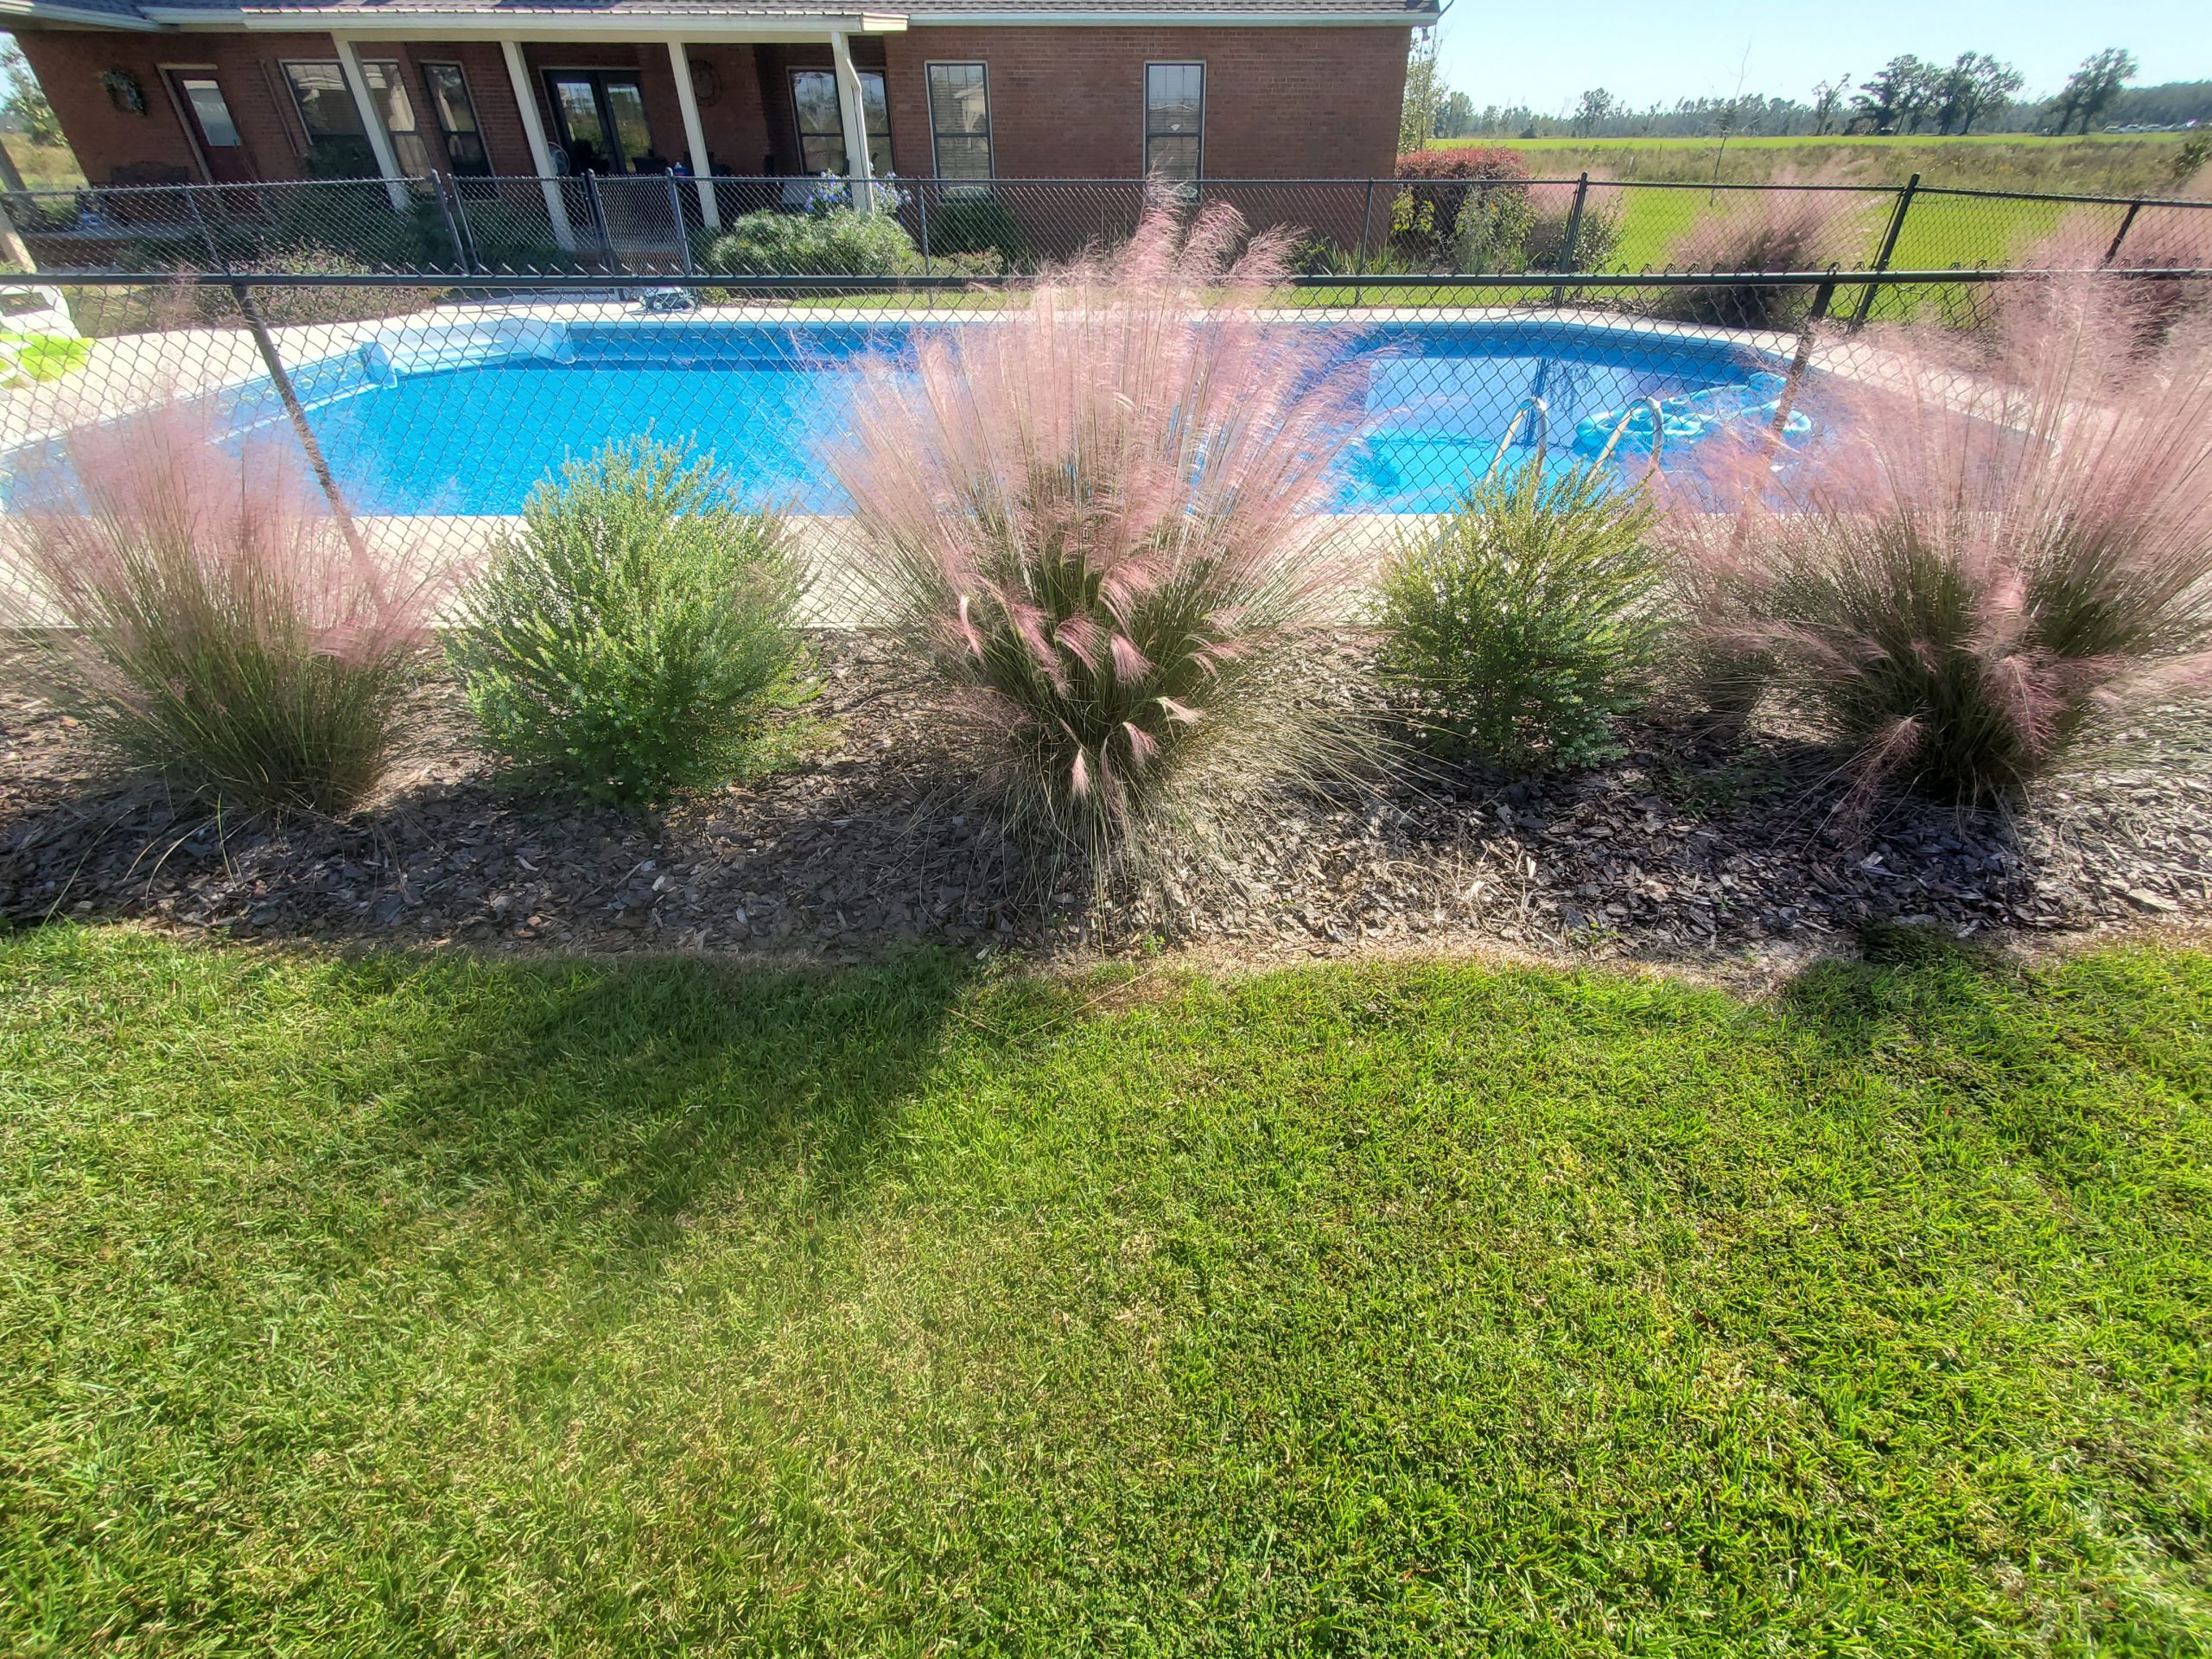
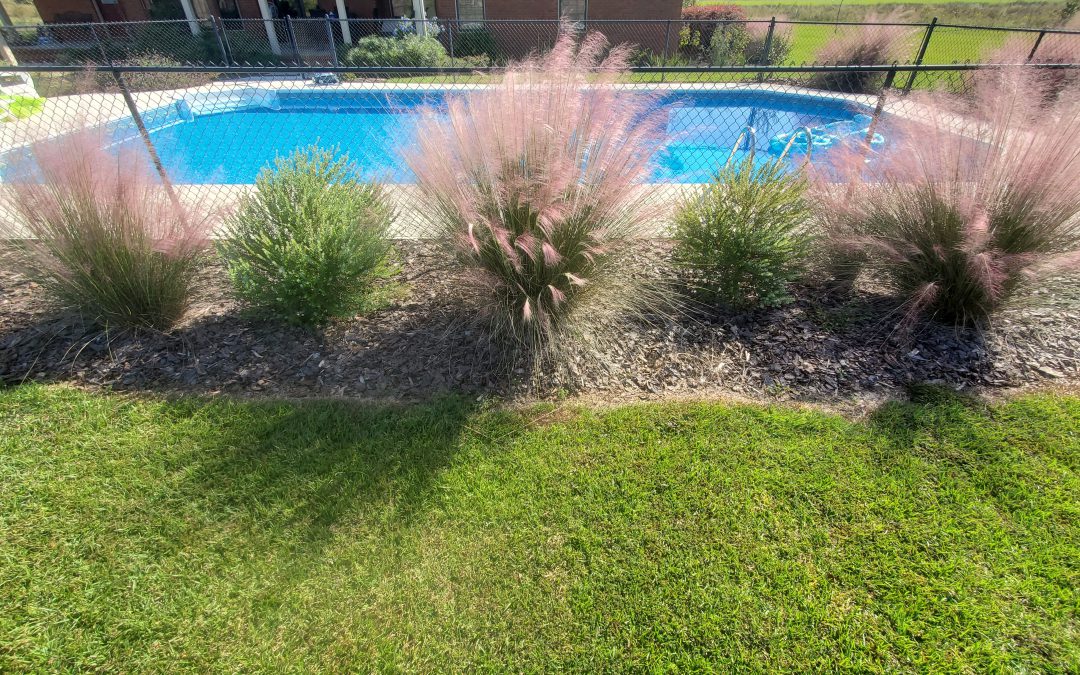
Muhly Grass and Darrow’s Blueberry in a local landscape. Photo courtesy of Daniel Leonard.
Muhly Grass, the native grass with the pinkish/purple panicles blooming right now, has gained much popularity in recent years, earning a reputation as a near pest/disease free, drought tolerant, attractive landscape plant. Operating in lieu of more traditional low growing shrubs in landscapes, Muhly is an airy, greenish gray bunch grass growing about 3-4’ tall and wide, lending informal, coastal texture to landscapes most of the year and really shining in fall during its flowering season. Once established, it never needs extra water, prefers little fertilizer, and only needs a rejuvenation prune (or burn – the Leonard preferred method. It’s fun and mimics the role of fire in Muhly’s native ecosystems!) every couple of years to keep it looking tidy.
Unlike Muhly Grass, Darrow’s Blueberry has not caught on broadly in the landscape industry but is no less deserving. This native blueberry species only grows a couple of feet tall, produces edible fruit that wildlife enjoy, and adds an unusual blue green color to landscapes via its tiny-leaved, evergreen foliage. It prefers the same sites as Muhly and is part of the reason they pair so well together. Our mostly sandy, well drained soils work just fine, but both plants can handle soils that are occasionally wet. A bonus, Darrow’s also has tiny, bell shaped flowers in spring that attract all manner of beneficial bee species. This makes it a must in any native pollinator garden!
As good as these species are alone, I think they are better together. In my family’s yard, we created a loose screen of widely spaced (8’ apart) Muhly Grass specimens around a pool, in the spirit of giving the area a “coastal” airy feel, and interspersed Darrow’s Blueberry in between.
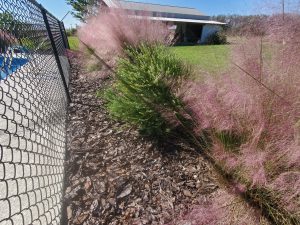
The pink Muhly Grass flowers pair nicely with the green blue foliage of Darrow’s Blueberry. Photo courtesy of Daniel Leonard.
The look has been outstanding, particularly in the late summer/early fall. The pinky purple flowers of Muhly Grass complement the green-blue foliage of the blueberries nicely and provide easy, lasting color without having to worry about planting finicky annuals or perennials each season.
Landscaping with natives does not have to look wild and unkempt, nor does it have to be drab and unattractive. Combining native yet showy plants like Darrow’s Blueberry and Muhly Grass makes for an unusual, refined, nearly no-maintenance feature in your landscape. Look for these and other neat native plants at native nurseries and independent garden centers around the Panhandle. If you’d like more information on native grasses, blueberries or any other horticultural topic, please contact your local UF/IFAS County Extension Office! Happy Gardening!
by Beth Bolles | Oct 21, 2020
Many people often request a recommendation for a small tree that will be suitable for their landscape and one to consider is the Chinese Pistache, Pistachia chinensis. Although not a native tree, Chinese Pistache does not have invasive potential so it can make a suitable option for both commercial and residential landscapes.
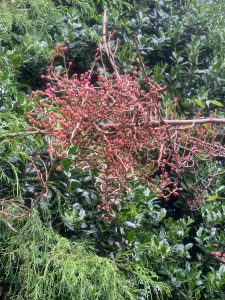
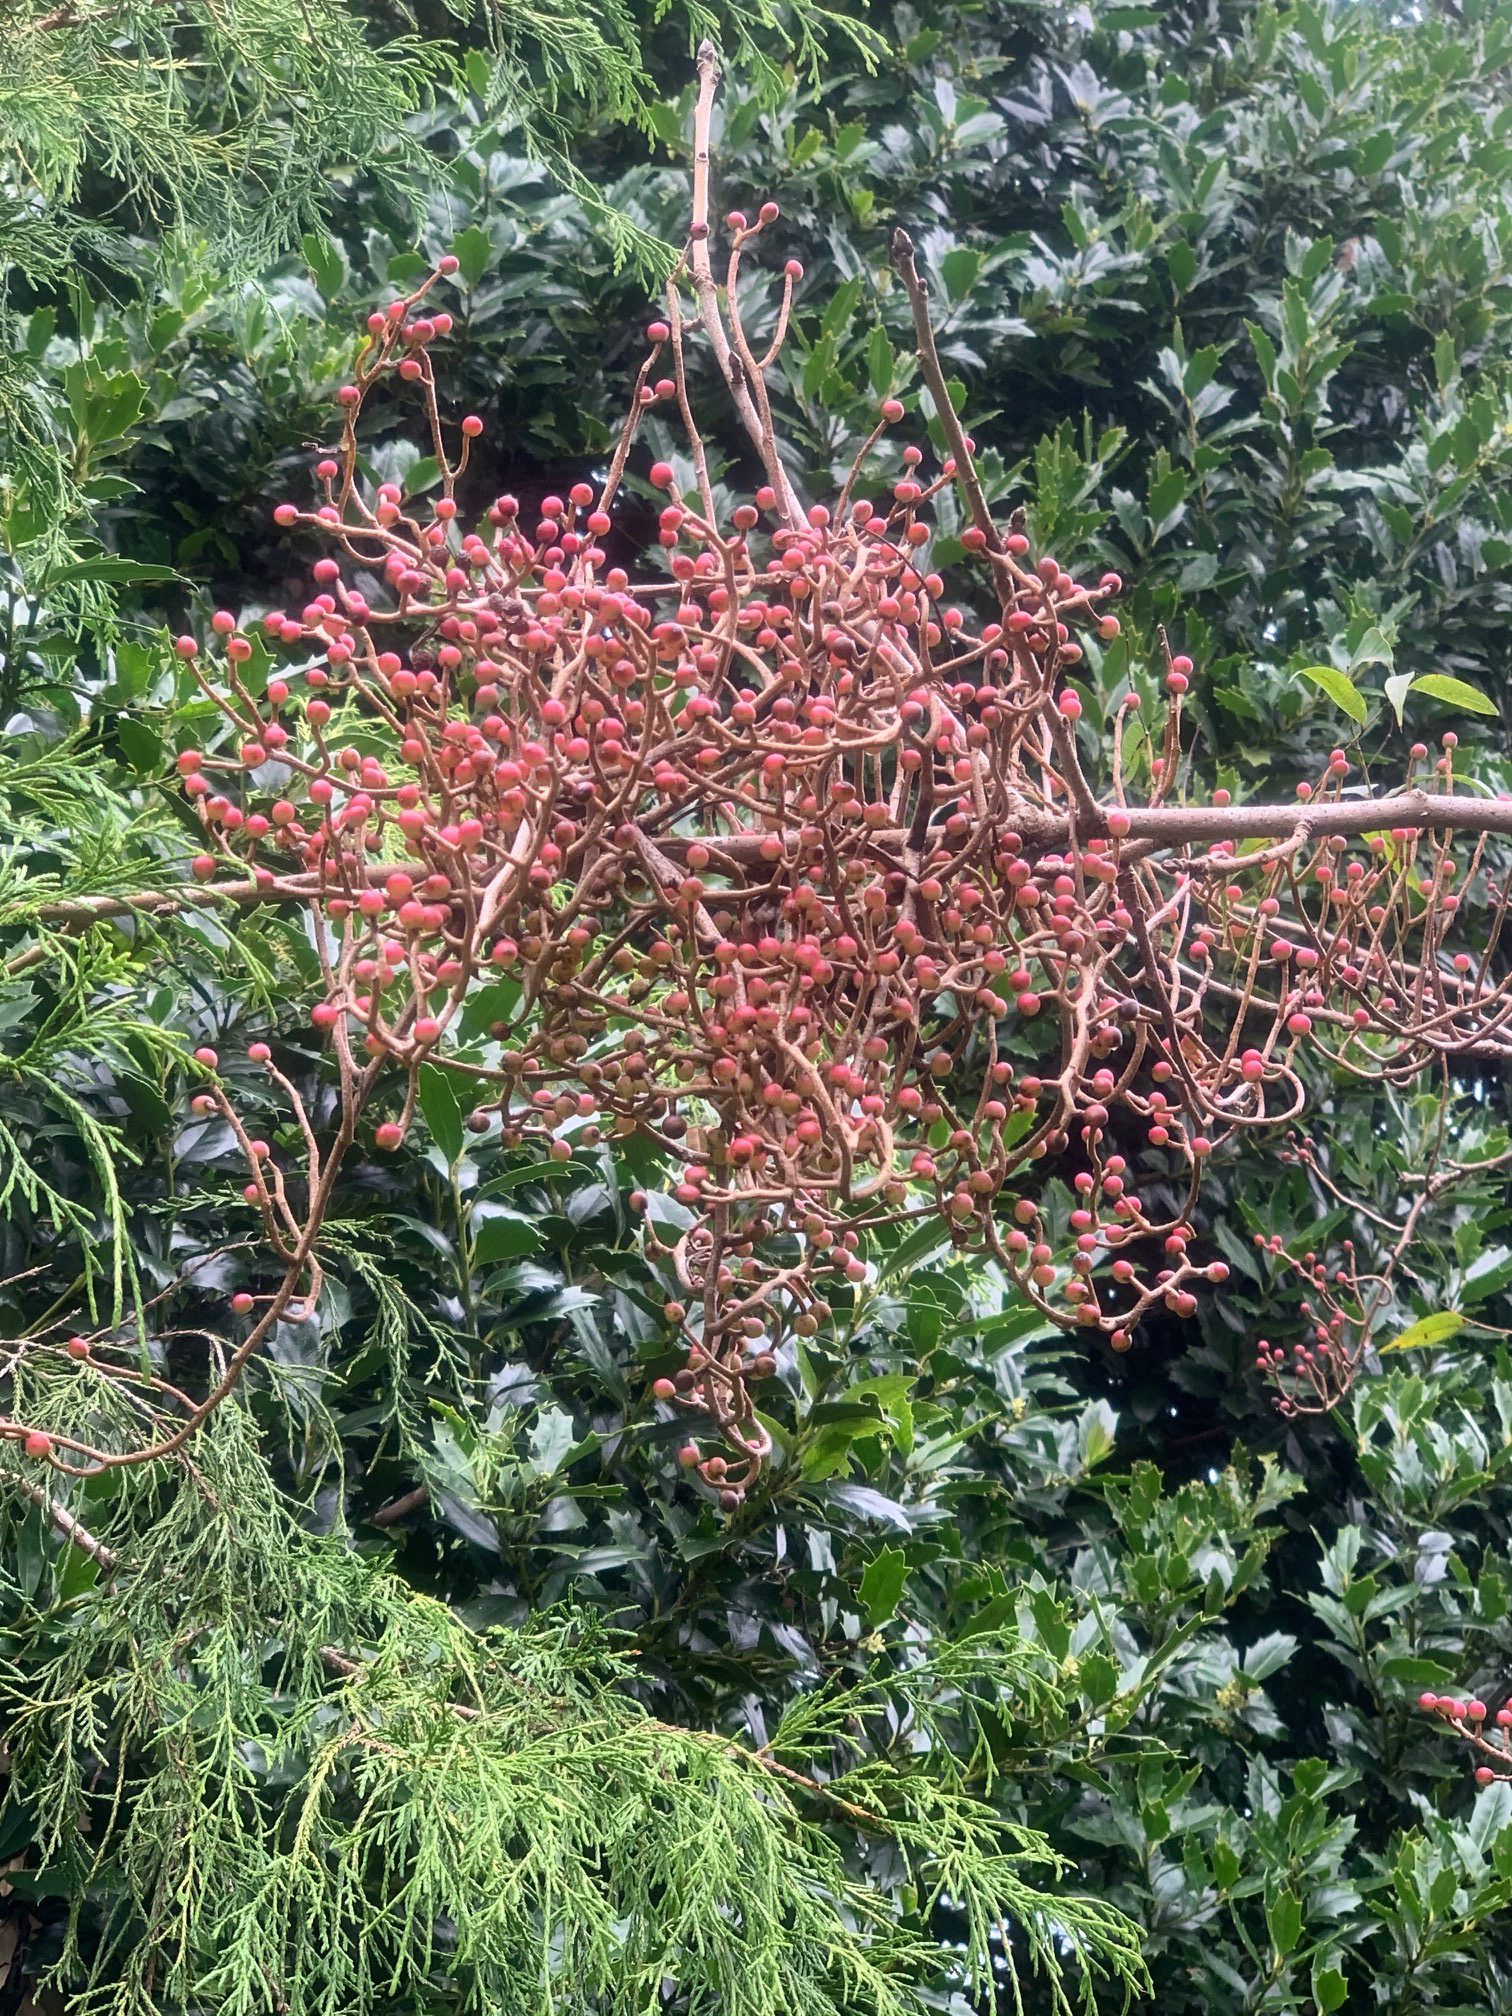
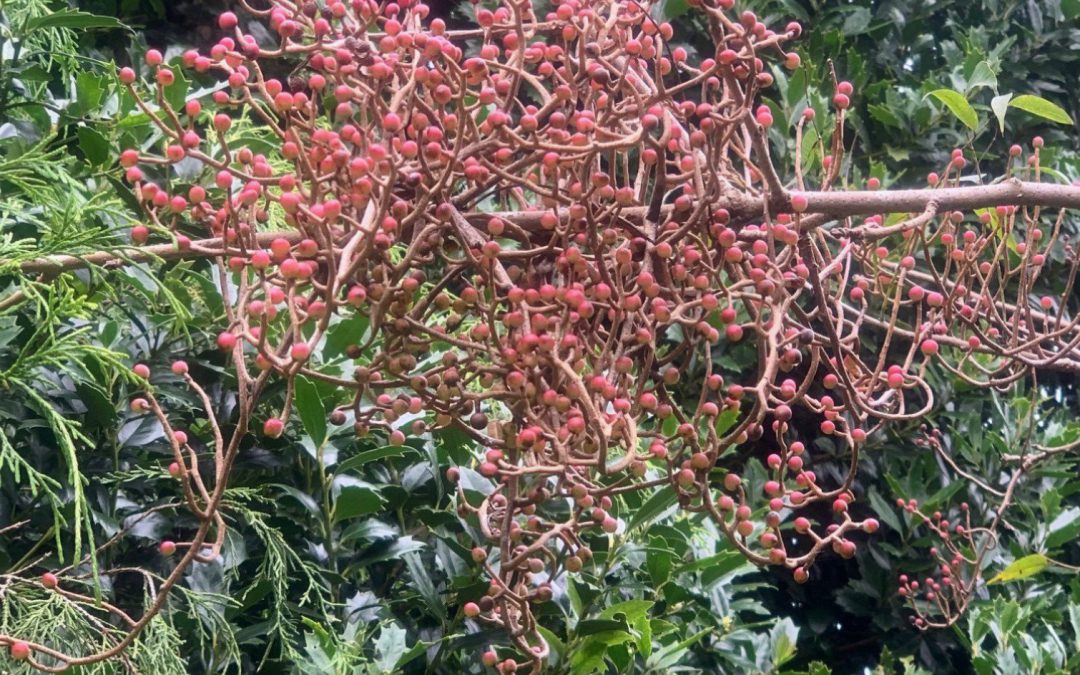
Berries also offer nice fall color. Photo by Beth Bolles, UF IFAS Extension Escambia County
The best features of Chinese Pistache are the fall color it offers with orange leaves, followed by clusters of salmon berries. It will lose its leaves as days shorten but you can enjoy the textured bark during the winter season. Compound leaves offer interest as well during the spring and summer. Adding some medium to fine textured foliage plants under and around trees will provide a nice landscape display.
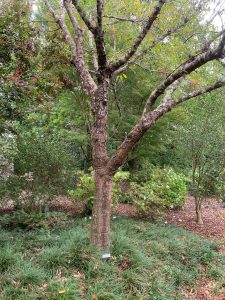
Chinese Pistache has been an attractive feature in the Escambia County Demonstration Garden for over 20 years. Photo by Beth Bolles, UF IFAS Extension Escambia County
A positive feature of Chinese Pistache is that once it is established, it is tolerant of drought. Expect trees to be about 25 to 30 feet in height with a 20 to 25 foot spread. Each tree will have it own unique branch structure and some pruning will be required when trees are young to develop strong connections. You may plant as a full sun tree to provide a little dappled shade for your garden or use as an understory tree in partial shade.
by Mary Salinas | Oct 14, 2020

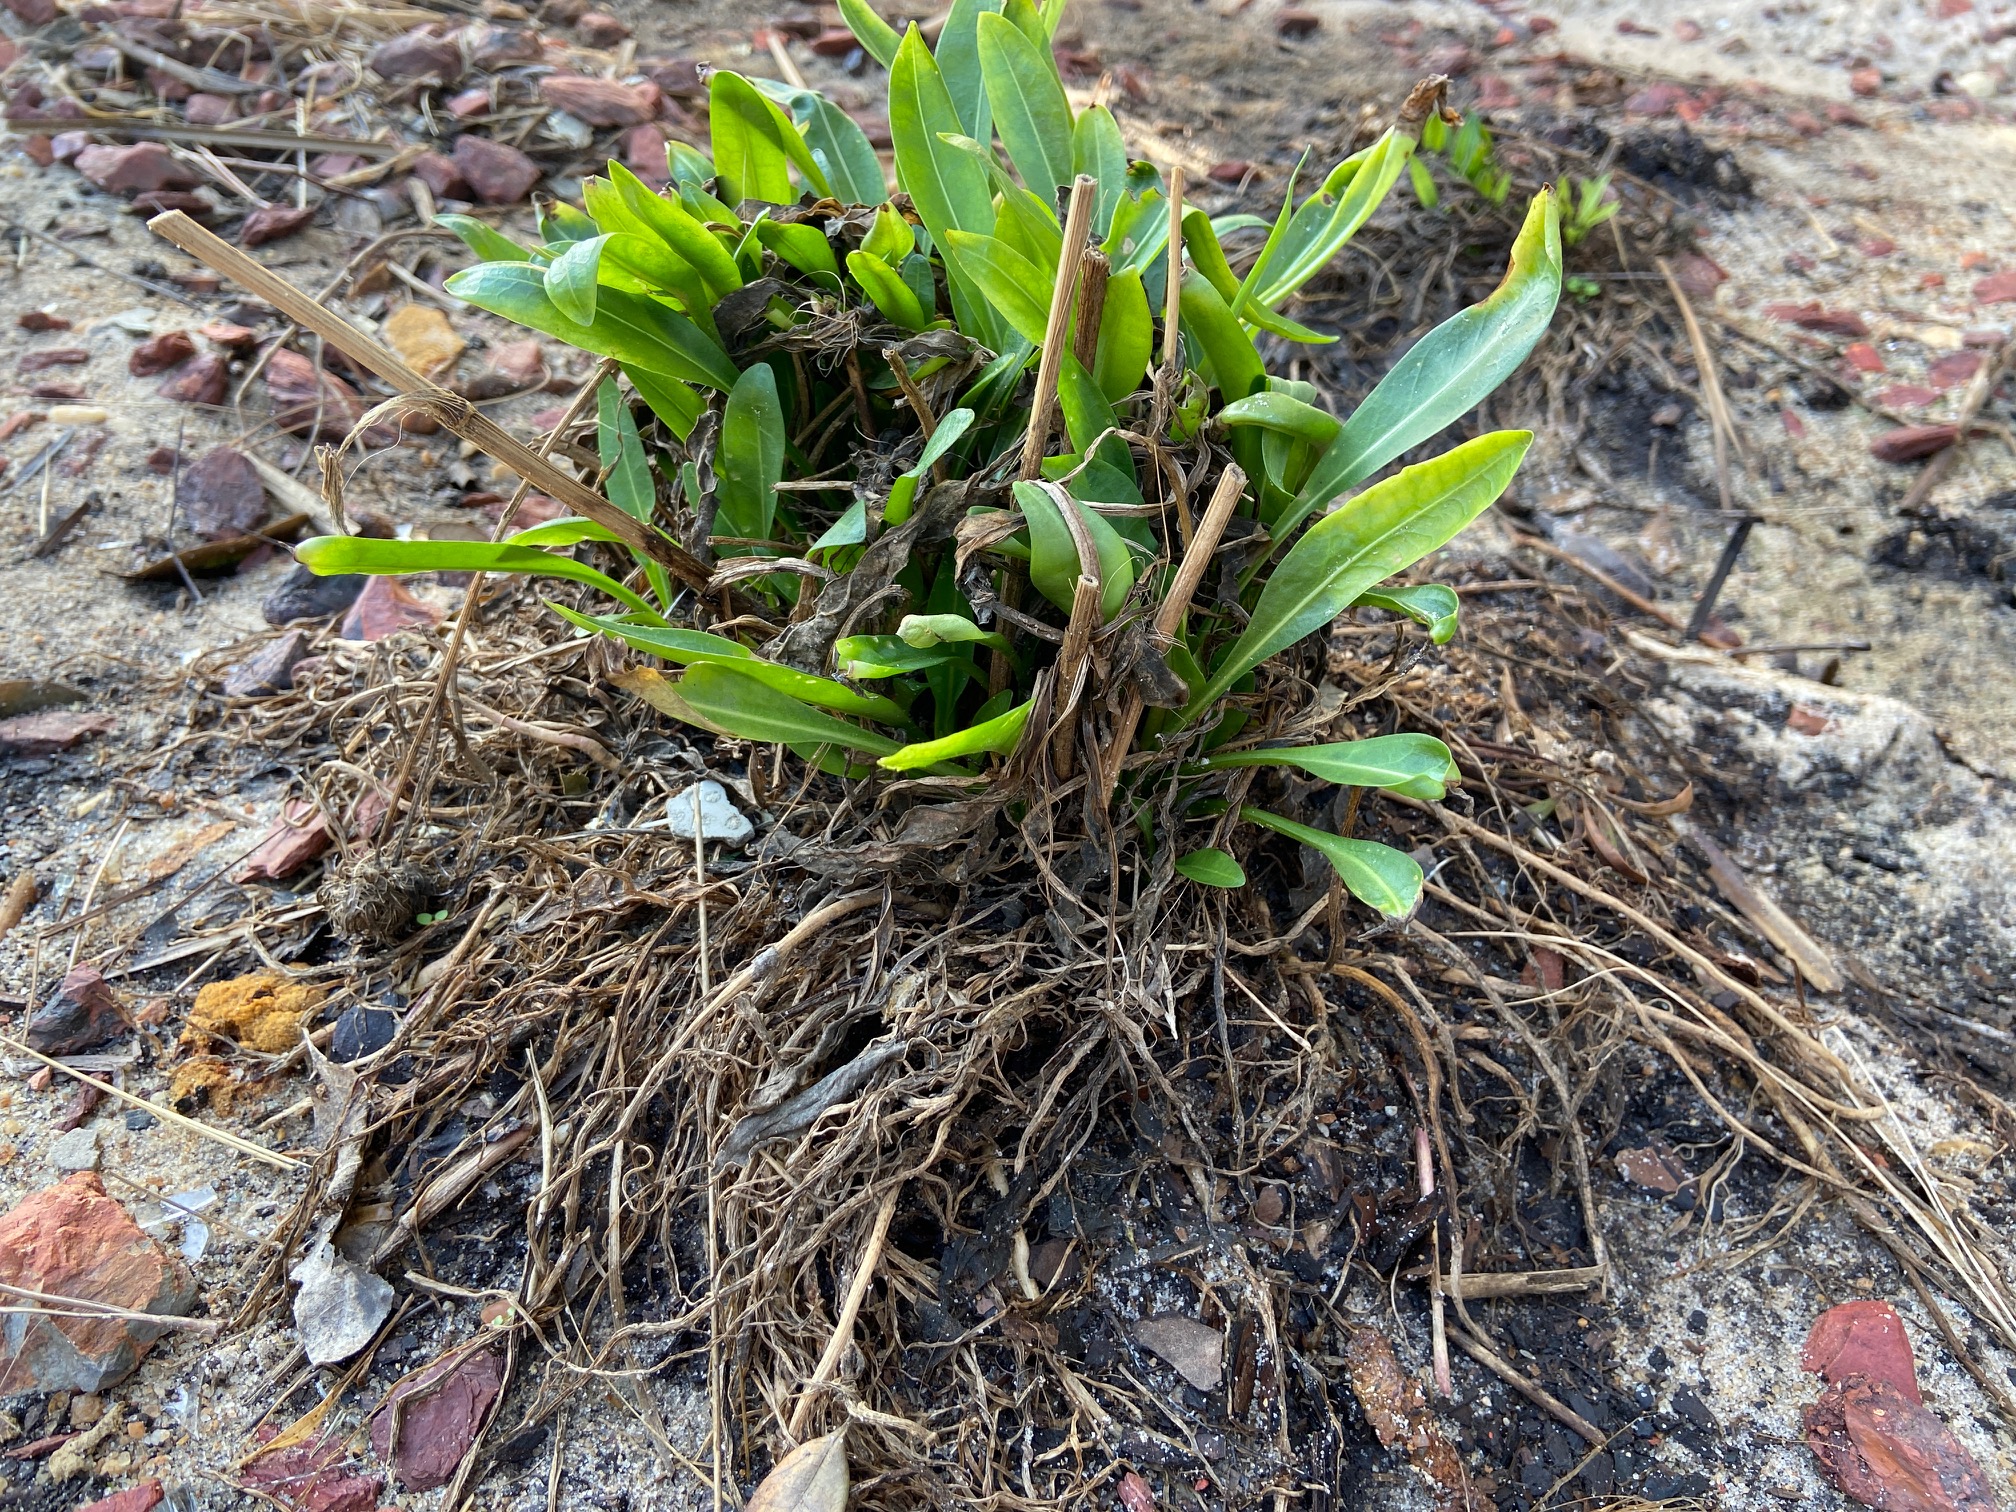
Stoke’s aster ‘Mel’s Blue’ 20 days after Hurricane Sally’s landfall. Notice how soil was washed away from root ball, all the leaves emerged post-hurricane. Photo credit: Mary Salinas, UF/IFAS Extension.
Hurricanes can wreak havoc in your landscape, but they can also reveal what plants are the toughest and most resilient. It’s a great learning opportunity.
A few weeks ago, Hurricane Sally came along and brought about 10 feet of surge and waves across my landscape and completely covered everything except the tallest trees for about 18 hours. (Fortunately, our house is on stilts and we did not have intrusion into our main living areas.)
As expected, the trees, including Dahoon Holly and Sweetbay Magnolia, took a beating but stayed intact. With their dense fibrous root system, most of the clumping native grasses also stayed put.
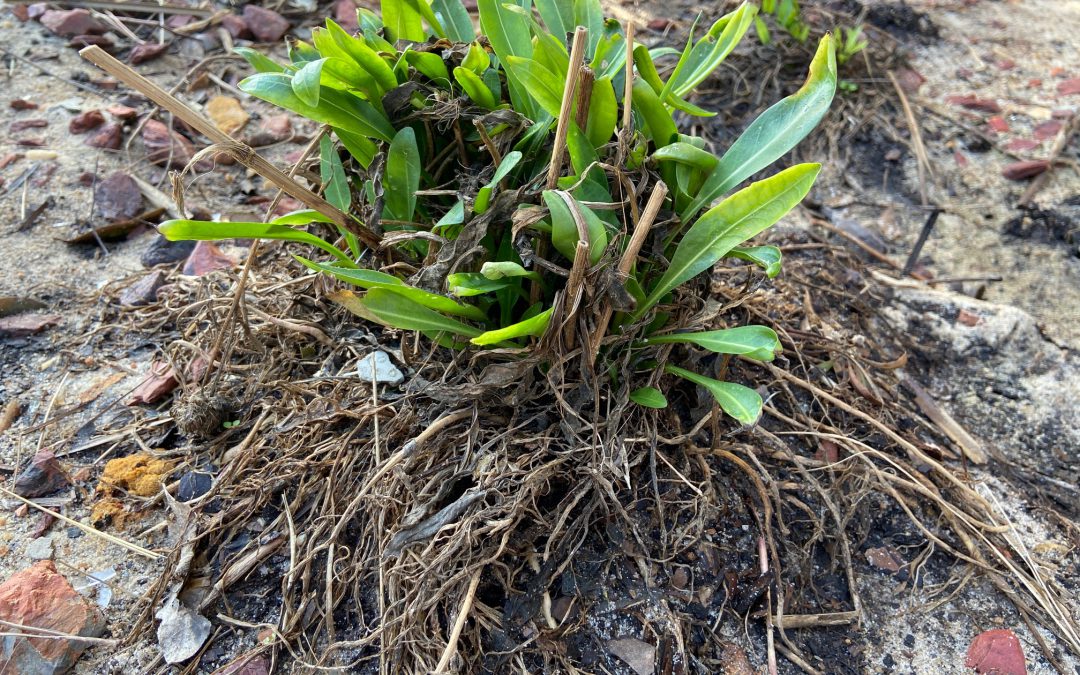
Perennial milkweed 3 weeks post-hurricane. New topsoil and compost now covers the rootball. Photo credit: Mary Salinas, UF/IFAS Extension.
The most surprising plant species that survived were about a dozen Stoke’s aster and 3 perennial milkweed. 4-5 inches of soil all around them was washed away, most of the roots were exposed, and the leaves were stripped or dead. The other perennials that had lived nearby were all washed away. To my surprise, within about 10 days after the storm, these two plant species started poking up new stems and leaves.
Here’s a list of some of the plants either in my yard or in the neighborhood that survived Hurricane Sally’s storm surge and may be suitable to add to your coastal landscape:
- Dahoon holly, Ilex cassine
- Muhly grass, Muhlenbergia capillaris
- Dwarf Fakahatchee grass, Tripsacum floridanum
- Perennial milkweed, Asclepias perennis
- Stoke’s aster, Stokesia laevis, specifically the cultivars ‘Mel’s Blue’ and ‘Divinity’
- Bottlebrush, Callistemon citrinus
- Gardenia, Gardenia jasminoides
- Bougainvillea, Bougainvillea spp.
- Flax Lily, Dianella tasmanica
- Crapemyrtle, Lagerstroemia spp.
- Cabbage palm, Sabal palmetto
- Canary Island date palm, Phoenix canariensis
- Sweetbay magnolia, Magnolia virginiana
- Augustinegrass, Stenotaphrum secundatum
- And, unfortunately, the rhizomes of the invasive torpedograss also survived.
For more information on salt tolerant and hurricane resistant plants, see:
UF/IFAS Gardening Solutions: Coastal Landscapes
UF/IFAS Gardening Solutions: Salt-tolerant Lawngrasses
UF/IFAS Gardening Solutions: Trees That Can Withstand Hurricanes

by Stephen Greer | Oct 1, 2020
Living in Northwest Florida brings many wonderful opportunities to be outside enjoying all the things nature has to offer. Outdoor living can become an extension of your home life. Planning and placing a creatively planned landscape space to be a part of this outdoor living adds so many dimensions for all to enjoy.

Outdoor Living, Courtesy UF / IFAS Gardening Solutions page.
Creating a relaxing space outside of your home needs to take in many considerations before planning begins. These spaces should take into account the creative thoughts of the homeowner. Do you enjoy grilling, sitting quietly to take in the sights and sounds of nature, gardening, hedges and walls for private areas, enjoying shady or sunny spots and many other considerations? Do you most like spending your time outside during the day or evening? Will lighting be needed? How much space do you have? What types of furniture will be selected to create those small sitting spots?
Soil types around your home should be a part of plant selections and include water movement considerations during the design process. The northwest area of Florida ranges from sandy coastal to sandhill sands to clay soils in the northern area of many panhandle counties. It is recommended to take soil samples to determine soil needs prior to placing the first plant into these outdoor spaces. With soil moisture ranging from wet to dry, certain plants perform well in wet sites and others in dry sites. That information should be a part of landscape planning decisions.
How do you envision these enjoyable areas and link to the home design? Flowing from the front entry through the home out to the backyard, you need to keep in mind what you and your family want to see and enjoy. What will it look like as the settings mature and change? Will there be walkways connecting the outdoor rooms. What types of walk materials will be used, stone, gravel, wood, turfgrass or another creative material? Are specific plant settings desired that may include a vegetable, flower or herb garden?
Mitigating the influence of insect pests needs to be a consideration when creating an outdoor living space in the panhandle.
Building a fire wise landscape is an important consideration also as the risk of wildfire in the state is always present during drought periods. Selection of plants that are fire resistant should be a priority. Enjoying time with family around the firepit is a pleasant experience. Keep in mind to plan, place and use firepits wisely. Have a firepit safety plan ready.
Outdoor living spaces also include recreation areas, both on and off your property. We are fortunate to have bike friendly roadways, especially in quiet neighborhoods. When biking, always follow the rules and regulations of the road. While out enjoying your pedaling adventure, you may want to take along the fishing equipment. If these are part of your plans think about storing supplies in locations with easy access.
There are a lot of questions that will need to be addressed before outdoor living spaces are created. One important consideration: outdoor spaces should be a comfortable place to visit and may be a quiet place for contemplation or a fun setting for friends and family. Thought should be given to hiring a professional landscape company to assist in making these wonderful settings a reality. Enjoy your outdoor living space!
by Daniel J. Leonard | Sep 8, 2020
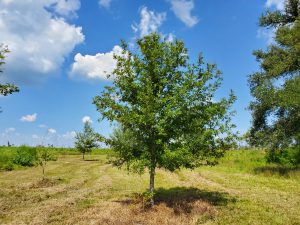
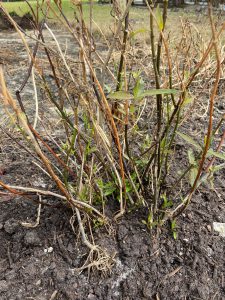
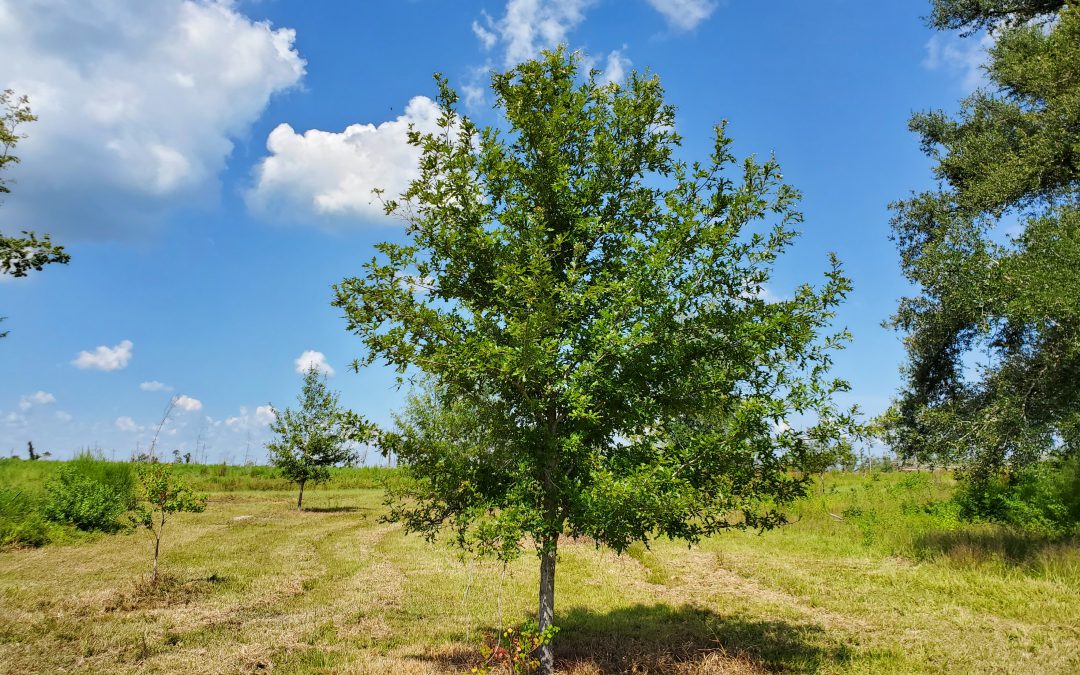
7 year old Overcup Oak (Quercus lyrata) on the edge of a wet weather pond in Calhoun County. Photo courtesy of Daniel Leonard.
Haunting alluvial river bottoms and creek beds across the Deep South, is a highly unusual oak species, Overcup Oak (Quercus lyrata). Unlike nearly any other Oak and most sane people, Overcups occur deep in alluvial swamps and spend most of their lives with their feet wet. Though the species hides out along water’s edge in secluded swamps, it has nevertheless been discovered by the horticultural industry and is becoming one of the favorite species of landscape designers and nurserymen around the South. The reasons for Overcup’s rise are numerous, let’s dive into them.
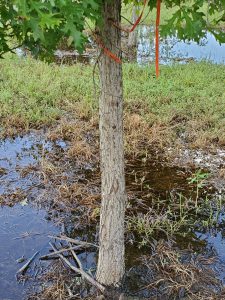
First, much of the deep South, especially in the Coastal Plain, is dominated by poorly drained flatwoods soils cut through by river systems and dotted with cypress and blackgum ponds. These conditions call for landscape plants that can handle hot, humid air, excess rainfall, and even periodic inundation (standing water). It stands to reason our best tree options for these areas, Sycamore, Bald Cypress, Red Maple, and others, occur naturally in swamps that mimic these conditions. Overcup Oak is one of these hardy species. Overcup goes above and beyond being able to handle a squishy lawn, it is often found inundated for weeks at a time by more than 20’ of water during the spring floods our river systems experience.
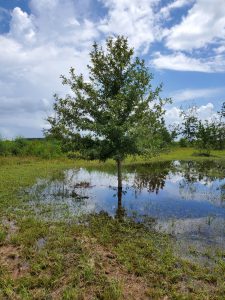
The same Overcup Oak thriving under inundation conditions 2 weeks after a heavy rain. Photo courtesy Daniel Leonard.
The species has even developed an interesting adaptation to allow populations to thrive in flooded seasons. Their acorns, preferred food of many waterfowl, are almost totally covered by a buoyant acorn cap, allowing seeds to float downstream until they hit dry land, thus ensuring the species survives and spreads. While it will not survive perpetual inundation like Cypress and Blackgum, if you have a periodically damp area in your lawn where other species struggle, Overcup will shine.
Overcup Oak is also an exceedingly attractive tree. In youth, the species is extremely uniform, with a straight, stout trunk and rounded “lollipop” canopy. This regular habit is maintained into adulthood, where it becomes a stately tree with a distinctly upturned branching habit, lending itself well to mowers and other traffic underneath without having to worry about hitting low-hanging branches. The large, lustrous green leaves are lyre-shaped if you use your imagination (hence the name, Quercus lyrata) and turn a not-unattractive yellowish brown in fall. Overcups especially shines in the winter, however, when the whitish gray, shaggy bark takes center stage. Overcup bark is very reminiscent of White Oak or Shagbark Hickory and is exceedingly pretty relative to other landscape trees that can be successfully grown here.
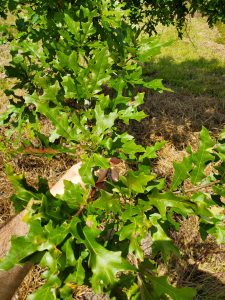
Overcup Oak leaves in August. Note the characteristic “lyre” shape. Photo courtesy Daniel Leonard.
Finally, Overcup Oak is among the easiest to grow landscape trees. We have already discussed its ability to tolerate wet soils and our blazing heat and humidity, but Overcups can also tolerate periodic drought, partial shade, and nearly any soil pH. They are long-lived trees and have no known serious pest or disease problems. They transplant easily from standard nursery containers or dug from a field (if it’s a larger specimen), making establishment in the landscape an easy task. In the establishment phase, defined as the first year or two after transplanting, young, transplanted Overcups require only a weekly rain or irrigation event of around 1” (wetter areas may not require any supplemental irrigation) and bi-annual applications of a general purpose fertilizer, 10-10-10 or similar. After that, they are generally on their own without any help!
Typical shaggy bark on 7 year old Overcup Oak. Photo courtesy Daniel Leonard.
If you’ve been looking for an attractive, low-maintenance tree for a pond bank or just generally wet area in your lawn or property, Overcup Oak might be your answer. For more information on Overcup Oak, other landscape trees and native plants, give your local UF/IFAS County Extension office a call!
by Mary Salinas | Sep 8, 2020
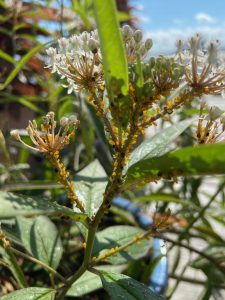
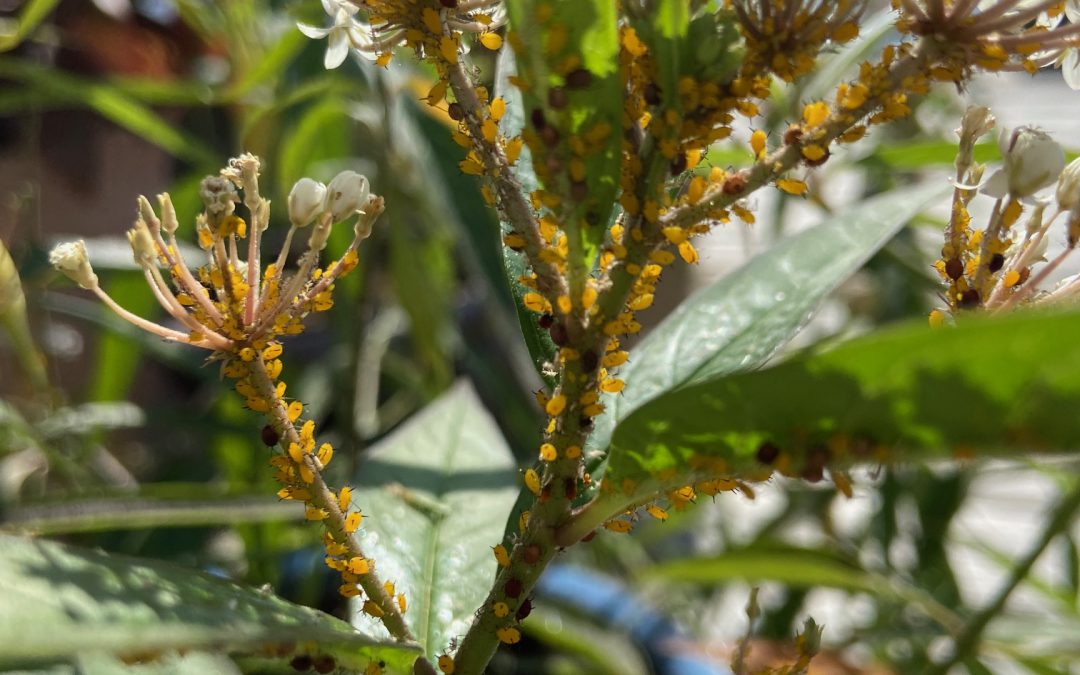
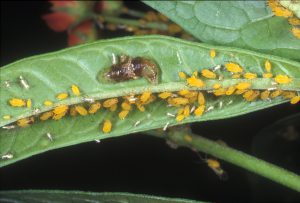
Perennial milkweed, Asclepias perennis, with oleander aphids; notice the brown aphid mummies that have been parasitized. Photo credit: Mary Salinas UF/IFAS Extension.
Milkweeds are appreciated for their beauty, but often we cultivate it for the benefit of the monarch butterflies who lay their eggs only on this plant genus. Avid butterfly gardeners want the monarch caterpillars to eat up the milkweed and become beautiful butterflies. Often instead, thousands of aphids show up and compete for space on the plants. These bright yellow aphids are known as oleander aphids.
Just how do aphids build up their populations so quickly? It seems that one day you have a small number on a few plants and then a few days later, thousands are all over your milkweed. Oleander aphids have a few advantages for quickly building their populations:
- All oleander aphids are female and do not need to mate to produce their young
- Aphids give birth to live young who immediately start feeding on the plant
- Aphids start reproducing when they are 4 to 10 days old and keep reproducing during their one-month life span
- When populations get heavy or the plant starts to decline, winged individuals are produced to migrate to new areas and plants.

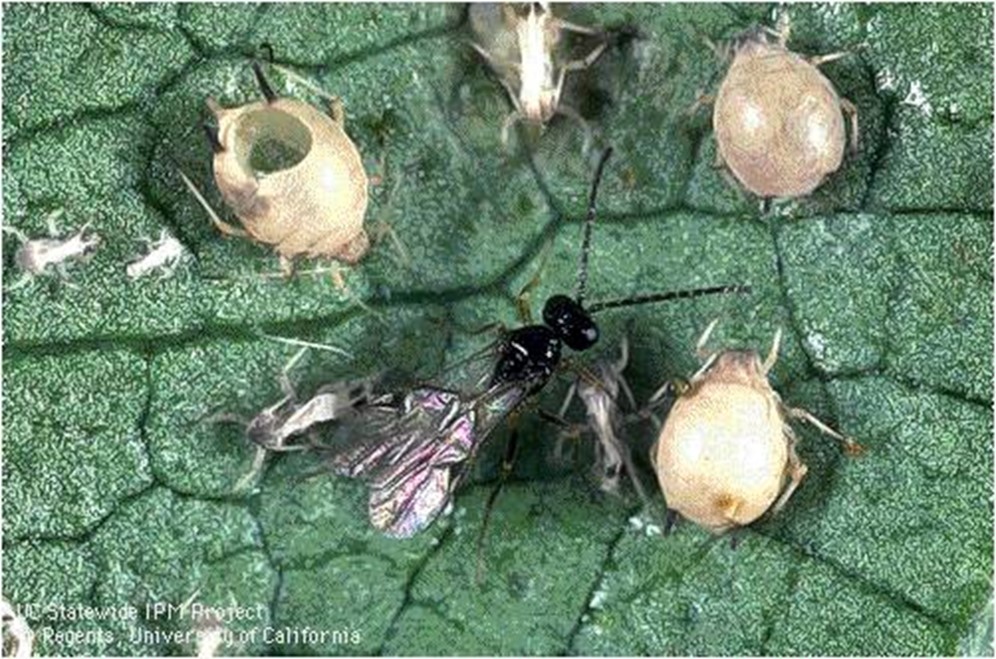
Parasitic wasp and aphid mummies. Photo credit: University of California.
What can or should you do to control this pest?
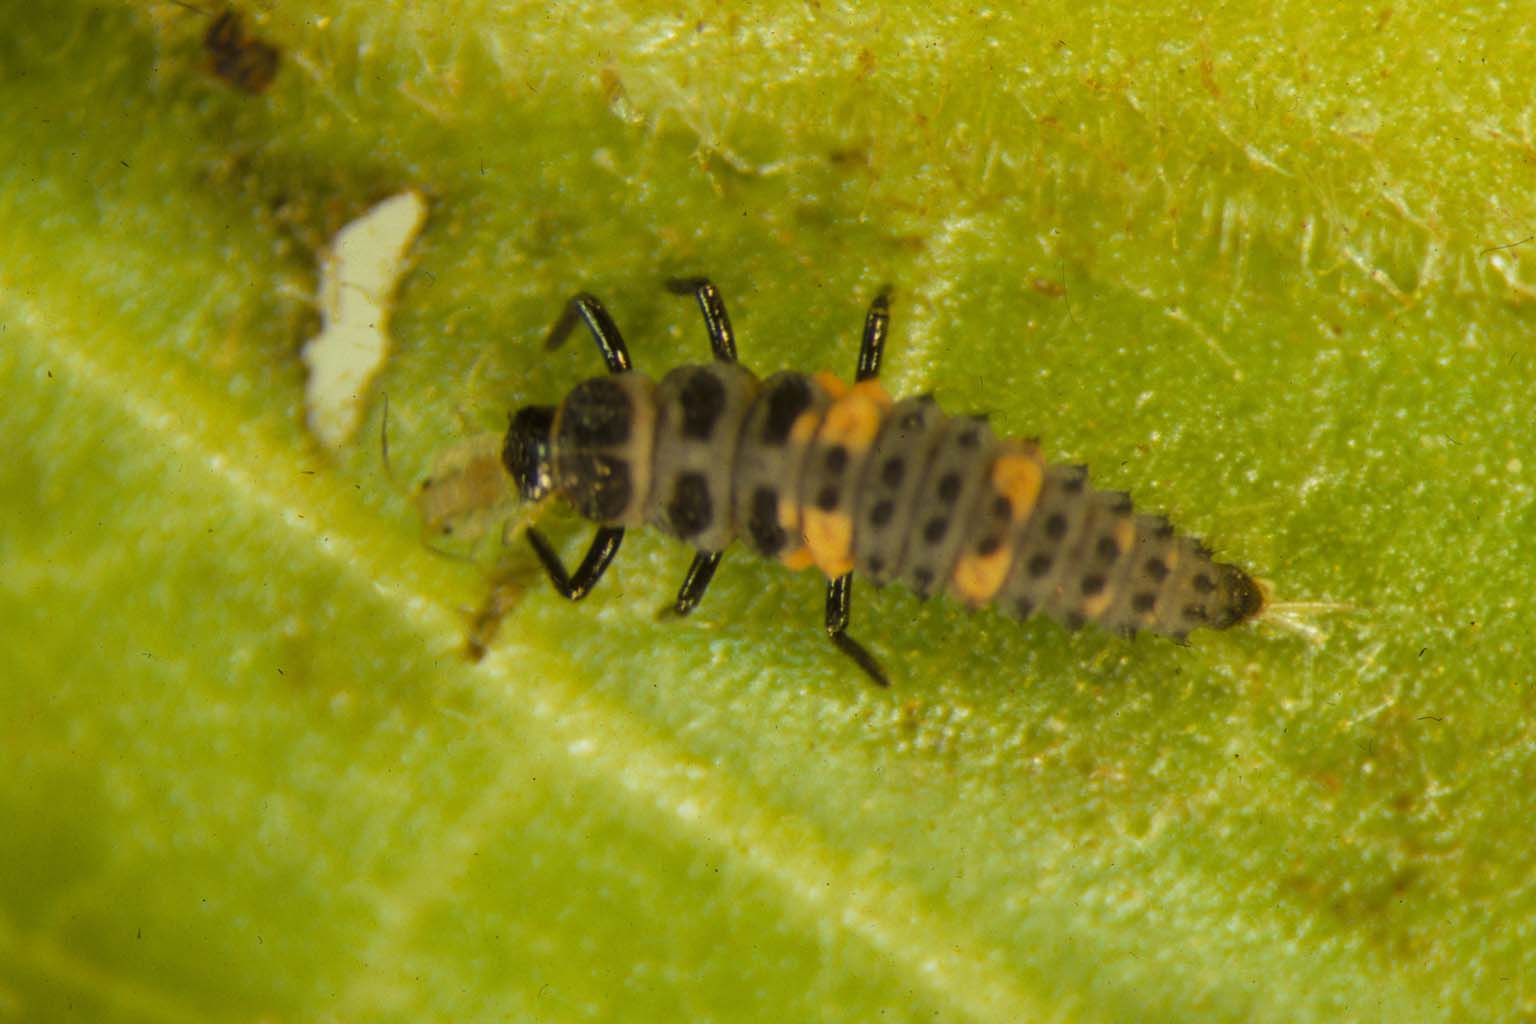
One option is to do nothing and let the natural enemies come in and do their job. One of the best is a very tiny wasp that you will likely never see. This parasitoid lays its eggs only inside aphids. The wasp larva feeds on the inside of the aphid and turns it into a round brown ‘mummy’ and then emerges when mature by making a round hole in the top of the aphid. Look closely with a hand lens at some of those brown aphids on your milkweed and you can see this amazing process. Another common predator I see in my own garden is the larvae of the hover fly or syrphid fly. You will have to look hard to see it, but it is usually there. Assassin bugs and lady beetles also commonly feed on aphids. The larvae of lady beetles look nothing like the adults but also are voracious predators of aphids – check out what they look like.

Lady beetle larva feeding on aphid on tobacco. Photo credit:
Lenny Wells University of Georgia Bugwood.org.
If you think your situation requires some sort of intervention to control the aphids, first check carefully for monarch eggs and caterpillars, keeping in mind that some may be very small. Remove them, shoo away any beneficial insects, and spray the plant completely with an insecticidal soap product. Recipes that call for dish detergents may harm the waxy coating on the leaves and should be avoided. The solution must contact the insect to kill it. Always follow the label instructions. Soap will also kill the natural enemies if they are contacted. One exception is the developing wasp in the aphid mummies – fortunately, they are protected inside as the soap does not penetrate. Oils derived from plants or petroleum can serve the same purpose as the insecticidal soap.
Syrphid fly larva and oleander aphids. Photo credit: Lyle Buss, University of Florida.
You also can squish the aphids with your fingers and then rinse them off the plant. If you only rinse them off, the little pests can often just crawl back onto the plant.
There are systemic insecticides, like neonicotinoids, that are taken up by plant roots and kill aphids when they start feeding on the plants. However, those products also kill monarch caterpillars munching on the plant and harm adult butterflies, bees, and other pollinators feeding on the nectar. So those products are not an option. Always read the product label as many pesticides are prohibited by law from being applied to blooming plants as pollinators can be harmed.
In the end, consider tolerating some aphids and avoid insecticide use in landscape.
Happy butterfly gardening!