by Stephen Greer | Aug 11, 2021
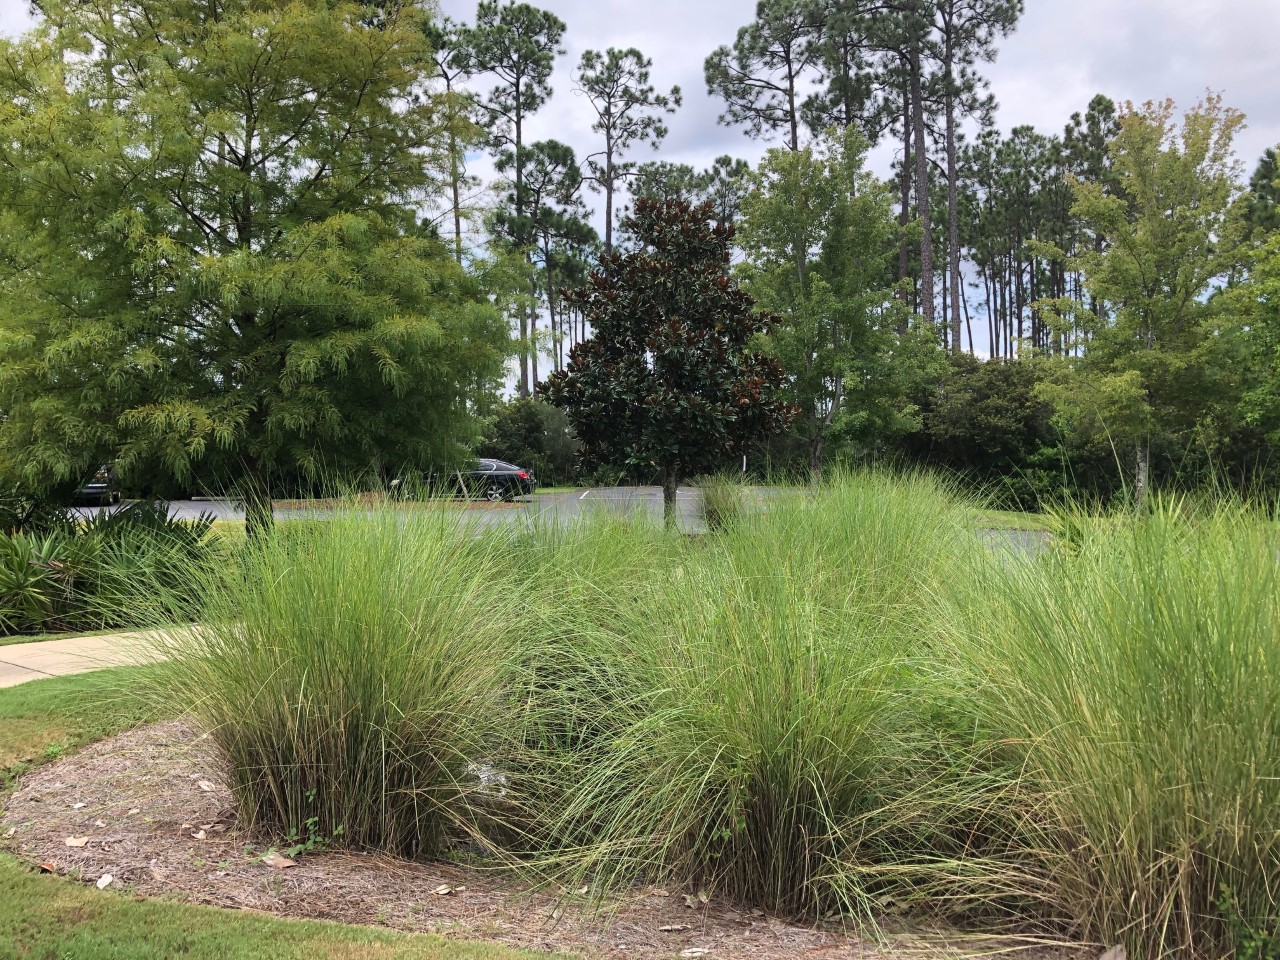
One big goal of establishing a home lawn and landscape is to enjoy an attractive setting for family and friends, while also helping manage healthy soils and plants. Soil compaction at these sites can cause multiple problems for quality plants establishment and growth. Soil is an incredibly important resource creating the foundation for plants and water absorption.

Photo courtesy: Stephen Greer, UF IFAS
Soils are composed of many different things, including minerals. In Florida, these minerals often include sand of differing sizes and clay in the northern area of the counties in the panhandle of Florida. Soil is also composed of organic matter, nutrients, microorganisms and others. When soil compacts, the air spaces between the sand or clay are compressed, reducing the space between the mineral particles. This can occur anytime during the landscape and lawn construction phase or during long term maintenance of the area with equipment that could include tractors, mowers, and trucks.
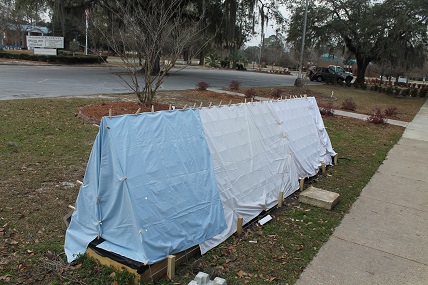
What can be done to reduce soil compaction? There are steps that can be taken to help reduce this serious situation. Make a plan on how to best approach a given land area with the equipment needed to accomplish the landscape of your dreams. Where should heavy equipment travel and how much impact they will have to the soils, trees, and other plants already existing and others to be planted? At times heavy plywood may be needed to distribute the tire weight load over a larger area, reducing soil compaction by a tire directly on the soil. Once the big equipment use is complete, look at ways to reduce the areas that were compacted. Incorporating organic matter such as compost, pine bark, mulch, and others by tilling the soil and mixing it with the existing soil can help. Anytime the soil provides improved air space, root will better grow and penetrate larger areas of the soil and plants will be healthier.
Even light foot traffic over the same area over and over will slowly compact soils. Take a look at golf course at the end of cart paths or during a tournament with people walking over the same areas. The grass is damaged from the leaves at the surface to the roots below. Plugging these areas or possibly tilling and reestablishing these sites to reduce the compacted soils may be necessary.
Photo courtesy: Stephen Greer, UF IFAS
Water absorption is another area to plan for, as heavy rains do occur in Florida. Having landscapes and lawns that are properly managed allow increased water infiltration into the soil is critically important. Water runoff from the site is reduced or at least slowed to allow the nutrient from fertilizers used for the plant to have more time to be absorbed into the soil and taken up by the plants. This reduces the opportunity for nitrogen, phosphorus, and other nutrients to enter water areas such as ponds, creeks, lagoons, rivers and bays. Even if you are miles from an open water source, movement of water runoff can enter ditches and work their way to these open water areas, ultimately impacting drinking water, wildlife, and unwanted aquatic plant growth.
Plan ahead and talk with experts that can help with developing a plan. Contact your local Extension office for assistance!
by Daniel J. Leonard | Aug 5, 2021
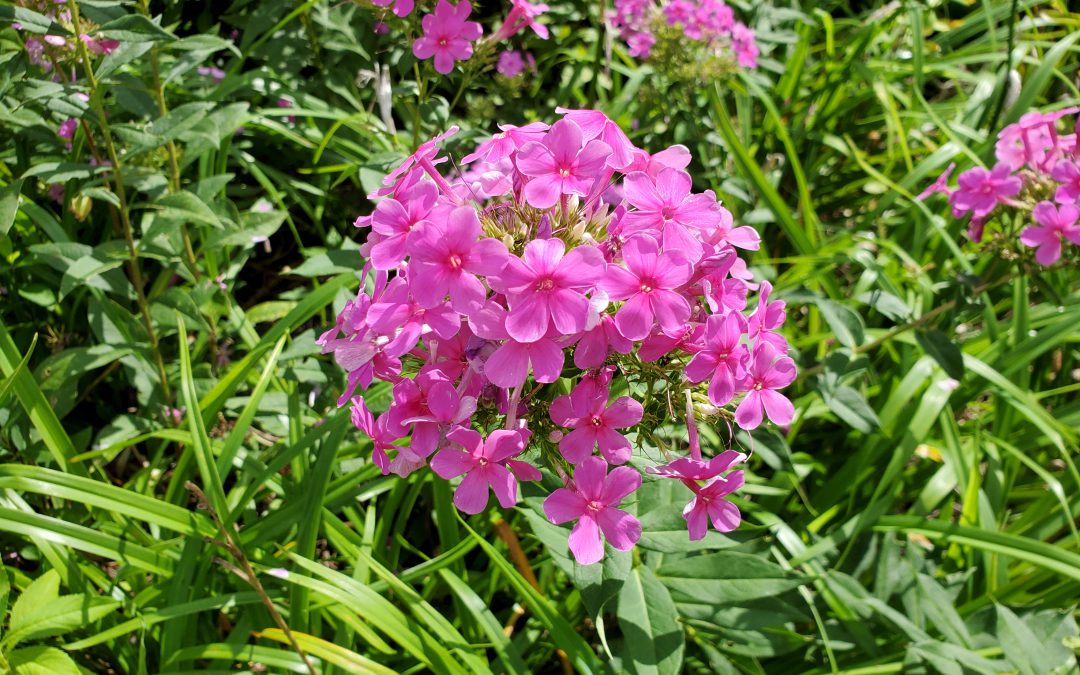
The number one request all would-be gardeners and budding landscape enthusiasts have is “I want something that I don’t have to take care of, tolerates the heat, blooms, and comes back every year”. That is a tall order in our climate but not an impossible one, especially if one is willing to take a step back in time and consider an old Southern passalong plant, Garden Phlox (Phlox paniculata)!

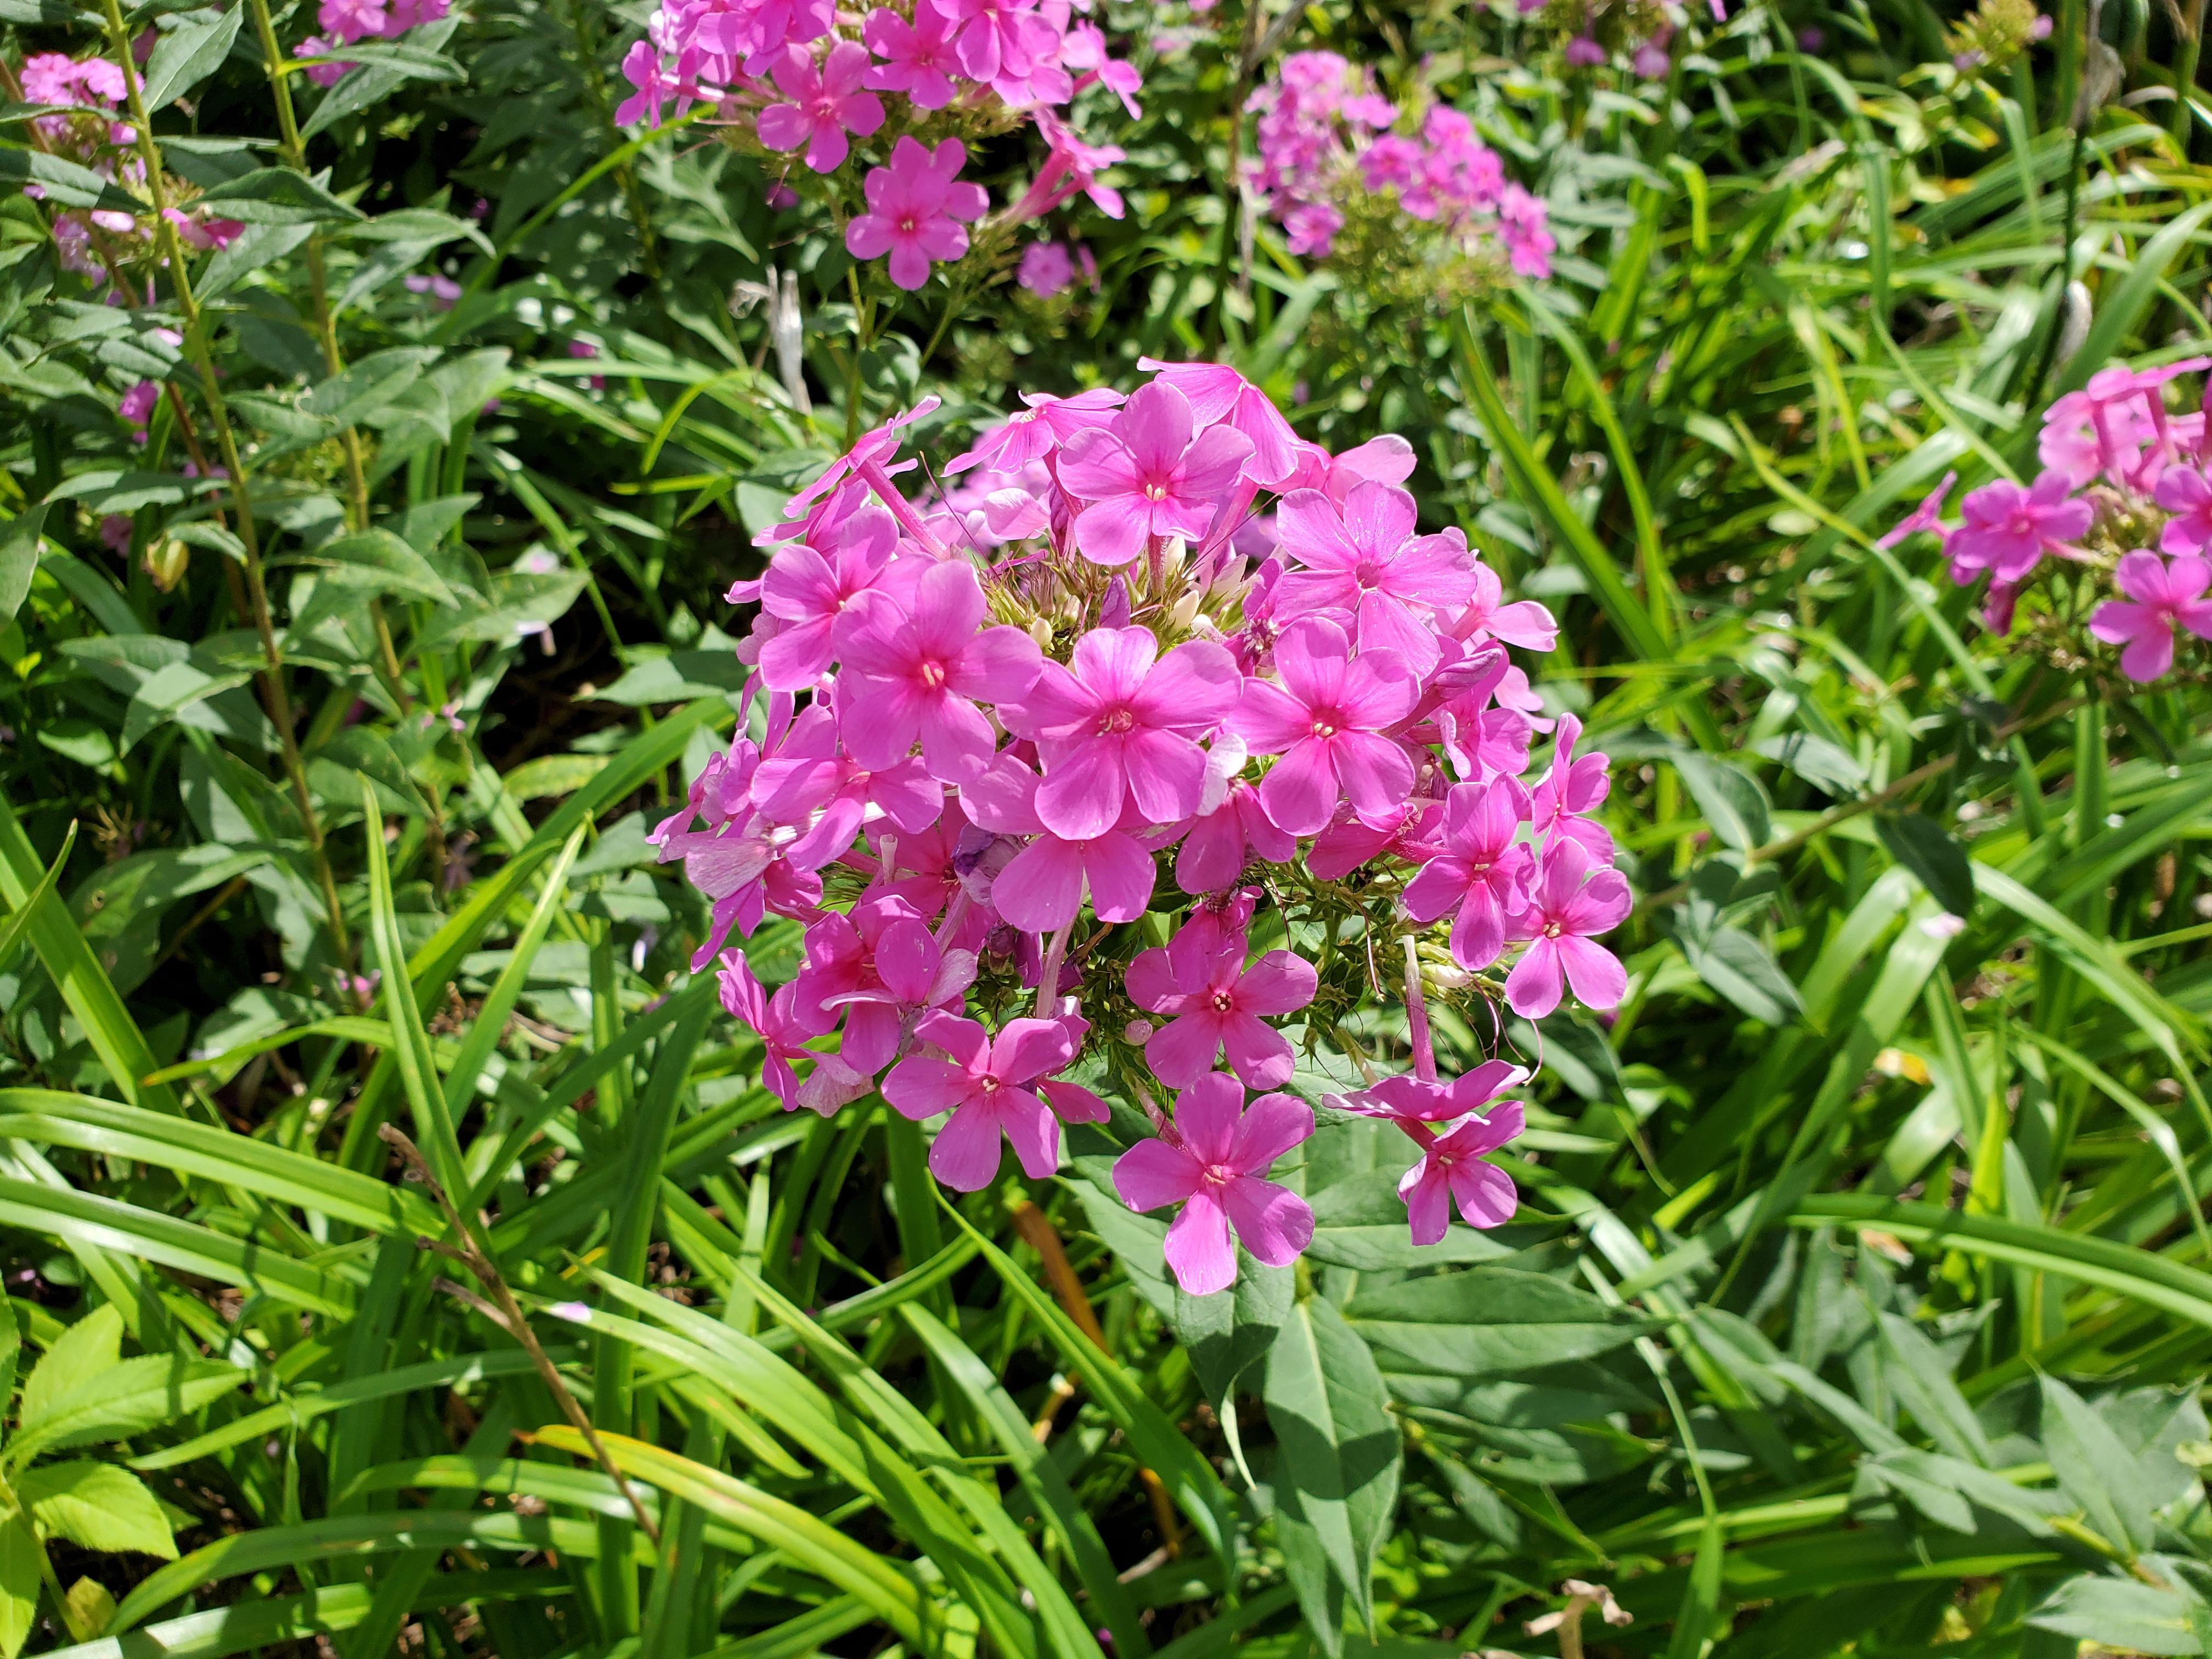
Garden Phlox (Phlox paniculata) in a Calhoun County landscape. Photo courtesy of Daniel Leonard.
This old heirloom perennial is an outstanding ornamental for Panhandle landscapes. Every spring, Garden Phlox emerges from a long winter sleep and shoots its attractive bright green foliage straight up, reaching 3-5’ in height. After hiding inconspicuously in the landscape all spring, Phlox then blasts into fiery magenta bloom during the heat of summer, beginning the show in late June. While individual Phlox flowers are only 1” wide or so, they are held prominently above the plant’s foliage in large clusters up to 8” in diameter and are about as eye-catching as flowers come. The flower show continues through July and August until finally fading out as fall rolls around. Plants then set seed and ready themselves for winter dormancy, repeating the cycle the following spring. A bonus, though individual Phlox plantings start off as small, solitary clumps, they slowly expand over the years, never over-aggressively or unwanted, into a mass of color that becomes the focal point of any landscape they occupy!
In addition to being gorgeous, Phlox is adaptable and demands very little from gardeners. The species prefers to be sited in full, blazing sun but can also handle partial shade. Just remember, the more shade Phlox is in, the fewer flowers it will produce. Site accordingly. Phlox is also extremely drought tolerant, thriving in most any semi-fertile well-drained soil. Though it can handle drought like a champ, Phlox will languish if planted in a frequently damp location. If water stands on the planting site for more than an hour or so after a big rain event, it is most likely too wet for Phlox to thrive. Once established, Phlox is not a heavy feeder either. A light application of a general-purpose fertilizer after spring emergence from winter dormancy will sustain the plants’ growth and flowering all summer long!

Clump of Garden Phlox in a Calhoun County landscape. Photo courtesy of Daniel Leonard.
Though the ornamental and low-maintenance attributes of plain Garden Phlox make it sound like a perfect landscape plant, it is uncommon in the modern nursery trade, having fallen out of favor as many old plants often do. The species is still a familiar site around old home places, cemeteries, abandoned buildings, and the like throughout the South, but is difficult to find in most commercial nurseries. The primary reason for this is that the commercially available modern Phlox hybrids sporting exotic flower colors and shapes are not tolerant of our growing conditions. These new Garden Phlox hybrids were bred to perform in the milder conditions of more norther climes and are extremely susceptible to the many fungal diseases brought on by Florida’s heat and humidity of summer, particularly Powdery Mildew. It’s best to avoid these newcomers and stick to the old variety with its pink flowers and ironclad constitution. Plain old Garden Phlox can be found in some independent and native plant nurseries, but the best and most rewarding method of acquisition is to make friends with someone that already has a clump and dig up a piece of theirs!
If you have been looking for a low-maintenance, high impact perennial to add to your landscape, old-fashioned Garden Phlox might be just the plant for you! For more information on Garden Phlox, other landscape perennials, passalong plants or any other horticultural topic, contact your local UF/IFAS County Extension Office. Happy Gardening!
by Matthew Orwat | Jul 29, 2021
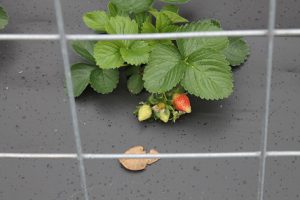
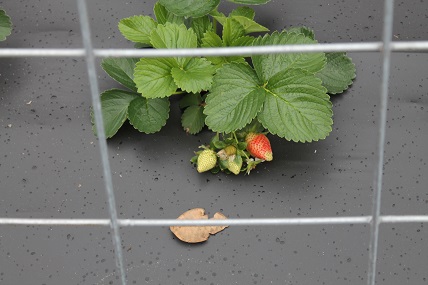
Strawberries growing on “plastic” to protect them from water splashed fungal spores found in soil. Image Credit: Matthew Orwat UF/IFAS Extension Washington County
As the alternating cycles of sun, heat and rain shape our summer days, I start thinking about cooler times of the year, the fall planting season. One plant to consider planting in the fall are strawberries. Planting strawberries in the fall is really an exercise in preparation for bountiful production of fruit beginning in January and continuing into May and June. The following procedure will lead to a successful strawberry production if followed!
The best location for strawberry production provides well-drained, moist, sandy soil with substantial organic matter. It must not be too wet. pH should be between 5.5 and 6.5, which is considered slightly acidic. A fertilizer scheme of 2 lbs. of a 10-5-10 fertilizer per 100 sqft of raised bed or 10 feet of row should be applied at pre-plant, with ¼ of the fertilizer over the top and the rest in a one-inch-deep band near the location of drip irrigation.
*DO NOT apply fertilizer directly below the plants, as the fertilizer may burn the young transplants.
This is a raised bed of strawberries, which has been filled with rich composted growing media. Image Credit: Matthew Orwat UF/IFAS Extension Washington County
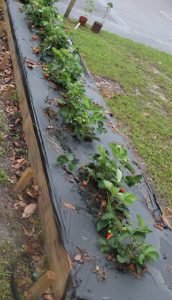
Commonly, a preferred system is the development of a hill system, which is 6-8 inches high and 24 inches wide. Drip irrigation should be installed for best results, thus keeping the leaves free of irrigation water. This hill should be covered with weed barrier, such as grower’s polyurethane plastic to reduce weed growth and soil splashing onto leaves. Additionally, strawberries do well when planted in a raised bed. This system can still utilize weed barriers and drip irrigation but gives the gardener the added benefit of manipulation of the growing media. Growing media made up of compost and coconut coir works especially well for this and may be found at local large garden centers.
Short day cultivars that have been proven to do well for home gardeners in Northwest Florida production are Sweet Charlie and Camarosa and should be purchased certified disease free from a reputable nursery. Both dormant bare root and actively growing plug plants are available for purchase, but I have had best luck with actively growing plug transplants.
While strawberry plants can easily withstand our winter temperatures, fruit can suffer damage from frosts below 32 degrees Fahrenheit. The good news is that small row covers or “low tunnels” can be constructed to prevent fruit loss and encourage early fruiting.
When setting out the transplants:
- Keep plants moist before planting
- Spread roots out in fan-shape
- Set plants in moist soil at the correct depth. Do not cover the plants crown with dirt or leave its roots exposed above the soil.
- Space plants 12 to 18 inches apart.
- Pack the soil firmly around the roots, then sprinkle with water. Overhead sprinkling may keep the tops from drying out until the roots can get established.
Homemade row cover for strawberries made of cow panels and sheets. Commercial row covers can be purchased using hoops and frost cloth. You can also make your own with pipes and bulk rolled frost cloth. Image Credit: Matthew Orwat UF/IFAS Extension Washington County
As stated above, strawberries should be mulched. Black polyethylene plastic mulch at 1 to 1½ mil thick is best (completely cover the top and sides of bed before planting). Be sure the bed is firm, formed correctly, moist, and fertilized adequately. Place soil on the edges of the plastic to hold it in place. Cut slits in the plastic for the transplants.
When using alternatives like straw, bark or other natural organic materials mulch to a depth of 1 to 2 inches, but do not completely cover the plant.
For more information, Please consult these references or contact your local extension agent:
by Stephen Greer | Jul 1, 2021
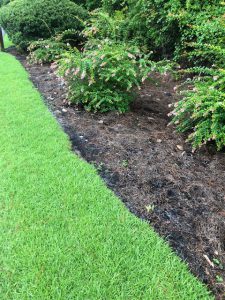
Photo Courtesy: Stephen Greer
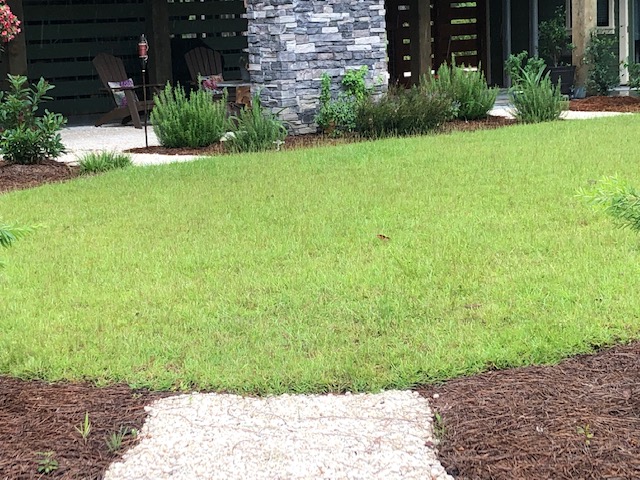
Lawn areas come in all sizes and shapes. Some are large open expanses providing long views and others are smaller versions surrounded by shrubs and trees creating a more private and secluded setting. There are a number of reasons for reducing the size of a lawn with some coming into play with your decisions. A home lawn is often an important part of the landscape that provides a place to play outdoors from picnicking, tossing the ball to taking a quite stroll.
Maintaining a healthy lawn is important to an overall performance of this part of the landscape. Several factors are involved in the success in keeping a strong and resilient lawn. Understanding the needs of a grass to remain healthy involve soil testing to address soil pH and nutrient needs plus water challenges. Misuse of fertilizer and over irrigation can be costly to you and to the overall health of the lawn. These decisions can lead to reducing lawn size to managing cost or removing underused areas.
There are big benefits to reducing your lawn from saving time in mowing, trimming and other manicuring needs to saving energy costs involving the lawn mower not to mention reducing pollution from the mower or weed eater. The reduced amounts of pesticides needed to manage weeds and disease to the lawn saves time and money.
Another way to look at the reducing the size of our lawn is there will be more space for expanding plant beds and potential tree placement. These settings increase the opportunities for a more biodiverse landscape providing shelter, protection and food options for birds and other wildlife.

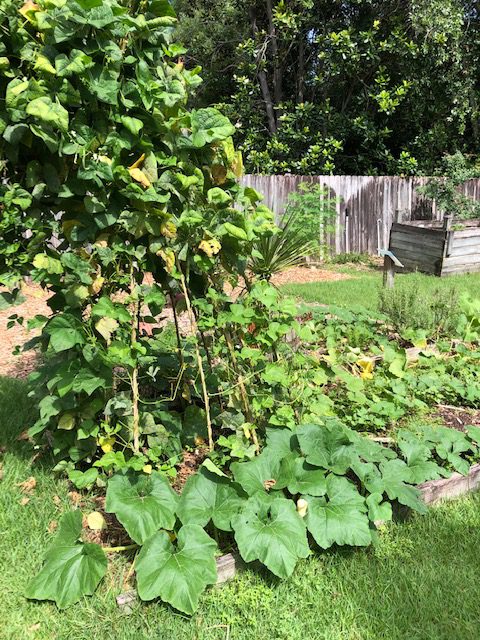
Photo Courtesy: Stephen Greer
The lawn can serve as a transition space that leads from one garden room space to another, while still offering a location to bring the lawn chair out to enjoy all that is around your lawn. Lawns and the landscape are ever changing spaces, especially as your trees and shrubs grow and mature to sizes that can directly impact the lawn performance. Often levels of shade will diminish edges and other areas of the lawn. This often will define the reduction of the lawn size moving going forward. Just remember that lawns and landscapes occupy a three-dimensional space involving the horizontal, vertical and overhead spaces. Just look around and think about what is best for you, your family and the setting.Are you more interested in developing other parts of the landscape? With many of us spending more time at home over the last year plus it gave time to think about the outdoor areas. Growing our own vegetables may be a new or expanding part of the landscape with the use of raised beds or interplanting into the existing landscape. Gardening can assist in reducing stress while at the same time providing that fresh tomato, lettuce, herbs and other fun healthy produce.
What ever your decisions are enjoy the lawn and landscape. For additional information, contact your local University of Florida IFAS Extension office located in your county.
by Beth Bolles | Mar 18, 2021
Plants with variegated foliage are very popular landscape selections. As flowers fade on other plants, the colors of variegated foliage continue to add interest through multiple seasons.
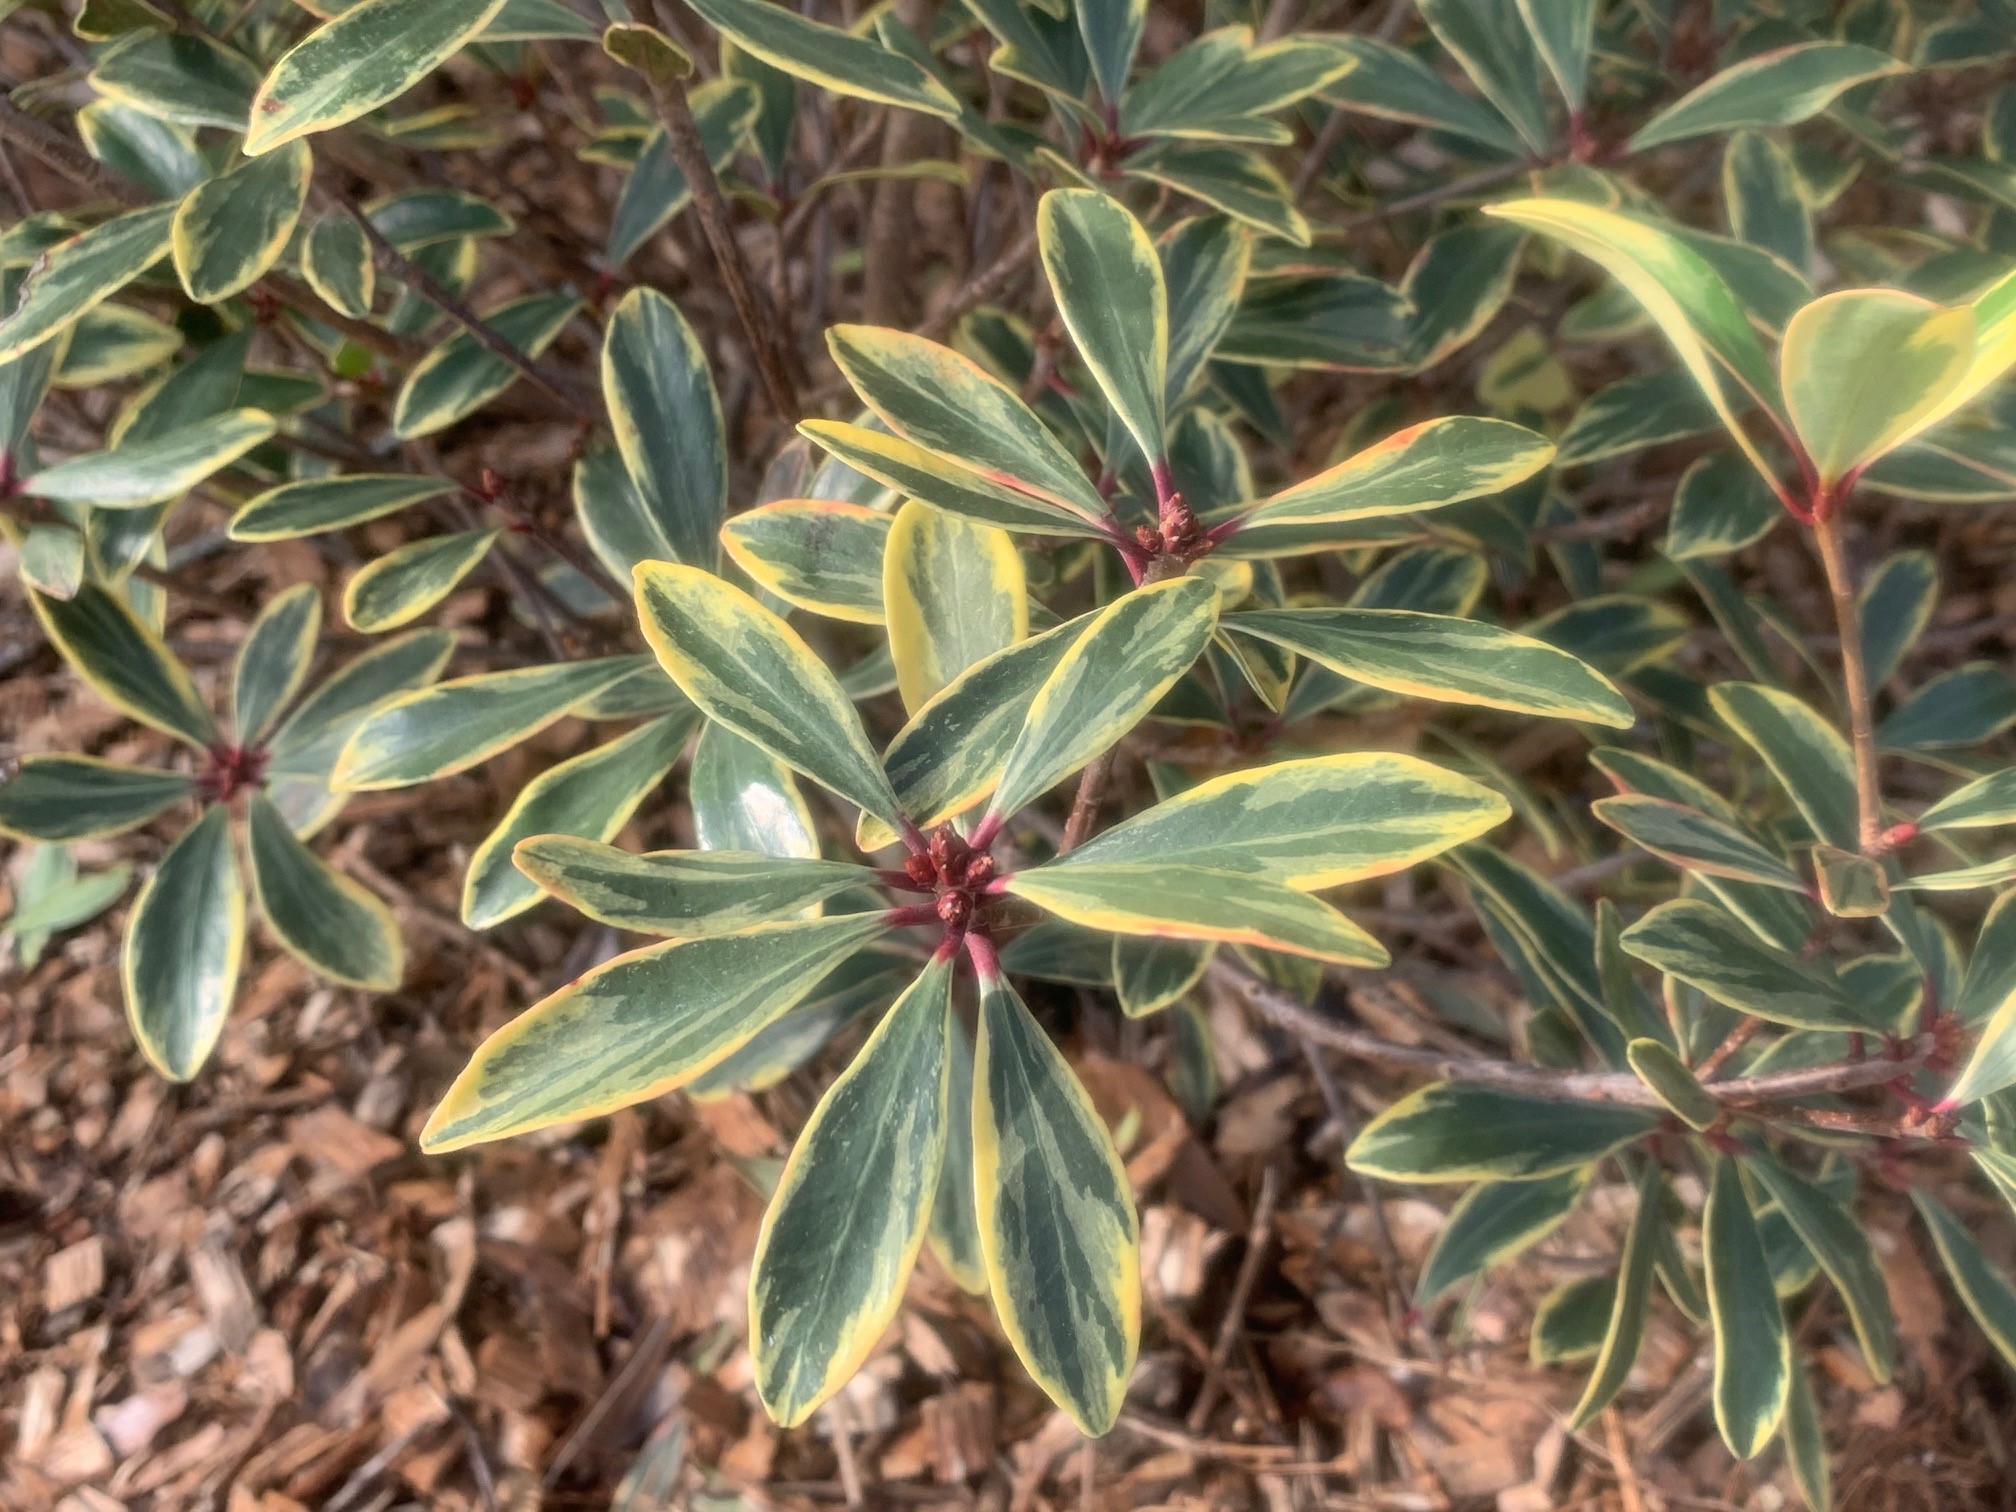
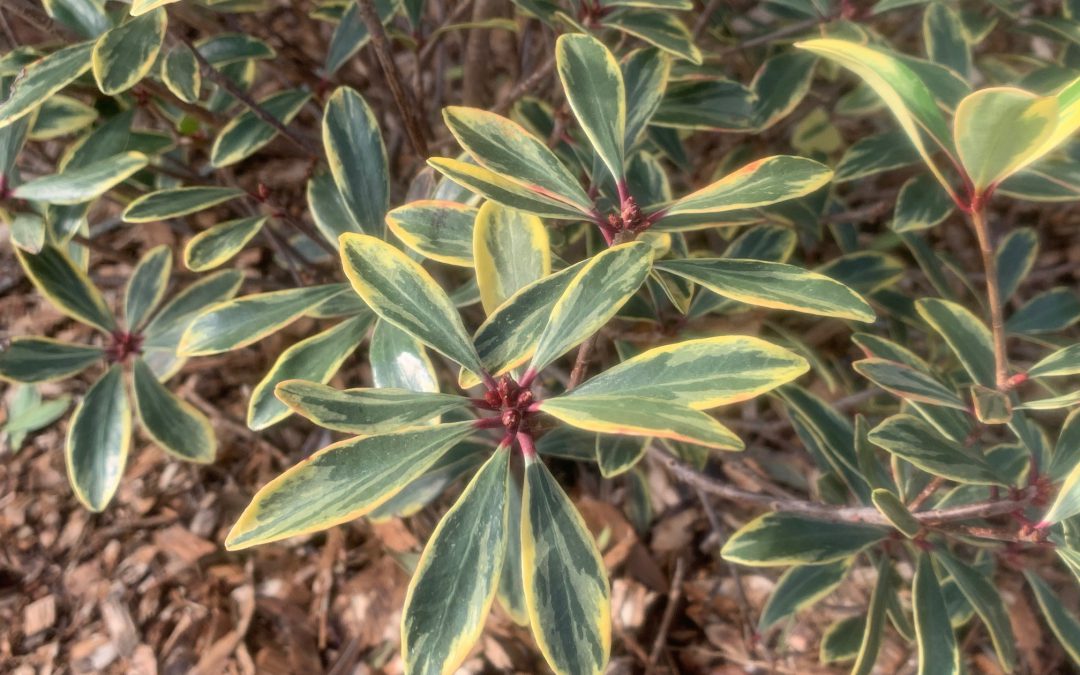
A very adaptable shrub that has been around for a long time, now has a selection with beautiful variegated foliage. Juliet™ cleyera offers green and white evergreen foliage that can brighten up a garden year around. New foliage adds additional interest with a maroon tinge.
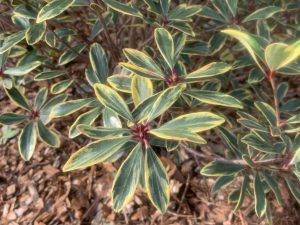
Variegated foliage of Juliet™ cleyera. Photo by Beth Bolles, UF IFAS Extension Escambia County
Like other selections of Cleyera, Juliet™ needs to be matched to an appropriate spot to accommodate its mature size. Shrubs will reach about 8 feet in height with a spread of about 5 feet. Plants may look best when left to grow in a more natural form with light selective pruning. This shrub is probably not suited for planting in front of home windows but used as a specimen or as a nice screen plant.
Once established, cleyera is a low maintenance plant and is adapted to grow well without routine irrigation. My home landscape has very well drained soil and I have not needed to apply supplemental irrigation to two cleyera shrubs in over 20 years. Consider a spot that receives full sun or partial shade for your plants.
An added advantage of cleyera shrubs in general is that bees are attracted to the flowers so it makes an additional nectar source for pollinators in the spring.
by Beth Bolles | Feb 11, 2021
Escambia County Master Gardener Volunteer Carol Perryman shares information for you to consider growing your own Bay laurel tree.
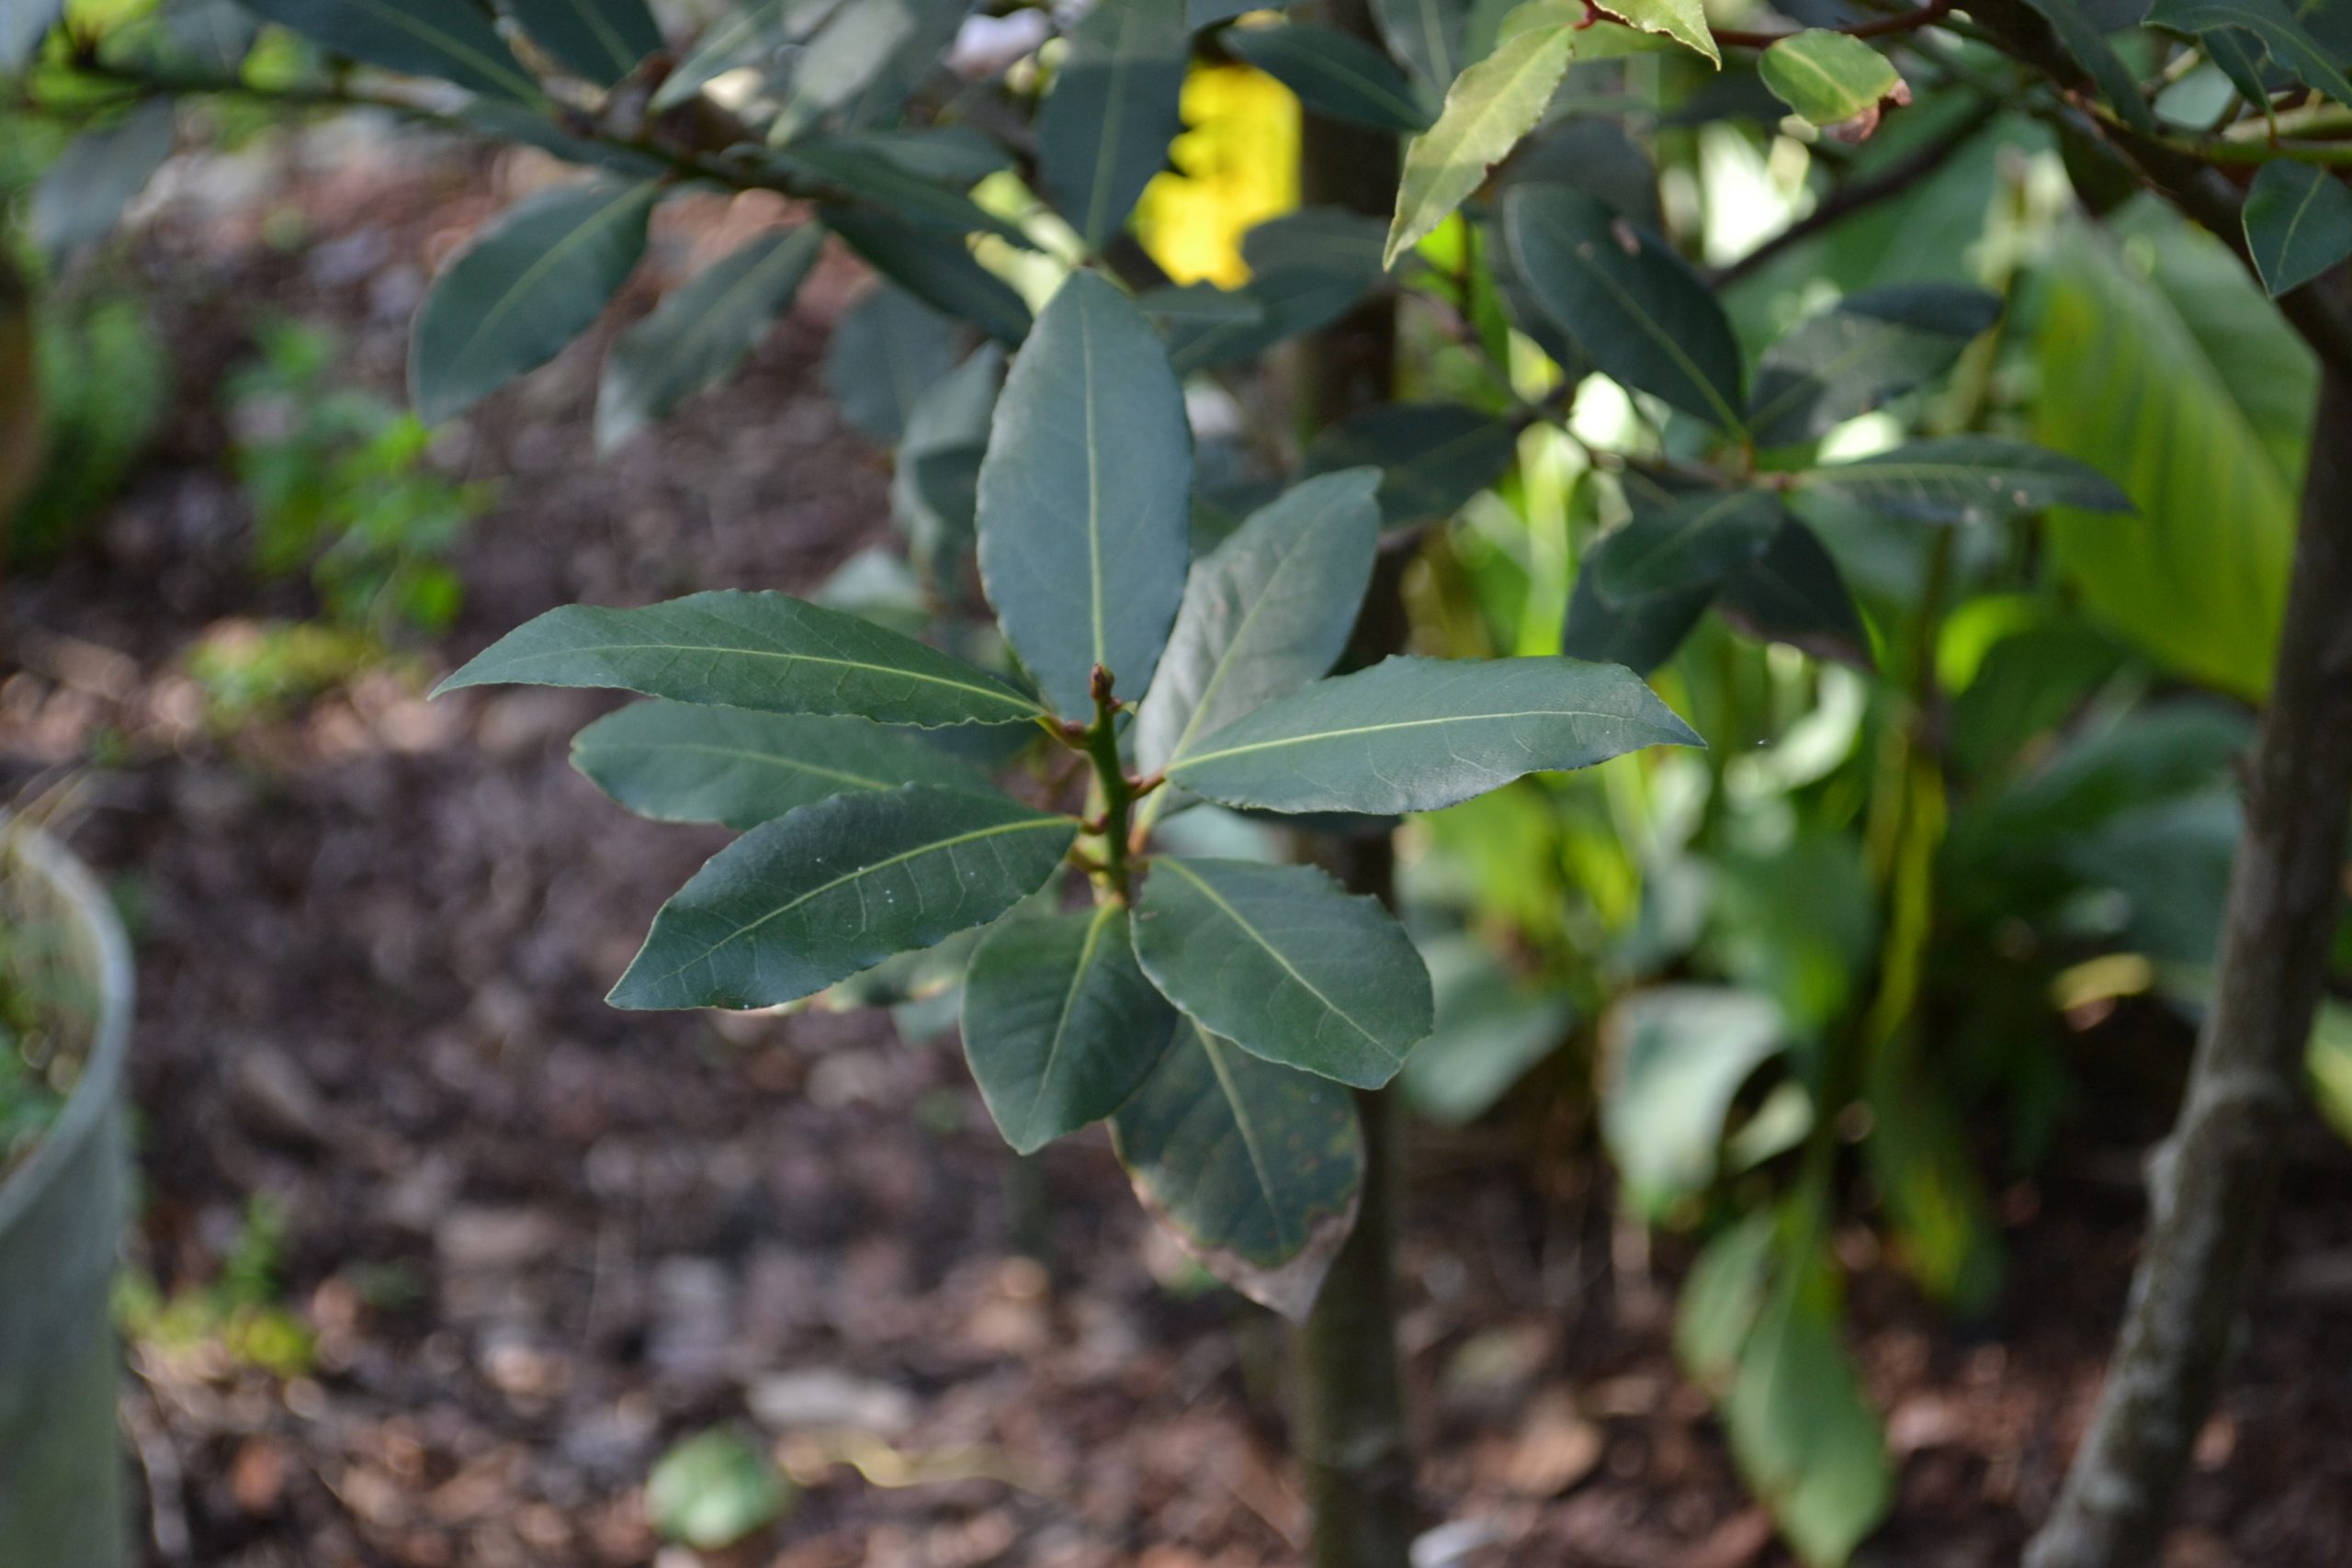
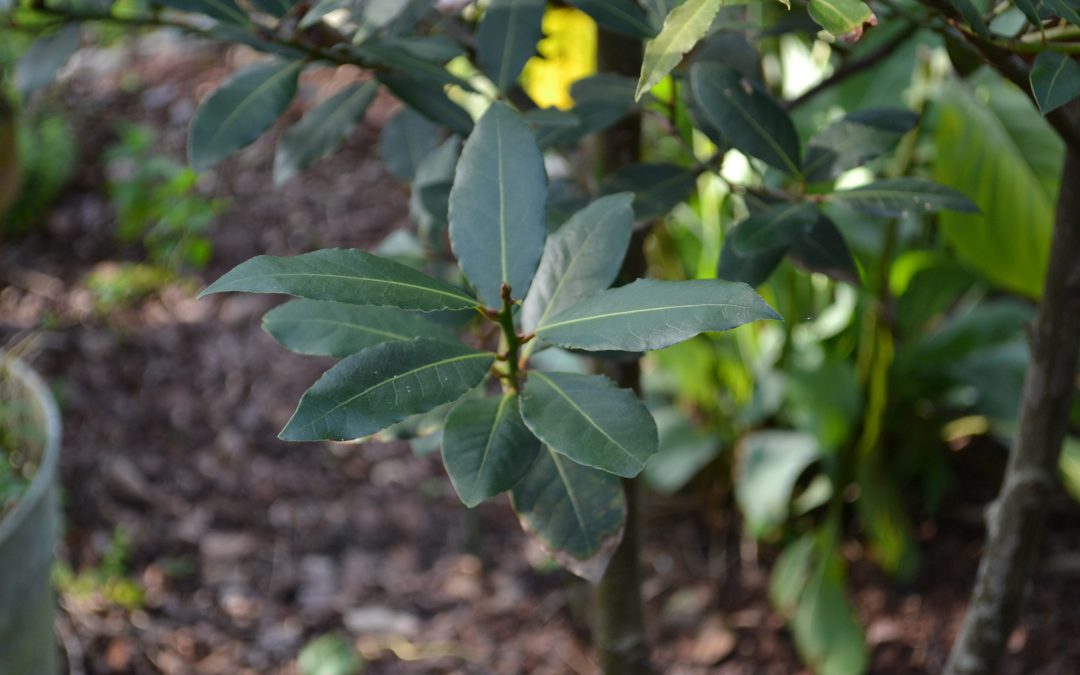
Laurus nobilis, commonly known as bay laurel, is an aromatic tree native to the western Mediterranean and it yields the bay leaves used in cooking. Mature leaves are leathery and dark green. Most are 3 to 4 inches in length with minute margin serrations. Small, inconspicuous yellowish-white blooms may appear in summer followed by a tiny fruit which turns black as it dries. Bay laurel is salt tolerant and can be grown on barrier islands.

Dark green bay leaves. Photo by Beth Bolles, UF IFAS Extension Escambia County.
The bay laurel tree is called daphne in Greece. Greek mythology says that Apollo, the sun god, fell in love with the nymph Daphne. Her father took action and turned her into a laurel tree. To remember Daphne, Apollo wore a laurel wreath and the tree came to represent honor and glory. Greek and Roman heroes and scholars were crowned with laurel wreaths. The earliest Olympic champions in 776 BC wore garlands of fragrant bay leaves. The tree was considered good luck, but the death of a bay tree was considered an omen of things to come.
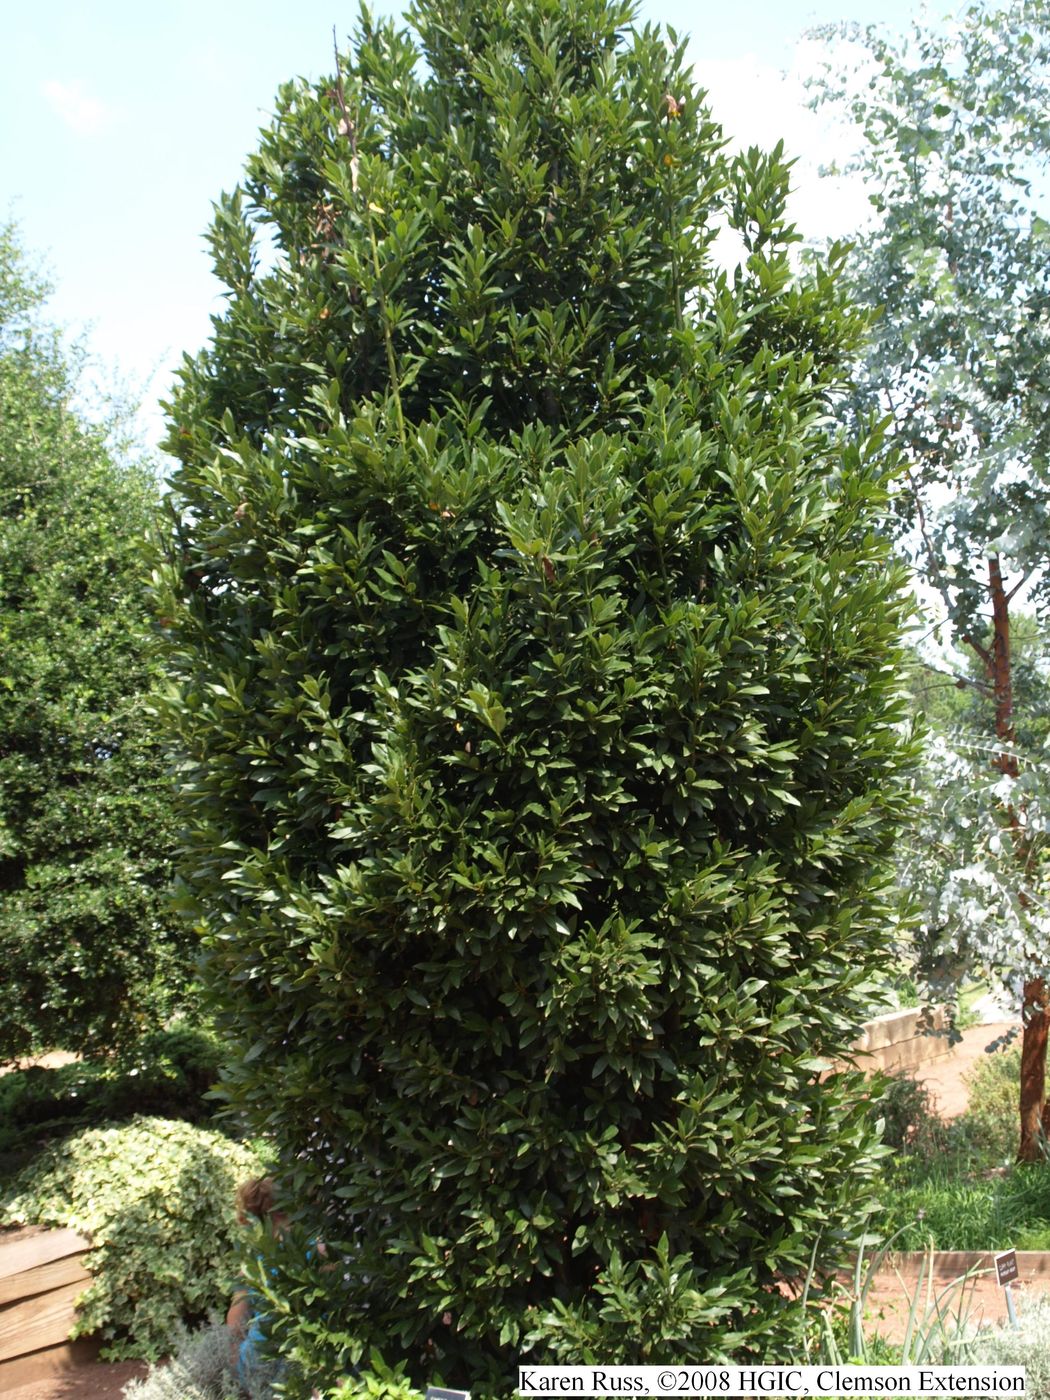
Bay laurels are slow-growing and show variation in growth habits. Most have a dense and shrubby appearance with multiple shoots from the base while some have a single trunk. Under ideal conditions, planted in the ground, the bay tree can reach 25 feet or higher, but most commonly grow to about 6 feet. In our zone, 8B, bay laurels can grow in the ground if planted in a sunny southern or eastern exposure location near a wall or building for cold protection.
Bay laurel plants like well-drained, rich soil. If the bed is properly prepared, additional fertilizer is rarely needed. Bay laurels will survive light frosts and the infrequent hard freeze if it is not for a prolonged period. More mature trees can also freeze to the ground and come back from the rootstock. Young trees should be protected from cold stress for several years until they are at least a foot tall before planting in the ground.

A bay laurel trained as a tree. Photo Credit: Karen Russ, Clemson University Extension
Bay laurels can also be grown indoors in containers in areas with strong natural lighting. Clay or wooden containers with many drainage holes are preferred. Plants should be fertilized regularly with complete fertilizer. In the summer, time-release fertilizer works best due to frequent watering. However, fertilizers too high in nitrogen will produce lush foliage with little flavor.
Bay laurel is a favored container-grown street plant in Europe. It has historically been found in gardens as a tree, a hedge, a topiary, or a focal point in an herb garden. Bay trees are only now gaining popularity in the United States. It was awarded the herb of the year in 2009.
Bay laurel has a reputation of being frustrating and difficult to propagate which results in very high prices for starter plants. To propagate use semi-hard wood cuttings and snap from branches rather than clipping. Strip the lower leaves and dip cutting in a rooting hormone. Stick in small pots filled with a fine-textured medium. If a knob forms at the end in a few weeks, then roots may form within a few weeks to several months. In recent years, plants have been more readily available in nurseries and even at large box stores.
Bay laurel is one of the primary culinary herbs in the garden. The culinary history has been documented for thousands of years. The leaves are treasured and used in many cuisines. Fresh leaves are tough but dried leaves are hard and brittle. Leaves are added at the beginning of cooking. Both fresh or dried are usually removed after cooking before food is served to prevent the risk of choking. Much is said about fresh versus dried bay leaves. I usually use fresh leaves because I have them available. I think they have a wonderful flavor. I use equal amounts of fresh or dried. Soft fresh leaves (petioles and midribs removed) are great chopped in salad dressings. Chopped leaves are also good in butters and cheeses with other herbs. Cajun cuisines use bay leaves to flavor rice and seafood. Bay is a primary element of bouquet garni, a bouquet of herbs, used in French cuisine. Bay goes in meats, soups, stews, vegetables, pasta, potatoes, and sometimes in custards and dessert sauces. Like parsley and marjoram, bay laurel is called a “liaison” herb which helps contrasting herb flavors blend rather than fight each other.
There are many plants that look like and smell like the bay laurel. Red bay, Persea borbonia, is native throughout our region and a substitute for bay laurel. Red bay is best used fresh. Its fragrance and flavor dissipate quickly if dried. This is one of the only substitutes. Others are poisonous or have little to no flavor. Madalene Hill and Gwen Barclay, authors of Southern Herb Growing, wrote, “A word to the wise: Be wary of collecting and using any wild plant as flavoring or food unless you’re absolutely sure of its safety. Just because a plant is called some type of bay or laurel does not mean it is edible.” Some are highly poisonous.
If you enjoy good food, you have enjoyed bay laurel, Laurus nobilis, whether you knew it or not. It’s time to grow your own beautiful and fragrant bay laurel tree. This will be a wonderful addition to your garden and to your kitchen.