by Daniel J. Leonard | May 20, 2019
Spring is a wonderful time of year. After months of dreariness and bare branches, bright, succulent green leaves and flowers of every kind and color have emerged. So too, have emerged gardeners and outdoor enthusiasts ready to tackle all their home and landscape improvement projects planned over the winter. However, this is also the time, when folks first start paying attention to their plants again, that strange, seemingly inexpiable plant problems crop up!
All plant problems can be divided into two categories: biotic problems, or issues caused by a living organism (think insects, fungus, and bacteria), and abiotic problems, issues that arise from things other than biotic pests. It’s the first category that people generally turn to when something goes wrong in their landscape or garden. It’s convenient to blame problems on pests and it’s very satisfying to go to the local home improvement store, buy a bottle of something and spray the problem into submission. But, in many of my consultations with clientele each spring, I find myself having to step back, consider holistically the circumstances causing the issue to arise, scout for pests and diseases, and if I find no evidence of either, encouraging the person to consider the possibility the problem is abiotic and to adopt patience and allow the problem to correct itself. Of course, this is never what anyone wants to hear. We always want a solvable problem with a simple cause and solution. But life isn’t always that easy and sometimes we must accept that we (nor a pest/disease) did anything wrong to cause the issue and, in some cases, that we ourselves actually caused the problem to happen in the first place! To illustrate, let’s consider two case studies from site visits I’ve had this spring.
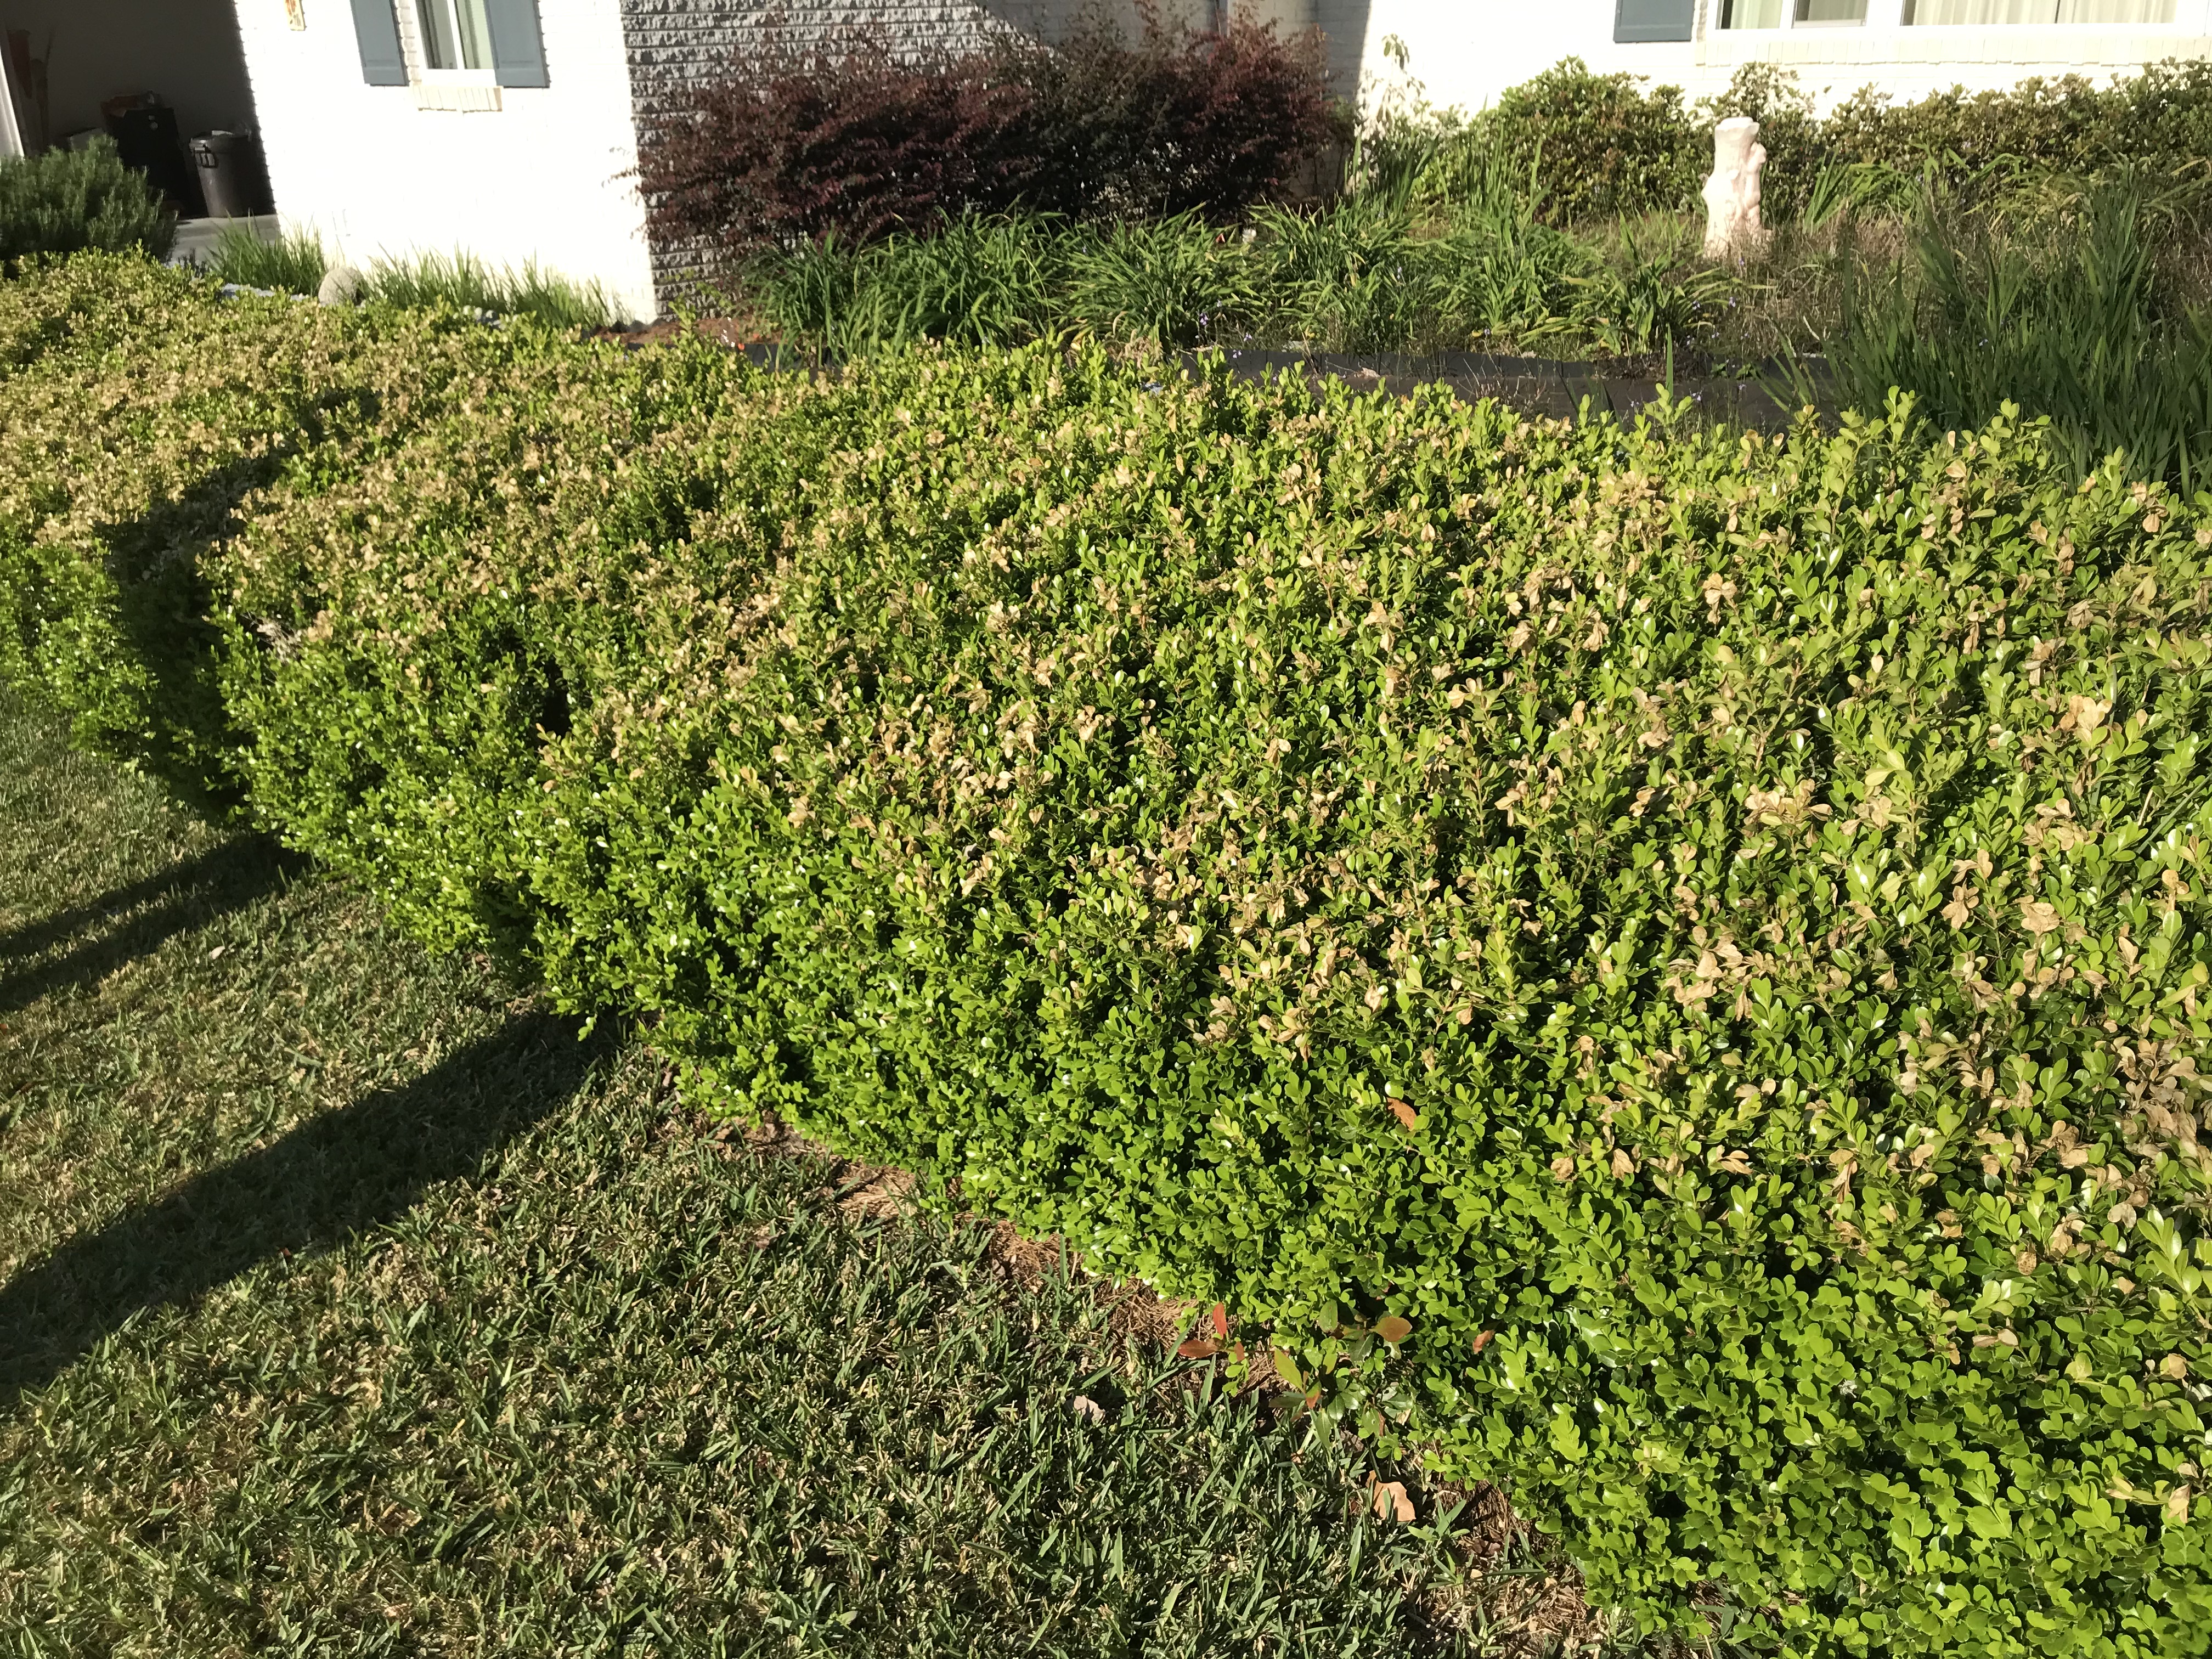
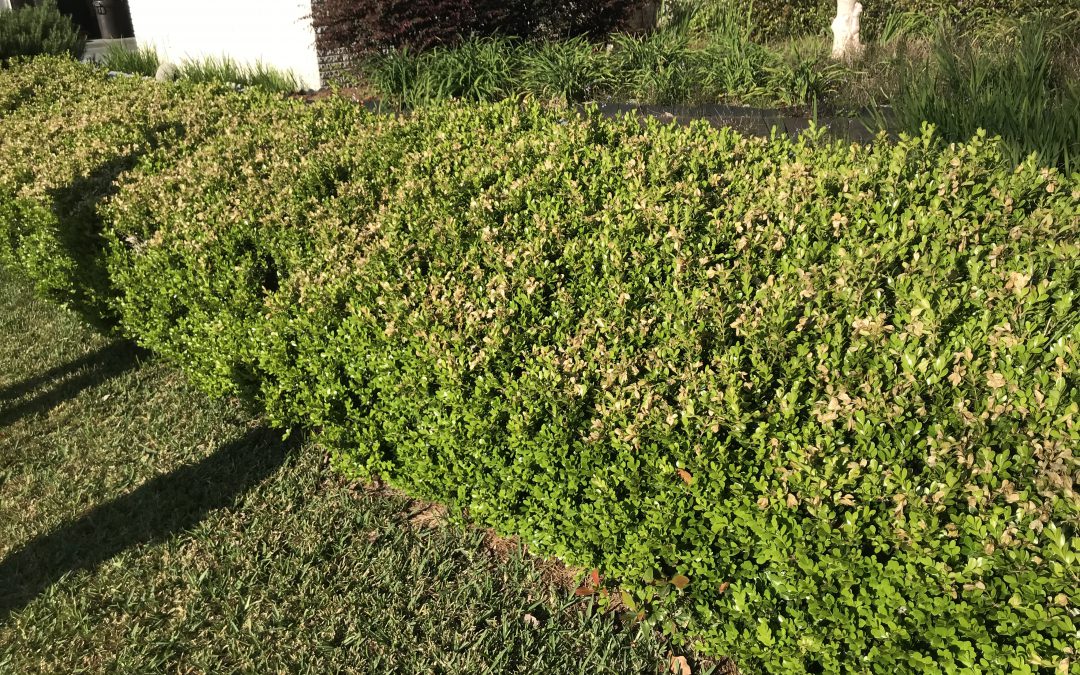
Cold damage on Boxwood hedge
Three weeks ago, I got a call from a very concerned client. She had gotten her March issue of a popular outdoor magazine in the mail, in which was a feature on an emerging pathogen, Boxwood Blight, a nasty fungus decimating Boxwood populations in states north of us. She had also noticed the Boxwoods in front of her house had recently developed browning of their new spring shoots across most the hedgerow. Having read the article and matching the symptoms she’d noticed to the ones described in the magazine article, she was convinced her shrub was infected with blight and wanted to know if there was a cure. Agreeing that the symptoms sounded similar and wanting to rule out an infection of an extremely serious pathogen, I decided to go take a look. Upon inspection, it was obvious that Boxwood Blight wasn’t to blame. Damage from disease generally isn’t quite as uniform as what I saw. The new growth on top of the hedge was indeed brown but only where the eaves of the house and a nearby tree didn’t provide overhead cover and, to boot, the sides of the hedge were a very normal bright green. Having gone through a recent cold snap that brought several mornings of heavy frost and knowing that the weeks before that the weather had been unseasonably warm, causing many plants to begin growing prematurely, all signs pointed toward an abiotic problem, cold/frost damage that would clear up as soon as the plant put on another flush of growth. The client was delighted to hear she didn’t have a hedge killing problem that would require either adopting a monthly fungicide regime or replacing the hedge with a different species.
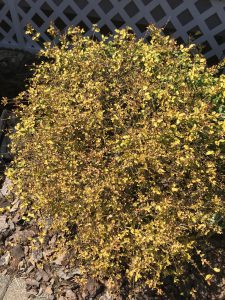
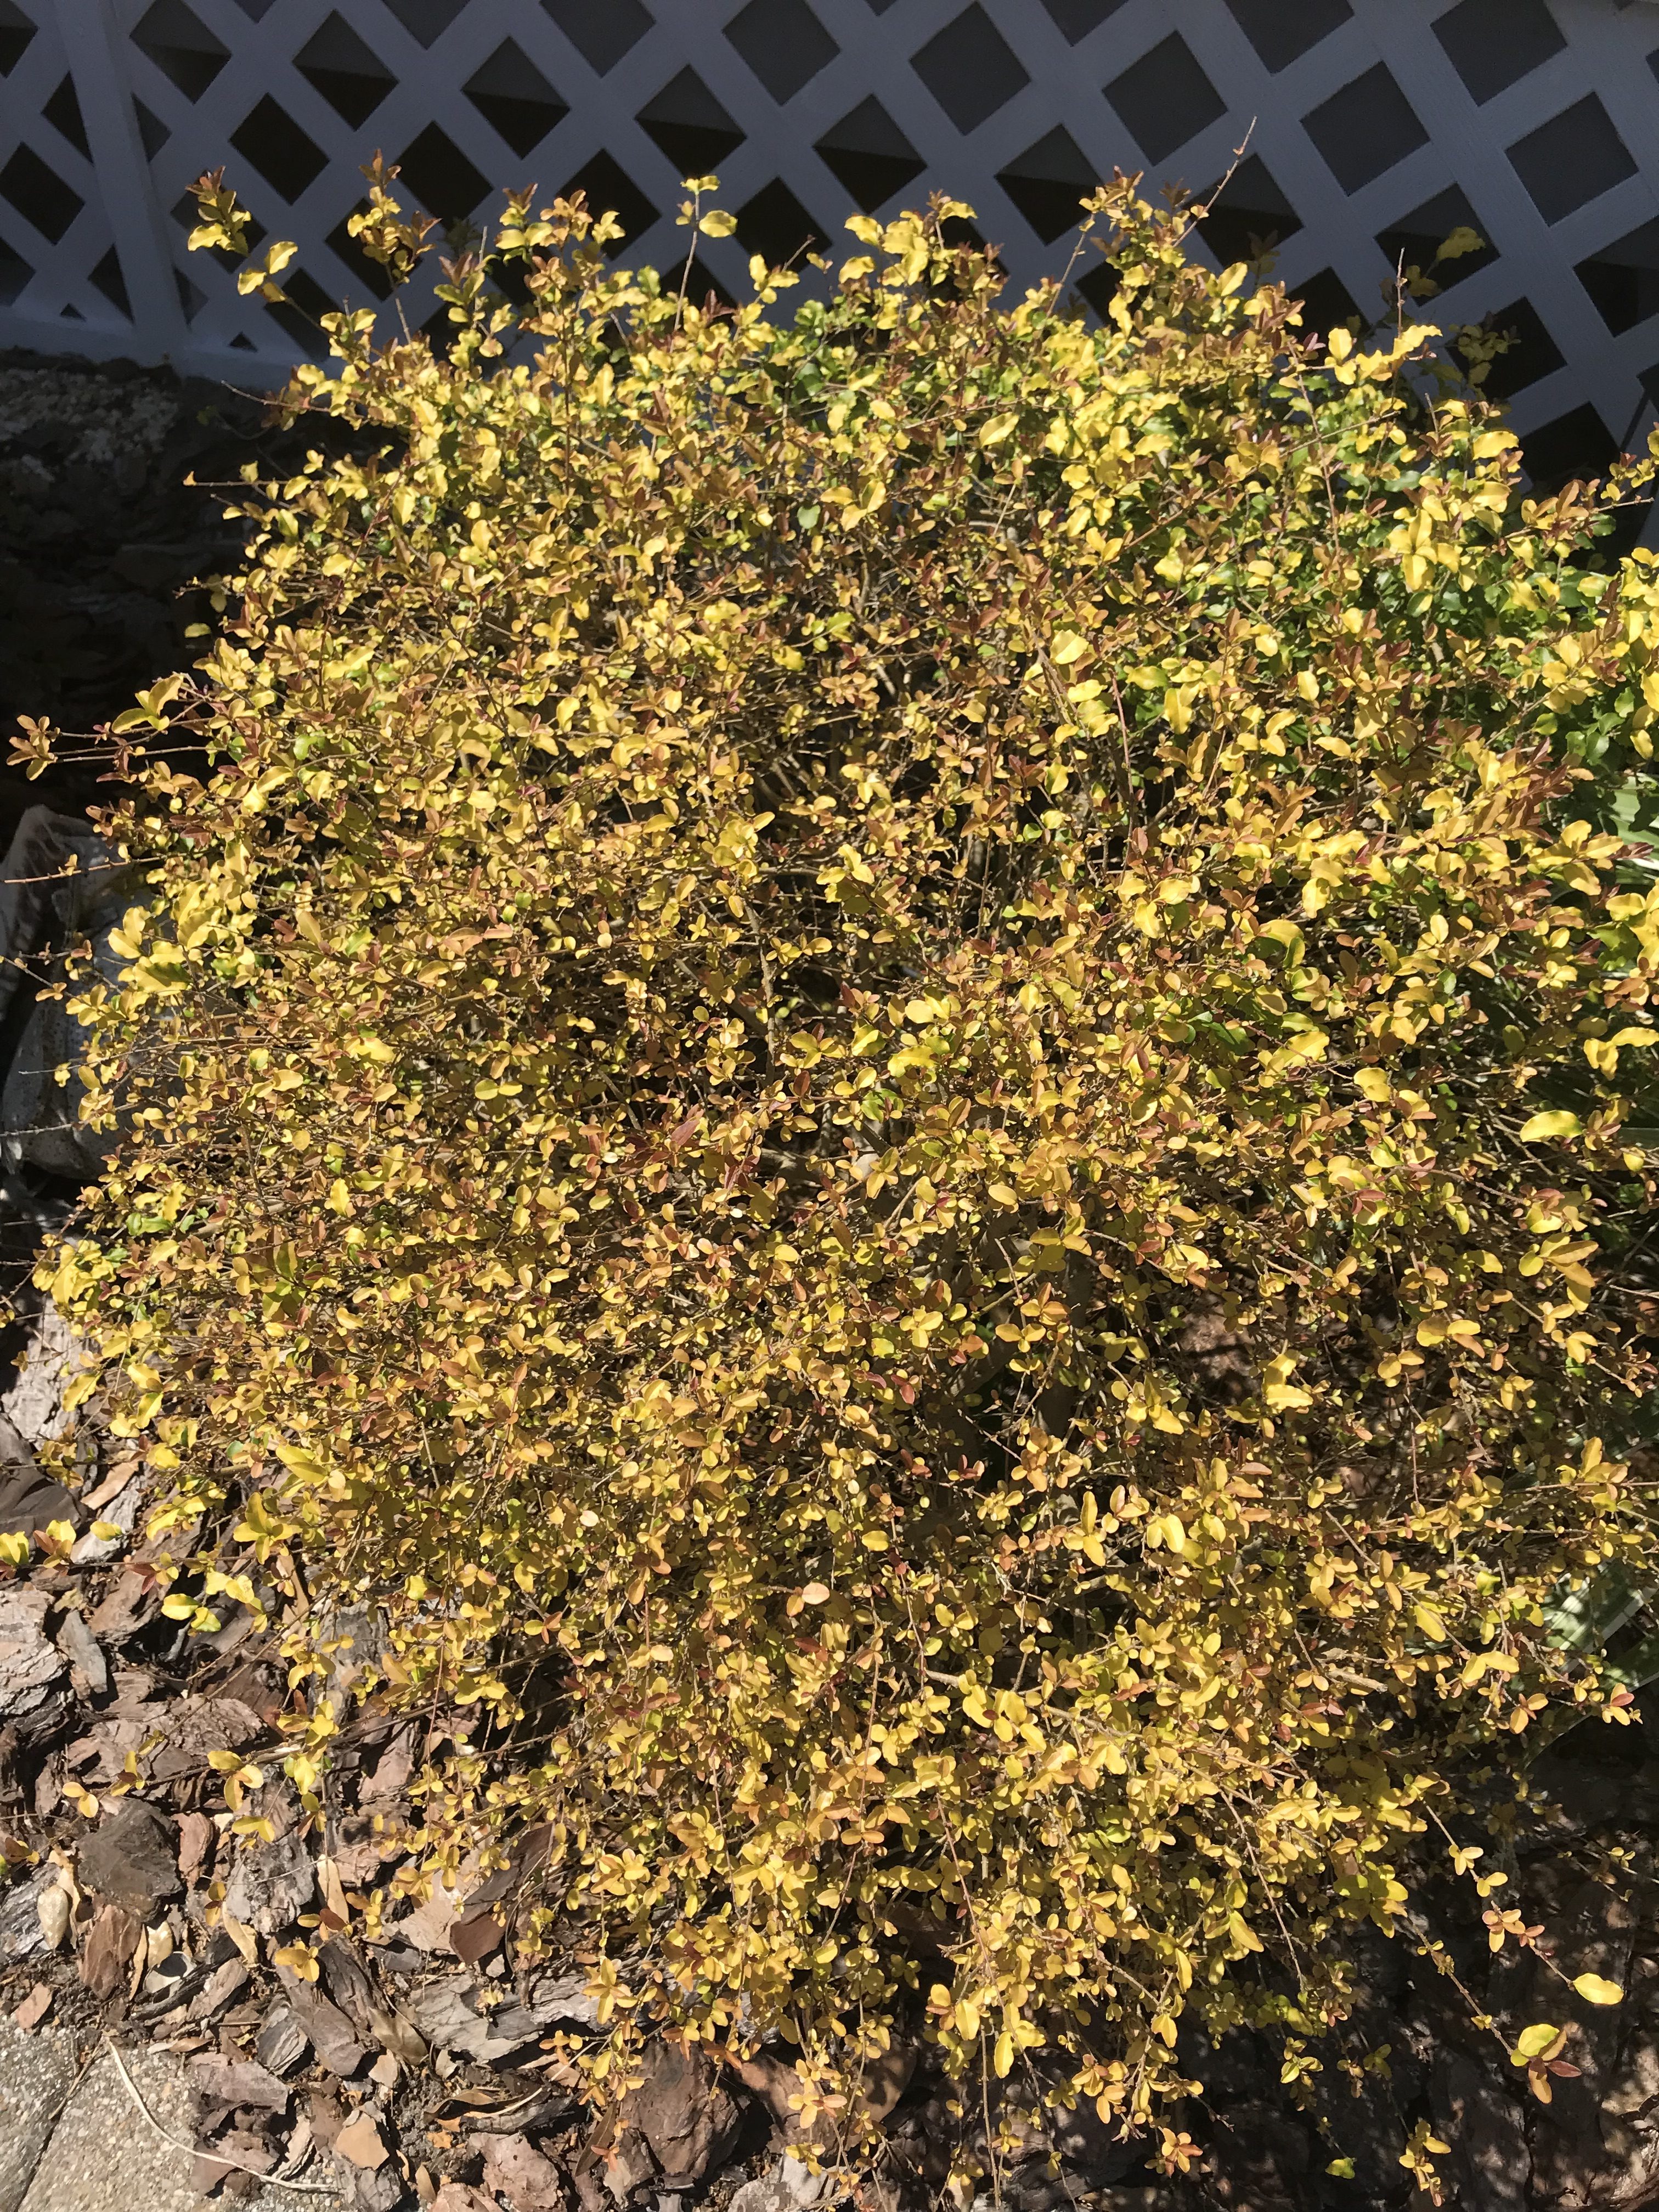
Damage to ‘Sunshine’ Ligustrum from pressure washing siding with bleach.
The very next week, another client asked if I would come by her house and take a look at a hedge of ‘Sunshine’ Ligustrum that lines her driveway, whose leaves had “bleached” out, turning from their normal chartreuse to a bronzy white color. This time, having seen similar issues with this particular plant that almost always involved an infestation of Spider or Broad Mites, I figured this was a cut and dry case that would end with a call to her pest control company to come spray the offending bugs. However, though the leaf damage looked similar, I was not able to locate any existing pests or find evidence any had been around recently, rather it appeared the leaves had been exposed to something that “bleached” and burned them. Puzzled, I began asking questions. What kind of maintenance occurs on the plants? Have you fertilized or applied any chemicals recently? Nothing. Then, near the end of our conversation, the client mentioned that her neighbor had pressure washed their house on a windy day and that she was irritated because some of the soap solution had gotten on her car. Bingo. Leaf burn from pressure washing solution chemicals. This time I was guilty of assuming the worst from a pest when the problem quite literally blew in on the wind from next door. Again, the client was relieved to know the plant would recover as soon as a new flush of growth emerged and hid the burned older leaves!
This spring, I’d encourage you to learn from the above situations and the next time you notice an issue on plants in your yard, before you reach for the pesticides, take a step back and think about what the damage looks like, thoroughly inspect the plants for possible insects or disease, and if you don’t find any, consider the possibility that the problem was abiotic in nature! And remember, if you need any assistance with identification of a landscape problem and want research-based recommendations on how to manage the problem, contact your local UF/IFAS Extension office.
by Molly Jameson | May 20, 2019
Spring is in the air, and that means temperatures are warming up and tank-tops, shorts, and flip-flops will soon be your preferred attire. Once those highs are steadily in the 80s and 90s, any outdoor activity will become coupled with a bottle of water and the occasional ice-cold glass of lemonade.
Self-watering containers allow you to continue gardening even if you plan on going on vacation this summer. Photo by Molly Jameson.
If you’re a gardener, you will notice the hot sun doing its best to dehydrate not only you, but your spring vegetable and flower beds too. And although April showers bring May flowers (and Mayflowers bring pilgrims) in many parts of the country, spring is historically one of the driest periods for the Florida Panhandle.
While spring in the Florida Panhandle can be quite dry, it is the relentless heat of summer that really drives up transpiration and evaporation rates. And herein lies the dilemma: the kids are soon to be on summer break, family vacations are on the horizon, and all your favorite summer veggies are on the brink of delivering their bounties.
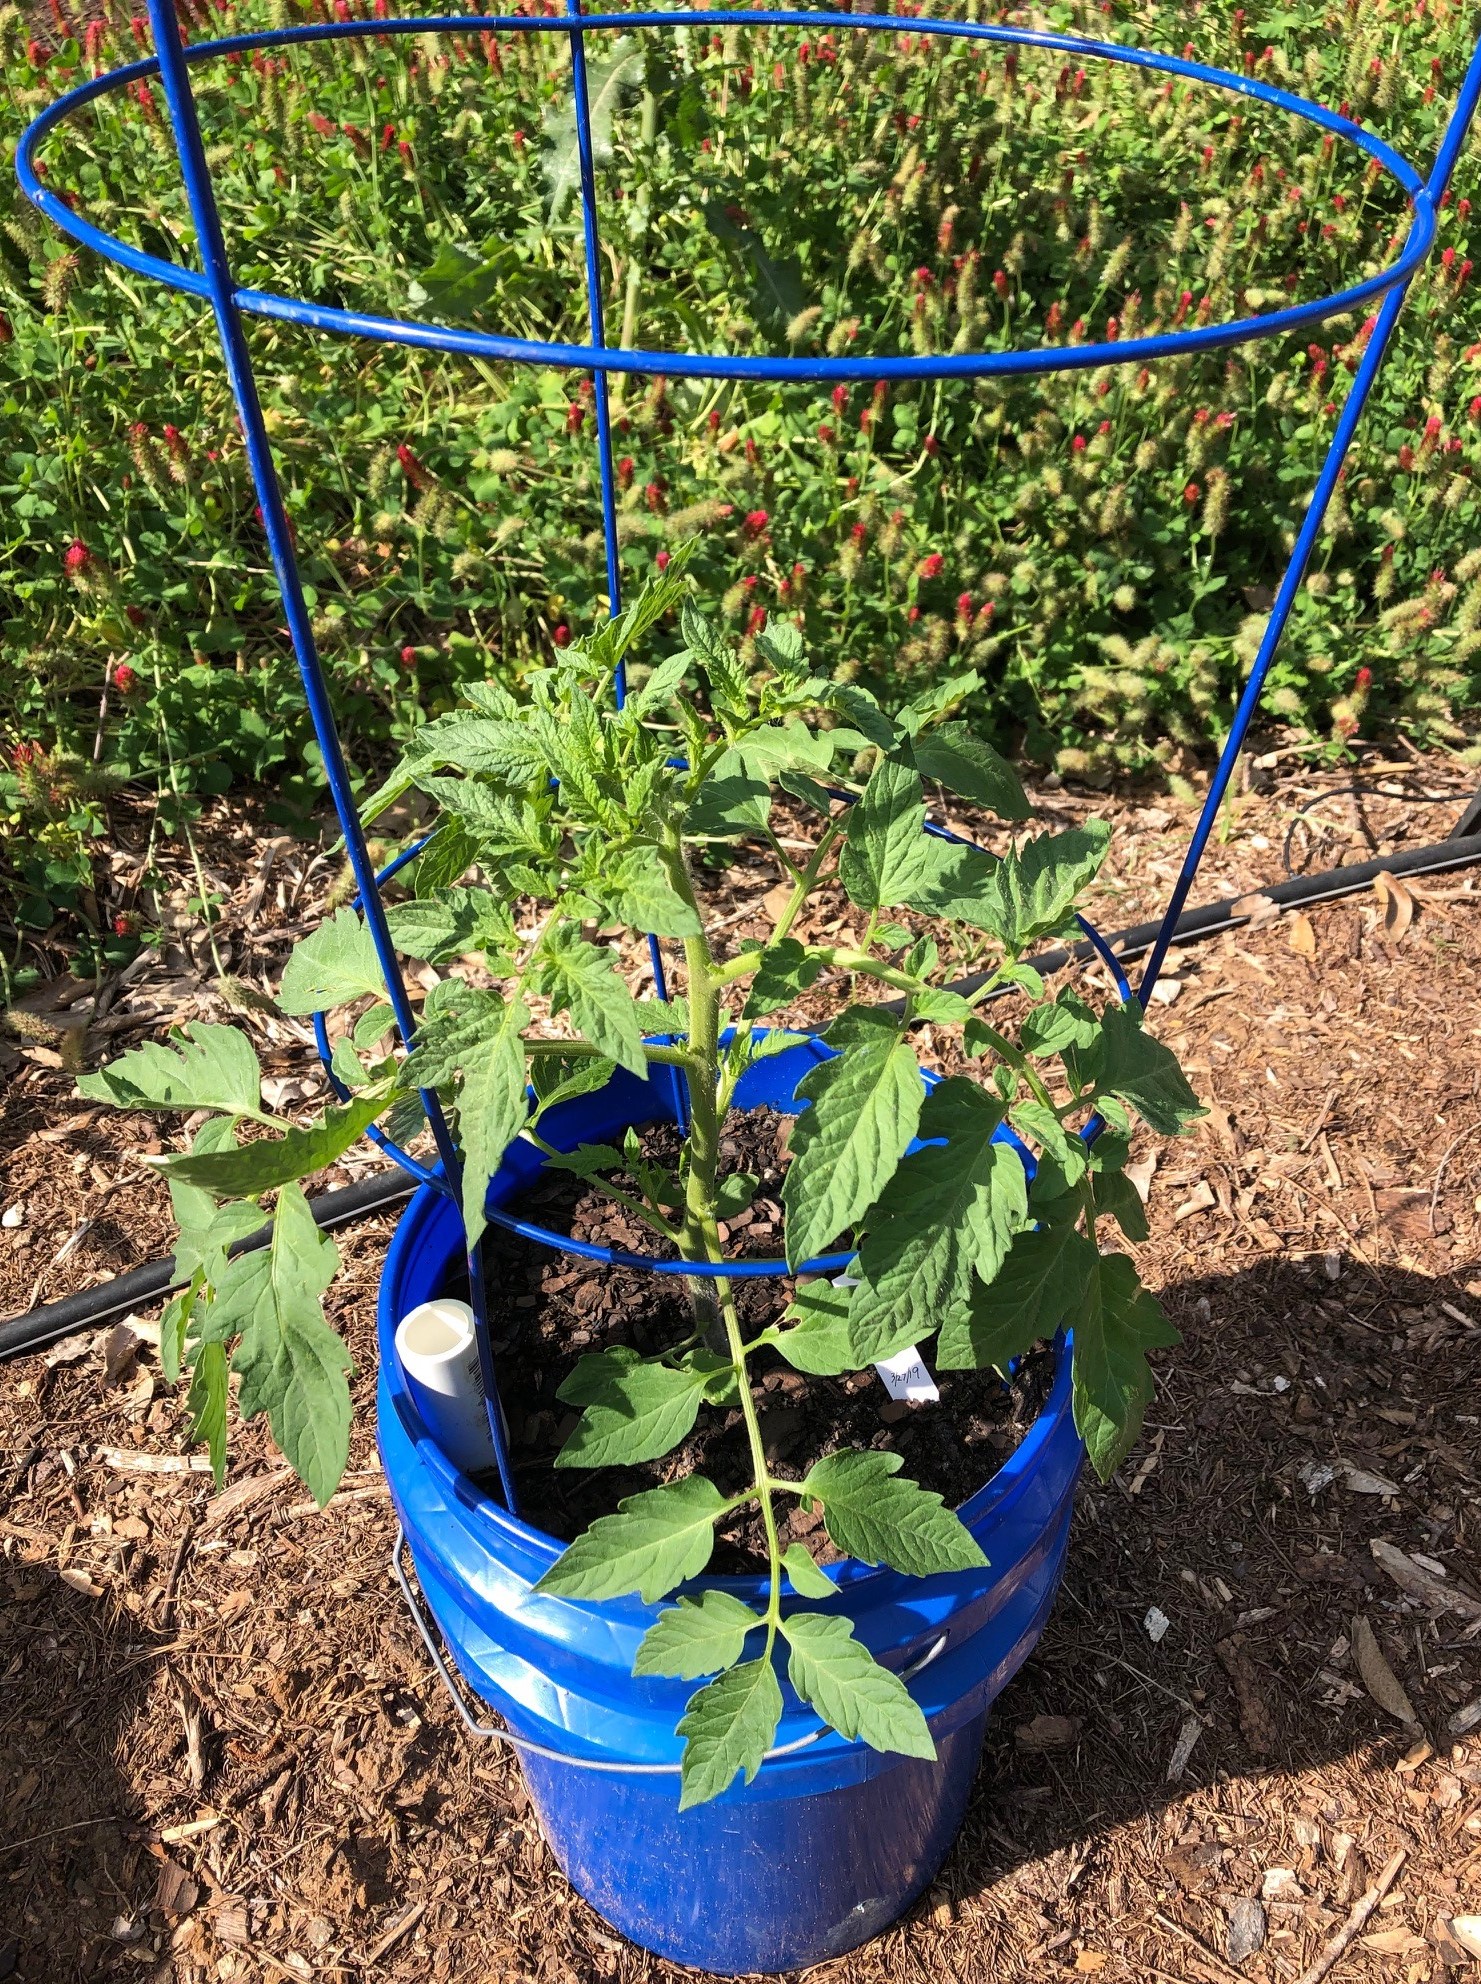
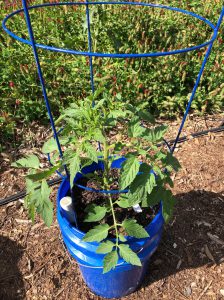
If you do not have a reliable irrigation system and timer or the fortune of a very generous green-thumbed neighbor, you risk your hard work in the garden succumbing to the heat while you are away. If you find yourself sacrificing a summer garden in place of a vacation, don’t despair. There is a low-cost, homemade solution that can step in while you are away: a self-watering container garden.
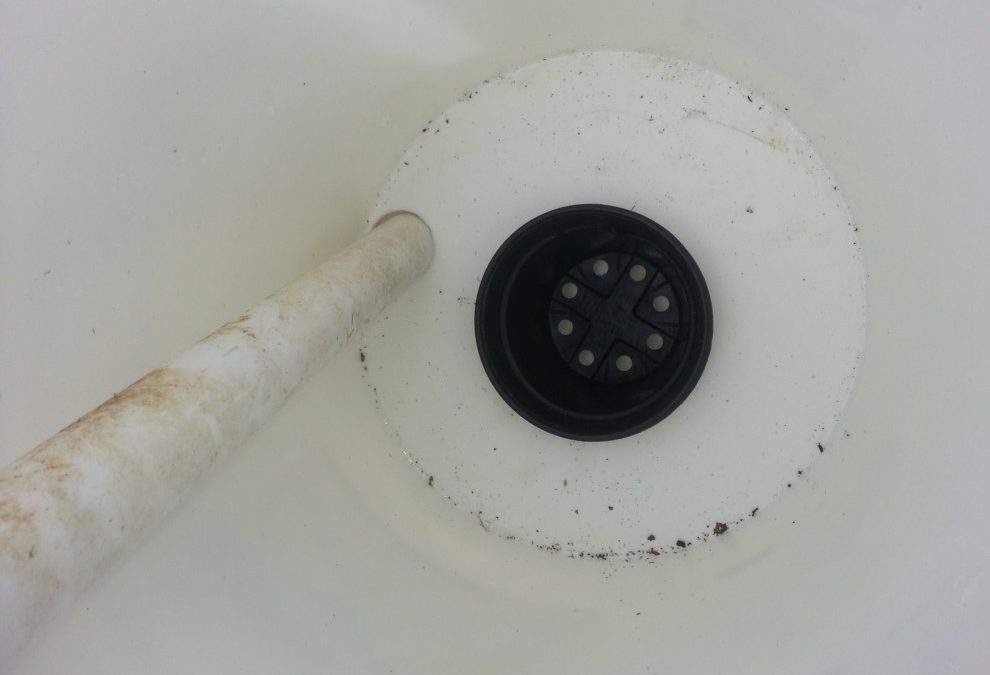
Self-watering containers use the process of capillary action, where water molecules are pulled upward from a water reservoir into soil above and then into and through plant roots. The forces of cohesion, in which water molecules stay close together, and adhesion, in which water molecules “stick” to other substances, create this important phenomenon.
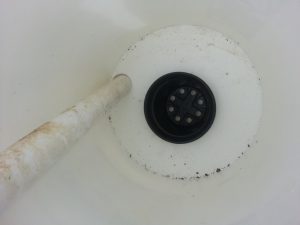
A wicking basket uses capillary action to pull water molecules up from the water reservoir and into the soil. Photo by Trevor Hylton.
While store-bought versions can be costly, you can make a self-watering container for less than $10 with just a few materials and tools. There are multiple designs for creating a self-watering container at home. Typically, designs include two five-gallon food-grade plastic buckets to hold the soil and plant; a knife or hole saw to access the water reservoir; a wicking basket or strips of cotton from an old towel, pants, or shirt to generate the capillary movement of water; a drill and drill bit for drainage; and a plastic pipe for easy filling of the water reservoir.
To make your own, view these Extension-produced self-watering container garden resources and follow the step-by-step instructions that work best for you:
by Sheila Dunning | May 17, 2019
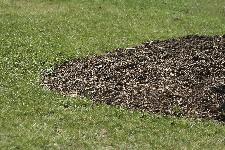
Natural bark mulch
There have been a lot of questions about the use of colored mulches in the landscapes. Many individuals are concerned about the possibility of negative environmental impact from the dyes used on wood chips and pine straw. According to the Center for Agriculture, Food and the Environment (https://ag.umass.edu) the primary concern with colored landscape mulches is not the dyes used for coloring. Rather, it is about the sources of wood chips and the possibility of contamination with toxic substances.
The dyes used in coloring wood mulch are primarily of two types: carbon-based dyes and iron oxide based dyes. Iron oxide, the most commonly used dye, is simply a compound of iron and oxygen. As the compound oxidizes, iron is released to the soil but is not considered to be toxic. Dyes that are not absorbed by or adsorbed to the wood would come off with contact, especially if the mulch is wet. There are also some carbon-based dyes used on mulch. These carbon-based colorants are similar to those used in ink and cosmetics. Other dyes for mulch are vegetable-based and therefore organic. At this time, there is no evidence that the dyes used to color wood chip mulch are toxic.
Most of the wood used for making colored mulch comes from recycled wood, i.e. wood scraps, wood pallets, and wood reclaimed from construction and demolition (C&D) waste. Besides the benefits of recycling waste wood materials, the reason why these wood materials are used for colored mulches is that they are very dry and readily absorb or adsorb coloring agents.
Unfortunately, some of the recycled waste wood used for making landscape mulch products is contaminated with various chemicals, such as creosote and CCA (chromated copper arsenate). CCA is the chemical that was used in the manufacturing of pressure-treated wood.
Even though arsenic-based wood preservatives were banned in 2003, there are still plenty of CCA preserved wood being re-purposed. Sometimes wood pallets that have been used in the transport of chemical agents can become contaminated by spills of these chemicals. CCA and other toxic chemicals have been found to be contaminating soil where colored mulch made from these wood products have been applied. CCA treated wood can kill beneficial soil bacteria, beneficial insects, earthworms and young plants. It can also be harmful to people spreading this mulch and animals who dig in it.
Additionally, dyed mulches break down much slower than natural mulches. The greatest advantage to using them is to reduce the expense and time required to replenish the mulch. When wood breaks down, it requires nitrogen to do so. Colored mulch can actually rob the plants of the nitrogen they need to survive. Natural mulches retain moisture and add organic material back to the soil enabling the plants to better utilize nitrogen. Avoiding the use of colored mulches reduces the risk of contamination better than any other practices. Colored pine straw may be an alternative.
It should not be assumed that all colored mulches are contaminated. However, anyone planning to use colored mulch should become familiar with the supplier and the source of the wood used in making it. If C&D waste wood is used, it should be a red flag that there is a possibility of CCA contaminated mulch.
Certified Mulch Label
If you wish to improve the chances that the dyed mulch that you are buying is safe for humans to handle look for the MSC Certification Logo on the packaging. MSC stands for Mulch and Soil Council, whose responsibility is to certify that a mulch or soil product is free of CCA-treated wood. According to MSC’s Product Certification program, “Certified mulches and soils can be found at major retailers and garden centers across the country.” If you have concerns after contacting the supplier about the source of the wood used, contact a private environmental testing lab in your area.
While reading packaging, check the source of the product. If the supplier is a land management company rather than a processing mill it may be that mature trees are being removed and shredded. These mulches are sold as “long-lasting”, “no-float” products. They have the appearance of pine straw, but are actually finely shredded cypress from the heart of trees. These are coming from properties where the bald and white cypress trees are harvested for mulch. You can tell that it isn’t pine straw because the mulch pieces lack pine needle structures such as the fascicles and a revolute shape. While the use of these products is not contaminating, it is still depleting the environment. Mulches that are natural by-products are the most Eco-friendly.
by Julie McConnell | May 17, 2019
Walking around my yard I’m always on the lookout for changes – both good and bad. I look to see which plants are leafing out or flowering. I scout for plant disease symptoms, insect damage, and weeds. I’ve learned over the years that when I spot a plant out-of-place before condemning it as a weed, I need to make sure it isn’t really a bonus plant!
This spring my yard has really changed. After losing numerous mature trees the sun is shining in new spots. Last fall I also had a bit of unexpected seed and vegetation dispersal to say the least, so I’m getting lots of surprises in the landscape. A few bonus plants I’m seeing and leaving alone are oak seedlings, black-eyed Susan, sunflowers, Angelina sedum, dotted horsemint, and verbena.
These plants might not be exactly where I would have placed them, but if they are not located somewhere that will be a maintenance problem, they can stay where they landed. Many of these plants are taking advantage of dry, non-irrigated sites and providing welcome vegetative groundcover that will help prevent erosion. The bonus is that they all provide food or shelter for birds and/or bugs!
How do you tell the difference between a weed and a plant you would like to keep? The key is to pay attention to plant features other than flowers. Start looking at foliage shape, texture, color, growth habit, and how leaves are arranged on the plant. Other characteristics are stem color and shape – some plants have square stems, others have ridges we refer to as “wings” in horticulture terms, tendrils on vines, all of these can be distinctive and recognizable before the obvious flowers form. Keep notes with pictures of plants at different life stages until you commit them to memory. Eventually you’ll be able to walk through your landscape and quickly note the differences which will help conserve those bonus plants and get weeds under control before they get too prolific.
Below are links to sites that might be outside your regular bookmarks. These resources show more than just the pretty flowers and have detailed information on life cycle and growing conditions.
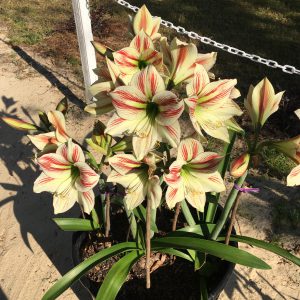
by Logan Boatwright | Apr 16, 2019
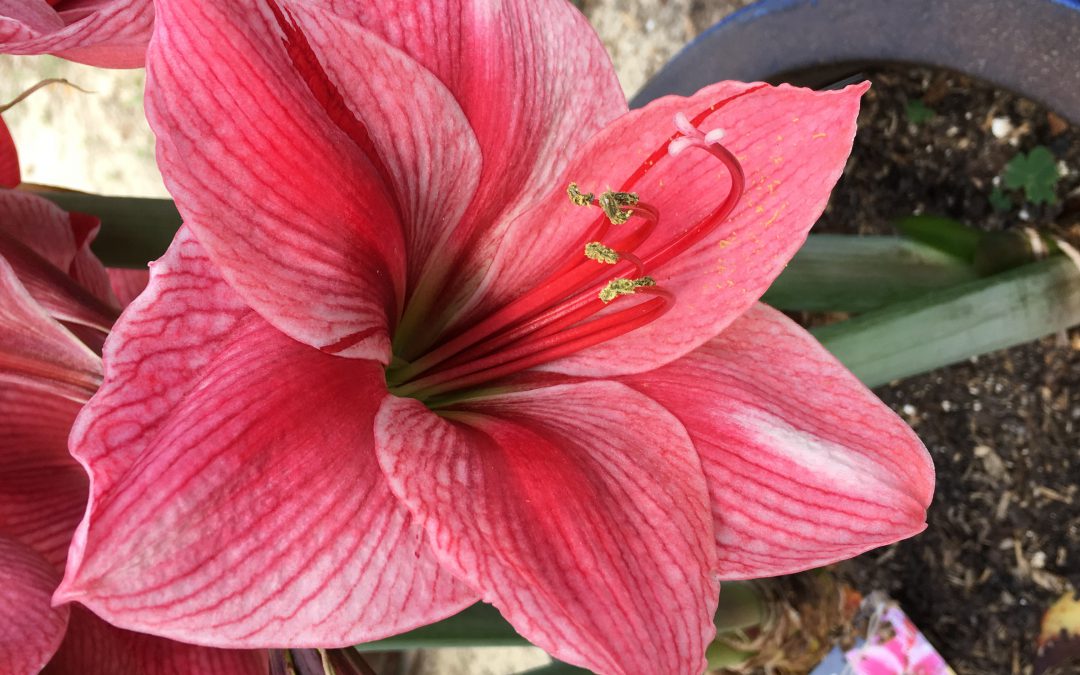
Blooming amaryllis flower. Photo by Logan Boatwright
Are you tired of seeing only green from your shrubs such as boxwood or yew? Are the areas next to your home walls, fences, terraces, tree islands, gate entrances, and/or borders barren? Do you want to add color to these areas? You may want to consider planting these areas with the beautiful amaryllis (Hippeastrum x hybridum).
Amaryllis grows from a tough, dependable bulb that will bloom during the spring after winter dormancy. The strap-shaped leaves will emerge first and grow about 1.5 inches wide, up to three feet long, and persist much of the year in Florida. They are reduced later in the summer and ultimately die back from frost.
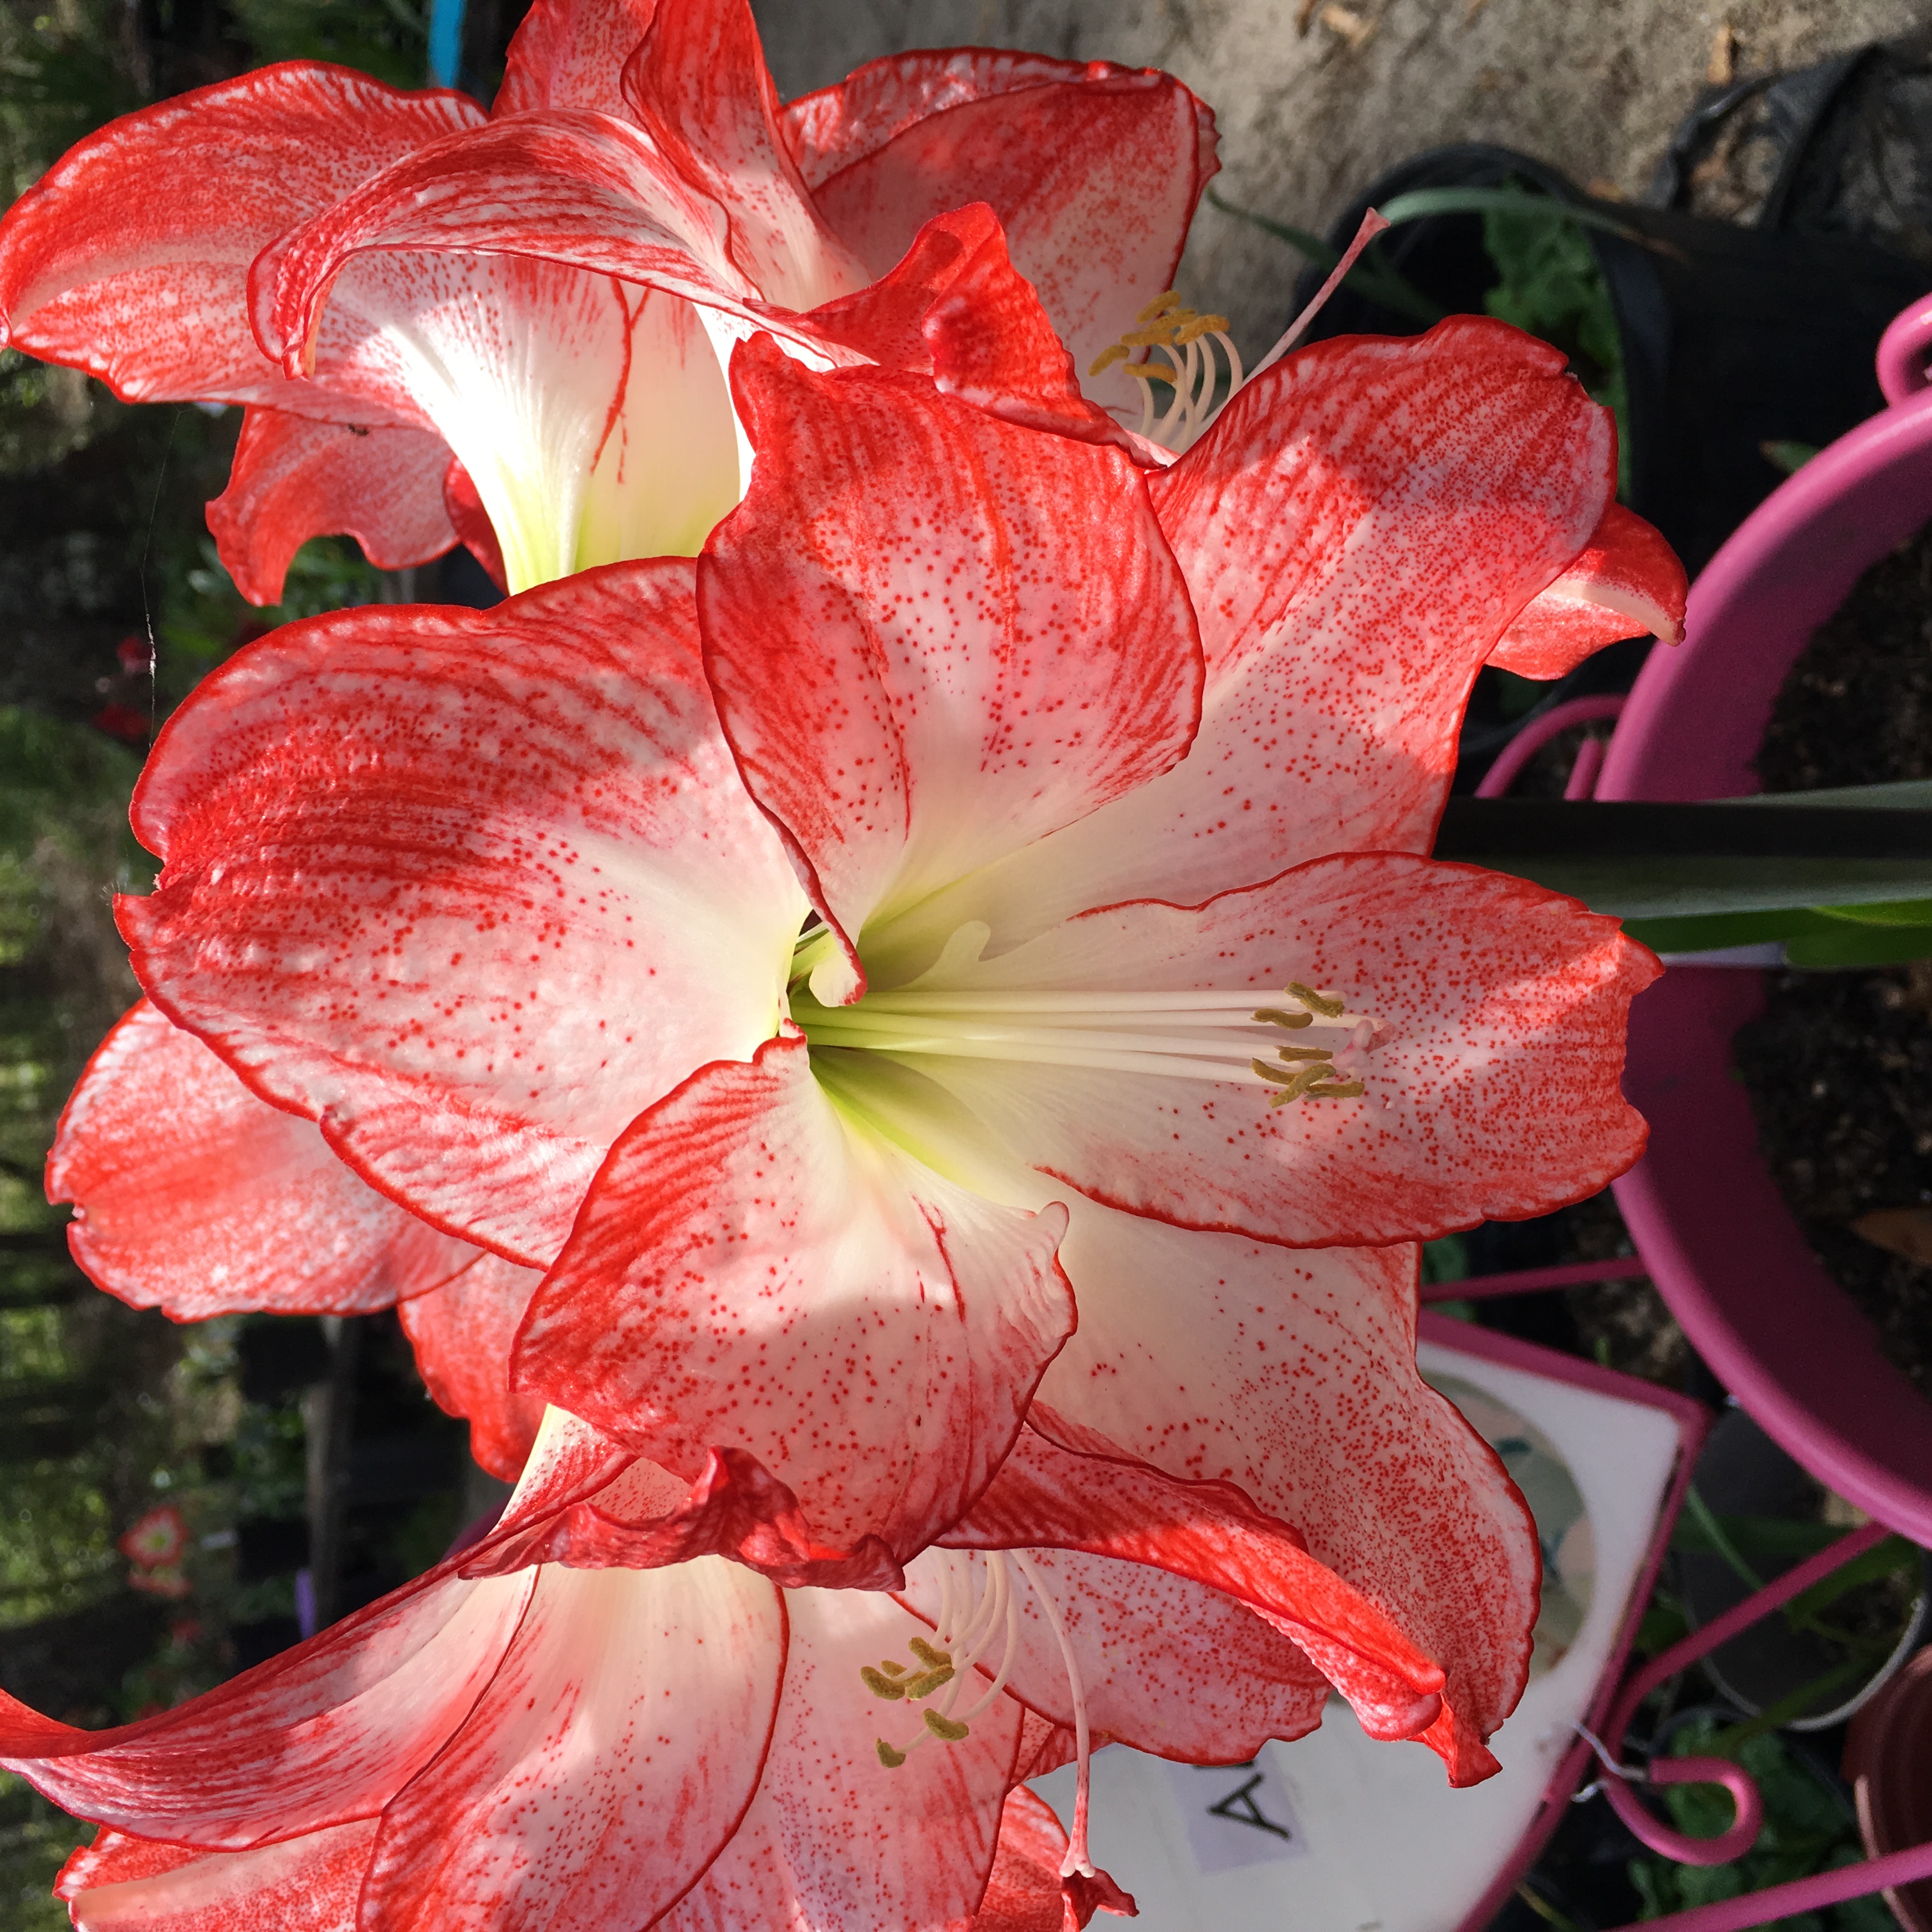
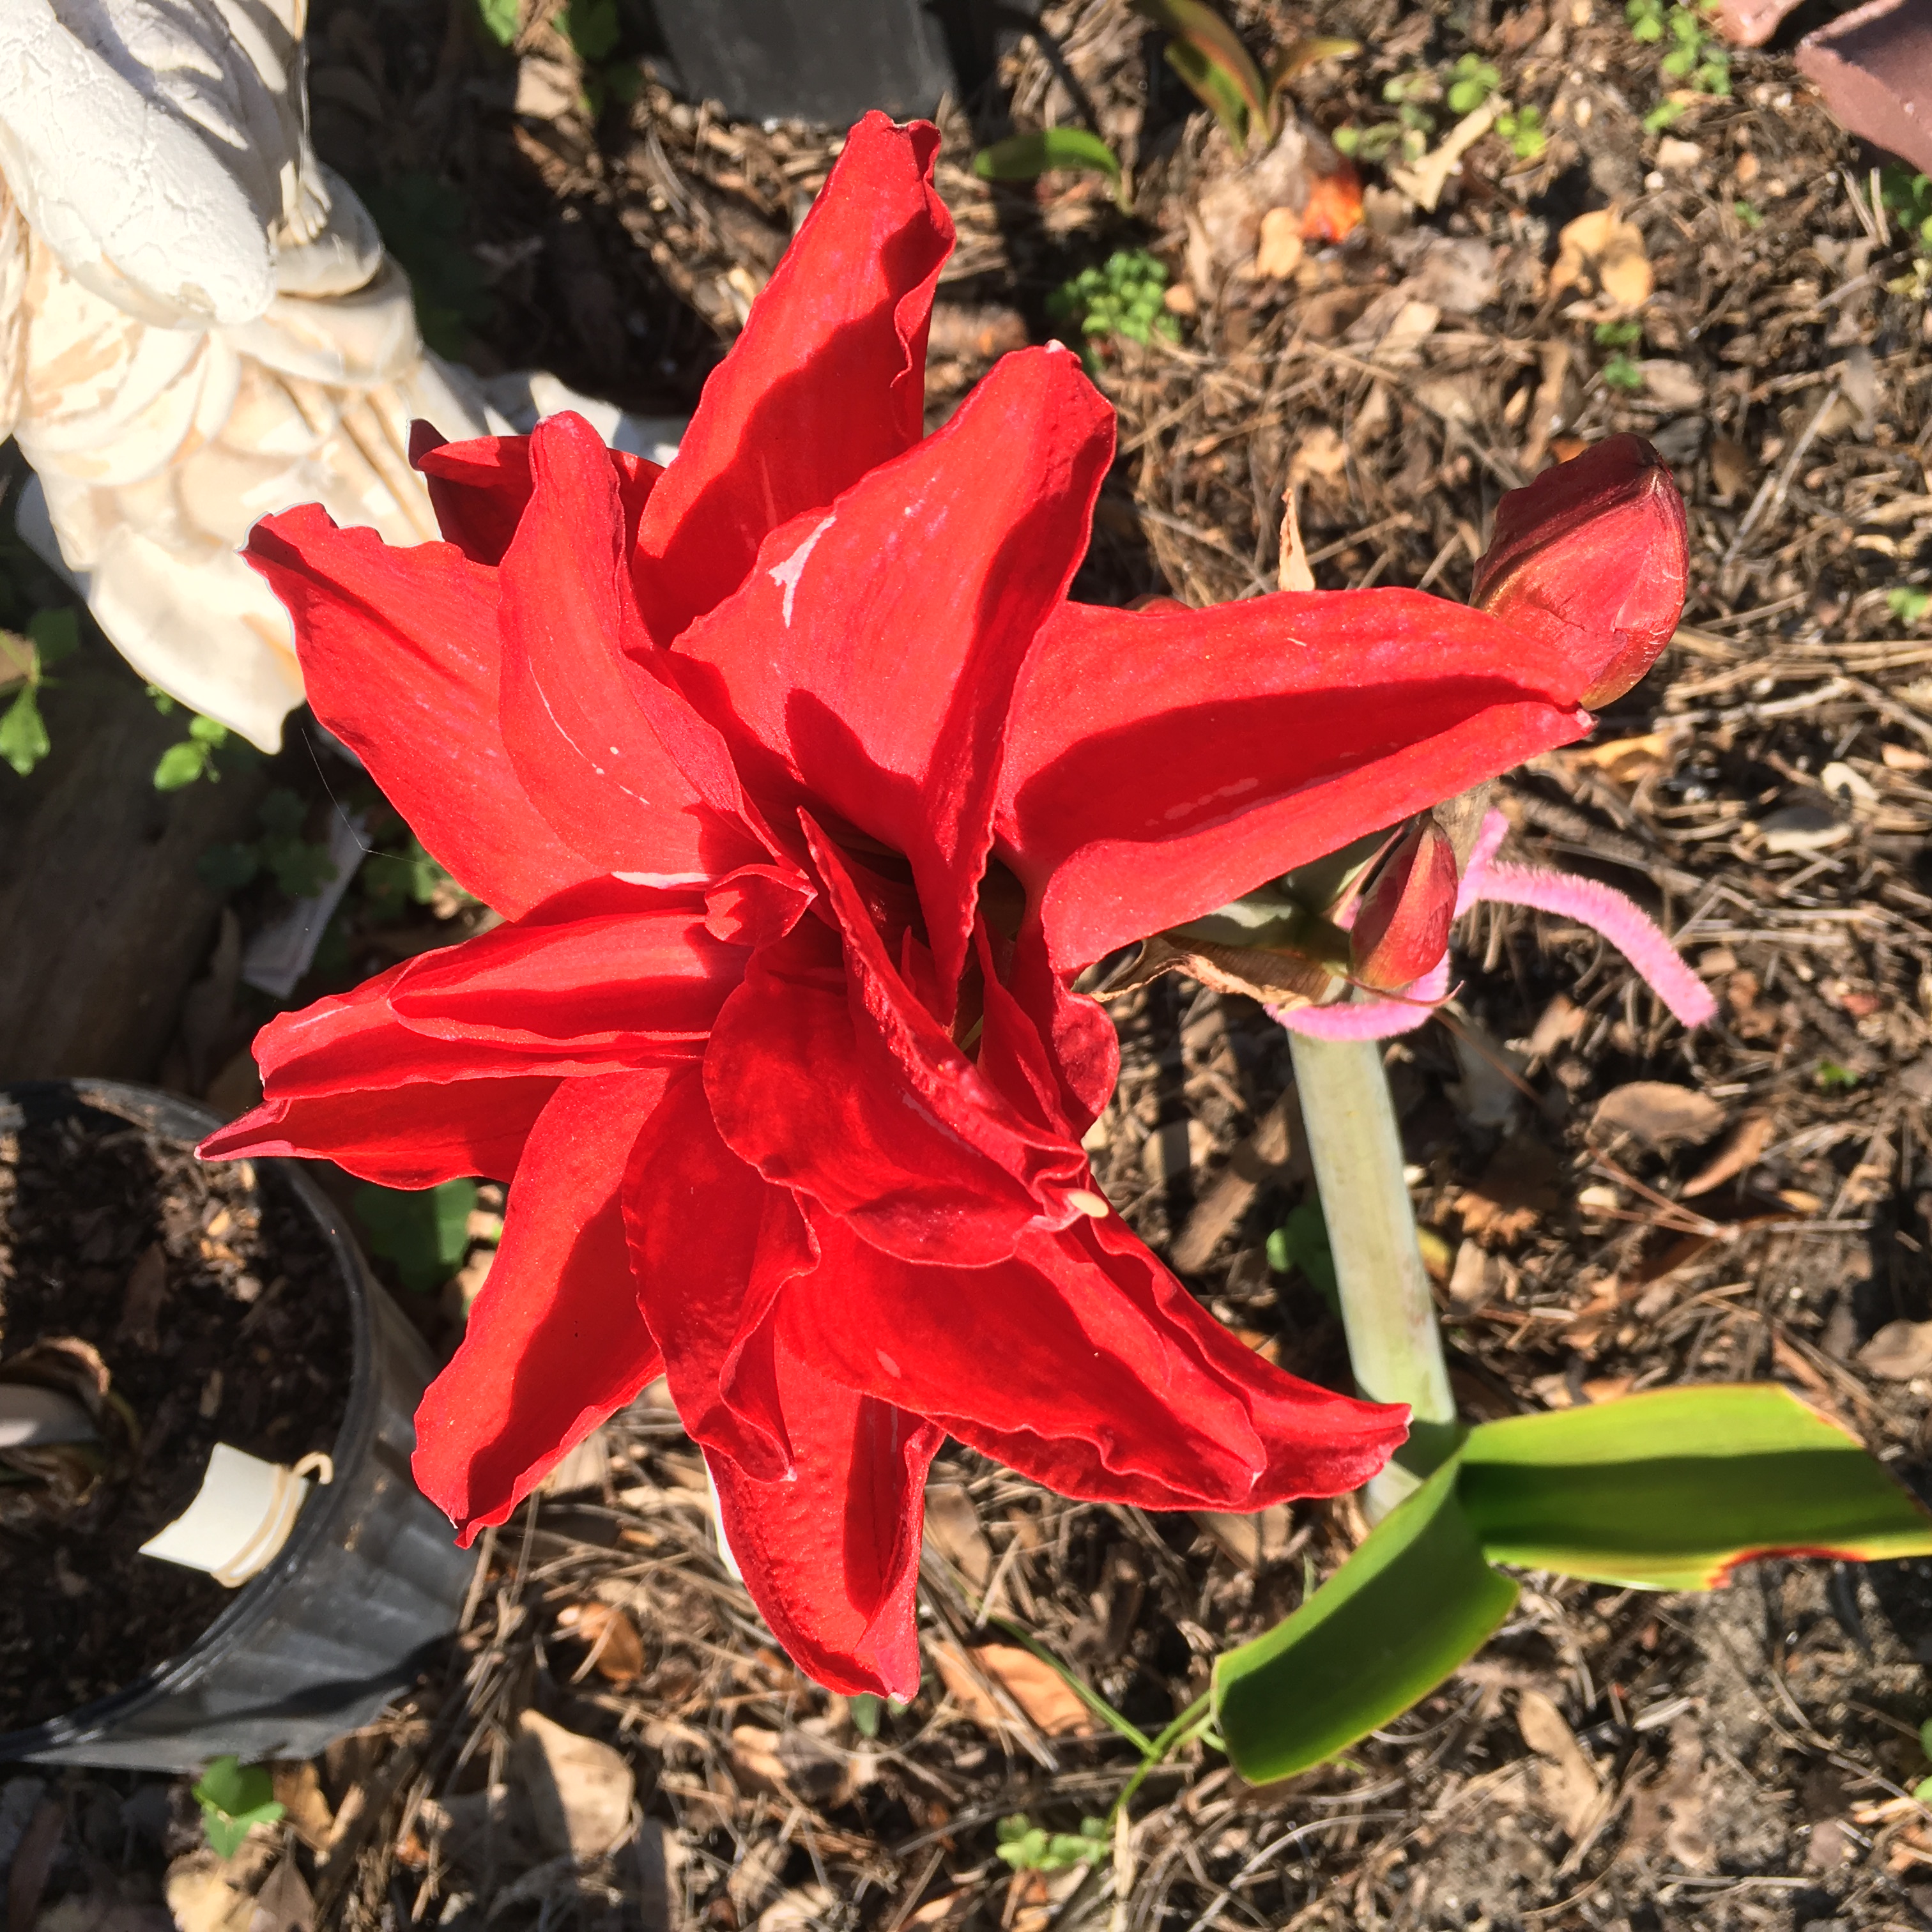
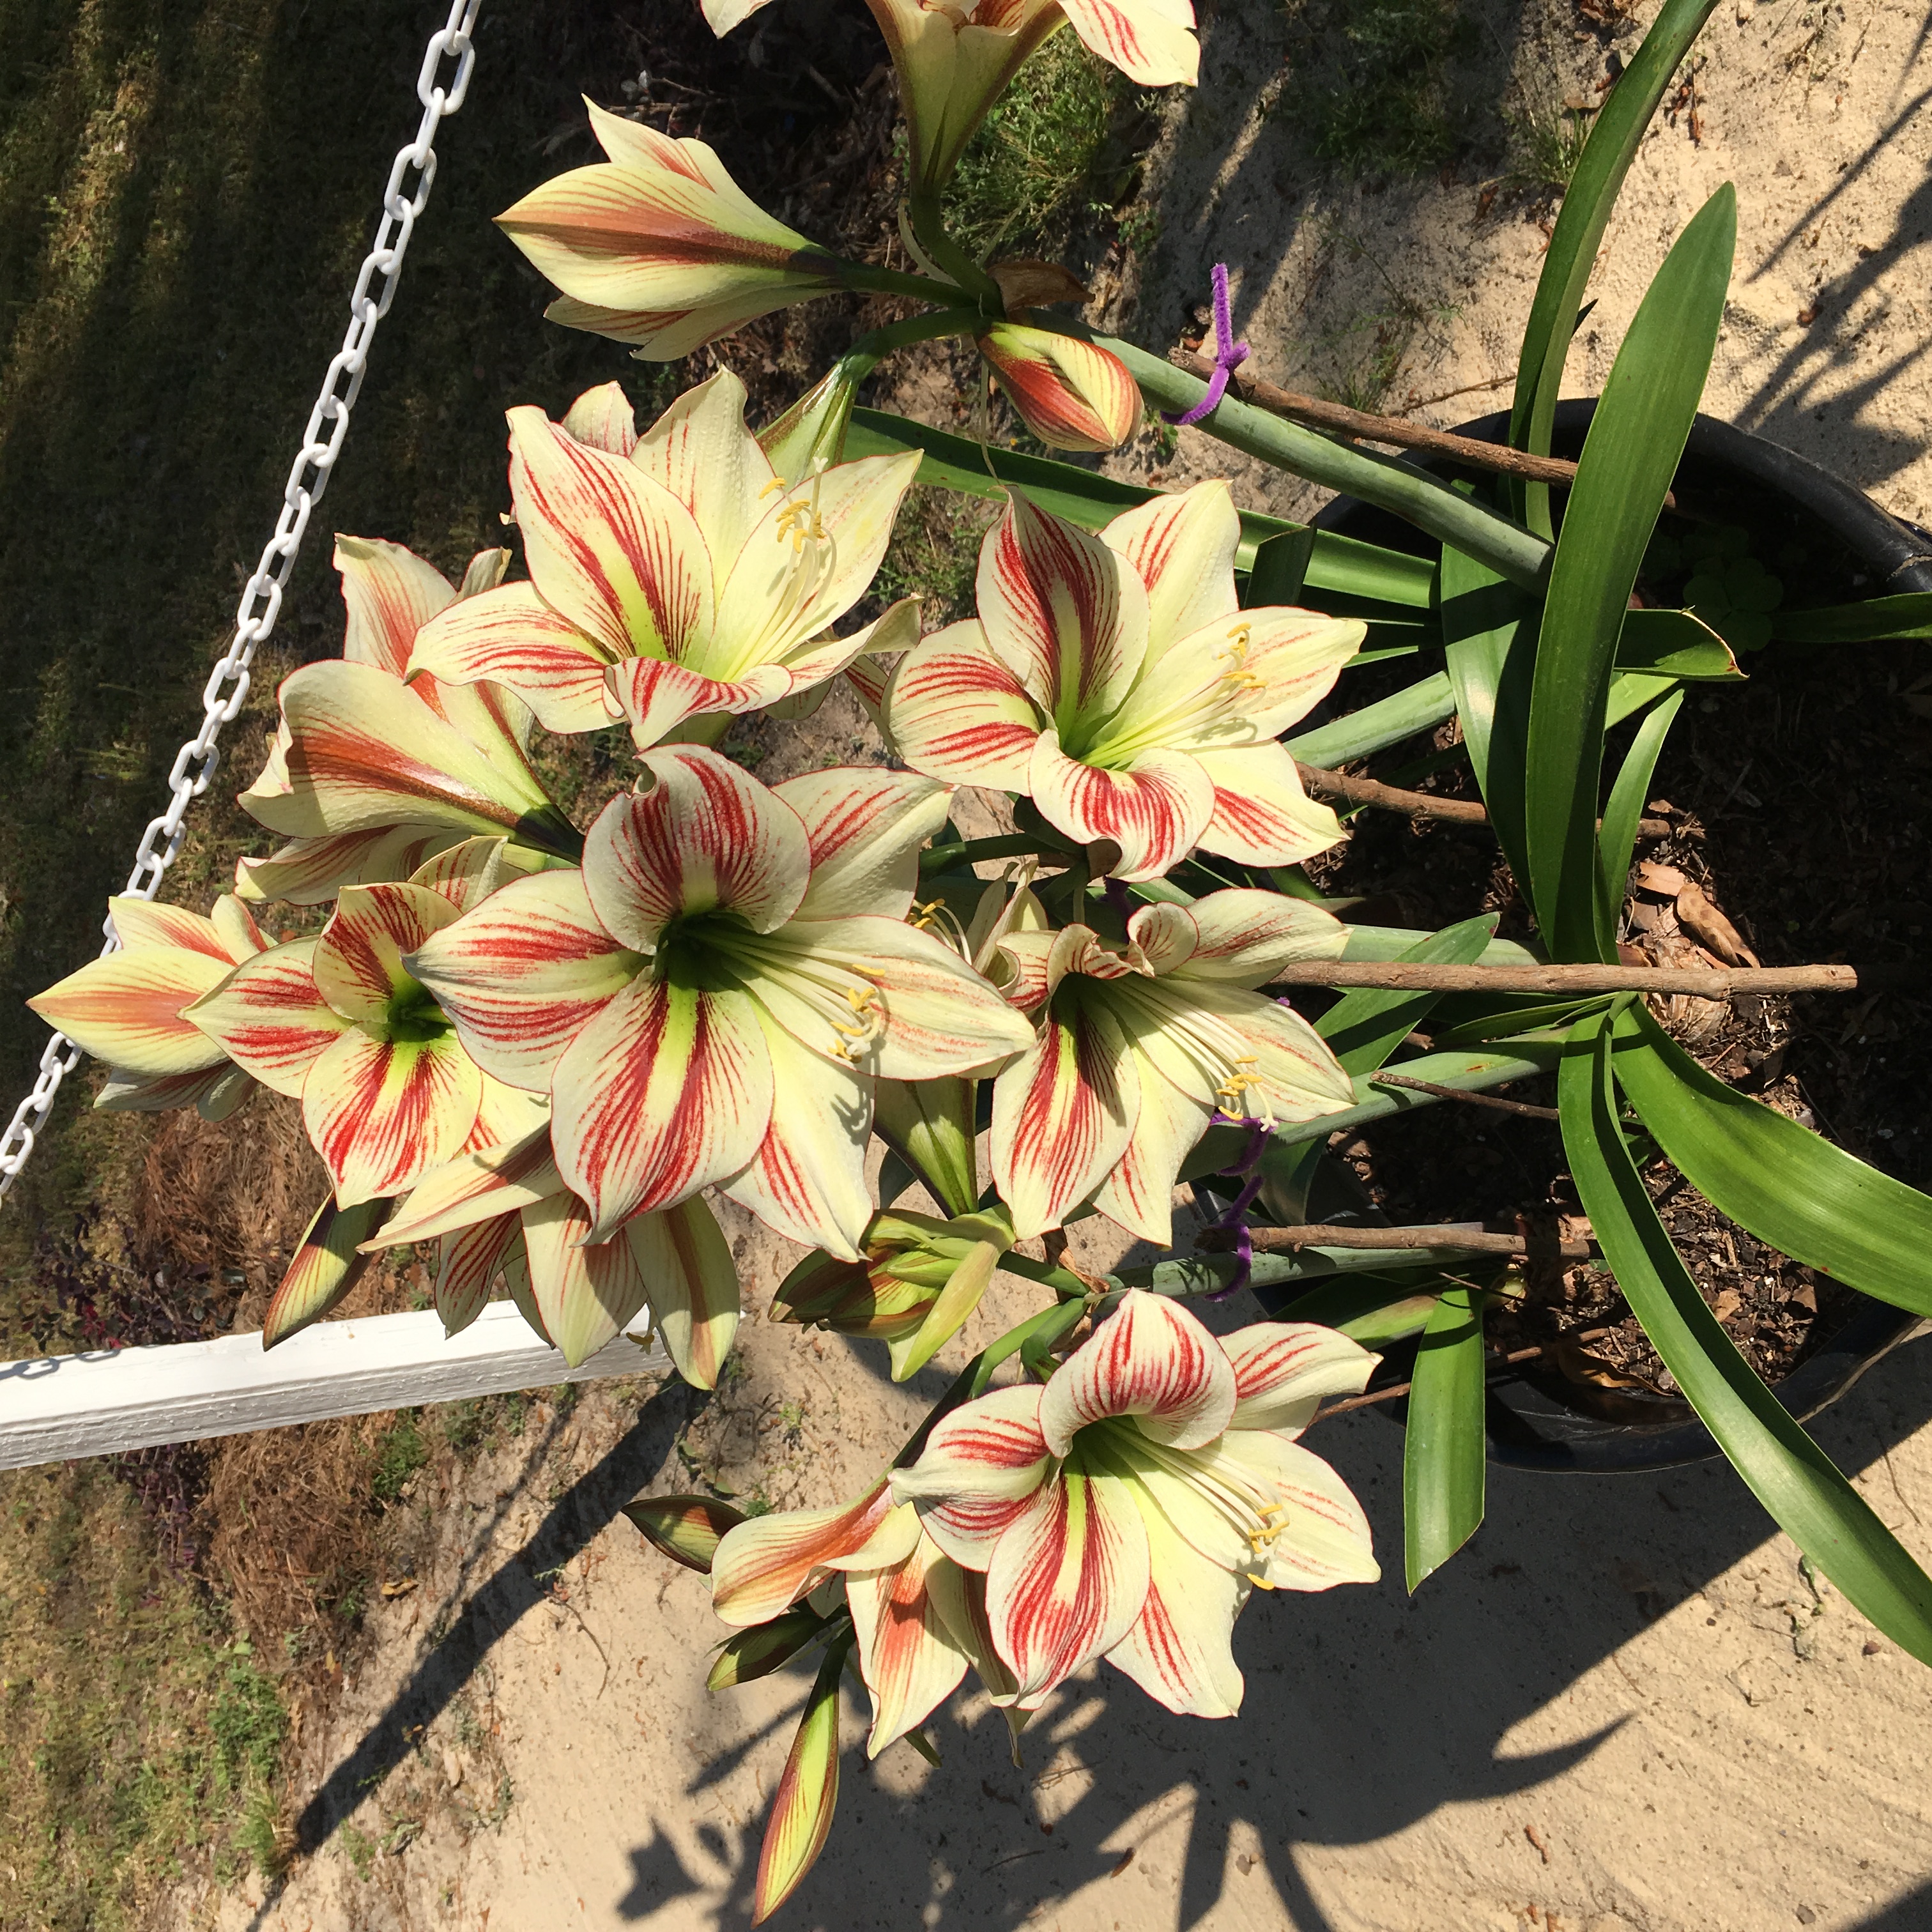
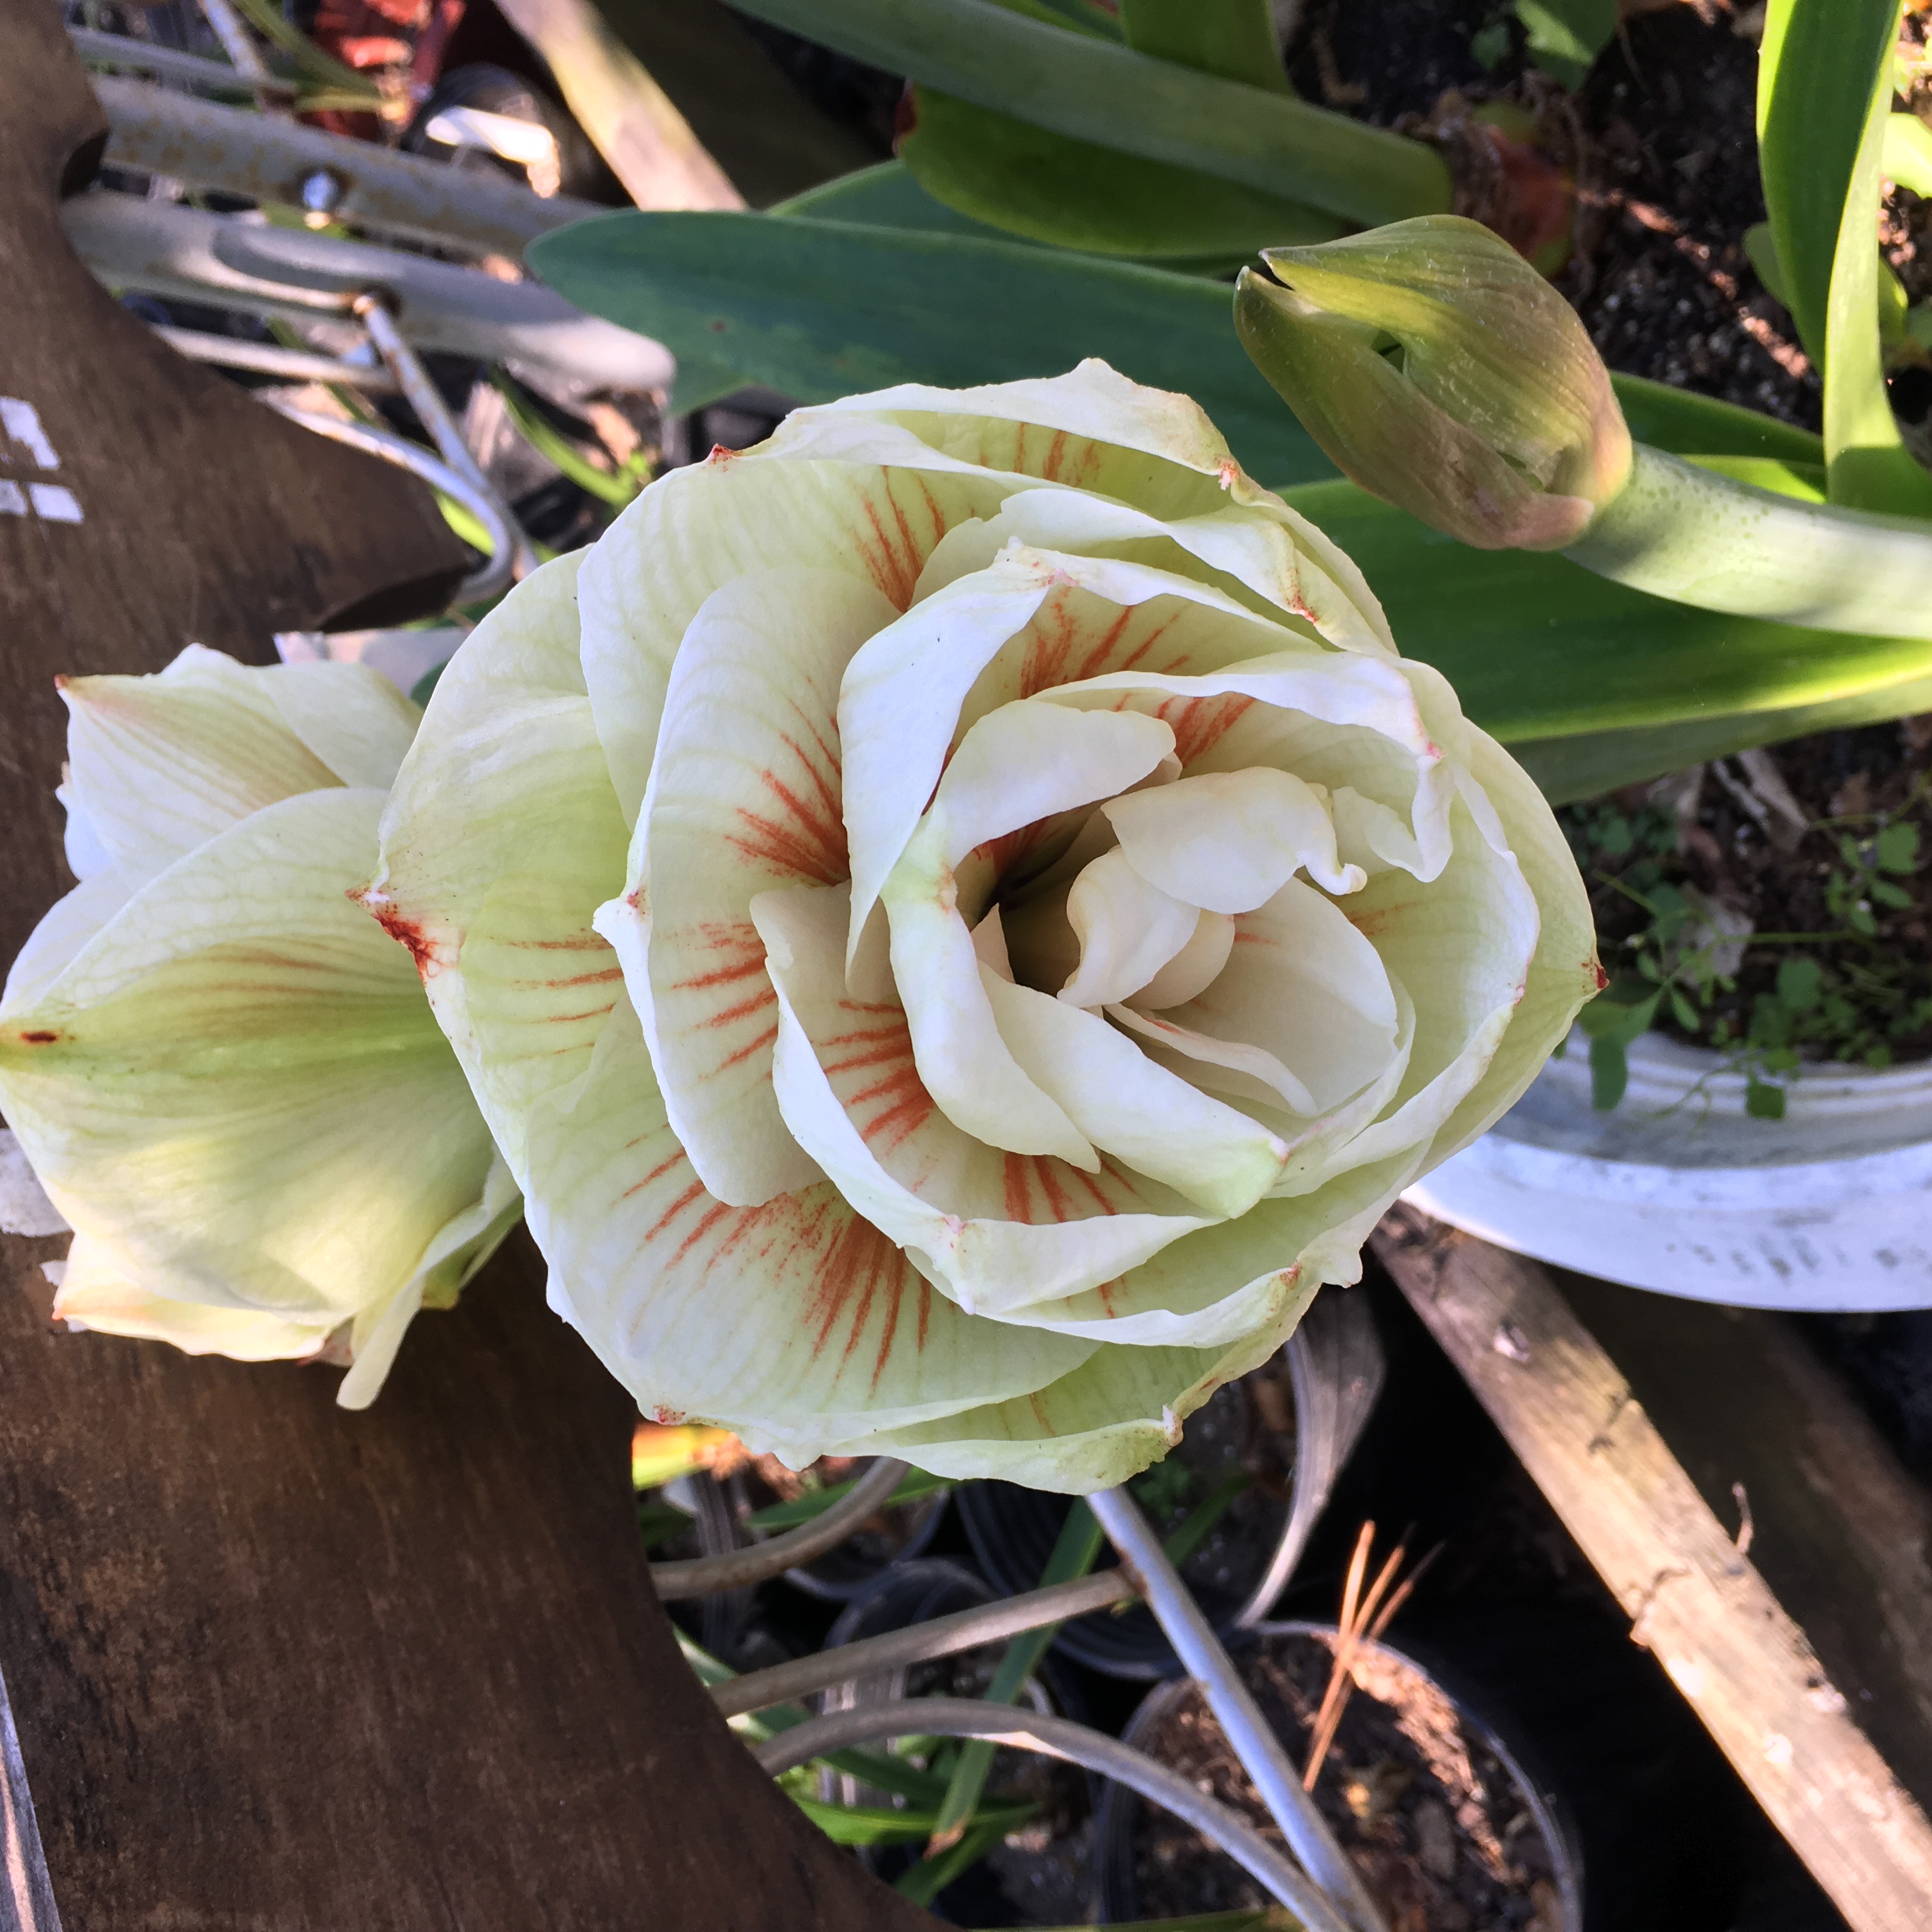
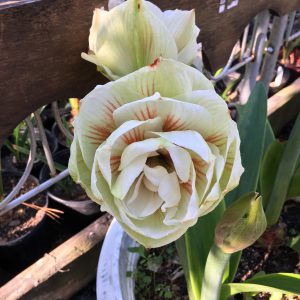
In the late winter, bulbs will eventually produce one to three leafless stalks, or scapes, that will each have two or more trumpet-shaped flowers. Flowers come in a variety of forms and shapes: from single and double, miniature or large. Flower colors can be red, bright pink, shades of pink, orange, white, rose, or even salmon. It does not stop there! The flowers may even be striped and multi-colored. Amaryllis can create a striking focal point when they are planted in clusters of 10 or more of similar color.

Double flowers of amaryllis. Photo by Logan Boatwright.
Amaryllis may be planted anytime of the year, but winter is best. They are sun- and shade-tolerant, but planting in light shade is best since leaves will yellow in full sun and plants bloom poorly in heavy shade. Amaryllis prefer well-drained sites to prevent bulb and root rots.
For the best amaryllis performance, till and amend the soil with a 3- to 4-inch layer of organic matter and 2 to 3 pounds of 6-6-6, or a comparable amount of other complete fertilizer per 100 square feet. Plant 12 to 15 inches apart. Amaryllis can greatly benefit from at least one fertilizer application in the early spring and two to three applications during the growing season.
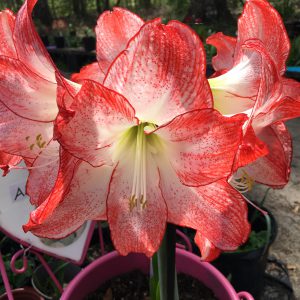
Many blooms from multiple amaryllis bulbs. Photo by Logan Boatwright.
After flowering it’s a good practice to remove the stalks, unless seeds for planting are desired. If the bulbs become crowded, dig and separate them out. Doing this will encourage large, uniform flowers.
Go out, plant a few amaryllis plants today, and be ready to. To learn more about Amaryllis, please follow this link.
Blooming amaryllis plant. Photo by Logan Boatwright.
by Beth Bolles | Apr 16, 2019
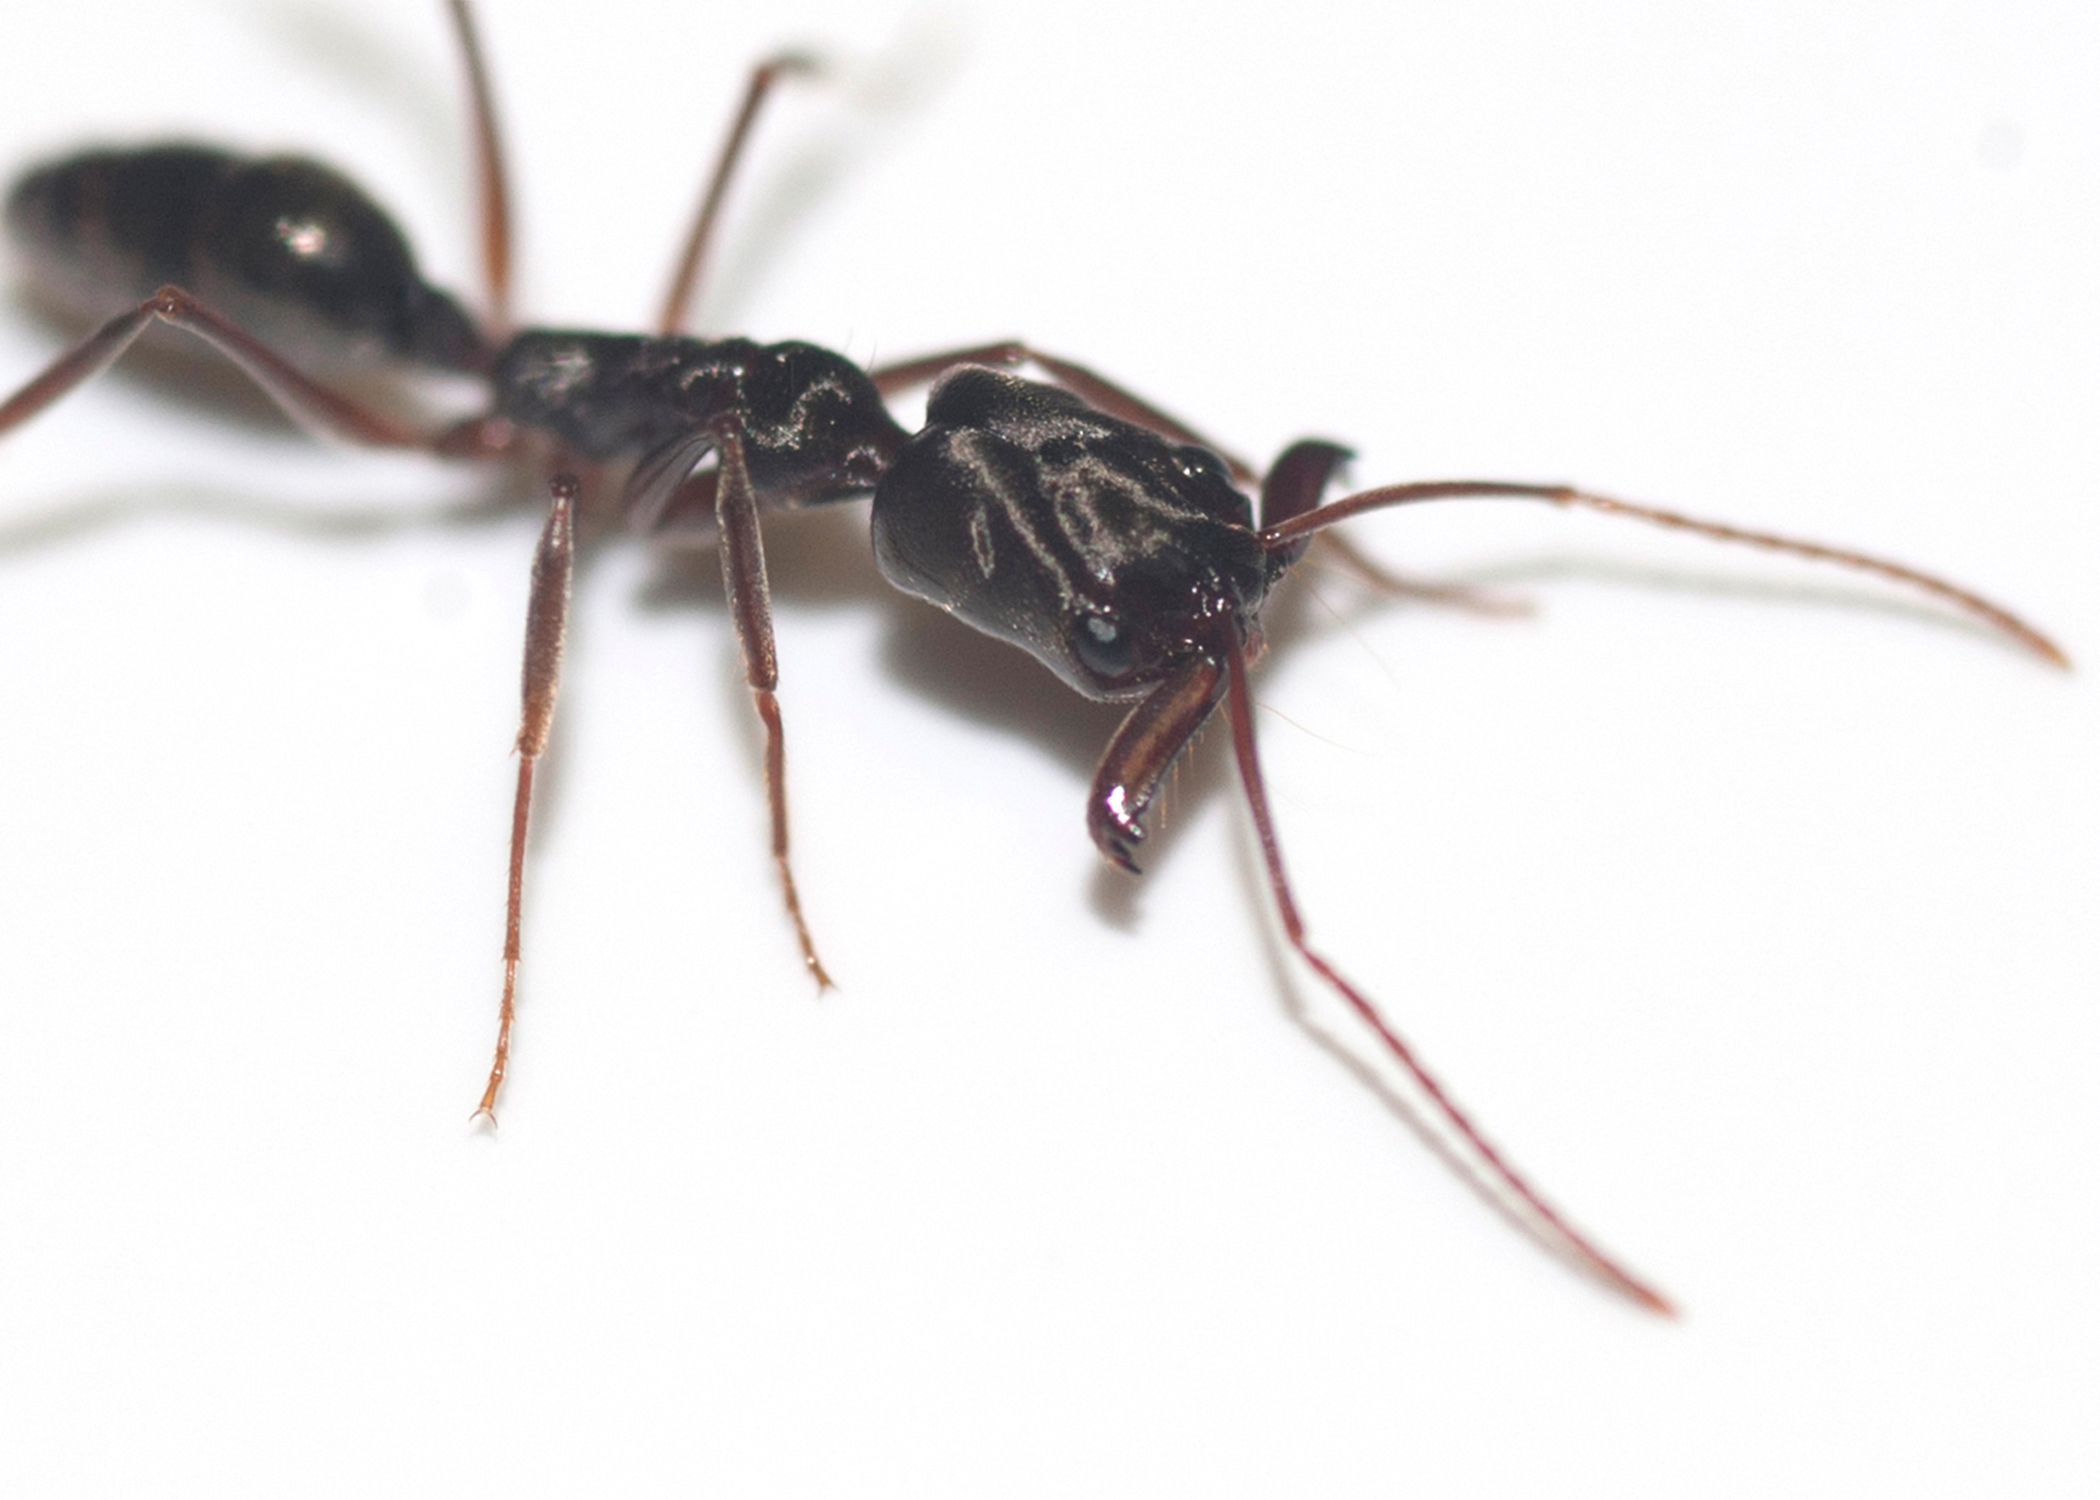
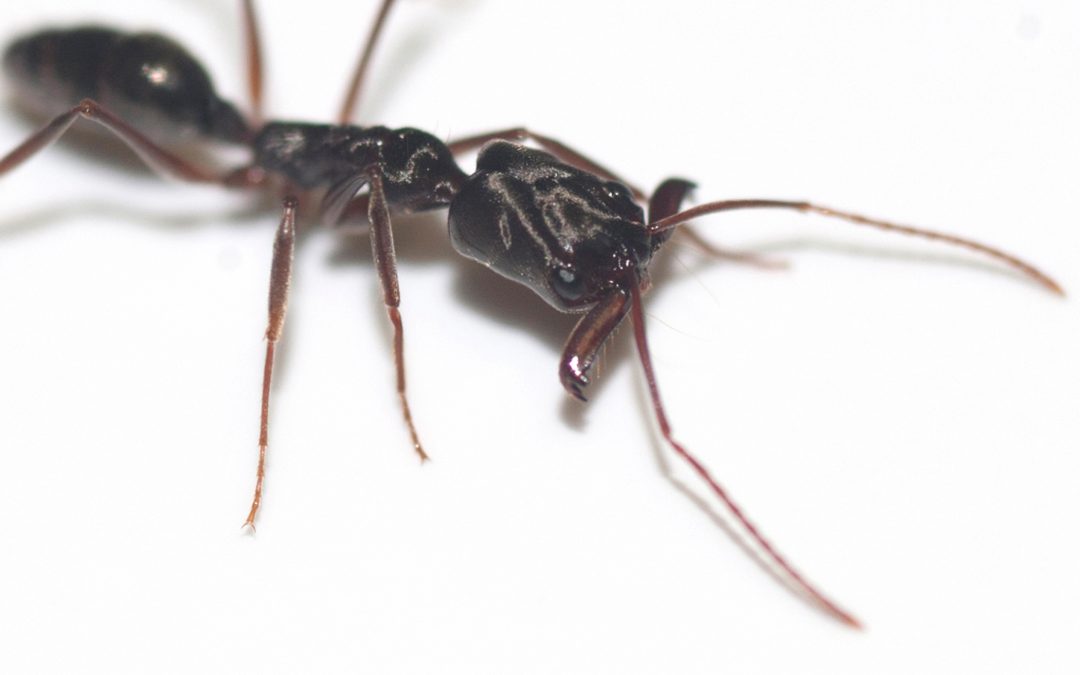
One of the interesting ants that I am seeing more commonly in landscape settings is the Trap jaw ant (Odontomachus sp.). This ant is so named because of it’s large mandibles (mouthparts) that spring shut capturing prey. These mouthparts can also be used as a defensive mechanism allowing the ant to spring away from something it encounters.
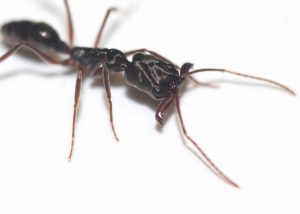
Trapjaw ants. Photo by MSU Ag Communications/Kat Lawrence
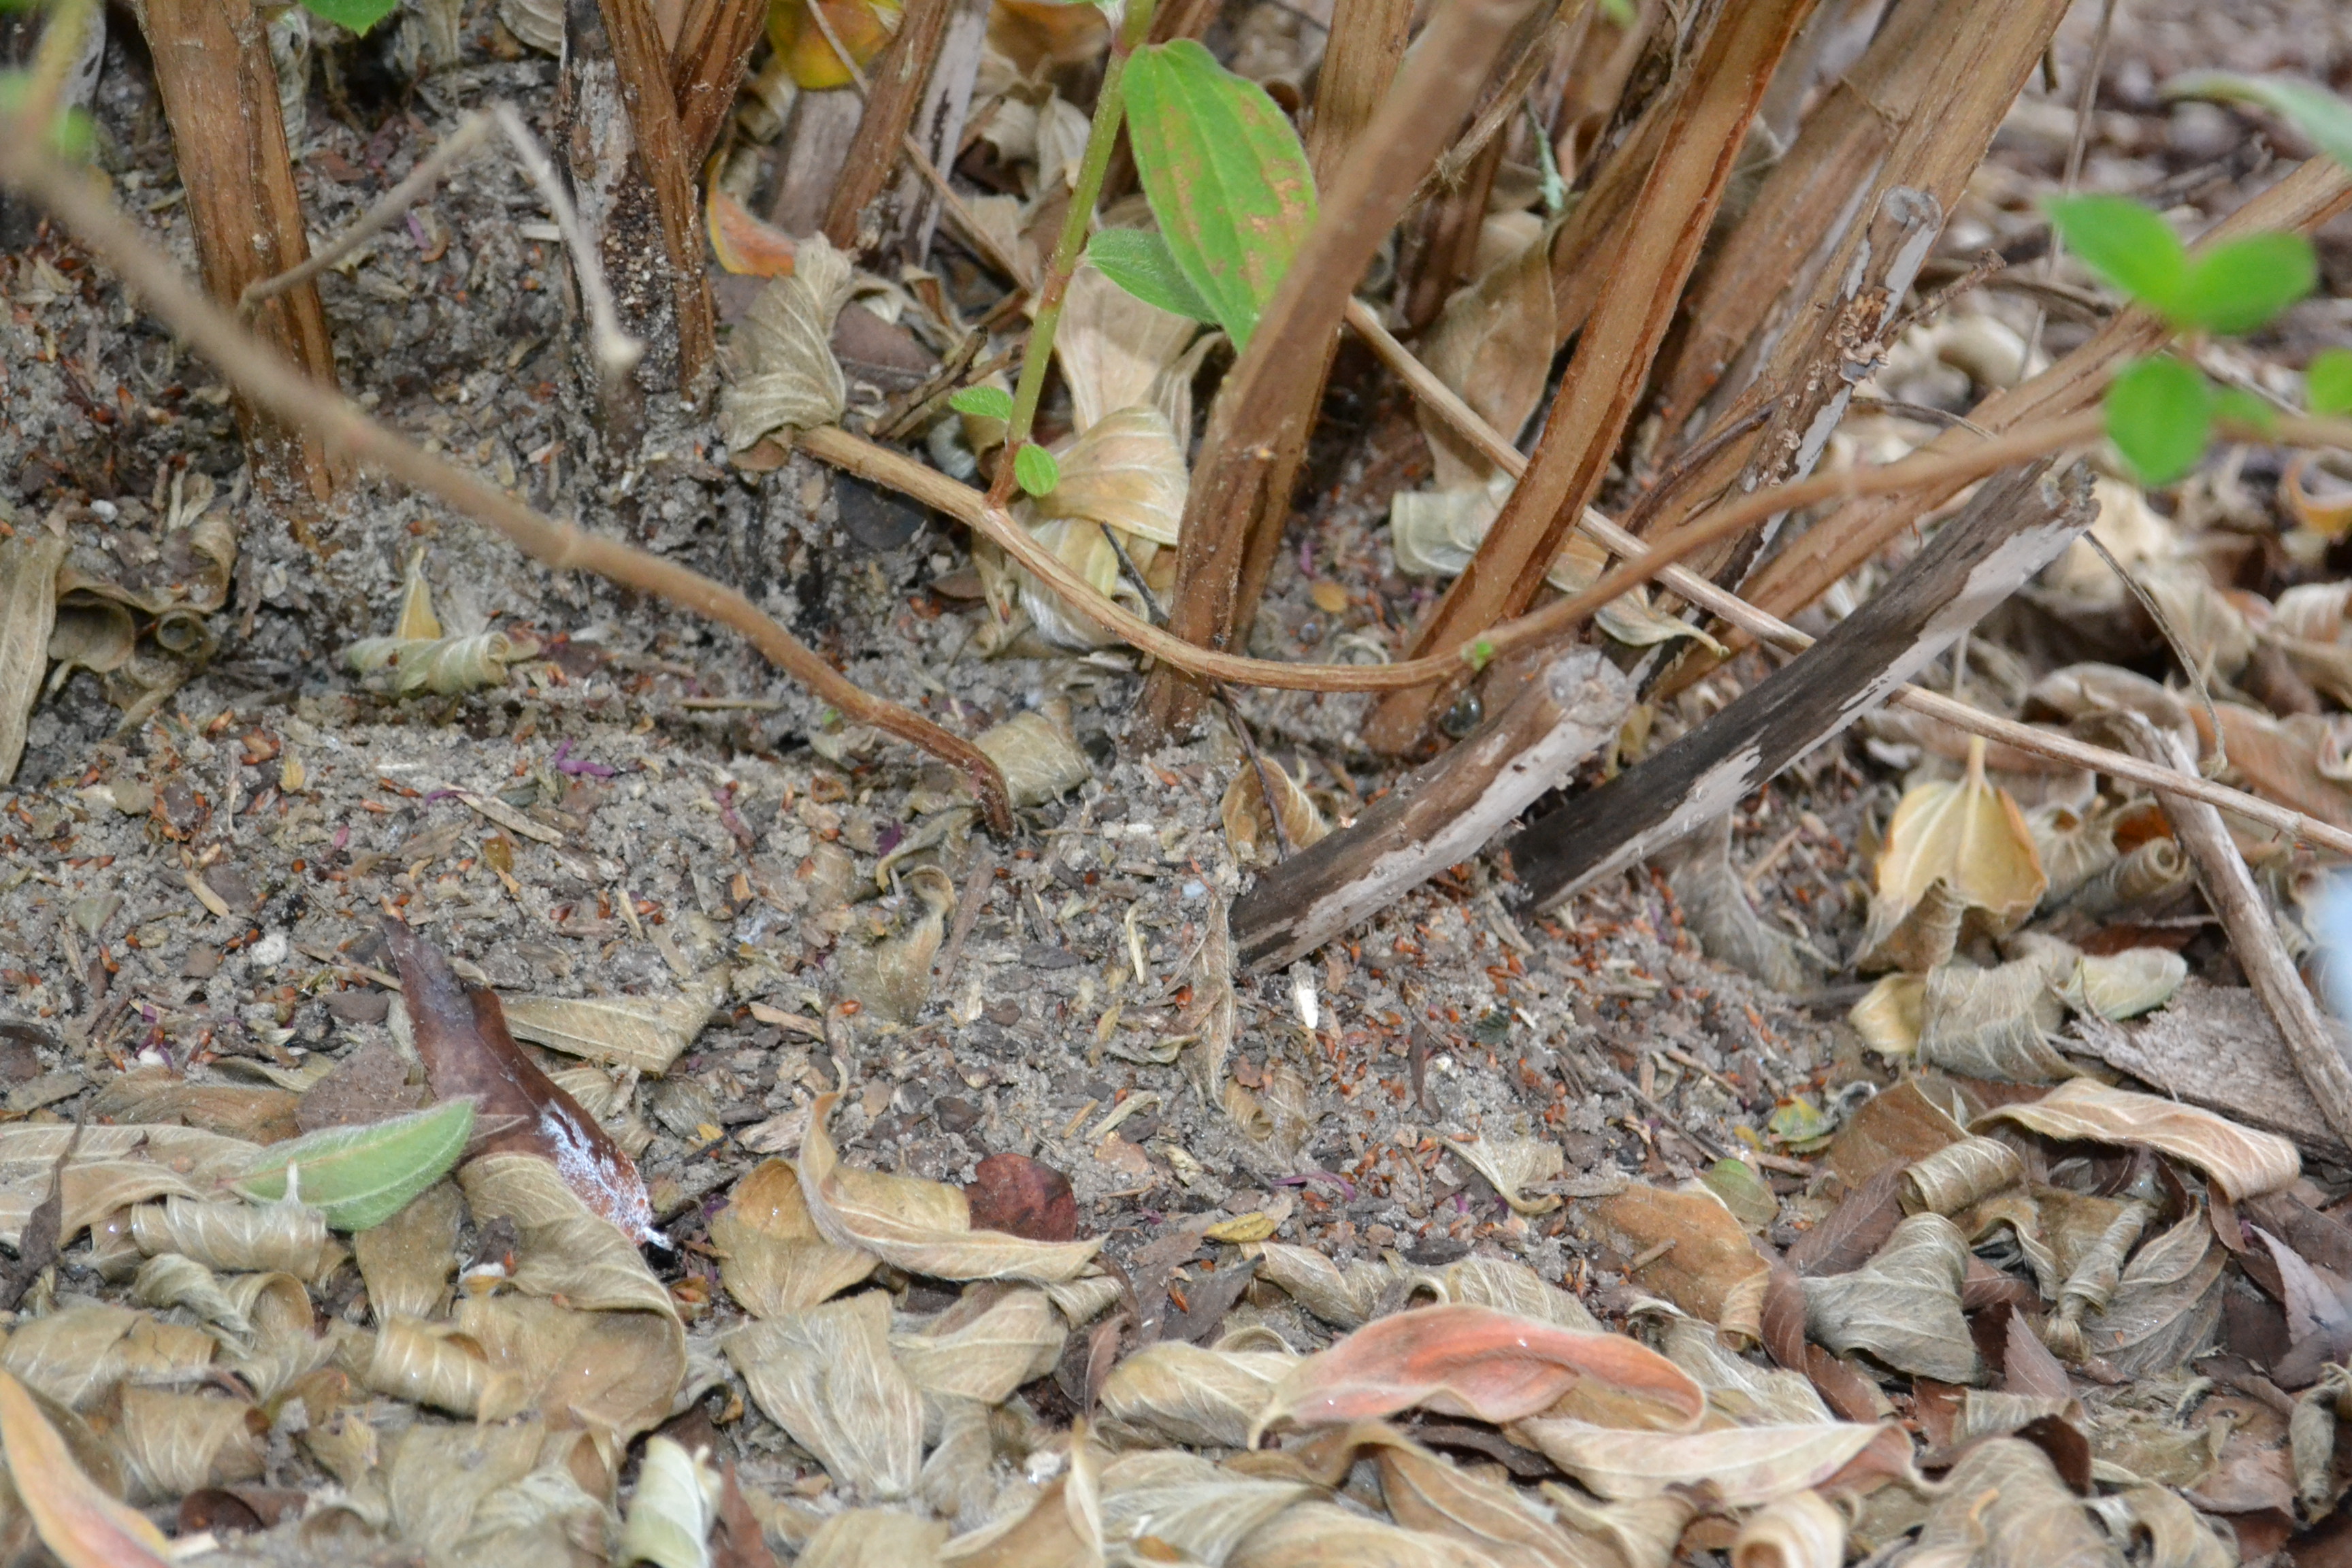
A nesting area is very recognizable after you have seen one because it looks like a collection of soil and small wood debris piled at the base of plants or old stumps. I have encountered nesting areas around living shrubs in many mulched areas of the landscape and under pots sitting on old tree stumps.

Nesting debris from the Trapjaw ants at the base of a Princess flower. Photo by Beth Bolles, UF / IFAS Extension Escambia County.
My first experience with the trap jaw ant was not very pleasant. I was working in a mulched area pulling a few weeds without gloves. I unknowingly disturbed the nest and received a pain sting similar to a paper wasp sting. The discomfort was short-lived and I personally did not have inflammation or inching a few minutes later. Of course, I identified the ant and have since become very familiar with recognizing nesting spots.
Although trap jaw ants are not native to our area, they do not rank in the same category as fire ants which are both economically and medically problematic. Since trap jaw ants are currently found in more natural areas of the landscape, homeowners should just be aware of their presence. Consider a pair of gloves or garden tools when rooting around in mulch. When a nesting area is disturbed, the large ants (about .5 inches) will be easy to observe as one of the more interesting ants we may encounter.