by Mary Salinas | Aug 25, 2017
After you have chosen the right fertilizer, fungicide, herbicide or insecticide to apply to your landscape, the question becomes: how much do I buy? Labels on these products will tell you how many square feet it will cover – so that leads to the next question: how many square feet of lawn do I have?
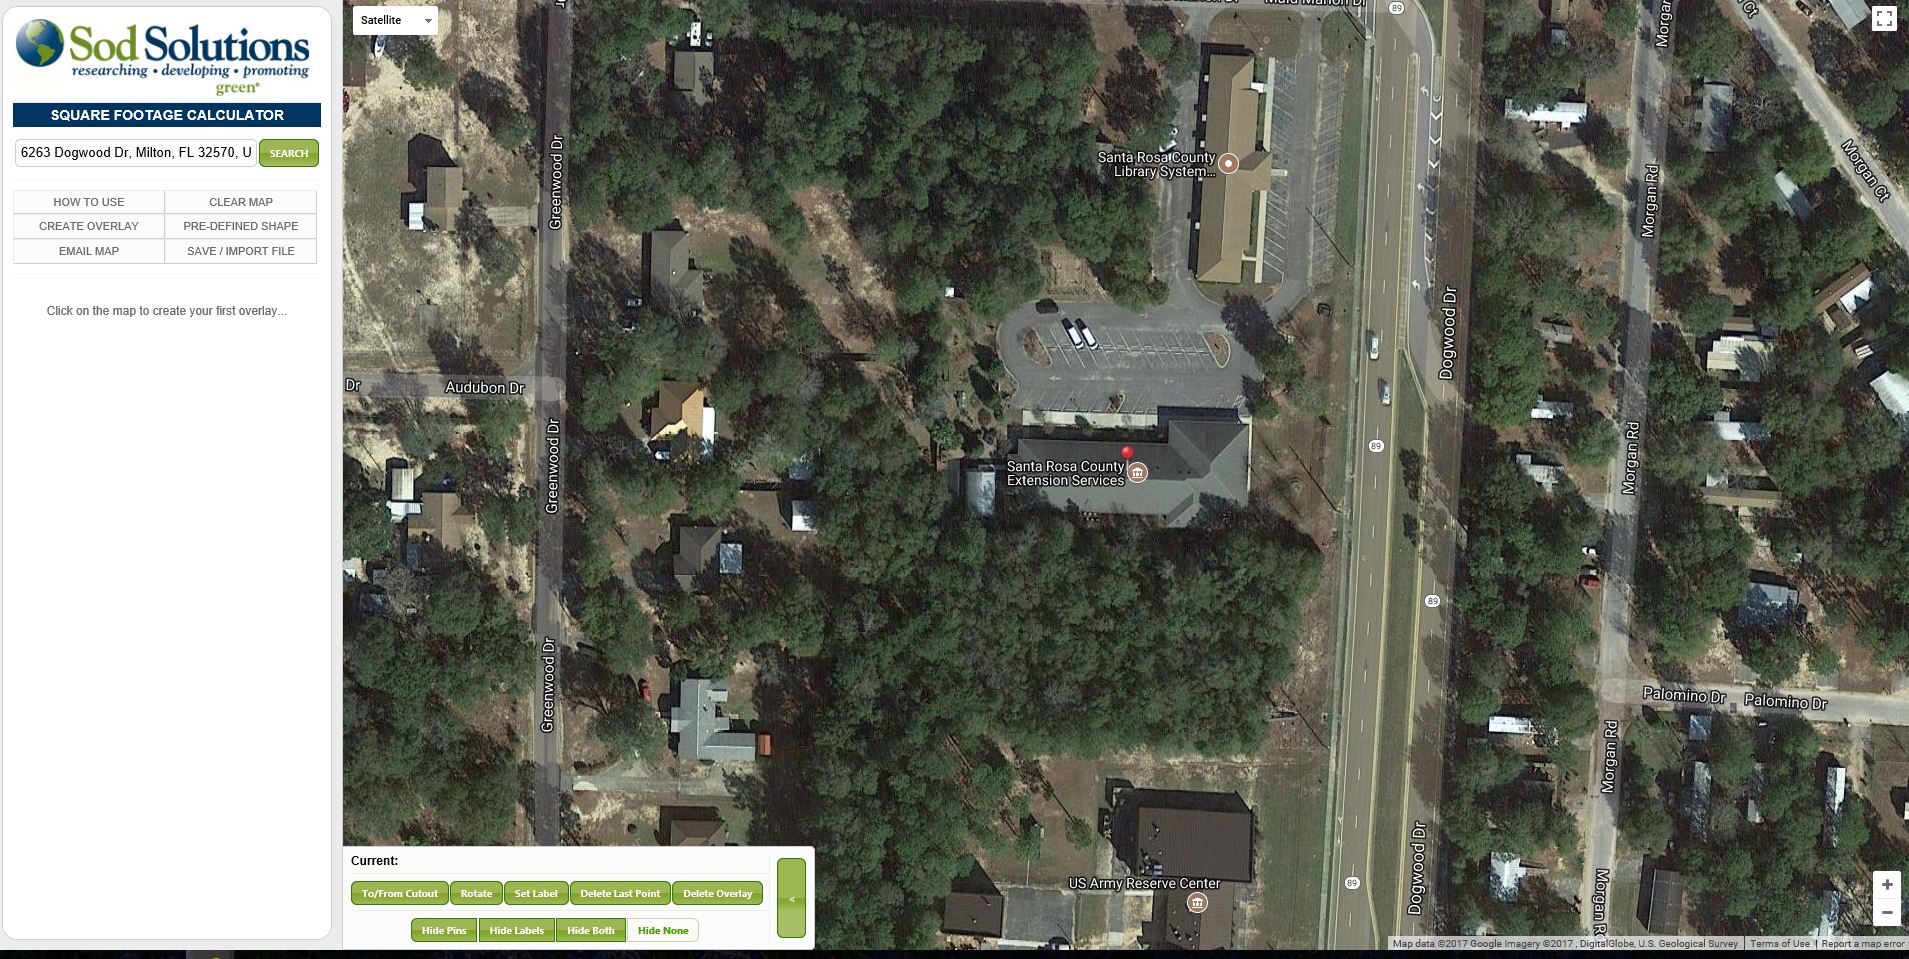
Here’s an easy way to determine your square footage. This online tool from Sod Solutions uses GIS mapping to figure it out from the comfort of your lounge chair.
On this front page, search for your address.

A bird’s eye view of your property comes up. Zoom in by using the + sign in the lower right corner of the screen.
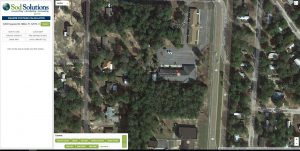
Plot points on the area you want to measure. This makes it so easy to measure those curved and odd-shaped areas!

The calculation of the area in square feet, yards, and acres is displayed on the left side. The perimeter is also calculated; that might be handy for determining the length of a fence line.
For more information:
Your Florida Lawn website
The Florida Fertilizer Label
Interpreting Pesticide Label Wording
by Larry Williams | Aug 18, 2017
A New Yorker cartoon shows a lady shopping a garden center bench for plants. She has three choices at three price points: annuals, $6; perennials, $10; eternals, $749.95.
No matter what the cost, plants don’t live forever. And if they did, what would they cost? They’d probably cost more than $749.95. Even though we know plants don’t live forever, we still don’t want a plant that we purchased, planted and cared for to die an early death.
All too often, I find myself in the position of reminding a person of this fact of life – plants don’t live forever.

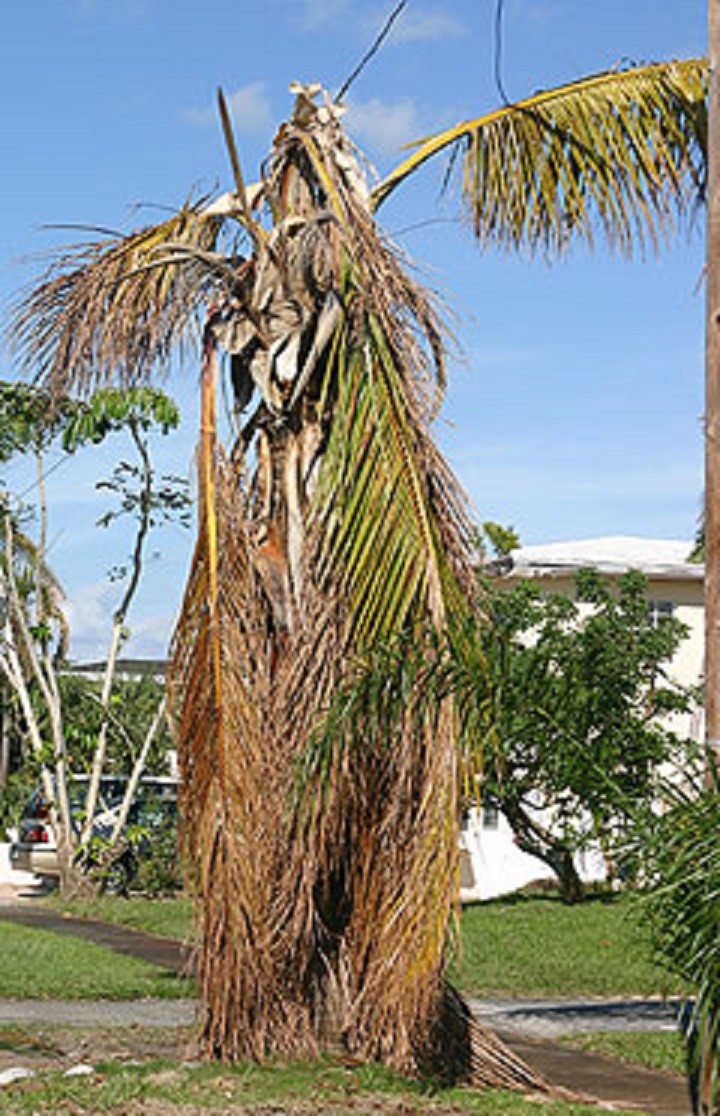
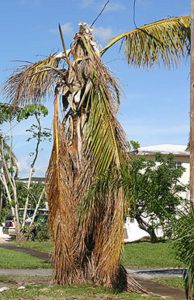
Palm in decline.
Credit: Edward F. Gilman, UF/IFAS.
There are extremes, though. The bristlecone pine can live thousands of years. There is one that was named Methuselah, which, at one time, was believed to be the oldest living tree on record approaching more than 4,800 years of age in central California. But in the 1970’s, offspring of Methuselah all died because they were sent to low-altitude locations. The parent tree’s location in the White Mountains is two miles above sea level.
Even though the bristlecone pine can live thousands of years, misplacing it (planted at too low an altitude) results in the tree living a fraction of its potential life. The point is to plant the right plant in the right place. Make sure the plant is well suited for Florida and to the site conditions: that wet site, that dry site, that salty site, that high pH site, that shady site, that sunny site, etc.
The second point is to have realistic expectations based on the plant species. Some plants genetically will live longer than others. One of our longest-lived tree species in Florida is the live oak. There are live oak trees in Florida that are hundreds of years old. But don’t expect a silver maple to make it that long. It’s a shorter-lived tree species. In Florida, a thirty-year-old silver maple is probably in a state of decline due to old age.
The third point is to learn how to correctly plant and maintain the plants you have. For example, most woody plants (trees and shrubs), will live a much shorter life simply from being planted too deep. And an over fertilized centipedegrass lawn will go into a state of decline resulting in the lawn living a shorter life.
Plant the right plant in the right place, learn what it likes and provide it. And when the plant reaches the end of its life, replace it.
Many homeowners spend more than $749.95 attempting to turn a short-lived plant into an eternal plant.
by Gary Knox | Aug 17, 2017
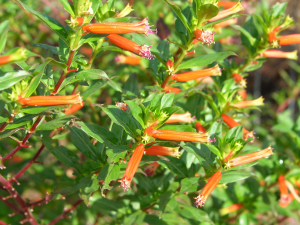
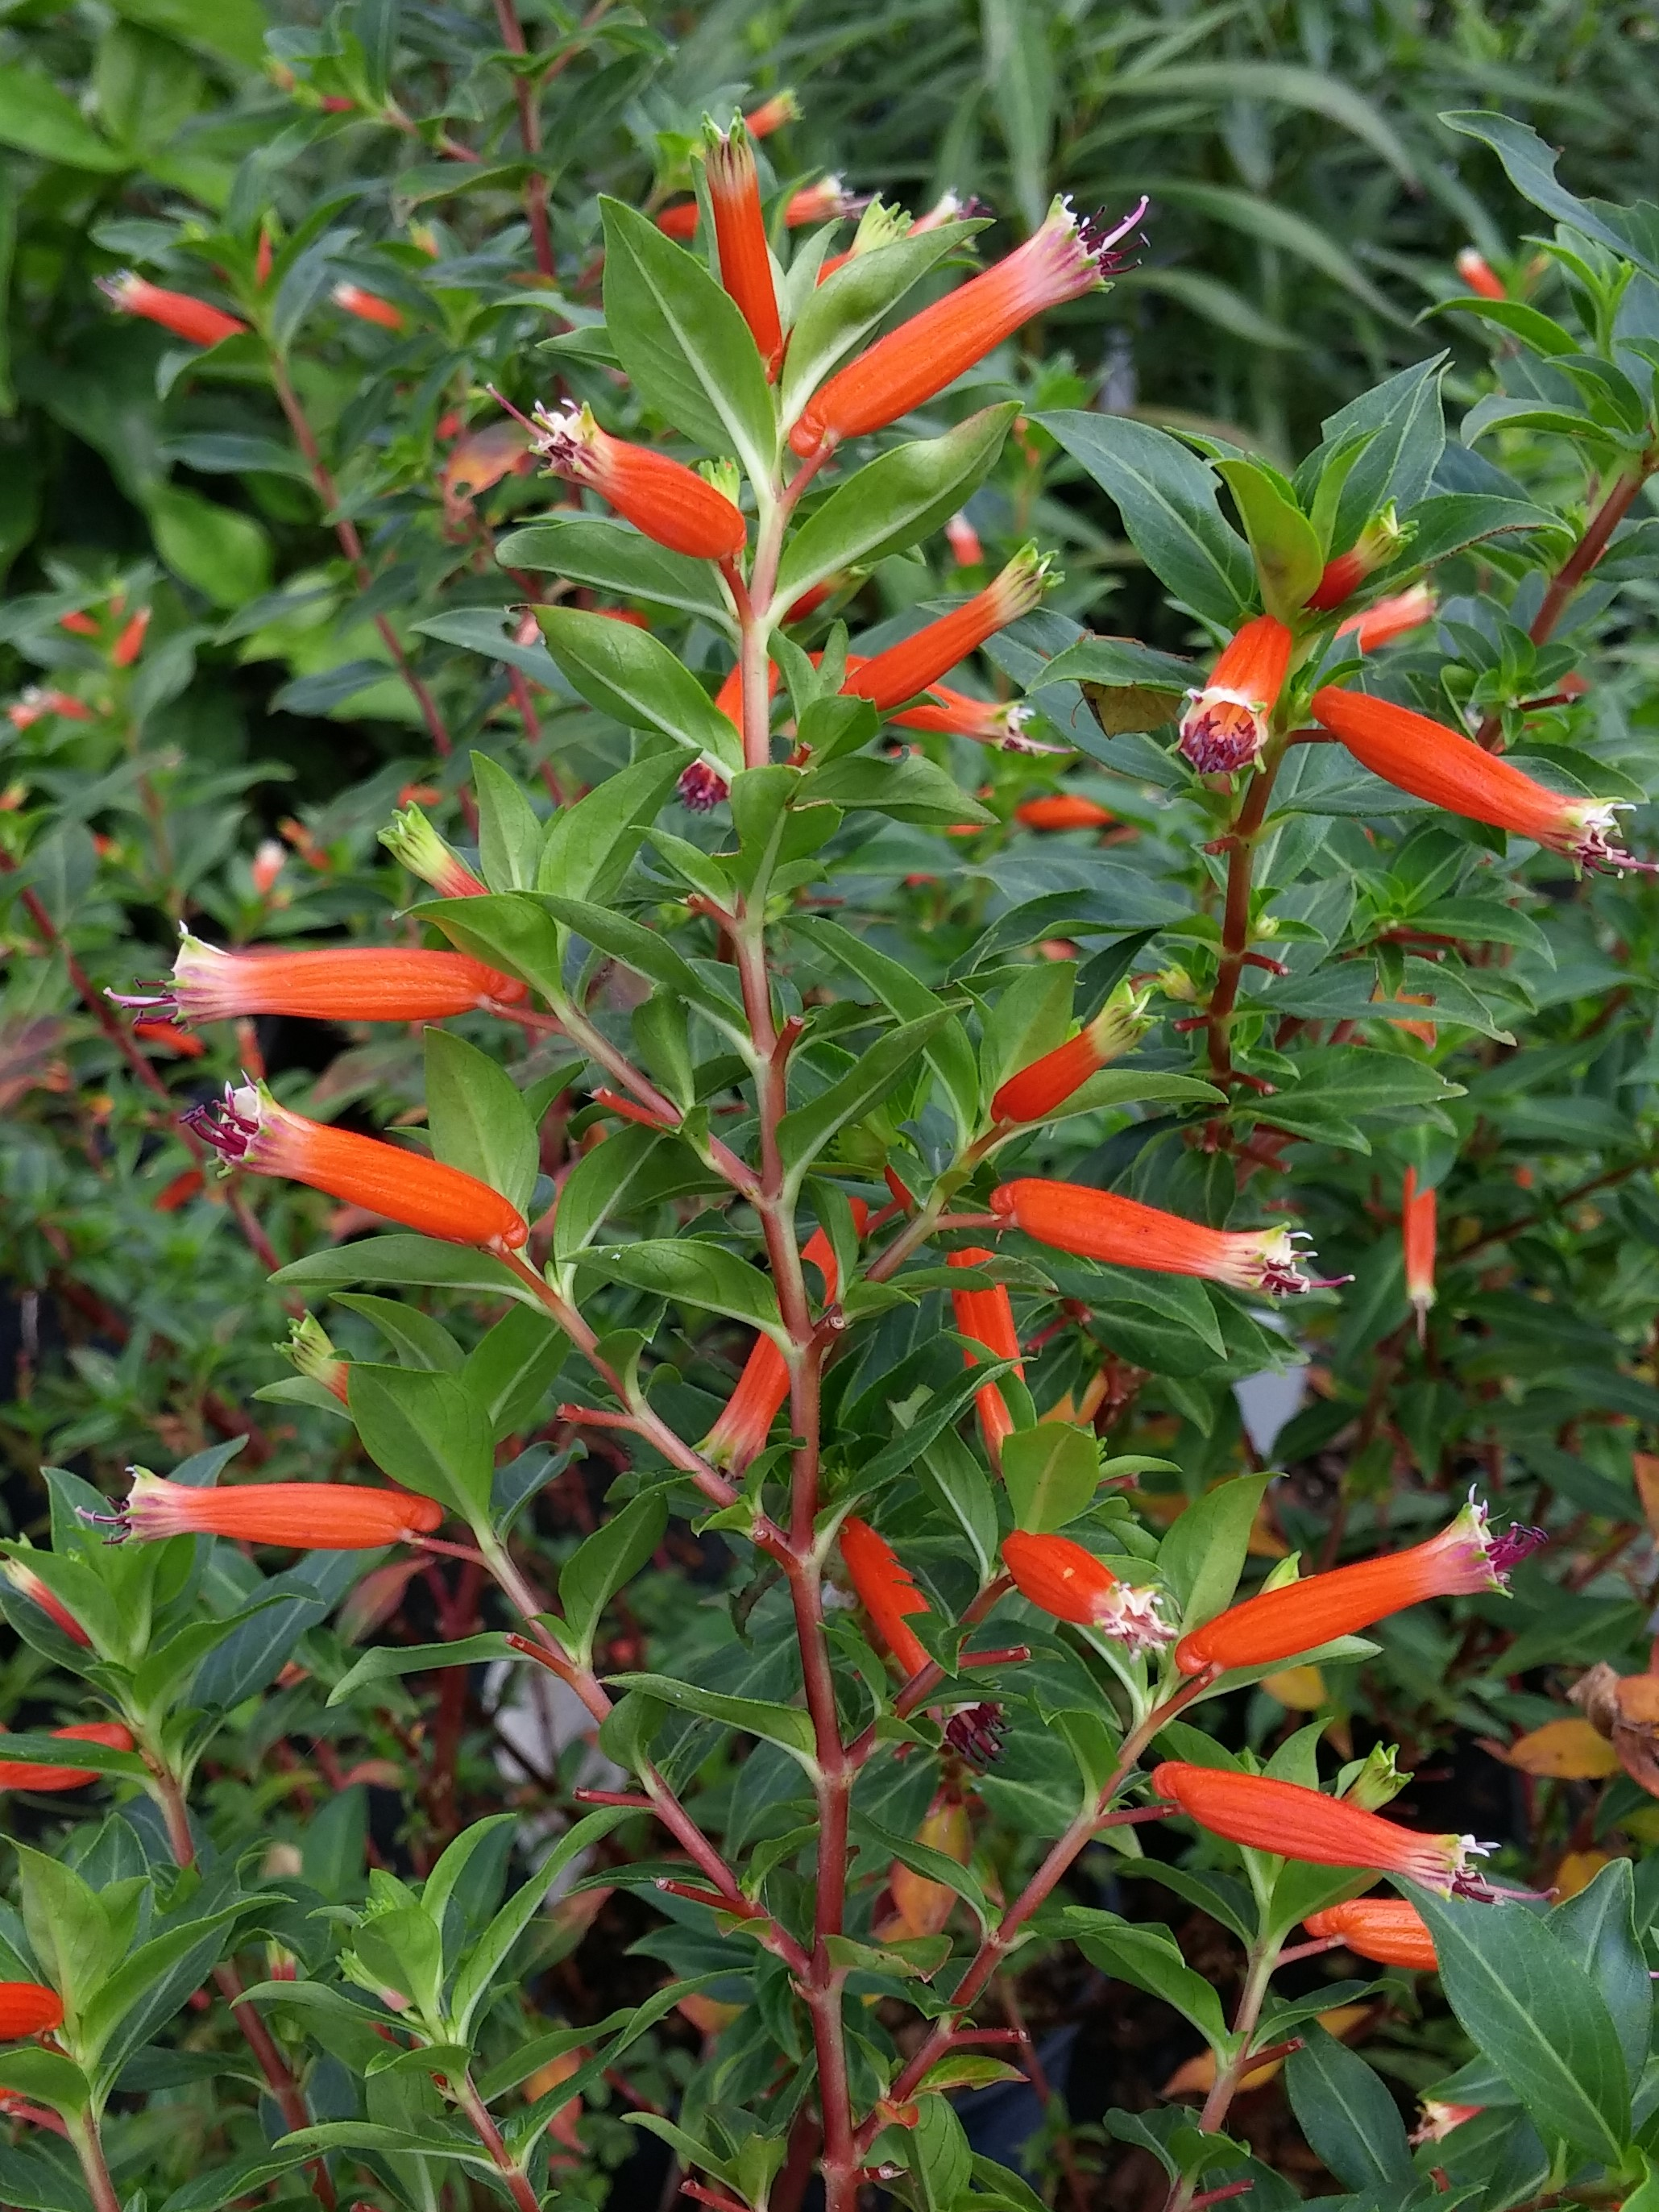
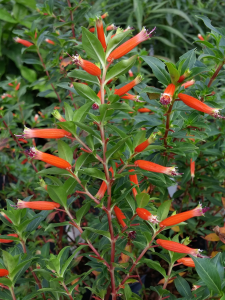
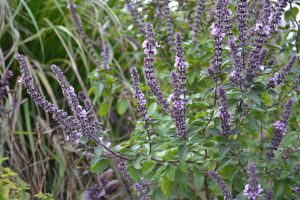
Cuphea ignea
Photo courtesy: Gary Knox
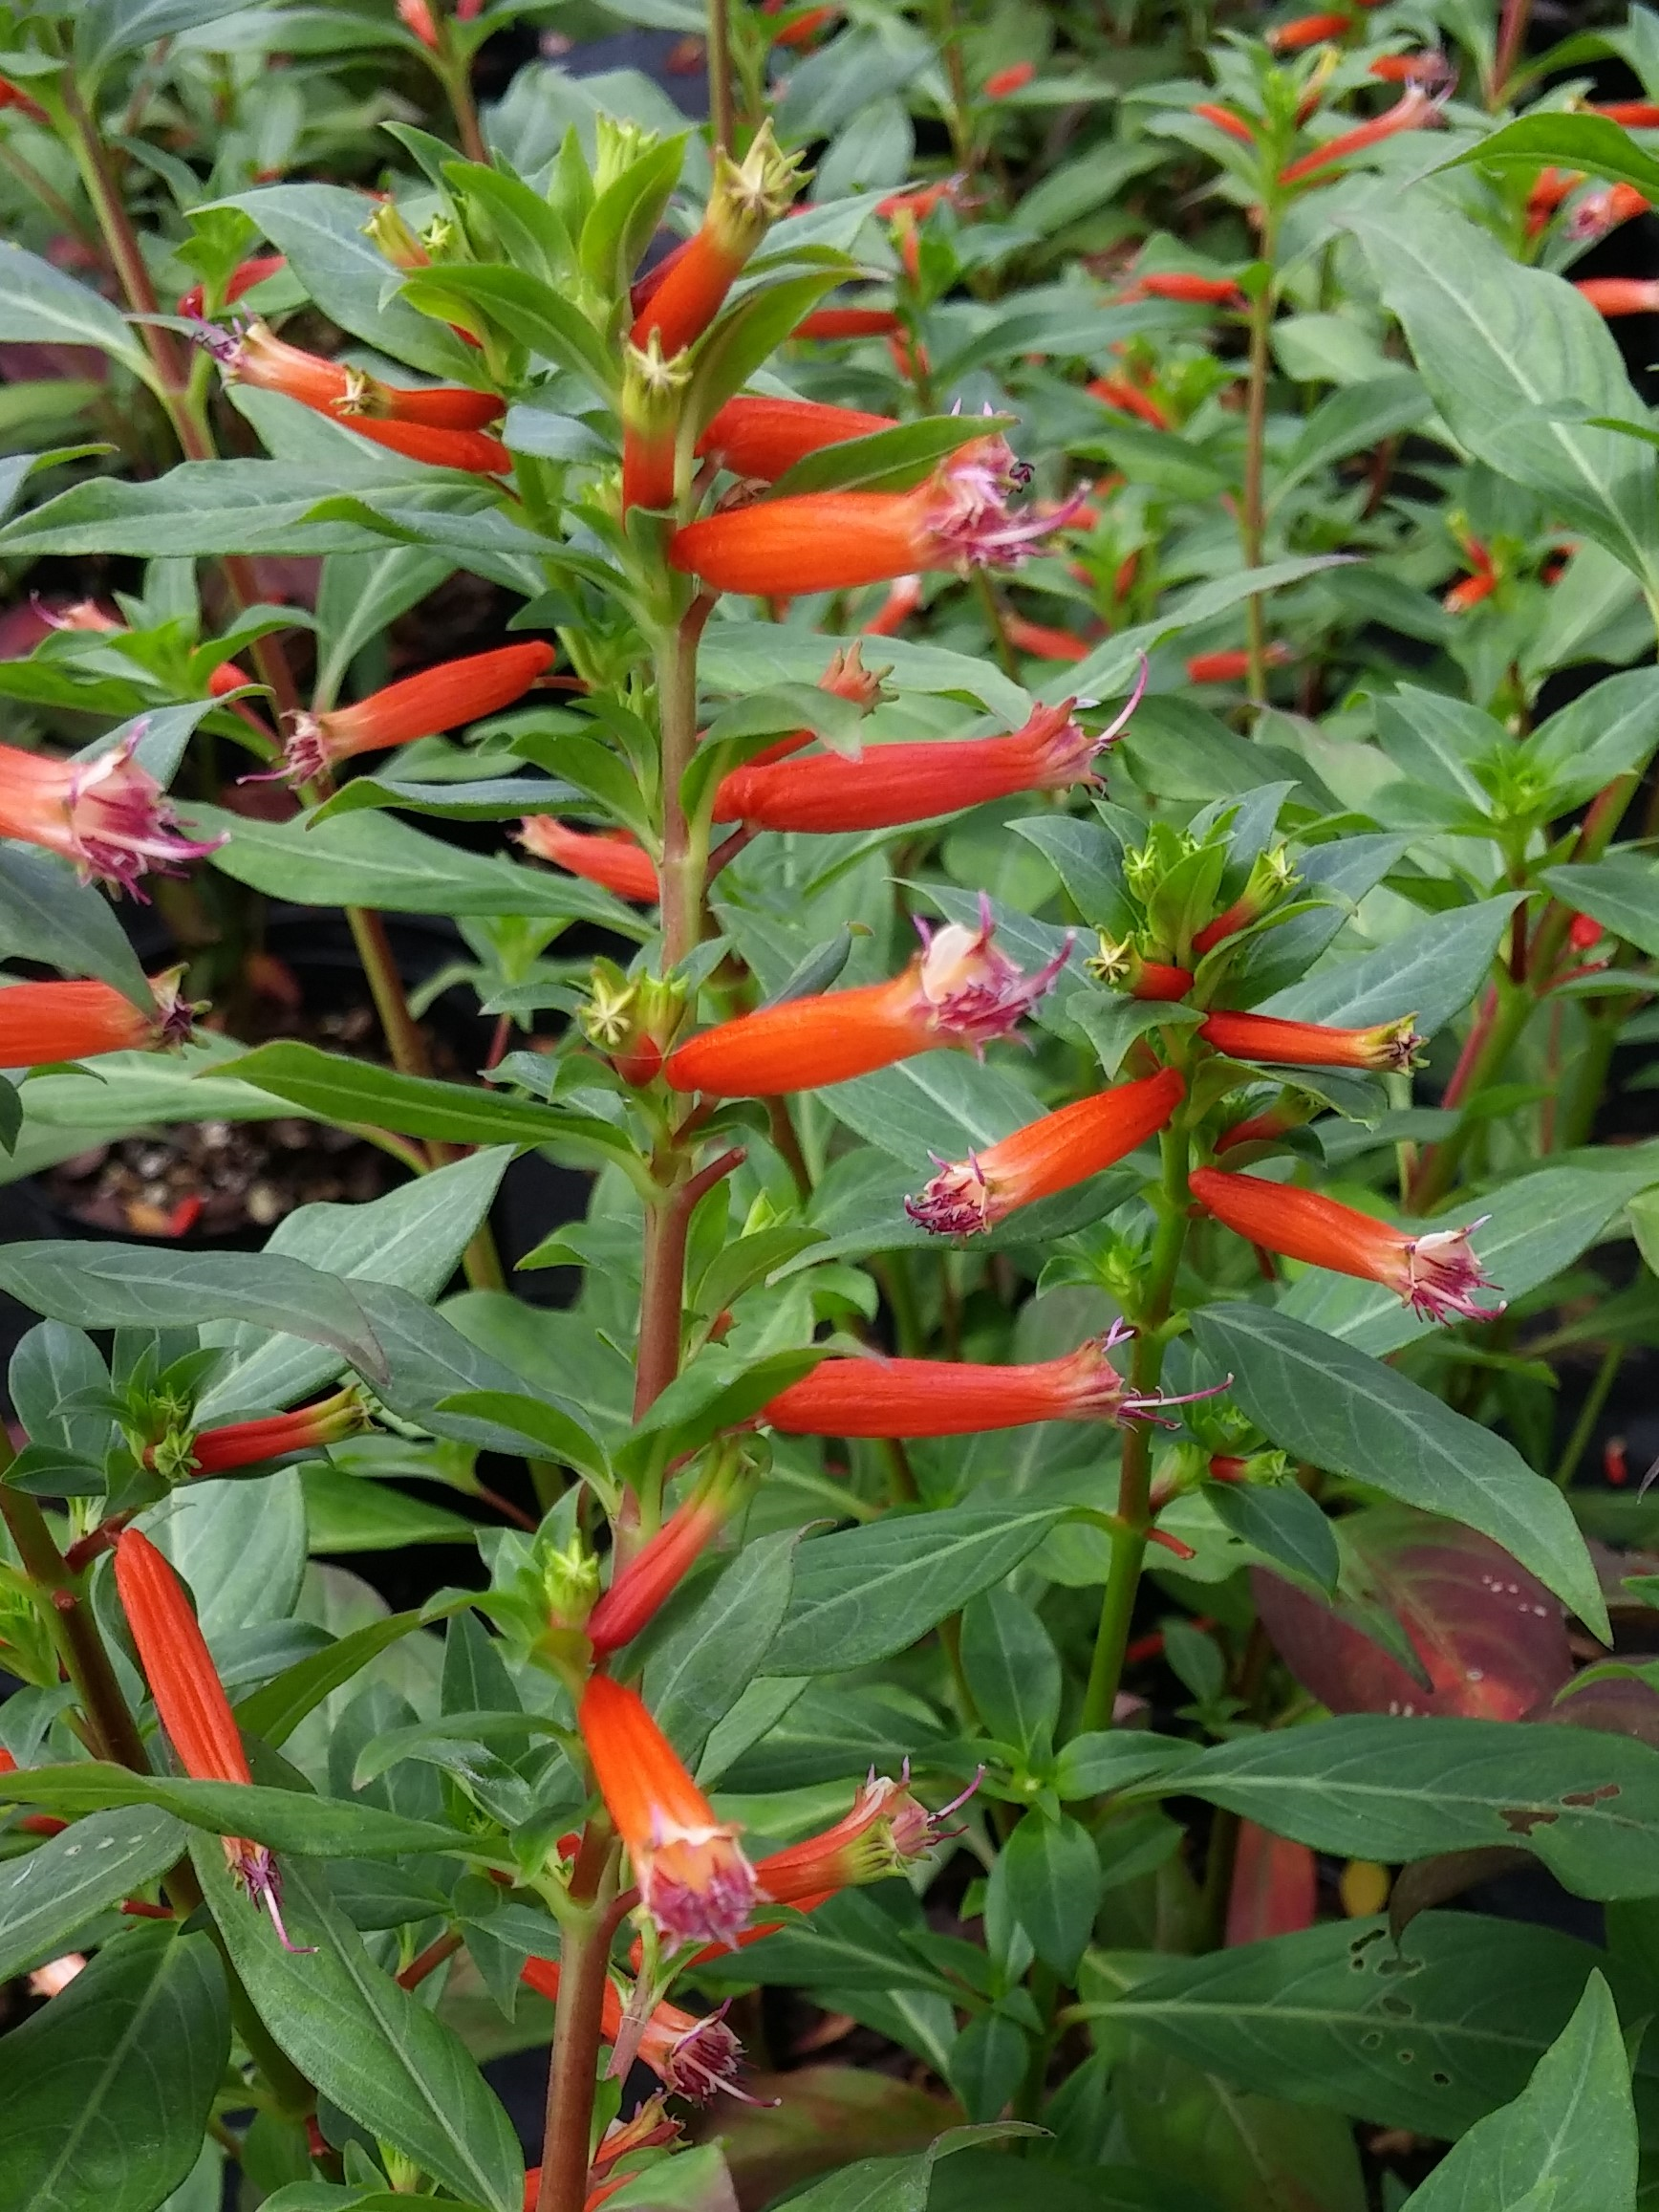
Cupheas are perennials that produce bright orange, red, yellow or purple flowers all summer and fall. Some species are called cigar plants due to their tubular, cigar shaped flowers tipped in red or yellow (like a lit cigar). Others are sometimes called firecracker plants because their cylindrical flowers are bright red or orange (looking like a firecracker). By any name, their nectar-filled, tubular flowers are widely known for attracting large numbers of hummingbirds, butterflies and bees. In addition, young stems of some species are reddish, further adding color and contrast to the usually narrow, lance-shaped green foliage.
As a group, cupheas grow best in full to part sun (the brighter, the better) and well-drained, moderately fertile soil. Cupheas are drought tolerant once established, but grow faster and larger with regular moisture and occasional fertilization. Their origins in warm climates allow them to thrive in heat, but likewise make some species sensitive to cold winters. Those that are frost tender along the Gulf Coast are best placed in a sheltered location in the garden. Cupheas are pest and disease resistant and are not invasive in Florida. They are not truly deer resistant, yet reports suggest cupheas are not favored by deer.
Cupheas are great summer performers in bright, hot and dry locations. Flowering begins in summer and continues through fall until short days and cool weather reduce flowering or frosts cause dieback. Along the Gulf Coast, cool winter weather slows them down, so re-growth doesn’t occur until mid to late spring, and flowering usually doesn’t begin until days and nights are warm. Growth and appearance of many cupheas are improved if plants are pruned or cut to the ground in late winter.
Over 200 species of Cuphea are native to Mexico and the warm-temperate and tropical Americas. Of these and their hybrids, the cupheas listed below are great summer-flowering perennials for the northern Gulf Coast.
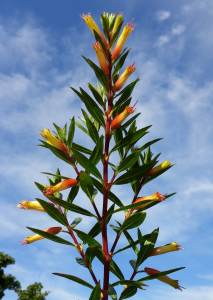
Cuphea micropetala
Photo courtesty: Gary Knox
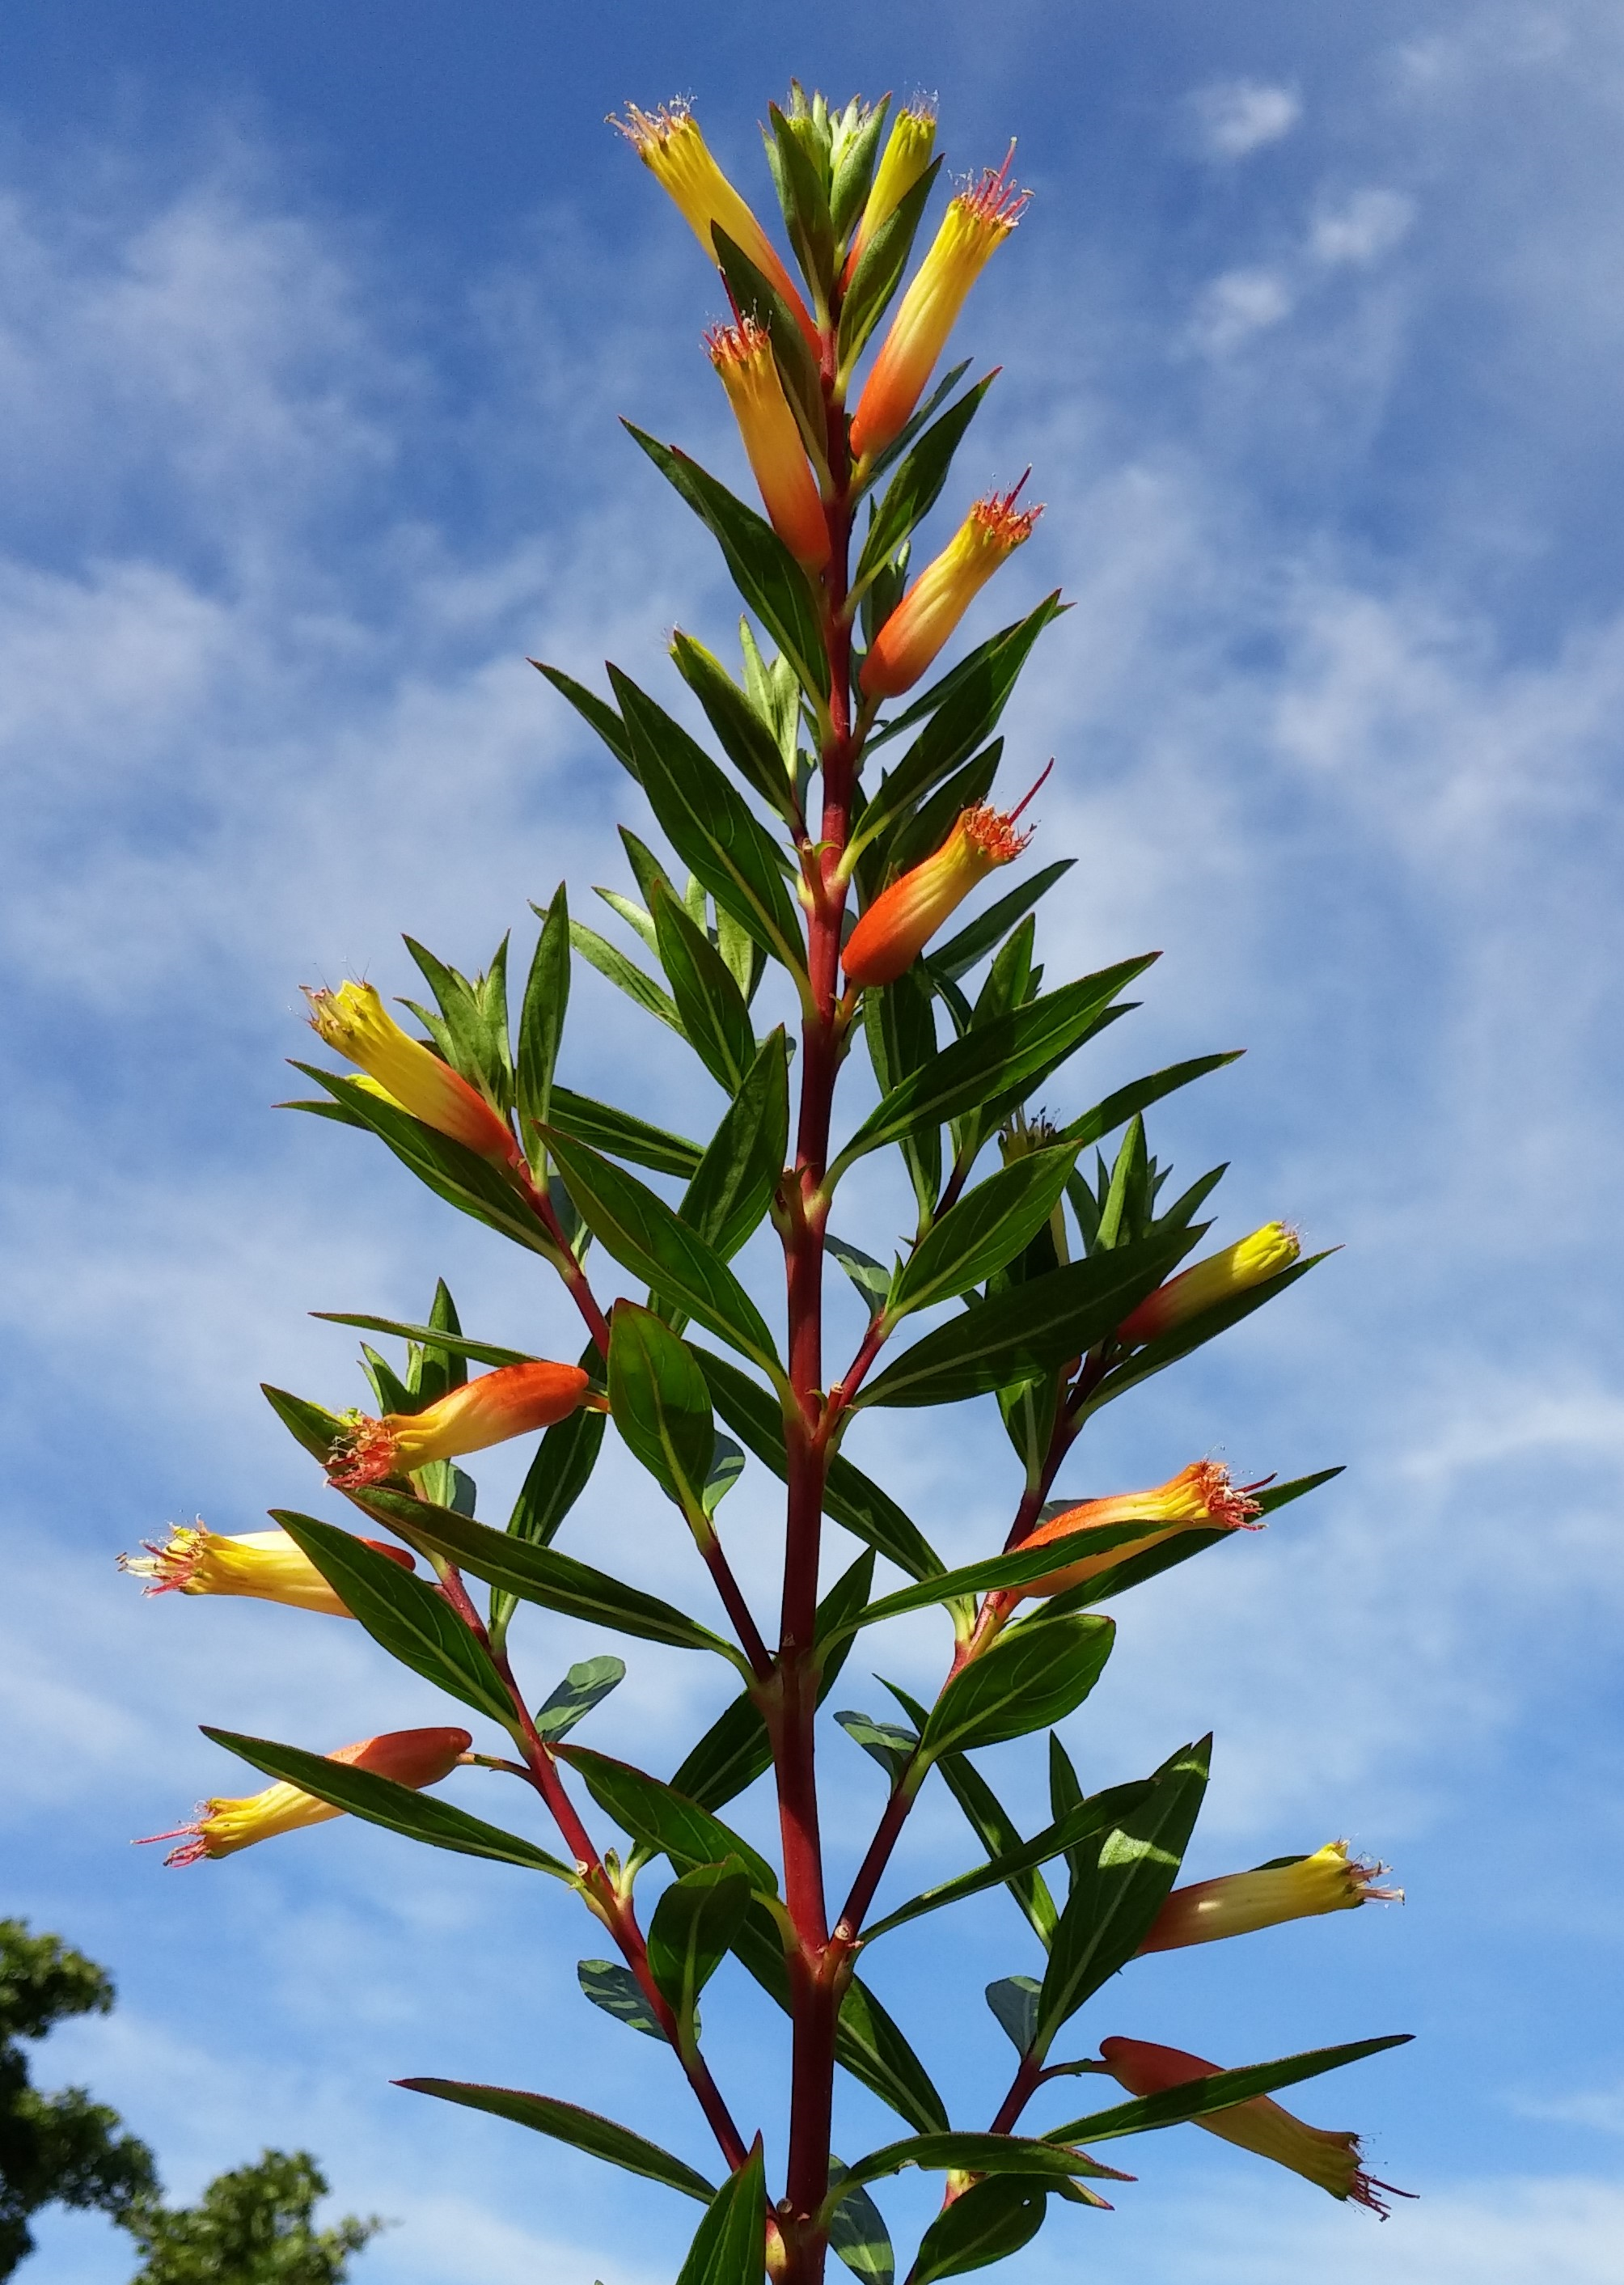
Cigar Plant (Cuphea ignea)
This fine-textured plant produces red to orange tubular flowers about an inch long. This cigar plant is hardy to about 20°F. It grows about 2 feet tall and 3 feet wide along the Gulf Coast, though it would be a larger, evergreen shrub in warmer climates. This cuphea tends to have lanky growth, so occasional summer pruning will stimulate branching which results in more dense growth.
Cigar Plant or Candy Corn Plant (Cuphea micropetala)
Flowers are 1.5 inches long, emerge pale yellow and gradually turn orange from the base upwards, offering a colorful, two-tone effect. Foliage is hardy to 25-30°F and this cigar plant is root hardy to at least 15°F. Stems should be cut back to ground level in late winter to keep the plant tidy. Clumps spread slowly outward by rhizomes, and the plant will reach 3 feet tall and wide along the Gulf Coast.
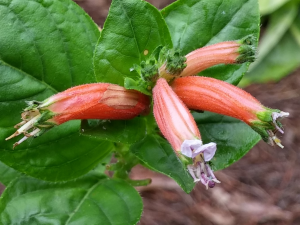
Cuphea schumannii
Photo courtesy: Gary Knox
Orange Cigar Plant or Schumann’s Cuphea (Cuphea schumannii)
This sprawling, floriferous cigar plant prefers moist, well-drained soil to thrive. Barrel-shaped, 1- to 1½-inch blooms are orange and yellow and sometimes have small purple petals at the tips. Flowers cover the branch terminals in the heat of summer and into fall. This plant is hardy in Zones 8 to 9 (at least down to the mid 20s°F). Unlike many other cupheas, leaves of orange cigar plant are oval- to heart-shaped. Stems grow 2 to 3 feet tall and readily flop or fall over. Plan to give orange cigar plant lots of room to sprawl through the garden!

Cuphea ‘David Verity’
Photo courtesy: Gary Knox
‘David Verity’ Large Firecracker Plant (Cuphea ignea × micropetala ‘David Verity’)
This floriferous hybrid produces flowers that are dark orange with a short yellow-orange flared tip and purple filamentts. Well-adapted to the Gulf Coast, this plant is foliage hardy down to 25-30°F and root hardy to at least 15°F. In Zone 9 this plant will grow as an evergreen shrub up to 4 to 5 feet tall and wide, but it will be smaller in areas where frost or freezes occur. This selection is believed to be a hybrid between Cuphea ignea and C. micropetala that was given in the mid 1970s to David Verity, then the manager of the UCLA Mildred Mathias Botanic Garden. It was subsequently named for him when later brought into commercial production.
‘Vermillionaire®’ Large Firecracker Plant (Cuphea ‘Vermillionaire®’)
This new hybrid appears to be a superior cuphea because it grows as a naturally compact plant that produces more flowers than other selections. ‘Vermillionaire®’ grows about 24 inches or more tall and wide with a compact, mounding habit. Orange tubular flowers are produced continuously until late fall. This cuphea is too new to know the full extent of its hardiness, but it is expected to be a perennial in Zones 8 and higher.
Mexican Heather (Cuphea hyssopifolia)
Unlike the previous cupheas, this plant has small purple flowers, and some selections sport white flowers. Another difference is Mexican heather’s finely textured, bright green leaves. Gulf Coast Zone 8 plants are usually killed to the ground in winter, often recovering by summer but resulting in a compact plant growing less than 24 inches tall and wide. In Zones 9 and higher, Mexican heather is a larger-growing semi-evergreen tropical shrub. Reported pests are leaf-chewing beetles (Altica and Colaspis spp.) and the twig-dwelling lesser snow scale (Pinnaspis strachani). Mexican heather works well for edging beds or sidewalks, helping to define and soften pathways. Cultivars include Allyson, Lavender Lace, Purple Nurple™ and the white-flowered Monga (Itsy Bitsy° White) and ‘White Whispers’.
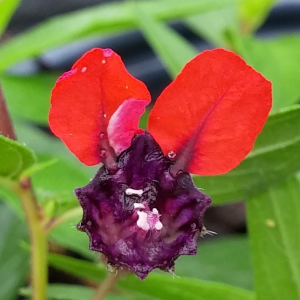
Bat-Faced Cuphea
Photo courtesy: Gary Knox
Bat Face Cuphea (Cuphea llavea)
Each 1-inch flower consists of a purple tube lipped with two red, upright lobes. By viewing the flower with its tip facing you, it takes only a little imagination to see the two red lobes resemble large “ears” above the purple “face” of a bat, hence the name. Along the Gulf Coast, bat face cuphea grows mound-shaped 8 to 24 inches tall and wide, depending upon the selection. It is very heat and drought tolerant but requires better drainage than the other cupheas. Bat face cuphea is evergreen down to the upper 20s°F and root hardy into the lower 20s°F. Improved forms of bat face cuphea include the cultivars, Flamenco Samba, Georgia Scarlet, Mellow Yellow, Miss Priss, Tiny Mice®, Sriracha™ Pink, Sriracha™ Violet, Torpedo, Vienco° Lavender and Vienco° Red.
by Sheila Dunning | Aug 17, 2017
If you are one of the many that have taken advantage of the frequent rain in order to establish a new lawn, keep an eye open for “grass worms”. Though truly caterpillars, not worms, these destructive, chewing insects can wreak havoc on new sod.

Sod Webworm Photo by: Lyle Buss UF
Tropical sod webworm larvae are destructive pests of warm season turfgrasses in the southeastern U.S. especially on newly established sod. Larval feeding damage reduces turfgrass aesthetics, vigor, photosynthesis and density, which is very evident on finer-bladed grasses such as bermudagrass and zoysiagrass. Adults, a dull brown colored moth about ¾ inch long, rest in sheltered and shrubby areas during the day and are active at dusk. Females deposit clusters of 10-35 eggs on the upper surface of grass blades. The eggs hatch in 3-4 days and develop from a 1 mm long caterpillar to one over 11 mm long through six instars within 21 to 47 days, depending on temperature. Larval feeding occurs at night, leaving the grass looking ragged, shortened and missing.
Control should be against damaging larvae, not the flying moths. However, insecticidal soap applications to moth harboring areas can reduce re-population frequency if such areas are located. Soil-drenching soap flushes can be used to find the caterpillars, especially in dry and hot grass areas. Bacterial-based insecticides will control sod webworm caterpillars without impacting beneficial species as long as they are applied with each flush of grass growth.
Excessive fertilizing will lead to caterpillar outbreaks in lawns. Newly installed sod is usually rich in nutrients and rapid growing, which makes it very attractive to sod webworms. Grass installation over the summer months should be immediately followed by sod webworm treatment.

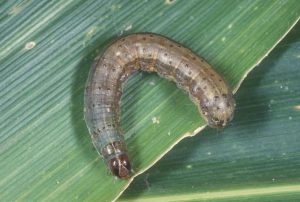
Fall Armyworm Photo by: Lyle Buss UF
Fall armyworms are also attracted to newly installed sod. They feed any time of the day or night, but are most active early in the morning or late in the evening. The 1 ½ inch long gray and white moth lays about 1,000 eggs in multiple masses on any vegetation. Two to 10 days later, the small caterpillar hatches and begins to grow to nearly 2 inches long over a two week period. The fall armyworm is easily recognized by its dark head marked with a distinct pale-colored inverted Y and the long black stripe running along each side of its body. These aggressive feeders “march” rapidly across grassed areas consuming every above-ground plant part. While bacterial-based insecticides will reduce the numbers, control of armyworms usually requires synthetic insecticides. Diligent inspection and early pesticide application is critical to establishment of new sod installed during the summer months.
by Beth Bolles | Jul 5, 2017

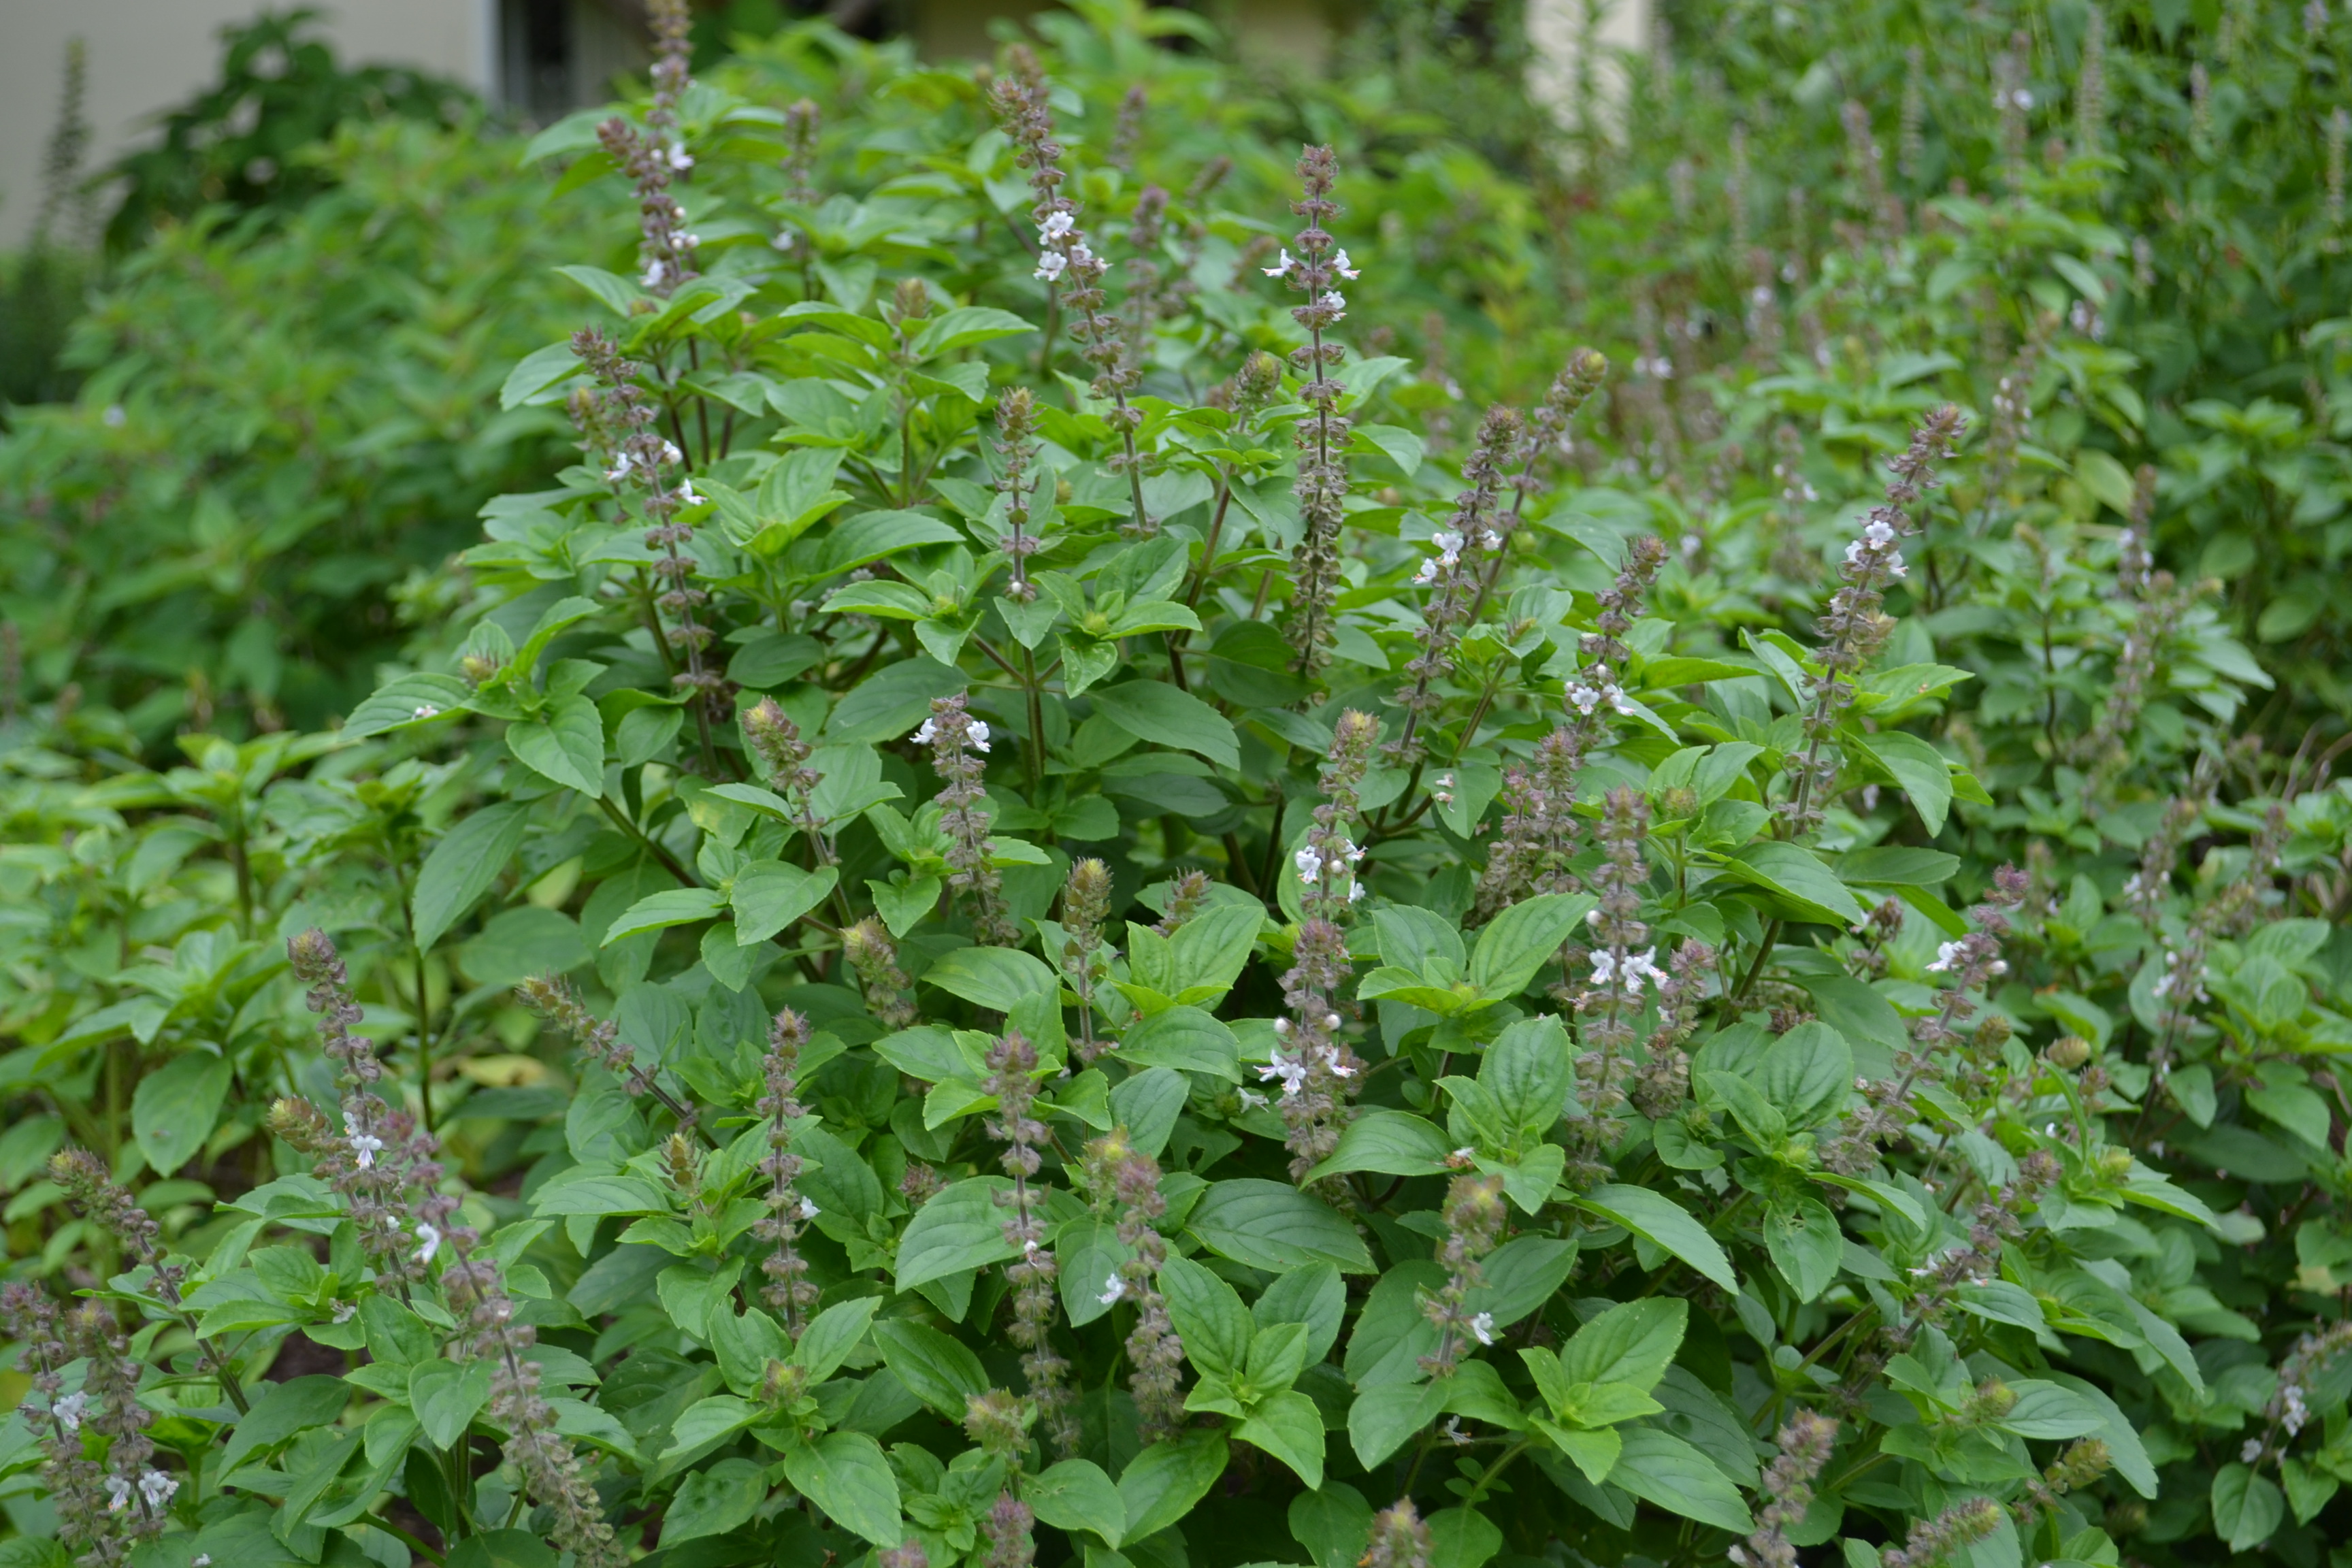
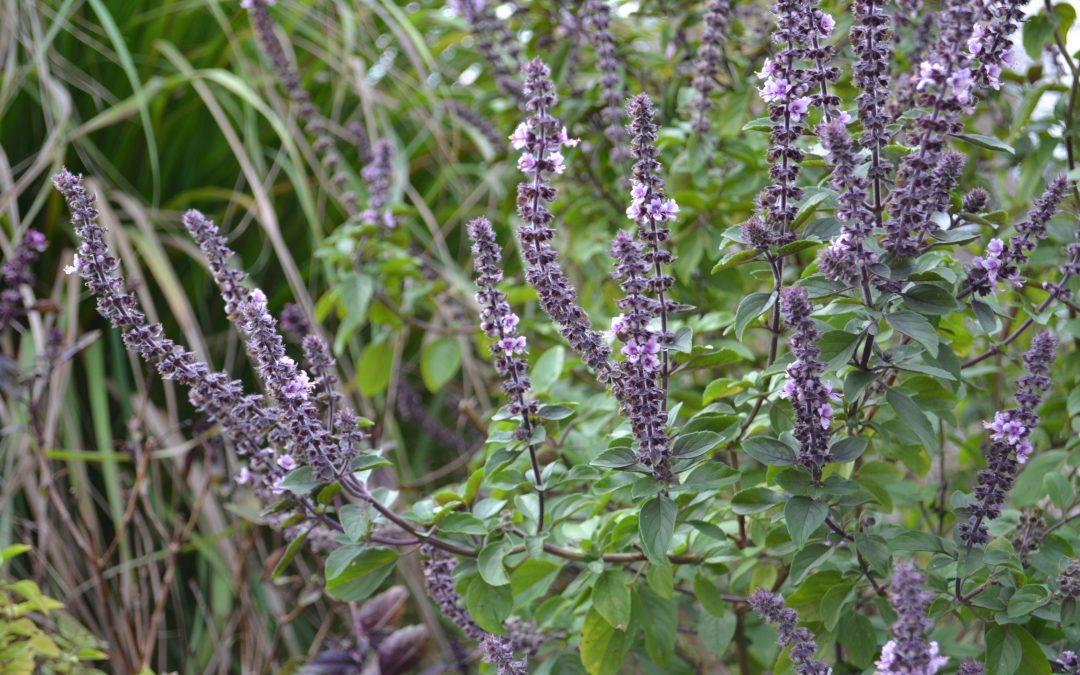
Many bees and beneficial wasps will be attracted to African blue basil. Photo by Beth Bolles, UF IFAS Extension Escambia County
Basil is a favorite plant in the summer herb garden and an absolute must for those who enjoy fresh leaves for a sandwich or delicious homemade pesto. While we grow basils as a food enhancer, an added benefit is that those basil selections that form flowers are very attractive to pollinators. If you would rather not let your favorite basil form flowers, consider adding a specific species that is grown more for its attractiveness to pollinators than its culinary uses.
African blue basil is a hybrid of two basils that has inherited a camphor flavor from one of its parents. Although edible, the flavor may not be appealing to those who are familiar with more traditional basil flavors. Plants produce abundant flowers that are pink with a dark purple base, although flowers are sterile so no seeds will be formed. If you want more African blue basil, you must purchase transplants or start your own from cuttings off the main plants.

African blue basil enhances gardens and landscapes. Photo by Beth Bolles, UF IFAS Extension Escambia County
Flowers of African blue basil are also showy in the garden. Photo by Beth Bolles, UF IFAS Extension Escambia County
Like other basils, African blue basil does like soils amended with composts that are well-drained. Plants thrive in full sun and will form rounded mounds that will be much larger than more culinary basils, up to five feet in some gardens. Plants do form woody stems and although frost tender, some plants may return in the spring in more protected areas.
Although some edible gardeners may not want to allow space for a basil that they will not use in the kitchen, the amount of pollinator activity on this selection makes it a benefit to any edible garden for all the frost-free months.
by Beth Bolles | Jun 10, 2017
It is common in Northwest Florida for palms to show signs of nutrient deficiencies. In general our sandy soil is often nutrient poor and available nutrients can easily move out of soils with frequent rainfall. In landscapes where fertilization is occurring, often the wrong types of fertilizer are applied. Fertilizer miss-application actually increases nutrient problems for the palm.
Palms can be deficient in many nutrients but the most common deficiencies we see in landscapes are from inadequate amounts potassium and magnesium. The simple solution would be to purchase a fertilizer labeled for palms to correct the problem. The difficulty is that most easily available fertilizers for palms do not have the correct form of nutrients that are required for the problems. With the exception of nitrogen, all other nutrients are in a quick release form so while the slow release nitrogen lasts for 2-3 months, all other nutrients have been used up. In response, the palm is encouraged to grow by the nitrogen but does not have enough of the other critical nutrients to carry out vital plant functions. What we see is often older leaves that are yellowing, browning, and die off before they should because the plant is pulling any available potassium and magnesium from old fronds to support new growth. Without the application of proper nutrients to the soil, the deficiency can continue until even new fronds are affected or the palm dies.
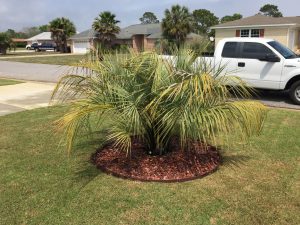
The fertilizer used for lawns does not have all the slow release and correct forms of nutrients for the palms. Older leaves turn yellow and brown indicating potassium deficiency. Photo by Beth Bolles, UF IFAS Extension Escambia County.
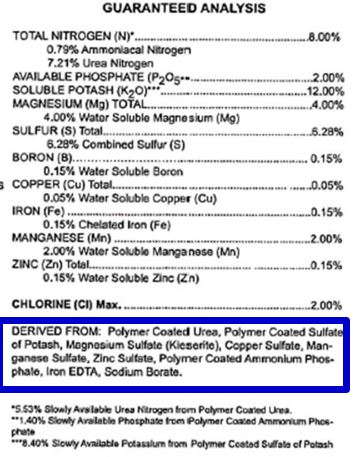
There is a solution that will help keep your palms healthy and attractive. Make sure you choose a specially designed fertilizer that has all nutrients in slow release form. Look for an analysis such as 8-2-12-4 (Nitrogen-Phosphorus-Potassium-Magnesium). Also read further on the label for Polymer Coated Sulfate of Potash, Magnesium Sulfate (Kieserite), and Chelate (Iron EDTA). These are the forms of nutrients that will be beneficial to your palms.

Look in the area ‘Derived From’ (outlined in blue) on your fertilizer label to find the forms of nutrients. Photo by Dr. Monica Elliott, US/IFAS Extension.
If you have a mixed landscape where the palms are planted in the lawn, be sure to keep all lawn fertilizers out of the root zone of the palms. Lawn fertilizers do not have the correct forms of nutrients for palms. Remember also that palms roots extend many feet beyond the palm canopy so your ‘no lawn fertilizer zone’ may be past the mulch ring.
The recommendation from the University of Florida is 1.5 pounds of fertilizer over a 100 square foot area. Broadcast this on top of the ground and lightly water after application. In North Florida, you will likely apply the correct palm fertilizer about at least two times in May and end of August or 1st of September. If you are not able to use a palm fertilizer with the correct form of slow release nutrients, it is best not to fertilize palms at all.