by Julie McConnell | Mar 28, 2016
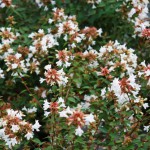
Clusters of tiny white flowers on abelia. Photo: Julie McConnell, UF/IFAS
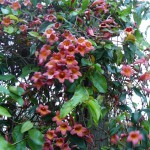
Abelias have been a landscape staple in the Southeastern United States for over a century. Numerous types have been used over the years, but two of the oldest forms still used in landscapes are Glossy Abelia Abelia x grandiflora and Abelia ‘Edward Goucher’, dating back to the early 1900s.
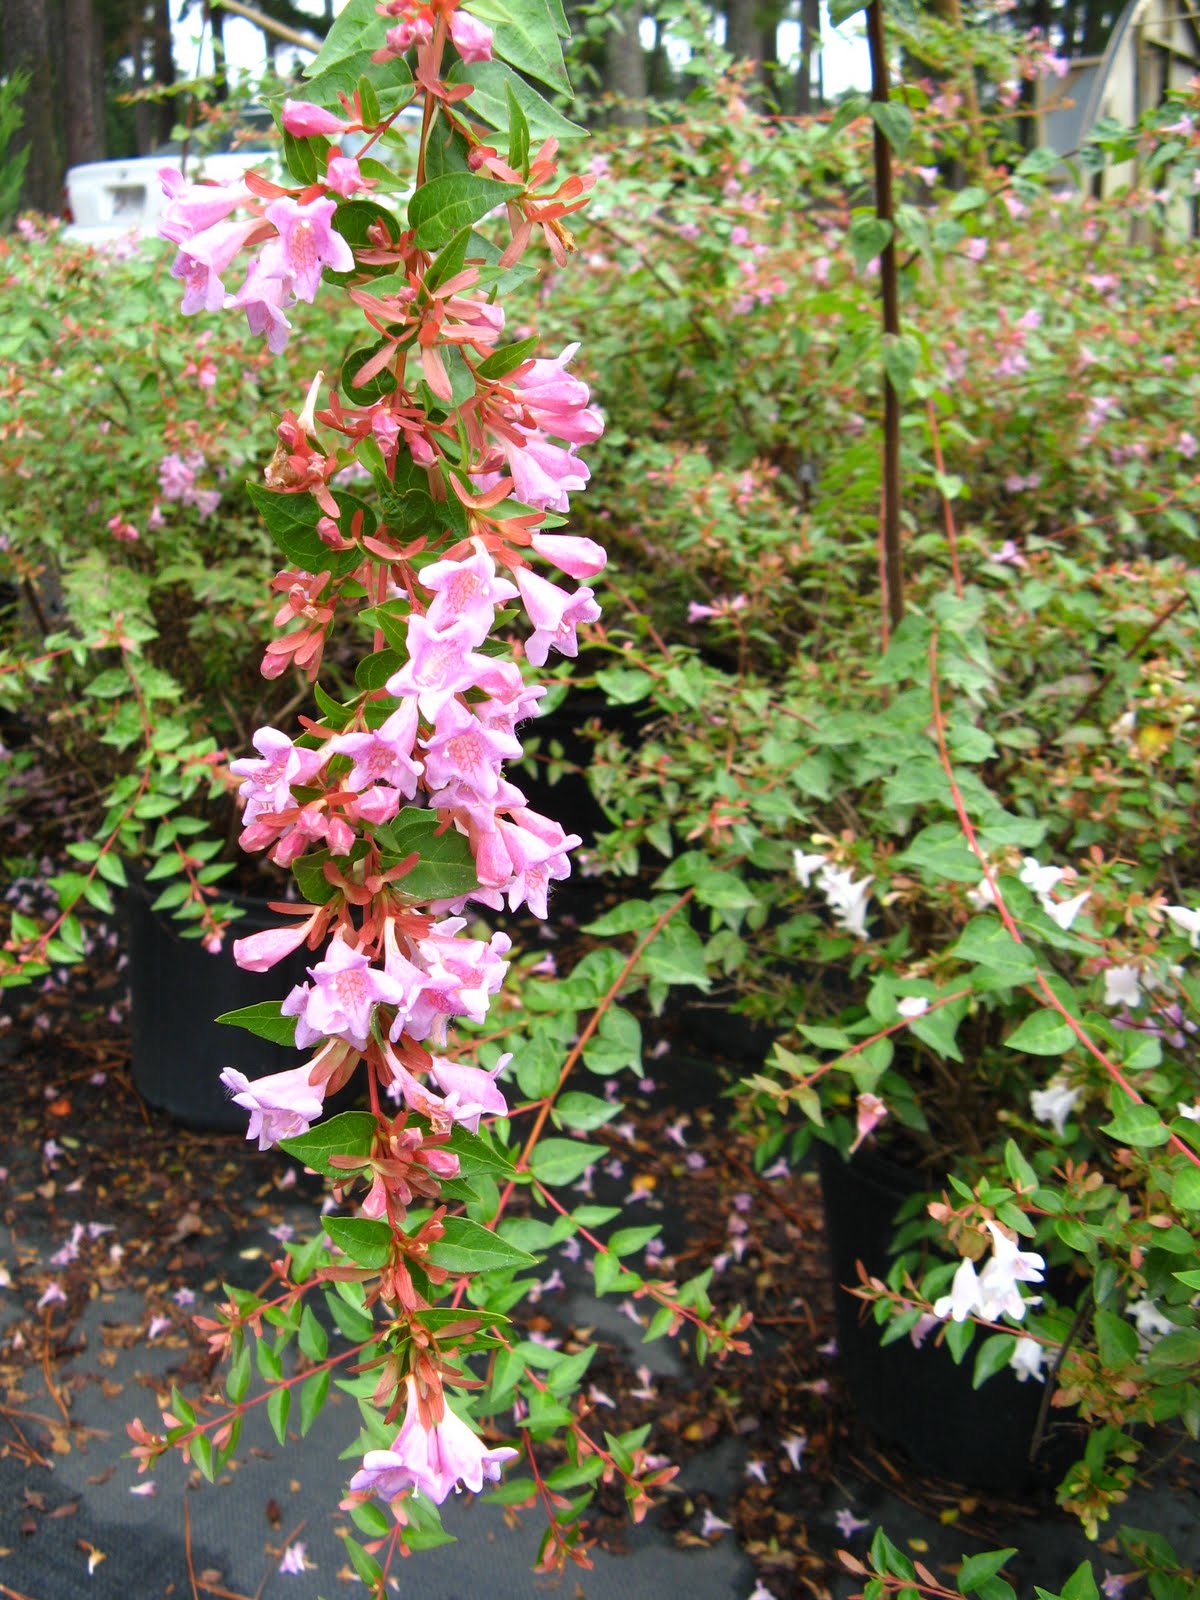
Glossy Abelia is a large informal shaped shrub with ½ – 1 inch glossy green leaves and large clusters of tiny white flowers. It can grow to 8 feet wide and tall and tolerates tough landscape sites such as full sun, low moisture (once established), acidic or slightly alkaline soils. It blooms prolifically and is attractive to butterflies and pollinators. New stems are reddish colored which contrasts nicely with dark green foliage which may be evergreen if winters are mild. After blooms are spent the pink sepals remain on the plants carrying more color through the season.
‘Edward Goucher’ Abelia does not grow quite as large and is a good performer with pink flowers. It is smaller than Glossy Abelia, but can still reach 5’x5’ when mature. It is also tolerant of hot, dry spots in the landscape.
Over the past few decades there have been many new introductions of abelia cultivars to the market. A major goal of breeders was to offer abelias that would fit into smaller landscapes and there has also been a trend towards variegated foliage color. There are dozens of abelias in production, but a few listed below are usually easy to find in local garden centers and have proven reliable in Florida landscapes.
- Abelia x ‘Rose Creek’ Rose Creek Abelia, low mounding growth habit reaching 2-3’ tall and 3-4’ wide, green foliage, new reddish stems, large clusters of white flowers
- Abelia x grandiflora ‘Hopley’s Lemon Zest™’ Lemon Zest Abelia or Miss Lemon™ Abelia grows 3-4’ tall and wide, has yellow and green variegated foliage, light pink flowers
- Abelia x grandiflora ‘Confetti’ Confetti® Abelia, matures at 3’ tall and wide, new foliage has pink, white, and green variegation and mature foliage is green and white variegated, pink and white flowers
- Abelia x grandiflora ‘Kaleidoscope’ P.P.#16,988 Kaleidoscope Abelia, compact growth 2-3’ tall by 3-3.5’ wide, gold and pink new foliage that matures into gold and green variegation, white flowers
All abelias perform best in full sun to part shade and have low water requirements once established. They are not salt tolerant, so avoid planting in coastal landscapes or in areas where salts are an issue. Abelias have few pest problems, but aphids have been known to feed on new growth – avoid over fertilization.
by Sheila Dunning | Mar 22, 2016
 According to the Atlas of Florida Vascular Plants, there are more than 4,200 plant species naturally occurring in the state. Nearly 3,000 are considered native. The Florida Native Plant Society (FNPS) defines native plants as “those species occurring within the state boundaries prior to European contact, according to the best available scientific and historical documentation.” In other words, the plants that grew in natural habitats that existed prior to development.
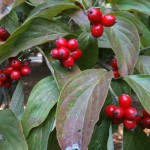
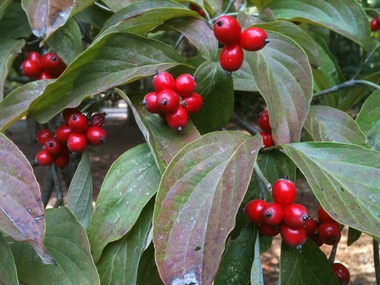
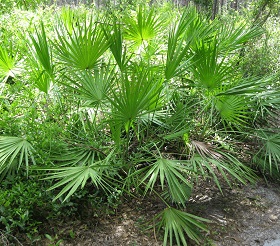
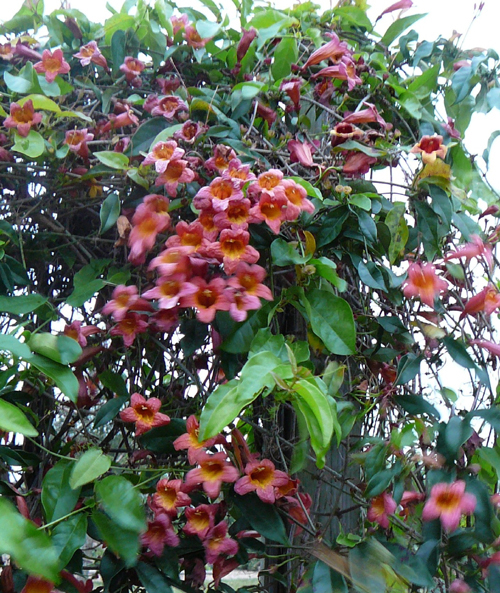
Native plants evolved in their own ecological niches. They are suited to the local climate and can survive without fertilization, irrigation or cold protection. Because a single native plant species usually does not dominate an area, there is biodiversity. Native plants and wildlife evolved together in communities, so they complement each other’s needs. Florida ranks 7th among all 50 states in biodiversity for number of species of vertebrates and plants. Deer browse on native vines like Crossvine (Bignonia capreolata), Trumpet Creeper (Campsis 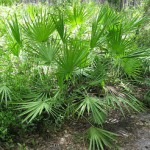 radicans), Yellow Jessamine (Gelsemium sempervirens) and Trumpet Honeysuckle (Lonicera sempervirens). The seeds and berries of Black-eyed Susan (Rudbeckia fulgida), Flowering Dogwood (Cornus florida) and Dahoon holly (Ilex cassine) provide vital food for songbirds, both local and migratory. Saw palmetto (Serenoa repens) provides cover for numerous birds and small mammals, as well as, reptiles.
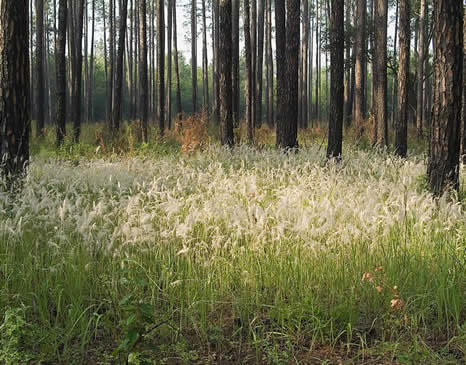
Non-native plants become “naturalized” if they establish self-sustaining populations. Nearly one-third of the plants currently growing wild in Florida are not native.  While these plant species from other parts of the world may provide some of the resources needed by native wildlife, it comes at a cost to the habitat. These exotic plants can become “invasive”, meaning they displace native plants and change the diverse population into a monoculture of one species. Chinese privet (Ligustrum sinense), Popcorn trees (Triadica sebifera) and Cogongrass (Imperata cylindrica) have
 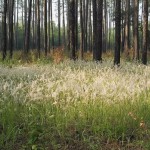 changed the landscape of Florida over the past decade. While Water hyacinth (Eichhornia crassipes) and Hydrilla (Hydrilla verticillata) have change water flow in many rivers and lakes. These invasive species cost millions of taxpayer dollars to control.
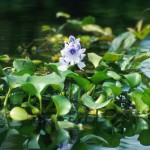
By choosing to use native plants and removing non-native invasive plants, individuals can reduce the disruptions to natural areas, improve wildlife habitat and maintain Florida’s biodiversity.
by Sheila Dunning | Feb 25, 2016
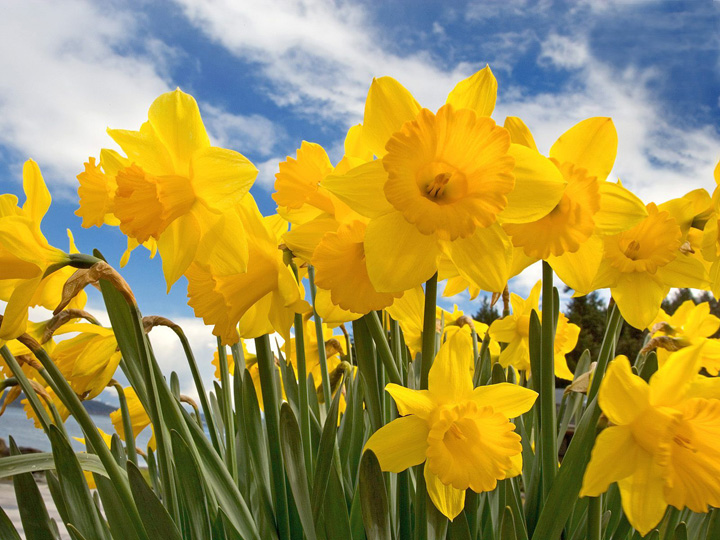
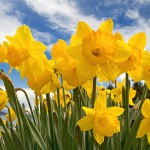 Few plants seem to signify the freshness of spring quite as well as daffodils. The name “daffodil” is derived from “addodell” a variant of Asphodel (a plant of the Asphodelus genus.) In historical documents and the common language of 16th century Europe, the term “daffodil” referred specifically to the wild daffodil, Narcissus pseudonarcissus.
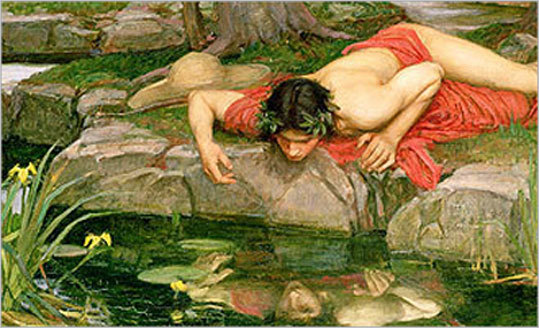
The derivation of the Latin narcissus is unknown. It is frequently linked to the Greek myth of Narcissus, who was rumored to be so obsessed with his own reflection that he died while gazing at himself in a pool of water. From the location of his death sprang the narcissus plant. Another Greek myth finds Persephone, daughter of the goddess Demeter, lured to her doom by the God Hades while picking a narcissus. Therefore the plant is perceived as a symbol of vanity in some Western culture.
Others attribute the plants’ name to its narcotic properties. One translation of the Greek name is “I grow numb!” All narcissus species contain the alkaloid poison lycorine, mostly in the bulb but also in the leaves. Members of the Amaryllidaceae family contain a unique type of alkaloids. They are responsible for the poisonous properties of a number of the species. Of the 200 different chemical compounds found in this plant family, at least 79 of them can be found in narcissus.
Daffodils are a popular potted plant for cut flowers, but also make attractive naturalized groundcovers in gardens and around trees, providing color from the end of winter through late spring. If the narcissus blooms on Chinese New Year, it is said to bring wealth and good fortune throughout the year. The flower color varies from white through pinks and yellows to deep reddish-orange with multiple petal forms. Hundreds of cultivars are available.
Planting dates vary according to geographical location, but the bulbs are usually planted in the fall when the soil is cool. Daffodils grow well in full sun or light shade, with the blooms lasting longer when protected from the noon day sun. When selecting a location for planting, it should be noted that the individual flowers will face the sun.
Pre-chilled bulbs should be planted in 6-8” deep holes with a tablespoon of slow release fertilizer added to the soil directly under the bulb and with 4-5” of soil covering the bulb. Watering throughout the winter will be necessary if rains are infrequent. After flowering, the daffodils need to be fertilized and watering should continue. The foliage will naturally turn yellow and die as stored food is restored to the bulb.
Division, transplanting and collection for forcing potted plants can be done after all the foliage has declined. To force Daffodils to bloom at varied times in a container the dried bulbs will need to be stored at a 45° F temperature for 4-6 weeks prior to being placed in the sun to grow.
The bright, cheery Daffodil flowers are beginning to bloom now and will continue as Easter approaches, reminding us that spring really is coming.

by Beth Bolles | Feb 24, 2016
Magnolias are well known plants to gardeners and many are familiar with the foliage and flowers of these plants. If you are looking for another earlier bloomer, you may want to consider adding a specimen selection to your landscape, the Star magnolia (Magnolia stellata).
Although not native to the United States, star magnolia is a slower growing multi stemmed deciduous shrub reaching about 15 feet in height over time. The best feature are the bright whitish pink star-shaped blooms appearing in late winter before leaves emerge. The flowers offer gardeners a peek of the spring to come and remind us that our Gulf Coast winters are not that long. 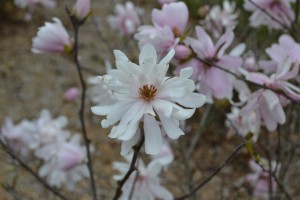
Plants do best in soil with some organic amendments and mulch over the root systems. A planting area that receives a little afternoon shade is ideal but established plants will adapt to sunnier locations when irrigation is provided during drier weather. Only occasional pruning is required to remove crossing branches or those that grow out of bounds. Prune after flowering if needed.

by Les Harrison | Feb 16, 2016
 Last Week’s temperatures have confirmed the winter of 2016 is not 100% over. Now is the time to plan that spring garden!.
Garden catalogs from every part of the nation are finding their way into many area homes. Their pages promise the buyer the potential for legendary success and the envy of their friends and neighbors.
After all, who can resist the full color beauty of giant flowers, large luscious fruit and vegetables which are sure to win a prize at the fair? There is not a runt, reject or cull in all the pages of these publications offering the mortal version of horticultural heaven.
Before ordering, the would-be gardener should consider several factors to increase the likelihood of a positive gardening experience. A failure will waste not only funds, but also much time and hard work and may introduce a long-term problem or two.
Cultivar selection for a tree, shrub, vegetable or fruit is critically important to producing the desired results. While a specific plant cultivar may grow and produce in one environment, it may not do so in all situations.
A common example of this problem is grape vines offered. Only muscadine grapes will grow and produce locally because Pierce’s disease kills other varieties.
Carefully examine the growing zones recommended by the catalog for specific cultivars. Check with fellow gardeners and the UF/IFAS Extension Office to see if they have any information or experience with any cultivars under consideration.
Heirloom varieties are especially sensitive to the variances in growing conditions. While they offer unusual and sometimes unique taste and culinary traits or landscaping characteristics, these antique varieties can be a challenge to grow.
Their genetic potential can make a consistent yield, especially for the novice growers, a real effort. Also, as an open pollinator variety, the results can be inconsistent.
Another question for the catalog company customer is new or untried plants varieties. Some of these plants are patented and few or no trials have been performed with them in north Florida’s growing zone.
Caution should be used when ordering these seed or plants. Being the first in North Florida to cultivate a new variety may require a large commitment of time and resources, and may produce only a large disappointment.
Check with fellow gardeners, local nurseries and your UF/IFAS Extension Office for available information on these new or patented varieties. It may save much wasted motion.
Lastly, be sure the plant or seeds under consideration do not have the potential as exotic invasive pests. As hard as this may be to believe, this does occur.
Some catalog vendors will advise buyers in the ordering instructions or at the time of ordering. Either way, the purchaser should check to verify the plant ordered does not have the potential to escape control and damage the environment.
Check out the following publications to assist with finding adapted fruit and vegetable varieties for North Florida.
by Mary Salinas | Feb 16, 2016
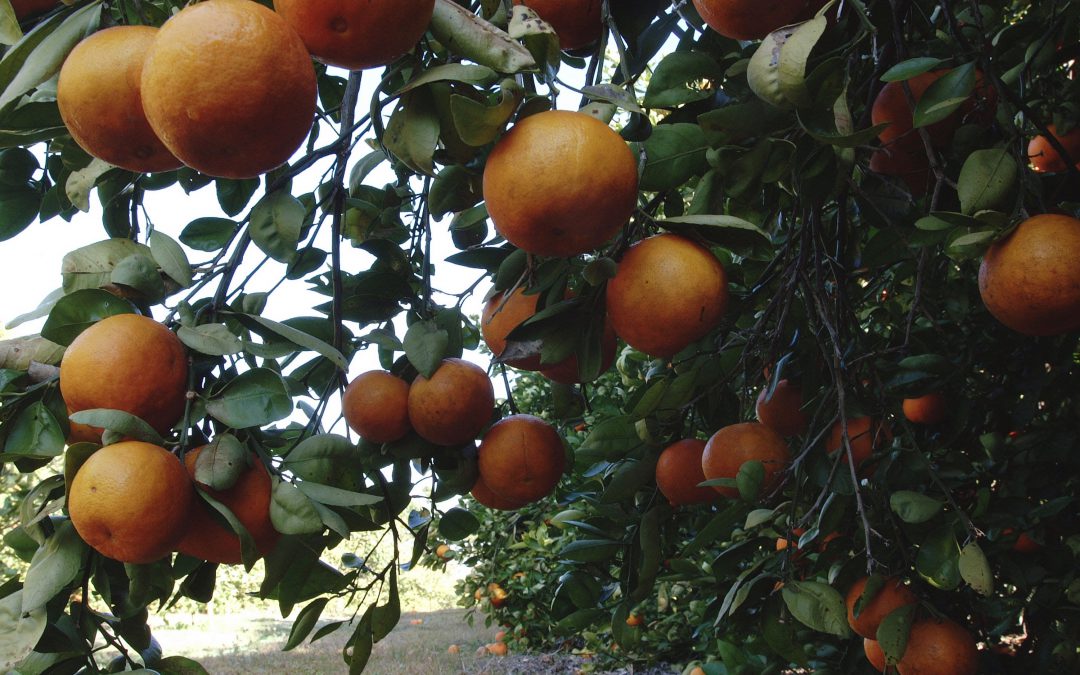
As you have read in other articles in this blog, it is too early to fertilize your lawn; however, this is a good time to start fertilizing your citrus to ensure a healthy fruit crop later in the year.
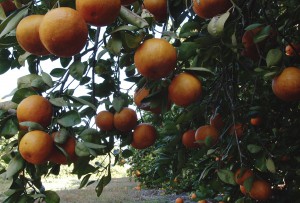
Orange grove at the University of Florida. UF/IFAS photo by Tara Piasio.
Citrus benefits from regular fertilization with a good quality balanced citrus fertilizer that also contains micronutrients. A balanced fertilizer has equal amounts of nitrogen, phosphorus and potassium such as a 6-6-6, 8-8-8 or a 10-10-10. The amount of fertilizer to be applied will vary on the formulation; for example you will need less of a 10-10-10 than a 6-6-6 as the product is more concentrated. Always consult the product label for the correct amount to use for your particular trees. Fertilizer spikes are not recommended as the nutrients are concentrated in small areas and not able to be widely available to all plant roots.
The number of fertilizations per year will vary depending on the age of the tree. Trees planted the first year need 6 light fertilizations that year starting in February with the last application in October. In following years, decrease the number of fertilizations by one per year until the fifth year when it is down to 3 fertilizations per year. From then on, keep fertilizing 3 times per year for the life of the tree. Good quality citrus fertilizer will have accurate and specific instructions on the label for the amount and timing of fertilizer application.
Fertilizer should be spread evenly under the tree but not in contact with the trunk of the tree. Ideally, the area under the drip line of the tree should be free of grass, weeds and mulch in order for rain, irrigation and fertilizer to reach the roots of the tree and provide air movement around the base of the trunk.
If you have not in recent years, obtain a soil test from your local extension office. This can detect nutrient deficiencies, which may be corrected with additional targeted nutrient applications.
For more information:
Citrus Culture in the Landscape