by Daniel J. Leonard | Jun 25, 2019
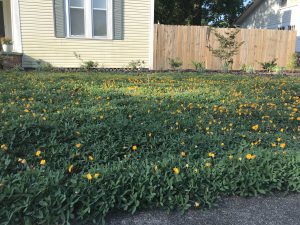
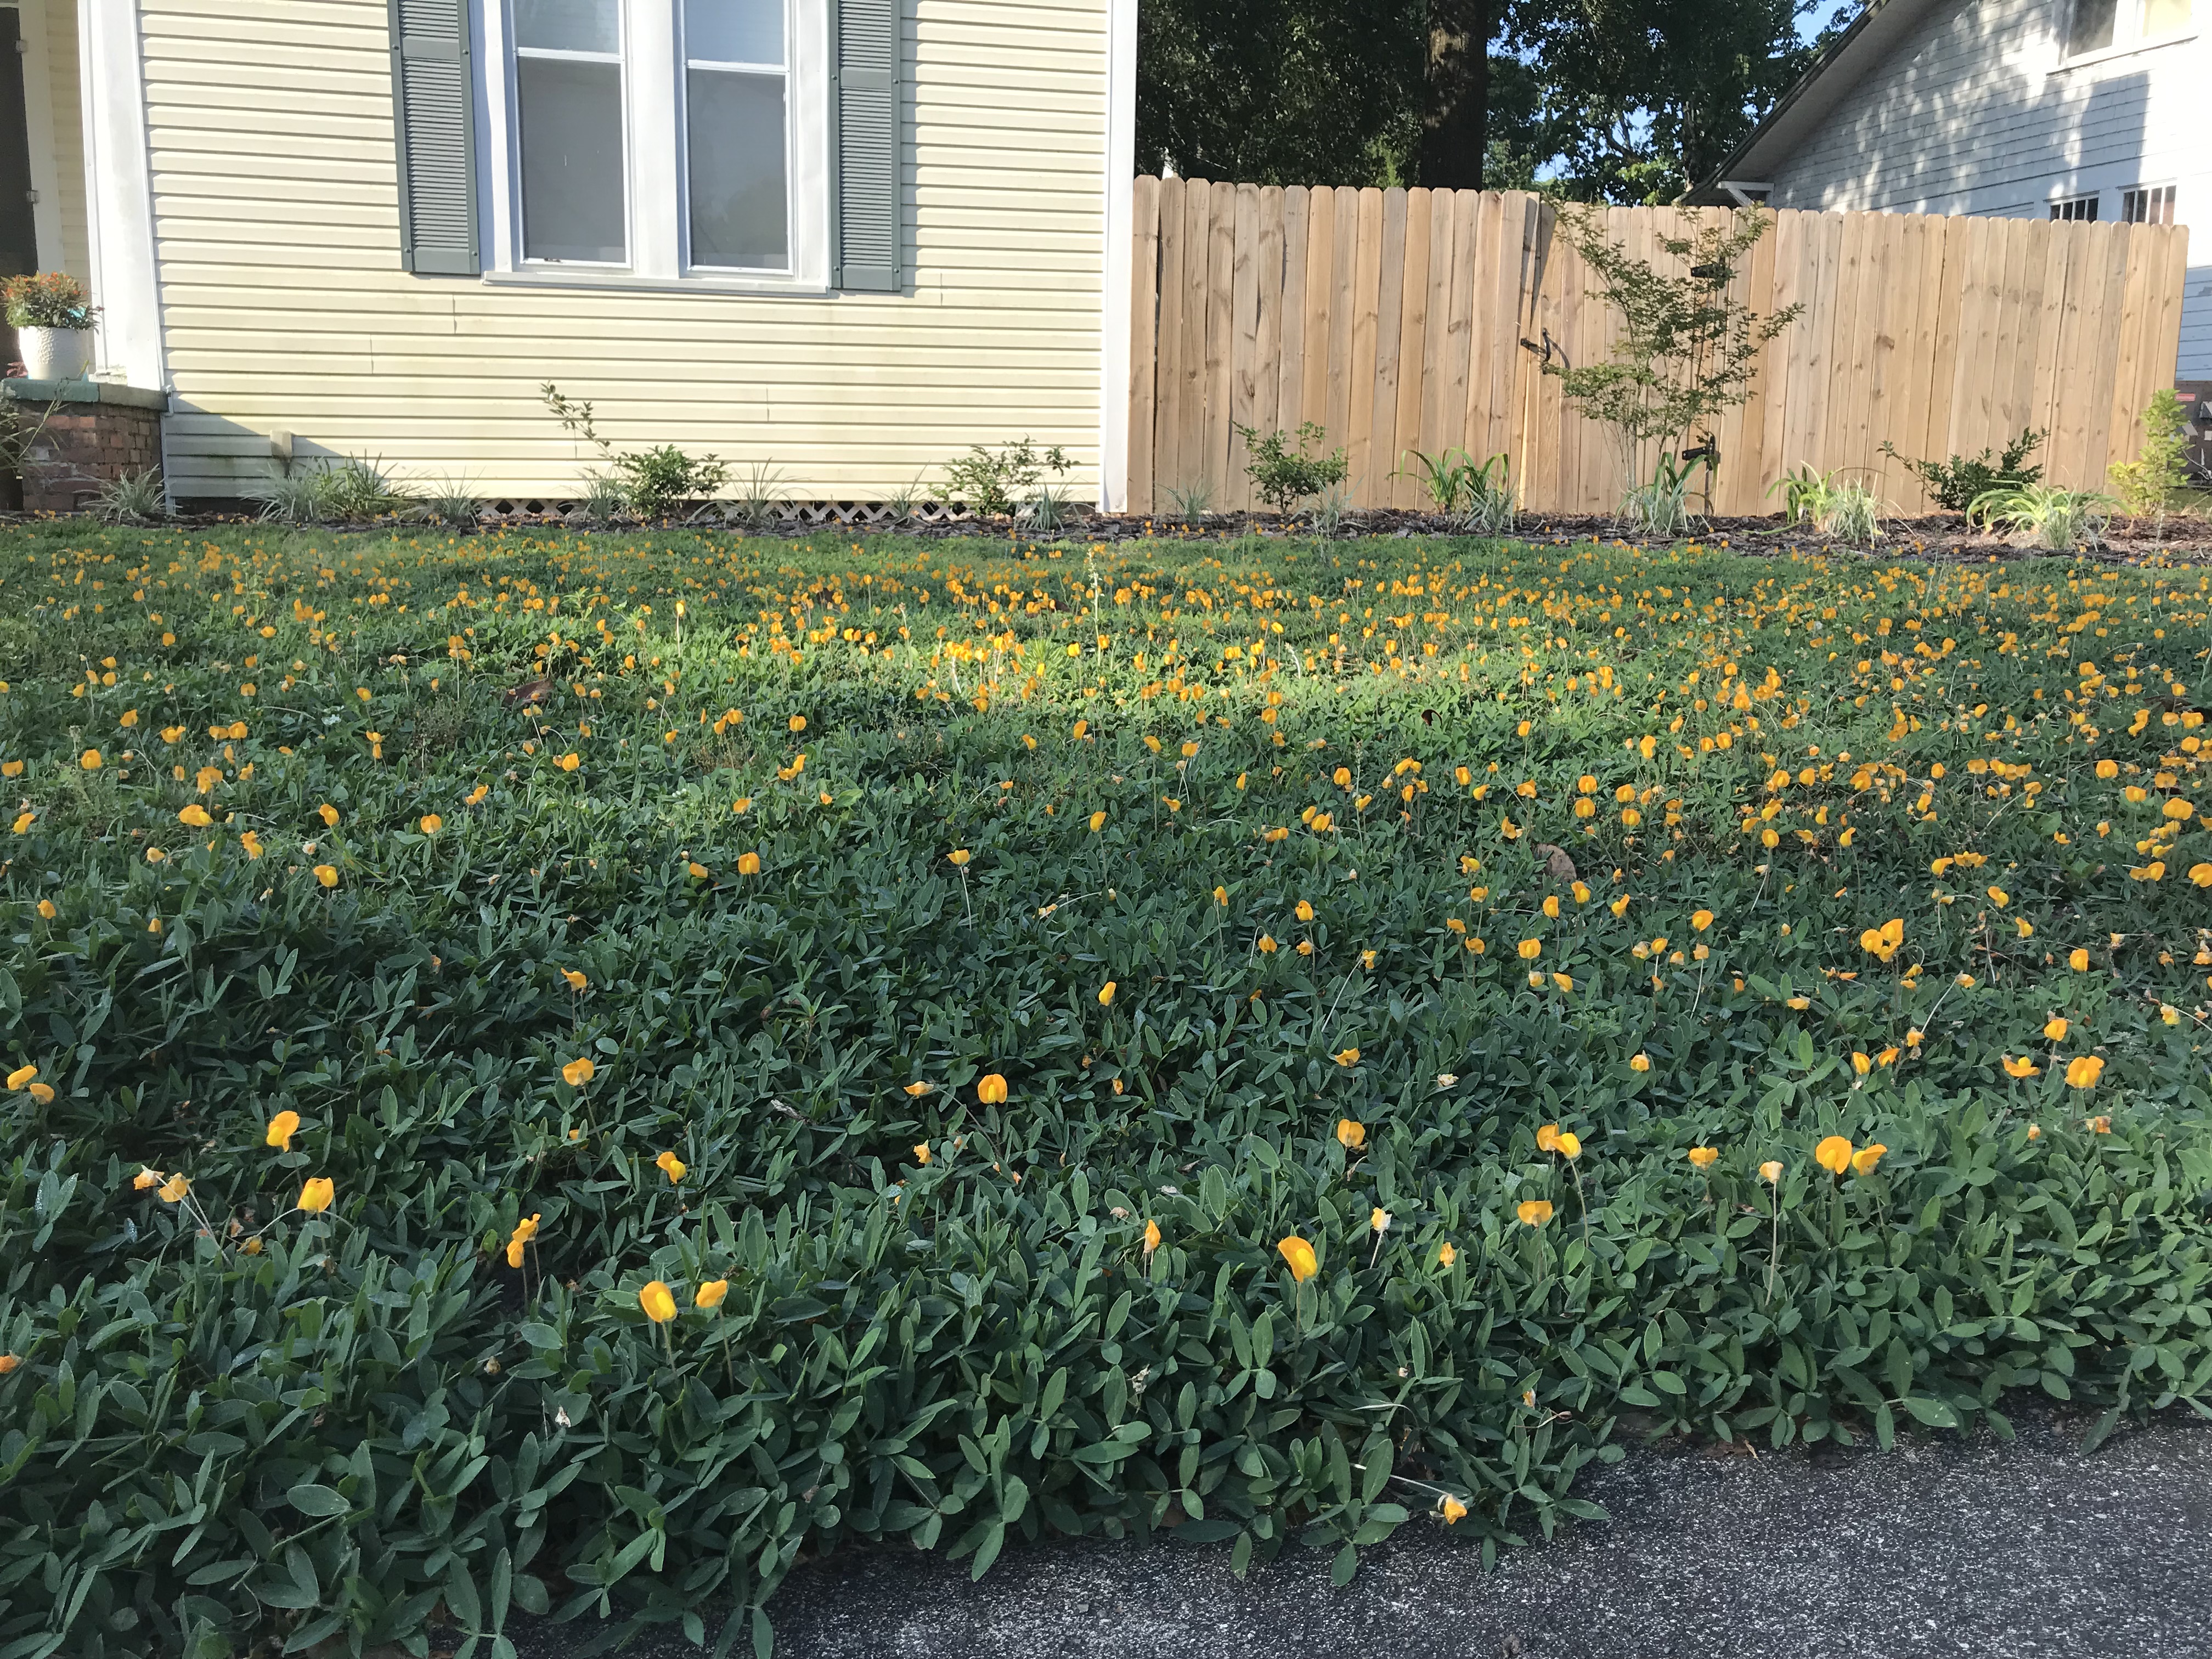
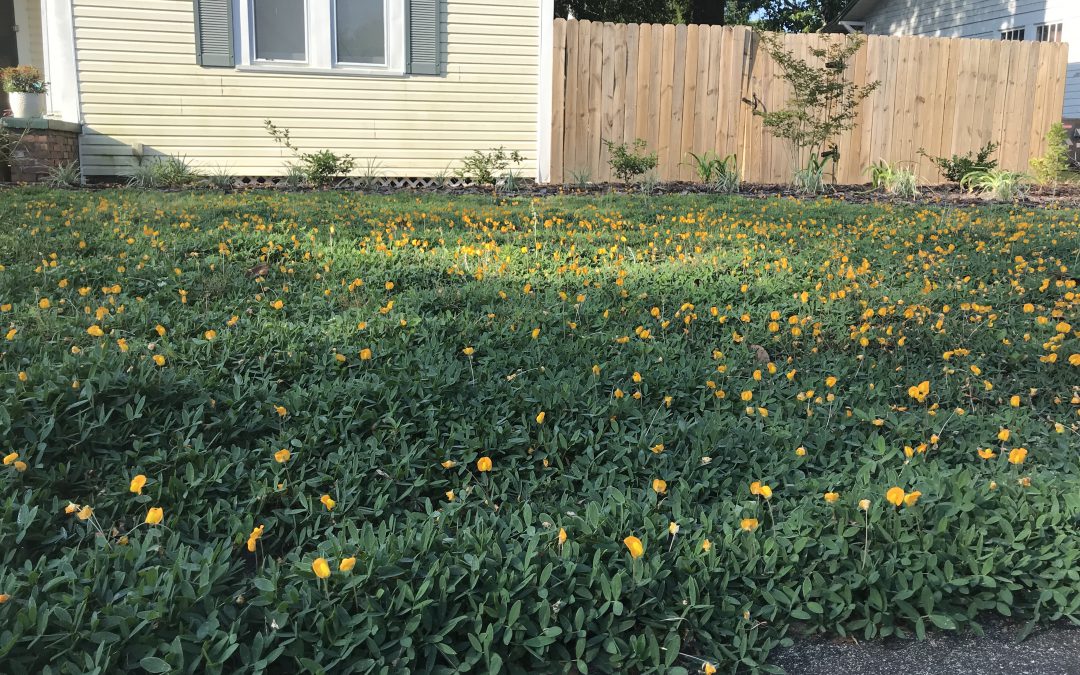
‘Needlepoint’ Perennial Peanut in the author’s lawn.
What began as my journey toward a turf-less lawn in September of 2017 is finally beginning to come together! In the fall of 2017, I installed about 120 one-gallon-sized ‘Needlepoint’ Perennial Peanut (Arachis glabrata) plants, purchased from Sunset Specialty Groundcovers in Live Oak, FL, on roughly 20” centers in my front lawn, an oddly shaped (650 ft2) patch of ground that had been previously filled with spotty centipedegrass and a healthy and diverse weed population. 18 months later, the peanut has almost completely filled in, shaded out all the weeds, and blooms nonstop!
Looking back, I definitely learned a few lessons the hard way. First, you should mulch bare ground in between plants at time of installation. Because there are few herbicides labelled for residential use on this crop and I didn’t want to experiment on my new “lawn”, I spent a lot of time on my hands and knees (much to the amusement of my neighbors and folks driving by) pulling weeds in the first two years that could have been prevented with mulch. Second, have a plan for keeping the perennial peanut in bounds once it has filled in the area it was supposed to and begins to travel into adjacent landscaped beds! The area my peanut inhabits is surrounded on two sides by inescapable concrete. It was on the other two sides, however, that I have had to improvise after they came under siege (literally under, because perennial peanut spreads by underground rhizomes). Installing some sort of edge blocker at planting and vigilance with routine mechanical edging is a must to keep it in bounds! Third, I recommend that you have a counter-argument prepared when the peanut goes dormant in the winter and your wife asks why the yard is bare dirt!
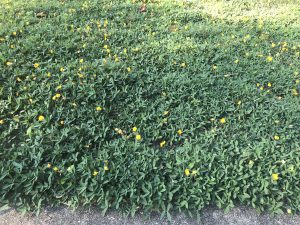
‘Needlepoint’ Perennial Peanut overhead shot showing complete ground coverage in the author’s lawn.
Overall, though there are a couple of things I would have done differently, I’m extremely pleased with my lawn of perennial peanut. It is absolutely stunning in the warm months, incredibly low maintenance, and unique! Plant some today!
As always, if you have any questions about perennial peanut or any other plant/crop, contact your local UF/IFAS Extension office.

by Sheila Dunning | Apr 9, 2019
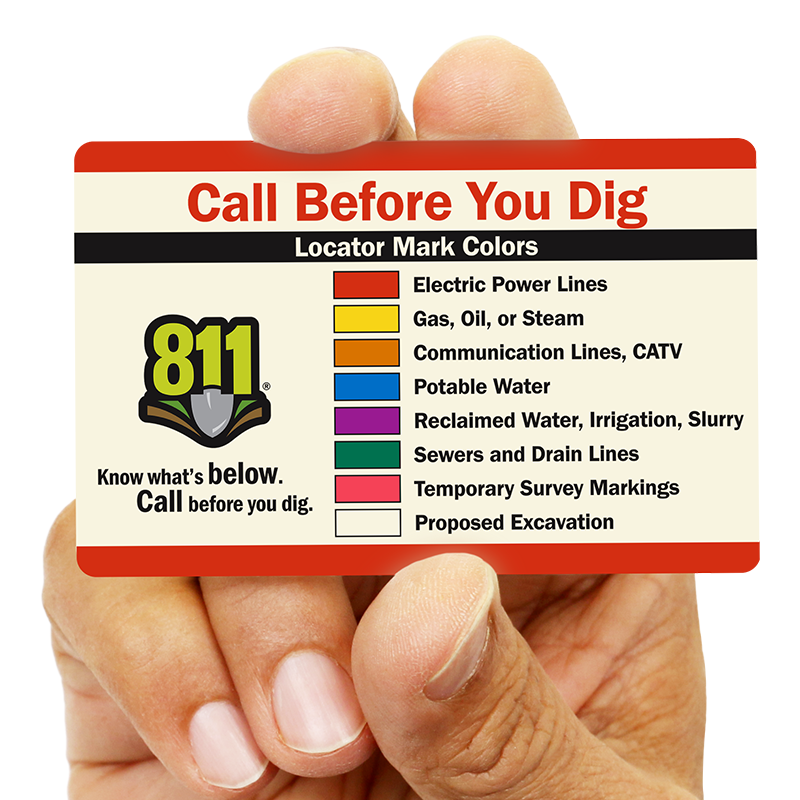
 Call 811 before you dig. No one wants a weekend project to be the cause of Internet, phone and cable outages. Worse yet, what if someone gets hurt from contact with natural gas or electrical lines? That’s why it is so important to have buried utilities in the yard located and marked before digging. Sunshine 811 coordinates each individual company to clearly mark where the service lines are located. Homeowners are required by law to contact 811 three days before any soil removal is done. The service is free.
Have information prepared before making the request. Describe the work to be performed (e.g. fence install, landscaping, irrigation install), including the type of equipment that will be used. Specify the exact location on the property and how long the work will continue. Finally, provide all the contact information (e.g. name, phone number, e-mail), should there be any additional questions.
Call 811 or request a single address ticket online. Receive a ticket number and wait two full business days, not counting weekends or holidays. Then contact 811 again. Make sure that all the utilities have responded in the Positive Response System (PRS). Sometimes that may mean that the company doesn’t have anything to make in the area.
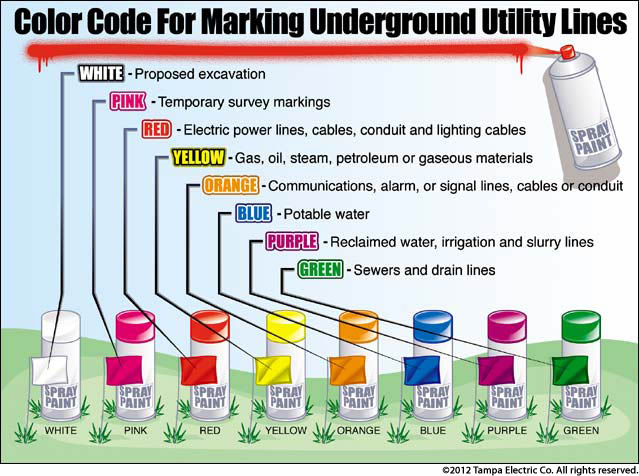
If there are utility lines running through the yard, they will be marked with specifically colored paints or flags. Red is used for electrical lines, orange indicates communication lines, yellow means gas, blue is used for potable water, purple is reclaimed water, and green indicates sewer lines. White lines may be used to outline digging areas and pink are temporary survey marks. This is the APWA Uniform Color Code.
Every effort is made to locate the lines as accurately as possible. But, the safest thing to do is hand dig to expose the utility line before using any mechanized equipment. Lines can vary up to 24” from the marked line and depths can be less than 5”. Remember there may be access lines running through the property even if that service isn’t utilized at that address.
Keep safe this spring. Call 811 before digging.
by Julie McConnell | Jan 3, 2019

Storm debris turned into holiday cheer in Bayou George. Photo: J_McConnell, UF/IFAS
By the time this article publishes, we will be more than 70 days since Hurricane Michael toppled or damaged an incredible number of trees in the Panhandle. Enormous piles of once stately shade trees line the streets in neighborhoods and business districts in. The cleanup efforts have been phenomenal, over 4 million cubic yards of storm debris picked up in Bay County to date, but there is still a long way to go in the recovery process.
So, as gardeners, how can you help our community get back on track amidst your own struggles to recover? A few Florida Friendly Landscaping™ Principles come to mind.
- #1 Right Plant, Right Place – as you rebuild your landscapes, make sure to choose the appropriate plant for the location. Consider mature size and give those plants space to thrive!
- #4 Mulch – do you have bare ground that will eventually become landscape beds or turf but no resources or time to replant yet? Consider mulching the area to keep soil from eroding and to help improve soil though decomposition of natural products. Hint – see Recycling for free sources!
- Mulch tips https://sfyl.ifas.ufl.edu/media/MulchBrochure.pdf
- keep mulch 12 inches from tree trunks
- recommended depth in beds or under dripline of tree canopy (excluding within 12” of trunk) is 2-3 inches
- leave an 18-24 inch buffer around building foundations mulch free to reduce conducive termite conditions
-
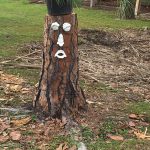
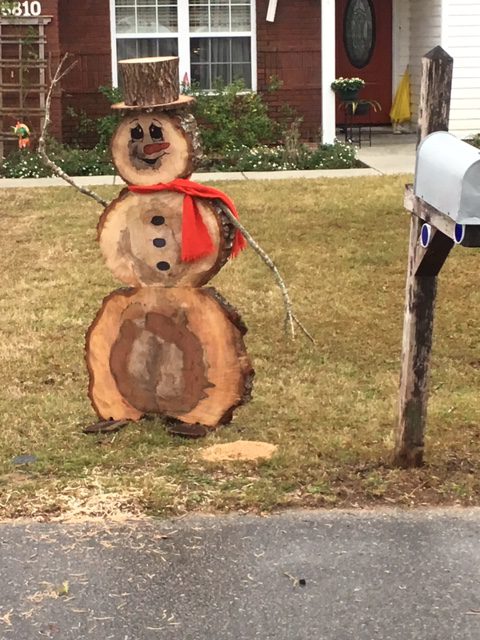
Dress up stumps with plants and whimsical designs. Photo: D_VanderMeer, UF/IFAS Master Gardener
#7 Recycle – driving around town I have seen some really creative uses for stumps, trunks, and branches that homeowners have constructed and messages of hope that bring a smile to my face. Another method of recycling is to use the chipped vegetative debris as mulch, either available as “utility mulch” by cities and counties or you may have some in your own yard right now.
- Utility mulch does come with some words of caution because there is an increased risk of introducing weeds to your landscape with untreated storm debris. However, if you need mulch for pathways or planting beds you will be helping your community’s cleanup effort by reducing waste accumulation. Just watch for “volunteer” plants and manage as needed.
In Bay County, there are 4 locations where you can load and haul off your own utility mulch from storm debris
- Under the Oaks Park – 5843 E. U.S. 98, Panama City, FL 32404
- G. Harder’s Park – 8110 John Pitts Rd., Panama City, FL 32401
- Chapman Park – 2526 Rollins Ave., Bayou George, FL 32404
- Laird Park – 6310 Laird Park Rd., Panama City, FL 3240
For sources in your county, check with your Solid Waste Department for utility mulch availability.
by Matt Lollar | Nov 8, 2018

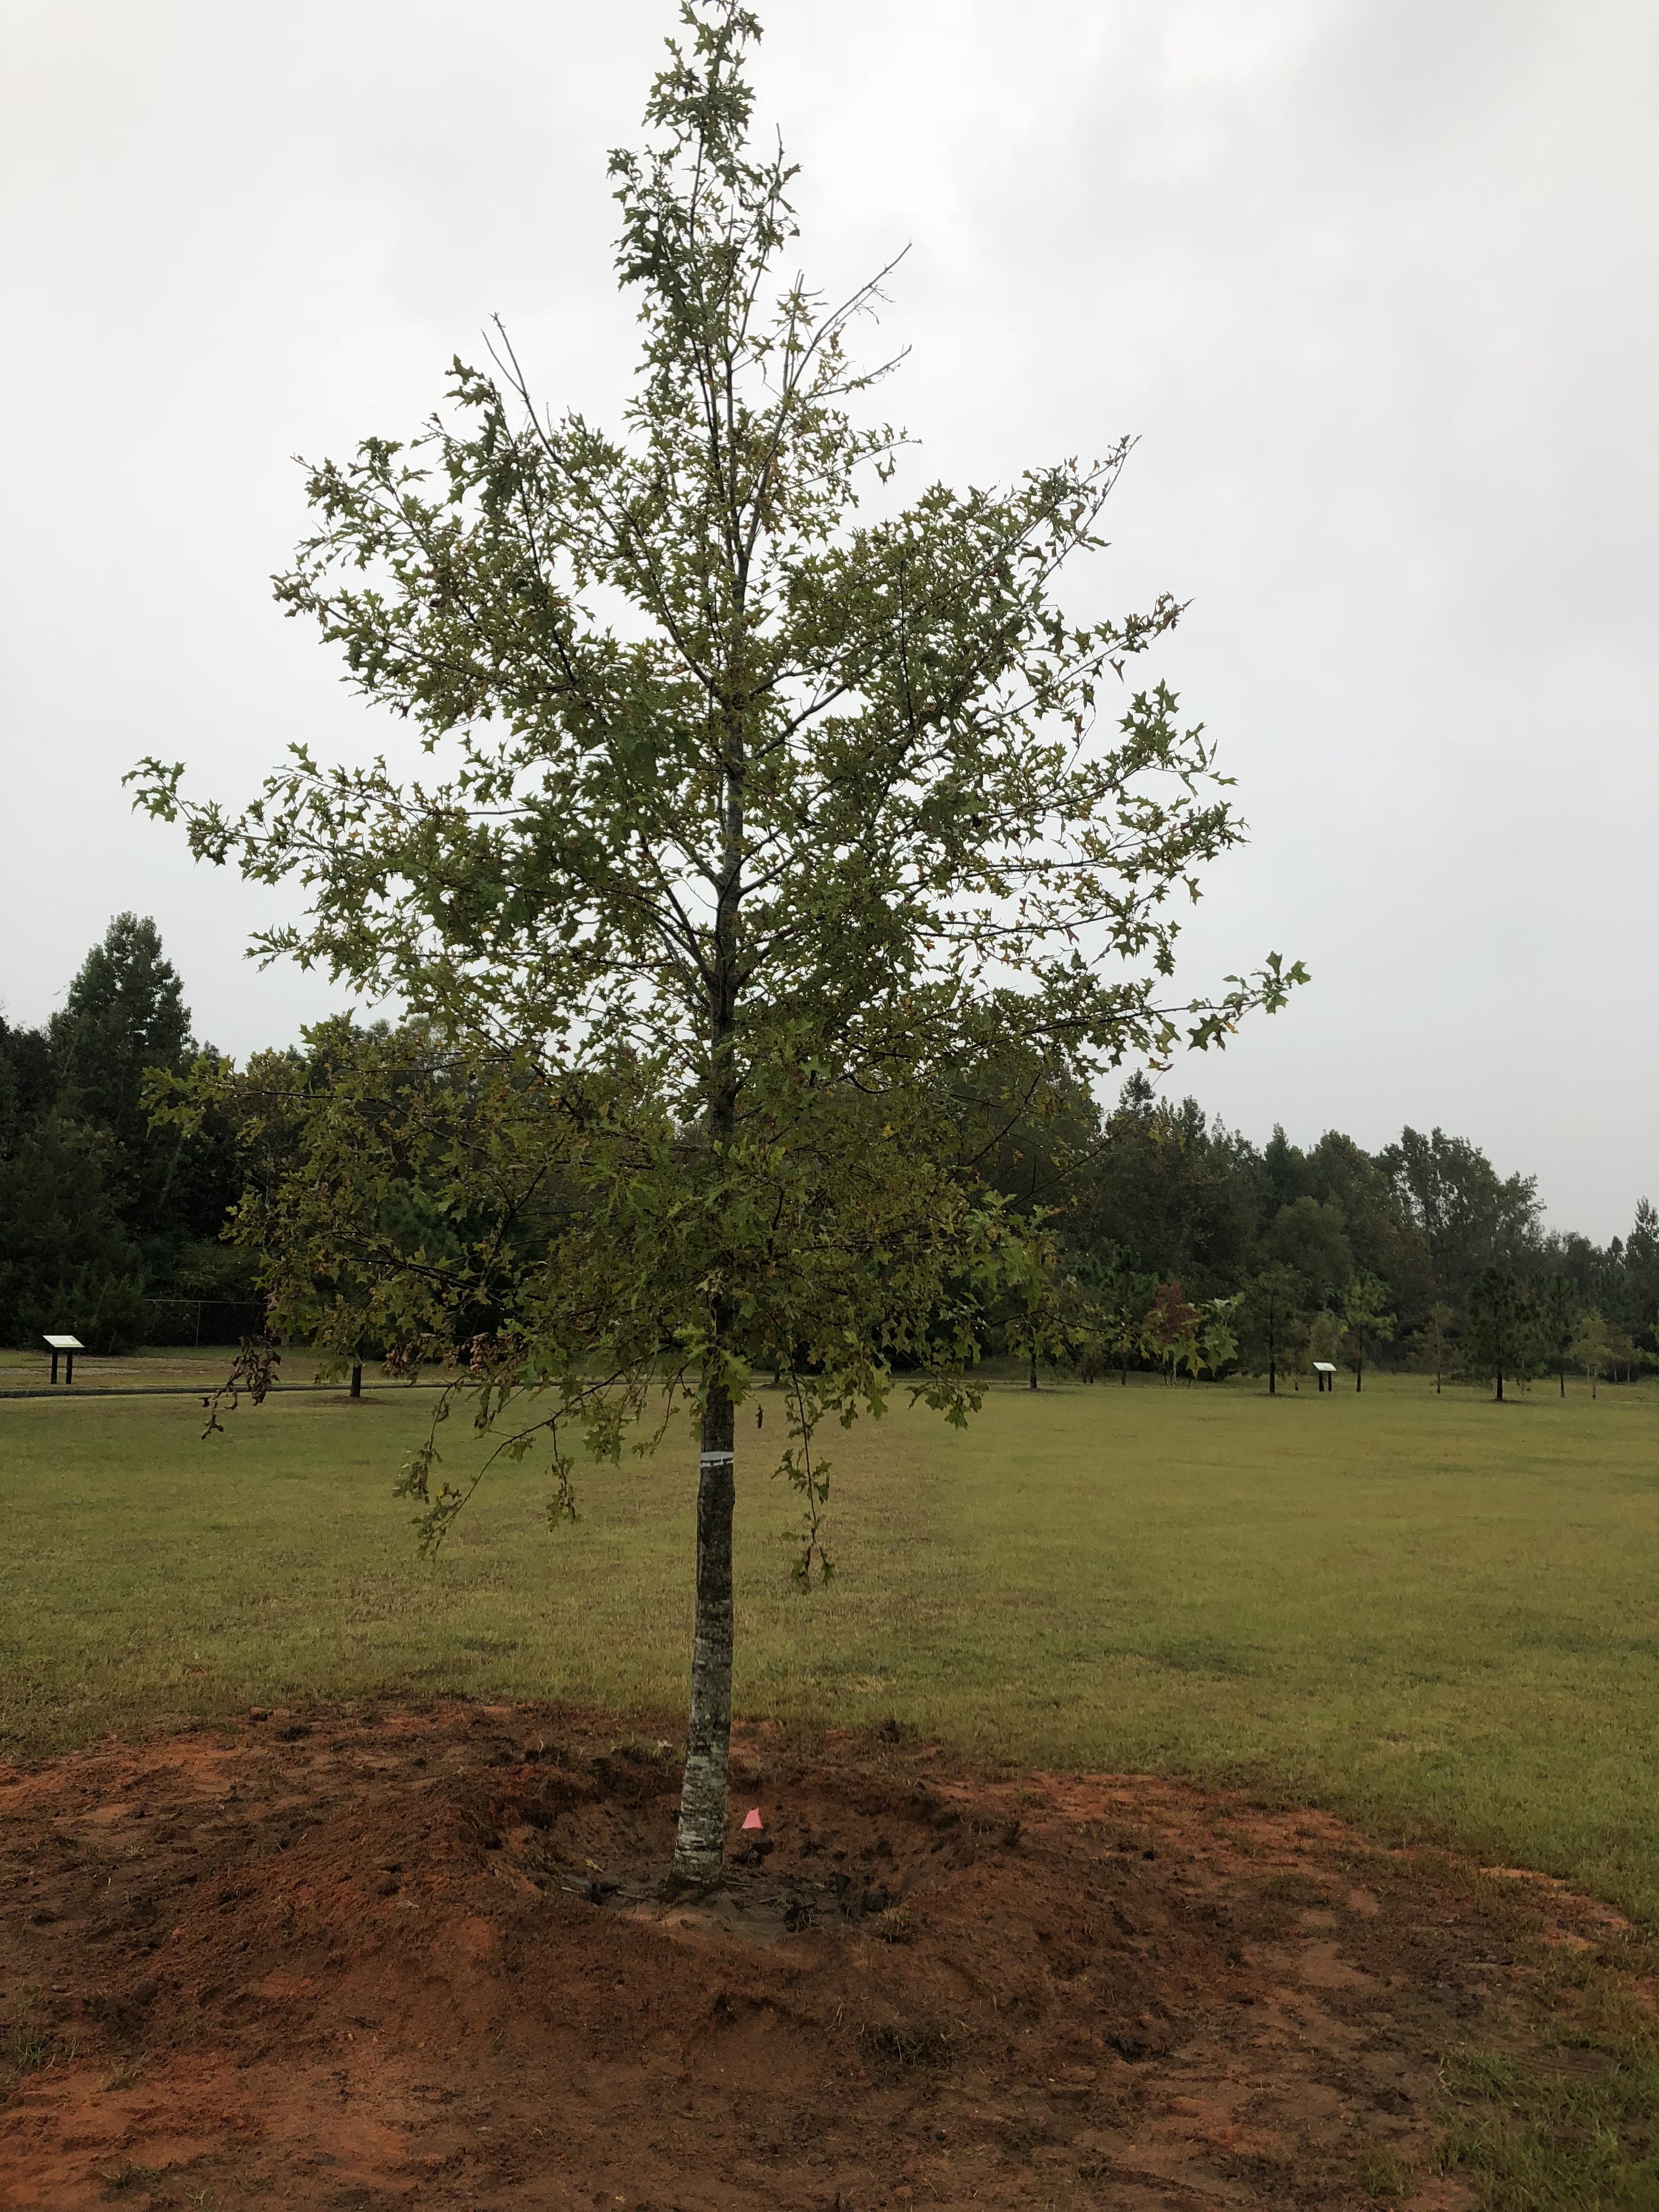
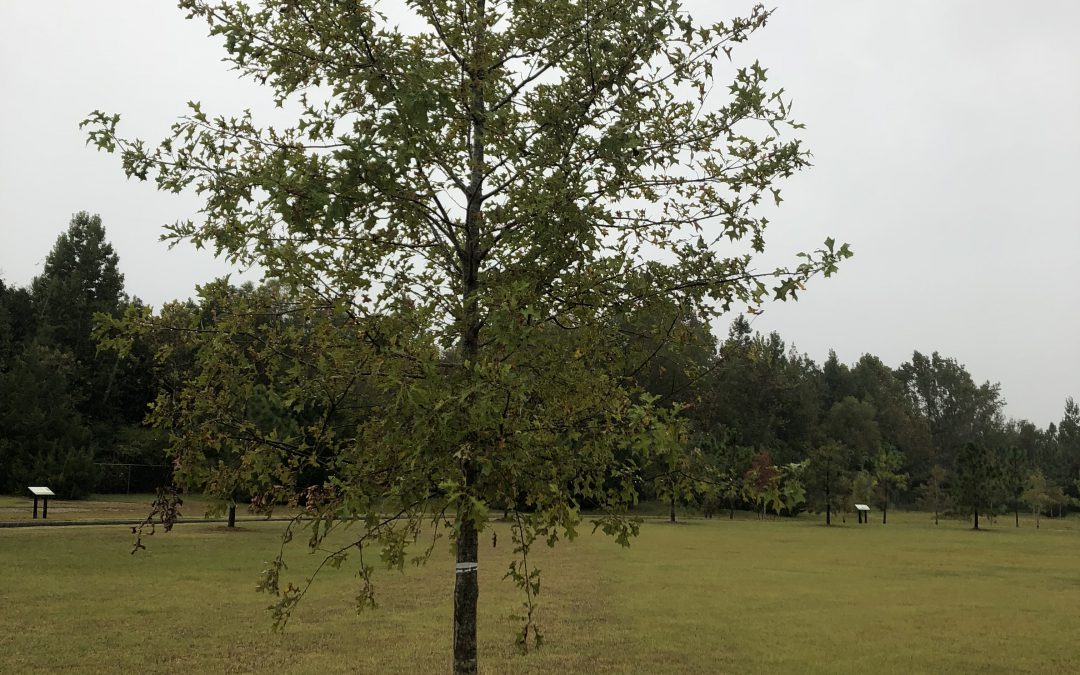
A planted tree with water retention berm. Photo Credit: Matt Lollar, University of Florida/IFAS Extension – Santa Rosa County
Often, Extension agents are tasked with evaluation of unhealthy plants in the landscape. They diagnose all sorts of plant problems including those caused by disease infection, insect infiltration, or improper culture.
When evaluating trees, one problem that often comes to the surface is improper tree installation. Although poorly installed trees may survive for 10 or 15 years after planting, they rarely thrive and often experience a slow death.
Fall is an excellent time to plant a tree in Florida. A couple of weeks ago beautiful Nuttal Oak was planted at Bagdad Mill Site Park in Santa Rosa County, FL. Here are 11 easy steps to follow for proper tree installation:
- Look around and up for wire, light poles, and buildings that may interfere with growth;
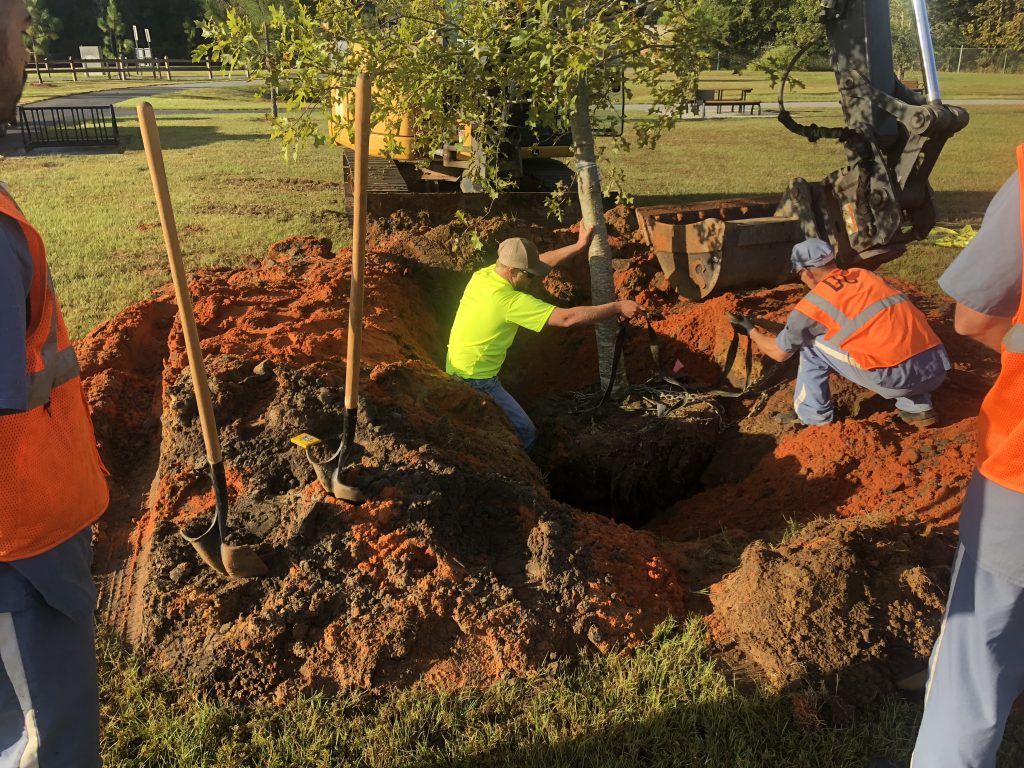
- Dig a shallow planting hole as wide as possible;
- Find the point where the top-most root emerges from the trunk;
- Slide the tree carefully into the planting hole;
- Position the point where the top-most root emerges from the trunk slightly above the landscape soil surface;
- Straighten the tree in the hole;
- Remove synthetic materials from around trunk and root ball;
- Slice a shovel down in to the back fill;
- Cover the exposed sides of the root ball with mulch and create water retention berm;
- Stake the tree if necessary;
- Come back to remove hardware.
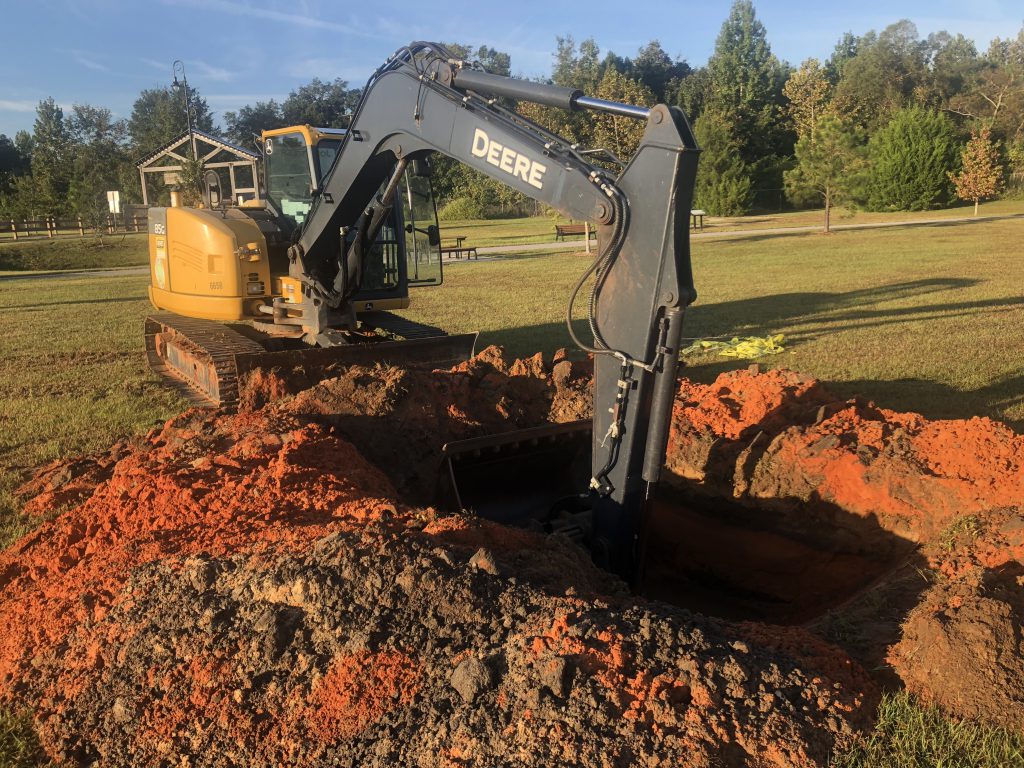
Digging a properly sized hole for planting a tree. Photo Credit: Matt Lollar, University of Florida/IFAS Extension – Santa Rosa County
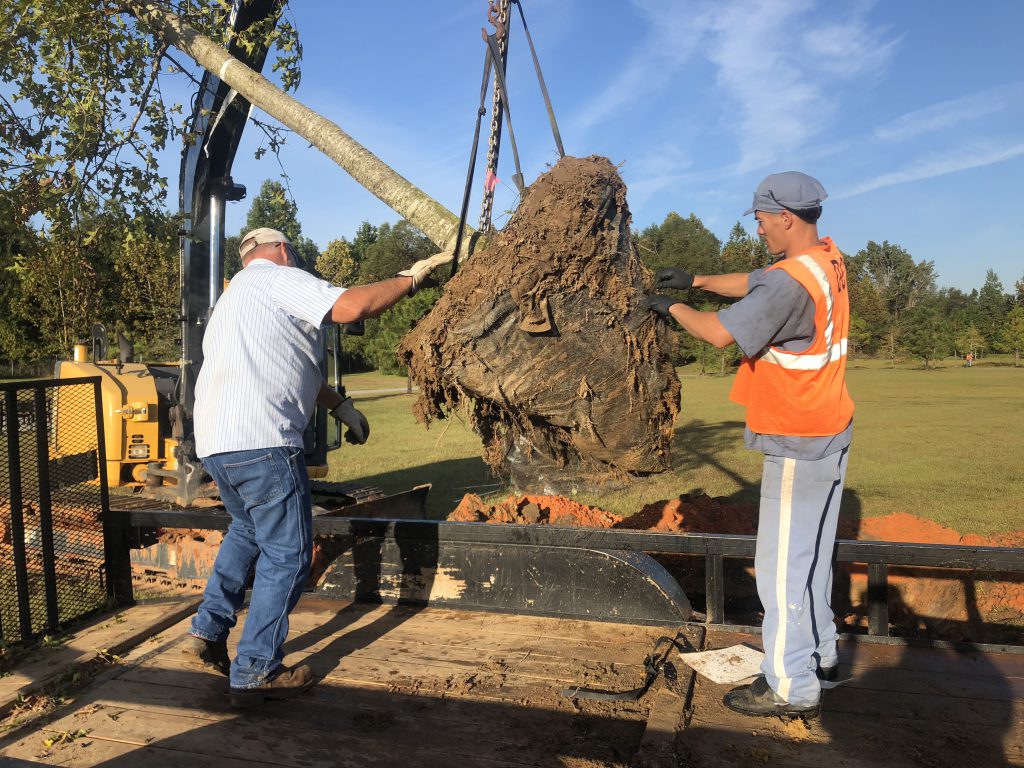
Removing synthetic material from the root ball. Photo Credit: Matt Lollar, University of Florida/IFAS Extension – Santa Rosa County
Straightening a tree and adjusting planting height. Photo Credit: Matt Lollar, University of Florida – Santa Rosa County
For more detailed information on planting trees and shrubs visit this UF/IFAS Website – “Steps to Planting a Tree”.
For more information Nuttall Oaks visit this University of Arkansas Website.

by Sheila Dunning | Apr 9, 2018
This month, recognized by the Senate and Florida’s governor, reminds diggers why calling 811 before all outdoor digging projects is important to your safety. Before installing a mailbox, fence, deck, garden or tree make sure to call Sunshine 811 to have underground lines marked. 811 is the free national number designated by the Federal Communications Commission. It notifies utility companies, who in turn send their professional locators to identify and mark the appropriate location of underground line with paint and flags in colors that identify the utility type. The following colors represent the seven various utilities: red, orange, blue, green, yellow, purple and white. To see which colors correspond with each utility go to: http://www.call811.com/faqs/default.aspx.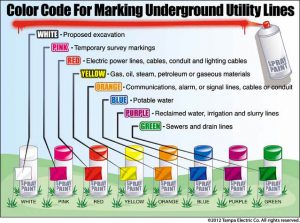
Hitting an underground utility line while digging can cause injuries, utility service outages to an entire neighborhood and damage to the environment. Failure to call before digging results in one unintentional utility hit every eight minutes nationwide. You could also be financially affected with costly fines and high repair costs.
Calling 811 in Florida is the law. At least two full business days before digging, do-it yourselfers and professional excavators must contact 811 by phone to start the process of getting underground utility lines marked. This is a free service. Be sure that all utilities have been marked before grabbing the shovel. Follow up on your one call ticket by contacting 811 again on the third day. For more information on Florida’s law, visit www.Sunshine811.com.
by Julie McConnell | Mar 13, 2018
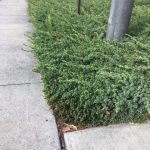
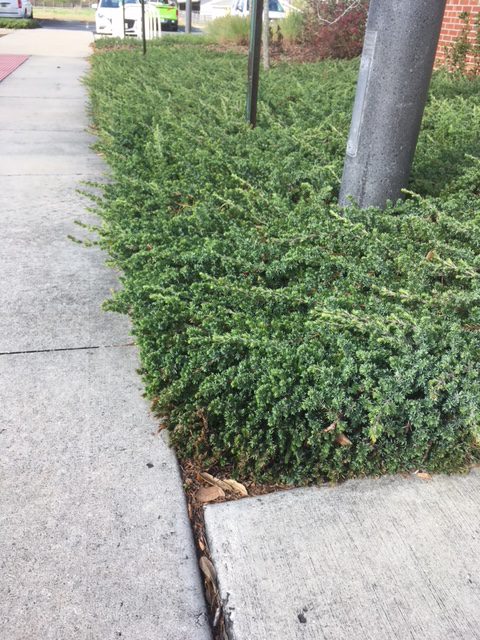
Shore juniper forms a thick groundcover and tolerates hot, dry sites. Photo: J_McConnell, UF/IFAS
We all know that when you have bare ground in Florida, eventually something unwanted moves in or the soil moves out. To avoid either of these negative outcomes, a good practice is to grow robust vegetative groundcovers, especially if the soil slopes and is at high risk of eroding. Turfgrass is one option, but what if you don’t enjoy caring for a lawn or the site is difficult to maintain or even unsafe to mow? An often overlooked option in our area is Shore Juniper Juniperus conferta.
Although some people find this plant less than exciting, its easy to explain why it can be a good option in certain situations.
- Easy to find at nurseries
- Inexpensive
- Low water requirements once established (you’ll need to turn the irrigation off on these!)
- Salt tolerant
- Evergreen
- Cold tolerant
- Low, spreading growth habit (won’t block view)
- Do not require pruning (junipers cannot tolerate heavy pruning!)
A common cultivar of shore juniper is Blue Pacific Juniper which grows to be about one foot tall but spreads two to three feet wide. The new foliage has a blue cast that gives it the common name. It creeps along the ground and will provide good ground cover to sloping sites. This plant should be planted on 3 foot centers so they have room to expand without crowding. Plant in well-drained soil and apply two inches of mulch on bare soil between plants to reduce weeds while the plants are filling in. Only water until established, then stop automated irrigation and only water as needed. Read more at Establishing Shrubs Florida Landscapes.