by Mark Tancig | Aug 19, 2019
Horticulture Extension Agents are asked a wide variety of questions, from plant identification to erosion control, from herbicide selection to water regulation. We’re usually expected to know the answer on the spot, too. We’re also expected to write a lot and share information with the public. Well, oftentimes, those factors come together to give us writing inspiration. A challenging question leads to research and gathering of information, which leads to an answer that should be shared so others can learn from it. A recent question regarding the use and regulation of backflow preventers from a longtime gardener inspired my latest knowledge quest and what I found seemed important enough to share with other gardeners.
I would guess that backflow preventers probably aren’t a common item on people’s minds, unless you’re a plumber or in the water supply business. However, backflow prevention devices help ensure that when we turn on the tap to drink, cook, clean, flush, bathe, and yes, garden, that the water isn’t contaminated.
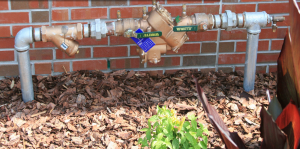
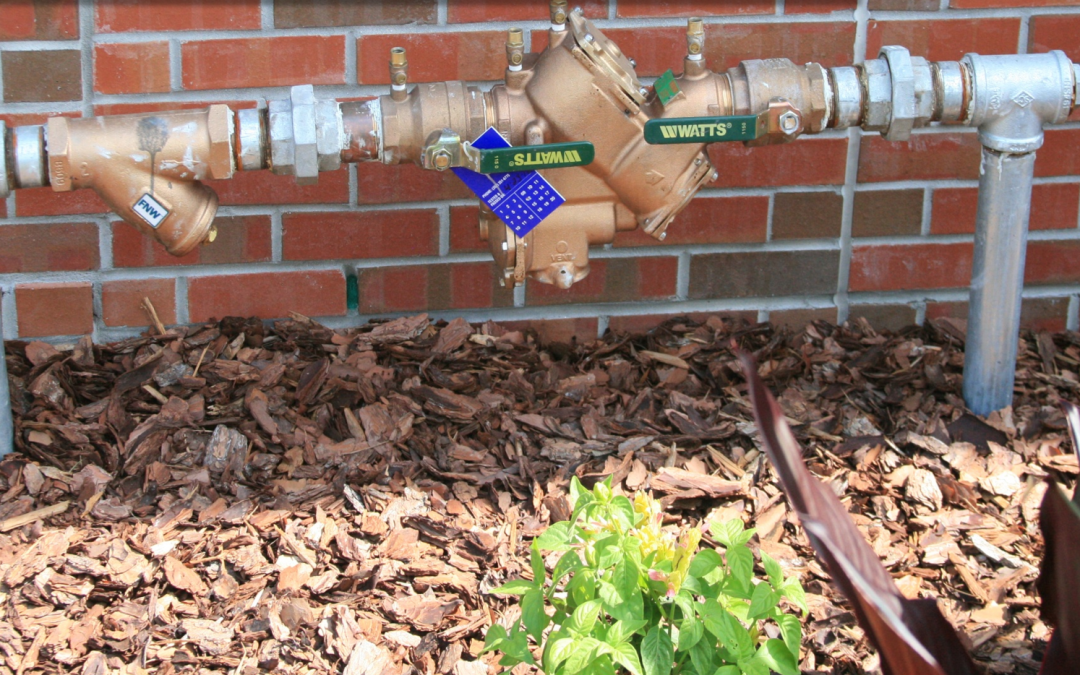
These larger backflow preventers are required to be installed and regularly inspected for certain plumbing systems. They usually hide under utility boxes or fake rocks. Credit: UF/IFAS.
Backflow preventers do just what their name implies, they prevent backflow. Backflow in a plumbing system happens when pressure in another part of the system drops, causing water from other locations to move in to equalize the pressure difference. This can be a problem in a potable water system when the main line loses pressure and water from a contaminated line is pulled in to the main line, potentially contaminating many users water. This can happen when a pipe breaks or during fire-fighting activities, for example. Contaminants of concern include chemical and biological agents, such as heavy metals, industrial compounds, bacteria, and pesticides.
Many of our indoor fixtures have built-in backflow preventers, such as toilets and bathtubs. Exterior backflow preventers, usually found under boxes or fake rocks near the water connection, are required for plumbing systems considered to be more of a hazard risk or where higher pressures could more easily flow back into the line. Examples of such plumbing systems include those with fire-fighting systems, hospitals, several-storied buildings, those associated with certain industrial processes, and, finally back to gardening, irrigation systems. In 1990, the Florida Building Code required that all residential irrigation systems include a backflow preventer. While the Florida Building Code also requires backflow preventers on all hose connections, i.e. spigots, many residential homeowners do not have these in place nor do water suppliers have the budgets to inspect each home’s spigots. A survey of 200 homes in the Midwest during 2002 found that 91% of homeowners did not have a backflow preventer attached to their spigots. I’m not sure north Florida would fare much better.
Gardeners should be aware of this responsibility and go ahead and install a backflow preventer on their outdoor spigots. This is especially true for those that use hose-end fertilizer or pesticide applicators, mix pesticides, or leave a pressurized hose connected to a sprinkler or other device. In addition to chemicals, all sorts of bacteria, algae, and other contaminants can grow in or enter a hose and get sucked back into the house’s line or, worse, the public supply line.
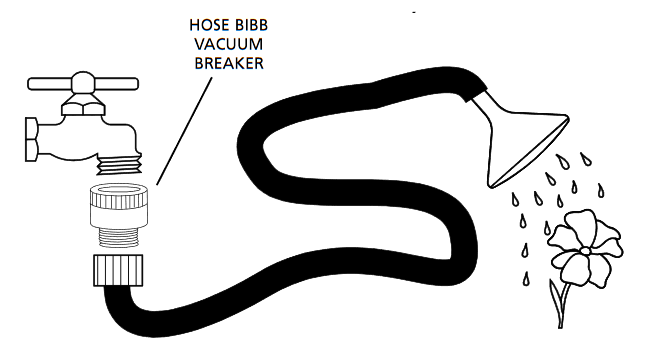
Backflow preventers are cheap and easy to install. A simple brass backflow preventer that connects between the spigot and the hose runs from $3 to $10 and will typically last for several years. You know it’s still working when water leaks out of the backflow preventer as you turn the spigot off. That’s a pretty easy and inexpensive fix to make sure the potable water source stays clean.
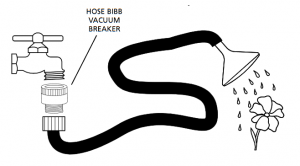
A simple and inexpensive hose bibb/spigot backflow preventer can help gardeners protect their potable water supply. Credit: Univ. S. Cal.
For more information on backflow prevention devices, and to keep writing ideas coming in, please contact your local UF/IFAS Extension Office.
by Matt Lollar | Aug 1, 2019
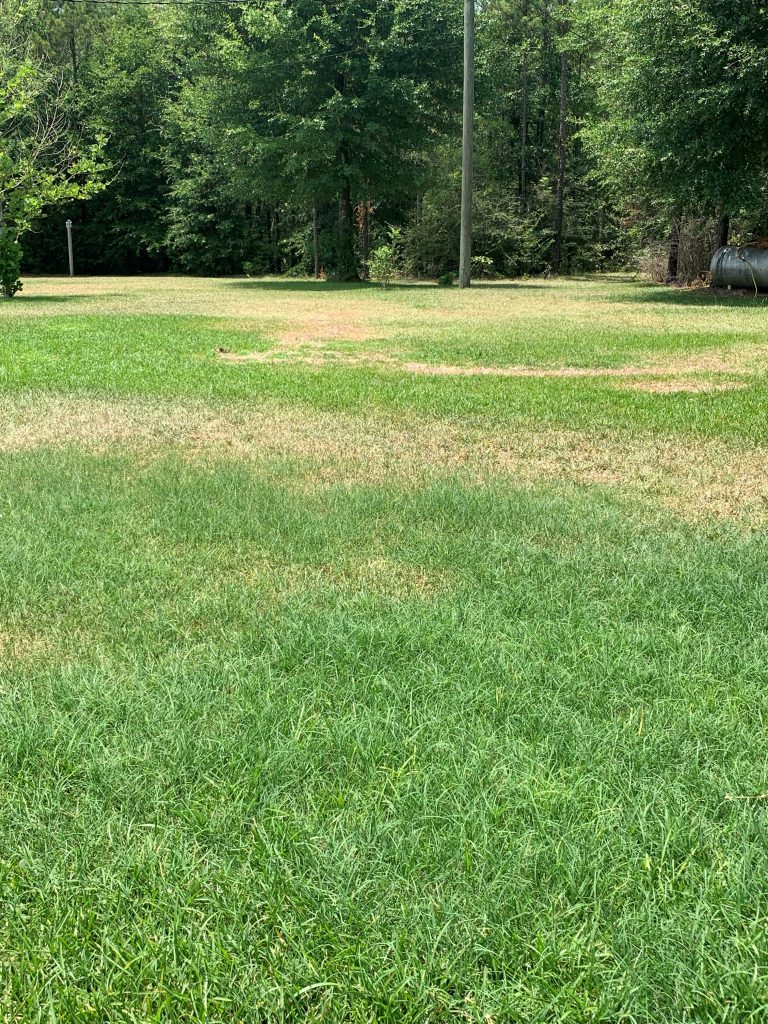
Large patch Rhizoctonia solani (known as brown patch in cool season grasses) is a common disease of many turfgrass species. It usually occurs during the cooler months from October through May when temperatures are below 80 degrees Fahrenheit. However, signs and symptoms of large patch and other Rhizoctonia diseases can be observed throughout the summer. Less common Rhizoctonia species that occur during the summer months are Rhizoctoni zeae and Rhizoctonia oryzae. Extended periods of turf wetness from excessive rainfall or overwatering provide ideal conditions for the disease to develop and spread.

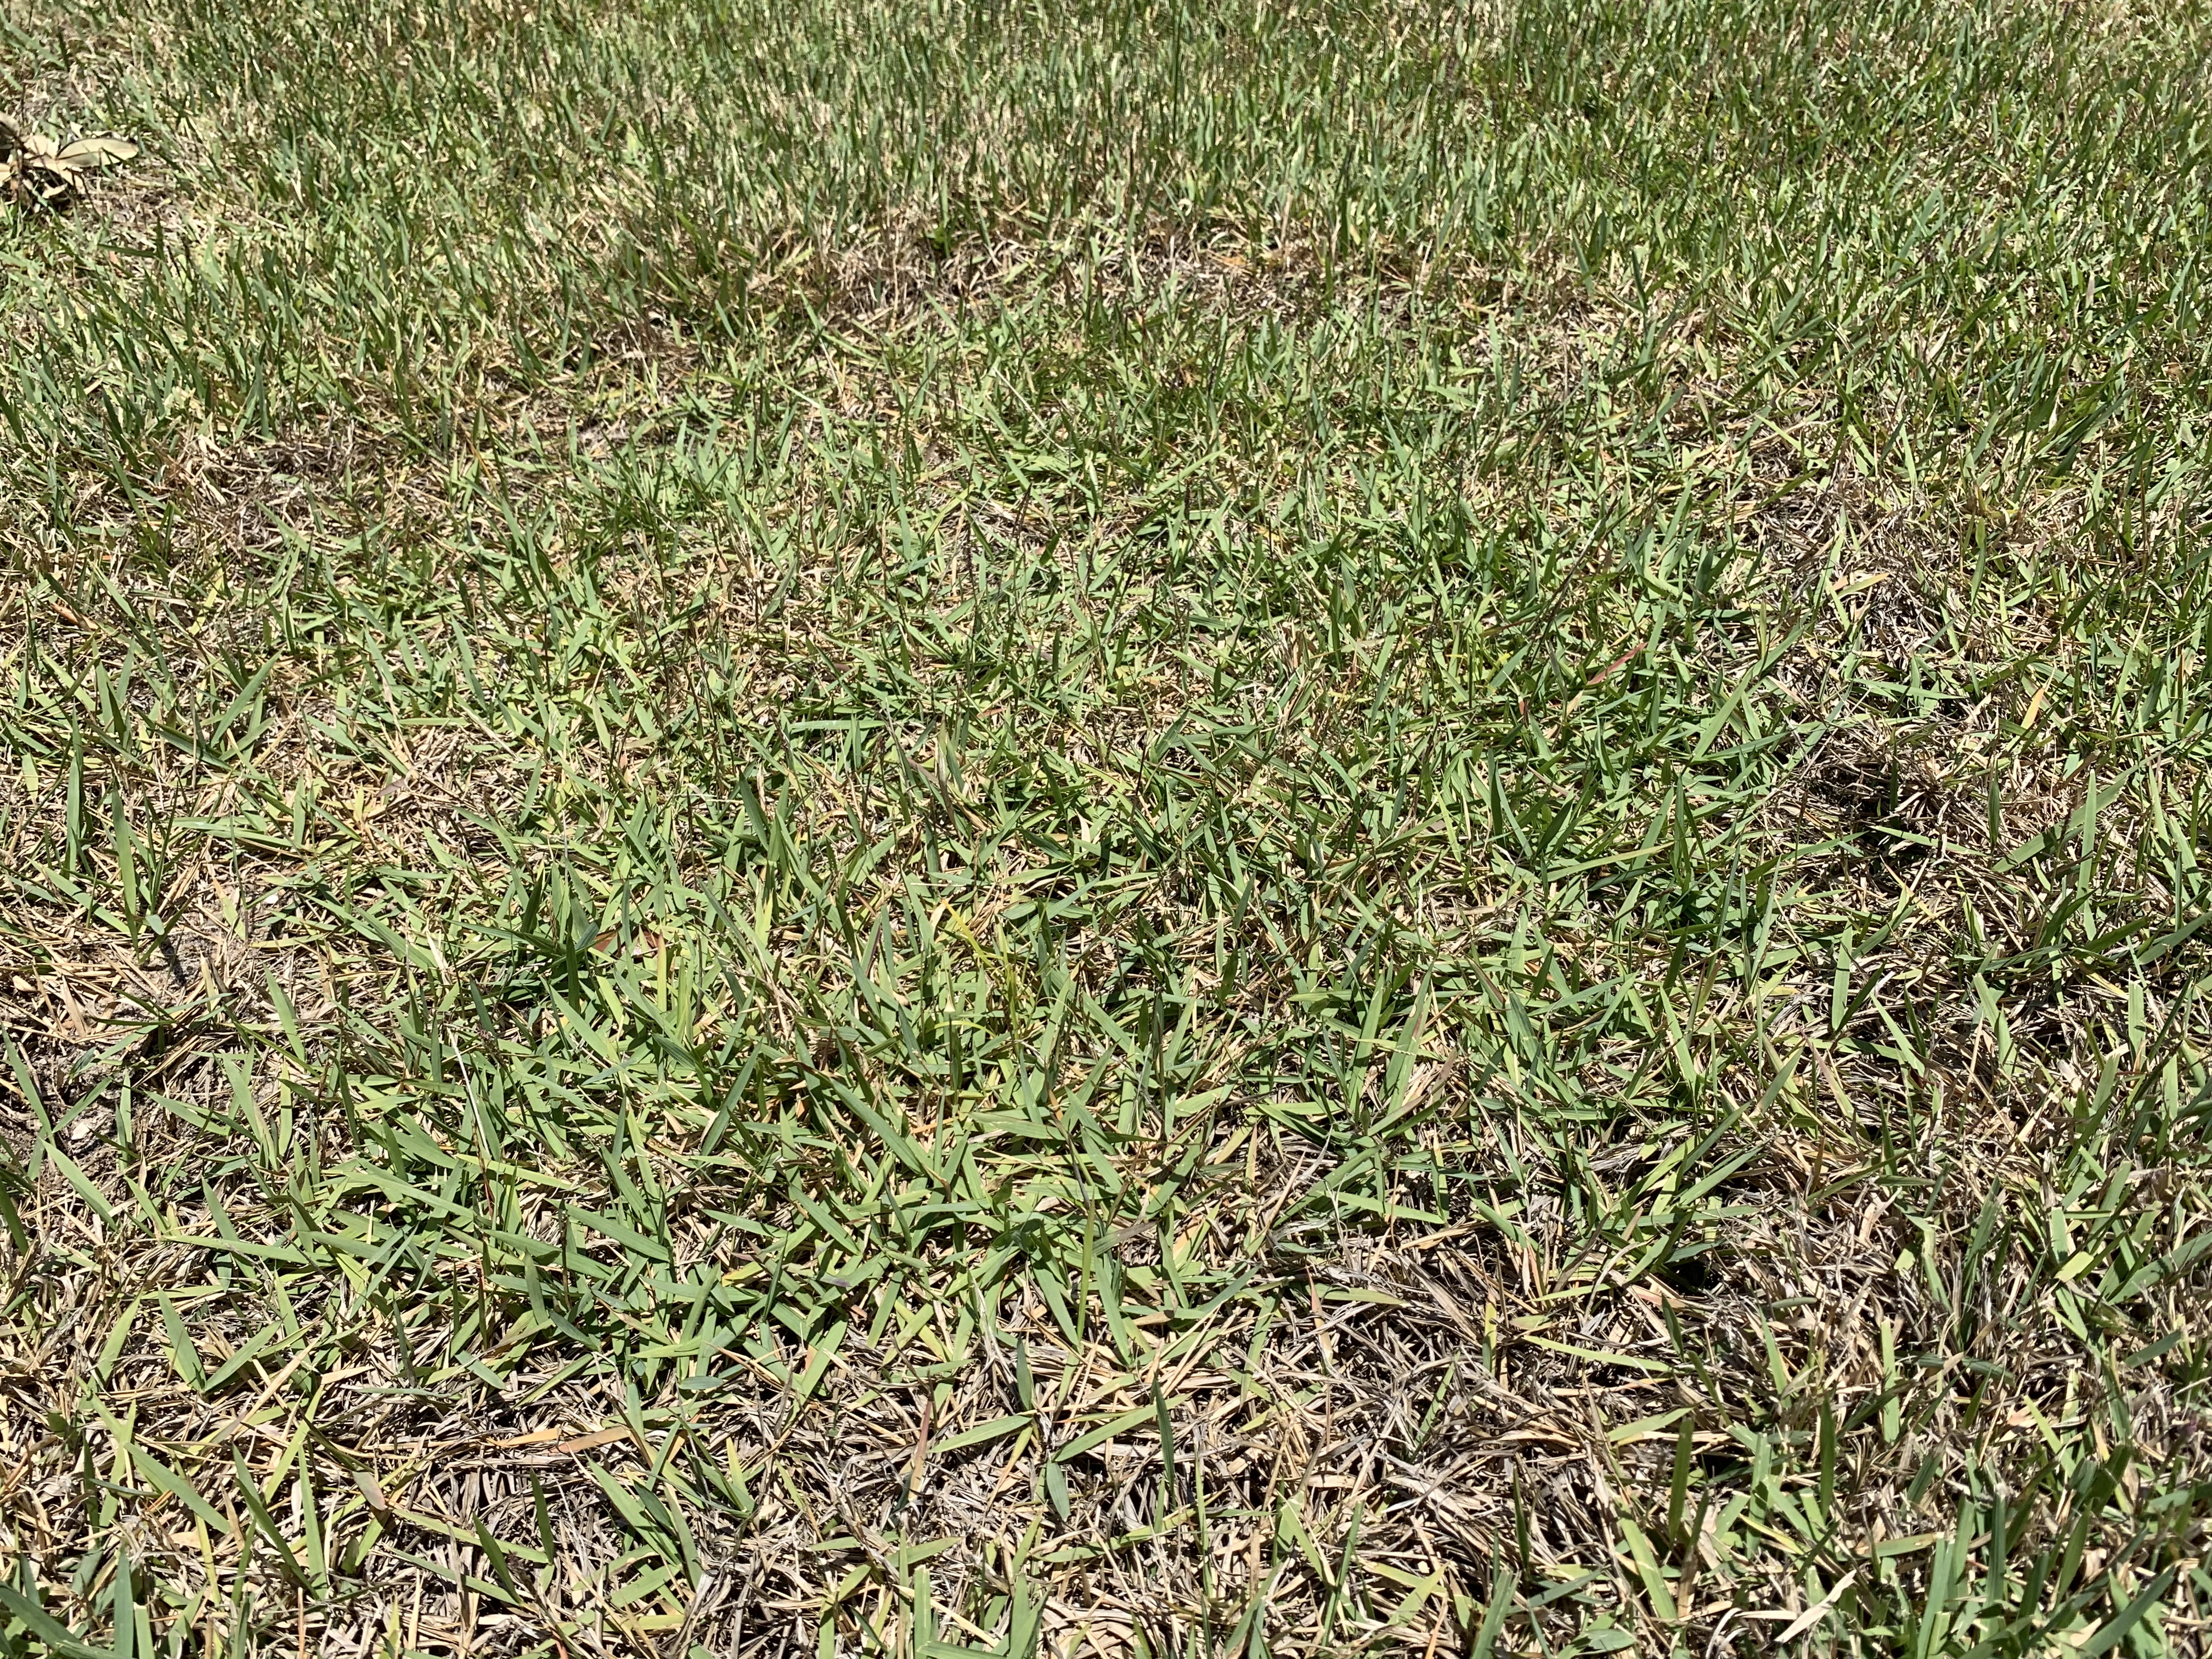
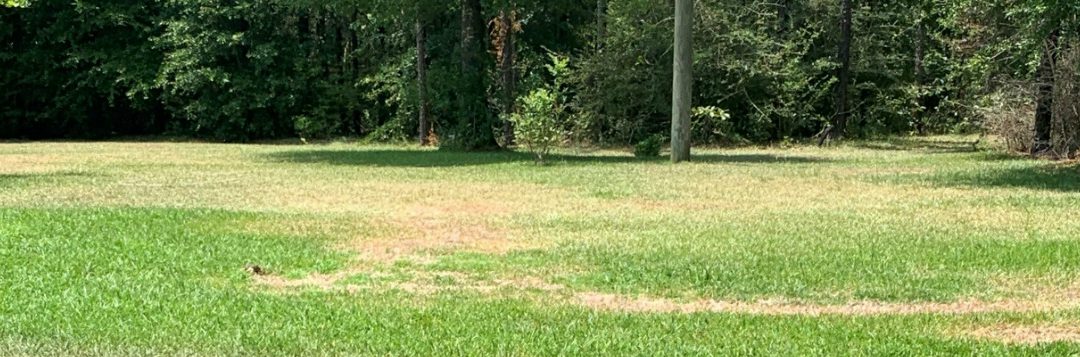
Rhizoctonia in a zoysiagrass lawn. Photo Credit: Matt Lollar, University of Florida/IFAS Extension – Santa Rosa County
This summer in Santa Rosa County, Rhizoctonia has been positively diagnosed in both St. Augustinegrass and zoysiagrass lawns and suspected in a number of centipedegrass lawns. The disease usually starts as small, yellow patches (about a foot in diameter) that turn reddish brown, brown, or straw colored as the leaves start to die. Patches often expand to several feet in diameter. It is common to see rings of yellow or brown turf with otherwise healthy turf in the center. The fungus infects portions of the blades closest to the soil, eventually killing the entire leaf. Grass blades can easily be pulled off their stems, but roots are not affected by the disease.
Rhizoctonia in a St. Augustinegrass lawn. Photo Credit: John Atkins, University of Florida/IFAS Extension – Santa Rosa County
Overwatering and excessive fertilization can both contribute to the development of Rhizoctonia disease. Improper timing of fertilizer application can also promote disease development. In the Florida Panhandle, turfgrass is actively growing from April to October. Slow-release fertilizers are recommended to allow for a more even distribution of nutrients over the course of multiple months. Recommended fertilizer rates are based on turfgrass species, geographical location, and fertilizer analysis. Please refer to the UF/IFAS Publication: “Urban Turf Fertilizer Rule for Home Lawn Fertilization” for rate recommendations.
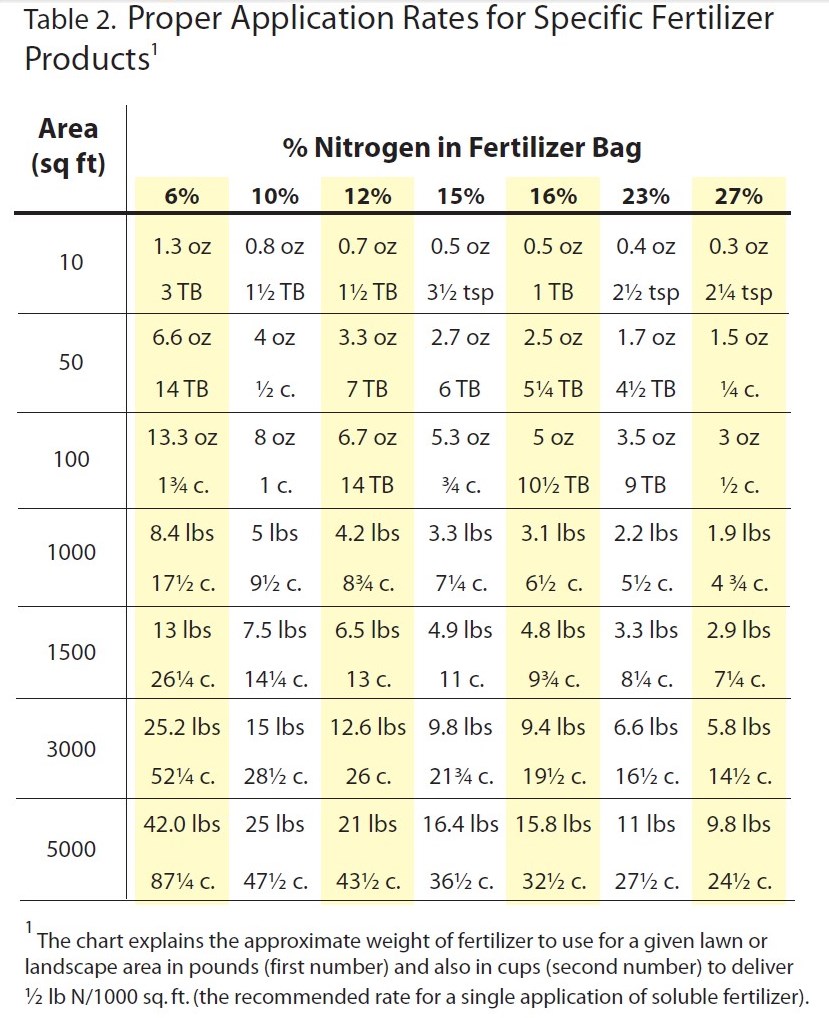
Chart excerpted from Florida-Friendly Landscaping publication.
If large patch or another Rhizoctonia disease is confirmed in your lawn, then chemical controls are necessary to keep the disease from spreading. Fungicide products containing the active ingredients azoxystrobin, chlorothalonil, fludioxonil, flutolanil, iprodione, mancozeb, metconazole, myclobutanil, polyoxin D, propiconazole, thiophanate-methyl, thiram, triadimefon, trifloxystrobin, or triticonazole are viable options for keeping the disease from spreading. For best results, follow the fungicide label for application instructions. It’s important to not only treat the affected areas, but also the healthy turf surrounding these areas in order to keep the diseased spots from growing in size.
Unfortunately, turf diseases are often not noticed until large patches of declining and dead turf are noticed. In these cases when large dead patches exist in the lawn, it is usually necessary to resod these areas. As with most problems that arise in the landscape, good cultural practices are the most proactive way to mitigate the chances with turfgrass diseases. The UF/IFAS Florida Friendly Website provides up-to-date solutions and recommendations for caring for Florida landscapes.
by Sheila Dunning | Jul 11, 2019
The Irrigation Association (IA) kicks off the official start of this year’s campaign on Tuesday, July 9, 2019. The initiative promotes the social, economic and environmental benefits of efficient irrigation technologies, products and services in landscape, turf and agricultural irrigation.
Irrigation (agricultural and turf/landscape) accounts for 65-70% of total freshwater use in the United States. According to the Environmental Protection Agency’s (EPA) WaterSense program, the average American family household uses more than 300 gallons of water per day; roughly 30% of this occurs outdoors. Efficient landscape irrigation systems and practices dramatically reduce water being lost or wasted.
The starting point for improving the efficiency of a home landscape sprinkler system is to calibrate each zone (http://ufdc.ufl.edu/IR00003389/00001) and make adjustments and repairs. That includes the rain shut-off device.
Florida is one of the few states with a rain sensor law. The most recent version of the statute (2010) states the following: “Any person who operates an automatic landscape irrigation system shall properly install, maintain, and operate technology that inhibits or interrupts operation of the system during periods of sufficient moisture.” (Florida Statute 373.62). Regardless of the water source or age of the system, all in-ground irrigation systems must be connected to a functioning rain sensor of some kind.

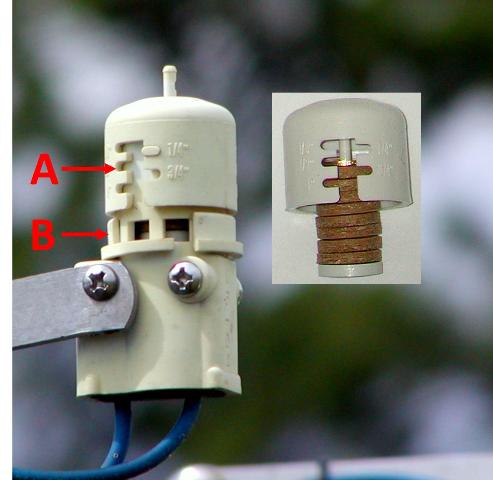
Expanding disk Rain Sensor
Expanded disk devices are the most popular rain sensor due to their low cost, ease of installation, and low maintenance. Traditionally, they are wired into the controller, but a wireless version allows for quicker installation and mounting up to 300 feet from the controller. These “mini-click” sensors contain disks made of cork that absorb rainfall and expand, triggering a pressure switch. The disk cover is rotated to adjust for the predetermined amount of rainfall required to trigger the switch. It should be set on ½ – ¾ inch, depending on soil type and rooting depth of irrigated plants. The switch continues to interrupt the scheduled controller as long as the disks are swollen. When the rain stops, the disks begin to dry out. Once they have contracted, the switch closes and the regularly scheduled irrigation cycle begins where it left off before the interruption. These small cork disks wear out in Florida’s heat and need to be replaced. By checking and repairing the sensor parts, the sprinkler system will operate much more efficiently. We have all seen irrigation systems running in pouring rain. Keep yours maintained to avoid this needless waste of water.
So, join the kids this summer. Go outside and play in the water. Turn on the sprinkler system and check it out. July is Smart Irrigation Month. Let’s see how efficient you can make your system and reduce the water waste in Florida.
by Molly Jameson | May 20, 2019
Spring is in the air, and that means temperatures are warming up and tank-tops, shorts, and flip-flops will soon be your preferred attire. Once those highs are steadily in the 80s and 90s, any outdoor activity will become coupled with a bottle of water and the occasional ice-cold glass of lemonade.
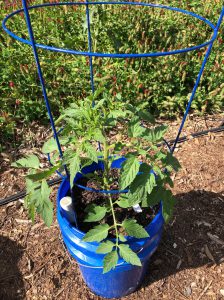
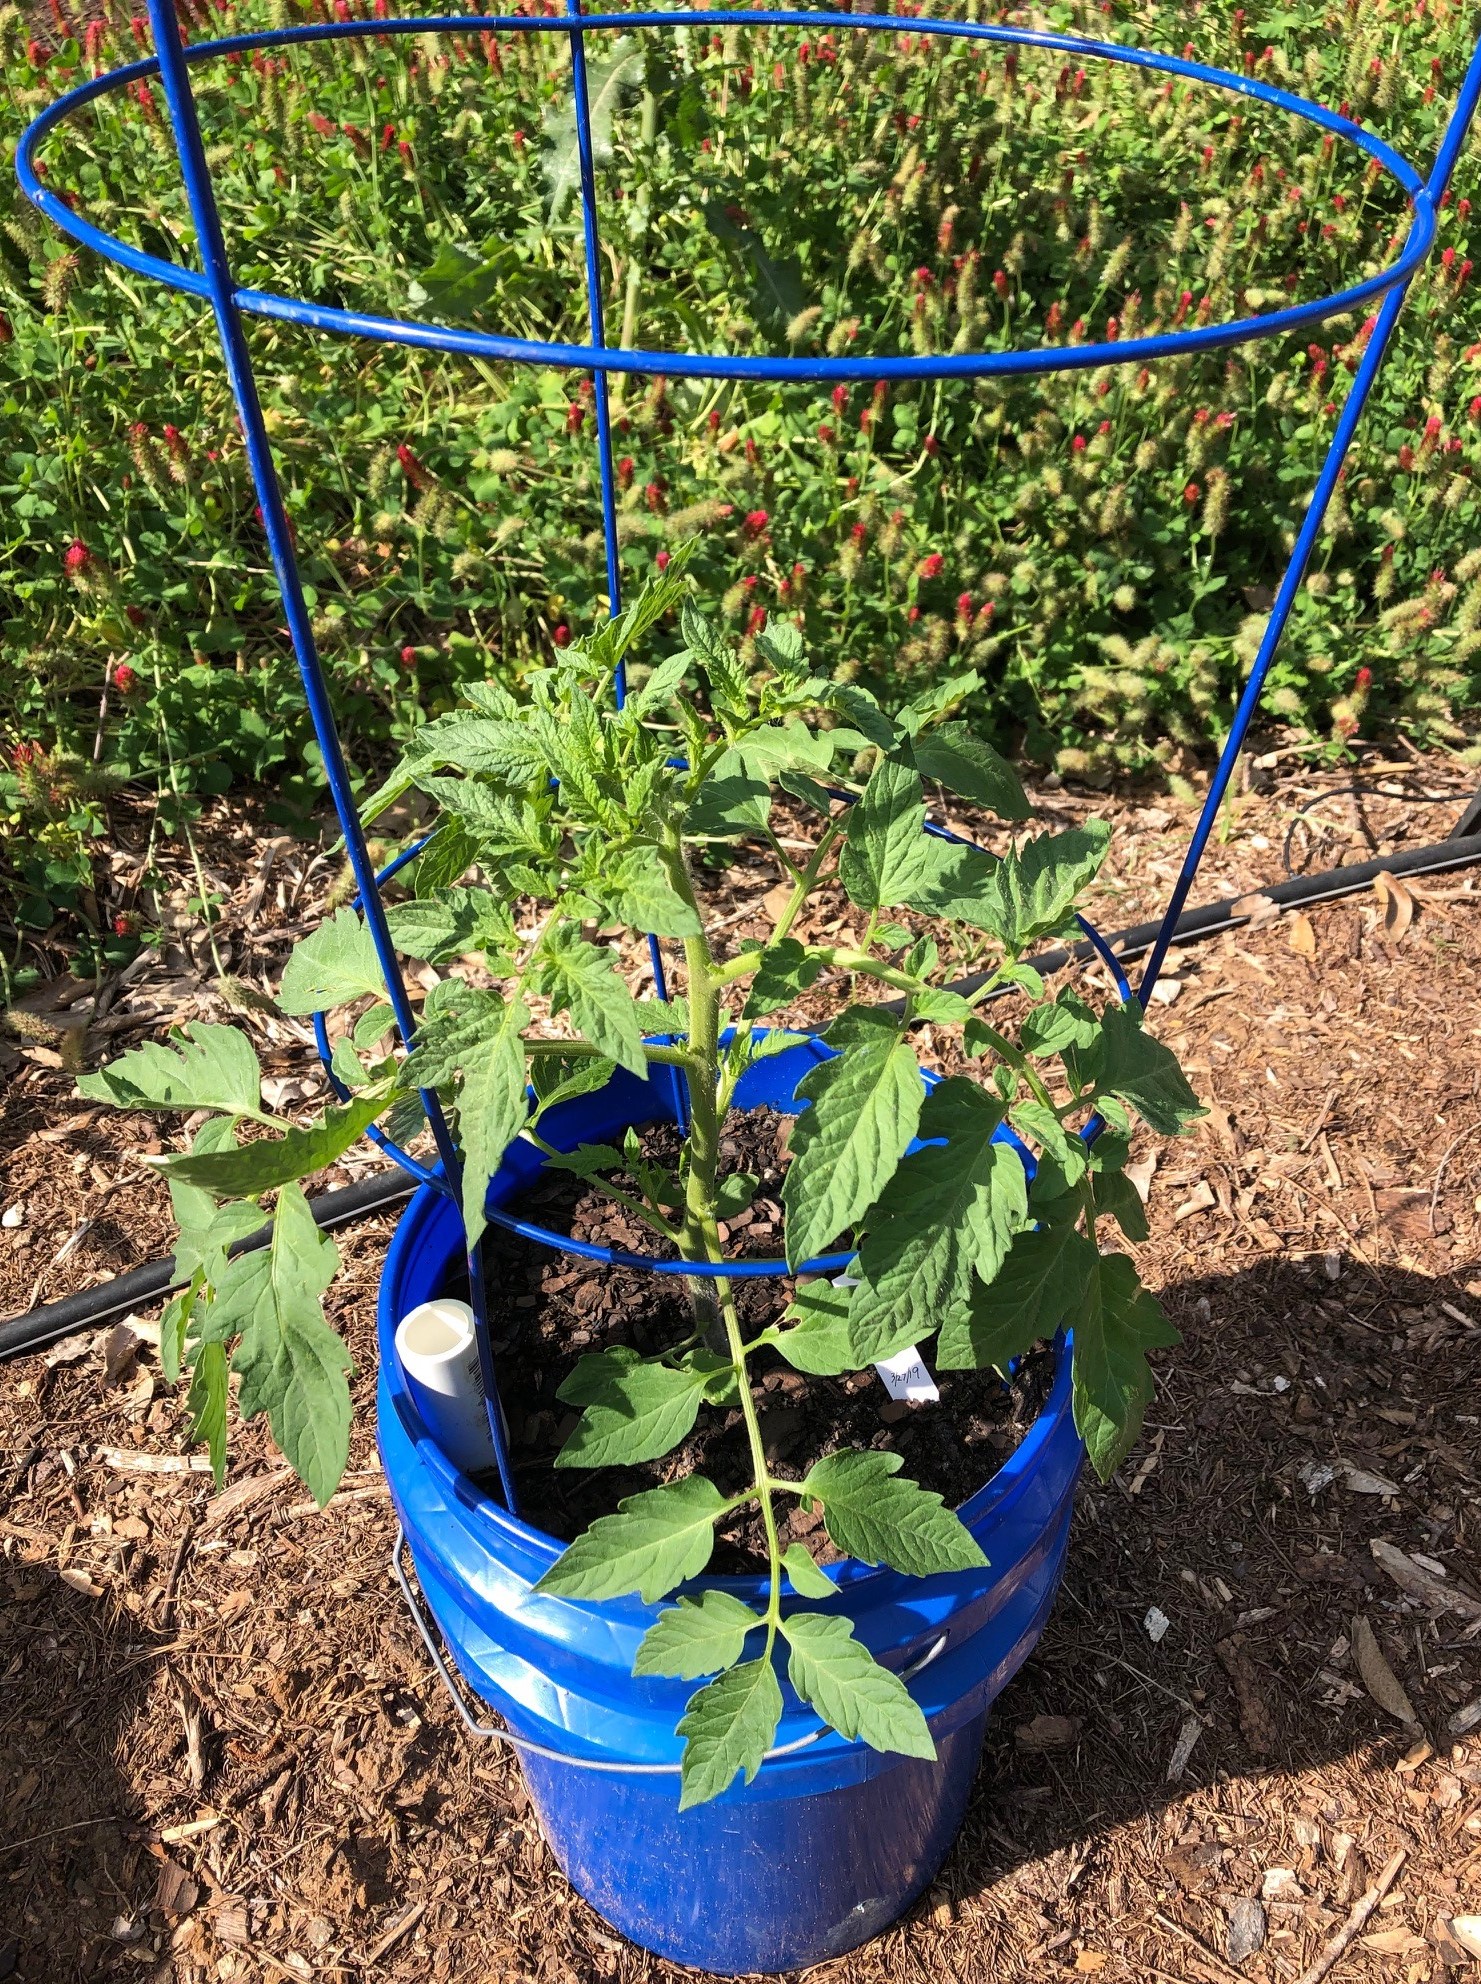
Self-watering containers allow you to continue gardening even if you plan on going on vacation this summer. Photo by Molly Jameson.
If you’re a gardener, you will notice the hot sun doing its best to dehydrate not only you, but your spring vegetable and flower beds too. And although April showers bring May flowers (and Mayflowers bring pilgrims) in many parts of the country, spring is historically one of the driest periods for the Florida Panhandle.
While spring in the Florida Panhandle can be quite dry, it is the relentless heat of summer that really drives up transpiration and evaporation rates. And herein lies the dilemma: the kids are soon to be on summer break, family vacations are on the horizon, and all your favorite summer veggies are on the brink of delivering their bounties.
If you do not have a reliable irrigation system and timer or the fortune of a very generous green-thumbed neighbor, you risk your hard work in the garden succumbing to the heat while you are away. If you find yourself sacrificing a summer garden in place of a vacation, don’t despair. There is a low-cost, homemade solution that can step in while you are away: a self-watering container garden.
Self-watering containers use the process of capillary action, where water molecules are pulled upward from a water reservoir into soil above and then into and through plant roots. The forces of cohesion, in which water molecules stay close together, and adhesion, in which water molecules “stick” to other substances, create this important phenomenon.
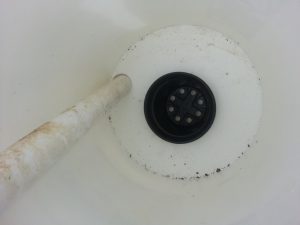
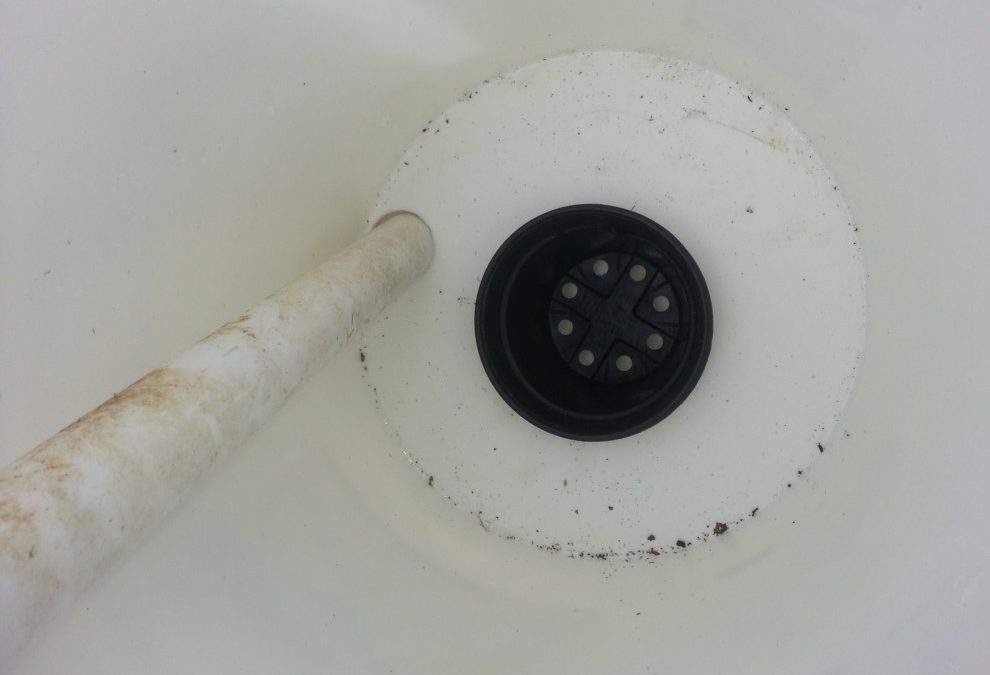
A wicking basket uses capillary action to pull water molecules up from the water reservoir and into the soil. Photo by Trevor Hylton.
While store-bought versions can be costly, you can make a self-watering container for less than $10 with just a few materials and tools. There are multiple designs for creating a self-watering container at home. Typically, designs include two five-gallon food-grade plastic buckets to hold the soil and plant; a knife or hole saw to access the water reservoir; a wicking basket or strips of cotton from an old towel, pants, or shirt to generate the capillary movement of water; a drill and drill bit for drainage; and a plastic pipe for easy filling of the water reservoir.
To make your own, view these Extension-produced self-watering container garden resources and follow the step-by-step instructions that work best for you:

by Sheila Dunning | Apr 9, 2019
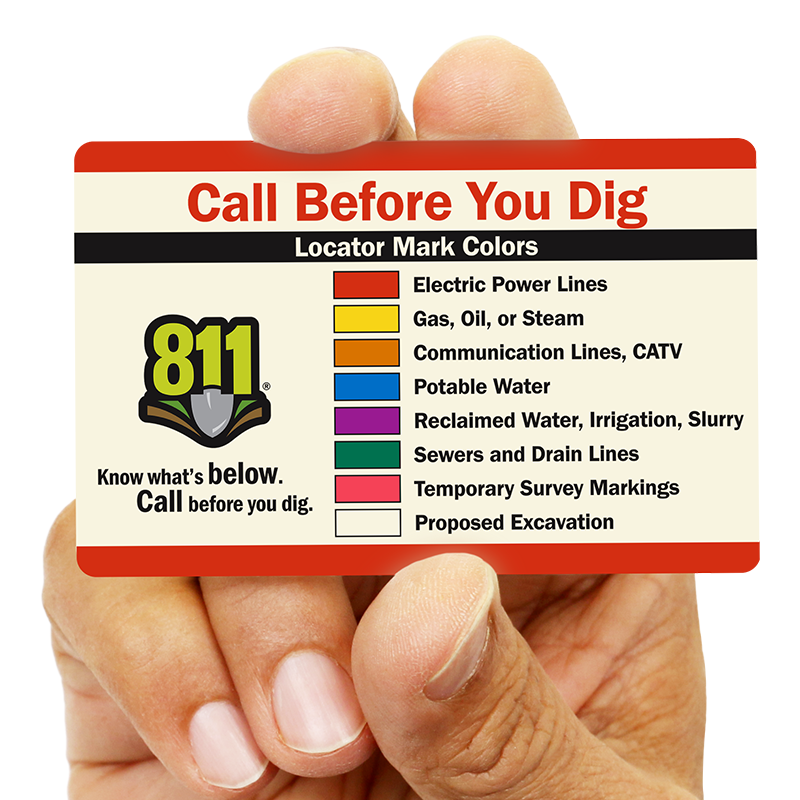
 Call 811 before you dig. No one wants a weekend project to be the cause of Internet, phone and cable outages. Worse yet, what if someone gets hurt from contact with natural gas or electrical lines? That’s why it is so important to have buried utilities in the yard located and marked before digging. Sunshine 811 coordinates each individual company to clearly mark where the service lines are located. Homeowners are required by law to contact 811 three days before any soil removal is done. The service is free.
Have information prepared before making the request. Describe the work to be performed (e.g. fence install, landscaping, irrigation install), including the type of equipment that will be used. Specify the exact location on the property and how long the work will continue. Finally, provide all the contact information (e.g. name, phone number, e-mail), should there be any additional questions.
Call 811 or request a single address ticket online. Receive a ticket number and wait two full business days, not counting weekends or holidays. Then contact 811 again. Make sure that all the utilities have responded in the Positive Response System (PRS). Sometimes that may mean that the company doesn’t have anything to make in the area.
If there are utility lines running through the yard, they will be marked with specifically colored paints or flags. Red is used for electrical lines, orange indicates communication lines, yellow means gas, blue is used for potable water, purple is reclaimed water, and green indicates sewer lines. White lines may be used to outline digging areas and pink are temporary survey marks. This is the APWA Uniform Color Code.
Every effort is made to locate the lines as accurately as possible. But, the safest thing to do is hand dig to expose the utility line before using any mechanized equipment. Lines can vary up to 24” from the marked line and depths can be less than 5”. Remember there may be access lines running through the property even if that service isn’t utilized at that address.
Keep safe this spring. Call 811 before digging.
by Larry Williams | Oct 20, 2018
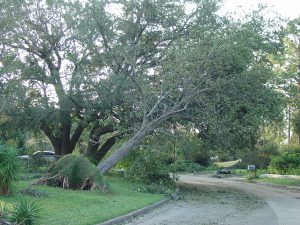
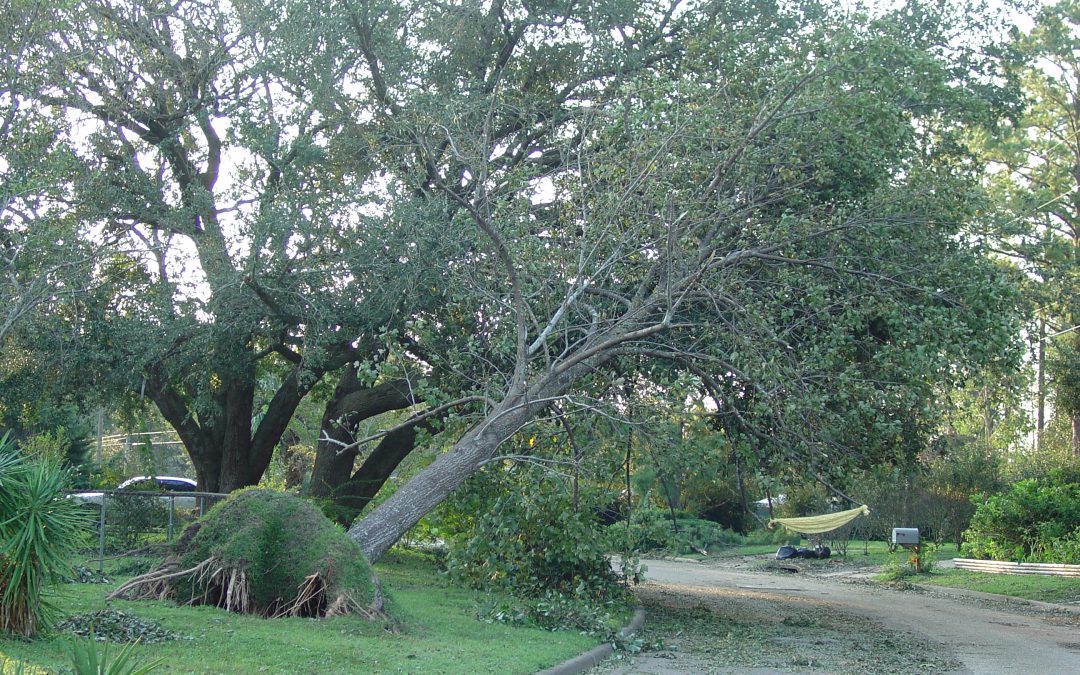
Partly uprooted tree from hurricane. Photo credit: Larry Williams
Hurricane damaged plants should be cared for as soon as possible. Partially uprooted small trees and shrubs should be securely staked in their original positions. Until plants are reset, protect exposed roots and prevent drying. Soil, moist burlap sacks or moist sphagnum moss can be put on exposed roots. Remove damaged roots so the tree can be reset at ground level.
Once reset, trees should be secured. Two or three, four-foot long, 2 x 2 inch wood stakes can usually anchor trees with trunk diameters less than two inches. Stakes should be placed about a foot outside root ball and inserted eighteen inches into soil. Secure stakes to trunk with ties made from wide, smooth material or hose-covered wire. Trees two inches or larger in diameter should be guyed with three or four wires or cables. Guy wires are secured to deeply driven short stakes evenly spaced outside the root ball. Guy wires should be run through rubber hose and secured to trunk at only one level. Mark support wires with bright materials to prevent accidents.
Guy wires should be adjusted several times during growing season to minimize trunk injury. Support stakes and wires should stay in place for one year.
Soil should be filled around root area once the tree is staked into position. Firm around roots to eliminate air pockets and provide support. Excess soil over the normal root area can be damaging. Only replace soil that has been washed or worked away from roots.
In cases where all branches were destroyed, remove the tree. This is especially important for trees such as pine that do not normally regain their natural form. You may be able to keep other trees such as oaks, where strong bottom limbs still exist. However, emerging sprouts from ends of large, cut limbs will be poorly secured to the tree and are likely to fall from the tree during a storm. In addition, decay organisms usually enter these large wounds. Trees and shrubs that lost their leaves from high winds can usually be saved and should resume growth.
Any tree work, including tree removal should be done by a professional arborist, preferably a certified arborist. To find a certified arborist in your area contact the International Society of Arboriculture (ISA) at 217 355-9411 or at http://www.isa-arbor.com/. You also may contact the Florida Chapter of ISA at 941-342-0153 or at http://www.floridaisa.org/.
Reset plants should be watered twice a week and fertilizer should not be applied. Until re-established, fertilizer will be of no benefit and may injure new roots.
Plants exposed to saltwater, including lawns, should be irrigated with fresh water as soon as possible. Apply water more frequently than under normal conditions.
For additional information, visit http://sfyl.ifas.ufl.edu/disaster-prep-and-recovery or contact the UF/IFAS Extension Office in your county.