by Gary Knox | Apr 23, 2020
Article by Dr. Gary Knox, Professor of Environmental Horticulture at the UF/IFAS NFREC Quincy
Introduction
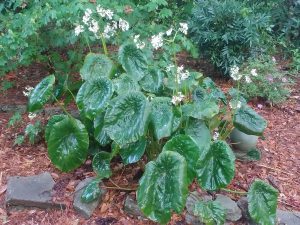
Rhizomatous begonias are a large group of Begonia species, hybrids and selections characterized by large, sometimes-colorful leaves arising from thick rhizomes that grow along the soil surface. White or pink flower clusters that appear in late winter and spring are an extra bonus with these plants. Some types can be used in north Florida as herbaceous perennials that add bold leaf texture and color as well as flowers to shady gardens.
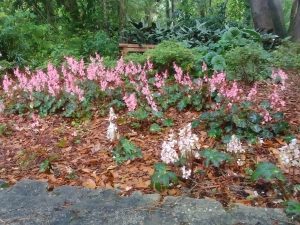
Begonia mass planting
Common rhizomatous begonias such as Begonia nelumbiifolia, ‘Erythrophylla’ (“Beefsteak”), and ‘Ricinifolia’ have long been grown outdoors in south and central Florida gardens as herbaceous perennials. North of these areas, rhizomatous begonias were considered cold sensitive and thus used strictly as pot-grown plants grown indoors or protected over winter. Nonetheless, north Florida trials testing the performance of outdoor, in-ground plantings started in Tallahassee and Gainesville as long ago as the late 1980s and early 1990s. With the proven success of some rhizomatous begonias in north Florida, interest in these plants increased rapidly in the early 2000s. Since then, savvy north Florida gardeners have been delighted by the possibility of using rhizomatous begonias as interesting herbaceous perennials for the shade garden. While temperatures below freezing can damage or kill leaves, these plants will usually produce new leaves from the rhizomes once warmer temperatures return in spring.
Plant Description Under North Florida Conditions
Leaves of rhizomatous begonias are this plant’s most distinctive feature and are why this group is so appealing to gardeners. Leaves often are large, from a few inches wide to almost 3 ft. in diameter (as reported for the cultivar ‘Freddie’ under the right conditions). Leaf shape may be rounded, star-shaped or irregularly edged, and leaf colors include burgundy, red, bronze, chartreuse, silver, and various shades of green including one so dark as to be almost black. Many types have leaves displaying patterns of one or more colors and some have silver or red markings. Undersides of leaves are often burgundy-colored, and leaf stems (petioles) also may exhibit colors other than or in addition to green. Leaves may be smooth, textured, or fuzzy-appearing due to large numbers of sometimes conspicuous hairs. Some types have leaves with an interesting three-dimensional spiral located on top of the leaf where the leaf blade attaches to the stem.

Begonia ‘Big Mac’ foliage
Rhizomatous begonia rhizomes are thickened, fleshy stems 1 to 2 in. or more in diameter that grow, branch and spread horizontally at or just below the soil surface, often in the mulch or leaf duff. Adventitious roots develop along the rhizome, and dormant buds embedded in the horizontal stem can be stimulated to grow new leaves after damage, stress or when divided. With age, as rhizomes grow outward, the oldest part of the rhizome will stop producing leaves and eventually die.
The rhizomes contain water and food reserves that allow this type of begonia to survive environmental stresses like drought as well as leaf loss or damage from cold temperatures. Shoots and roots can grow from the rhizome even if leaves and roots are killed or damaged.
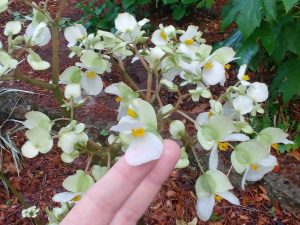
Flowers occur in late winter to spring, depending on the species, cultivar and weather, and are quite showy on some selections. Flowers typically are white to various shades of pink and occur in a cluster (technically called a cyme) held above the foliage, in some cases dramatically high above the foliage. Individual flowers may range in size from 3/8-inch to over 2 inches at their widest point and a flower cluster may contain a few to over 120 individual flowers, depending on selection and growing conditions. A mature rhizomatous begonia may have an extended period of flowering, providing weeks of color. This long floral display results from large numbers of flowers developing sequentially on an individual flower cluster such that new flowers are still forming long after the first flowers have opened. Furthermore, multiple flower clusters appear over an extended time period. Flowers occasionally are pollinated and form winged seed capsules, though seed production and viability are variable. After flowering, the leaves remain a point of interest in the garden due to their size, lush appearance, interesting shapes and colorful patterns.
Cultural Requirements, Use and Maintenance
Rhizomatous begonias grow best in light shade or indirect light but can tolerate morning sun. Plants thrive in rich, organic, well-drained soil that is moist but not wet. A layer of organic mulch or leaf litter often is enough to provide basic conditions for growth in most soils if they are well-drained. Accordingly, organic mulches or leaf litter should be applied regularly around plants. Fertilizer stimulates growth but decomposing organic mulches can provide adequate nutrients, except perhaps with poor or sandy soils.
Newly planted begonias should be watered regularly. After establishment, most rhizomatous begonias benefit from regular watering but only require irrigation during periods of drought or extended dry weather.
An individual plant makes an attractive specimen plant in a container or in the garden. With time, a rhizomatous begonia can spread and, in the garden, develop into a patch. Alternatively, planting large numbers of the same rhizomatous begonia can create a very dramatic garden border, mass planting, or groundcover, especially in spring when all plants are flowering. To achieve this effect more rapidly and with smaller numbers of plants, tips of rhizomes can be pruned to stimulate rhizome branching and result in a denser plant or patch. Rhizome tip pruning should be done after plants finish flowering. Plants can be divided and moved easily since only the rhizome is needed to establish a new plant, but this should occur after flowering and early in the growing season so plants have long enough to establish before cold weather.
For aesthetic purposes, dead or damaged leaves may be removed as needed but especially after frosts and hard freezes. Similarly, leaves that overwinter often become “ratty” in appearance with time and may be removed without affecting plant growth.
Potential Problems
Rhizomatous begonias have few pests or other problems. Mealy bugs can occasionally infest plants. As with other large-leaved plants, wind or physical contact can tear and damage leaves. In north Florida, winter frosts and freezes can damage and disfigure leaves or kill leaves entirely, causing them to lose structural integrity and collapse, appearing mushy. Foliage may be protected during cold weather by frost cloth, sheets or other typical cold protection strategies, though heavy coverings could themselves damage leaves.
Rhizomes themselves usually survive cold weather because they are insulated from low temperatures by being half-buried in the ground and/or being covered by mulch. Adding mulch regularly to rhizomatous begonia plants will provide increased freeze-protection. Also, their typical planting location under tree canopies protects plants from a radiation freeze. Soil drainage is a more important factor for rhizomes since wet soil conditions could lead to rot, particularly in winter.
Common Types and their Descriptions Under North Florida Conditions
With hundreds of species and thousands of cultivars and hybrids, rhizomatous begonias can be overwhelming. Many rhizomatous begonias look alike and even experts have difficulty distinguishing species and cultivars. Many grown in north Florida have their origins in Mexico, Central and South America, though the Begonia Family is huge and species are found nearly world-wide.
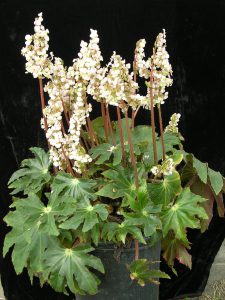
Begonia heracleifolia
Technically rhizomatous begonias include Rex begonias, a group derived from Asian native, Begonia rex, and known for their especially colorful leaves. However, most Rex begonias do not grow well in Florida’s heat, high rainfall and high humidity, and so these begonias are excluded here.
Begonias listed below represent types that have proven resilient and usually cold hardy in north Florida USDA Cold Hardiness Zone 8b.
Species:
Begonia heracleifolia: The species boasts star-shaped leaves up to 6 in. across on stiff, hairy, thick leaf stems (petioles) up to 5 in. long. Each of the pointed leaf lobes is edged in dark green and has a chartreuse stripe along the central midrib, adding contrast. Spectacular sprays of pale pink flowers appear in late winter in clusters measuring 3 ½ in. by 4 ½ in. on 6-in. flower stalks (pedicels). Each cluster contains about 30 or more flowers, each about 1 in. across. As the season goes on, foliage gets showier and showier. It often dies down after winter freezes but re-emerges in late spring.
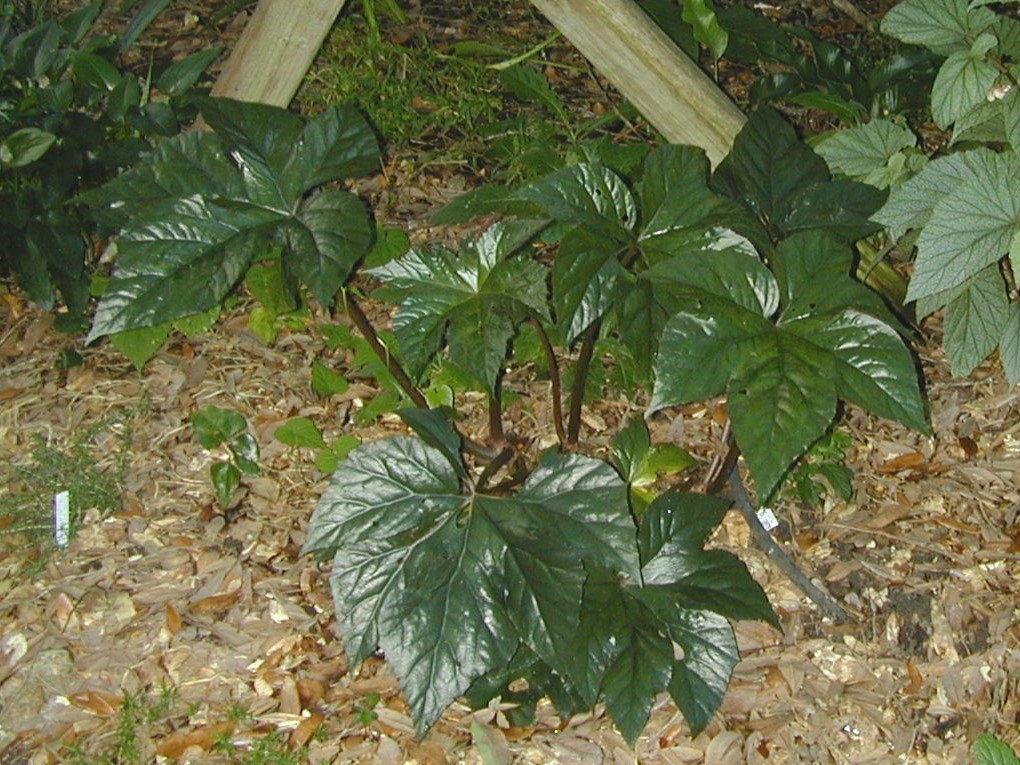
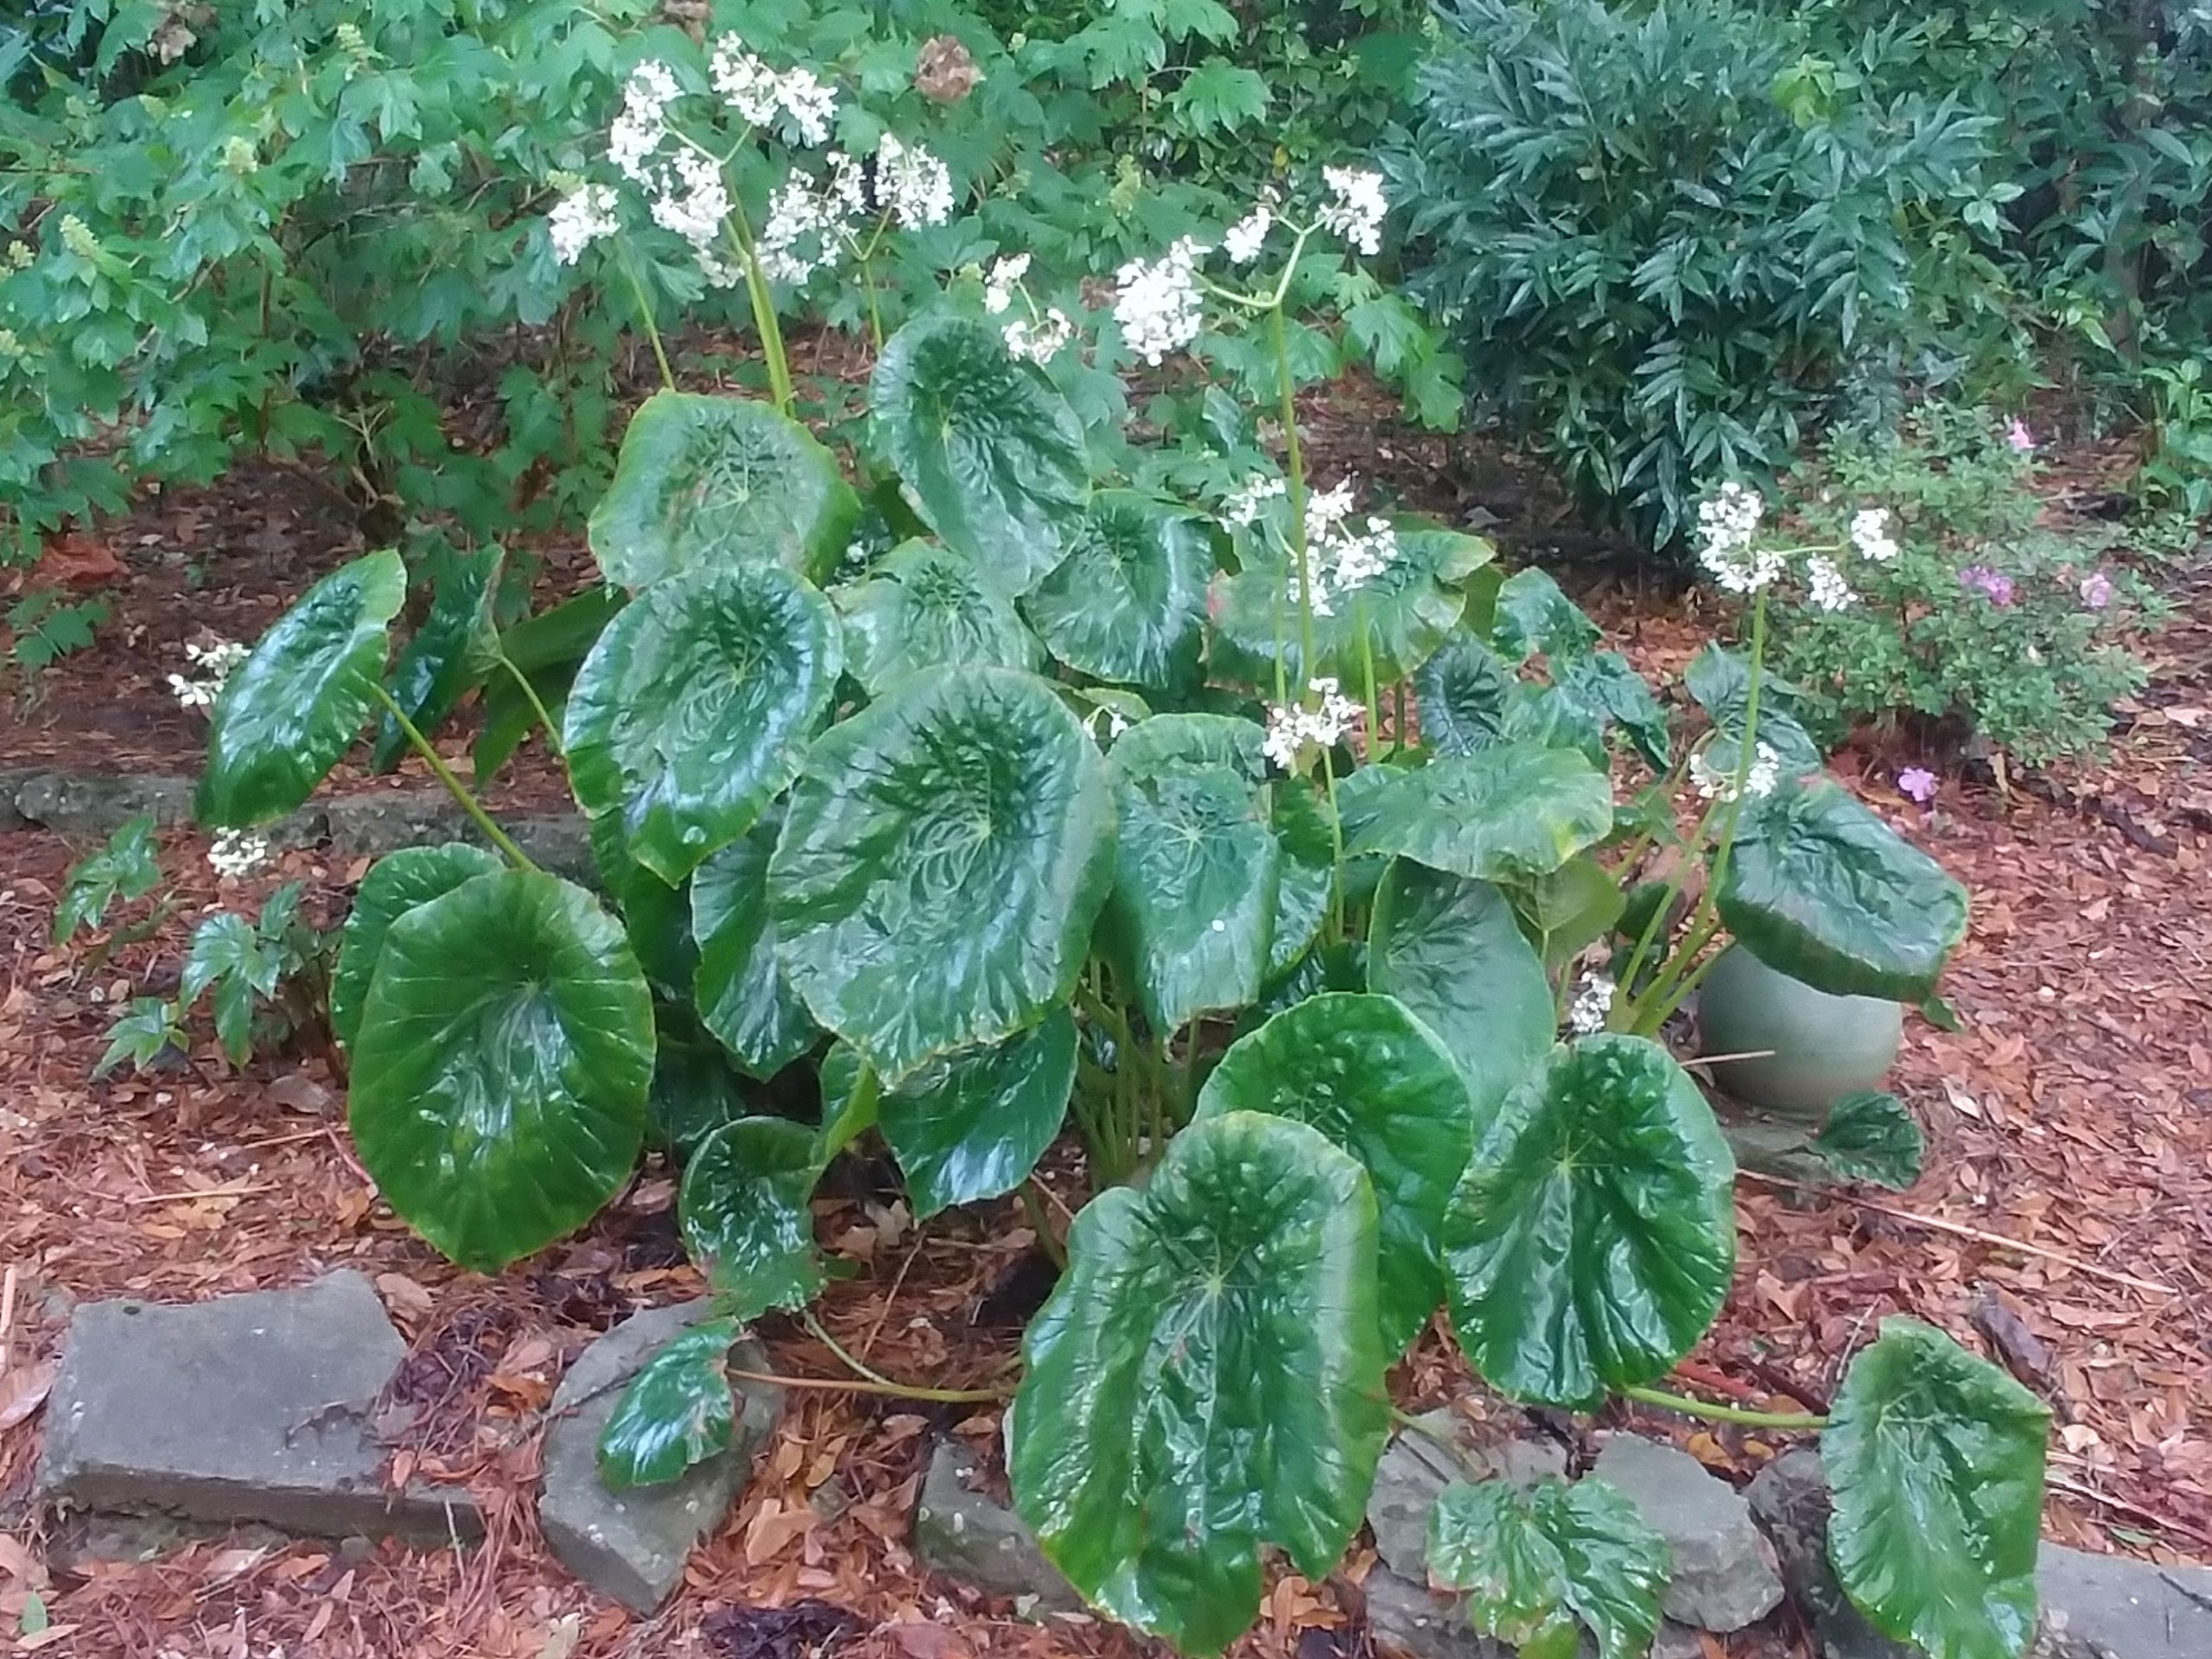
Begonia nelumbiifolia
- nelumbiifolia: This cold hardy begonia is known for its exceptionally large, water lotus-shaped leaves, creating a stunning specimen. Individual leaves can grow as large as 18 in. by 14 in. on leaf stems as long as 36 in. but 12 in. by 9 in. leaves are more typical. As temperatures warm, new developing foliage continues to get bigger, growing into very large leaves by fall. There also is a form in which the medium green leaves have red veining. White flowers are displayed above the foliage in mid to late spring in airy clusters measuring 7 ½ in. to more than 12 in. across on stems up to 48 in. tall. Clusters may contain as many as an astounding 120 flowers, each about ¾ in. across at its widest point.
2. popenoei: Huge rounded leaves with red veins and undersides make this a specimen plant which can grow to 3 ½ ft. tall and wide. Hardy with protection, it throws up tall stalks with clusters of white flowers in late winter.
Cultivars:
“Beefsteak”: This catch-all name refers to the original beefsteak begonia, ‘Erythrophylla’, as well as many derivatives that look similar. Beefsteak begonias characteristically have rounded leaves with a glossy green to bronze top surface and reddish undersides. Leaves range in size from 4 to 7 in. in diameter, and flower clusters are on stems up to 18 in. tall. ‘Erythrophylla’ was developed in 1847 and is considered a tough, vigorous plant, hence the common name, “beefsteak”. Given the long history and vigor, ‘Erythrophylla’ and derivative beefsteak begonias have long been shared as pass-along plants, world-wide as potted plants and later as an in-ground Florida garden plant. One type has ruddy, evergreen leaves and long-lasting, bold pink flower clusters. The scalloped 4-in leaves are on short 5 ½ in. reddish leaf stems but are most notable for remaining undamaged by temperatures down to the mid 20s °F, long after all other begonias’ leaves have turned to mush. Mid spring finds this plant topped by numerous clusters of dark pink flowers, with the display lasting 6 weeks or more. Individual clusters are about 8 in. by 5 in. on flower stems about 12 in. tall. Each cluster contains about 20 flowers each about ¾ in. wide at its widest point.
Begonia ‘Big Mac’ in flower
‘Big Mac’: This is a large, vigorous plant with enormous star-shaped leaves having reddish undertones and red leaf stems. The plant grows about 3 ft. tall and 2 ft. wide. Individual leaves may grow up to 18 in. wide on 16-in. leaf stems but typical leaves on younger plants are 10 in. to 12 in. wide. Individual white flowers are an amazing 2 in. wide at their widest point in clusters measuring 7 in. by 12 in. and containing about 75 flowers. Cold winters will knock it to the ground, but this begonia re-emerges again in late spring. This plant was hybridized in 1982 by Paul P. Lowe in Lake Park, Florida.
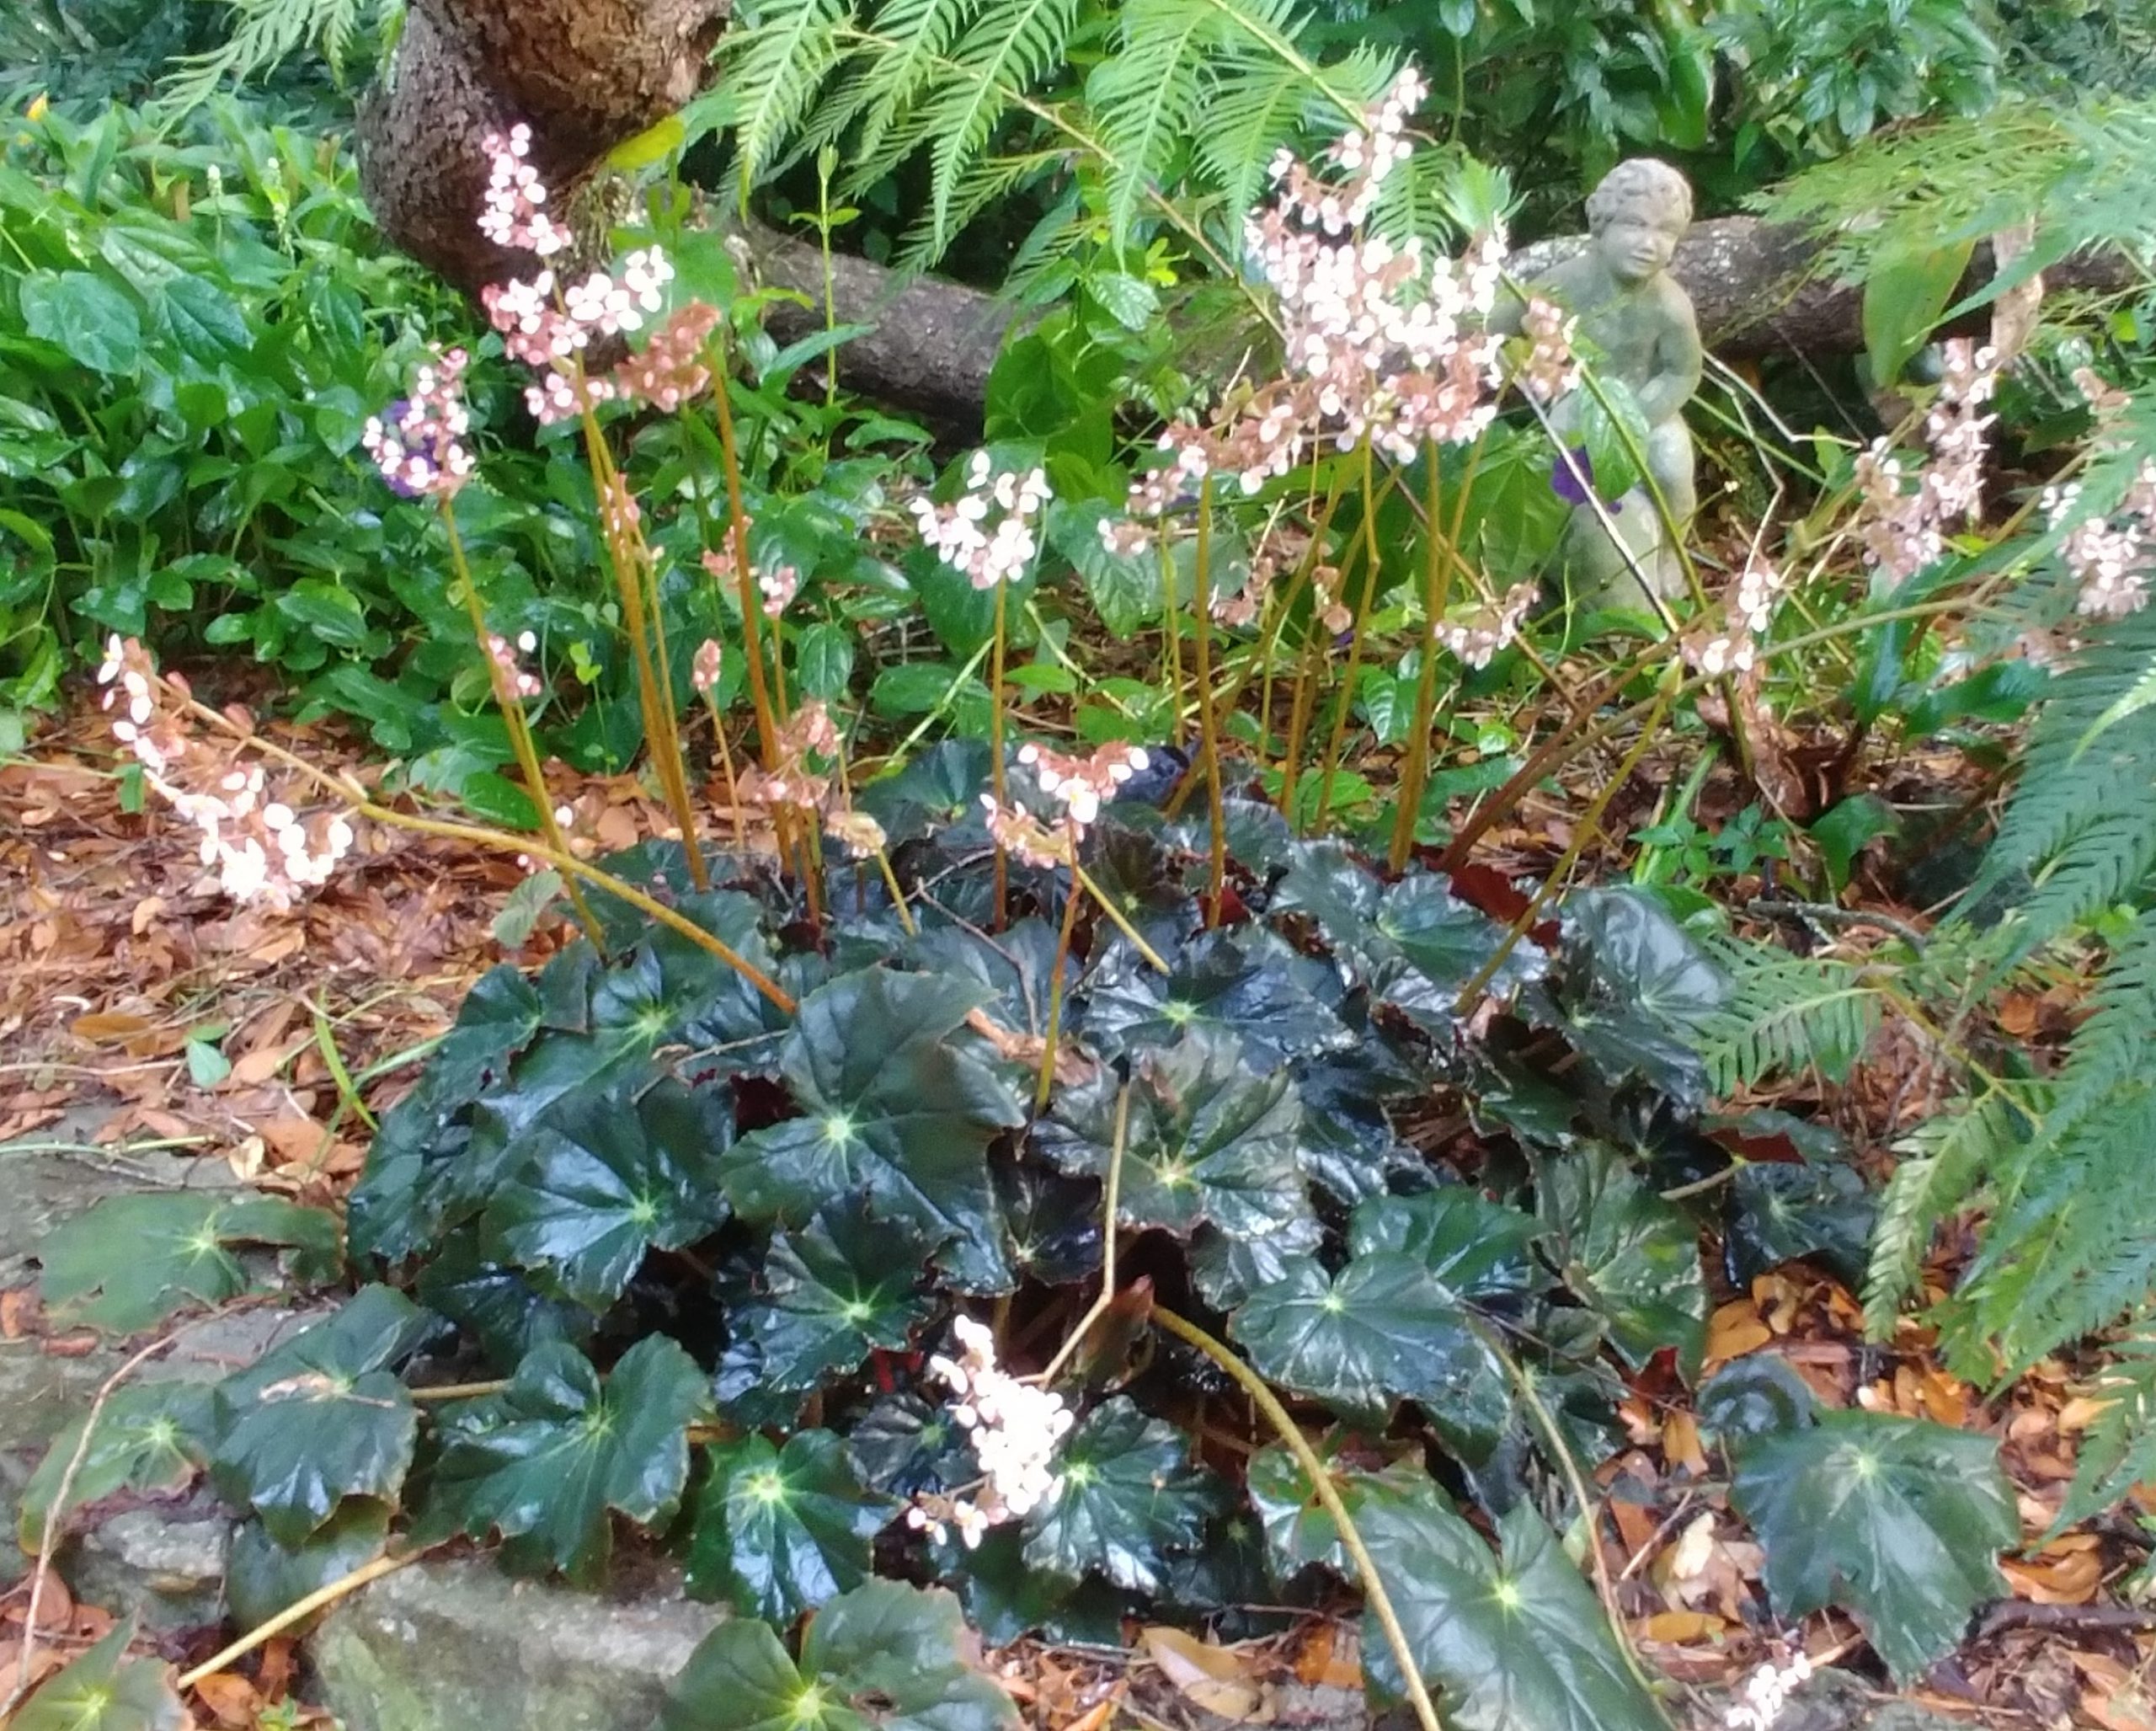
‘Joe Hayden’: This begonia features dramatic, dark, lobed leaves with burgundy undersides. Leaves are up to 8 in. long supported by leaf stems up to 9 in. long. In spring, the plant is topped by light pink flowers held high above the foliage. Each cluster measures about 5 in. by 7 in. on flower stems up to 26 in. tall. Each cluster contains more than 100 individual flowers, each about ¾ in. across at its widest point. This selection was hybridized in California in 1953 by Rudolf Ziesenhenne, but many similar selections have been made and are often confused with ‘Joe Hayden’.

Begonia ‘Joe Hayden’
Many other cultivars are common, but other cold hardy types suitable for north Florida include ‘Caribbean King’, ‘Caribbean Queen’, ‘Washington State’ and the catch-all ‘Ricinifolia’ types (with large, castor bean-shaped leaves). New breeding by scientists and enthusiasts promises to deliver many more types of rhizomatous begonias with increased foliage cold hardiness and an expanded range of foliage types and colors. A major Texas nursery introduced a series of rhizomatous begonia hybrids marketed as Crown Jewel Begonia™. The series currently features five patent-pending cultivars that are promoted as landscape plants for Zone 8. Additional breeding work is ongoing in north Florida.
Availability and Propagation
Rhizomatous begonias are available from Internet/mail order nurseries, some American Begonia Society members, other gardening groups, and plant societies. The introduction of trademarked rhizomatous begonias like Crown Jewel Begonia™ show promise for wider availability of rhizomatous begonias from nurseries.
Rhizomatous begonias are easily propagated by division, separation of rhizomes, or by rhizome pieces. When planting, place the rhizome or pieces (as small as 2 in. long) horizontally and half buried in a new in-ground location or in a container with potting soil. As with other begonia species, leaves may be used for propagation, though this method usually takes longer to achieve a size suitable for planting in the garden. Plants can be grown from seeds but production time is similarly long.
References:
American Begonia Society. (2020) https://www.begonias.org/index.htm. Accessed 15 April 2020.
Ginori, Julian, Heqiang Huo, and Caroline R. Warwick. (2020) A Beginner’s Guide to Begonias: Classification and Diversity, ENH1317. Environmental Horticulture Department, UF/IFAS Extension. January 2020. https://edis.ifas.ufl.edu/ep581.
Lowe, Paul. (1991) Growing Rhizomatous Begonias in the Ground in Southern Florida. Begonian 58:89. May/June 1991. https://www.begonias.org/Articles/Vol58/GrowingRhizomatousBegoniasFlorida.htm.
Schoellhorn, R. (2020) Personal communication, Alachua, FL.
Sharp, Peter G. (2011) Down to Earth – with begonias. 111 pp. http://ibegonias.filemakerstudio.com.au/PeterSharp/DownToEarthWithBegonias.pdf.
The International Database of the BEGONIACEAE. (2020) http://ibegonias.filemakerstudio.com.au/index.php?-link=Home. Accessed 16 April 2020.
UF/IFAS Gardening Solutions. (2019) Begonias. http://gardeningsolutions.ifas.ufl.edu/plants/ornamentals/begonias.html.
Watkins, Sue. (2020) Personal communication, Tallahassee, FL.
by Larry Williams | Dec 4, 2019
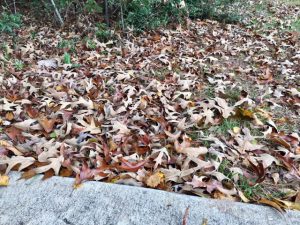
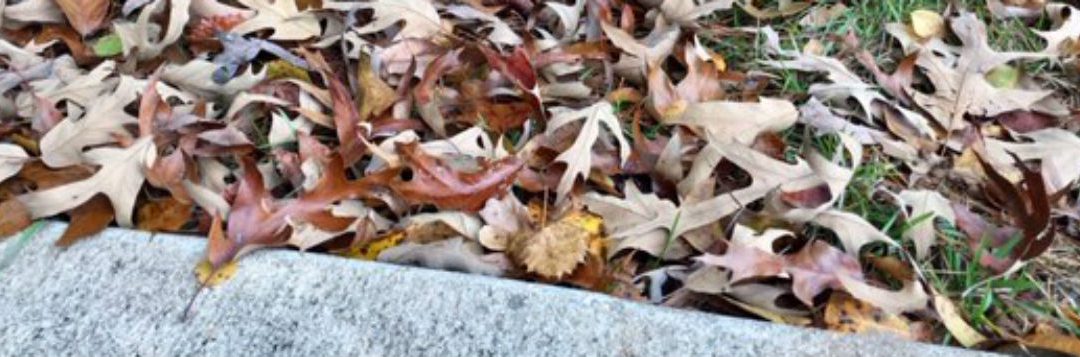
Fall oak tree leaves abound and can be recycled as landscape mulch. Photo credit: Larry Williams
Weed control is not top on my list as a reason to use mulch. There are weeds that can push through mulch such as nutsedge (nutgrass) or that can germinate and grow in the mulch. But done correctly, mulching plant beds and gardens can help inhibit some weeds. Tree leaves can be used as a mulch.
In addition to weed control, mulch provides other benefits. It can make landscapes look more attractive. It keeps roots evenly moist, acts to insulate roots from extreme heat and cold and can help decrease loss of soil from wind and water erosion. Mulch serves as a barrier to some soil-borne diseases, especially in the vegetable garden. And, as organic mulch breaks down, it improves the soil’s fertility, aeration, structure and drainage.
Tree leaves make good mulch. They can be placed on the soil surface beneath and around shrubs, trees, perennials, annuals and vegetables.
Fall leaves are abundant. Some people feel overwhelmed by the volume. One resident reported raking more than 100 large bags of leaves from his half-acre property. One large oak tree can contain over 250,000 leaves!
Tree leaves can be placed in landscape beds or around vegetables “as is” or chopped up with a shredder or mower into smaller pieces and then spread around vegetables, shrubs and trees. Mixing leaves from several different species of trees can make better leaf mulch. Leaves of the same size tend to mat together and produce a shingling effect that can shed water and reduce gas exchange in the soil. Shredded leaves stay seated better on the landscape than whole leaves.
A mulch layer three inches deep after settling is enough for most plants. If possible, extend the mulched areas out to the outermost leaves (called the drip line) and beyond. And be sure to pull the mulch back a few inches from the main trunk. Never pile mulch around the trunk.
Using those fallen tree leaves as mulch recycles a natural resource and saves you money, enriches your soil, fertilizes your plants and keeps them out of the local landfill.
So, instead of putting all those leaves curbside in plastic bags to be hauled off, use them to benefit your landscape, which may include less weeds.
For additional information on landscape/garden mulch, contact the UF/IFAS Extension Office in your County or access the following sites.
http://gardeningsolutions.ifas.ufl.edu/care/planting/mulch.html
http://edis.ifas.ufl.edu/topic_mulch
by Ray Bodrey | Oct 22, 2019
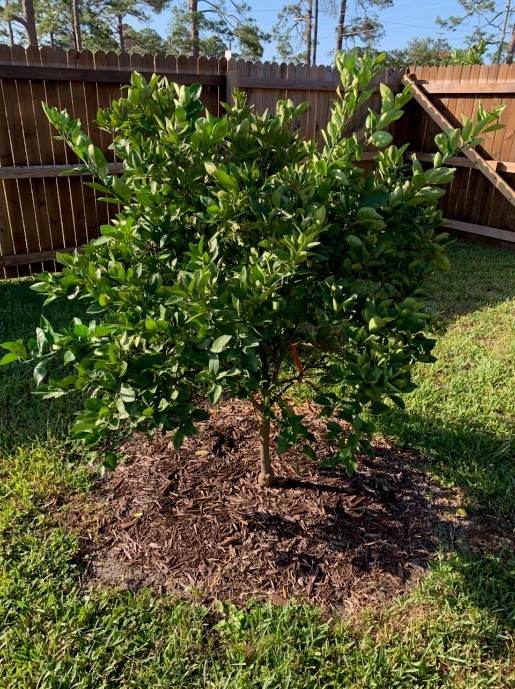
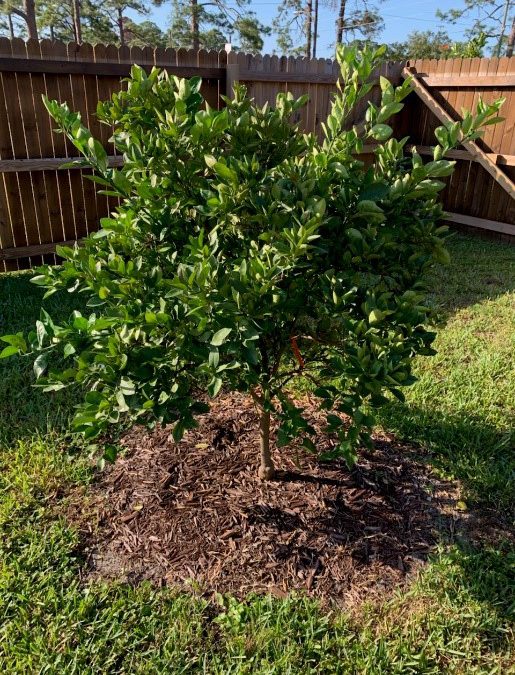
Root rot may develop if citrus trees are mulched closer than 12″ to the trunk
Thankfully, cooler temperatures have finally made it to the Florida Panhandle, but it took until the middle of October. The last two months surely taught us lessons about helping our gardens beat the heat. One strategy to help plants cope with extreme heat or drought is mulching.
Many of us either have or can easily find, piles of wood chip mulch from fallen trees, thanks to the hurricane. This material will come in handy now, as fall and winter mulching is a great gardening practice with many benefits.
Think of mulch as a blanket for plants. By acting as a cover to the root system, mulch can perform as both a cooling factor during warm months and can help warm the root system during cooler weather, as well as assist in retaining moisture. This is important, as regulated soil moisture will accept rain or irrigation water much easier than crusty, dry soil. Water will simply runoff and can cause erosion in dry soil conditions. Mulch is a great weed barrier and is also aesthetically pleasing in the landscape by helping define borders and gives depth. A 3-4” thick layer of mulch, in a 2-3’ diameter, is typically a sufficient amount of mulch for landscape plants and fruit trees.
There are two types of mulch material that you’ll find in our area, organic or inert. Components of organic mulch include compost, bark, leaves grass clippings, straw, wood chips and even saw dust. Straw, wood chips and saw dust contain very little nitrogen, however. If mulching with these materials, it’s a good idea to add some nitrogen fertilizer. One or two cups of a complete fertilizer like 10-10-10 should help you avoid nutrient issues. Organic mulch will need to be replenished yearly to some degree, as it breaks down into a soil amending compost. This breakdown into compost will improve soil water holding capacity and fertility.
Inert mulch can be made of shells, gravel, pebbles, plastic and rubber. However, inert options are not as easy to use in controlling moisture and temperature levels and of course provides no nutrient value. With Inert mulch, you should always fertilize the area first, especially vegetable gardening. Use approximately two pounds of 10-10-10 fertilizer for every 100 square feet of vegetable garden. This may not seem like much fertilizer, but since plastic mulch reduces the amount of fertilizer that leaches out of the root zone of your plants, you can apply less fertilizer to begin with. That’s a big reason why UF/IFAS researchers recommend plastic mulch to commercial vegetable and ornamental producers in Florida, but organic mulches are more appropriate for most home garden settings.
Mulching may be one of the most valuable and cost-effective garden practices. Mulch helps control weeds, conserves moisture, moderates soil temperatures, improves soil fertility and last, but not least, adds to the beauty of the landscape.
For more information contact your local county extension office.
Information for this article provided by Dr. Robert Black and Dr. Gary W. Knox of UF/IFAS Extension. More information can be found at this website: http://gardeningsolutions.ifas.ufl.edu/care/planting/mulch.html
UF/IFAS Extension is an Equal Opportunity Institution.
by Mary Salinas | Oct 22, 2019
Gardeners are always fighting the endless weeds that pop up in landscape and flower beds. When homeowners put in a new landscape bed and want to prevent future weed invasions, many think that putting down landscape fabric is a great way to keep the weeds from emerging and protect the newly planted trees, shrubs or perennials.

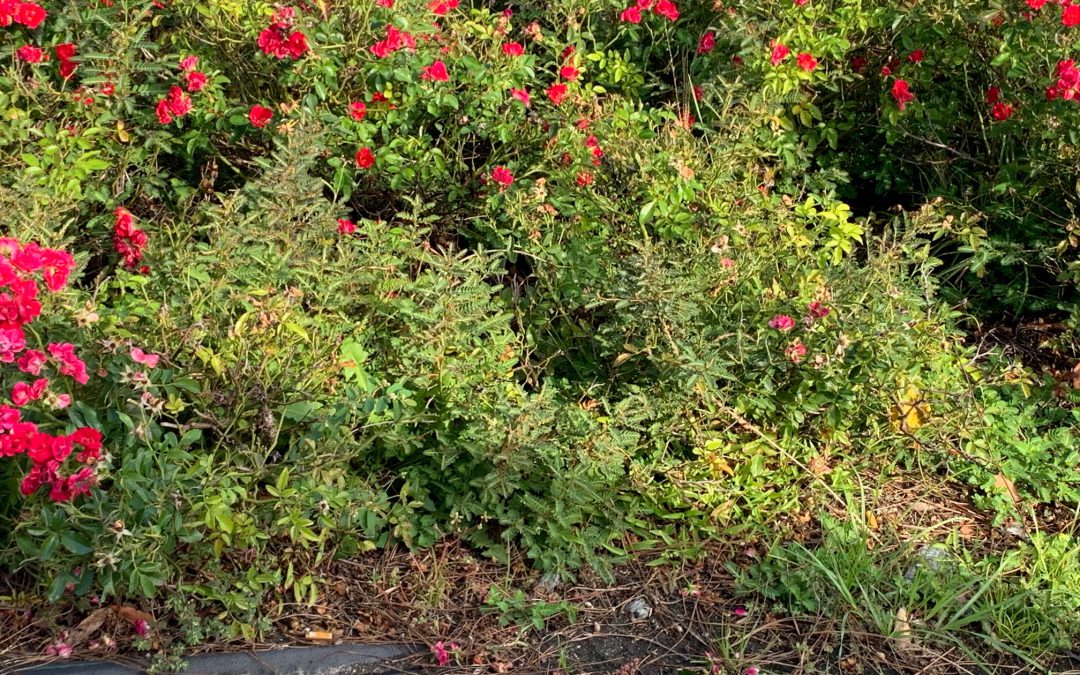
An example of failure of landscape fabric to control weeds less than 2 years after planting. Note the peeking through at the edges. Photo credit: Mary Salinas, UF/IFAS Extension.
Is Landscape fabric a good choice? Why or why not?
If landscape fabric is not covered up, sunlight will degrade the fabric. When mulch is placed on top of the fabric (and we all do want to cover it up – the fabric is not very attractive) the mulch breaks down into soil. Inevitably, weed seeds blow in and settle and germinate and grow on top of landscape fabric. And here you are with a weed problem. Weeds also find their way into the openings cut for desirable plants and along the edge of the fabric.
Landscape fabric is porous when put in place to allow water to pass through, but as time passes, the pores can get clogged and water penetration is restricted – rain and irrigation runs off and the plants you meant to protect are not getting the water they need.
Maybe the worst effect is that the landscape fabric creates unfavorable soil conditions. A healthy soil is key to good plant health. One thing soil needs to have is an exchange of carbon dioxide and oxygen between the soil and the atmosphere. Recent studies from Washington State University demonstrated that gas movement between the soil and the atmosphere is restricted about 1,000 times more when landscape fabric is present than when areas have only wood mulch.
So, if landscape fabric is not a good choice, what is?
Mulch made from wood, bark, fallen leaves and pine needles. See Gardening Solutions: Mulch for sustainable ideas.
For more information:
Improving Weed Control in Landscape Planting Beds
by Daniel J. Leonard | Jun 25, 2019
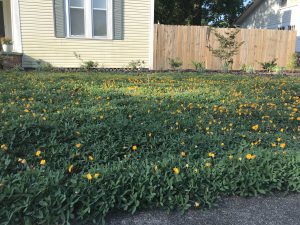
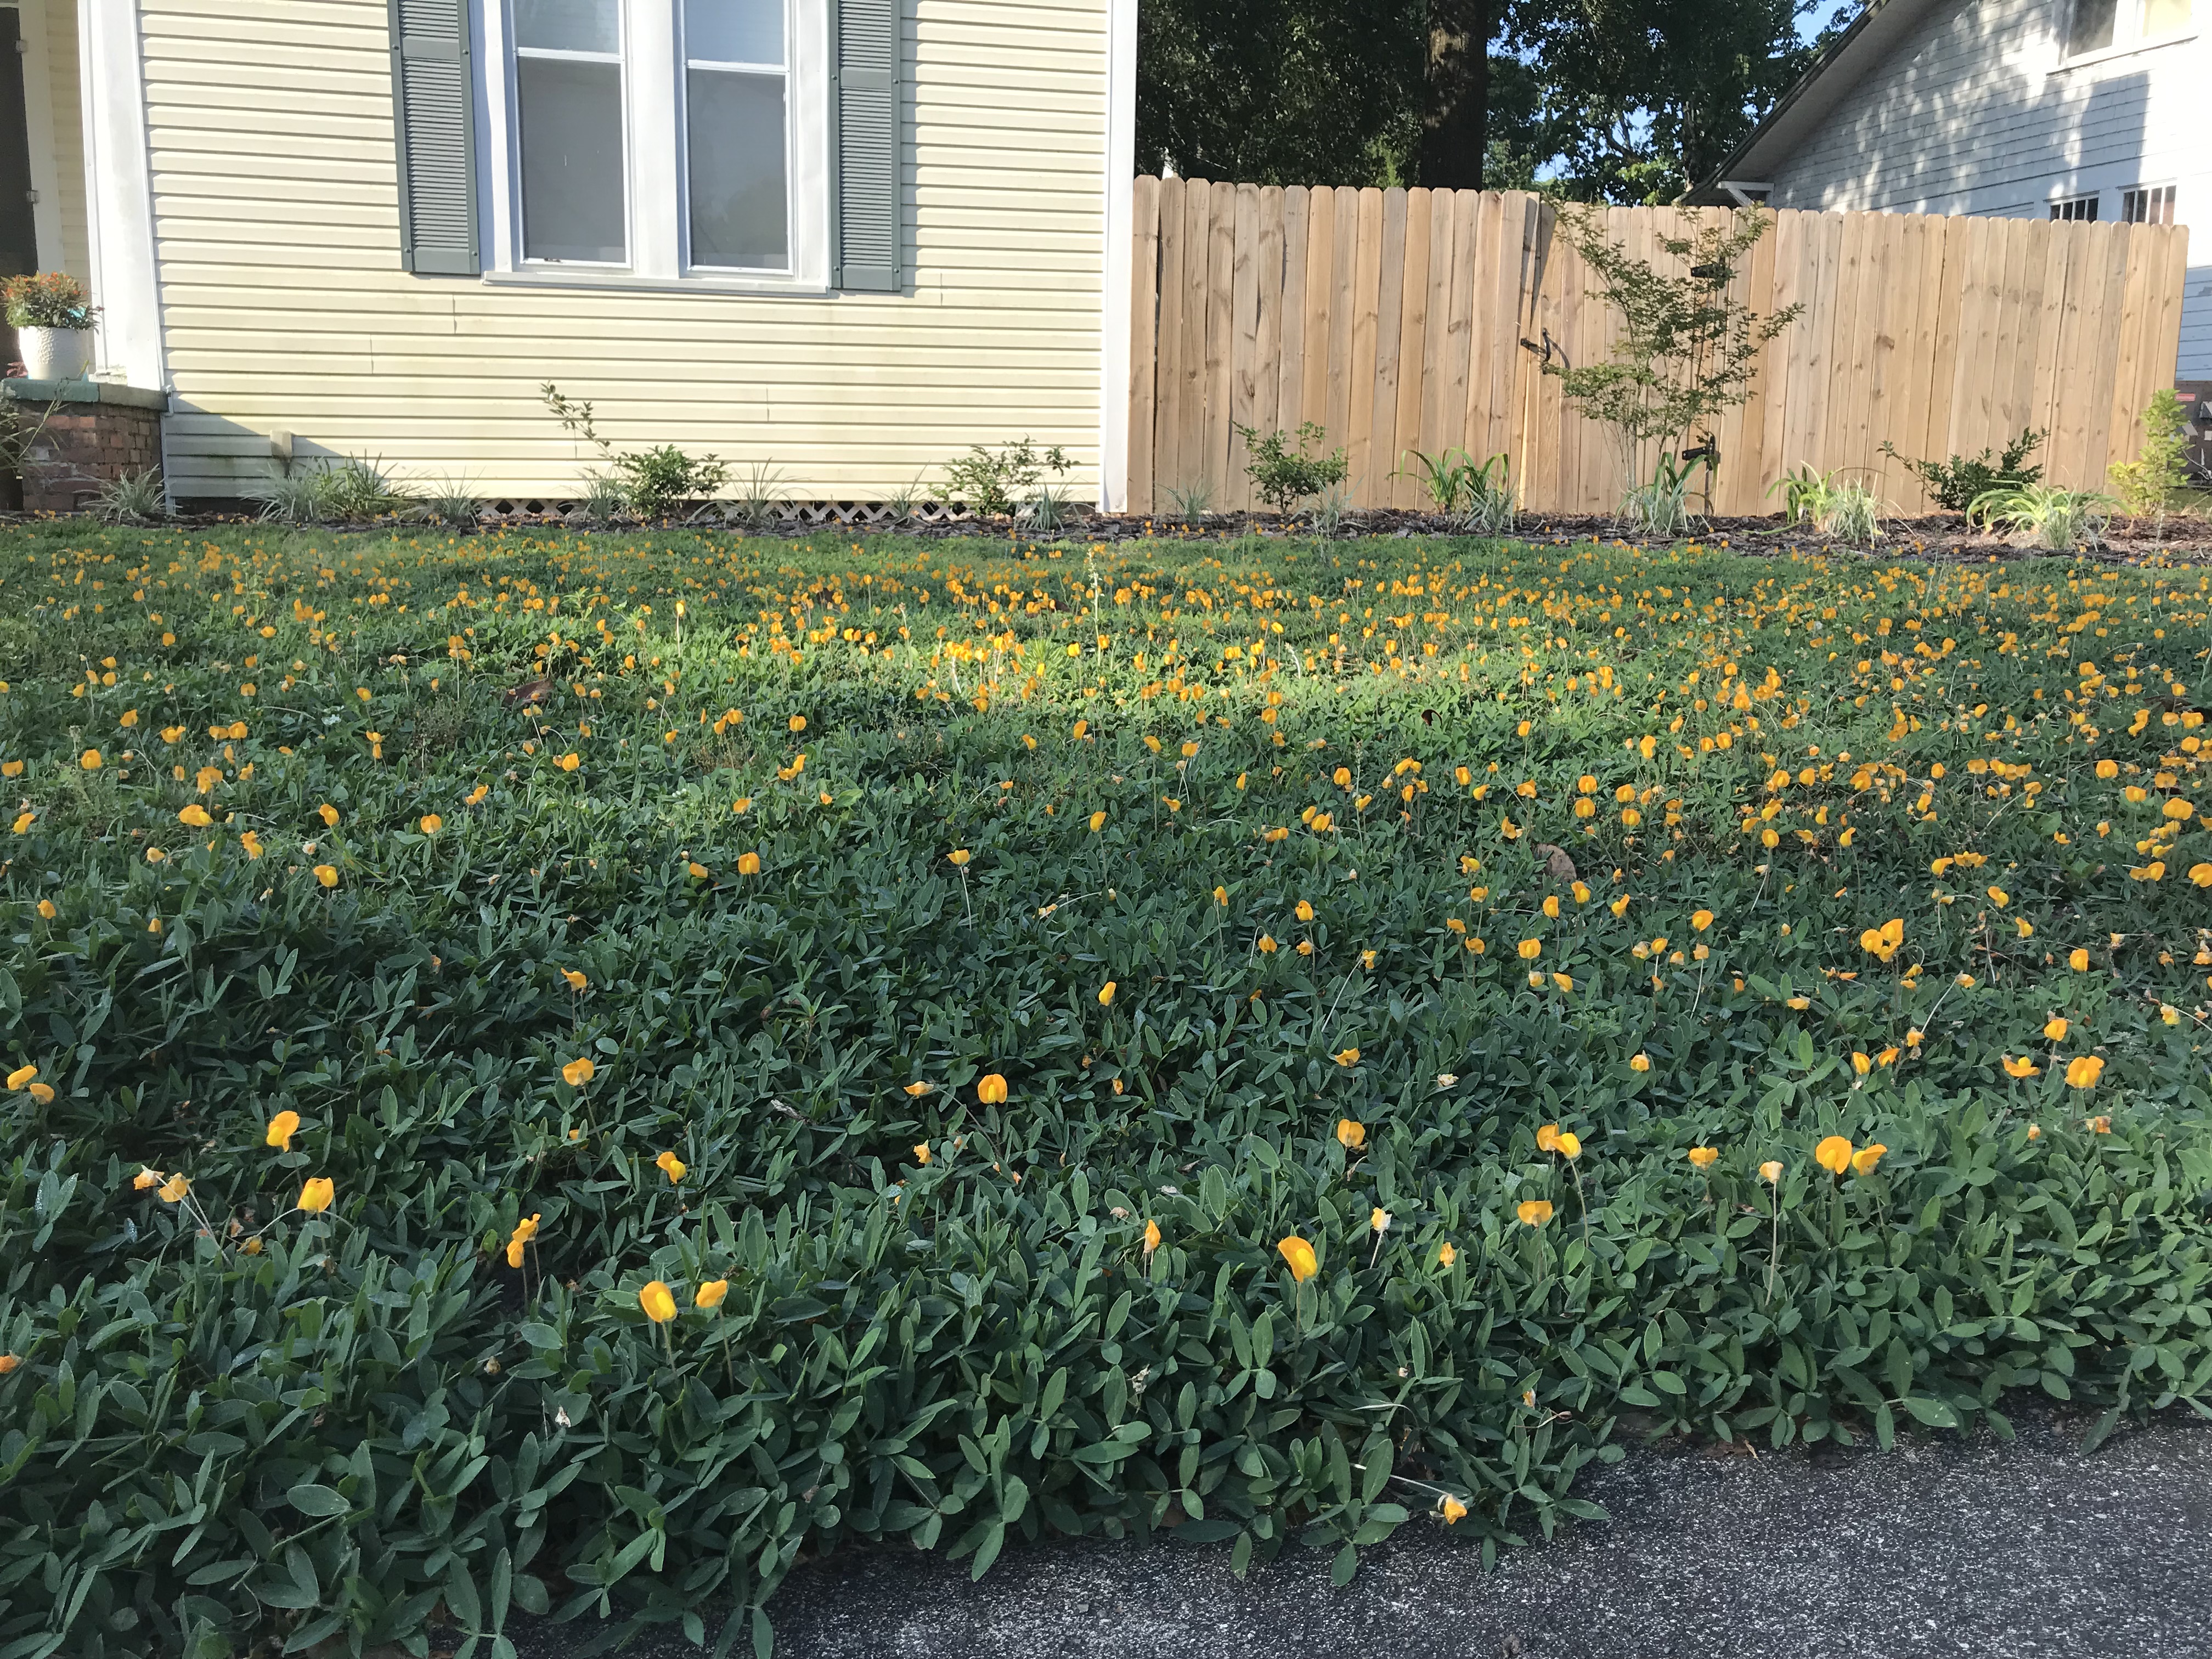
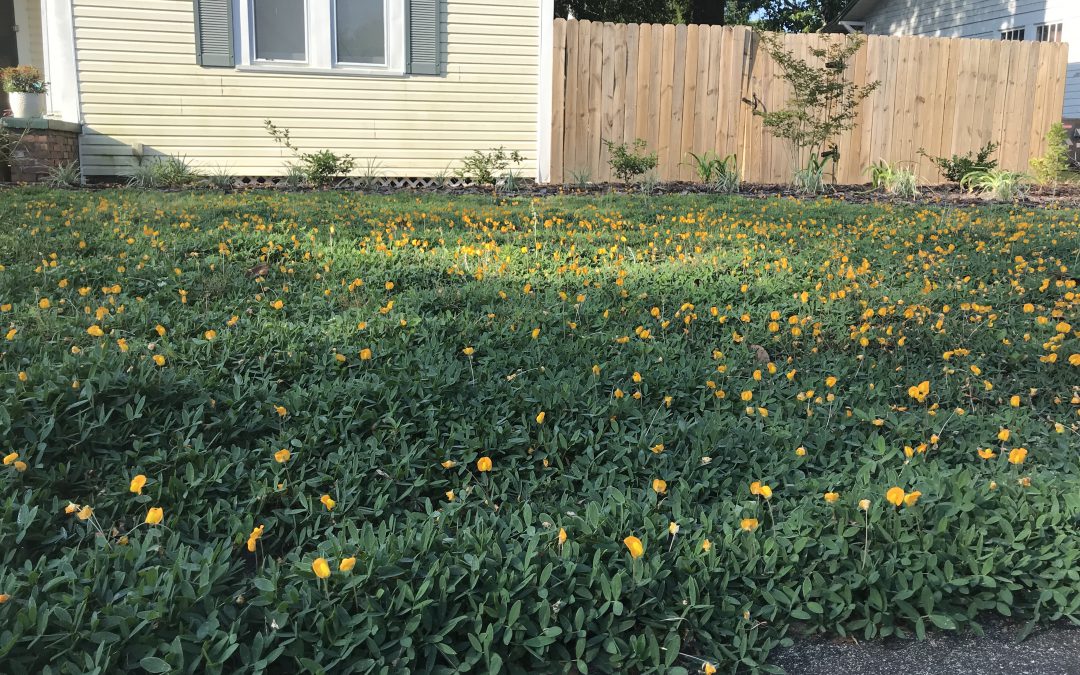
‘Needlepoint’ Perennial Peanut in the author’s lawn.
What began as my journey toward a turf-less lawn in September of 2017 is finally beginning to come together! In the fall of 2017, I installed about 120 one-gallon-sized ‘Needlepoint’ Perennial Peanut (Arachis glabrata) plants, purchased from Sunset Specialty Groundcovers in Live Oak, FL, on roughly 20” centers in my front lawn, an oddly shaped (650 ft2) patch of ground that had been previously filled with spotty centipedegrass and a healthy and diverse weed population. 18 months later, the peanut has almost completely filled in, shaded out all the weeds, and blooms nonstop!
Looking back, I definitely learned a few lessons the hard way. First, you should mulch bare ground in between plants at time of installation. Because there are few herbicides labelled for residential use on this crop and I didn’t want to experiment on my new “lawn”, I spent a lot of time on my hands and knees (much to the amusement of my neighbors and folks driving by) pulling weeds in the first two years that could have been prevented with mulch. Second, have a plan for keeping the perennial peanut in bounds once it has filled in the area it was supposed to and begins to travel into adjacent landscaped beds! The area my peanut inhabits is surrounded on two sides by inescapable concrete. It was on the other two sides, however, that I have had to improvise after they came under siege (literally under, because perennial peanut spreads by underground rhizomes). Installing some sort of edge blocker at planting and vigilance with routine mechanical edging is a must to keep it in bounds! Third, I recommend that you have a counter-argument prepared when the peanut goes dormant in the winter and your wife asks why the yard is bare dirt!
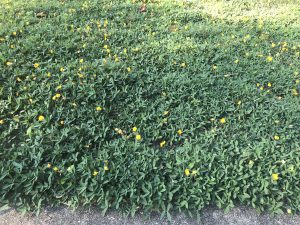
‘Needlepoint’ Perennial Peanut overhead shot showing complete ground coverage in the author’s lawn.
Overall, though there are a couple of things I would have done differently, I’m extremely pleased with my lawn of perennial peanut. It is absolutely stunning in the warm months, incredibly low maintenance, and unique! Plant some today!
As always, if you have any questions about perennial peanut or any other plant/crop, contact your local UF/IFAS Extension office.
by Daniel J. Leonard | May 27, 2019
Talk to nearly any Panhandle gardener and one of the first things brought up in conversation is the difficulty growing large, beefsteak/slicing tomatoes (Solanum lycopersicum) in their home garden. Large tomatoes are indeed among the more challenging garden vegetables in North Florida, affected by myriad pests, pathogens and abiotic issues. However, giving up growing this garden favorite is unwarranted as success can be had by following a couple of often overlooked, simple steps to ward off potential problems.
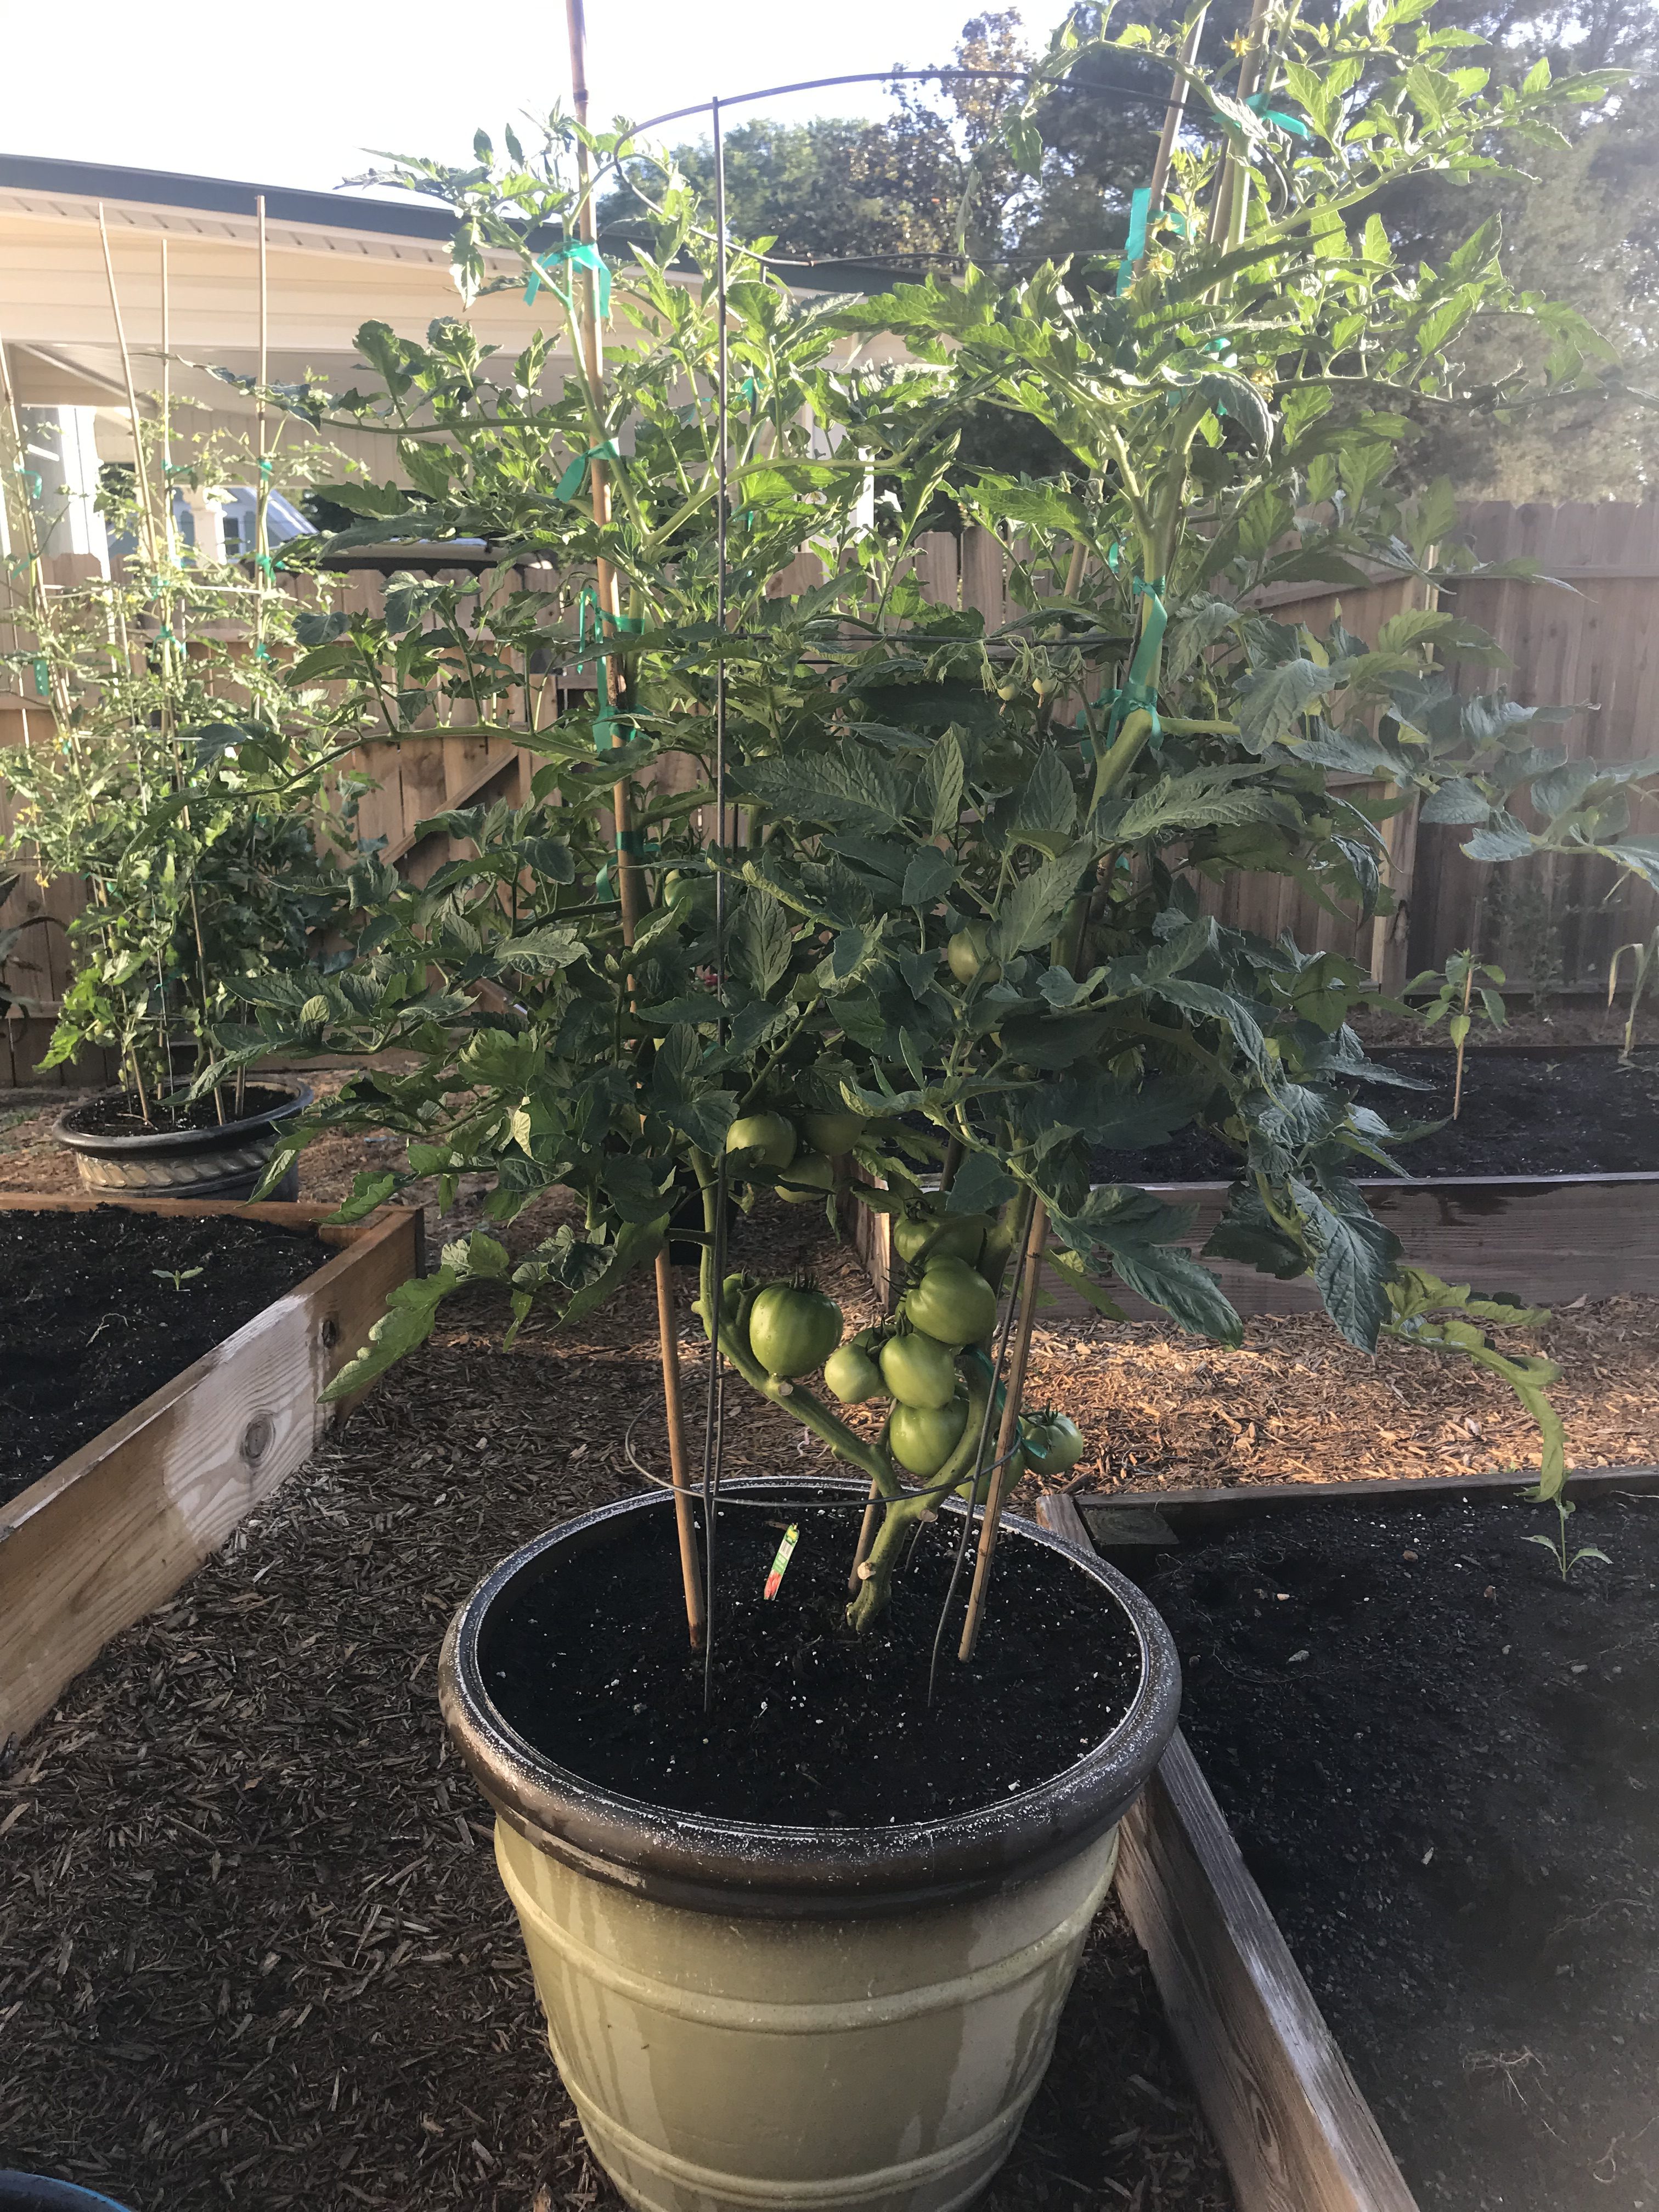
Choose Resistant Cultivars – One of the major recent gardening trends is the rise of heirloom veggies, particularly heirloom tomatoes. While many of these varieties certainly are interesting and often possess superior flavor/texture, heirlooms are, as a group, extraordinarily susceptible to disease in our climate. Fortunately for gardeners, there are a number of excellent varieties available with large resistance profiles to many common diseases and a similar taste profile to heirloom favorites! ‘Big Beef’ (pictured), ‘Better Boy’, ‘Celebrity’, and ‘Skyway’ are just a few of the many great cultivars with extensive disease resistance available as transplants at garden centers or as seed from quality online seed vendors.

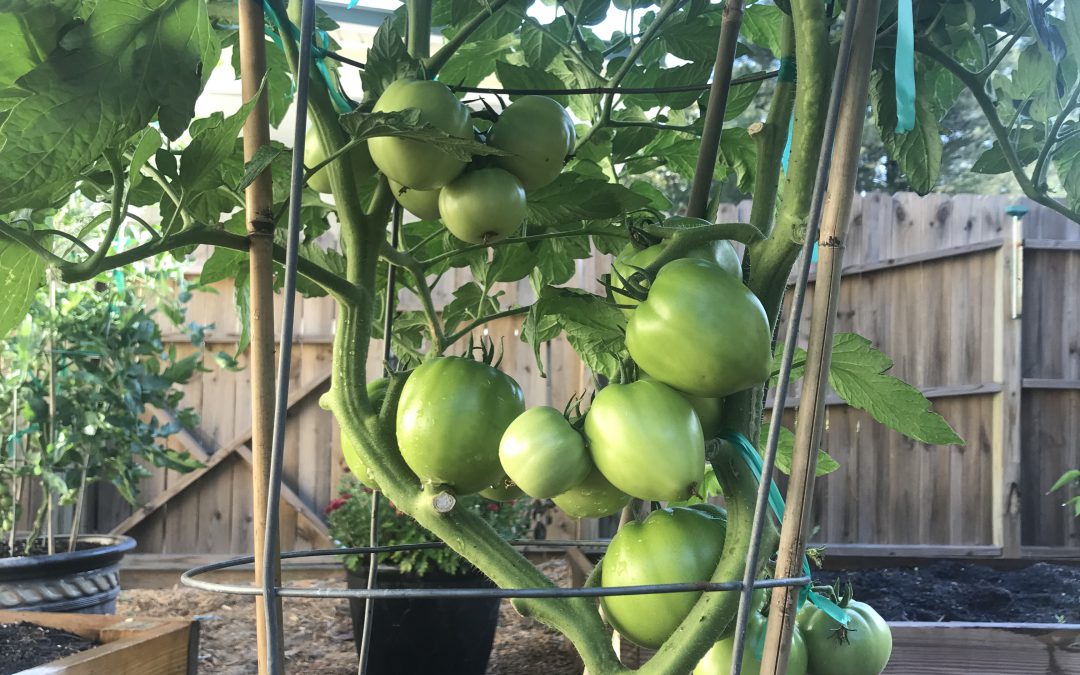
Tomato ‘Big Beef’ in 15 gallon decorative container
Start Early – Once, you’ve selected the proper cultivar, the next key is to get them in the ground early! I’m convinced one of the primary reasons folks fail with tomatoes is waiting for “traditional” garden planting dates. For instance, an old tradition in the South is to plant your garden on Good Friday before Easter. However, according to Johnny’s Selected Seeds Southeast Sales Representative Blake Thaxton, tomatoes should be germinated and growing in the garden no later than March 15. Mr. Thaxton notes two primary reasons for this, the most important being pest/disease avoidance. Beefsteak tomato varieties take around 70 days from planting to harvest, so a March 15th planting date yields ripe tomatoes around the third or fourth week of May, when pest/disease pressure is still manageable. Pests and disease occurrence becomes exponentially worse in the Panhandle as May trickles into June and July, therefore it is critical that your fruit begin ripening prior to this onslaught. An important second motivation to plant early is that tomatoes stop setting fruit when nighttime temperatures rise above 75°F. At these temperatures, tomato pollen is rendered sterile and though the plant will continue flowering, no fruit will be set.
Mulch – Another overlooked best management practice in backyard veggie gardening is mulching! Those of us who tend flower beds already know many benefits of mulch like soil temperature moderation, weed prevention, and moisture conservation. But for tomato growers, mulch has another benefit – disease prevention! Several serious diseases that affect tomato are soil-borne pathogens (i.e. Early Blight, Late Blight, Bacterial Spot, etc.). These pathogens find their way onto plants either indirectly via water splashing from soil onto leaves or direct contact from leaves and fruit resting on the soil. To prevent these pathogens from infecting plant tissue, apply an organic mulch (preferably wheat straw or tree leaves) under and around plants. This simple step goes a long way toward season-long, yield-saving disease prevention.
Consistent Watering – Everyone knows plants need water but what you might not know is that irrigation consistency makes a huge difference in plant health, particularly tomatoes. Consistent watering is key in helping ward off one of the most frustrating tomato maladies, blossom end rot (BER) – you know, the one where the bottom end of your perfectly good tomato fruit turns to a brownish mush! Though BER is caused by calcium deficiency, the condition is commonly induced by creation of distinct wet and dry periods from non-regular watering, interfering with calcium uptake and availability to the plant. So, while you may have adequate soil calcium, if you don’t water correctly, the condition will happen anyway! It’s also good to keep in mind that mature tomato plants use large quantities of water daily, so during the heat of summer, plants in containers may need to be watered multiple times daily to maintain consistently moist soil. Think about it, you don’t drink 8 glasses of water when you wake up and then never drink again throughout a hot day. A tomato is no different. Allowing your plants to wilt down before providing additional water ruins productivity and can induce BER.
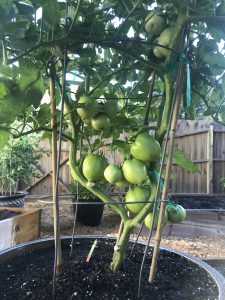
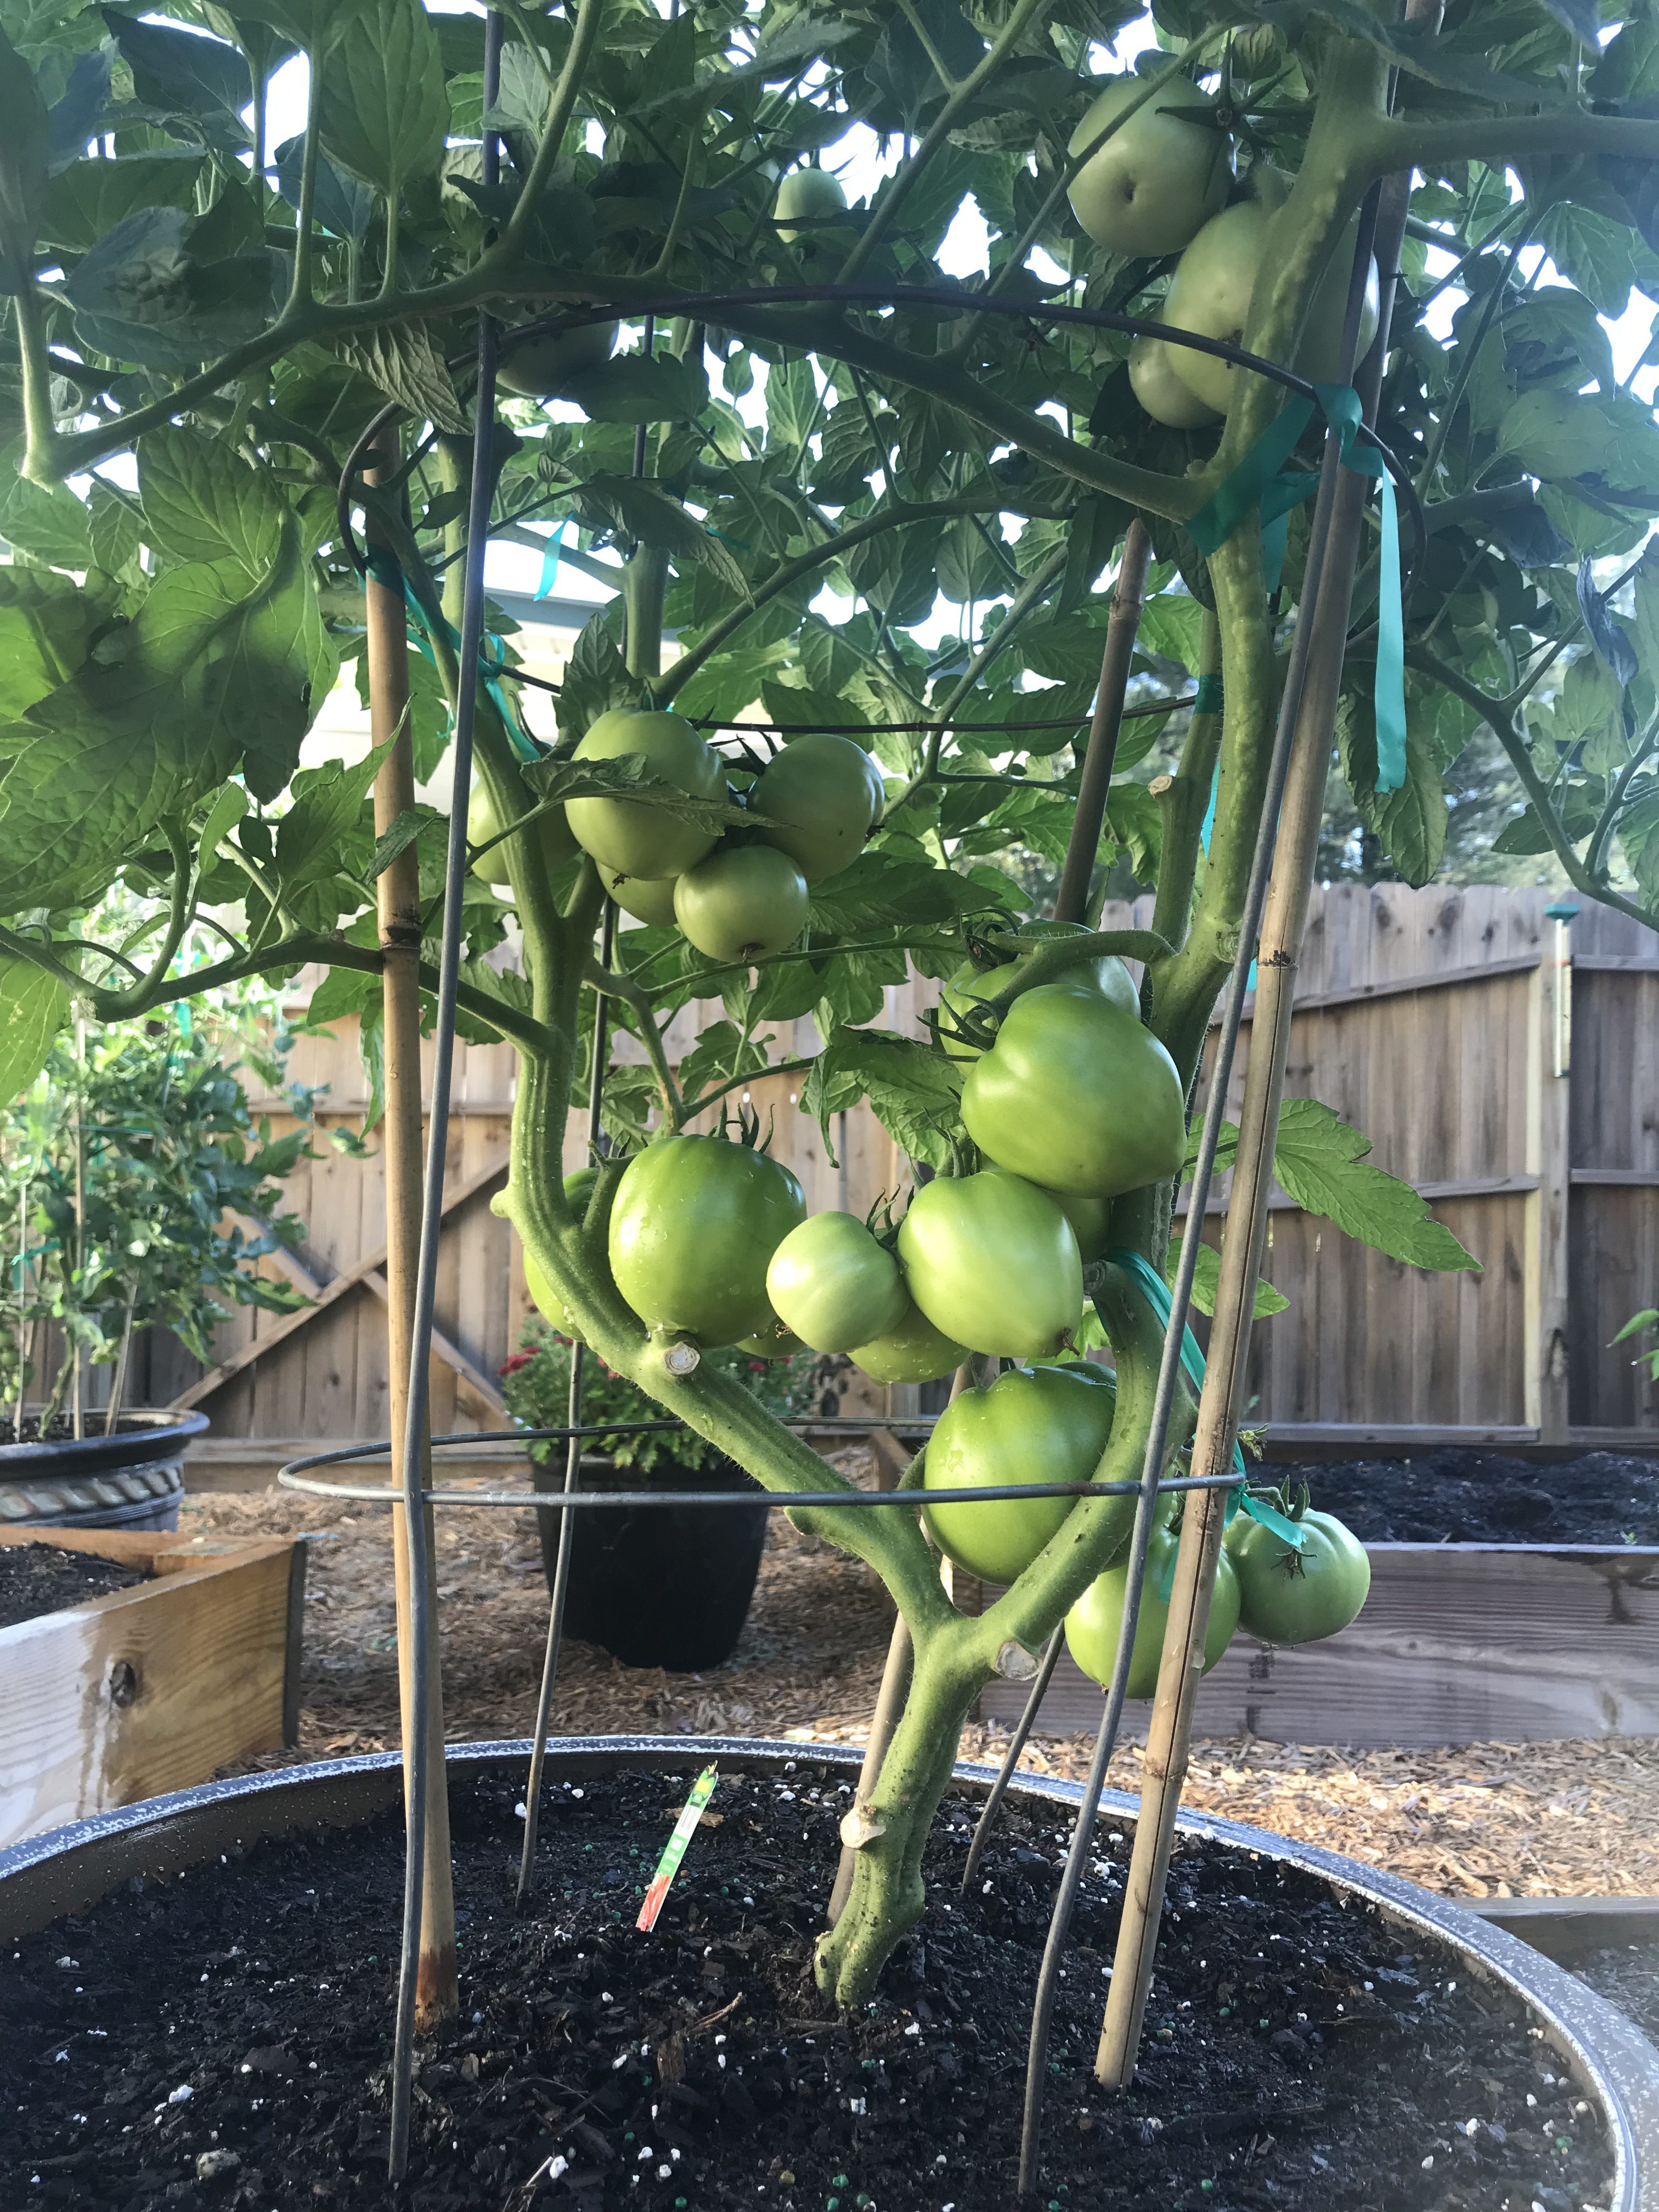
Tomato ‘Big Beef’ demonstrating pruning for soil clearance and airflow.
Pruning – I get it. Once you’ve nursed your baby tomato from a wee transplant or seed into a rapidly growing and flowering plant, it seems counter-intuitive to break out the pruners, but to keep your tomato plant as healthy as possible for as long as possible, that is what you must do! Pruning tomatoes should accomplish two things. First, remove the bottom layer of foliage from the plant base, so that water will not readily splash onto the lowest remaining leaves. (I tend to remove all leaves up to the second set of flowers 8-12” from the soil’s surface.) As with mulching, this prevents bacterial and fungal pathogens from spreading easily from the soil surface onto your plant. Second, tomato plants, especially the vigorous indeterminate varieties, often grow more foliage than is necessary for fruit production. This excess foliage can prevent airflow and trap moisture in the canopy of the plant, promoting disease. To open up the canopy and allow for more airflow, I prune off leaves that grow from the primary stems inward to the center of the plant. The idea is to keep the inside of the plant open while allowing enough leaves to power photosynthesis and shade the developing fruit below.
Tomatoes are notoriously hard to grow, but by following a few easy preventative practices, gardeners can greatly increase their chances of realizing harvestable fruit come summer. Please keep in mind that this is not an exhaustive list that will ensure disease-free plants over the entire growing season (you should also get a soil test to make sure your pH and soil fertility are correct and ideally you’d never work in your tomatoes when they are wet, etc., but this is a good place to start!). However, a little bit of planning and prevention early in the season can make growing tomatoes a lot less frustrating! As always, if you have questions regarding tomatoes or any other horticultural topic, please contact your local UF/IFAS Extension Office. Happy gardening!