by Ashley Stonecipher | Aug 5, 2021

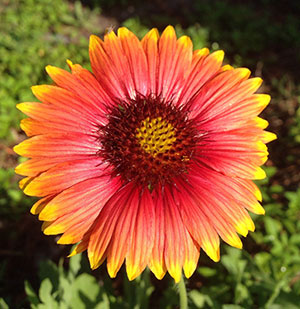
Native Gaillardia. Photo courtesy UF/IFAS.
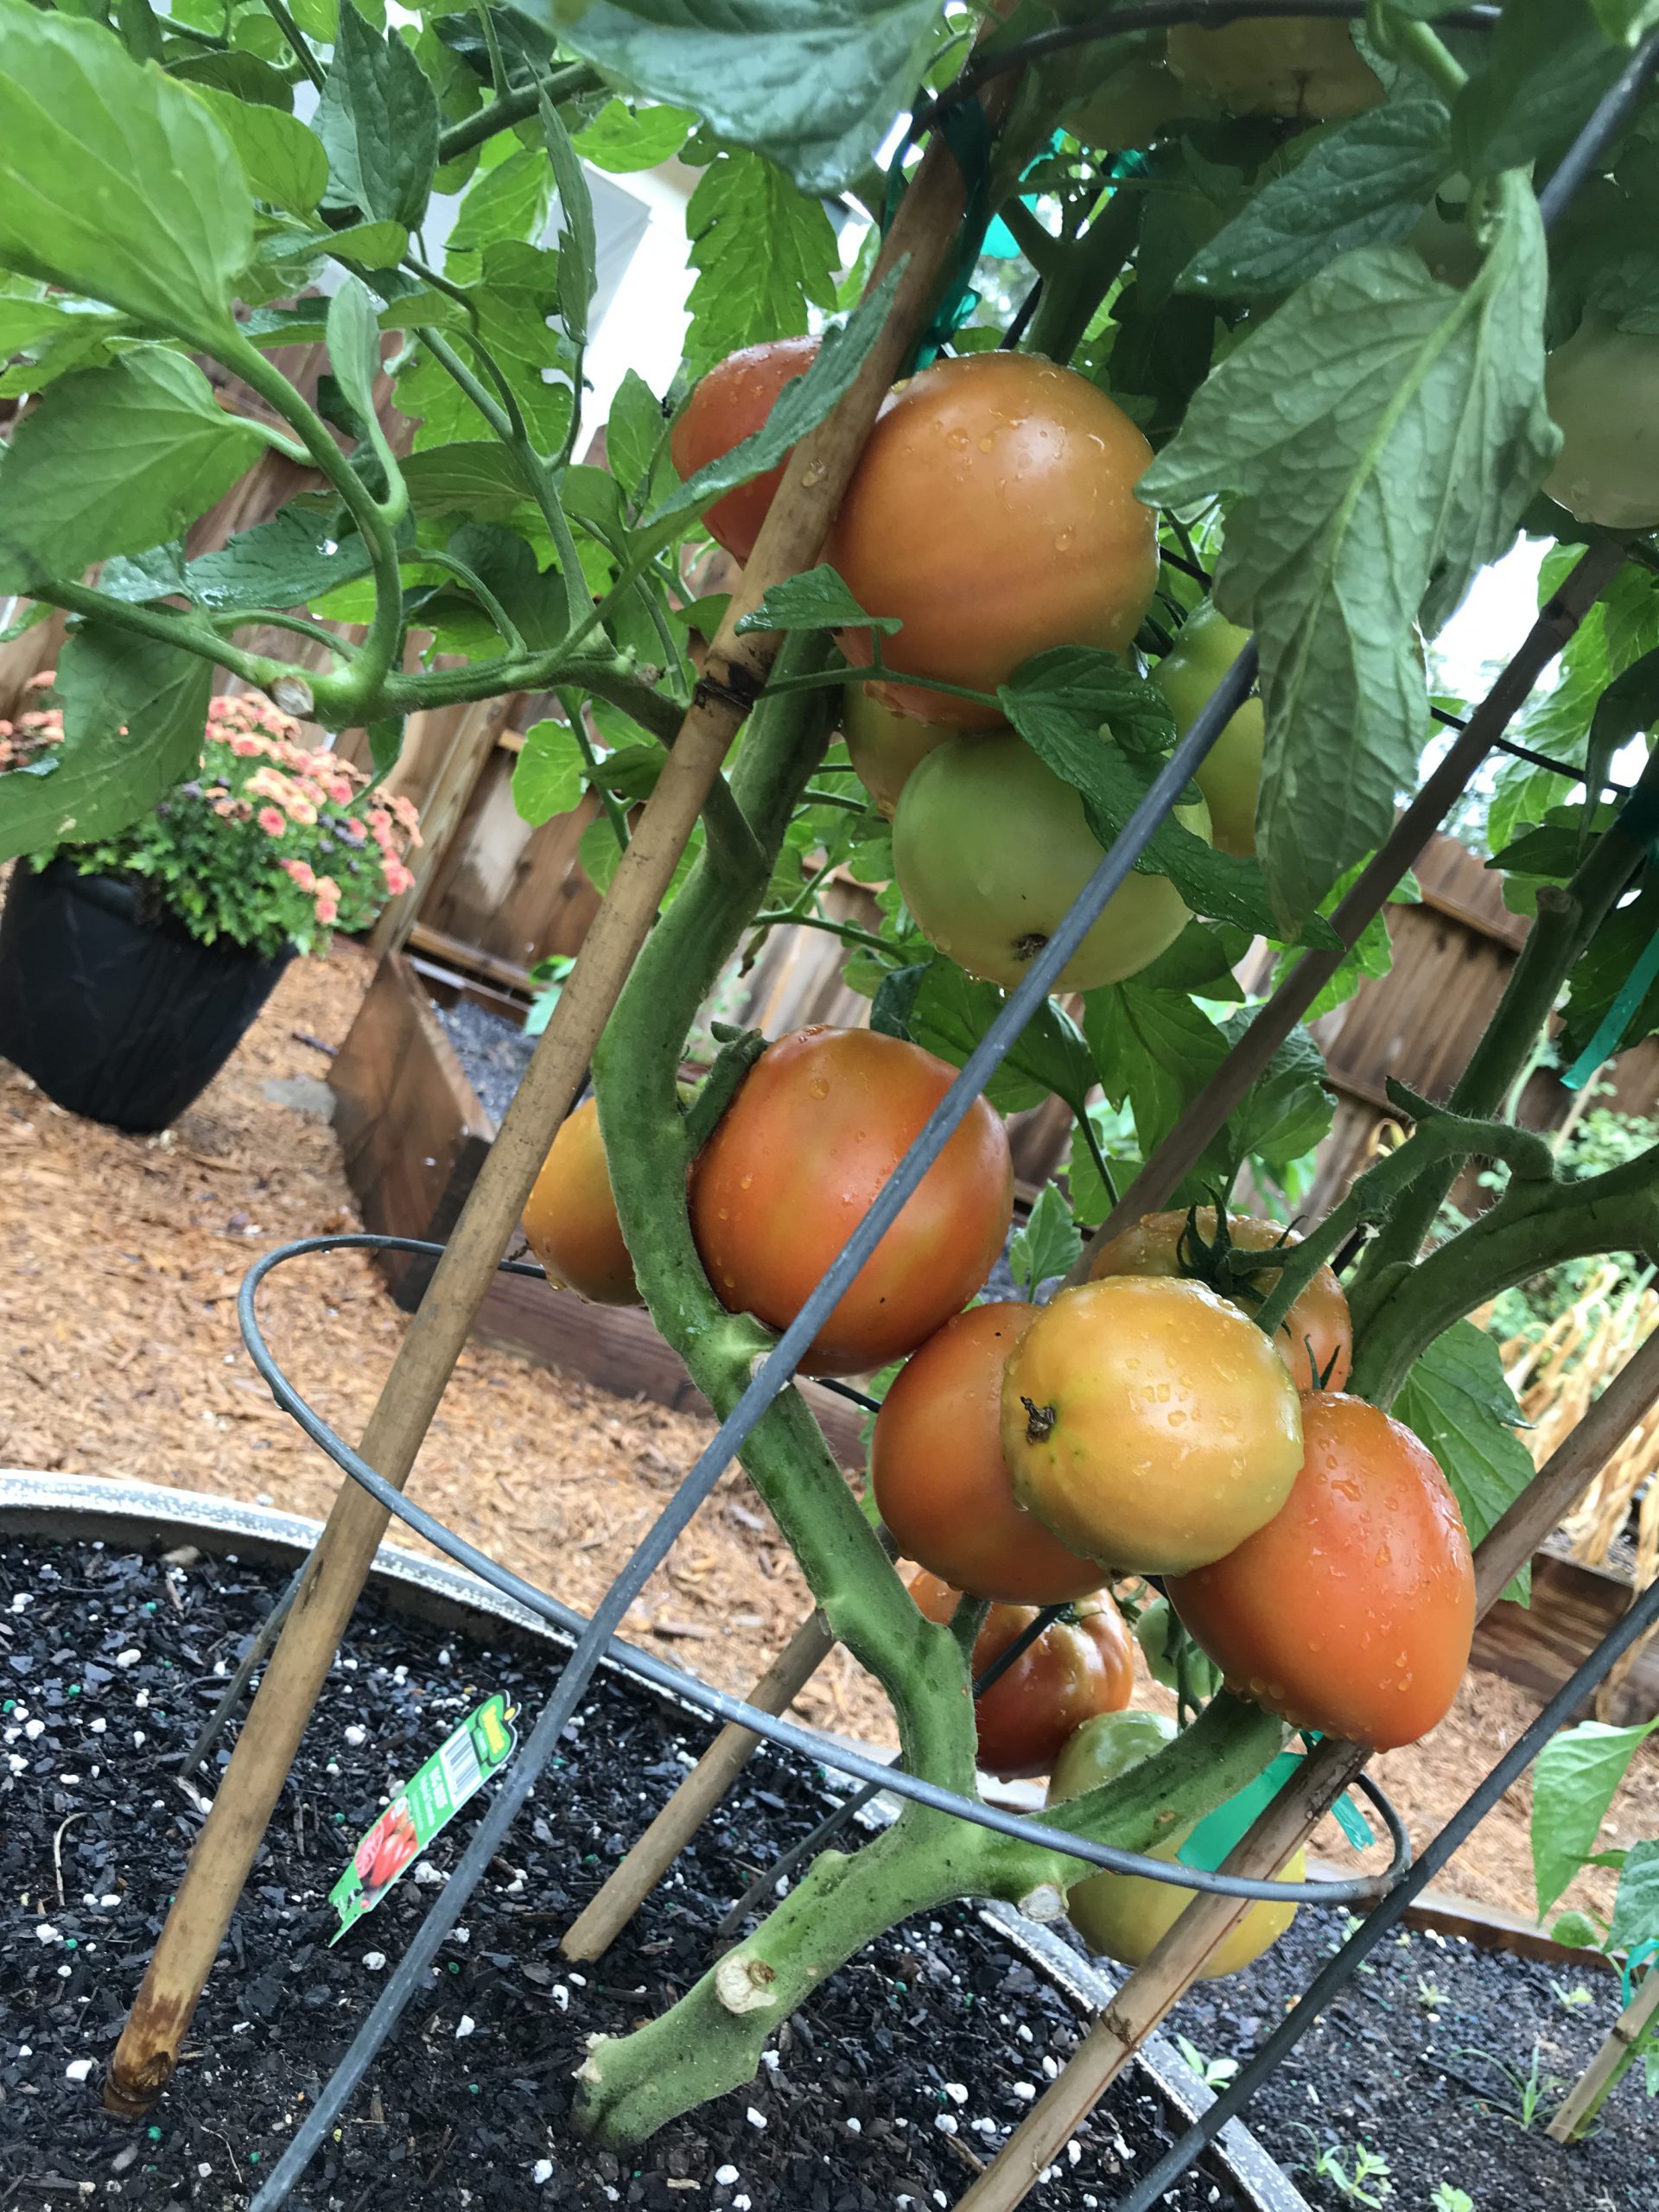
The hottest days of the summer are here and you might be thinking, “There is no way something could survive this heat!”. You might also be wondering “What can I do in my landscape?” Well, you are correct – it is hot and there are not many plants that thrive in this type of weather, but the good news is we are at the end of the summer season and there are things we can begin to do to get ready for fall. It’s not too late to get the last of the summer vegetables going such as lima beans, cucumbers, eggplants, and peppers. Many cool season crops can also be planted by seed now and tomatoes will thrive going into the fall season. See Vegetable Gardening in Florida
There are some heat-tolerant annuals like vinca, gaillardia, bulbine, and coleus that can be planted now in the landscape. See Annuals. Any time of the year, even late summer, bulbs like Aztec Lily, Butterfly Lily, Walking Iris, and Spider Lily can be planted. See Bulbs for Florida. Not many herbs do well in our Florida sun this time of year, but Bay Laurel, Ginger, Mexican Tarragon, and Rosemary can be planted as transplants now but not as seeds just yet. See Herbs.
August and late summer is the time of year that you may be seeing damage in your lawns. This could be caused by insects, disease, or irrigation failure. It is important to determine the cause, so the proper remedy is used. Some ways to avoid lawn damage are checking your mower blades regularly and making sure they are sharp. Also only cut the top one third of the blade of grass to not stress it in the heat of the day. It is good practice to test your irrigation clock and have a rain sensor. Some municipalities in north Florida prohibit the application of fertilizer during the summer rainy season from June to September so check with your local extension office. See Insect Management in Your Florida Lawn
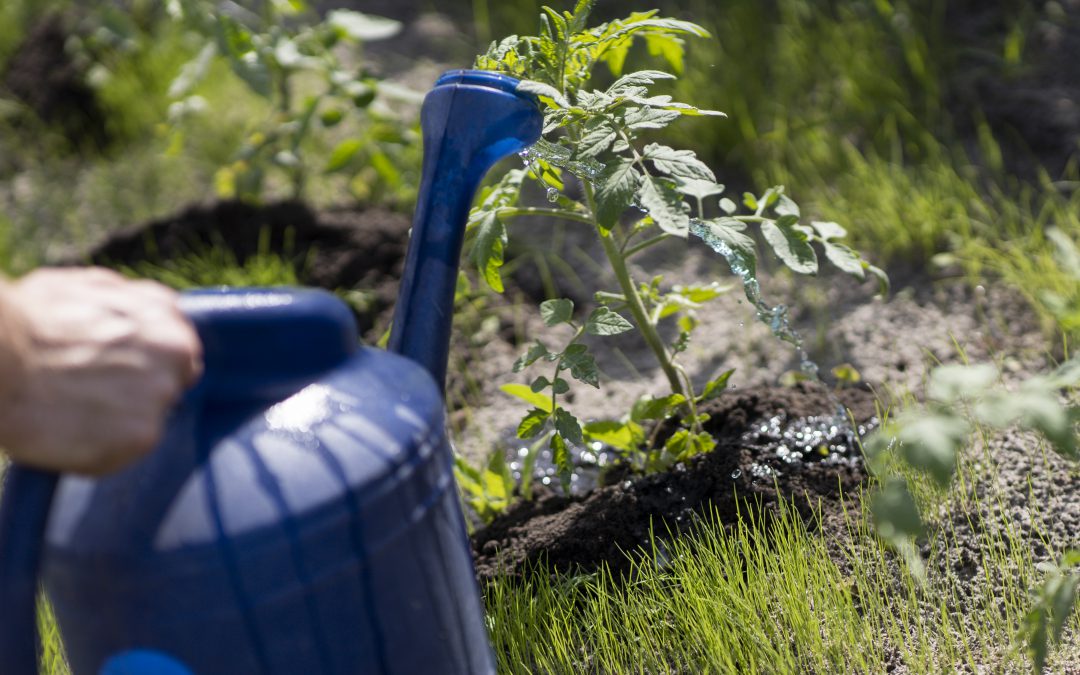
You can become more self-sufficient by growing your own healthy food in your backyard. Photo by Molly Jameson.
There are some other maintenance measures you can take in August to help your landscape and prepare for the fall season. If older palm fronds are yellowing, this could indicate a deficiency in magnesium or potassium. Talk to your local agent or visit your local store for an appropriate palm fertilizer. See Palm Nutrition and Fertilization. Are you holding on to those beautiful fall mums or decorative Christmas poinsettias? Now is the time to pinch them back to allow time for buds to set for winter blooms. Finally, it is a good time to deadhead (remove old blooms) and fertilize flowering annuals and perennials. We’ve had substantial rain this summer, so keep in mind that the soil could be lacking nutrients. A soil test can give you data that indicates what you need for the up-and-coming growing season.
Information for this article can be found in the UF/IFAS EDIS publication: “North Florida Gardening Calendar” by Sydney Park Brown: ENH1190/EP451: North Florida Gardening Calendar (ufl.edu)
by Pat Williams | Jan 22, 2021
For all my years in the classroom, I never let students say the “d-word” when discussing soil science. In some instances, we had a “d-word” swear collection jar of a quarter when you used the term and even today, I hesitate from spelling the word out in text due to feedback from all those I have corrected. In case you still need a clue on the “d-word”, it ends in irt.
As a horticulturist for 46 years, I have read, heard, and been told many secrets to growing good plants. I still hold firm that without proper knowledge of how soil works, most of what we do is by chance. Soil is a living entity comprised of parent material (sand, silt, and clay), air, water, organic matter (OM), and microorganisms. It is this last item which makes our soils come to life. If you have pets, then you know they need shelter, warmth, air, water, and food. From this point forward think of soil microorganisms as the pets in your soil. If you take care of them, they will take care of your plants.
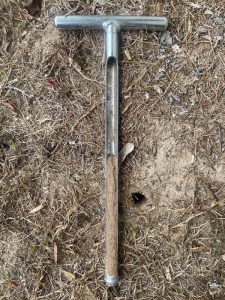
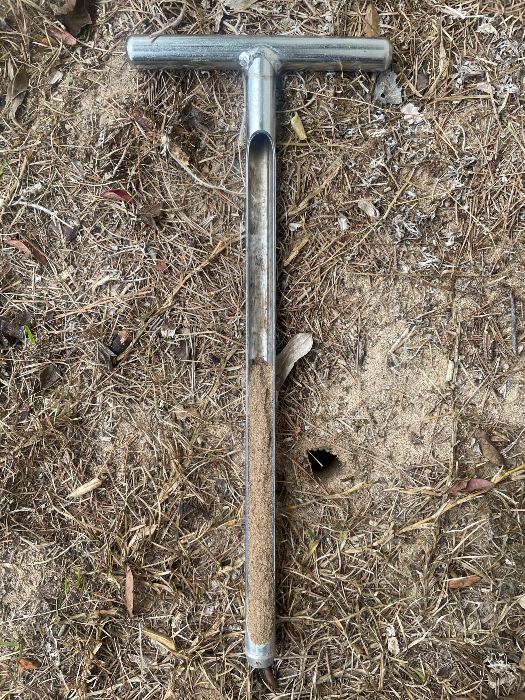
Sandy soil without any organic matter at the Wakulla County Extension office.
There is a huge difference in habitat from a sandy soil to a healthy soil with a good percentage of OM (5% – 10%). In one gram of healthy soil (the weight of one standard paper clip), you can have bacteria (100,000,000 to 1,000,000,000), actinomycetes (10,000,000 to 100,000,000), fungi (100,000 to 1,000,000), protozoa (10,000 to 100,000), algae (10,000 to 100,000), and nematodes (10 to 100) (1). A teaspoon of healthy soil can contain over four billion organisms (2). These microorganisms are part of the soil food web and they form a relationship between soil and your plants. They help convert nutrients to useable forms and assist with other plant functions.
The question becomes how to take care of your soil pets. For years we have performed practices that compromise these populations. Growing up we put all of our grass clippings in the weekly trash. We know now how valuable those clippings are and to leave them be. Two practices still common today though are tilling and raking leaves.
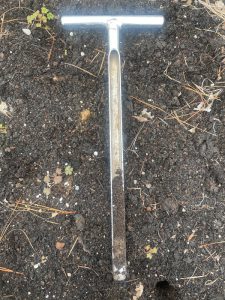
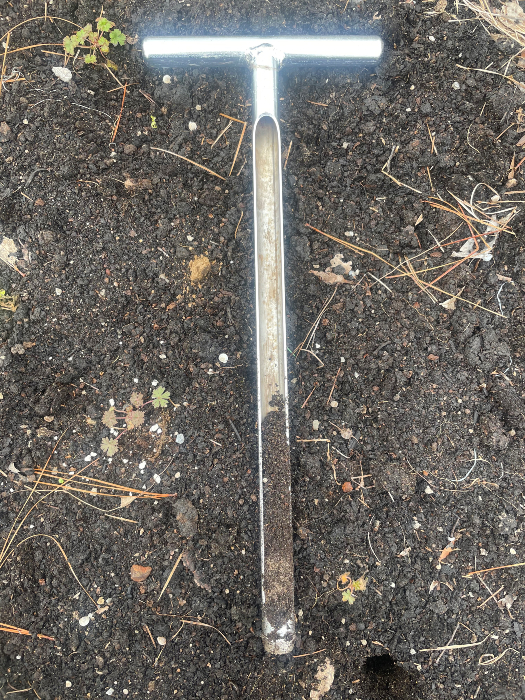
Master Gardener Volunteer vegetable bed with organic matter added.
Tilling has a limited purpose. If I place a layer of organic matter on top of the ground, then tilling incorporates the OM which feeds my pets. Excess tilling of soil introduces large amounts of oxygen which accelerates the breakdown of OM thus reducing our pet populations over time. Another adverse result from tilling is disturbing the soil structure (how the parent materials are arranged) which can reduce pore spaces thus limiting water percolation and root growth. There is a reason agriculture has adapted no-till practices.
Raking leaves (supposedly the sign of a well-kept yard) is removing large amounts of OM. Do you ever wonder why trees in a forest thrive? All of their leaves fall to the ground and are recycled by the microorganisms. Each of those leaves contains macronutrients (carbon, hydrogen, oxygen, nitrogen, phosphorus, potassium, calcium, sulfur, and magnesium) and micronutrients (boron, copper, chlorine, iron, manganese, molybdenum, nickel, and zinc) which are necessary for plant growth. You would be hard pressed to find all those nutrients in one fertilizer bag. So recycle (compost) your leaves versus having them removed from the property.
We are in our off season and tasks such as improving soil health should be considered now for soils to be ready in spring. Remember a little organic matter at a time and never work wet soils. As your OM levels build over the years, remember to change your watering and fertilizing schedules as the soil will be better adapted at holding water and nutrients. Soil tests are still recommended before fertilizing.
If you would like more tips on improving your soil, contact me or your local county horticulture extension agents. For a more in depth look at caring for your soils, read The Importance of Soil Health in Residential Landscapes by Sally Scalera MS, Dr. A.J. Reisinger and Dr. Mark Lusk (https://edis.ifas.ufl.edu/ss664).
- Chapter 2: Soils, Water, and Plant Nutrients. Texas Master Gardener Training Manual.
- The Importance of Soil Health in Residential Landscapes. 2019.
by Sheila Dunning | May 27, 2020
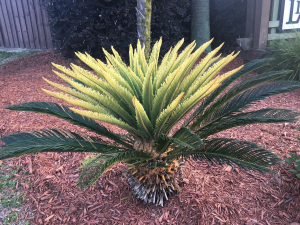
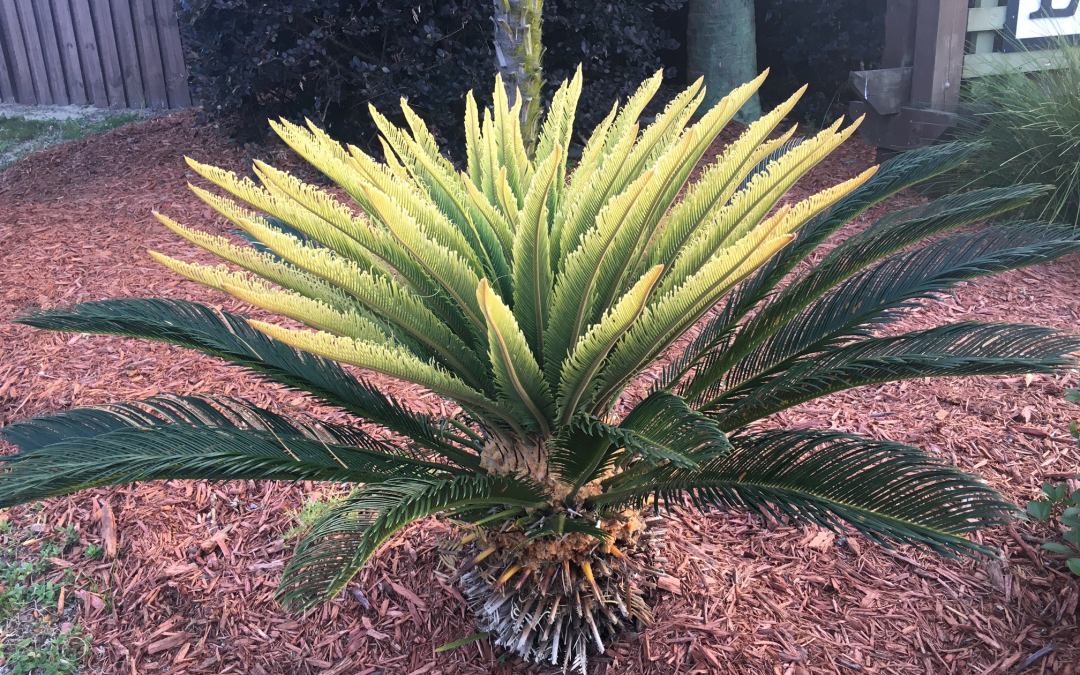
Photo by: Sheila Dunning
The first sign that something is going wrong in a plant is often a loss of the color green. When a sago is forming all new yellow leaves it is a matter of concern. Typically, this a common nutritional deficiency – manganese. Sandy soils of the Panhandle have a hard time retaining nutrients. Manganese and other micronutrient availability is highly influenced by soil pH. Being an essential plant nutrient, manganese is critical to growth. More specifically, it is the base of the metalloenzyme cluster of the oxygen evolving complex (OEC) in photosystem II (PSII). I hope that means more to you than it does me. Basically, manganese is part of the photosynthetic activity and since it isn’t very mobile in the plant, the new growth of sagos turns yellow.
If the nutrient deficiency isn’t corrected, the newly-formed leaves will become deformed and turn brown. In a sago this is referred to as “frizzle-top”. Many people believe the plant has a disease when they see the symptoms and may apply fungicides to no avail. Keep in mind the discoloration of the affected leaves cannot be reversed. However, manganese replacement in the soil will enable the sago to form normal leaves with the next growth phase. Damaged fronds can be removed later to improve the appearance of the sago over time.
Begin this process by determining the soil pH through a soil test. Your local Extension office can help you obtain lab submission forms and explain the collection procedure. Manganese is most available for uptake by sagos when the soil pH is between 5.5 and 6.5. If the pH is above 6.5, larger amounts of manganese will have to be present before the plant can utilize it. When the soil pH is below 5.5 the nutrient is quickly leached out of the soil during rain events.
To correct a manganese deficiency the sago plant will need to receive manganese sulfate. The product is readily available at local nurseries, garden centers and building supply stores. The amount needed for each plant will vary with the size of the sago and the existing soil pH. Sagos growing in sandy, acidic soil will require less manganese sulfate than those in high pH soils. Refer to the package label for application rates.
by Matt Lollar | Apr 23, 2020
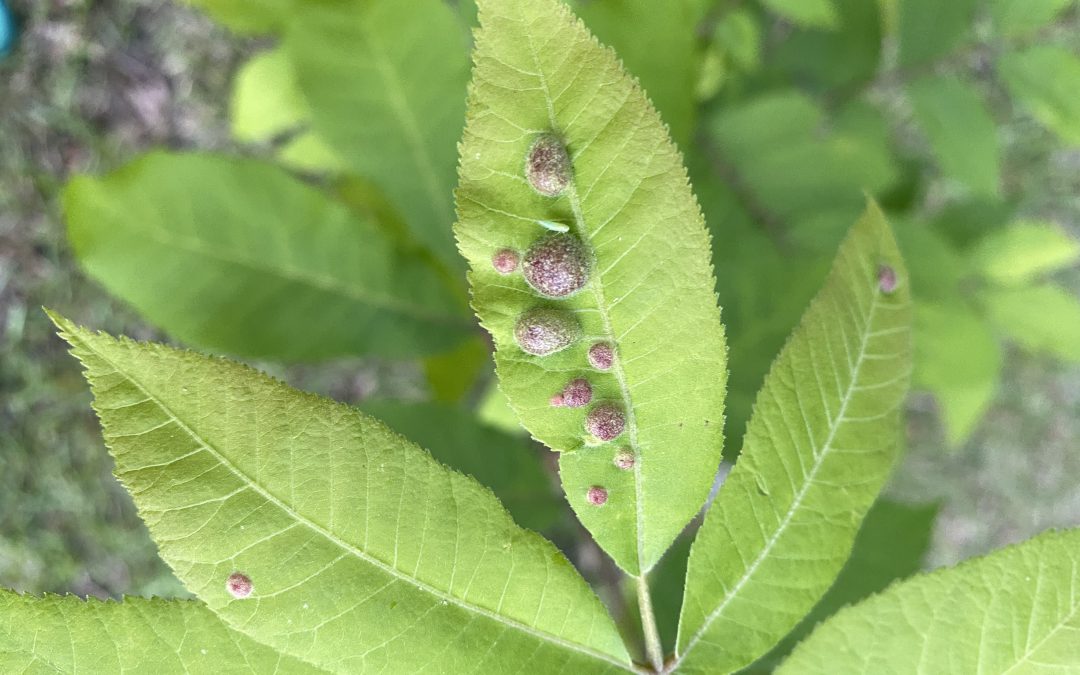
I was recently sent some pictures of some unusual growths on pecan tree leaves. At first glance, the growths reminded me of the galls caused by small wasps that lay their eggs on oak leaves. However, after a little searching it became apparent this wasn’t the case. These galls were caused by the feeding of an aphid-like insect known as phylloxera.
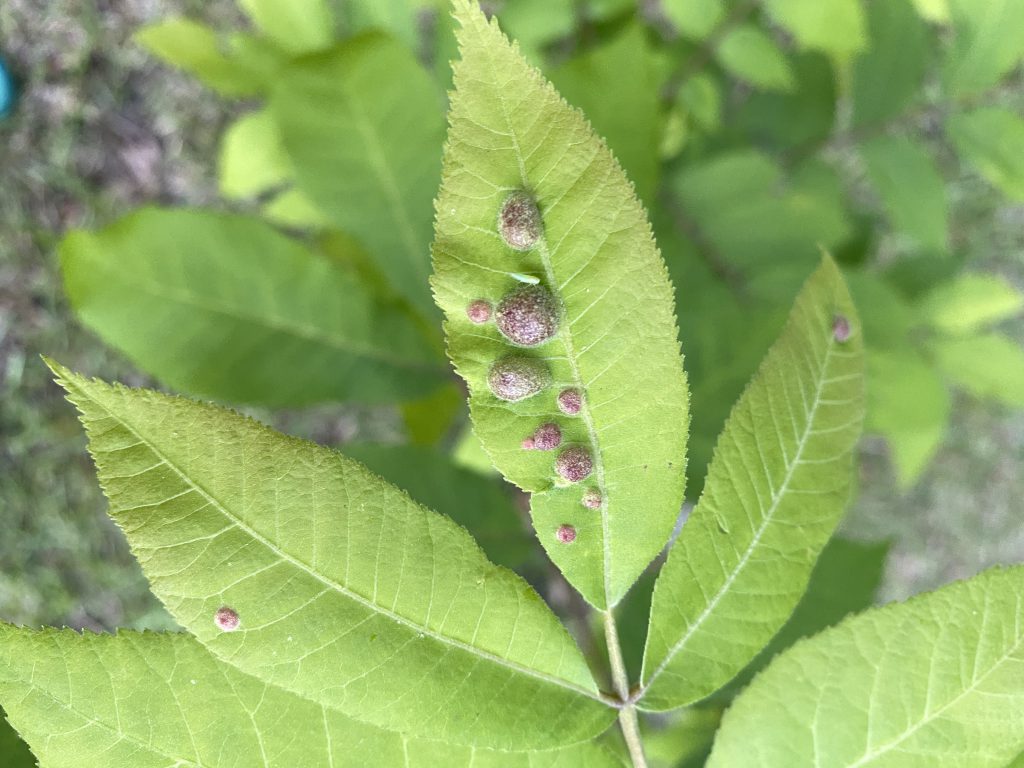
Leaf galls caused by pecan phylloxera. Photo Credit: Matt Lollar, University of Florida/IFAS Extension – Santa Rosa County
The feeding from the phylloxera causes the young leaf tissue to become distorted and form a gall that encloses this female insect called a “stem mother”. These insects are rarely seen, but the hatch from over-wintering eggs in March/April just after budbreak. Once hatched, these “stem mothers” crawl to the new leaves and begin feeding. Once the gall forms, they start to lay eggs inside the gall. The eggs hatch inside the gall and the young phylloxera begin to feed inside the gall and the gall enlarges. The matured insects break out of the gall in May and some will crawl to new spots on the leaves to feed and produce more galls.
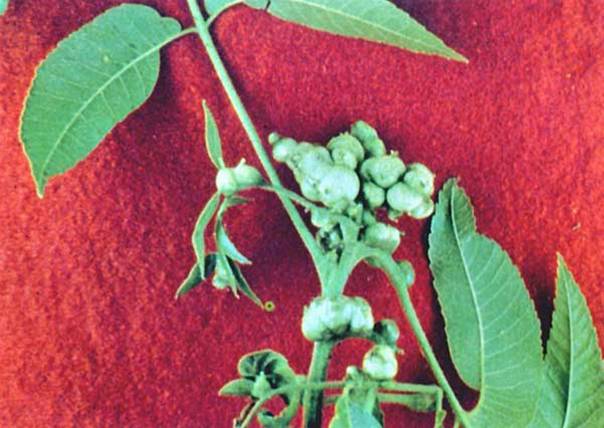
Pecan stem damage from phylloxera. Photo Credit: University of Georgia
There are two common species of phylloxera that infect the leaves. The Pecan Leaf Phylloxera seems to prefer young trees and the Southern Pecan Leaf Phylloxera prefers older trees. The damage from each of these insects is nearly indistinguishable. Damage from these insects is usually not severe and merely an aesthetic issue.
Once the damage is discovered on a tree, it is too late to control the current year’s infestation. There are currently no effective methods for control of phylloxera in home gardens. Soil drench applications witha product containing imidacloprid have been limited in their effectiveness.
by Daniel J. Leonard | Apr 1, 2020
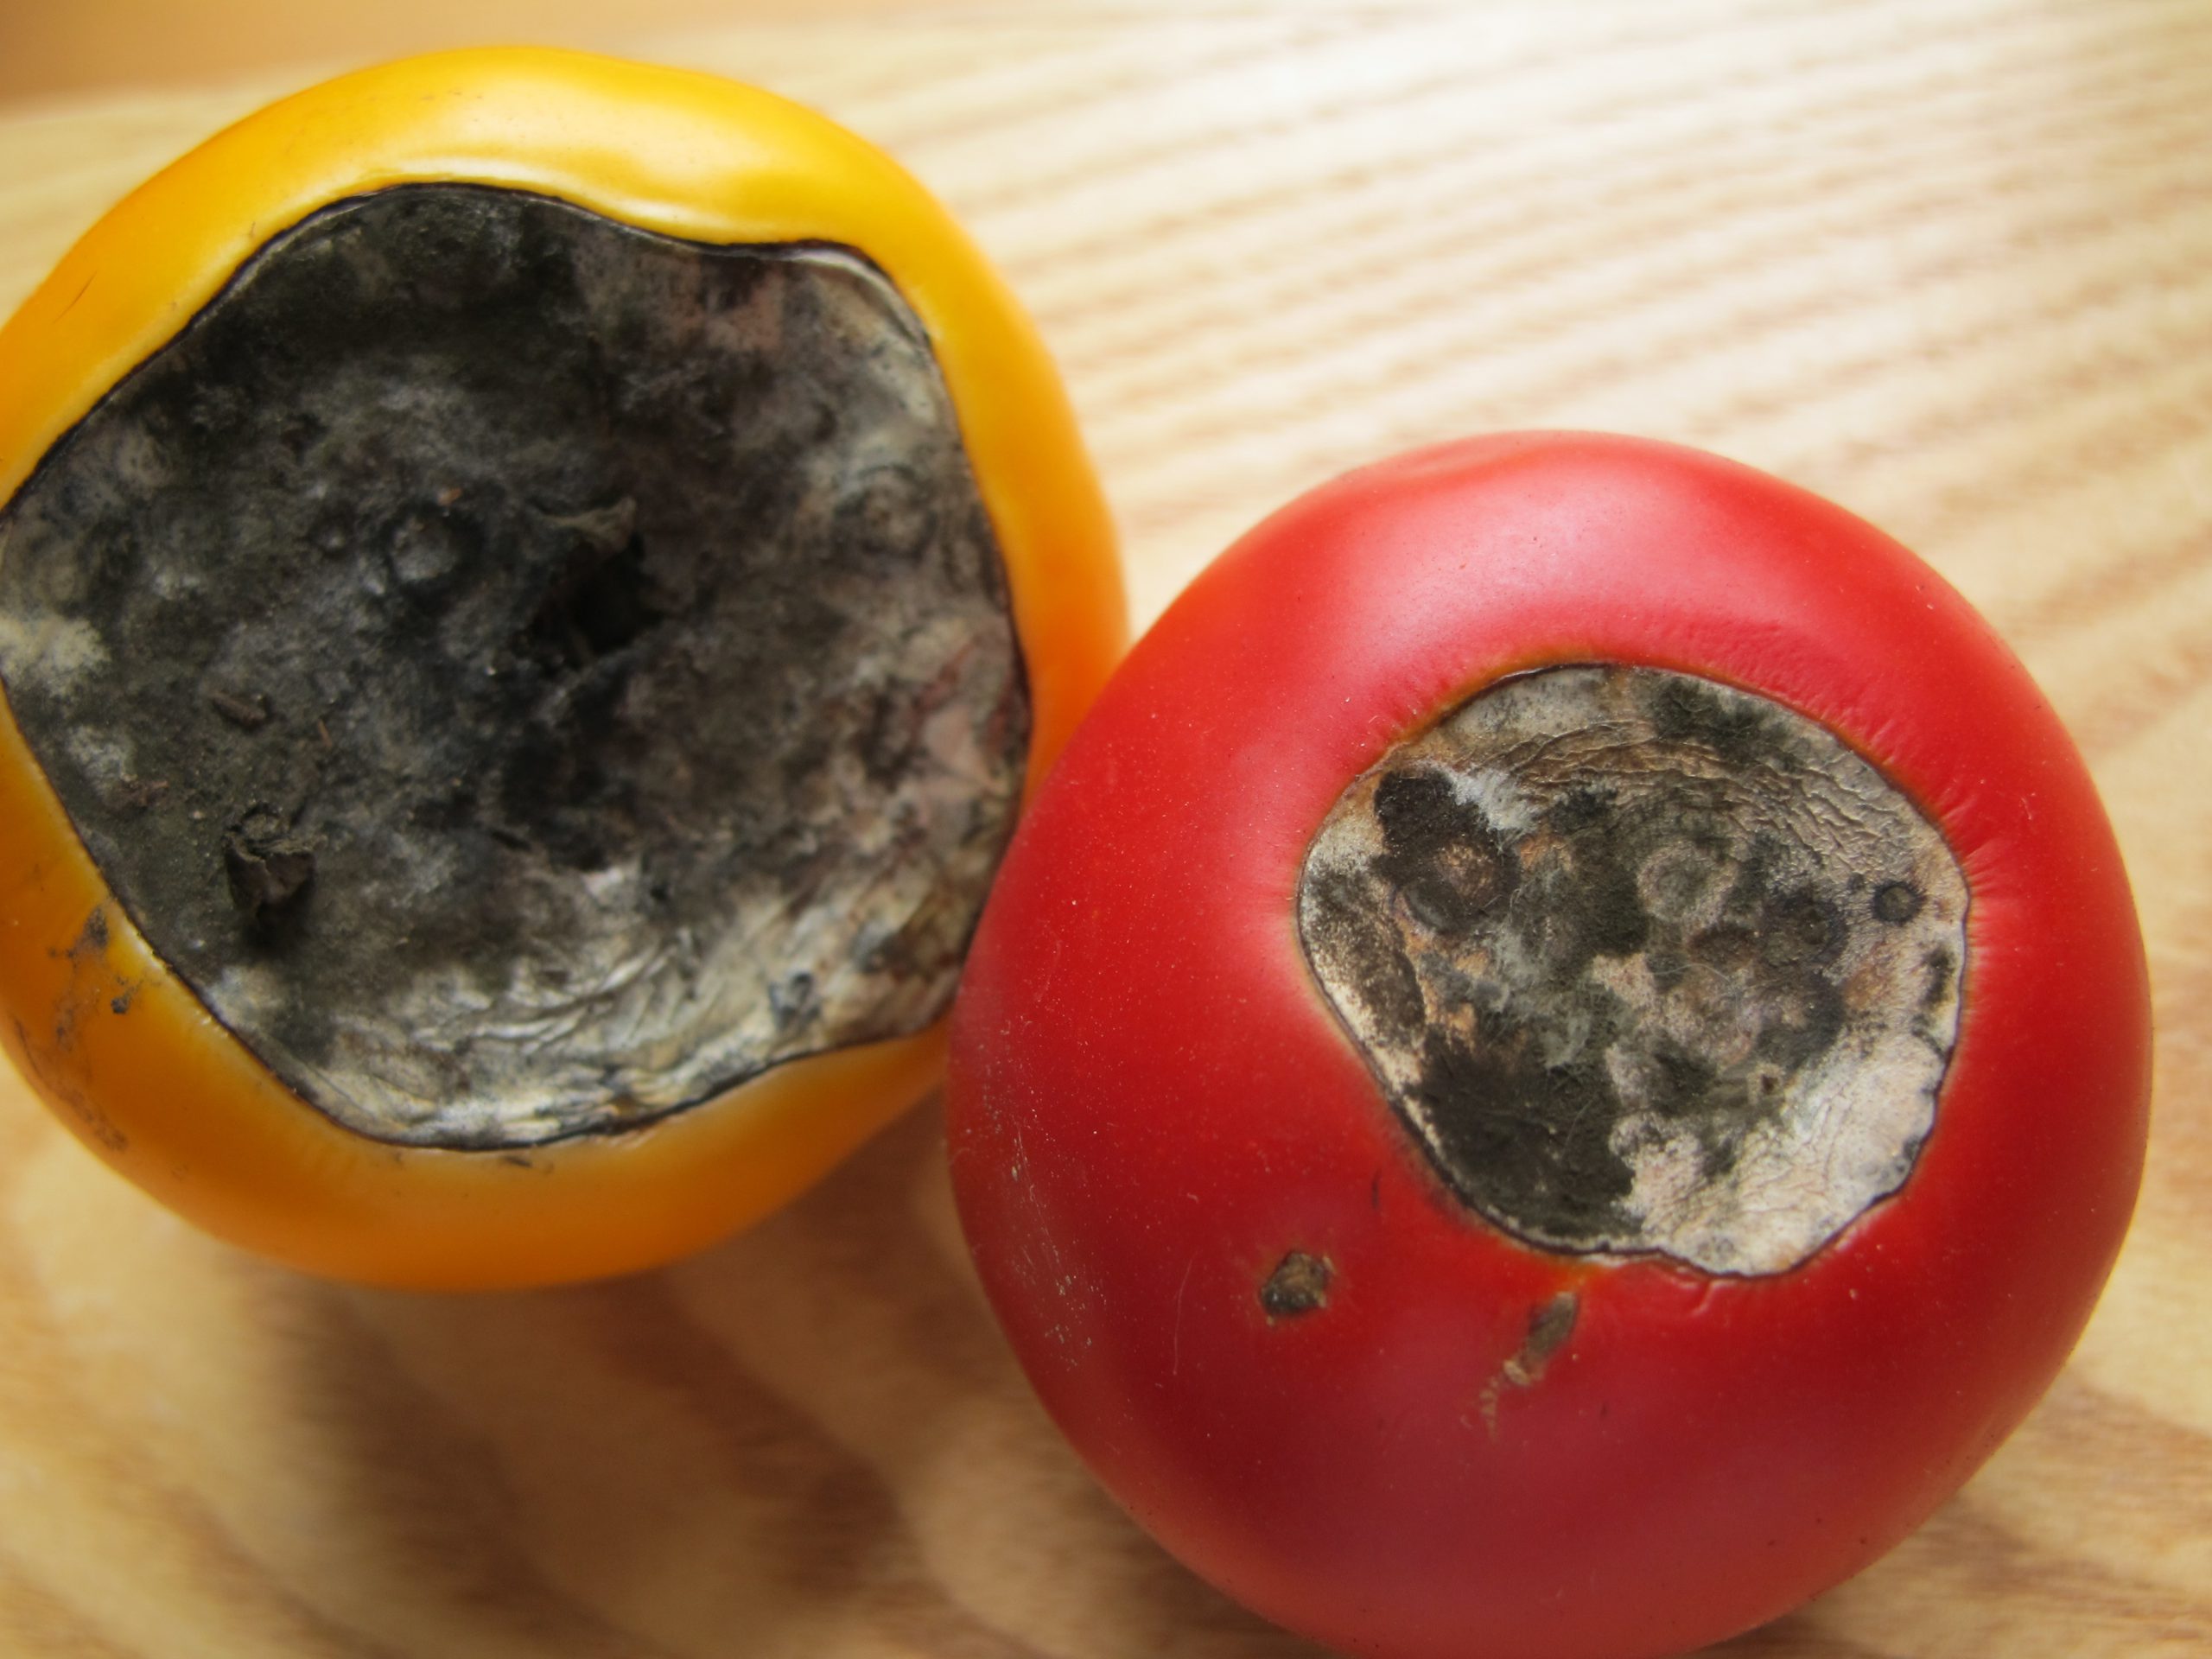
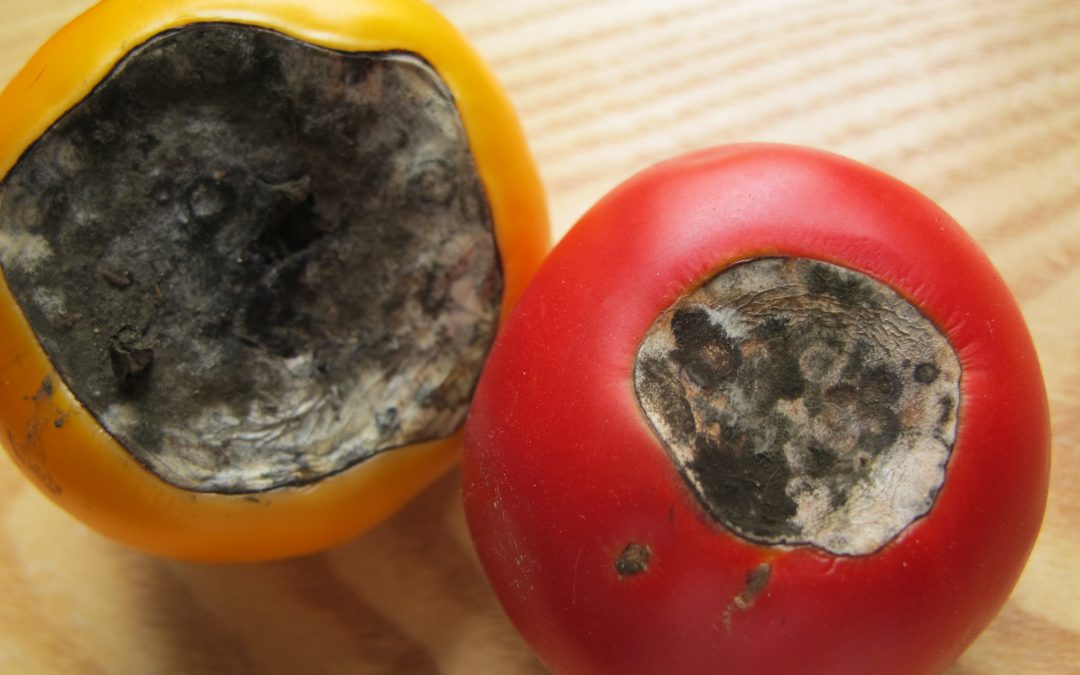
There aren’t many more frustrating things than growing seemingly healthy tomatoes, those plants setting an abundance of flower and fruit, and then, once your tomatoes get about the size of a golf ball, having the fruit rot away from the base. This very common condition, called Blossom End Rot (BER), is caused one of two ways: by either a soil calcium deficiency or disruption of soil calcium uptake by the plant. Fortunately, preventing BER from occurring and then realizing an awesome crop of tasty tomato fruit is relatively simple and home gardeners have a couple of possible preventative solution!
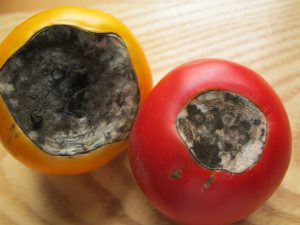
Blossom End Rot damage. Photo Courtesy Larry Williams, Okaloosa County Extension.
- Soil Test & Lime if Needed. The only way to really know if your soil calcium level is sufficient is through a soil test. A complete soil test through the UF Soil Lab or other lab measures both raw nutrient levels and pH. Testing for pH is especially critical. For calcium, either already in the soil or in a supplement you apply, to be available to tomato plants, soil pH needs to be between 6.0-7. In more “acidic” soil pH below 6, nutrients like iron and aluminum become more available to your tomato plants, outcompeting calcium for uptake into the roots. We don’t want that. If your soil test indicates a pH below 6, it will give a lime recommendation somewhere between 3-5 lbs/100 ft sq of garden area to raise the pH to the sweet spot between 6.0-7.0 where your tomatoes will thrive.
- Use a Non-Lime Calcium Supplement. If you’ve had your soil tested and your pH is fine, adding more lime as a calcium supplement isn’t helpful. Using lime as an additional calcium source can actually lift pH above that 6.0-7.0 zone and cause other problems. At this point, once pH is where we want it, I like to add a non-lime calcium supplement. There are lots of options here. Traditional fertilizers labeled for tomatoes and veggies tend to have a good calcium content in the 6-10% range and work great. However, if you’re into organic gardening or just don’t need the extra nutrient value of a complete fertilizer, Gypsum is a good calcium supplement and is widely available. Regardless of which non-lime source you choose, apply at planting or shortly after and follow label rates for best results.
- Water Properly. Consistent watering is key in helping ward off BER. Though we know BER is generally

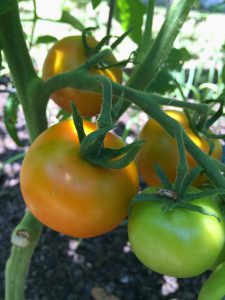
Healthy ‘Big Beef’ tomatoes grown in 2019 with a pH of 6.5, amended with Gypsum at planting, and watered regularly each day! Notice no BER. Photo courtesy the author.
caused by calcium deficiency, it can be induced by creation of distinct wet and dry periods from non-regular watering, interfering with calcium uptake and availability to the plant. So, while you may have adequate soil calcium, if you don’t water correctly, the condition will happen anyway! It’s also good to keep in mind that mature tomato plants use large quantities of water daily, so during the heat of summer, plants in containers may need to be watered multiple times daily to maintain consistently moist soil. Think about it, you don’t drink 8 glasses of water when you wake up and then never drink again throughout a hot day. A tomato is no different. Allowing your plants to wilt down before providing additional water ruins productivity and can induce BER.
Blossom End Rot, while one of the more destructive fates of tomatoes, is totally preventable by a little legwork early in the growing game from you! Soil test and change pH with lime if needed, add a shot of calcium through a tomato blend fertilizer or non-lime supplement like gypsum, and water regularly! Do these three things and you’ll be well on your way to a great crop of early summer tomatoes. If you have any questions about tomato blossom end rot or any other horticulture or agricultural topic, please don’t hesitate to reach out to us at the UF/IFAS Calhoun County Extension Office. Take advantage of this beautiful spring weather and get in the garden today! Happy gardening.

by Sheila Dunning | Sep 7, 2019
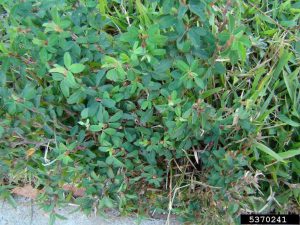
“There are these weeds spreading all over my yard. They have little round leaves that are real close to the ground and creep in every direction. I keep trying to get rid of them by mowing my grass shorter, but they are killing my grass. What are they and how do I get rid of them?” Here at the Extension office, this is a conversation I have had nearly daily for the past month. We are here to help with identification and control of many landscape problems, including weeds.
However, my first word of advice is to change the mowing practice. Short, spreading weeds cannot be mowed out. You need to do just the opposite. Mowing as high as possible (3-4”) will help to reduce weeds by shading them out, therefore, reducing their spread.
In every instance, the weeds have been common lespedeza (Kummerowia striata (Thunb.) Schind syn. Lespedeza striata) and/or prostrate spurge (Euphorbia maculata syn. Chamaesyce maculata). Both grow close to the ground with a spreading habit. Both have small, rounded leaves and produce small, light-colored flowers. But, if you look close, there are significant differences that will help with identification.
 Common lespedeza, also known as Japanese clover, is prostrate summer annual that forms 15-18 inch patches. The stems are wiry. It has dark green trifoliate
 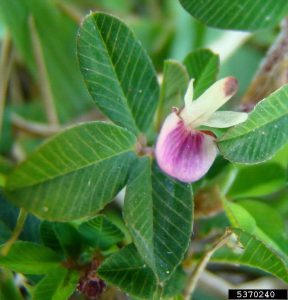 (arranged in threes) leaves with three oblong, smooth leaflets. Leaflets have parallel veins nearly at right angles to a prominent mid-vein. Its leaves have smooth edges and a short spur at the tip of each leaflet. Flowers appear in late summer with small pink to purple, single flowers found in leaf axils on most of the nodes of the main stems. As common lespedeza matures, the stems harden and become woody.
Prostrate spurge is a summer annual broadleaf weed that spreads by seed. The leaves are oval in shape, small, and opposite along the stem. As it matures, a red spot may form in the center of the leaf, earning it the common name spotted spurge. Another distinct characteristic is the stem contains a milky sap that oozes when the stem is broken. Light pink to white-colored flowers appear from early-summer through the fall.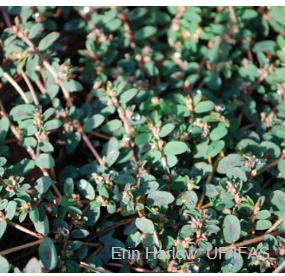
Both are annual,broadleaf weeds, so there are several post-emergent herbicides available to kill the ones present. Don’t forget the pre-emergent herbicide application in late winter though. These weeds can drop plenty of seed. The importance of knowing which weed you have is more about the message they are trying to send you. These weeds can indicate other issues that may be part of the reason the grass is thinning and allowing the weeds to take over in the first place.
Common lespedeza is a legume. It thrives when water is plentiful and soil nutrients are low. If this is the weed “taking over” your yard, you need to get a soil test and evaluate your watering habits. Improving fertility and reducing soil moisture will naturally weaken common lespedeza.
If your thin patches of declining grass are being replaced with spurge, it may be time to submit a sample for a nematode assay. Research has shown that spurge is a weed that can thrive with high populations of nematodes. Turfgrass species are easily harmed by nematodes (microscopic roundworms that imbed into and on grass roots). If the assay indicates harmful population levels, unfortunately there are few options for reduction of the nematodes. However, several ornamental plants are tolerant. So, you may need to consider creating a landscape bed area rather than continuing to battle poor-looking grass.
Weeds can serve as indicators to soil conditions that may need to be addressed. Learning to identify weeds may teach you more than just their names.