by Sheila Dunning | Aug 7, 2019
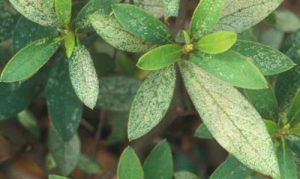
Damage caused by azalea lace bug, Stephanitis pyrioides (Scott), feeding. Photograph by James. L. Castner, University of Florida. Severely damaged leaves become heavily discolored and eventually dry or fall off. Symptoms may sometimes be confused with mite injury, but the presence of black varnish-like excrement, frequently with cast skins attached, suggest lace bug damage (Johnson and Lyon 1991).
You may be noticing the color disappearing from your azaleas right now. Do your azaleas look bleached out from a piercing-sucking insect. The culprit is probably azalea lace bug, Stephanitis pyrioides. This pest overwinters in eggs on the underside of infested leaves. Eggs hatch in late March and early April. The insect then passes through five nymphal instars before becoming an adult. It takes approximately one month for the insect to complete development from egg to adult and there are at least four generations per year. Valuable plants that are susceptible to lace bug damage should be inspected in the early spring for the presence of overwintering lace bug adults, eggs and newly-hatched nymphs. Inspect these plants every two weeks during the growing season for developing lace bug infestations.
Both adults and nymphs have piercing-sucking mouthparts and remove sap as they feed from the underside of the leaf. Lace bug damage to foliage detracts greatly from the plant’s beauty, reduces the plant’s ability to produce food, decreases plant vigor and causes the plant to be more susceptible to damage by other insects, diseases or unfavorable weather conditions. The azalea can become almost silver or bleached in appearance from the feeding lace bug damage.
However, lace bugs often go undetected until the infested plants show severe damage sometime into the summer. By then several generations of lace bugs have been weakening the plant. Inspecting early in the spring and simply washing them off the underside of the leaves can help to avoid damage later and the need for pesticides.
Adult lace bugs are flattened and rectangular in shape measuring 1/8 to 1/4 inch long. The area behind the head and the wing covers form a broadened, lace-like body covering. The wings are light amber to transparent in color. Lace bugs leave behind spiny black spots of frass (excrement).
Adult azalea lace bug, Stephanitis pyrioides (Scott), and excrement. Photograph by James. L. Castner, University of Florida.
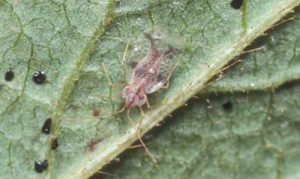
Lace bug nymphs are flat and oval in shape with spines projecting from their bodies in all directions. A lace bug nymph goes through five growth stages (instars) before becoming an adult. At each stage the nymph sheds its skin (molts) and these old skins often remain attached to the lower surface of infested leaves.
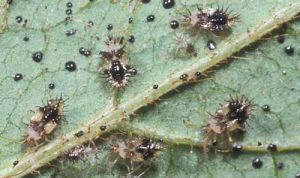
Nymphs of the azalea lace bug, Stephanitis pyrioides (Scott), with several cast skins and excrement. Photograph by James. L. Castner, University of Florida.
Azalea lace bug eggs are football-shaped and are transparent to cream colored. Lace bug eggs are found on the lower leaf surface, usually alongside or inserted into a leaf vein. Adult females secrete a varnish-like substance over the eggs that hardens into a scab-like protective covering.
Other plant species, such as lantana and sycamore, may have similar symptoms. But, realize that lace bugs are host specific. They feed on their favorite plant and won’t go to another plant species. However, the life cycle is similar. Be sure to clean up all the damaged leaves. That’s where the eggs will remain for the winter. Start next spring egg-free.
For more information go to: http://entomology.ifas.ufl.edu/creatures/orn/shrubs/azalea_lace_bug.htm
by Carrie Stevenson | Aug 1, 2019

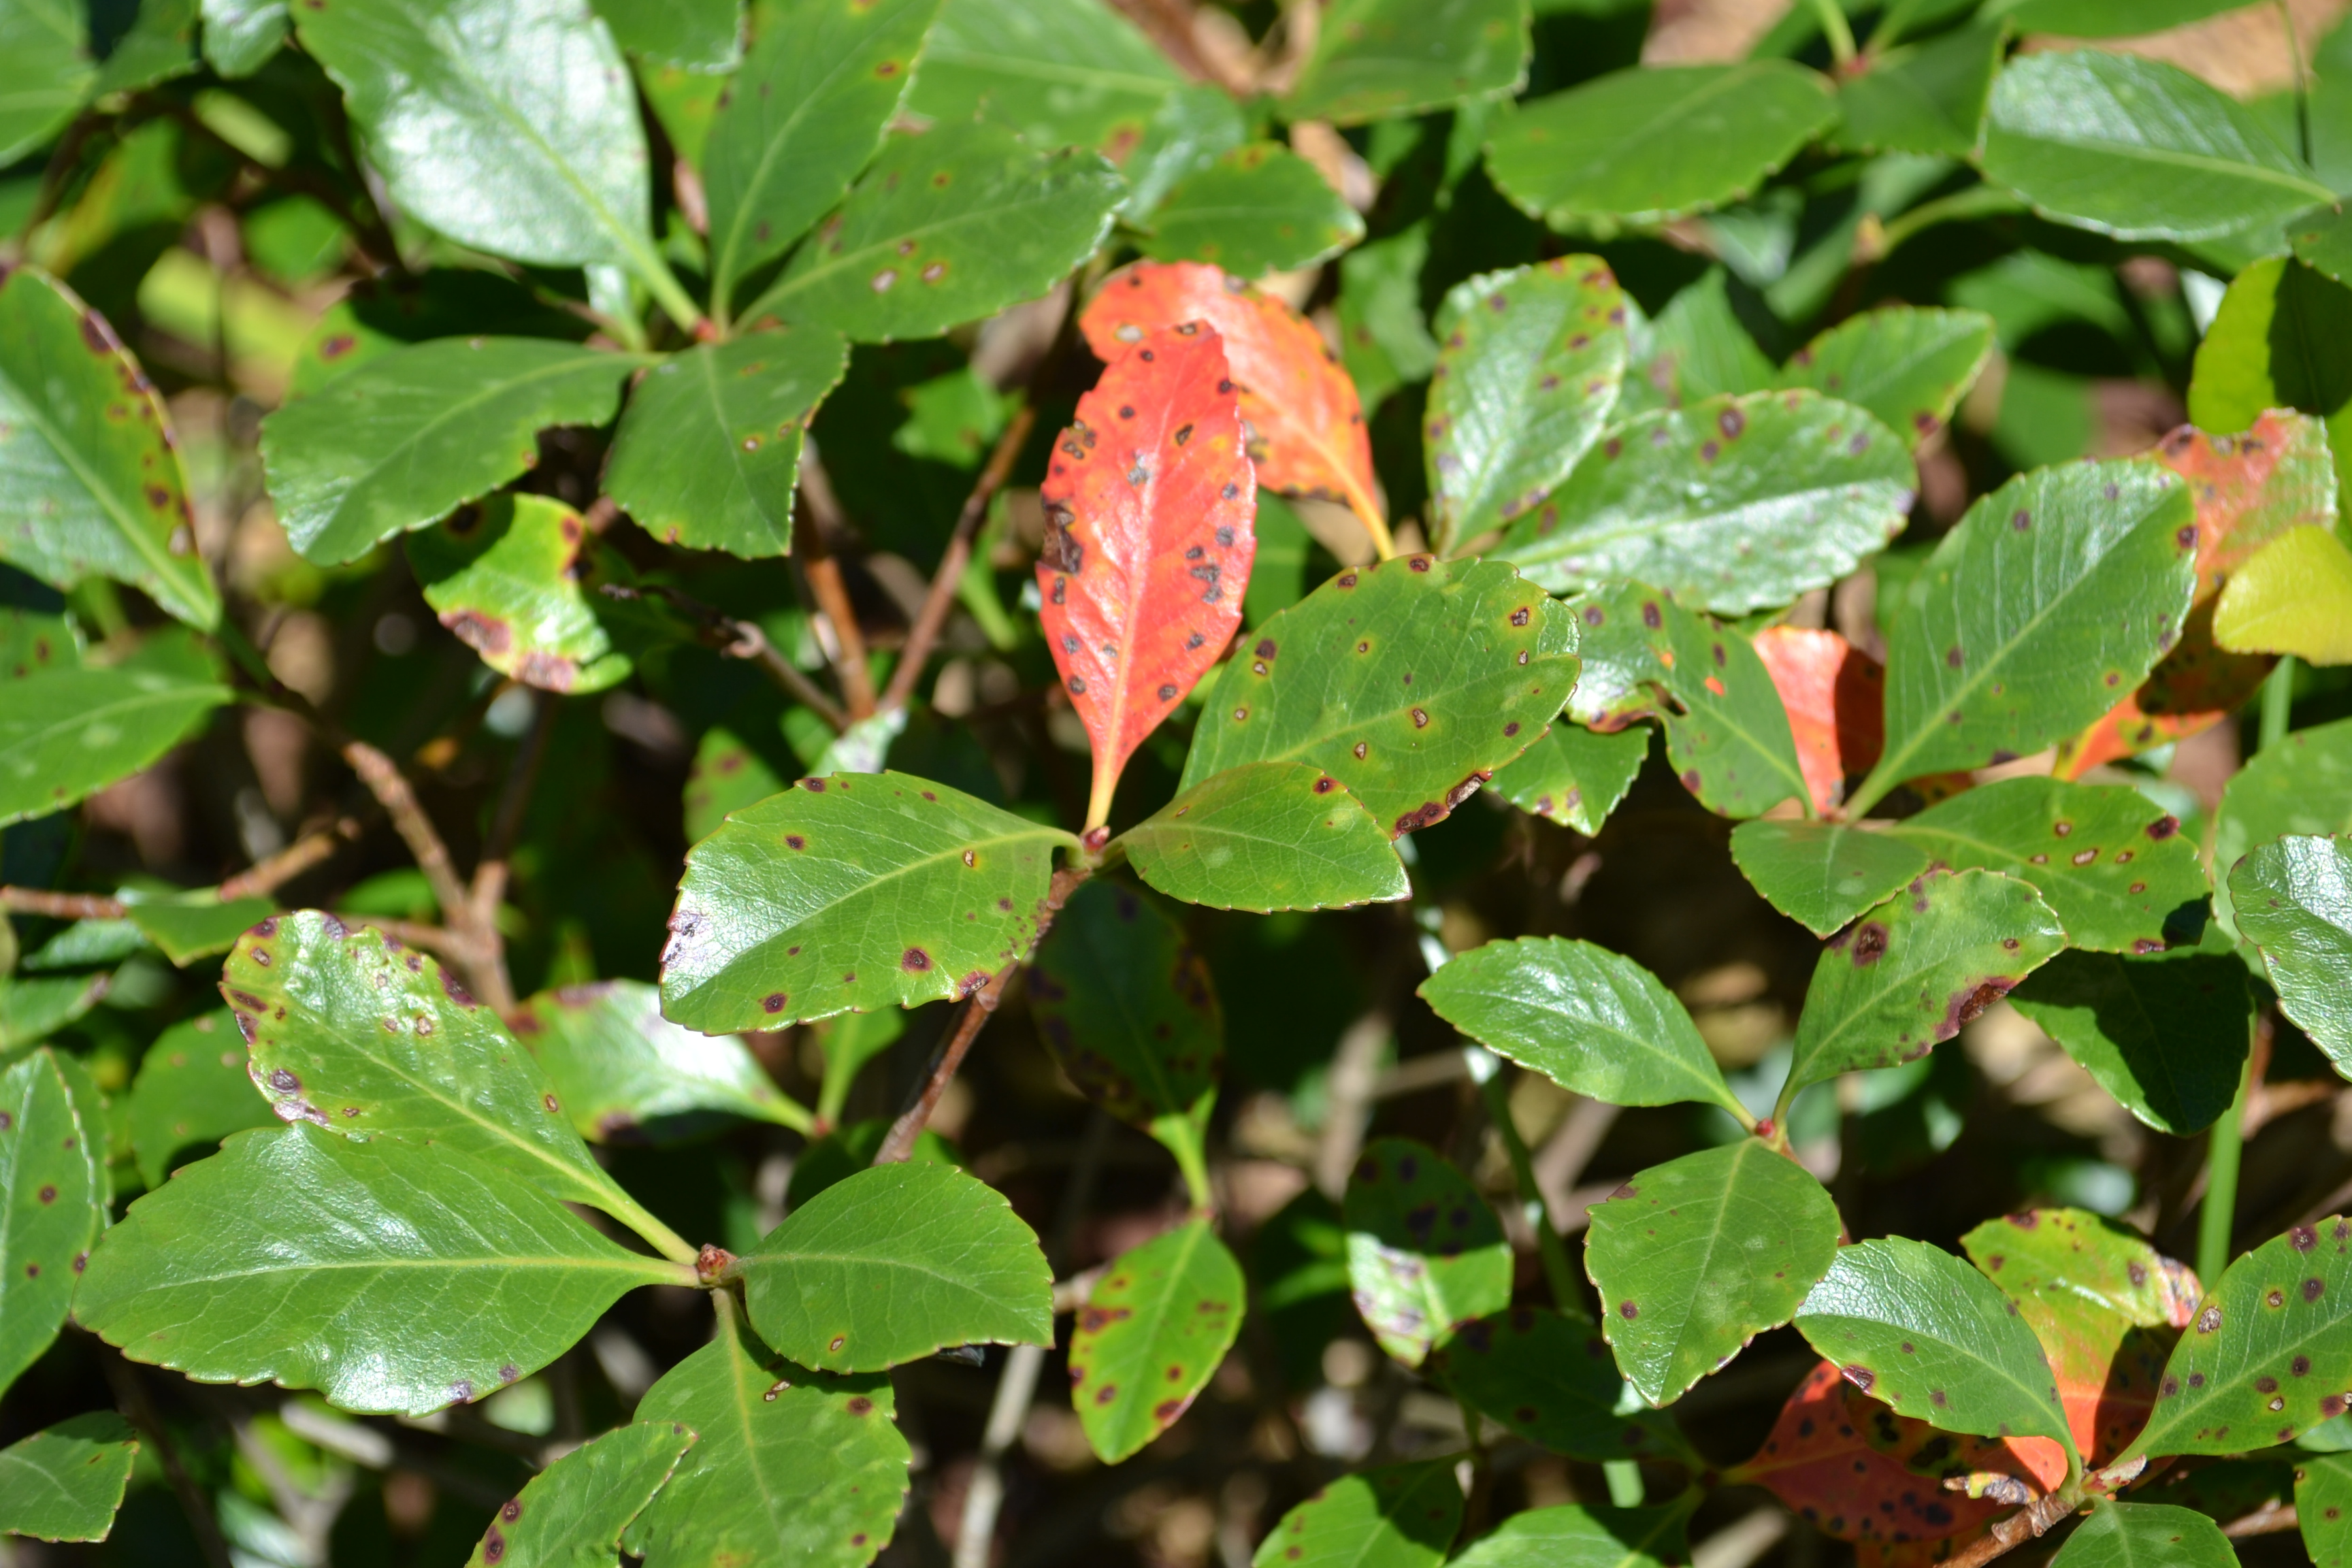
Reddish, round spots are the first sign of Entomosporium Leaf Spot on Indian Hawthorn. Photo credit: Beth Bolles, UF IFAS Extension
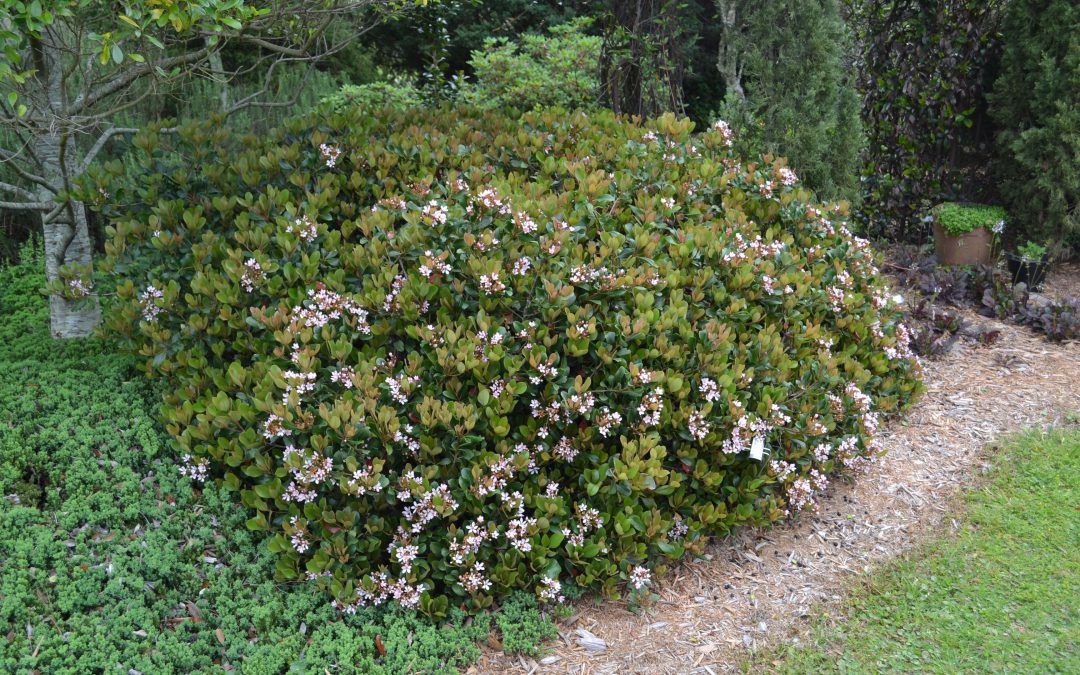
Indian hawthorn (Rhaphiolepis spp.) is one of those great evergreen shrubs with such a reputation for hardiness that most folks tend to plant it and not worry about it. Indian hawthorn is not a Florida native, but is adapted to our weather conditions and is widely used in home landscapes throughout the Southeast.
However, it is important that homeowners and landscape managers pay attention to them, particularly during the warm, often wet weather growing season. During such conditions, the plant is vulnerable to Indian hawthorn leaf spot, caused by a fungus called Entomosporium mespili. Several years back, this fungus spread through the once-popular red-tip plant (Photinia fraser), to the extent that this species is now rarely used.
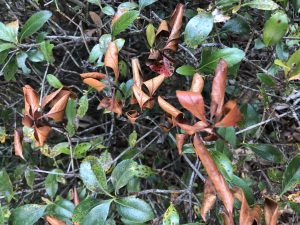
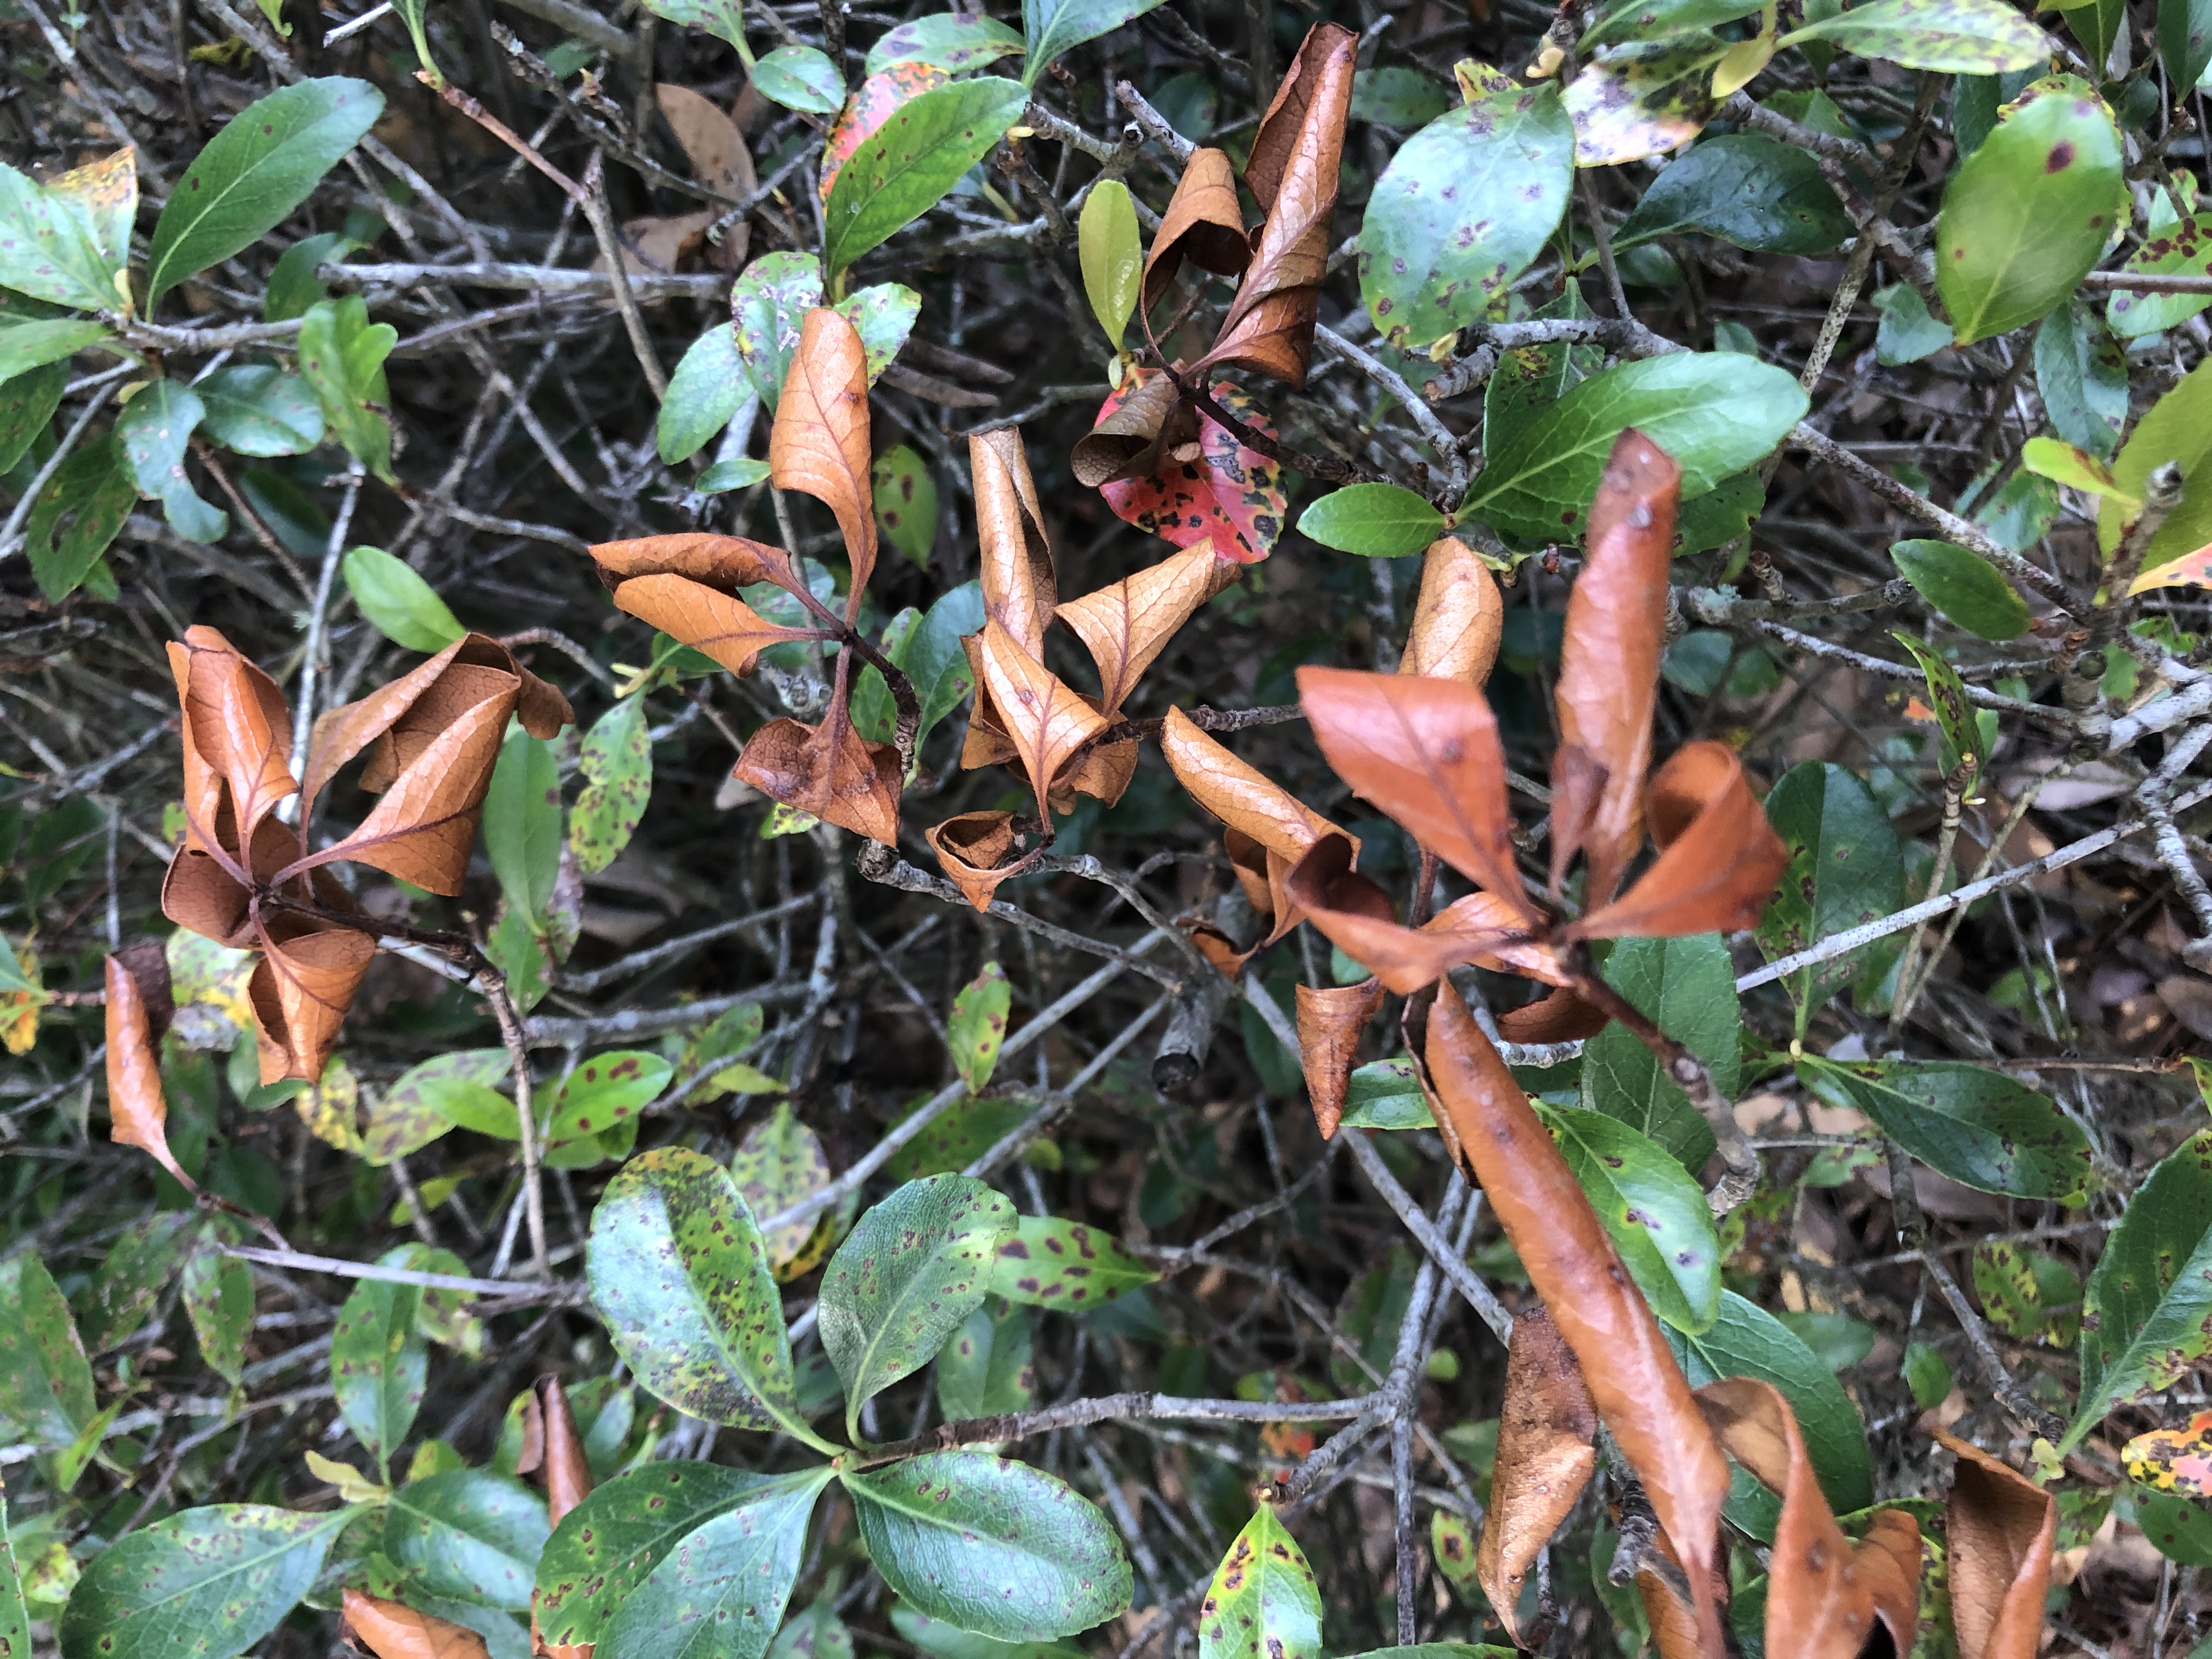
An Indian hawthorn plant heavily affected with leaf spot fungus can be covered with round circles on the green leaves, eventually leading to plant death. Photo credit: Carrie Stevenson, UF IFAS Extension
Symptoms of leaf spot fungi include small, circular red spots on young leaves, which then expand into larger patches. On older leaves, the spots are gray in the middle with red/maroon borders. Eventually, leaves can drop and entire plants may defoliate and die. The disease typically spreads through rainwater or overhead irrigation.
To manage the disease, it is best to create space between a sick plant and a healthy one to allow better air circulation. This will allow leaves to dry off after rainfall events and prevent expansion of spores. Be sure not to overwater, prune, or fertilize shrubs that show signs of the disease, as this encourages growth—the fungus thrives particularly well on young, vigorously growing leaves.
For leaf spot problems that become difficult to manage with just cultural practices, fungicides containing chlorothalonil, myclobutanil, or propiconazole may be used. Always follow label instructions when using chemical management and apply in the spring or fall. In addition, dead or dying plants should be removed and replaced with cultivars showing resistance to Entomosporium leaf spot, including Eleanor Tabor, Indian Princess, Gulf Green, Betsy, Blueberry Muffin, Georgia Petite, Olivia, and Snow White.
by Julie McConnell | Jun 21, 2019
My obsession with plants started with the purchase of my first house in Waverly, Alabama in the late 90s. I bought a house with seven acres and of that about 1.5 acres was a fenced yard. The landscape was not very appealing, so I was on a mission to make it beautiful yet functional for my dogs. The only problem was, as a new homeowner, I had very little expendable income for my burgeoning plant habit. This dilemma forced me to be a resourceful gardener.
Shop the discount rack at garden centers
- Many retail garden centers (especially mixed use stores with limited plant space) will discount plants simply because they are no longer flowering. Plants look perfectly healthy but are just not considered “retail ready” anymore, so rather than hold them over until they bloom again and appeal to most shoppers the stores tend to mark them down.
- Plants are either growing or they are dead, so it is common to find some outgrowing their container and are getting “potbound” which means the root system is outgrowing the pot. Potbound plants are hard to keep watered without wilting and the solutions are to transition to a larger pot or plant in the ground. Most garden centers are not equipped to pot up overgrown plants to larger containers, so the easier solution is to sell them quickly. If you purchase a plant with circling roots be sure to trim the bottom and score (slice) the root ball to encourage roots to spread laterally.
- Avoid plants that appear diseased (leaf spots, brown stems, mushy parts, rotting odor) or have active feeding insect activity.
Compliment other gardeners’ plants
- When you get gardeners together, they inevitably start swapping plants. I really don’t have an explanation for this other that good old southern hospitality, but I’ve noticed over the years that when you express appreciation of plants to other people they tend to end up in your own yard. Ask if you can take a pinch (for cuttings) or offer to divide a clump of crowded perennials and you are on your way to a trunk full of plant babies.
- I can’t recommend this for multiple safety reasons, but I have been known to photographs plants in my travels then strike up a conversation with a homeowner who insisted I take one home.
Experiment with basic propagation techniques
- Grow flowers from seed. Either purchase seeds (usually under $2/pack) or collect seed heads from spent flowers in your own garden. After flowers fade, allow them to set seed then either crush and distribute in other parts of your garden or store in a cool, dry place until you can swap with friends.
- Division – clumping perennials such as daylilies, cast iron plant, iris or liriope can be dug up and cut into smaller pieces with a shovel or machete. You only need to be sure to have buds on top and roots on the bottom to make a new plant. Other plants create offshoots that can be removed from the parent plant. Examples of these are agave, cycads, and yucca.
- Cuttings – the list of plants that can be propagated from stem cuttings is endless but a few that are very easy are crape myrtle, hydrangea, and coleus.
- Patented plants can not be propagated.
For more information read Plant Propagation Techniques for the Florida Gardener or contact your local UF/IFAS Extension Office.
by Logan Boatwright | May 27, 2019
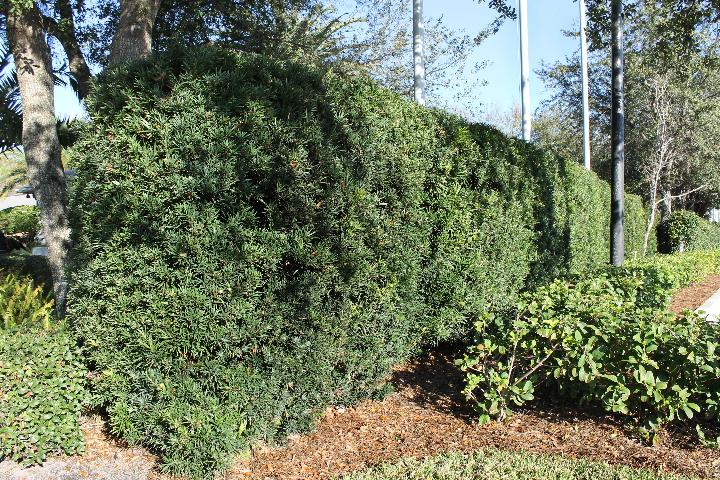
Everyone likes their privacy. Usually, a large eight-foot privacy fence is built for that reason. That option tends to be expensive. What is a different approach for a similar result? A natural wall!
One advantage of having a natural wall is that a homeowner has options when choosing plants. When it comes to choosing plants for a natural wall, the first thing to decide is if a wall needs to be year round or seasonal. Size would be the next factor to determine.
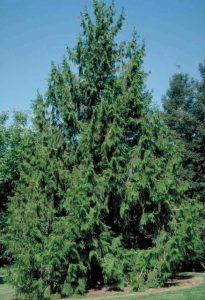
Japanese Cedar (Cryptomeria japonica) has the capability of growing 40 to 60 feet in height and 15 to 20 feet in width. There are some smaller varieties to pick from, but where is the fun in having a small wall?
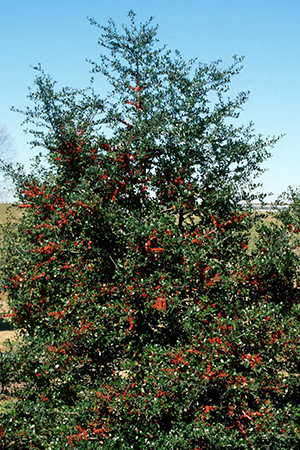
Another plant option that would require pruning, but make an excellent natural wall is Japanese Yew (Podocarpus macrophyllus). This specimen will grow 30 to 40 feet tall and 20 to 25 feet in width if left unpruned, however, it is a slow grower. Yaupon Holly (Ilex vomitoria) comes in several selections of various sizes so the height range is 3 to 20 feet. The width range is 5 to 15 feet.
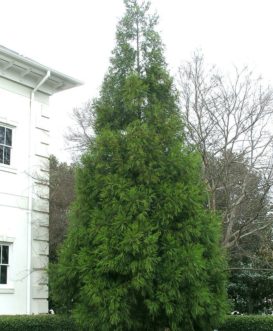
The Emerald Green Arborvitae is a fast grower that would be ideal for the homeowner who does not want a tall wall. It keeps a tight pyramid shape that will reach heights up 12 to 14 feet and needs 4 to 6 feet of space. Green Giant Arborvitae or Thuja Giant (Thuja standishii x plicata ‘Gre) is an excellent tree to pick for a natural wall. It has the capability to reach 50 to 60 feet in height and spreads out 12 to 20 feet at maturity. This arborvitae is considered to be a fast grower since it can increase more than 24” per year.
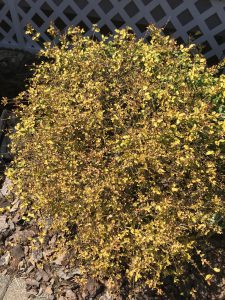
The larger selections of Loropetalum are other shrubs that homeowners have used to establish their privacy wall. One can expect a height up to 15 feet if left unpruned and pinkish to purple strap-like flowers, which makes for a great wall height.

‘Yoshino’ Japanese cryptomeria
Photo by Karen Russ, ©HGIC, Clemson Extension
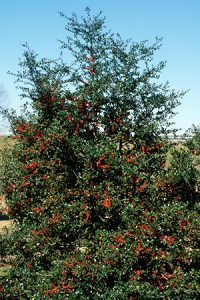
A yaupon holly cultivar (Ilex vomitoria ‘Roundleaf’). John Ruter, University of Georgia, Bugwood.org Creative commons license.
Thuja plicata: Giant Arborvitae. Credit: Ed Gilman, UF/IFAS

Podocarpus macrophyllus or Japanese Yew. Credit: UF/IFAS
These plants are some of the selections homeowners may choose to start their natural walls. Given time, these shrubs will develop into a dense screen for the interruption of unwanted light or noise. To learn more about the aforementioned plant material, contact your local UF / IFAS extension agent.
by Daniel J. Leonard | May 20, 2019
Spring is a wonderful time of year. After months of dreariness and bare branches, bright, succulent green leaves and flowers of every kind and color have emerged. So too, have emerged gardeners and outdoor enthusiasts ready to tackle all their home and landscape improvement projects planned over the winter. However, this is also the time, when folks first start paying attention to their plants again, that strange, seemingly inexpiable plant problems crop up!
All plant problems can be divided into two categories: biotic problems, or issues caused by a living organism (think insects, fungus, and bacteria), and abiotic problems, issues that arise from things other than biotic pests. It’s the first category that people generally turn to when something goes wrong in their landscape or garden. It’s convenient to blame problems on pests and it’s very satisfying to go to the local home improvement store, buy a bottle of something and spray the problem into submission. But, in many of my consultations with clientele each spring, I find myself having to step back, consider holistically the circumstances causing the issue to arise, scout for pests and diseases, and if I find no evidence of either, encouraging the person to consider the possibility the problem is abiotic and to adopt patience and allow the problem to correct itself. Of course, this is never what anyone wants to hear. We always want a solvable problem with a simple cause and solution. But life isn’t always that easy and sometimes we must accept that we (nor a pest/disease) did anything wrong to cause the issue and, in some cases, that we ourselves actually caused the problem to happen in the first place! To illustrate, let’s consider two case studies from site visits I’ve had this spring.
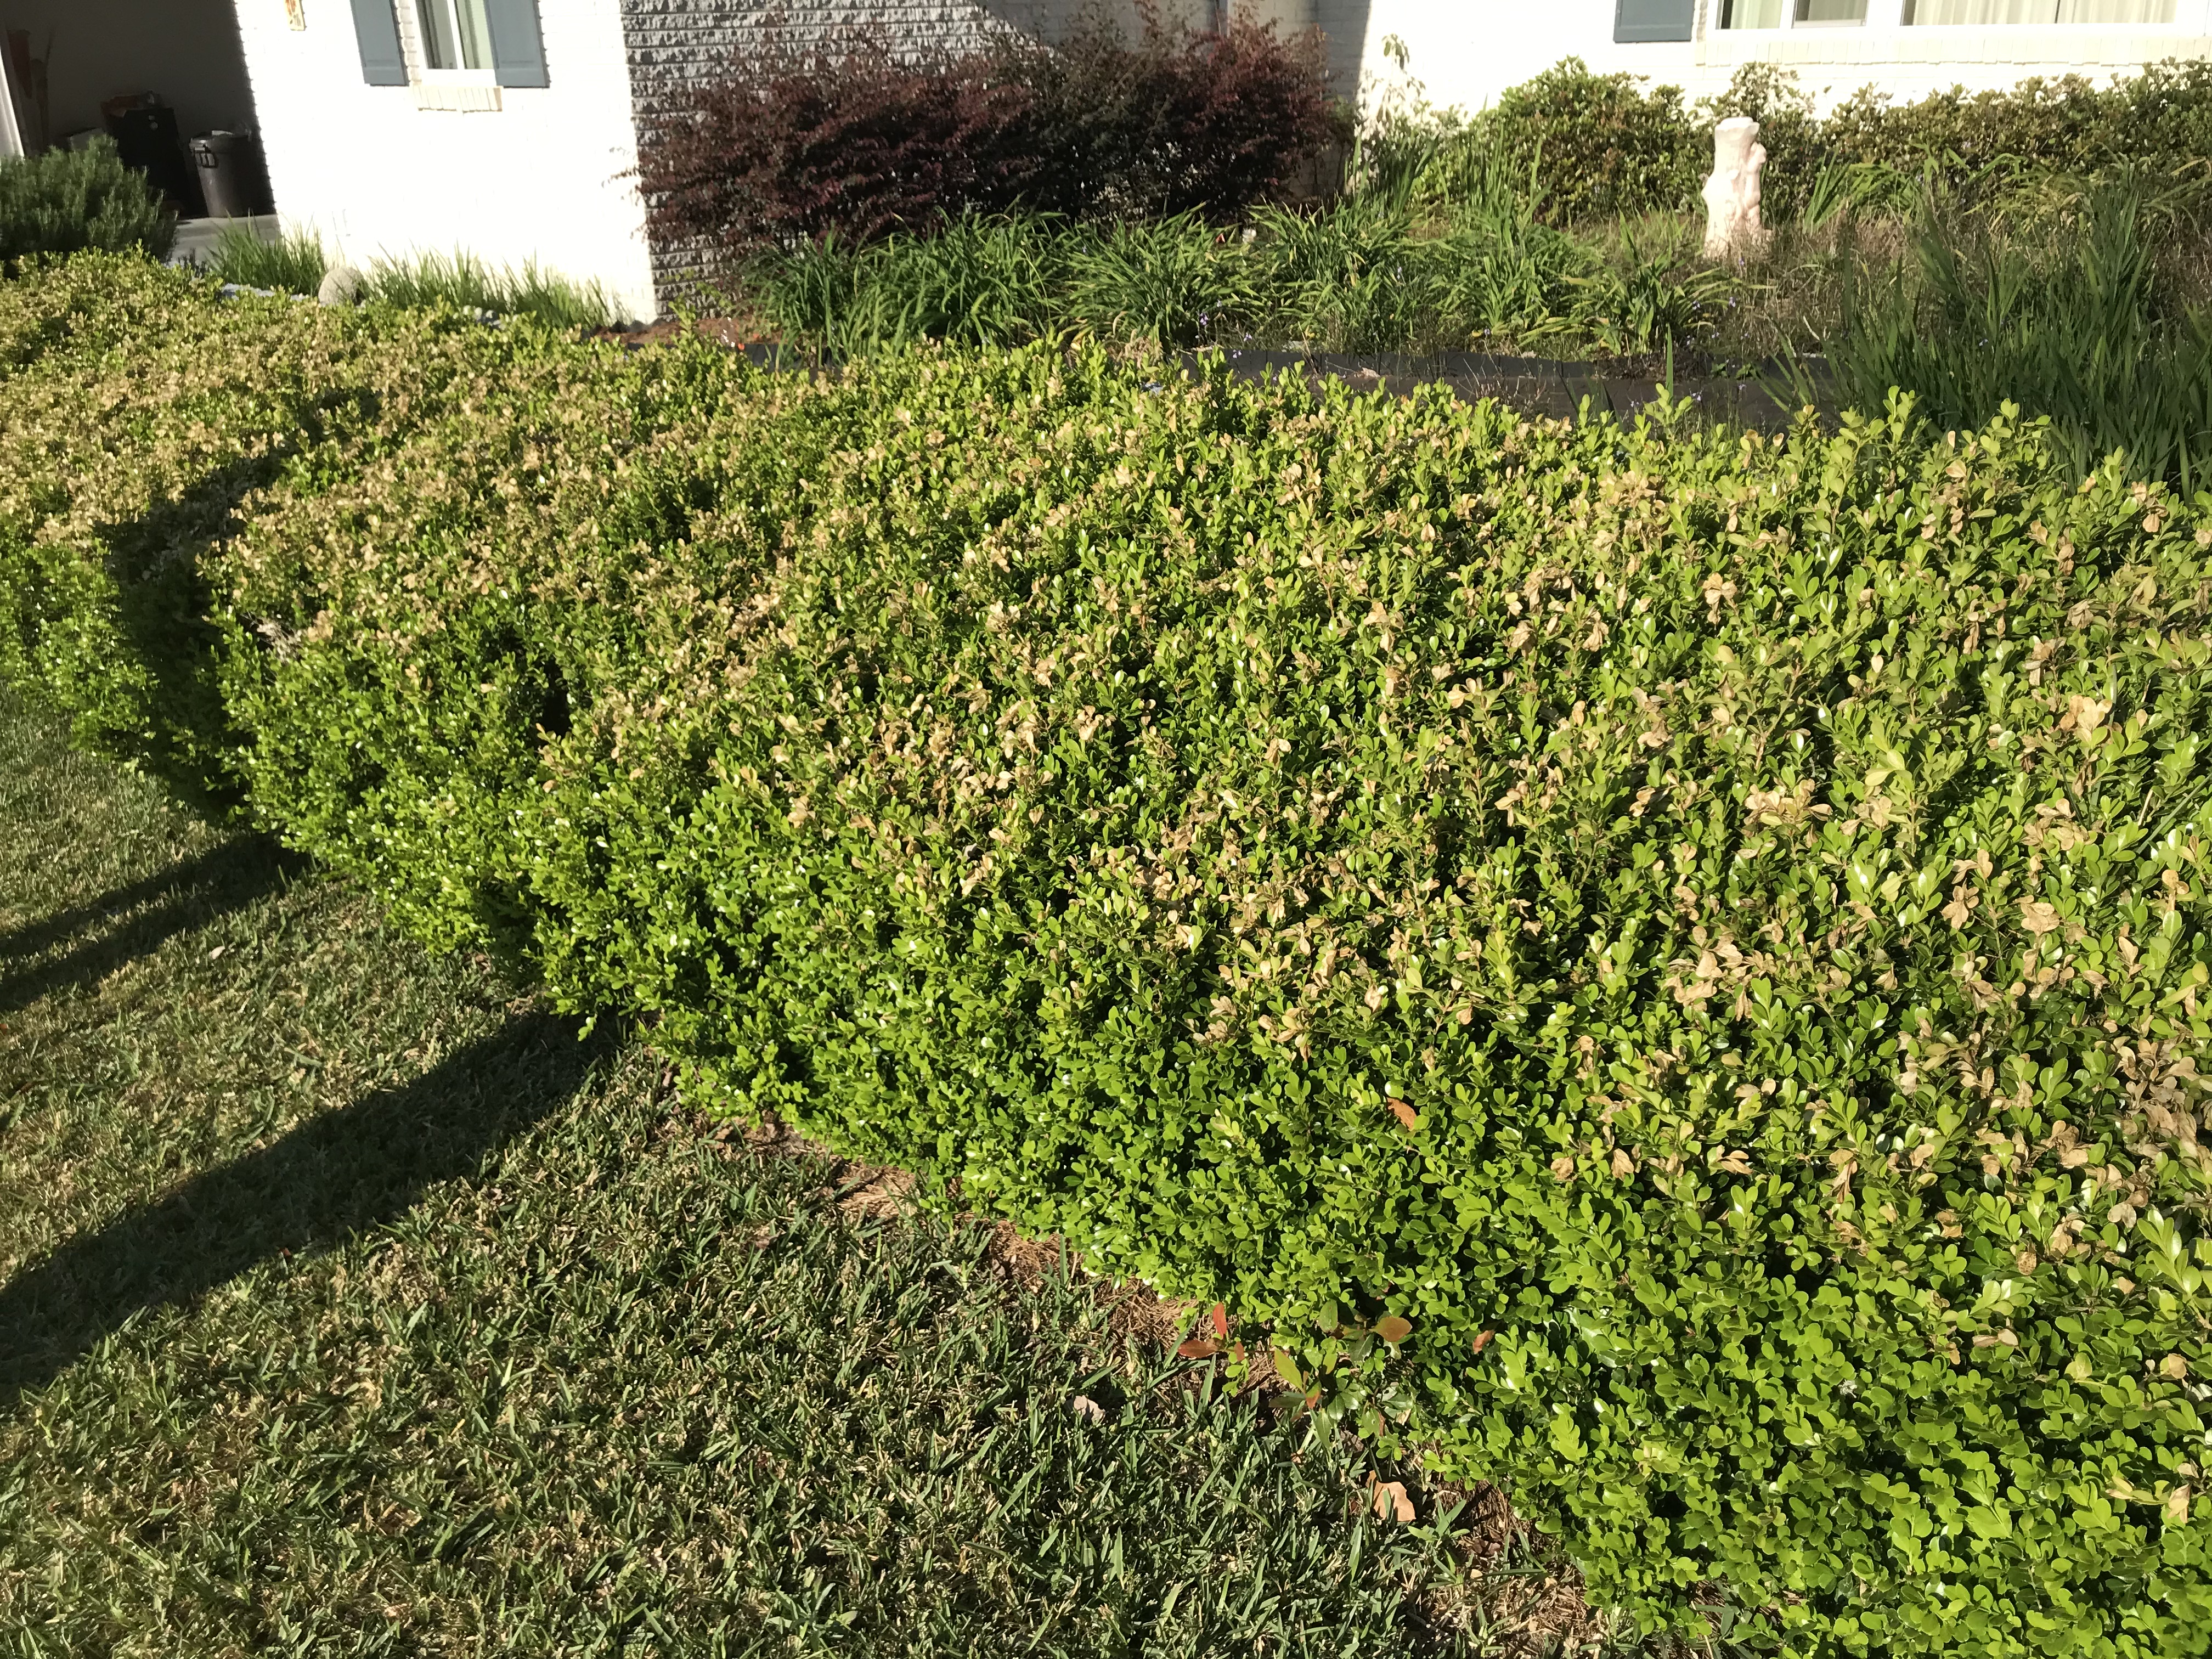
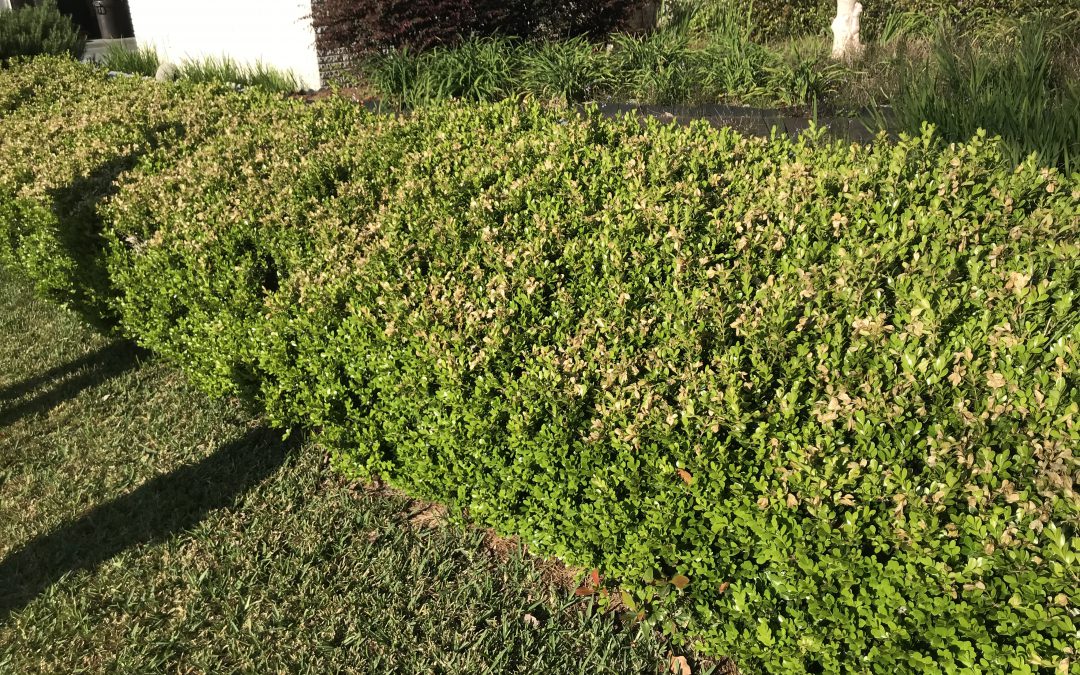
Cold damage on Boxwood hedge
Three weeks ago, I got a call from a very concerned client. She had gotten her March issue of a popular outdoor magazine in the mail, in which was a feature on an emerging pathogen, Boxwood Blight, a nasty fungus decimating Boxwood populations in states north of us. She had also noticed the Boxwoods in front of her house had recently developed browning of their new spring shoots across most the hedgerow. Having read the article and matching the symptoms she’d noticed to the ones described in the magazine article, she was convinced her shrub was infected with blight and wanted to know if there was a cure. Agreeing that the symptoms sounded similar and wanting to rule out an infection of an extremely serious pathogen, I decided to go take a look. Upon inspection, it was obvious that Boxwood Blight wasn’t to blame. Damage from disease generally isn’t quite as uniform as what I saw. The new growth on top of the hedge was indeed brown but only where the eaves of the house and a nearby tree didn’t provide overhead cover and, to boot, the sides of the hedge were a very normal bright green. Having gone through a recent cold snap that brought several mornings of heavy frost and knowing that the weeks before that the weather had been unseasonably warm, causing many plants to begin growing prematurely, all signs pointed toward an abiotic problem, cold/frost damage that would clear up as soon as the plant put on another flush of growth. The client was delighted to hear she didn’t have a hedge killing problem that would require either adopting a monthly fungicide regime or replacing the hedge with a different species.
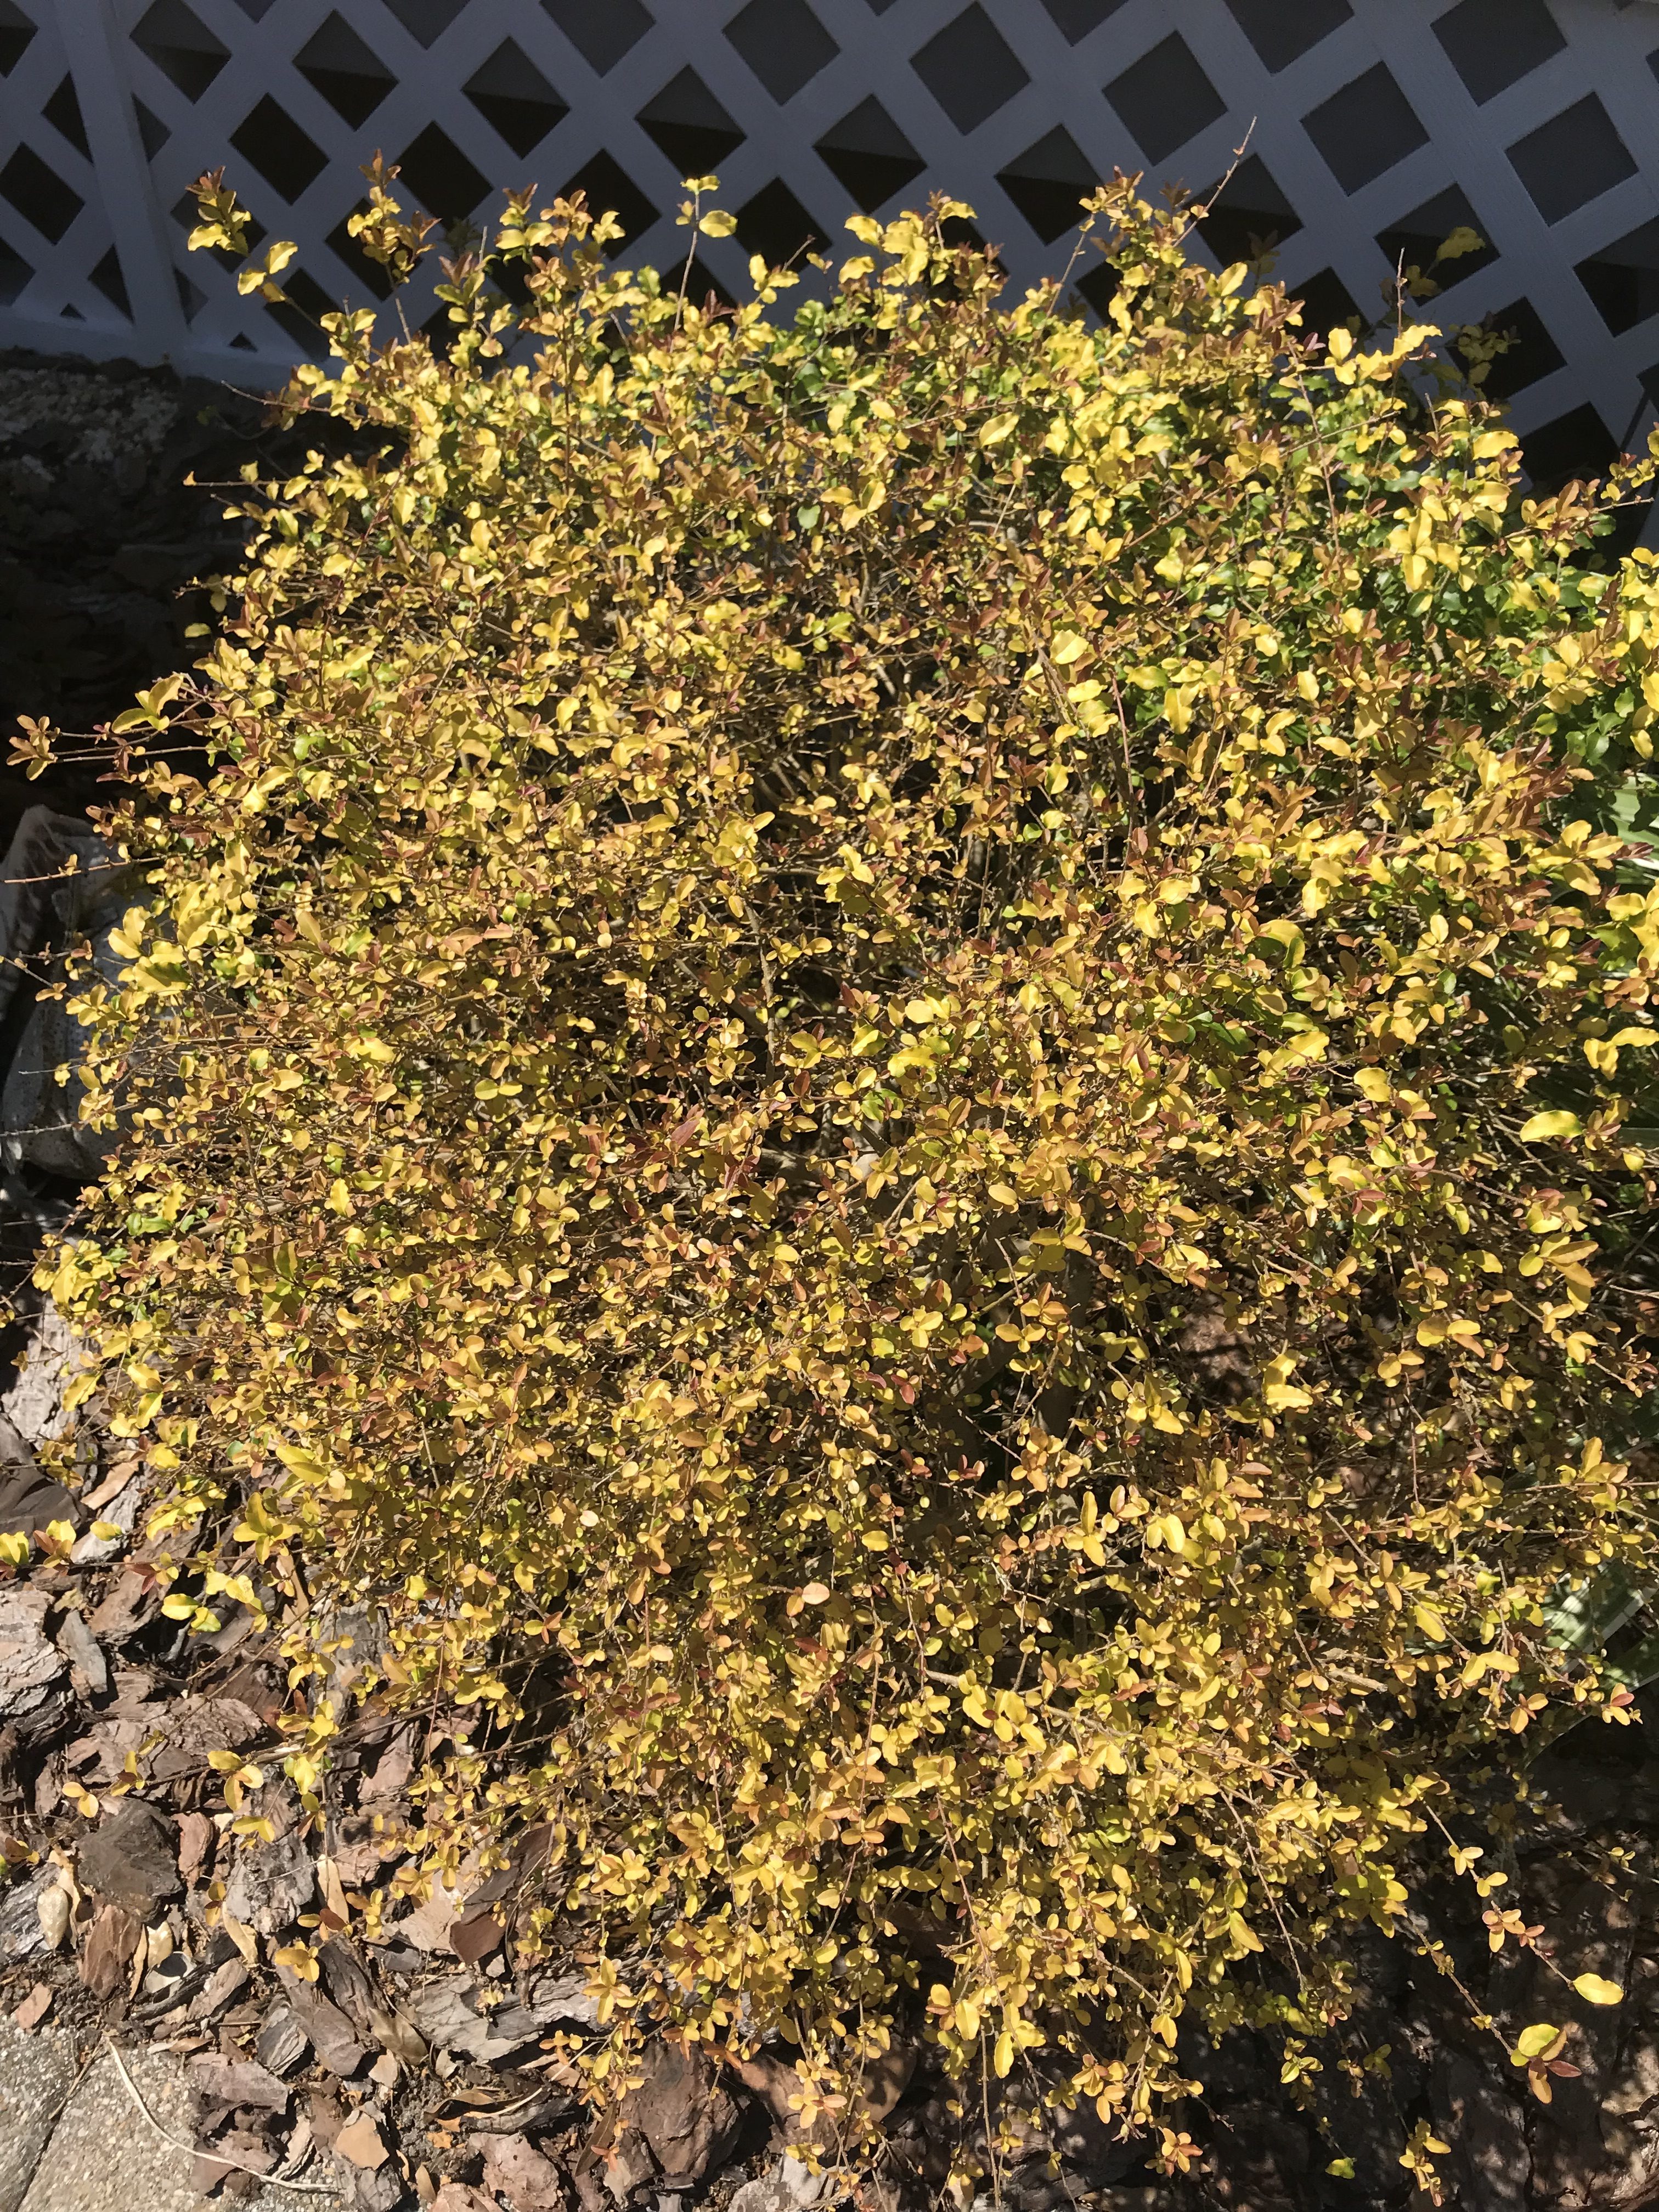
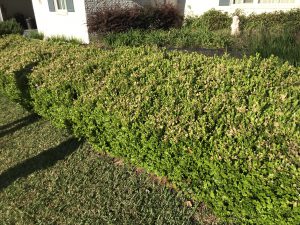
Damage to ‘Sunshine’ Ligustrum from pressure washing siding with bleach.
The very next week, another client asked if I would come by her house and take a look at a hedge of ‘Sunshine’ Ligustrum that lines her driveway, whose leaves had “bleached” out, turning from their normal chartreuse to a bronzy white color. This time, having seen similar issues with this particular plant that almost always involved an infestation of Spider or Broad Mites, I figured this was a cut and dry case that would end with a call to her pest control company to come spray the offending bugs. However, though the leaf damage looked similar, I was not able to locate any existing pests or find evidence any had been around recently, rather it appeared the leaves had been exposed to something that “bleached” and burned them. Puzzled, I began asking questions. What kind of maintenance occurs on the plants? Have you fertilized or applied any chemicals recently? Nothing. Then, near the end of our conversation, the client mentioned that her neighbor had pressure washed their house on a windy day and that she was irritated because some of the soap solution had gotten on her car. Bingo. Leaf burn from pressure washing solution chemicals. This time I was guilty of assuming the worst from a pest when the problem quite literally blew in on the wind from next door. Again, the client was relieved to know the plant would recover as soon as a new flush of growth emerged and hid the burned older leaves!
This spring, I’d encourage you to learn from the above situations and the next time you notice an issue on plants in your yard, before you reach for the pesticides, take a step back and think about what the damage looks like, thoroughly inspect the plants for possible insects or disease, and if you don’t find any, consider the possibility that the problem was abiotic in nature! And remember, if you need any assistance with identification of a landscape problem and want research-based recommendations on how to manage the problem, contact your local UF/IFAS Extension office.
by Matt Lollar | Apr 9, 2019
The UF/IFAS Extension and FAMU will be bringing the Florida Pest Management Conference to Milton on April 17th. Attend to earn CEUs for your PCO License. Attendance is free and we are currently seeking sponsors at $80 per sponsoring business/organization. For more details and to register, please visit the conference webpage at Northwest Pest Management Conference.