by Larry Williams | Apr 23, 2020
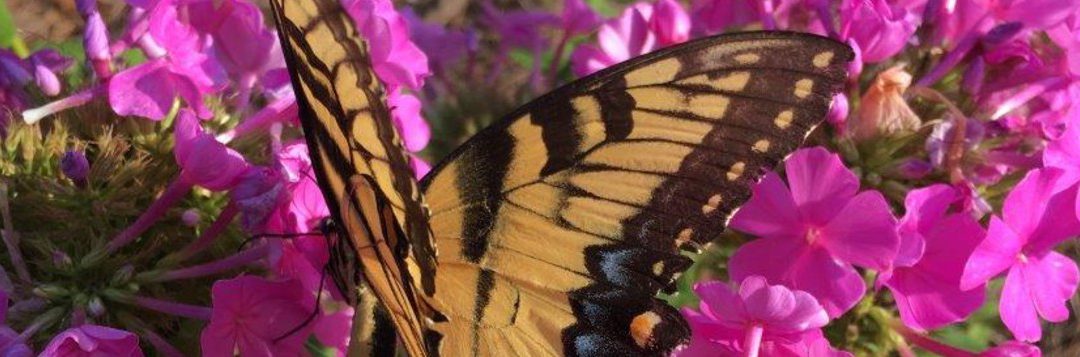
One of the things to do while stuck at home due to COVID-19 restrictions, is to look for caterpillars and butterflies in your landscape. I’ve noticed giant swallowtail butterflies (Papilio cresphontes) a little early this year. The giant swallowtail is one of the largest and most beautiful butterflies in our area. Its larval stage is known as the orangedog caterpillar. This unusual name comes from the fact that it feeds on young foliage of citrus trees.

Orangedog caterpillar. Photo credit: Donald Hall, University of Florida
The orangedog caterpillar is mostly brown with some white blotches, resembling bird droppings more than a caterpillar. When disturbed, it may try to scare you off by extruding two orange horns that produce a pungent odor hard to wash off.
I’ve had some minor feeding on citrus trees in my landscape from orangedog caterpillars. But I tolerate them. I’m not growing the citrus to sell. Sure the caterpillars eat a few leaves but my citrus trees have thousands of leaves. New leaves eventually replace the eaten ones. I leave the caterpillars alone. They eat a few leaves, develop into chrysalises and then emerge as beautiful giant swallowtail butterflies. The whole experience is a great life lesson for my two teenagers. And, we get to enjoy beautiful giant swallowtail butterflies flying around in our landscape and still get plenty of fruit from the citrus trees. It is a win, win, win.
In some cases, the caterpillars can cause widespread defoliation of citrus. A few orangedog caterpillars can defoliate small, potted citrus trees. Where you cannot tolerate their feeding habits, remove them from the plant. But consider relocating the caterpillars to another area. In addition to citrus, the orangedog caterpillars will use the herb fennel (Foeniculum vulgare) and rue (Ruta graveolens) as a food source. Some butterfly gardens plant citrus trees to provide food for orangedog caterpillars so that they will have giant swallowtail butterflies. So you could plan ahead and grow some fennel, rue or find a butterfly garden in your area for the purpose of relocating the larvae.
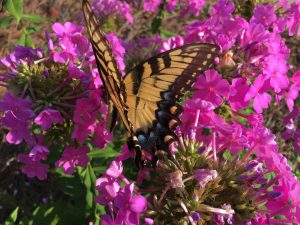
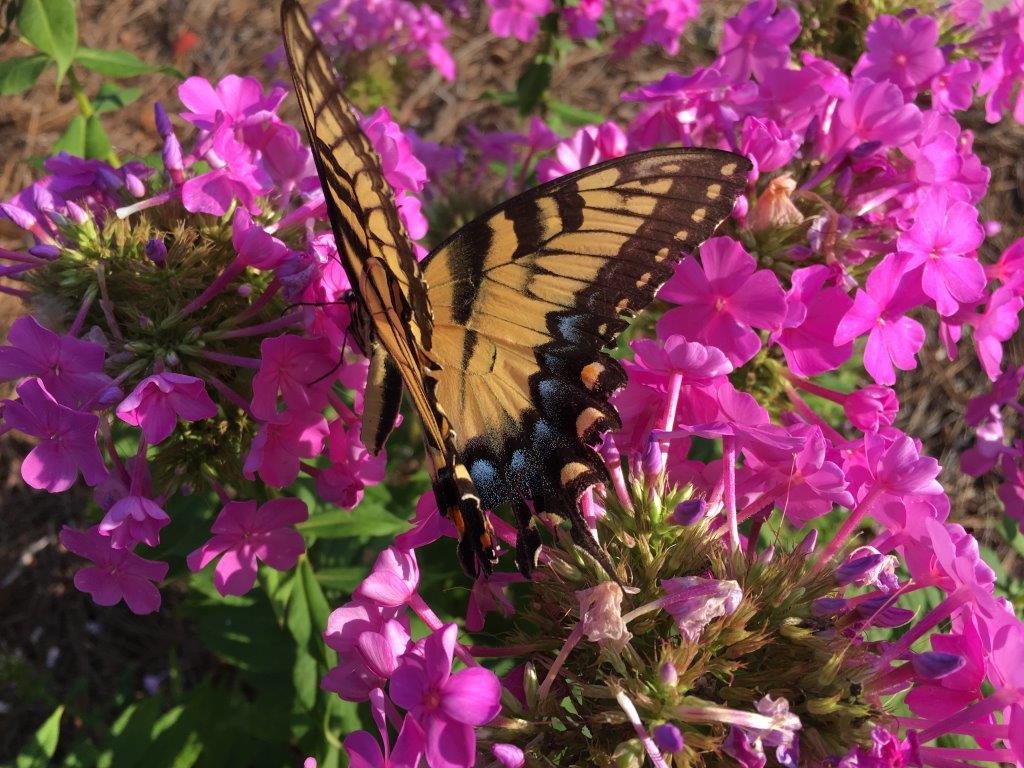
Yellow giant swallowtail butterfly on pink garden phlox flowers. Photo credit: Larry Williams
The adult butterflies feed on nectar from many flowers, including azalea, bougainvillea, Japanese honeysuckle, goldenrod, dame’s rocket, bouncing Bet and swamp milkweed. Some plants in this list might be invasive.
Keep in mind that mature citrus trees can easily withstand the loss of a few leaves. If you find and allow a few orangedog caterpillars to feed on a few leaves of a mature citrus tree in your landscape, you and your neighbors might get to enjoy the spectacular giant swallowtail butterfly.
More information on the giant swallowtail butterfly is available online at http://edis.ifas.ufl.edu/in134.
by Larry Williams | Apr 15, 2020
Did you know that the first virus discovered was in plants, not in humans? As early as 1857, tobacco farmers in the Netherlands recognized a new disease of tobacco. It wasn’t called a virus at the time as the causal agent was unknown. In 1886, Adolph Mayer, a German agricultural chemist, determined that the “tobacco mosaic” disease could be transmitted to healthy plants by rubbing them with infected leaf sap.
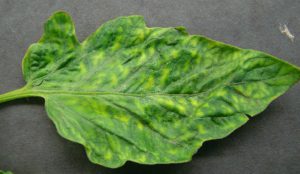
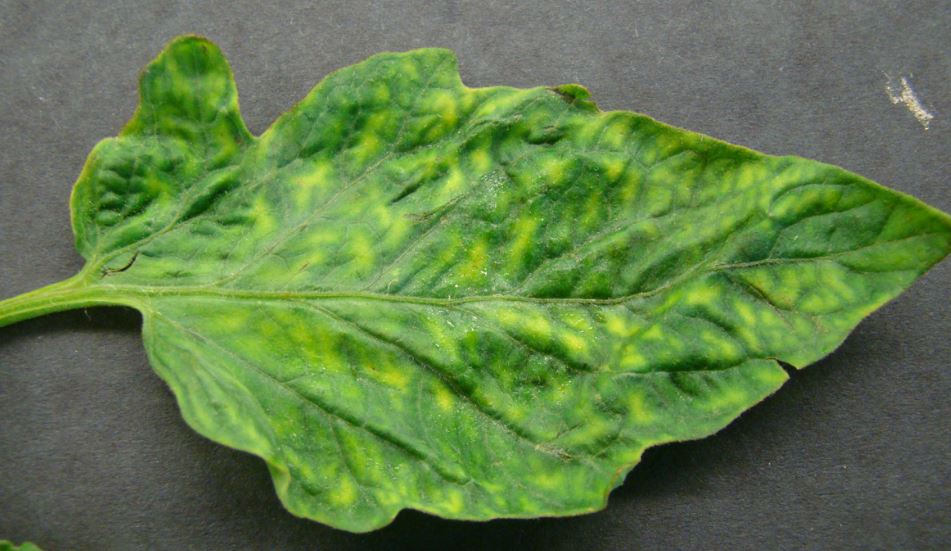
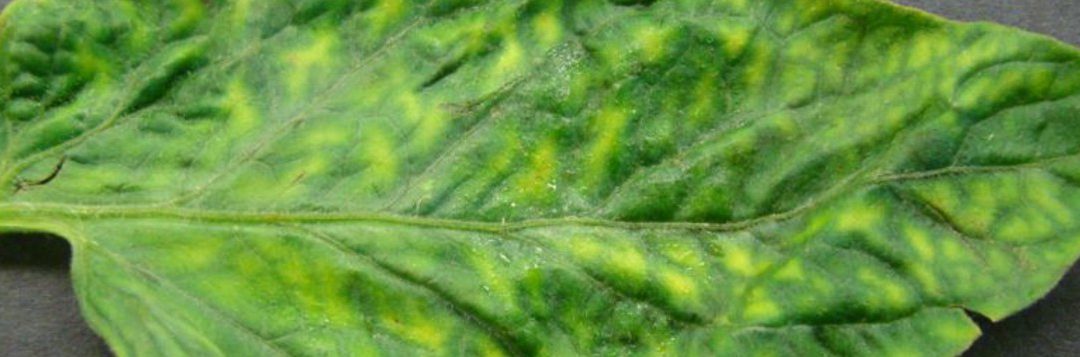
Tomato leaf with tobacco mosaic virus. Photo credit: UF Plant Pathology Department
When taking a plant pathology course in college, it amazed me that viral organisms were ever discovered. They are extremely small. So small that it was not until the development of the electron microscope in the late 1930s that scientists were able to see the structure of the tobacco mosaic virus. Viruses are 20 – 250 nanometers in diameter, about 100 times smaller than bacteria.
The discovery of fungi and bacteria came before the discovery of viruses as the cause for plant diseases. In most cases, we have many chemical options for control of fungal and bacterial diseases in plants. But there are few to no chemical options to control viral organisms in plants. By the nature of how a virus operates in a plant cell, chemical control results in death of the host cell, surrounding tissue and possibly the whole plant.
Control of viruses in plants involves eliminating the source of the virus such as nearby weeds, control of insect vectors that transmit the disease such as aphids and thrips and use of resistant plants.
Historically, plant diseases have caused major impacts on humans. In 1845, the Potato Famine in Ireland was caused by the fungus Phytophthora infestans. This disease was responsible for the death of more than 1 million people as it devastated the production of the potato as a major food source at the time and is credited for the beginning of plant pathology as a science. Cryphonectria parasitica, an introduced fungus, essentially wiped out the American chestnut as the dominant tree in the eastern U.S. forests during the early 1900s. The excellent wood was used to build homes and the nutritious nuts were eaten by humans and fed to livestock. Currently, UF/IFAS plant pathologists are working to solve Citrus Greening, a bacterial disease that has severely damaged the citrus industry and has the potential to completely eliminate citrus production in Florida.
If it were not for the land-grant university system, of which Extension Agents are a part, there would be few to no plant pathologists in the United States. It is these land-grant universities, like the University of Florida and others, that provide plant pathology courses, training, research, development and ultimately that graduate with degrees those who go on to careers in the field of plant pathology, discovering new diseases and developing controls for these diseases.
by Ray Bodrey | Apr 8, 2020
Spring has arrived and so have the insects. Caterpillars are crawling around and one possesses a unique appetite.
Neodiprion spp. is the most common defoliating insect group affecting pine trees. In all, there are 35 species that are native to the U.S. and Canada. The redheaded pine sawfly, Neodiprion lecontei, is the primary species found in the Florida Panhandle.
Adult sawflies can be as large as 1/3 of an inch in length. The female can be two-thirds larger than the male and are mostly black with a reddish-brown head, with occasional white coloration on the sides of the abdomen.
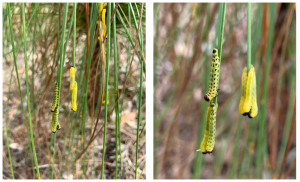
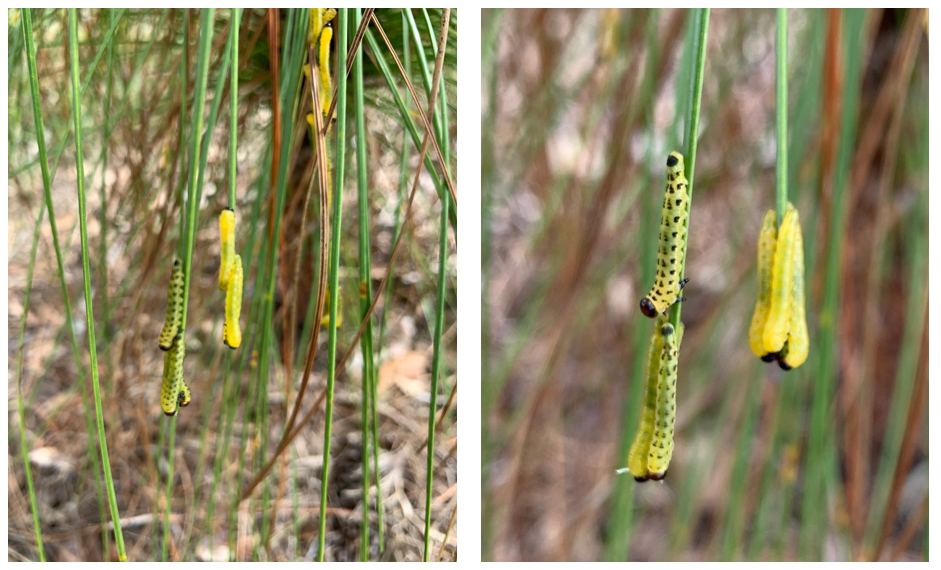
Mature larvae of the redheaded pine sawfly. Credit: Patty Dunlap, Gulf County Master Gardener.
The ovipositor, the tube-like organ used for laying eggs, is saw-like, hence the common name. During the fall, females make slits in pine needles and deposit individual eggs, up to 120 eggs at a time. The eggs are shiny, translucent and white-hued. Mature larvae (caterpillars), as seen in the accompanying photo, are yellow-green, emerge in the spring and feast on pine needles. After weeks of feeding on needles, the mature larvae drop to the ground. The cocoon, a reddish-brown, thin walled cylinder, is spun in the upper layer of the soil horizon or in the leaf litter; this is called the pupae stage. The pupae overwinter, and adults emerge from the cocoon in the spring of the following year.
Mature larvae are attracted to young, open growing pine stands. Pine is the preferred host, but cedar and fir, where native, are secondary food sources. Neodiprion lecontei is an important defoliator of commercially grown pine, as the preferred feeding conditions for sawfly larvae are enhanced in monocultures of shortleaf, loblolly, and slash pine, all of which are commonly cultivated in the southern United States. Defoliation can kill or slow the growth of pine trees as well as predispose trees to other insects or disease.
Are there control methods? Yes, biological control is a major factor, as natural enemies are numerous. Disease, viruses and predators help regulate population control. For small scale control, physically removing eggs or larvae is key. Again, most infestations occur on younger tree plantings, so they’ll be in reach. Be sure to scout young pines for signs of infestation. Horticultural soaps and oils are effective chemical controls, if needed.
For more information, contact your local county extension office.
Supporting information for this article can be found in the UF/IFAS Extension EDIS publication, “Redheaded Pine Sawfly Neodiprion lecontei” by Sara DeBerry: https://edis.ifas.ufl.edu/pdffiles/IN/IN88200.pdf
UF/IFAS Extension is an Equal Opportunity Institution.
by Sheila Dunning | Mar 20, 2020
Until recently, rainfall has been plentiful. That’s great for the water table and preparing plants to wake up for spring. But, insects are also stirring. Bugs are affected by rain in many ways. When water is plentiful, they can grow faster, reproduce sooner and travel farther. Combine that with the fact that the insects’ homes are being flooded out and their normal food sources are displaced; and where do you think they are headed? Yes, into your house. Four bugs you can anticipate seeing after rain events include cockroaches, sowbugs, ants and centipedes.
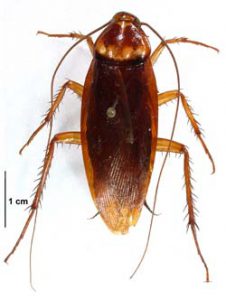
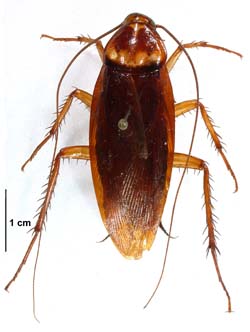
American Cockroach
Photo by: J.L. Castner
UF/IFAS
Roaches tend to live in places that flood easily, especially this time of year. To survive the cold nights, cockroaches need to find a warm place to rest. Typically those places would be drains, pipes, sewers, along foundations and in crawl spaces. But, when it rains, these locations are often flooded, forcing cockroaches to scurry for their lives to avoid drowning. A crack in weather stripping or window caulking makes a quick hideaway. Once inside, they may decide to stay. Frequent rainy days create the lingering humidity that makes all kinds of places more livable for roaches.
Sowbugs and his cousin, the pillbug, are very small, pill-shaped pests with multiple legs and a series of shell-like plates. Often referred to as roly-polys, these creatures are actually a form of land

Sowbug
Photo by: J.L. Castner UF/IFAS
crustacean related to lobsters, crabs, and crayfish. The sowbug’s breathing tubes require moisture to function properly, so they must stay near water. Typically this fact restricts the sowbug to living in moist soil or sand. Ending up inside a building is normally a terminal condition for them. However, due to the moisture left in the air after a rain event, sowbugs that seek refuge inside are able to survive for longer periods of time. Given the opportunity, sowbugs will reproduce indoors. If they have decaying organic material to feed on, they may stick around even longer; having time to create a multi-generational infestation.
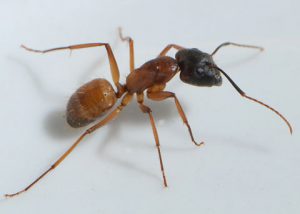
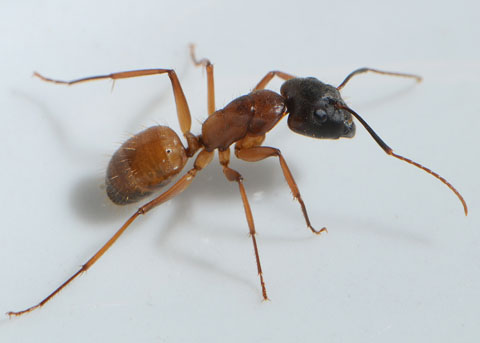
Carpenter Ant
Photo by: J.L.Castner
UF/IFAS
Ants are never too far away. They usually build their colonies in the soil near convenient sources of food and shelter. Being in the ground puts ant colonies at great risk for flooding out, even with short periods of rainfall. When this happens, ants are forces to find higher, drier ground quickly or risk being washed away. What better place than a house? Once inside, the ants get back to work looking for food and building the colony. Expect to see ants around kitchen sinks, on window sills and working their way into cupboards and pantry areas during and after a heavy rain. Unfortunately, if they find all the elements needed to make their home, the ants will be very reluctant to go back outside.
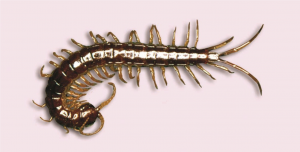
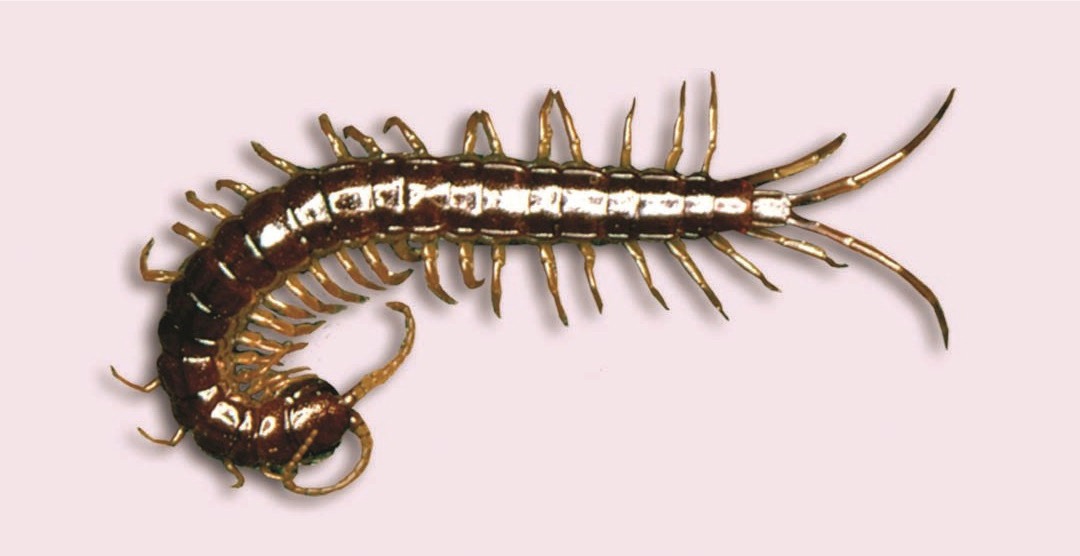
Centipede Photo by: J.L. Castner UF/IFAS
Like the other pests mentioned, centipedes are attracted to humid environments. But, centipedes are active hunting carnivores. They like to feed on roaches, sowbugs and ants. So, they follow them into the house, a well-stocked hunting ground. Centipedes typically only hunt late at night, but in dark areas they can hunt day and night. Finding centipedes if most likely an indication of another pest infestation.
These rain-displaced pests may need some help from a pest control product and/or operator to be discouraged from staying inside. We need the rain. But, keep a close watch for the unwanted visitors.
by Carrie Stevenson | Feb 18, 2020

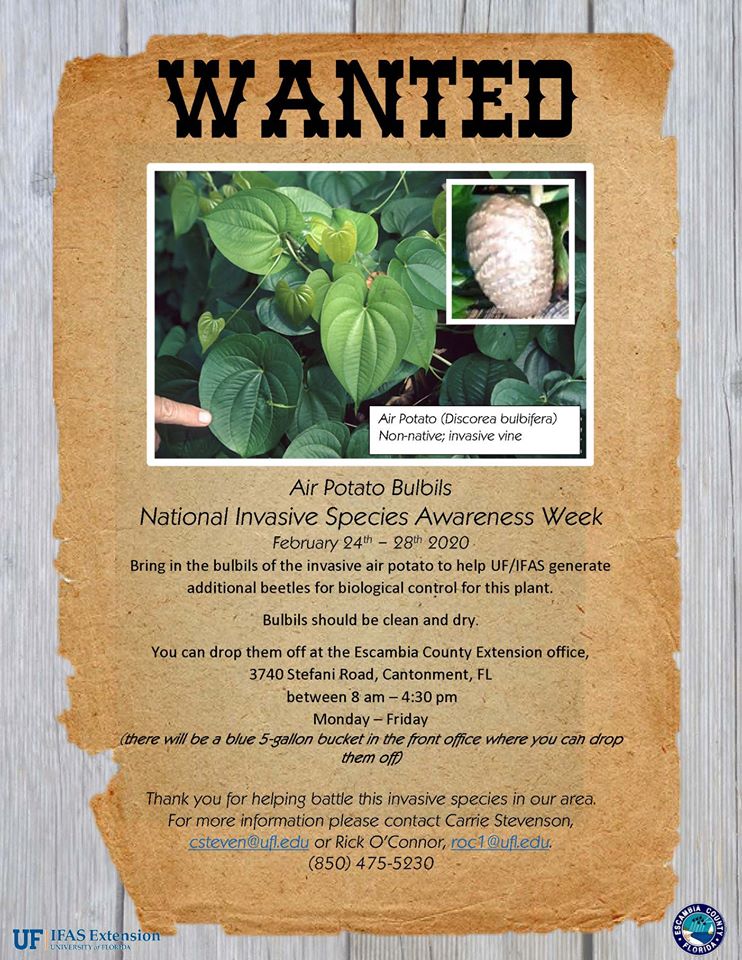
Several Extension offices in the Panhandle are collecting air potato bulbils for National Invasive Species Week. Photo credit: Esther Mudge, Escambia County
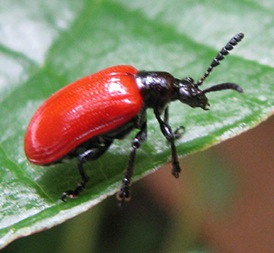
The non-native invasive air potato vine (Discorea bulbifera) has wound its way throughout Florida, from pine forests and creek floodplains to backyards. Their heart-shaped leaves are most noticeable in the spring and fall, where they can take over large areas, not unlike their fellow invasive vine, kudzu. In the fall, the plant produces a potato-like tuber called a bulbil, which grows above ground on the vine. The bulbils drop in the winter and then produce new vines the following spring.
The vine’s growth has been uncontrolled or kept back by herbicide for years, until researchers discovered a biological control insect known as the air potato leaf beetle (Liloceris cheni). In the vine’s native Nepal and China, the beetle controls growth by surviving on the leaves of the air potato, its sole food source. After extensive study, the USDA approved the use of these beetles in Florida to control the air potato vine population here. UF IFAS Extension offices statewide have participated in these beetle release programs, providing thousands of beetles to homeowners and property owners seeking to manage the invasive vine using a chemical-free technique. Left alone, air potato vines can smother full-sized trees, blocking the sunlight and causing them to collapse under the weight of the intertwined vines.
From 2012-2015, beetles were able to reduce air potato vine coverage and bulbil density by 25-70% (depending on location and density of beetle population). The active beetle-production phase of a UF IFAS grant has ended, but researchers are committed to the goal of reducing this nuisance species statewide.
To assist with this process, several Extension offices in the Panhandle are sponsoring a bulbil collection during National Invasive Species Week (NISAW, February 23-29). This effort will serve two important roles: to remove bulbils from the natural environment and to provide a seed source for university researchers seeking to grow air potato vine in a controlled environment, sustaining a continued population of air potato beetles for distribution.
For more information on Air Potato Vines and Leaf Beetles, visit https://bcrcl.ifas.ufl.edu/airpotatobiologicalcontrol.shtml or contact your local County Extension office.
by Larry Williams | Dec 4, 2019
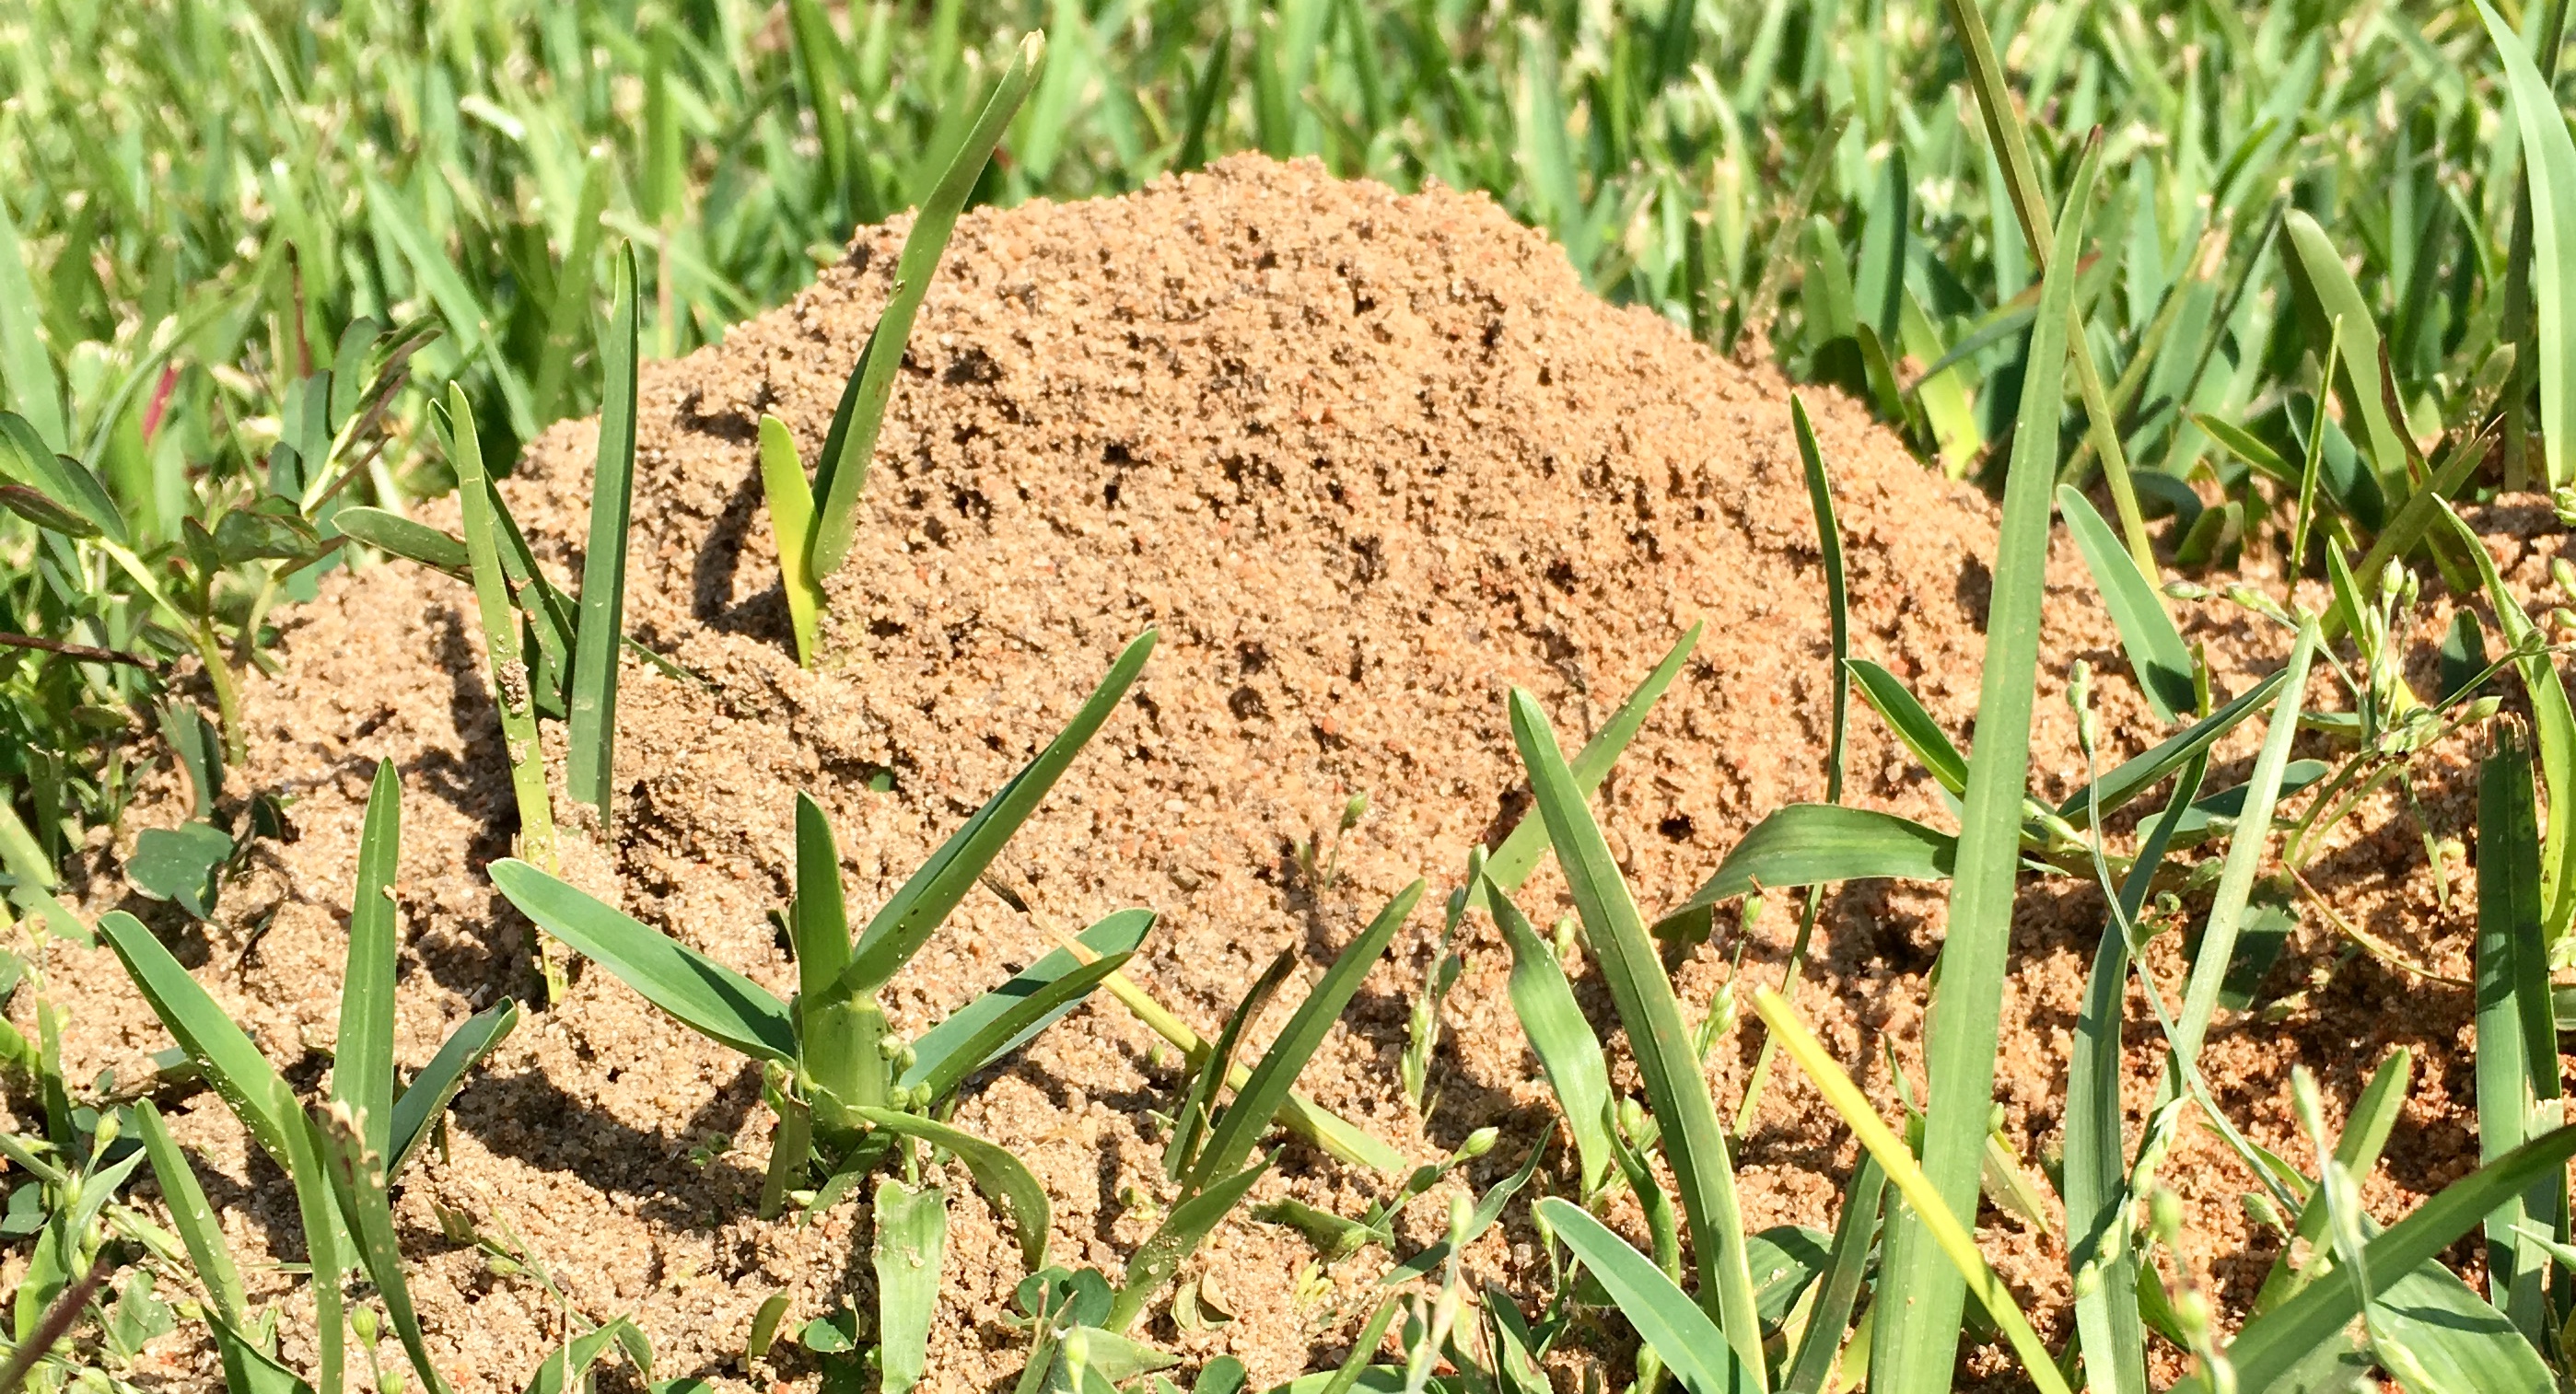
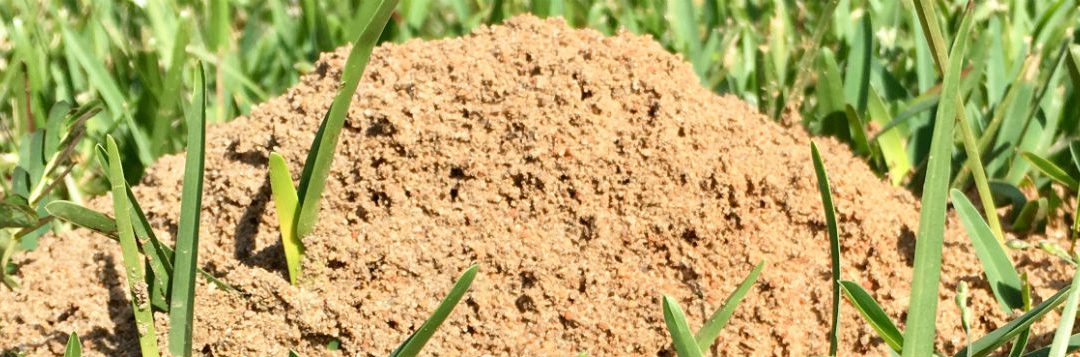
Fire ant control options in some situations include doing nothing.
 Fire ant colonies consist of the brood (eggs, larvae and pupae) and adult ants. The adults include winged males, winged females, one or more egg producing queen and workers. The winged males and females mate in spring or early summer after a rainy period. Males die shortly after mating. Newly mated females can fly as far as twelve miles from the nest (or farther carried by wind). After landing, mated females shed their wings and begin digging chambers in which they lay eggs to start a new colony.
A single queen can lay over 2,000 eggs per day! She can live an average of six to seven years. A mature fire ant colony may contain 100,000 to 500,000 workers. Fire ant mounds/colonies can reach densities of 200 to 800 per acre.
You should now begin to understand why fire ants are difficult to control. Where they don’t present a direct threat to human health, the best management practice may be to leave them alone.
Homeowners may have to find a tolerable level. Waging war on this insect can be expensive and requires a long-term commitment. There is no single, universal solution to controlling fire ants. A one-time treatment may make the problem worse. In areas where native ants and fire ants have been reduced or eliminated with insecticides, reinfestation by fire ants into these treated areas is rapid.
A balanced approach to fire ant management is recommended. Those mounds that pose no threat to humans should be left alone. Instead target specific mounds such as those close to buildings and walkways.
When treating single mounds with contact insecticides, it’s critical to treat when the queen and brood are close to the surface, which is between 70ºF to 85ºF. When using fire ant baits, it’s important to apply the bait when the ants are foraging for food. They are most actively doing that between 70ºF to 85ºF. Actively foraging ants will pick up the bait and carry it into the nest within minutes. That’s important because baits tend to quickly go rancid and then are no longer attractive to ants. When using season-long control products, it’s a must to achieve uniform coverage of the area. Always read and follow the label precautions and directions when using any insecticide.
Where fire ants create no threat in out-of-the-way areas on your property, consider the option of leaving them alone.
The following link to a UF/IFAS Extension publication provides options for fire ant control in lawns, gardens and landscapes. http://edis.ifas.ufl.edu/lh059