by Mark Tancig | Sep 18, 2017
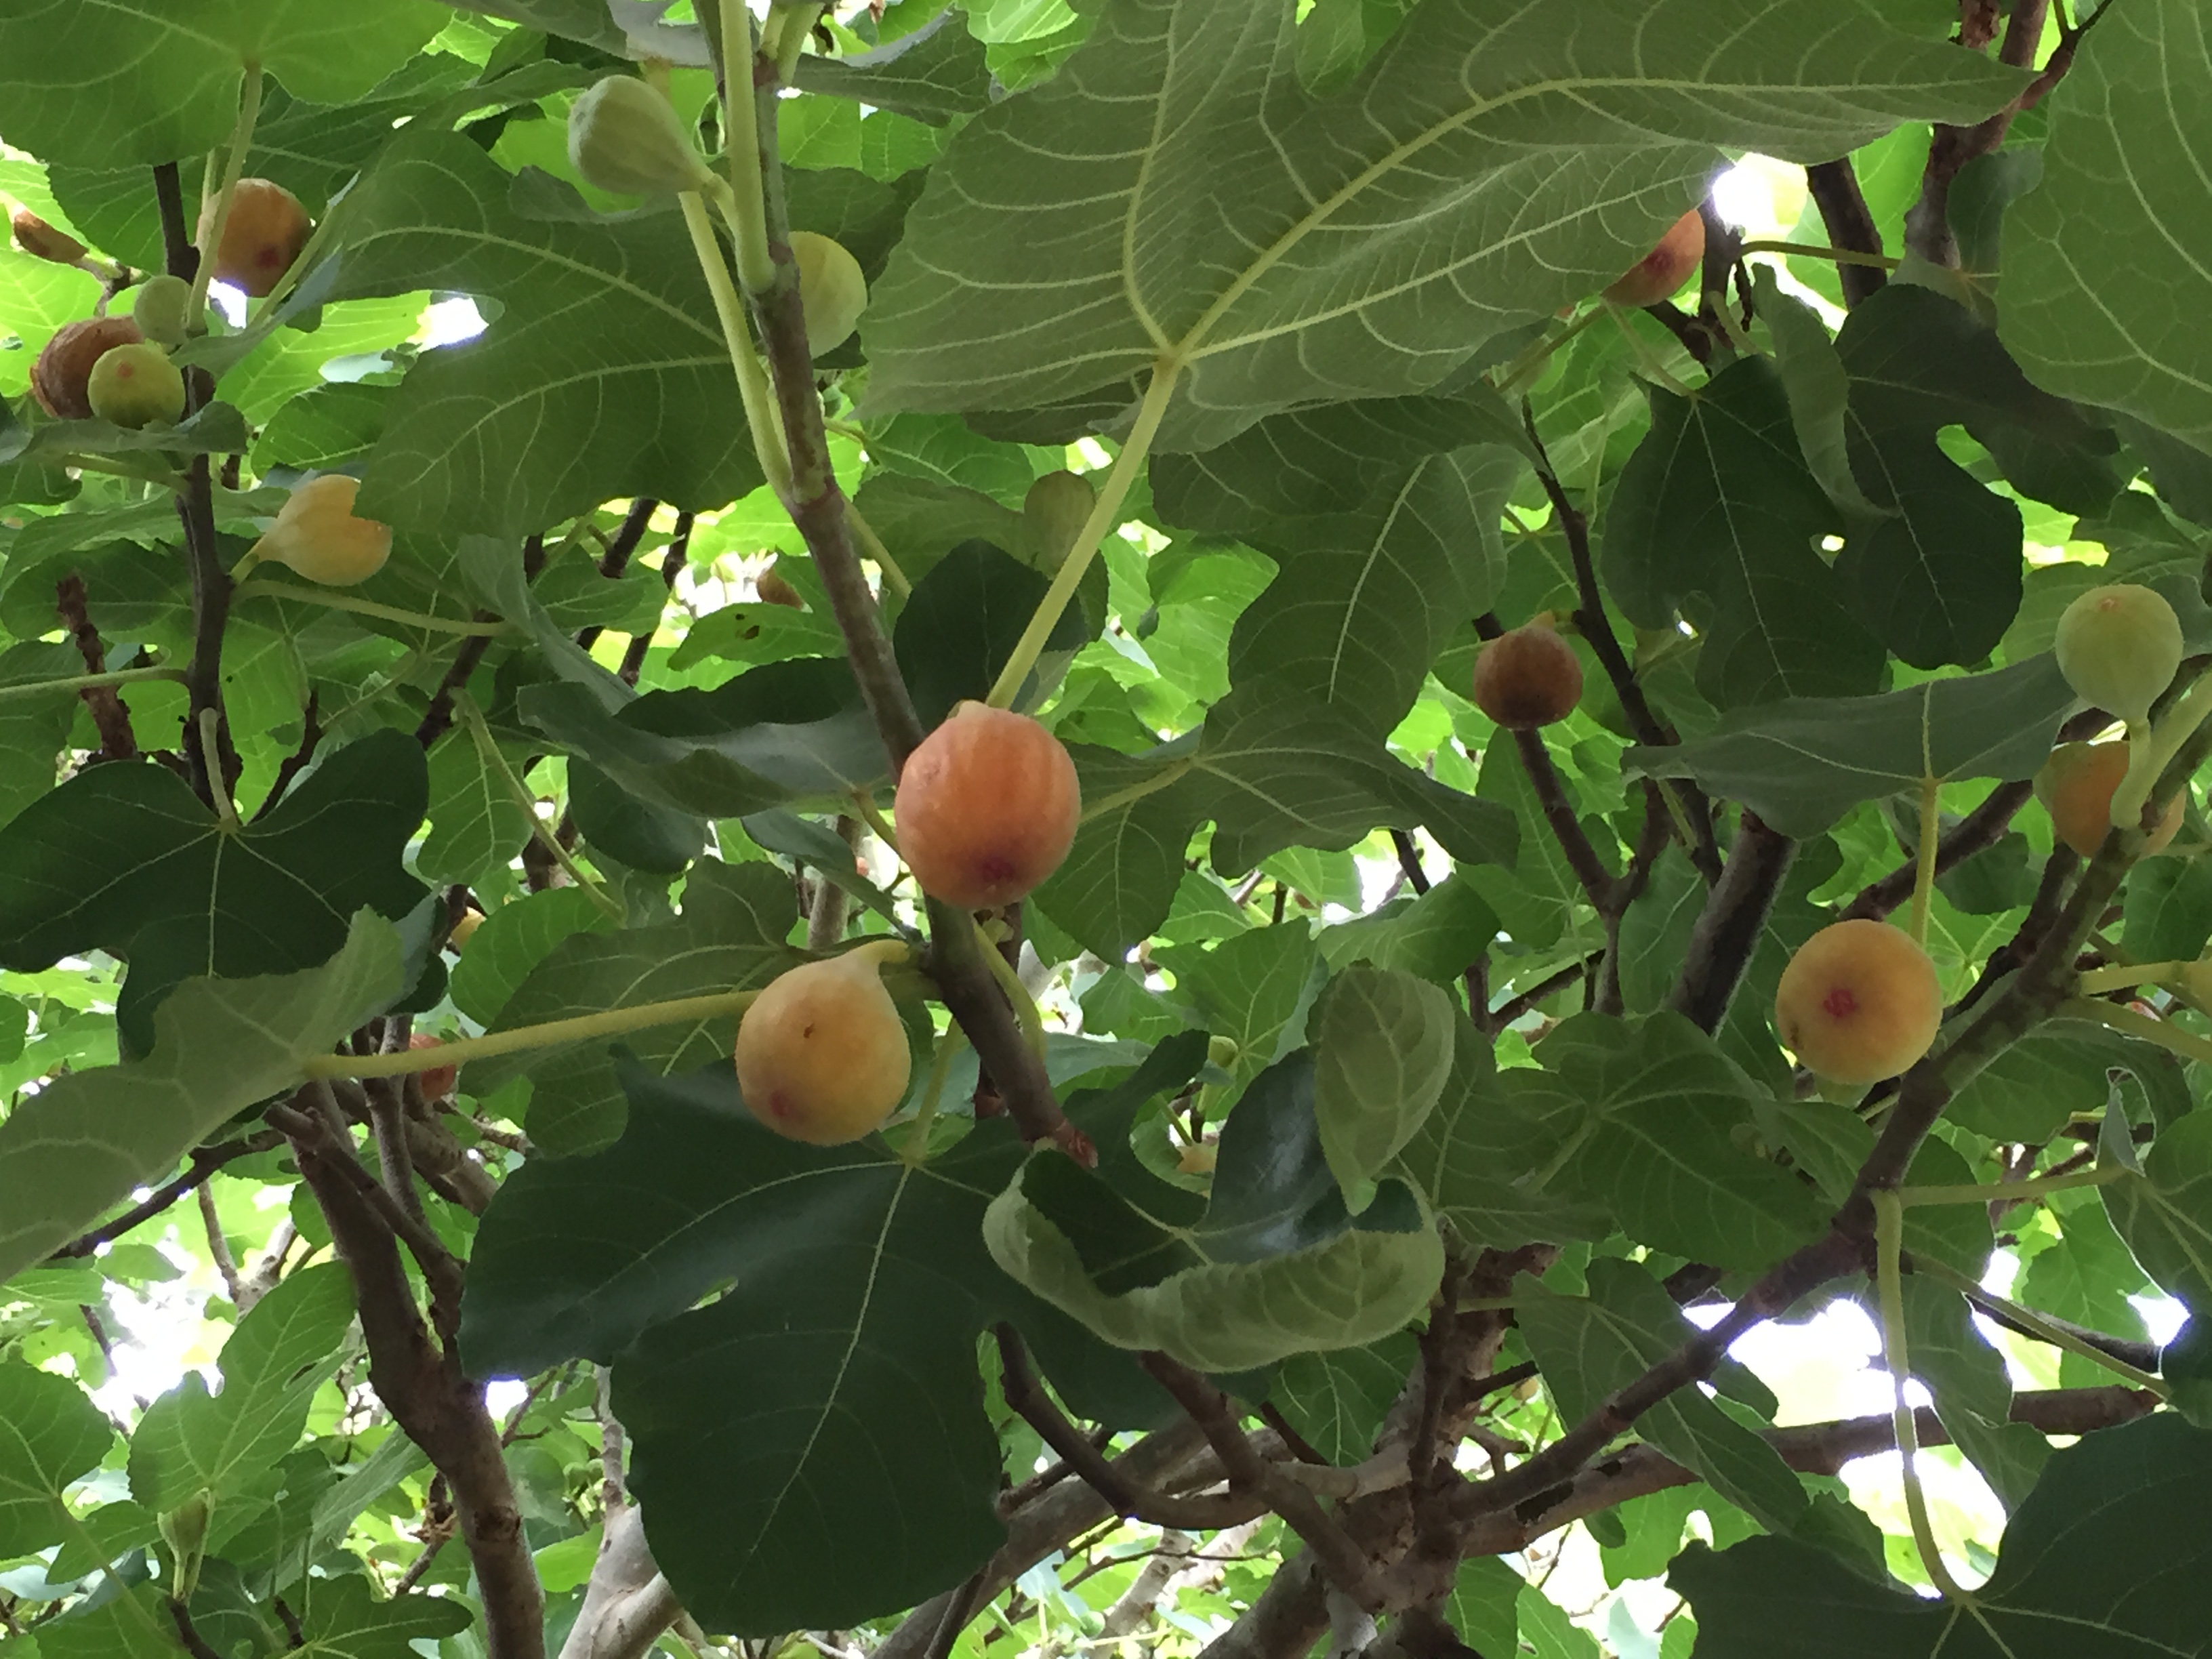
Hopefully, by this time of year, most north Florida gardeners have harvested their figs and are enjoying fig preserves or fig bars. But if you’ve noticed your fig leaves dropping a little early, it may be a sign of the fungal disease Fig Rust (Cerotelium fici).
Figs are a great fruit tree for the north Florida home garden. Not only do they provide a tasty reward (if you can keep the birds and squirrels away), but they are fairly easy to maintain and are bothered by relatively few pests and diseases. One of the few diseases that can be common, however, is fig rust, especially when conditions are favorable. In the case of fig rust, a fungus, warm humid weather is what it likes and well, we have plenty of that.

Figs are a great fruit tree for North Florida. Credit: Mary Derrick, UF/IFAS.
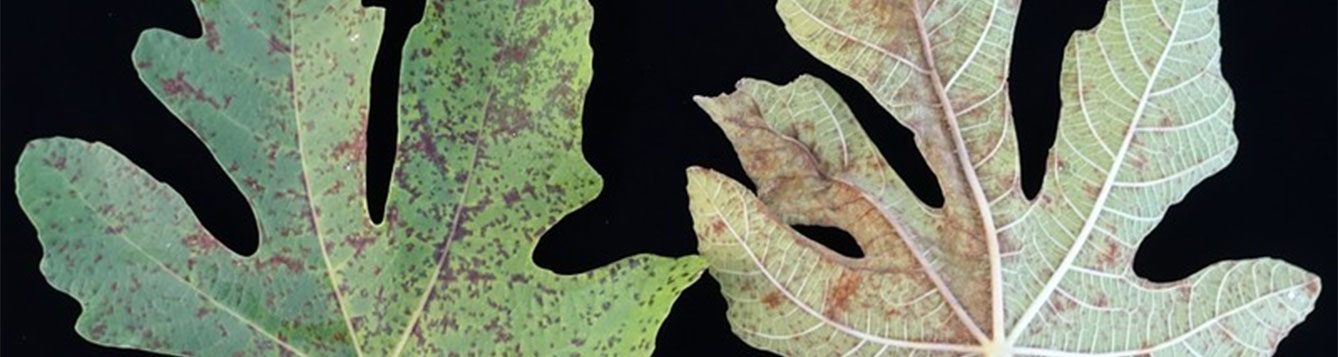
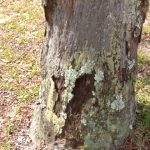
The first signs of the fig rust disease are small yellow to yellow-green spots/lesions on the upper surface of the leaf that turn a reddish-brown color as they get larger. A heavy infestation causes the leaves to turn yellow and drop early. While fig rust does not injure the fruit, repeat occurrences of premature leaf drop can adversely affect the overall health of the tree, resulting in yield loss. Another concern is that if the leaves drop too early, the tree will flush out with new growth heading into winter. This new growth can be injured by early freezes and cause a loss of fruit the following season.

Fig rust on leaves. Credit: UF/IFAS.
What can you do to prevent and/or cure fig rust? Unfortunately, once you see the yellowish-green/reddish-brown spots on the leaves, it’s too late to provide any control. As always, proper cultural practices can help. Pruning the tree to provide adequate airflow keeps the leaves as dry as possible during our humid summers. Remember to prune fig trees in Florida after fruit harvest, not in the dormant season, since fruit is borne on previous year’s growth. Another cultural control to prevent fig rust is to rake diseased leaves out from under the tree. The fungal spores in the fallen leaf litter pass the disease on to next year’s leaves. Other cultural controls include providing adequate moisture and placing a healthy dose of mulch around the tree. Figs require minimal fertilizer. Using a general complete fertilizer with micronutrients (such as a 10-10-10), young trees should receive 1 cup (1/2 pound) and mature trees 4-8 cups (2-4 pounds) per year.
There are currently no chemical controls approved for fig rust in Florida. The classic Bordeaux mix is recommended by various authors to be used as a preventative fungicide during the dormant season, before the lesions appear on the leaves. The Bordeaux mixture is a mix of copper sulfate, lime, and water in a 1:1:10 ratio and is considered an organic pesticide. This mix has been used since the late 19th century and was discovered by accident after botanists and farmers realized that grapevines sprayed with the mix to deter theft had less fungal problems. As with any pesticide, be cautious when using. Overuse of copper-based fungicides can cause copper to build up in soils, leading to potential issues to plant and human health.
While figs are generally worry free for our area, fig rust is one disease to be on the lookout for. Good gardening practices can reduce the occurrence of this disease and ensure a bountiful harvest. For questions on growing figs or about the fig rust disease, visit the UF/IFAS EDIS website – edis.ifas.ufl.edu – or contact your local Extension office.
by Carrie Stevenson | Sep 8, 2017

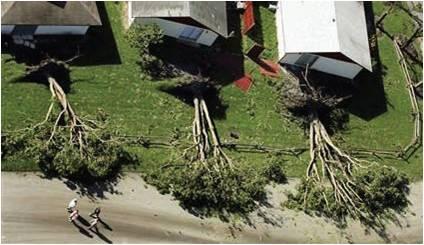
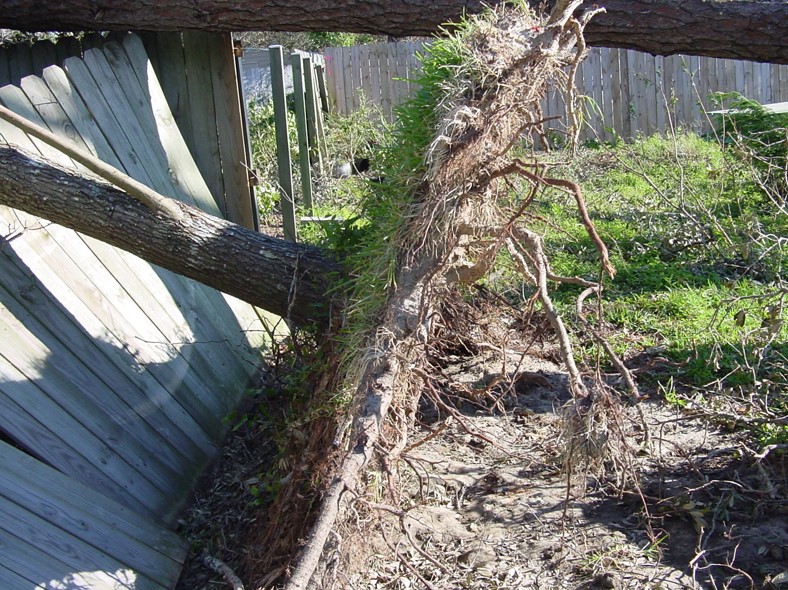
Trees are often among the first victims of hurricane-force winds. Photo credit: Mary Duryea, University of Florida.
Well, it is the peak of hurricane season (June 1-November 30), and this one is proving to be no joke. After having all summer to heat up, Gulf and Atlantic water temperatures peak in late August-mid September, feeding storms’ strength. Legendary hurricanes like Harvey, Katrina, and Andrew all made landfall during this time of year. The models for Irma show likely impacts in Florida, and due to its extreme size, most of the state is in line to endure heavy rain and wind regardless of location.
From a landscaping perspective, hurricanes can be truly disastrous. I will never forget returning home after evacuating from Hurricane Ivan and realizing all the leaves had been blown from nearly every tree in town. Mid-September suddenly looked like the dead of winter. A Category 3 storm when it landed near the southwest corner of Escambia County, Ivan was responsible for a 40% loss of tree canopy in our county.
Even if the Panhandle is not directly impacted by a storm, it is always smart to prepare. Research conducted by University of Florida arborists and horticultural specialists have yielded some practical suggestions.
To evaluate trees for potential hazards;
- Know your tree species and whether they are prone to decay or wind damage (more below).
- Look for root or branch rot—usually indicated by very dark spots on the bark.
- Tree structure—is there a single, dominant central trunk? Are branches attached to the trunk in a U-shape (strong) or V-shape (weak)?
- Smart pruning—never “top” (cut the tops from trees) but instead prune crowded limbs and remove limbs that are dead, dying, or hanging above power lines.
As for species selection, keep in mind that pines generally do not perform well in gale-force winds. Longleaf pines are quite strong, but common slash pines often snap or lean in storms. Even if a pine tree survives, it can be vulnerable to damage or death from pine bark beetles. It is wise to monitor pines for up to 2 years after a storm.
In addition, a survey conducted throughout the southeastern United States after hurricanes from 1992-2005 yielded important information on the most (and least) wind-resistant tree species. Live oaks and Southern magnolias topped the list, while pecans and cherry laurels performed poorly. This full, user-friendly report from the study is a useful tool.
For more hurricane preparedness information, visit the UF IFAS Extension Disaster Manual online or contact your local Extension office or Emergency Management agency.
by Beth Bolles | Sep 8, 2017
Trees are a valuable resource. They add beauty to our community, serve as food and shelter for animals, filter the air, and cool urban environments. Trees can also be a liability when poorly maintained, damaged, or diseased. There are often times when an arborist is needed to help determine the best course of action for the tree.
There are many individuals who are involved in the tree care and removal business. Not all of these people are certified in the care of trees. Arborists are people who receiving training in the planting, care, and maintenance of trees.

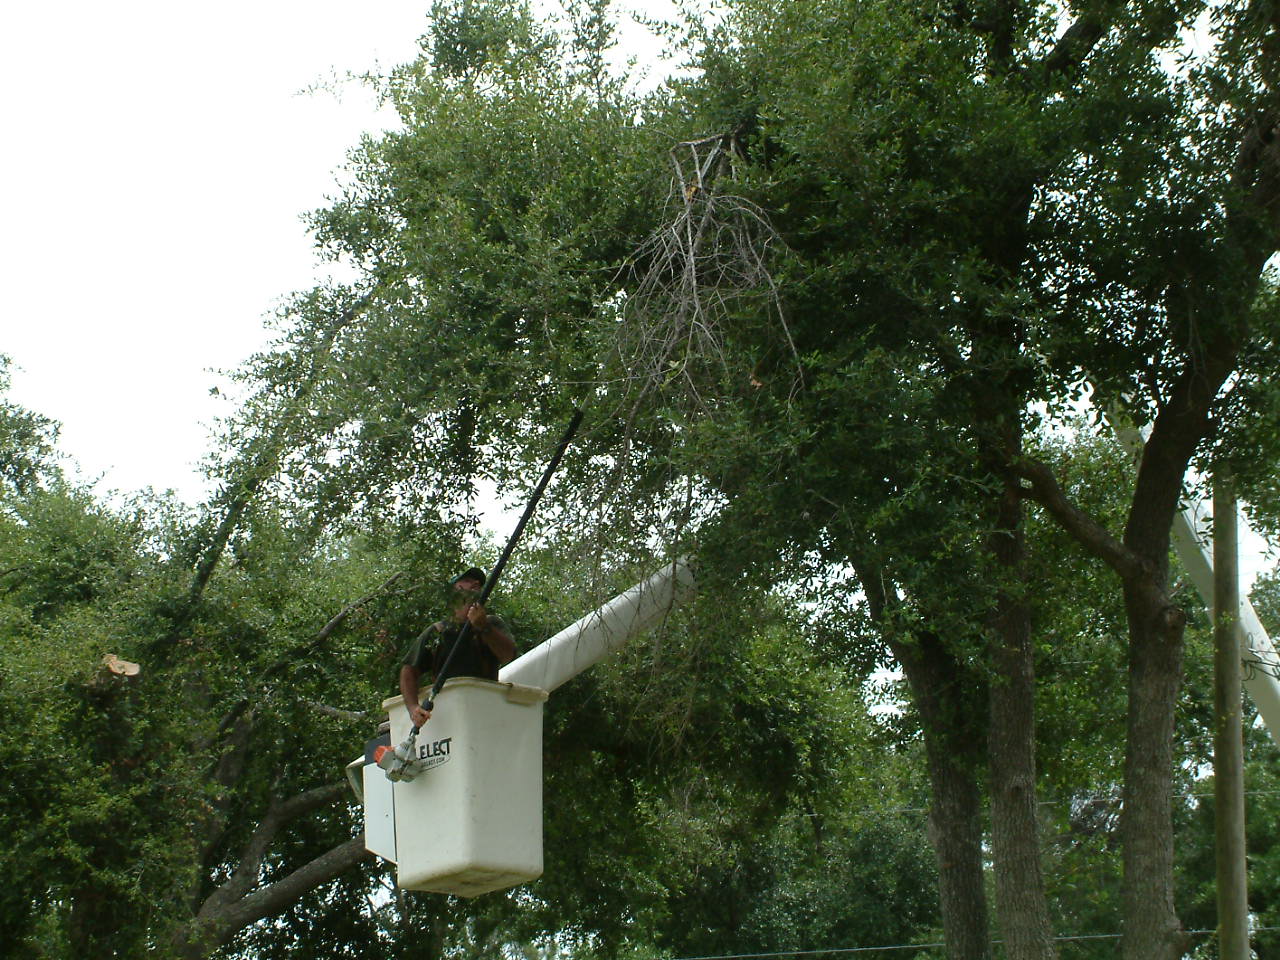
Professional arborists have specialized training to create safe, structurally sound trees, even when damaged by storms. Photo by Beth Bolles, UF IFAS Extension Escambia County
Certified arborists go through a voluntary certification process with the International Society of Arboriculture which means that they have at least three years experience and have passed a comprehensive examination developed by tree experts. A certified arborist maintains certification by attending regular training courses.
An arborist may also be a member of another organization which helps professionals stay up-to-date on tree care techniques and information. These include the National Arborist Association and the American Society of Consulting Arborists.
Hiring an arborist to work on your trees is important for several reasons. An arborist can evaluate the tree and determine the steps necessary to create a healthy specimen. In regards to pruning, the professional will determine what type of pruning is necessary and remove branches properly.
Professionals will also perform tree care practices that are recommended by University research. A few practices that the arborist would not perform include topping trees, using climbing spikes on trees which are not being removed, and making flush cuts against the trunk.
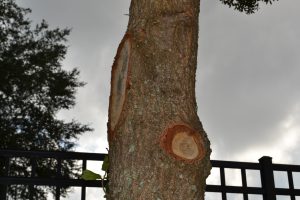
Flush cuts are damaging to trees and can create a future hazard in your landscape. Photo by Beth Bolles, UF IFAS Extension Escambia County
Finally arborists have the skills and equipment to safely and efficiently prune or remove trees. This includes personal and property damage insurance and workers compensation insurance.
Next time you need tree work or advice, hire a professional for the job. It will definitely be worth the investment.
by Sheila Dunning | May 25, 2017
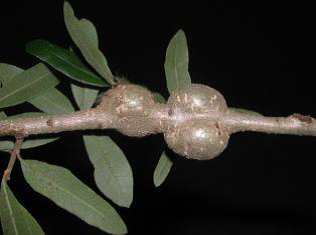
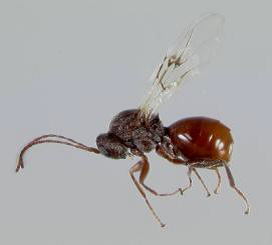
 As oak trees are now fully leafing out and people start hanging out in the shade of the canopy, many of you are noticing strange growths on the branches. They look like potatoes, spiky cones and fuzz balls on the leaves and stems. Don’t worry. It’s just a harmless wasp that chose that tree to create a nursery for her young.
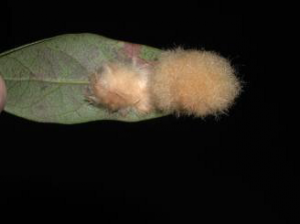
Galls are abnormal plant growth or swellings comprised of plant tissue. Galls are usually found on foliage or twigs. These unusual deformities are caused by plant growth-regulating chemicals produced by tiny wasps. The chemicals produced by these insects interfere with normal plant cell growth.
The life cycles of the various gall-forming wasps are highly variable. Two or more years are required for gall wasps that develop in woody twig galls to reach maturity. Gall-forming wasps usually overwinter as adults in protected places away from the host tree. As the buds break in the spring and the leaves begin to expand, these small wasps start to lay their eggs in expanding plant tissue. During the egg-laying process or early larval-feeding period, specialized body glands secrete growth-regulating chemicals that interact with certain plant chemicals to produce these abnormal growths.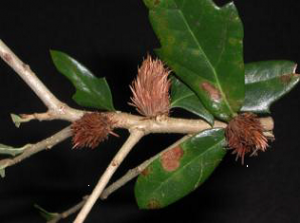
After a brief period of cell growth, gall development stops completely. Once these galls are formed, they do not continue to use nutrients from the host plant. The insect is confined within “its house” and feeds only on gall tissue during the remainder of its development. The galls provide shelter, protection, and food for the immature wasps. Inside a gall, the larvae are surrounded by tissues rich in nutrients
 There are a variety of gall-forming species of small wasps that commonly infest oak, Quercus spp ., trees. Galls generally are aesthetically objectionable to homeowners who find them unattractive and fear that galls will cause damage to the health of their oak trees. Most leaf galls on oak cause little or no harm to the health of a tree. However, twig or branch galls may cause injury by distorting branch development in a heavily infested tree.
Chemical control is seldom suggested for management of leaf galls on oak. Cultural methods of control may be effective in reducing the impact of these insects. Some fallen leaves may harbor various life stages of gall-producing pests. Therefore, it may be useful to collect and destroy all infested leaves. Some of these pests overwinter in twigs and branches of oak. Where such woody galls are detected, prune and destroy the infested plant material when the galls are small and have just started to develop. But, remember every bug needs a home!
All photos by Eileen Buss, UF Entomologist
by Matt Lollar | May 18, 2017
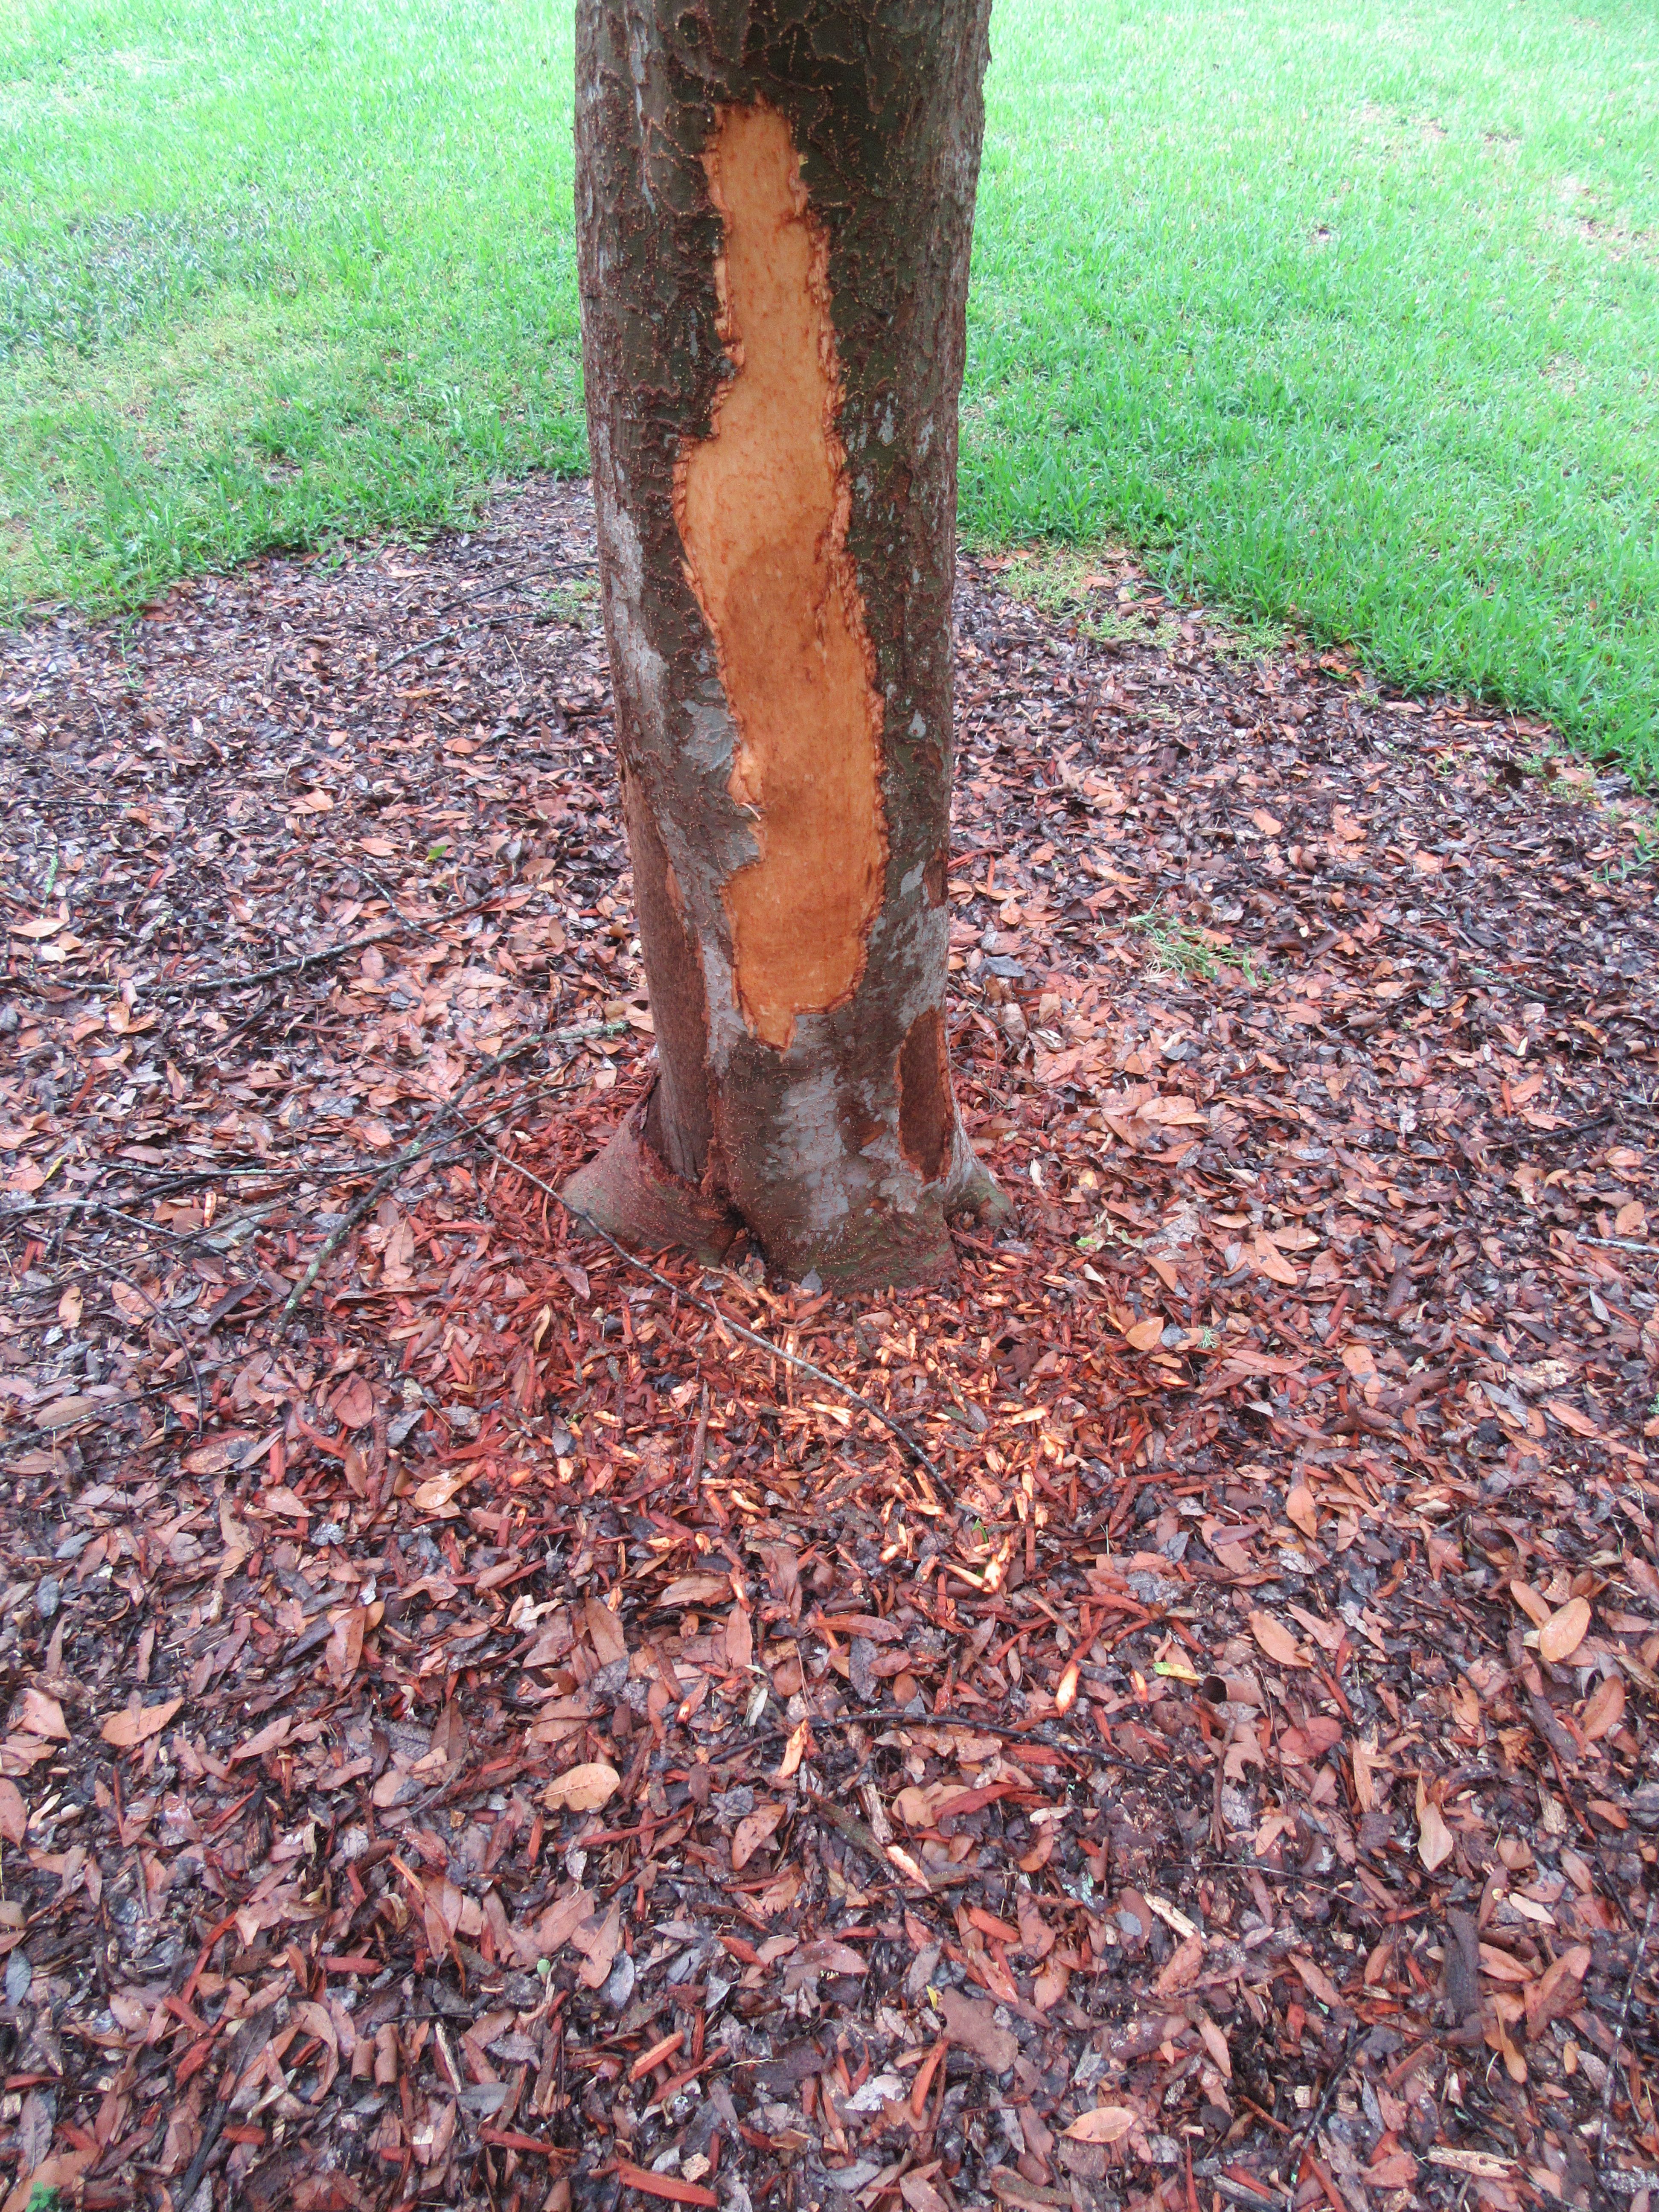
Squirrel bark stripping damage on a Chinese elm. Photo Credit: University of Florida/IFAS Extension

Barked stripped from the trunk of a Chinese elm. Photo Credit: University of Florida/IFAS Extension
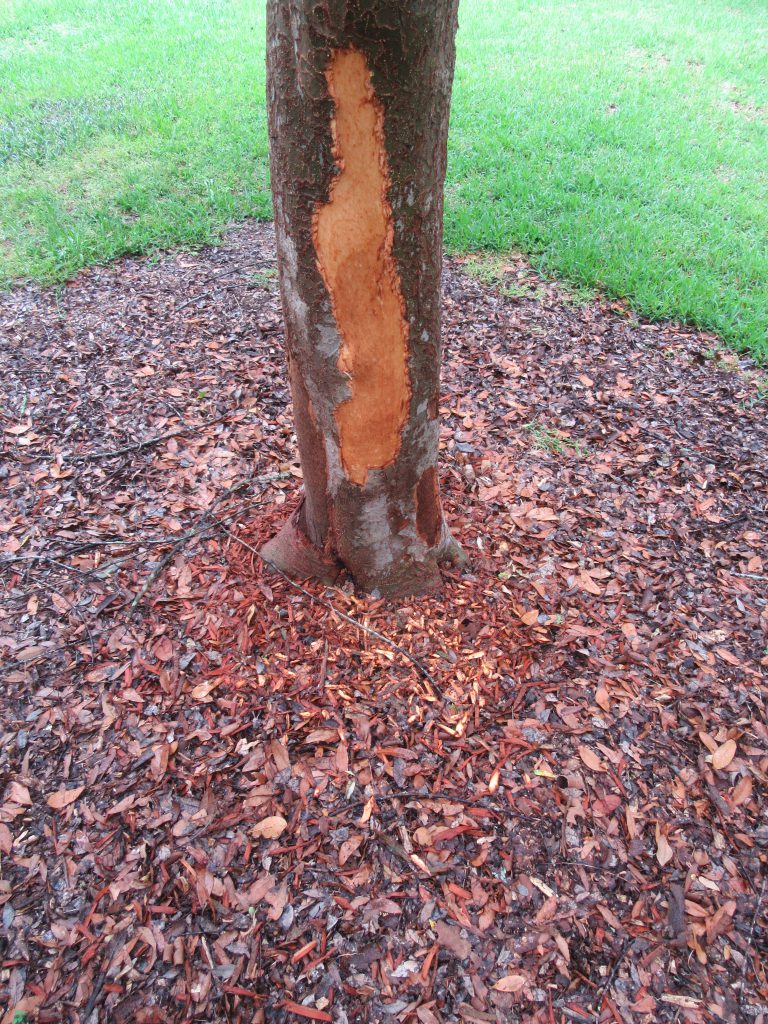
The squirrels are at it again! This time they are stripping the bark from the trunks of my Chinese elm (Ulmus parvifolia) trees. Squirrels feed on the bark of a number of other different tree species including oaks, maples, and pecans. There are a few theories as to why squirrels feed on tree bark.
- Pregnant Females – Pregnant squirrels don’t eat prior to giving birth, but it is thought they chew on bark to help them bear the pain of pregnancy.
- Water Source – This theory isn’t very reputable due to the fact that squirrels have been seen feeding on bark come rain or shine.
- Food Source – The inner bark layer (phloem) contains sugar and nutrients which help satisfy a squirrel’s appetite.
The good news is squirrels generally do not eat enough bark to kill a tree. A squirrel will typically only strip a half inch section of bark about three inches long. However, the squirrels in my yard were much hungrier this year as you can see in the featured pictures.
Because squirrels do not usually girdle the trunk of the tree, they generally do not cause enough damage to kill a tree. However, their bark stripping habits can be unsightly in a well-maintained landscape. A few control options are available.
- Tree Wrap – Tree trunks can be wrapped with 24″ or longer aluminum flashing. Unfortunately, this option can be more unsightly than the bark stripped trunks.
- Repellents – A number of different wildlife repellents are on the market. Most repellents do not smell very good because they contain egg solids.
- Harvest – This is my favorite method of control! Make sure you follow all state and local laws.
For more information on wildlife management, please visit EDIS or The Internet Center for Wildlife Damage Management.
by Julie McConnell | Apr 7, 2017
It’s really tempting to buy a tree and plant it in the middle of your lawn or directly in front of your picture window, but instead take some time to choose the best spot first. Several considerations such as maintenance and mature size should be taken into account before the site is selected.
Mowing close to the trunk of this Pindo palm has caused repeated injury to the trunk. Photo: JMcConnell, UF/IFAS
Placing a tree in a lawn area without creating a bed can lead to maintenance issues for both the tree and the turfgrass. It is easy to simply cut out a small patch of turf the size of the rootball and install a tree, however, as the grass grows up towards the trunk over time maintaining that grass will become difficult. It is common to see mechanical injuries to tree trunks because weed eaters or mowers have chipped away at the bark when trying to cut the grass. Other potential problems are irrigation zones calibrated for turf delivering the wrong amount of water to trees and herbicides used on grass that may cause injury to trees.
Over time, as the tree canopy grows, it will create shade and any grass trying to grow in that area will thin and be more susceptible to disease and insect pressure. By creating a large ornamental bed for your tree, you will prevent some pitfalls associated with placing the tree in the lawn.
Another common mistake is planting a tree too close to a house or other structure. It can be difficult to imagine how large a tree will grow at maturity because it is not a quick process. Trees placed close to houses may grow into eaves and shed leaves onto roofs and into gutters. This adds to maintenance and can provide mosquito breeding grounds. Also, some tree roots may interfere with walkways or septic systems and should be sited far enough away to avoid these issues.
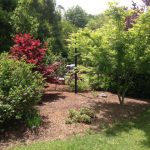
These Japanese Maples are planted in a bed separate from the lawn making care for both plant types easier. Photo: JMcConnell, UF/IFAS
Be sure to research any tree you plan to install to find out ideal growing conditions and mature size. If you plan ahead and use good maintenance practices, a tree can become an valuable part of your home landscape to be enjoyed for years to come.