by Sheila Dunning | Oct 7, 2020

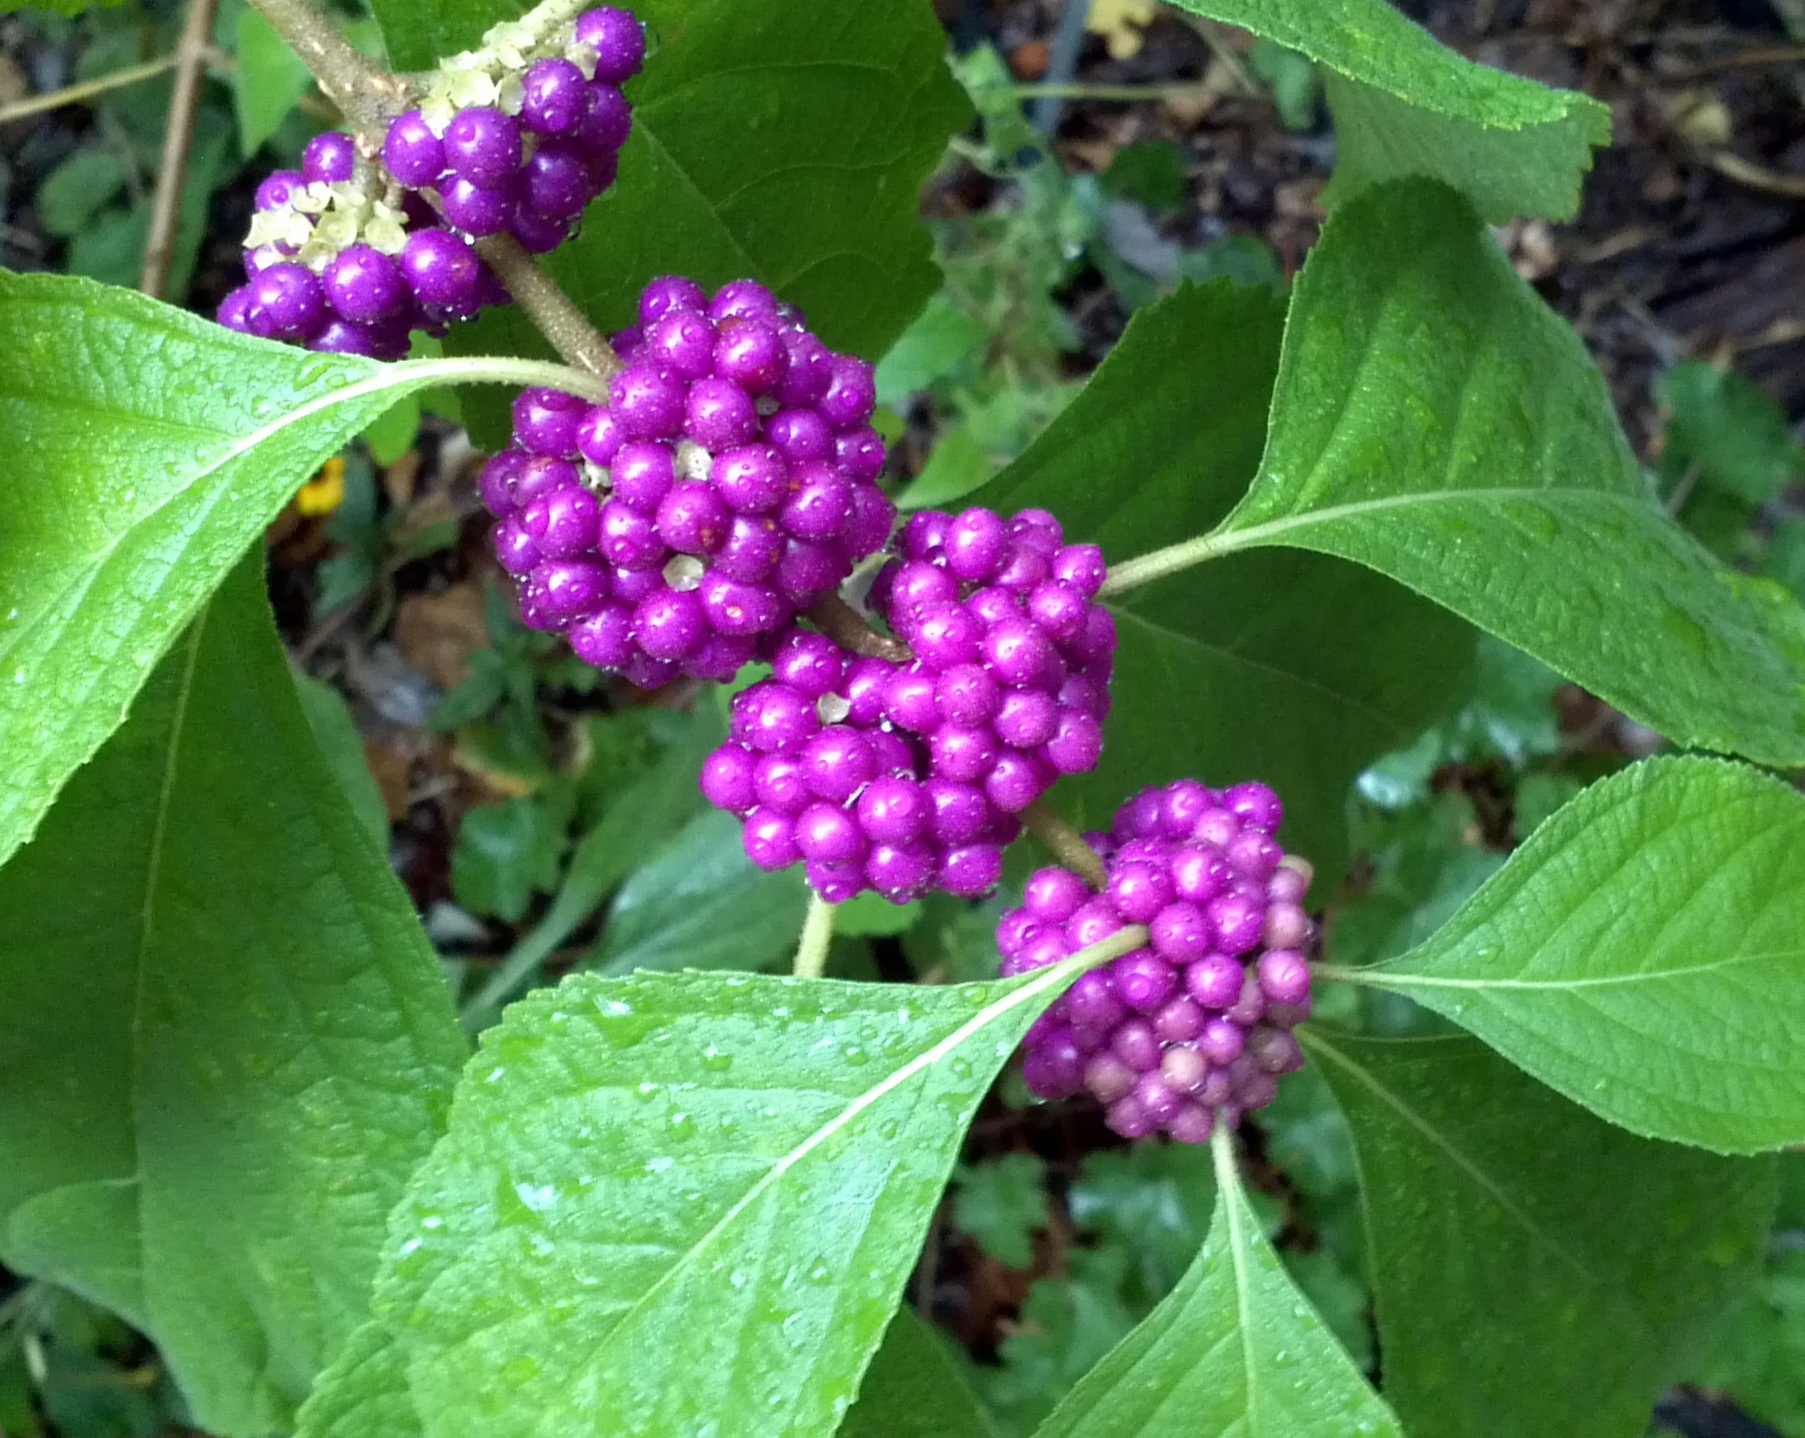
American Beautyberry Photo by: UF/IFAS
Each fall, nature puts on a brilliant show of color throughout the United States. As the temperatures drop, autumn encourages the “leaf peepers” to hit the road in search of the red-, yellow- and orange-colored leaves of the northern deciduous trees. In Northwest Florida the color of autumn isn’t just from trees. The reds, purples, yellow and white blooms and berries that appear on many native plants add spectacular color to the landscape. American Beautyberry, Callicarpa americana, is loaded with royal-colored fruit that will persist all winter long. Whispy pinkish-cream colored seedheads look like mist atop Purple Lovegrass, Eragrostis spectabilis and Muhlygrass, Muhlenbergia capillaris. The Monarchs and other butterfly species flock to the creamy white “fluff” that covers Saltbrush, Baccharis halimifolia. But, yellow is by far the dominant fall flower color. With all the Goldenrod, Solidago spp., Narrowleaf Sunflower, Helianthus angustifolius and Tickseed, Coreopsis spp., the roadsides are golden. When driving the roads it’s nearly impossible to not see the bright yellows in the ditches and along the wood’s edge. Golden Asters (Chrysopsis spp.), Tickseeds (Coreopsis spp.), Silkgrasses (Pityopsis spp.), Sunflowers (Helianthus spp.) and Goldenrods (Solidago spp.) are displaying their petals of gold at every turn. These wildflowers are all members of the Aster family, one of the largest plant families in the world. For most, envisioning an Aster means a flower that looks like a daisy. While many are daisy-like in structure, others lack the petals and appear more like cascading sprays.
Helianthus
So if you are one of the many “hitting the road in search of fall color”, head to open areas. For wildflowers, that means rural locations with limited homes and businesses. Forested areas and non-grazed pastures typically have showy displays, especially when a spring burn was performed earlier in the year. Peeking out from the woods edge are the small red trumpet-shaped blooms of Red Basil, Calamintha coccinea and tall purple spikes of Gayfeather, Liatris spp. Visit the Florida Wildflower Foundation website, www.flawildflowers.org/bloom.php, to see both what’s in bloom and the locations of the state’s prime viewing areas. These are all native wildflowers that can be obtained through seed companies. Many are also available as potted plants at the local nurseries. Read the name carefully though. There are cultivated varieties that may appear or perform differently than those that naturally occur in Northwest Florida. For more information on Common Native Wildflowers of North Florida go to http://edis.ifas.ufl.edu/ep061.
by Beth Bolles | Sep 8, 2020
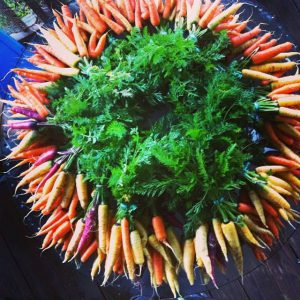
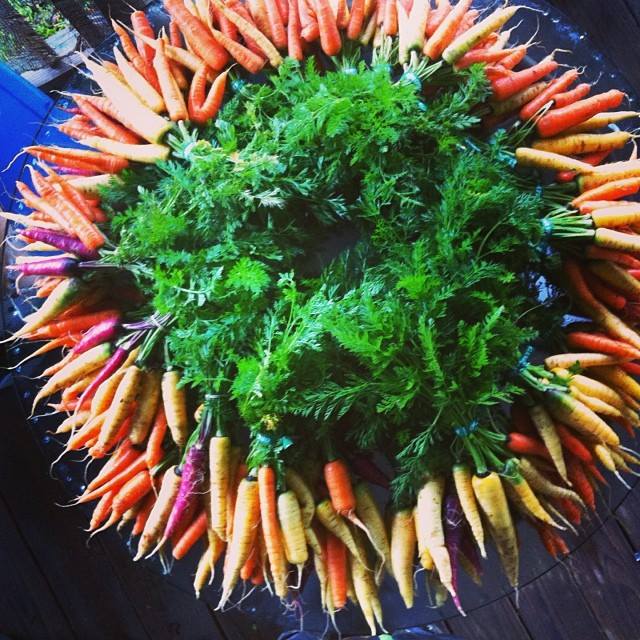
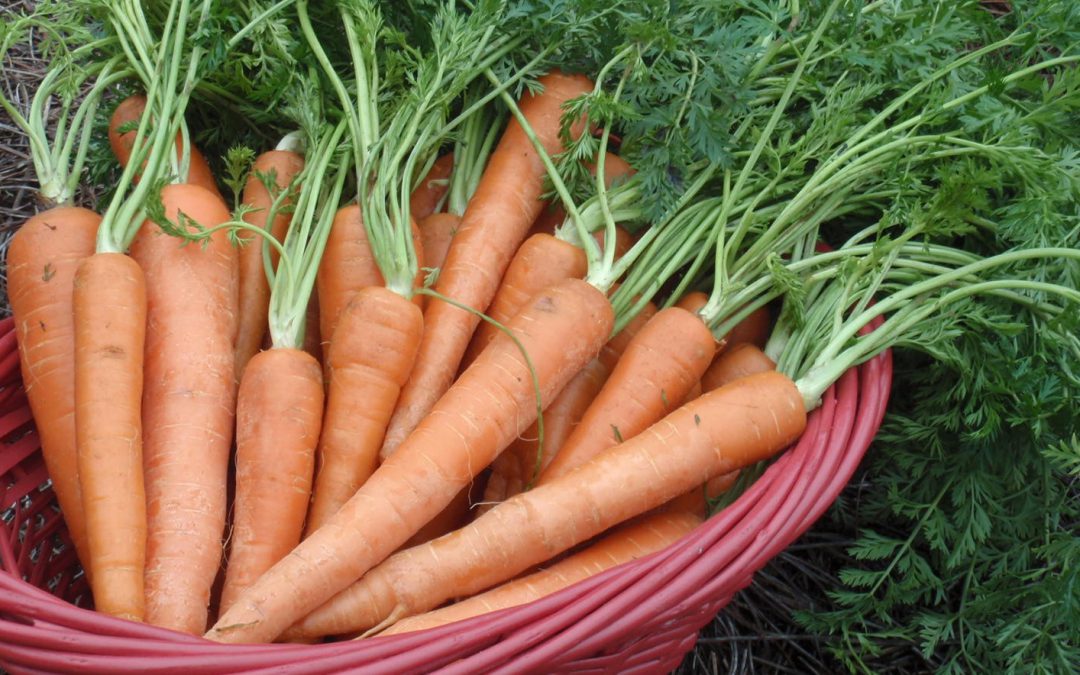
The modern carrot is available in many sizes, colors, and flavor profiles thanks to thousands of years of plant breeding. Photo by Kelly Thomas.
The University of Florida Vegetable Gardening Guide is a wonderful resource for those who are getting started gardening and growing some edible plants. As you look through the publication, you will see a chart for the different portions of Florida about when to start different fruits and vegetables. Remember this is just a guide. We may have to adjust some of our starting dates depending on local temperatures and other weather patterns.
A good example is that the guide states to start carrots beginning in August. For many years now our August temperatures are just too hot for starting carrots. Portions of September in North Florida may also be too warm for carrots. The ideal temperatures for growing carrots are 75 degree F. days and 55 degree F. nights. We need to at least wait until our temps are in the low to mid 80’s before even trying carrot seeds.
When you plant your carrot seeds, they will need good moisture to germinate. Be patient. Carrots are not always the fastest to come up. It normally takes at least 7 days for germination to occur and can take a little longer at times.
Use the Florida Vegetable Gardening Guide as a way to help you plan for your next fun gardening experience. Add in the expertise of your local county Extension Agent, along with local observations about current weather, and you will have success in your home garden.

by Ray Bodrey | Jul 1, 2020
Sunflowers, Helianthus spp., are a great choice for gardeners who are looking for some cheerful color in their landscape. Here in Florida, we have the main ingredient for success, lots of sunshine!
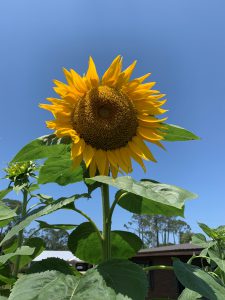
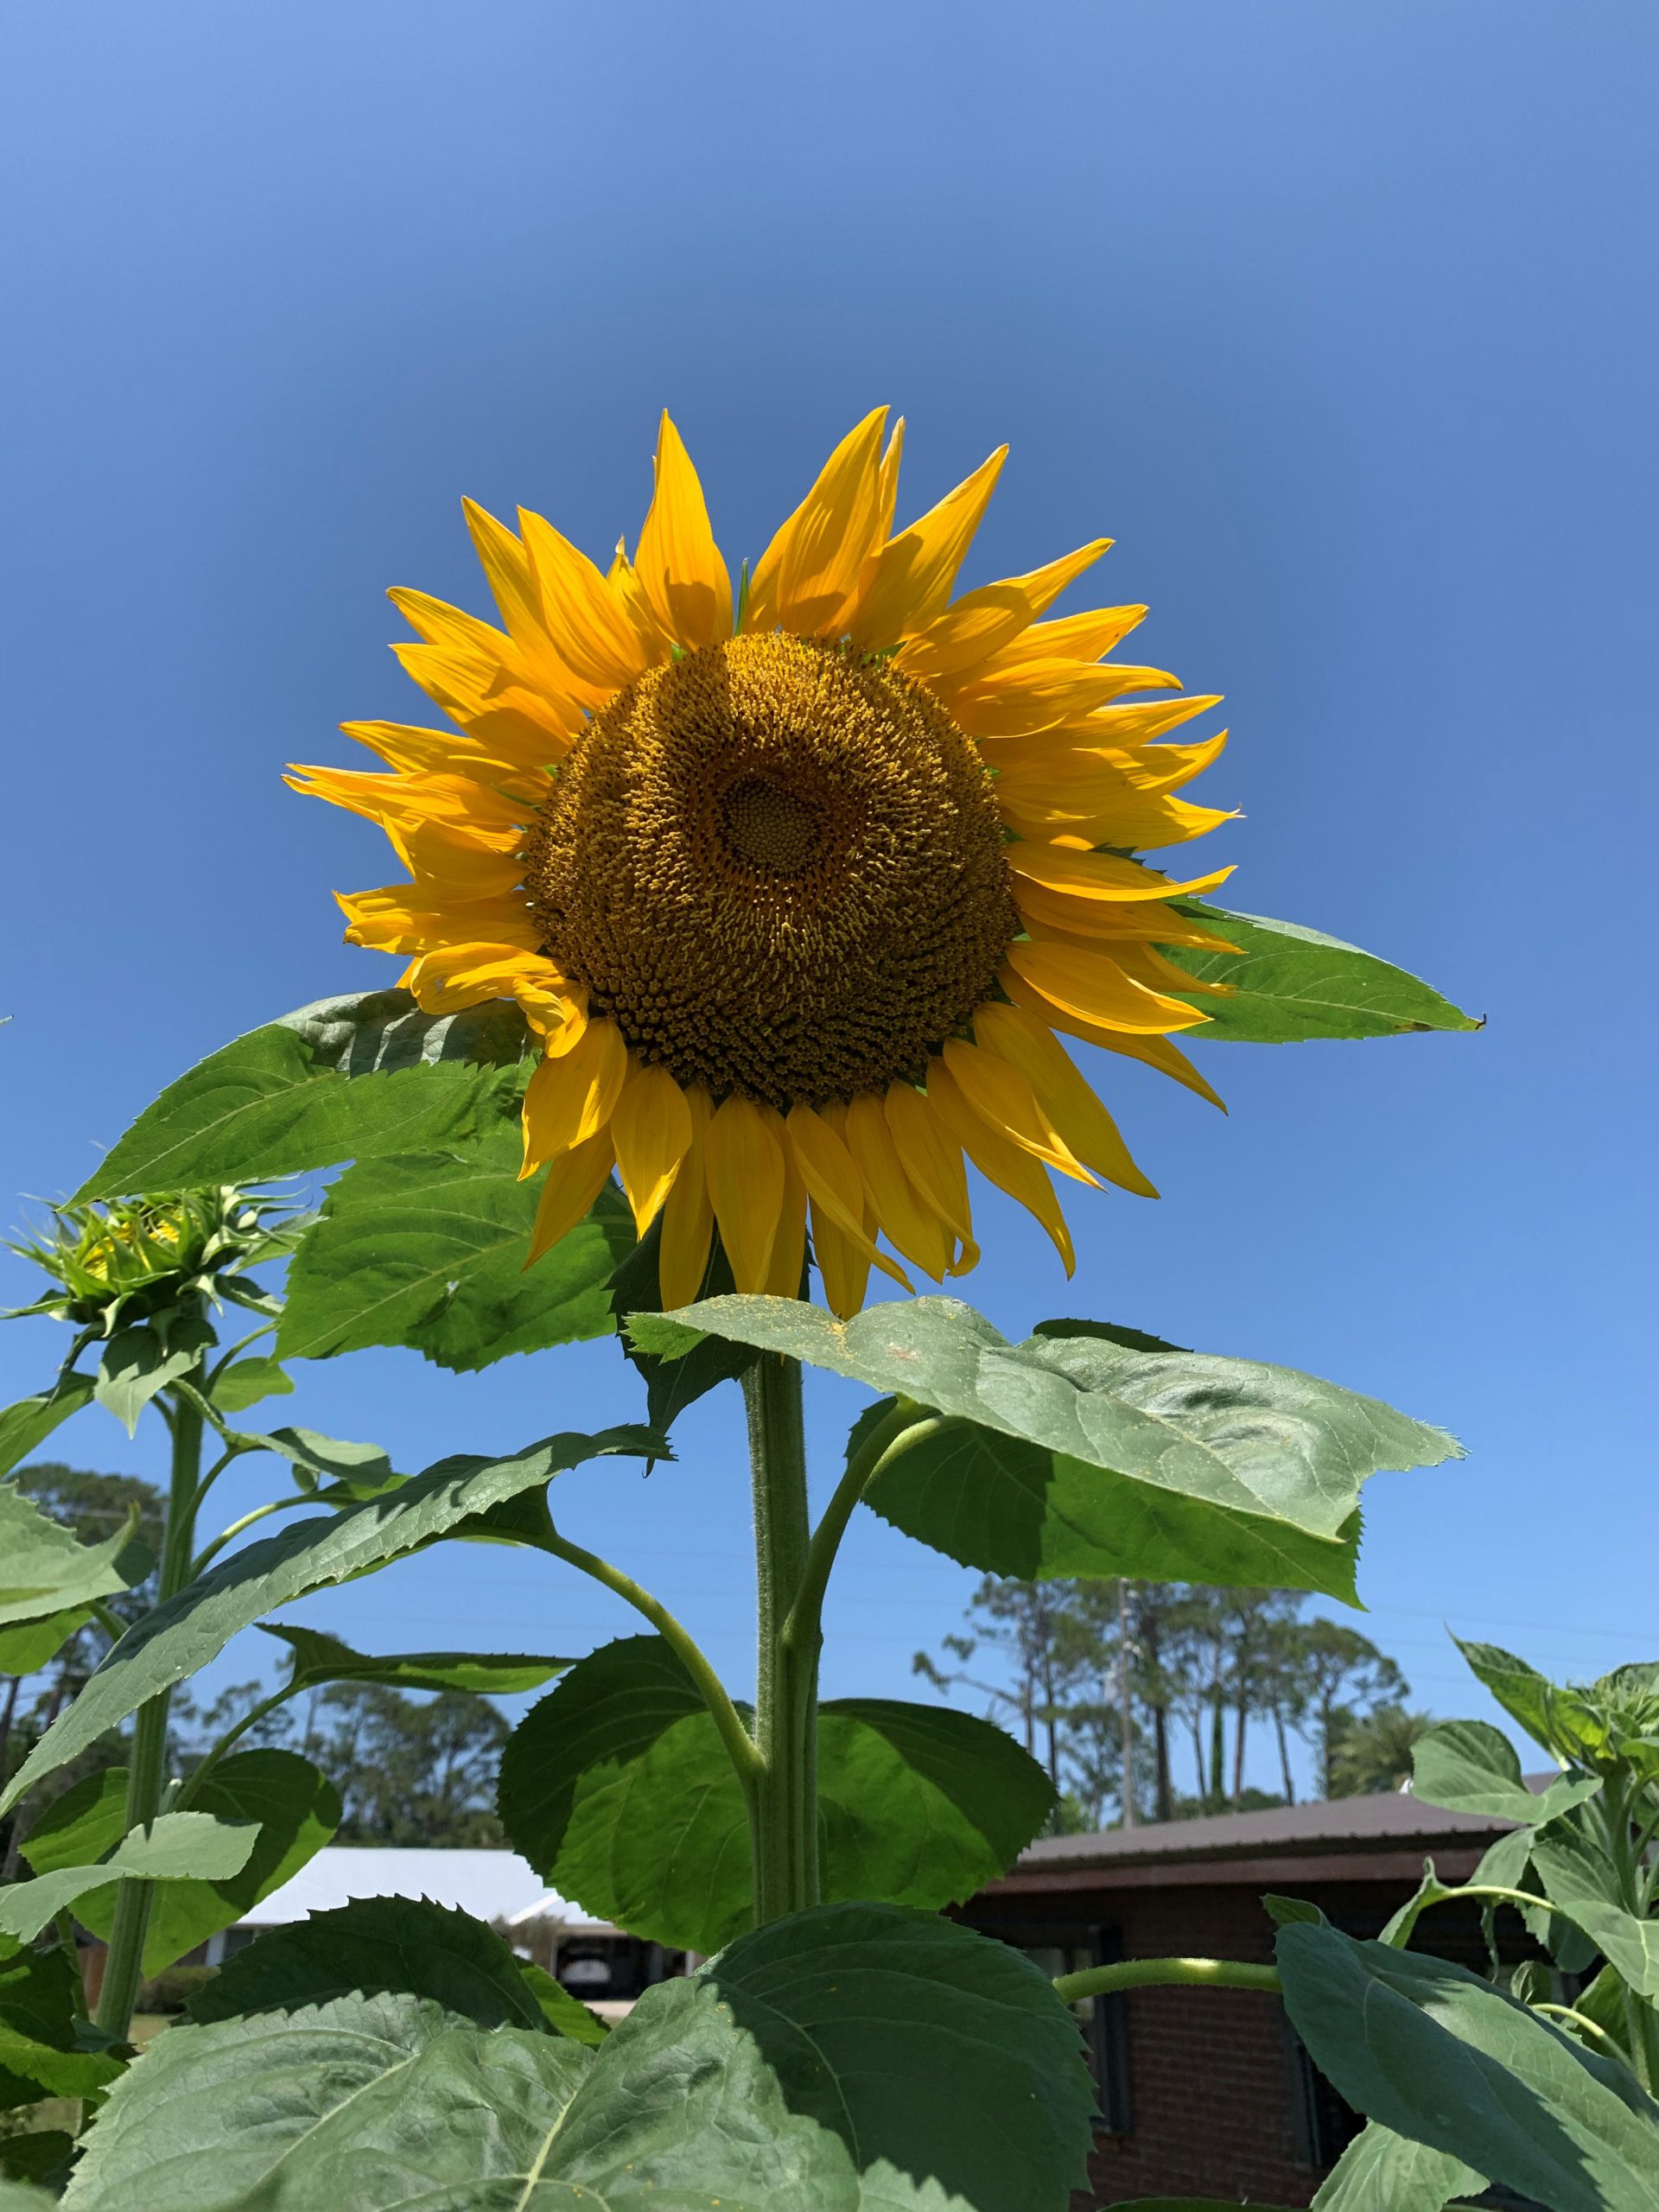
‘Skyscraper’ Sunflower bloom. Photo courtesy of Ray Bodrey.
Sunflowers are short-lived annuals. The average time between planting and bloom is roughly 65 days. You can typically plant sunflowers in Florida beginning in late winter until early fall. Only the coldest months cause problems, and for most years that’s only November – January. Sunflowers can be planted almost anywhere there is full sun. The major selling point with sunflowers is, of course, the impressive blooms (figure 1). These yellow to sometimes orange or red-petaled flowers develop a central seed disc, with most variety’s flowers having approximately an 8” diameter.
When planting, you may choose to plant in narrow rows with close seed spacing in order to cull weaker plants later. A final row and seed spacing of 2’-3’ is recommended for full height and development of most varieties. However, you may also choose to plant in a bed, using a close pattern as seen in the photo below. In any event, sunflowers are easy to propagate by seed and are very low maintenance. Occasionally, powdery mildew and spittle bugs can be a nuisance. A general garden fungicide and insecticide will help if problems occur.
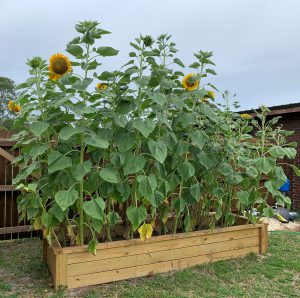
‘Skyscraper’ sunflowers planted on close spacing. Photo courtesy Ray Bodrey.
Sunflowers are available in many varieties, consisting of different color blooms and plant sizes. These sizes range from dwarf (1’-3’) to tall (10’-15’) varieties. You may wish to stake taller varieties at some point, as plants will tend to lean with no wind break in place. Here’s a few garden variety common names to look for: ‘Sunbright’, ‘Sonja’, ‘Sunrich Lemon’, ‘Sunrich Orange’ and ‘Autumn beauty’. Seed companies also have mixes available in packets. For tall plants, ‘Mammoth’ or ‘Skyscraper’ varieties will do the trick.
If you are fond of the sunflower bloom and looking for a groundcover, there are a couple of native perennials that fit this category. Beach sunflower, Helianthus debilis or swamp sunflower, Helianthus angustifolius, are groundcovers/ornamentals for landscapes and thrive in dry, hot climates and in a range of soil types. They also are great pollinator attractors.
For more information on growing sunflowers, contact your local county extension office.
Supporting information for this article and links to other publications on sunflowers can be found at the UF/IFAS Gardening Solutions website: https://gardeningsolutions.ifas.ufl.edu/plants/ornamentals/sunflowers.html
UF/IFAS Extension is an Equal Opportunity Institution.
by Daniel J. Leonard | Jan 23, 2020
Cruciferous vegetables, mostly cool-season annuals in the Brassicaceae (formerly Cruciferae) family, are part of a healthy diet, prized for their high fiber content and unique sulfur-containing compounds known as glucosinolates. This vegetable family includes things many of us love (or love to hate) like Brussels sprouts, cabbage, cauliflower, collards, kale, mustard, turnips, bok choy, and Chinese cabbage. They’re also commonly grown in Panhandle gardens. However, as anyone who has grown these species knows, some are easier than others. For example, kale and radish are among the easiest of all plants to grow. But get beyond the basics and folks often run into difficulty with species like broccoli and cabbage. The high rainfall/humidity and frequent warm spells experienced here during the growing season often lead to serious pathogen problems, dooming my garden in years past. However, this winter, thanks to a couple of new cultivars, ‘Capture’ Cabbage and ‘Burgundy’ Sprouting Broccoli, I’ve enjoyed a plentiful supply of tasty crucifers!
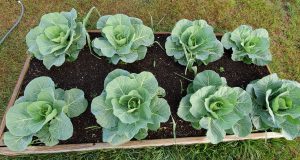
4’x 8′ raised bed planted with ‘Capture’ on 24″ centers.
‘Capture’ Cabbage, developed by Bejo Seeds of California as a mid-season “white” fresh market cabbage for the South, has been an outstanding performer in my garden this year. Touted as highly resistant to Black Rot and Fusarium Yellows (by far the two most devastating pathogens of Cabbage), I had to try it for myself. I planted seeds 24” apart in my standard 4’ wide x 8’ long x 12” deep raised beds filled with mushroom compost and aged pine bark. Seedlings were fertilized once about three weeks after germination with a general purpose 10-10-10 fertilizer. The plants that developed have been extremely vigorous (I’m glad I paid attention to plant spacing guidelines on the seed packet!) and have not shown ANY evidence of disease, even through an unusually warm and wet winter that would have hammered older susceptible varieties. My plants have begun to develop heads and should be ready for harvest and the kitchen in just a couple more weeks! If you’ve had problems getting a cabbage from germination to head formation and harvest without serious disease pressure, give ‘Capture’ a try next fall!
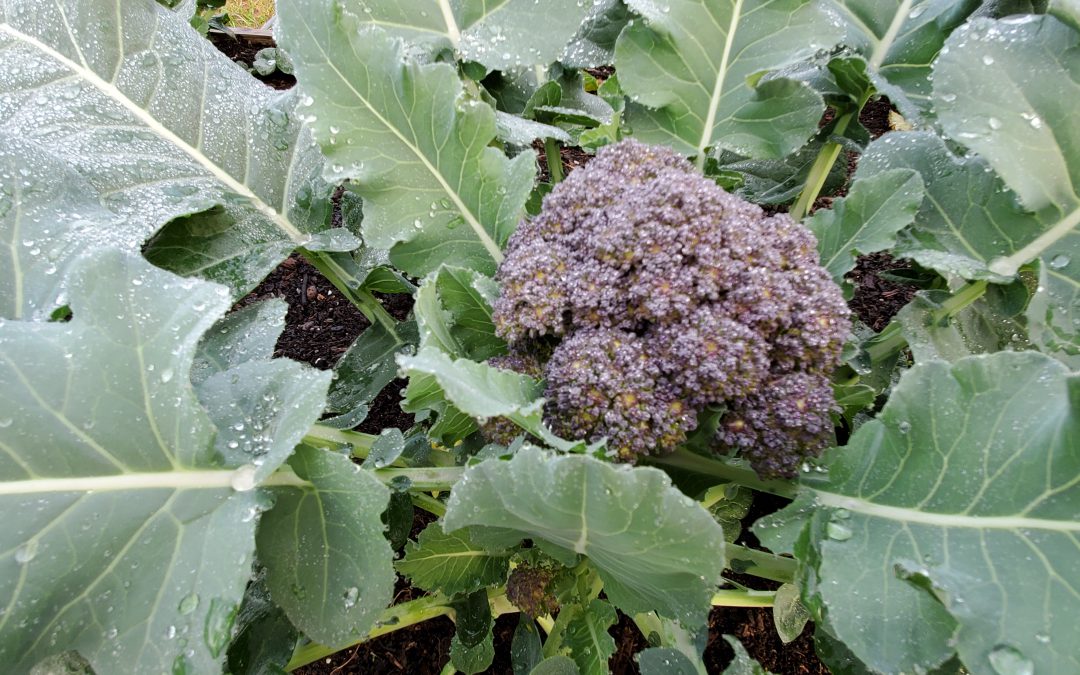
‘Burgundy’ Broccoli in the author’s raised bed garden.
‘Burgundy’ Broccoli, developed by Elsom Seeds in the United Kingdom, is a unique variety sure to turn heads in your garden. True to its name, the prolific florets are a deep, purple color. Though the central “head” on ‘Burgundy’ is quite small, that’s not the primary feature anyway. Considered a “sprouting” broccoli, this cultivar puts out an abundance of side shoots that make ‘Burgundy’ sort of a cut-and-come-again broccoli, allowing for a long harvest window. Another advantage from a disease avoidance perspective is the short maturity time (the time from planting seeds to having harvestable shoots) of around 40 days! For perspective, a “regular” heading broccoli has a maturity of around 60 day, lots more time for problems to happen. In the same growing conditions described above for cabbage, ‘Burgundy’ performed amazingly well for me, growing strong, healthy stalks, large, unblemished leaves and an abundance of purple shoots with a nice flavor profile!
If you want to enjoy homegrown broccoli and cabbage but disease pressures have made your previous efforts unproductive, give ‘Capture’ Cabbage and ‘Burgundy’ Broccoli a try! These two selections have made it easier than ever to enjoy unique, homegrown, healthy cruciferous veggies. Keep these and other quality, disease-resistant cultivars in mind when planning your winter garden in 2020!
by Matthew Orwat | Sep 17, 2019

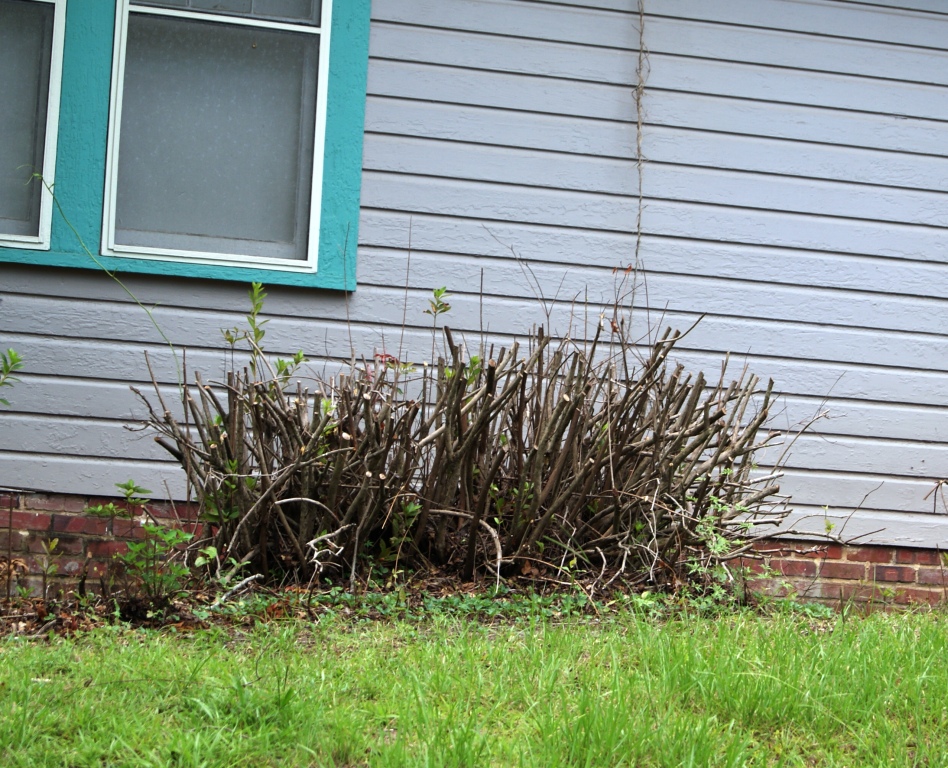
Fall Pruned Azalea. Image Credit Matthew Orwat
Although Northwest Florida is well known for its beautiful Azalea displays every spring, many do not understand that these shows of bloom could be sacrificed completely by pruning at the wrong time.
Pruning Azaleas in the fall will result in a loss of spring bloom the following spring, since flower buds are initialized on previous year’s growth for most azalea cultivars.This means that they flower on growth put on throughout the previous growing season. If a gardener removes the previous season’s new growth, they are removing the blooms as well.
So, when is the proper time to prune Azaleas? The ideal time to prune is directly after the spring bloom. This will give the plant enough time to generate abundant new growth, thus maximizing bloom next spring. One might think that when growing the repeat blooming Encore azaleas, pruning time doesn’t matter. Should the need arise to prune these compact, repeat blooming shrubs the optimal time is directly after spring bloom and not after the final fall bloom cycle.
For more information on pruning Azaleas or on general Azalea culture, please read the UF / IFAS publication Azaleas at a Glance or check out the Pruning Azalea page on Gardening Solutions.