by Carrie Stevenson | Jul 11, 2025

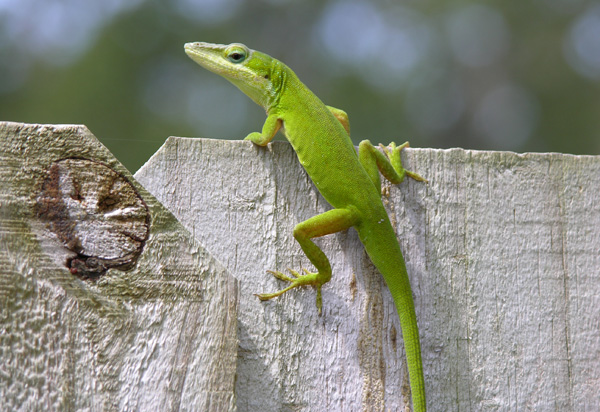
Green anole on a fence post. Photo credit: Dr. Steve A. Johnson, UF
There’s plenty of animals you might call “cute”, but lizards usually aren’t among them. However, I’d take exception to that premise when discussing the green anole (Anolis carolinensis). With big blue eyes, brilliant green skin, and flirty males doing push-ups and flexing their dewlaps (the pink throat fan) at you, these little reptiles are more endearing than most.

A green anole–with a slightly forked tail–poses on a deck chair. Photo credit: Carrie Stevenson, UF IFAS Extension
Native to Florida and the deep South, they are competent crawlers, prowlers, and predators. I see them frequently on my office building’s outer stucco walls, running along fences, or skittering up trees. They feed on beetles, termites, ants, worms, spiders, and more. Called the “American chameleon” by some, they possess excellent camouflage, changing their skin rapidly from green to dull brown depending on their backgrounds.
Over the last few years, I—and many biologists—have been concerned about the health of their population. As the invasive Cuban brown anole successfully gained a foothold in north Florida, I saw fewer green anoles and many more of the browns. It has seemed that the greens were losing ground. The invasive species can outcompete the native by eating the green anoles’ young and eggs.
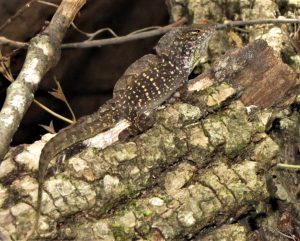
Male brown anole on a tree. Photo credit: Dr. Steve A. Johnson, UF
A recent study by a UF PhD candidate found another explanation for why Floridians have seen more brown anoles than green. His study found that the two species have found a way to coexist—the green anoles are moving further up the canopy (an average of 17x higher!), while browns are staying closer to ground level. The green anoles thrive in more natural areas, whereas the brown anoles do well in lower level urban surroundings.
Interestingly, this summer I’ve noticed a resurgence in green anoles and have rarely seen brown ones. I am wondering if our snow days knocked the tropical brown anole populations back, enabling the more temperate greens to recover. Time will tell if the greens have regained their advantage or if it’s only temporary.
One of the best ways to help improve green anole populations is to plant more native vegetation, especially multiple layers, to create a varied canopy. For more information on how to do that, check out our Florida-Friendly Landscaping Guide to Plant Selection and Landscape Design.
by Daniel J. Leonard | Jul 11, 2025
Normally, when one thinks of flowers that can take Florida’s summer heat, Petunia isn’t the first species that comes to mind, certainly not for me. For our northern neighbors, Petunias are one of the most popular summer bedding plants; their warm days and cool summer nights are perfect for Petunias. But, in the deep south, we are forced to grow Petunias in the cool months before the summer heat melts them. However, with the introduction of Wave Petunias back in 1995, the idea of a heat tolerant hybrid Petunia that could extend flowering was born. Then a decade later in 2006, Proven Winners debuted the next evolution of heat tolerant Petunias came along, the ultra-tough Supertunia Series, and disrupted everything we thought we knew about growing Petunias.
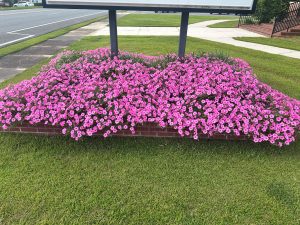
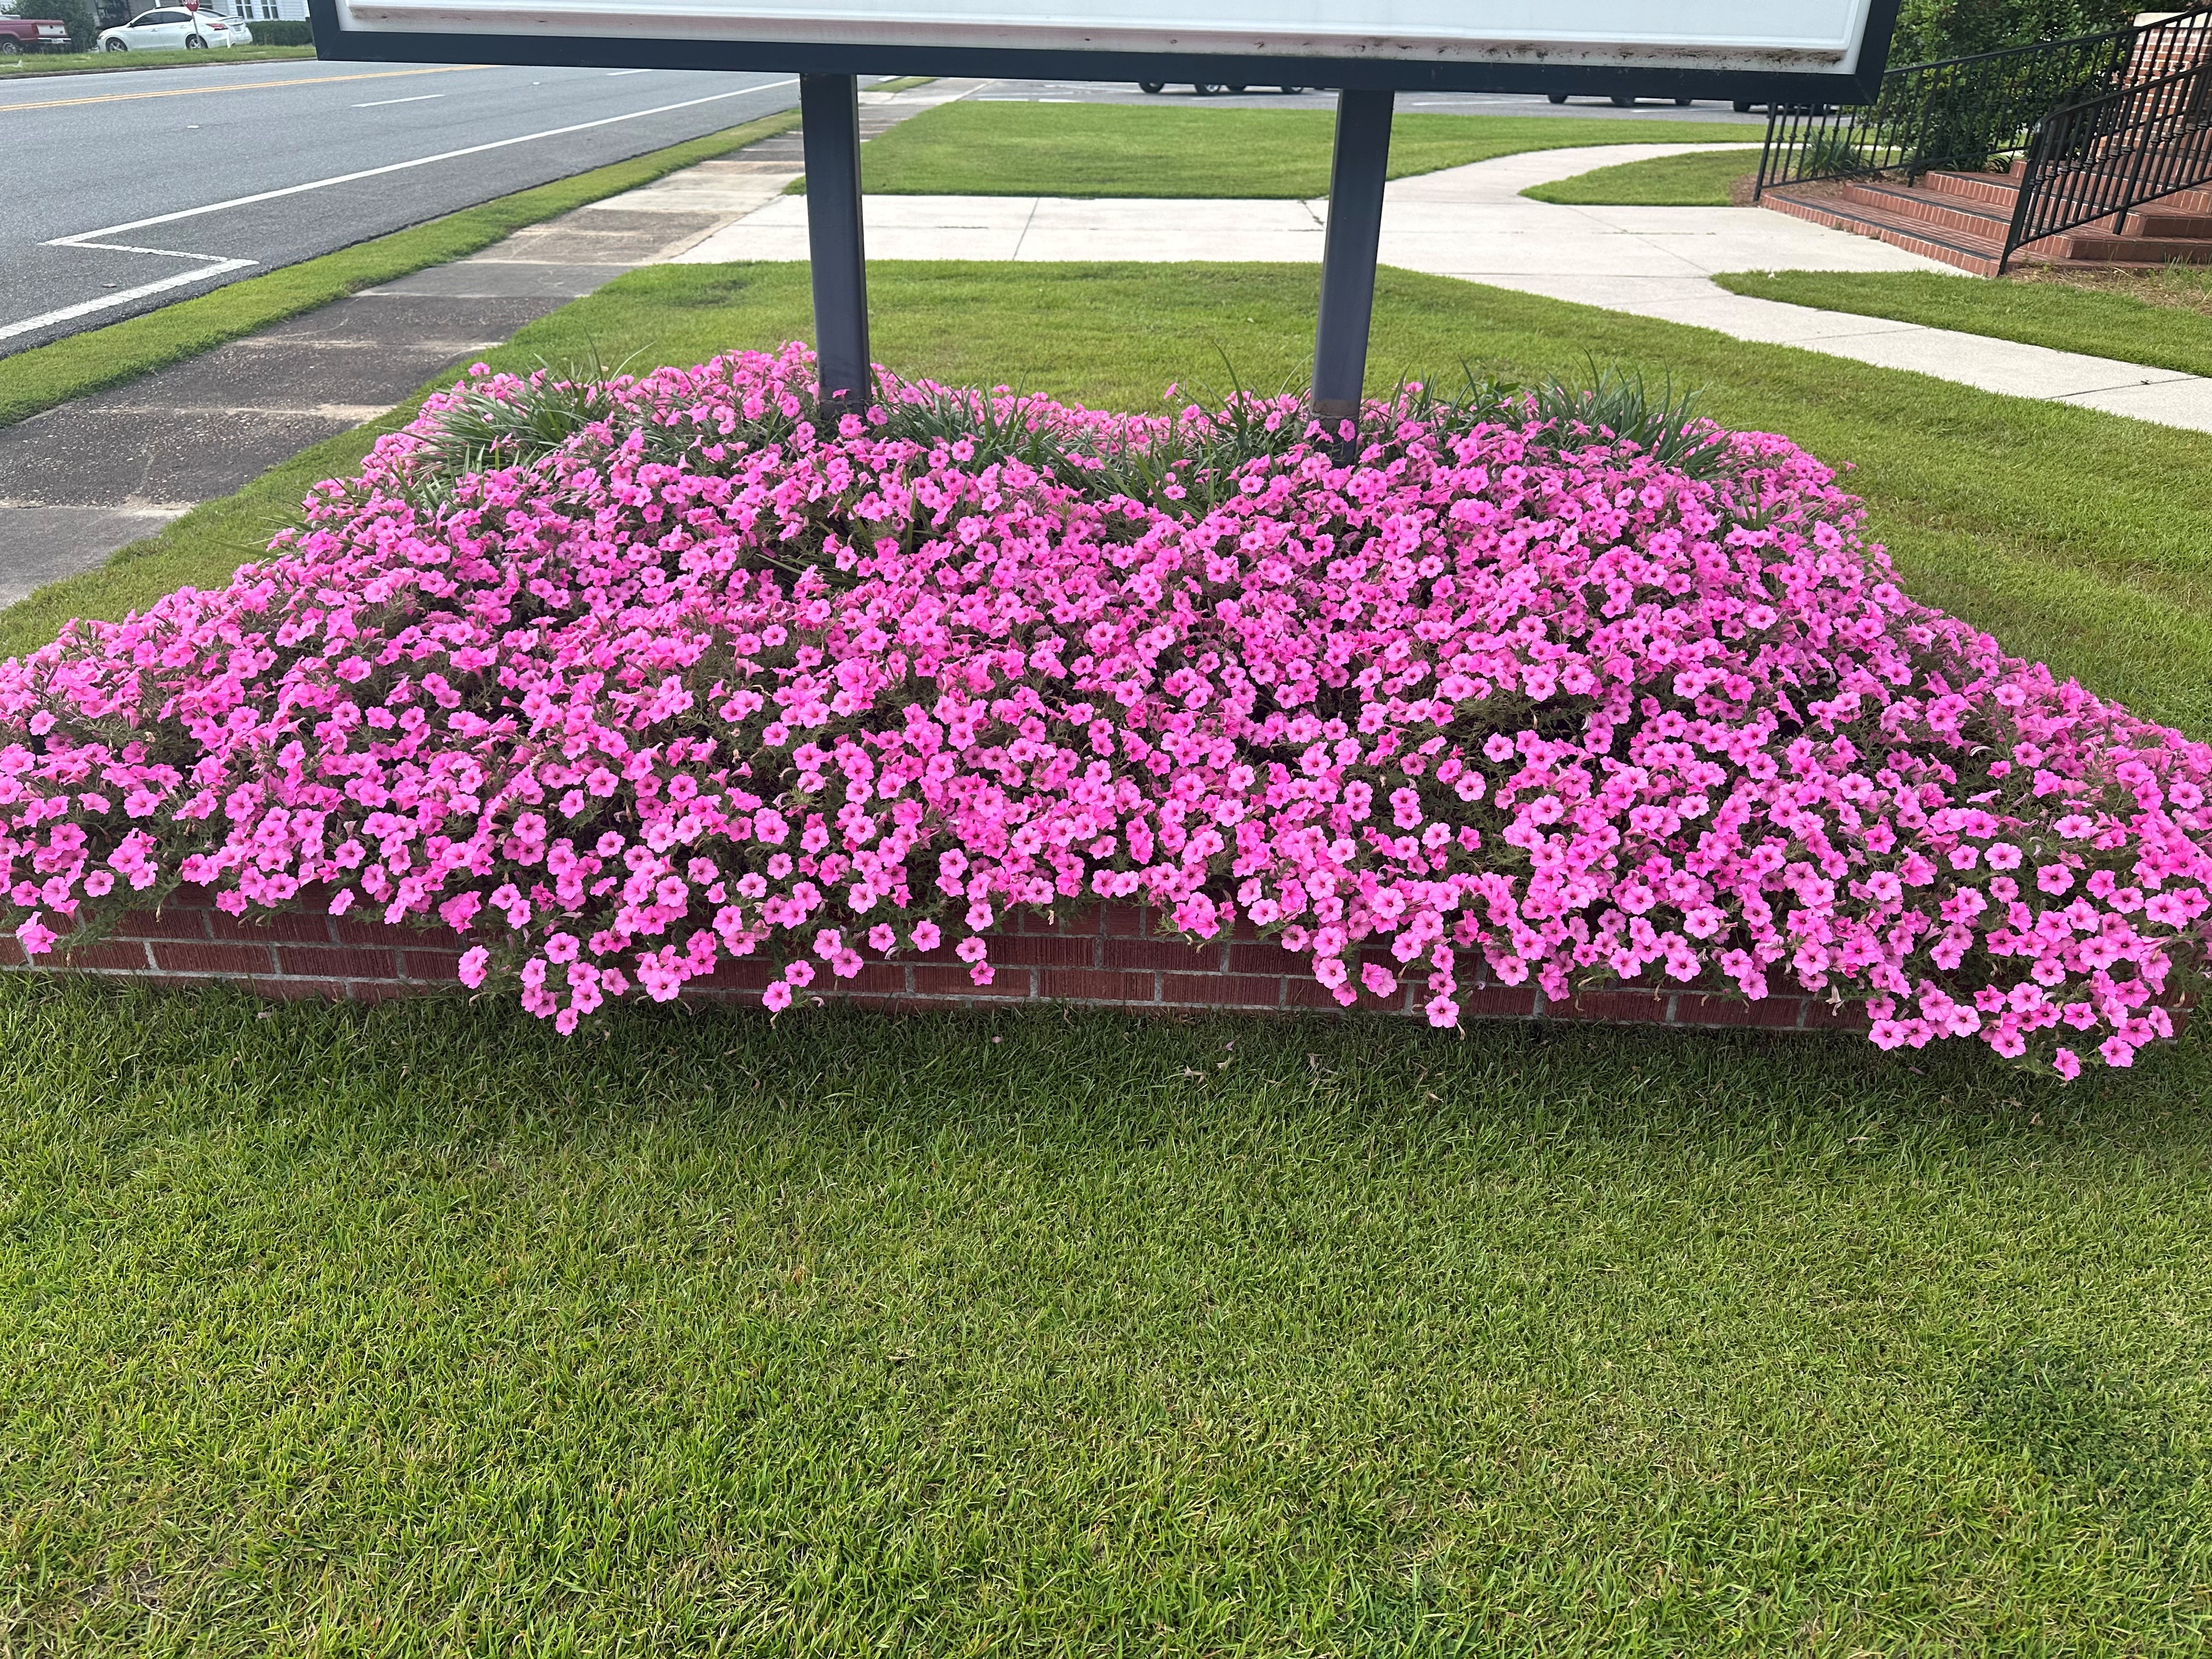
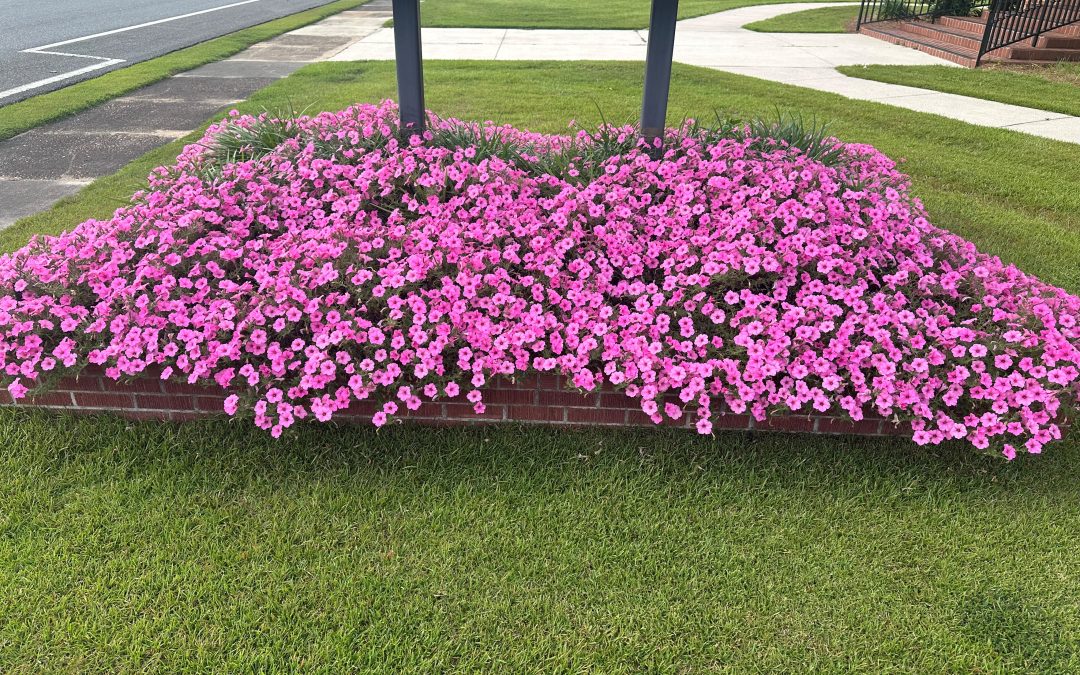
Supertunia Vista® Bubblegum® in mid-June 2025. Photo courtesy of Daniel Leonard.
There are several sub-series of Supertunia, all are good in my experience, but my favorite and the most resilient to heat is definitely the Vista® series, specifically the cultivar Vista® Bubblegum®. Vista® Bubblegum® is a massively growing Petunia that can spread in excess of 4’ and possesses vivid pink flowers with dark pink veins. Adding to the appeal of Vista Bubblegum is its self-cleaning nature, meaning no deadheading is required and it will flower more or less continuously throughout the life of the plant. However, the most outstanding aspect of the plant is its heat tolerance (for a Petunia). In general, Petunias in the Panhandle are planted in the fall, grow through the *usually* mild winter months, flower in the spring and then begin to languish in the heat of May-June. Vista® Bubblegum® chooses instead to laugh at the heat and mine (planted in early November) are still going strong, unfazed by the heat, in the second week of a very hot July. This plant just won’t quit. Pretty impressive stuff.
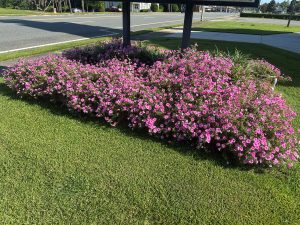
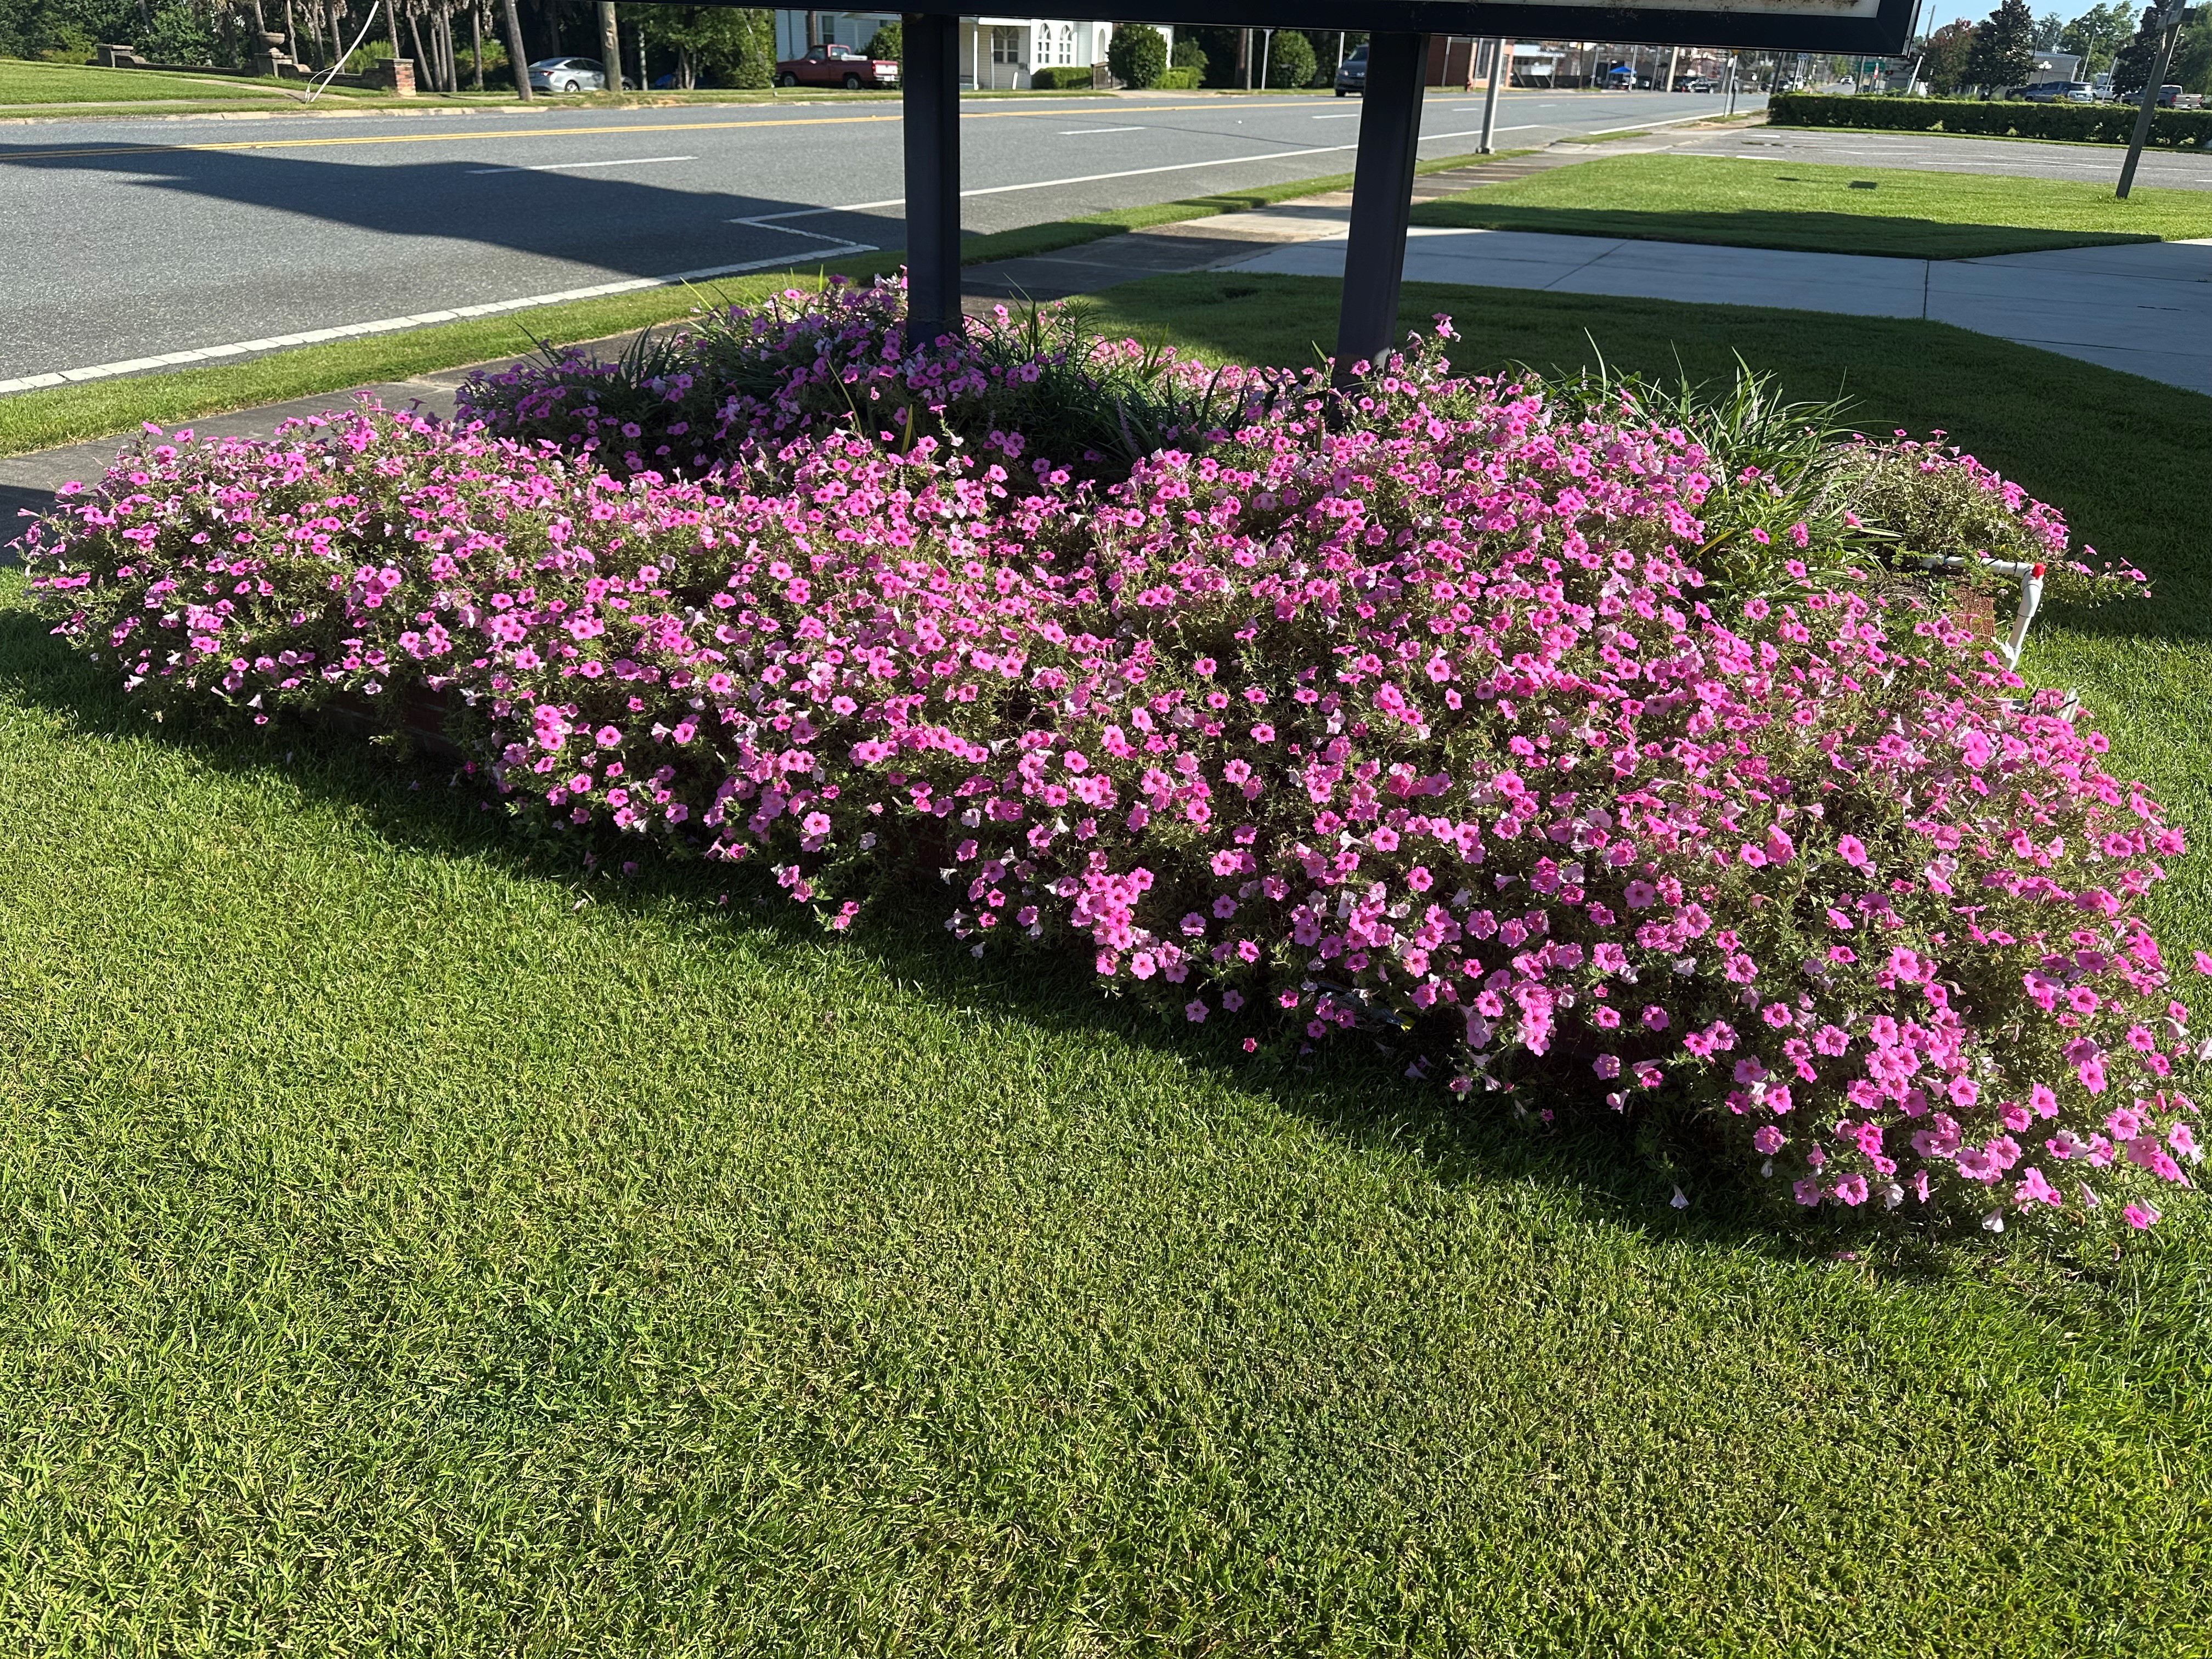
Supertunia Vista® Bubblegum® beginning to look a little tired in mid-July 2025 but still going strong! Photo courtesy of Daniel Leonard.
For best results with Vista® Bubblegum® and all other petunias, be sure to site in a location with full sun and keep regularly watered and fertilized, especially if grown in containers, as these prolific bloomers require a lot of energy to support the months-long flower show. Unfortunately, unless you already have Vista® Bubblegum® in your garden, you’ll have to wait until the fall to find more in nurseries, but these plants and its series siblings are well worth the wait! Plant a few this fall and enjoy beautiful color throughout next spring and summer.
For more information on growing petunias or any other horticultural topic, contact your local UF/IFAS Extension County office. Happy gardening!
by Joshua Criss | Jul 6, 2025
The Panhandle has experienced a significant amount of rain lately. It seems like there isn’t a day that goes by in which even walking out the door seems impossible due to the downpour. While this is hard enough for the people living in the area, without a mitigation strategy, your lawn and landscapes may be suffering just as much. The good news is that there are several methodologies to usher the excess into local surface water reservoirs.
The Issue
Before we get started, let’s first talk about why storm water needs to be managed. Storm water can be defined as any rainfall failing to infiltrate the soil. In short, it is water that flows from your property onto impervious ground into storm water drains and ultimately into the Gulf of America.
This water can and will carry pollution from houses, pet waste, and heavy metals, amongst other things, into our local waters. All of that is before we even account for nitrogen moving from the atmosphere during these storms. All of this may be detrimental to local aquatic populations, ultimately leading to eutrophication due to excess nutrients. In the worst cases, these nutrient-rich waters cause red tide, which limits recreational use and fishing in our area.
The good news is that homeowners can take specific actions to mitigate the risks associated with storm water. The three primary types of these are rain gardens, swales, and rain barrel catchment systems.
Rain Gardens
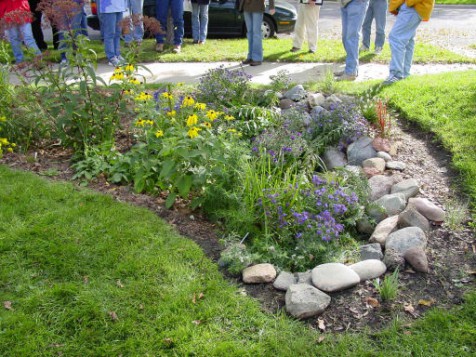
A rain garden is an area planted with vegetation designed to prevent mass water flow on your property. They may be sited in multiple locations, including sloped yard areas, or those in which you notice pooling following a rain event.
Carve out the area and backfill with porous soil materials. The plants you’ll want to select for this garden should be able to tolerate drought followed by periods of flooding. One solid strategy for this mitigation system is to direct the downspouts from your house into one of these garden spaces. Between the turfgrasses planted along the water’s path and the root systems of the plants within the rain garden, storm water will be pushed through a biofiltration system while being redirected from the local watershed. To learn more about rain gardens, consult these document.

UF/IFAS Photo: Theresa Watkins
Swales
Swales are like rain gardens in that their primary purpose is to redirect water flow. While these may be outfitted with vegetative plantings termed bioswales, the highway for water flow in traditional swales typically consists of turfgrasses.
These are quickly draining soils, aided further by the thick root masses inherent to grass. Where they differ from rain gardens is in the amount of work they require. Critical to this system is selecting turfgrass species suitable for the site and applying the correct water, fertilizer, and mowing practices. These practices allow for strong and stress-free grass growth.
Rain Barrels
Last, though certainly not least, are rain barrels. These may be found at the downspout of gutter systems attached to houses. Their purpose is to collect the stormwater flowing from the roof. They can be a handy tool in eliminating stormwater runoff. To learn more about designing rain barrel catchment, consult this document.

UF/IFAS Photo
Stormwater is a significant concern in our lawns and landscapes. If allowed to go unchecked, it provides an avenue for pollutants and excessive nutrients to enter our waterways. Implementing the strategies in this article can significantly reduce these risks. For more information on stormwater management or any horticulture topic, refer to your local Extension office.
by Donna Arnold | Jul 6, 2025
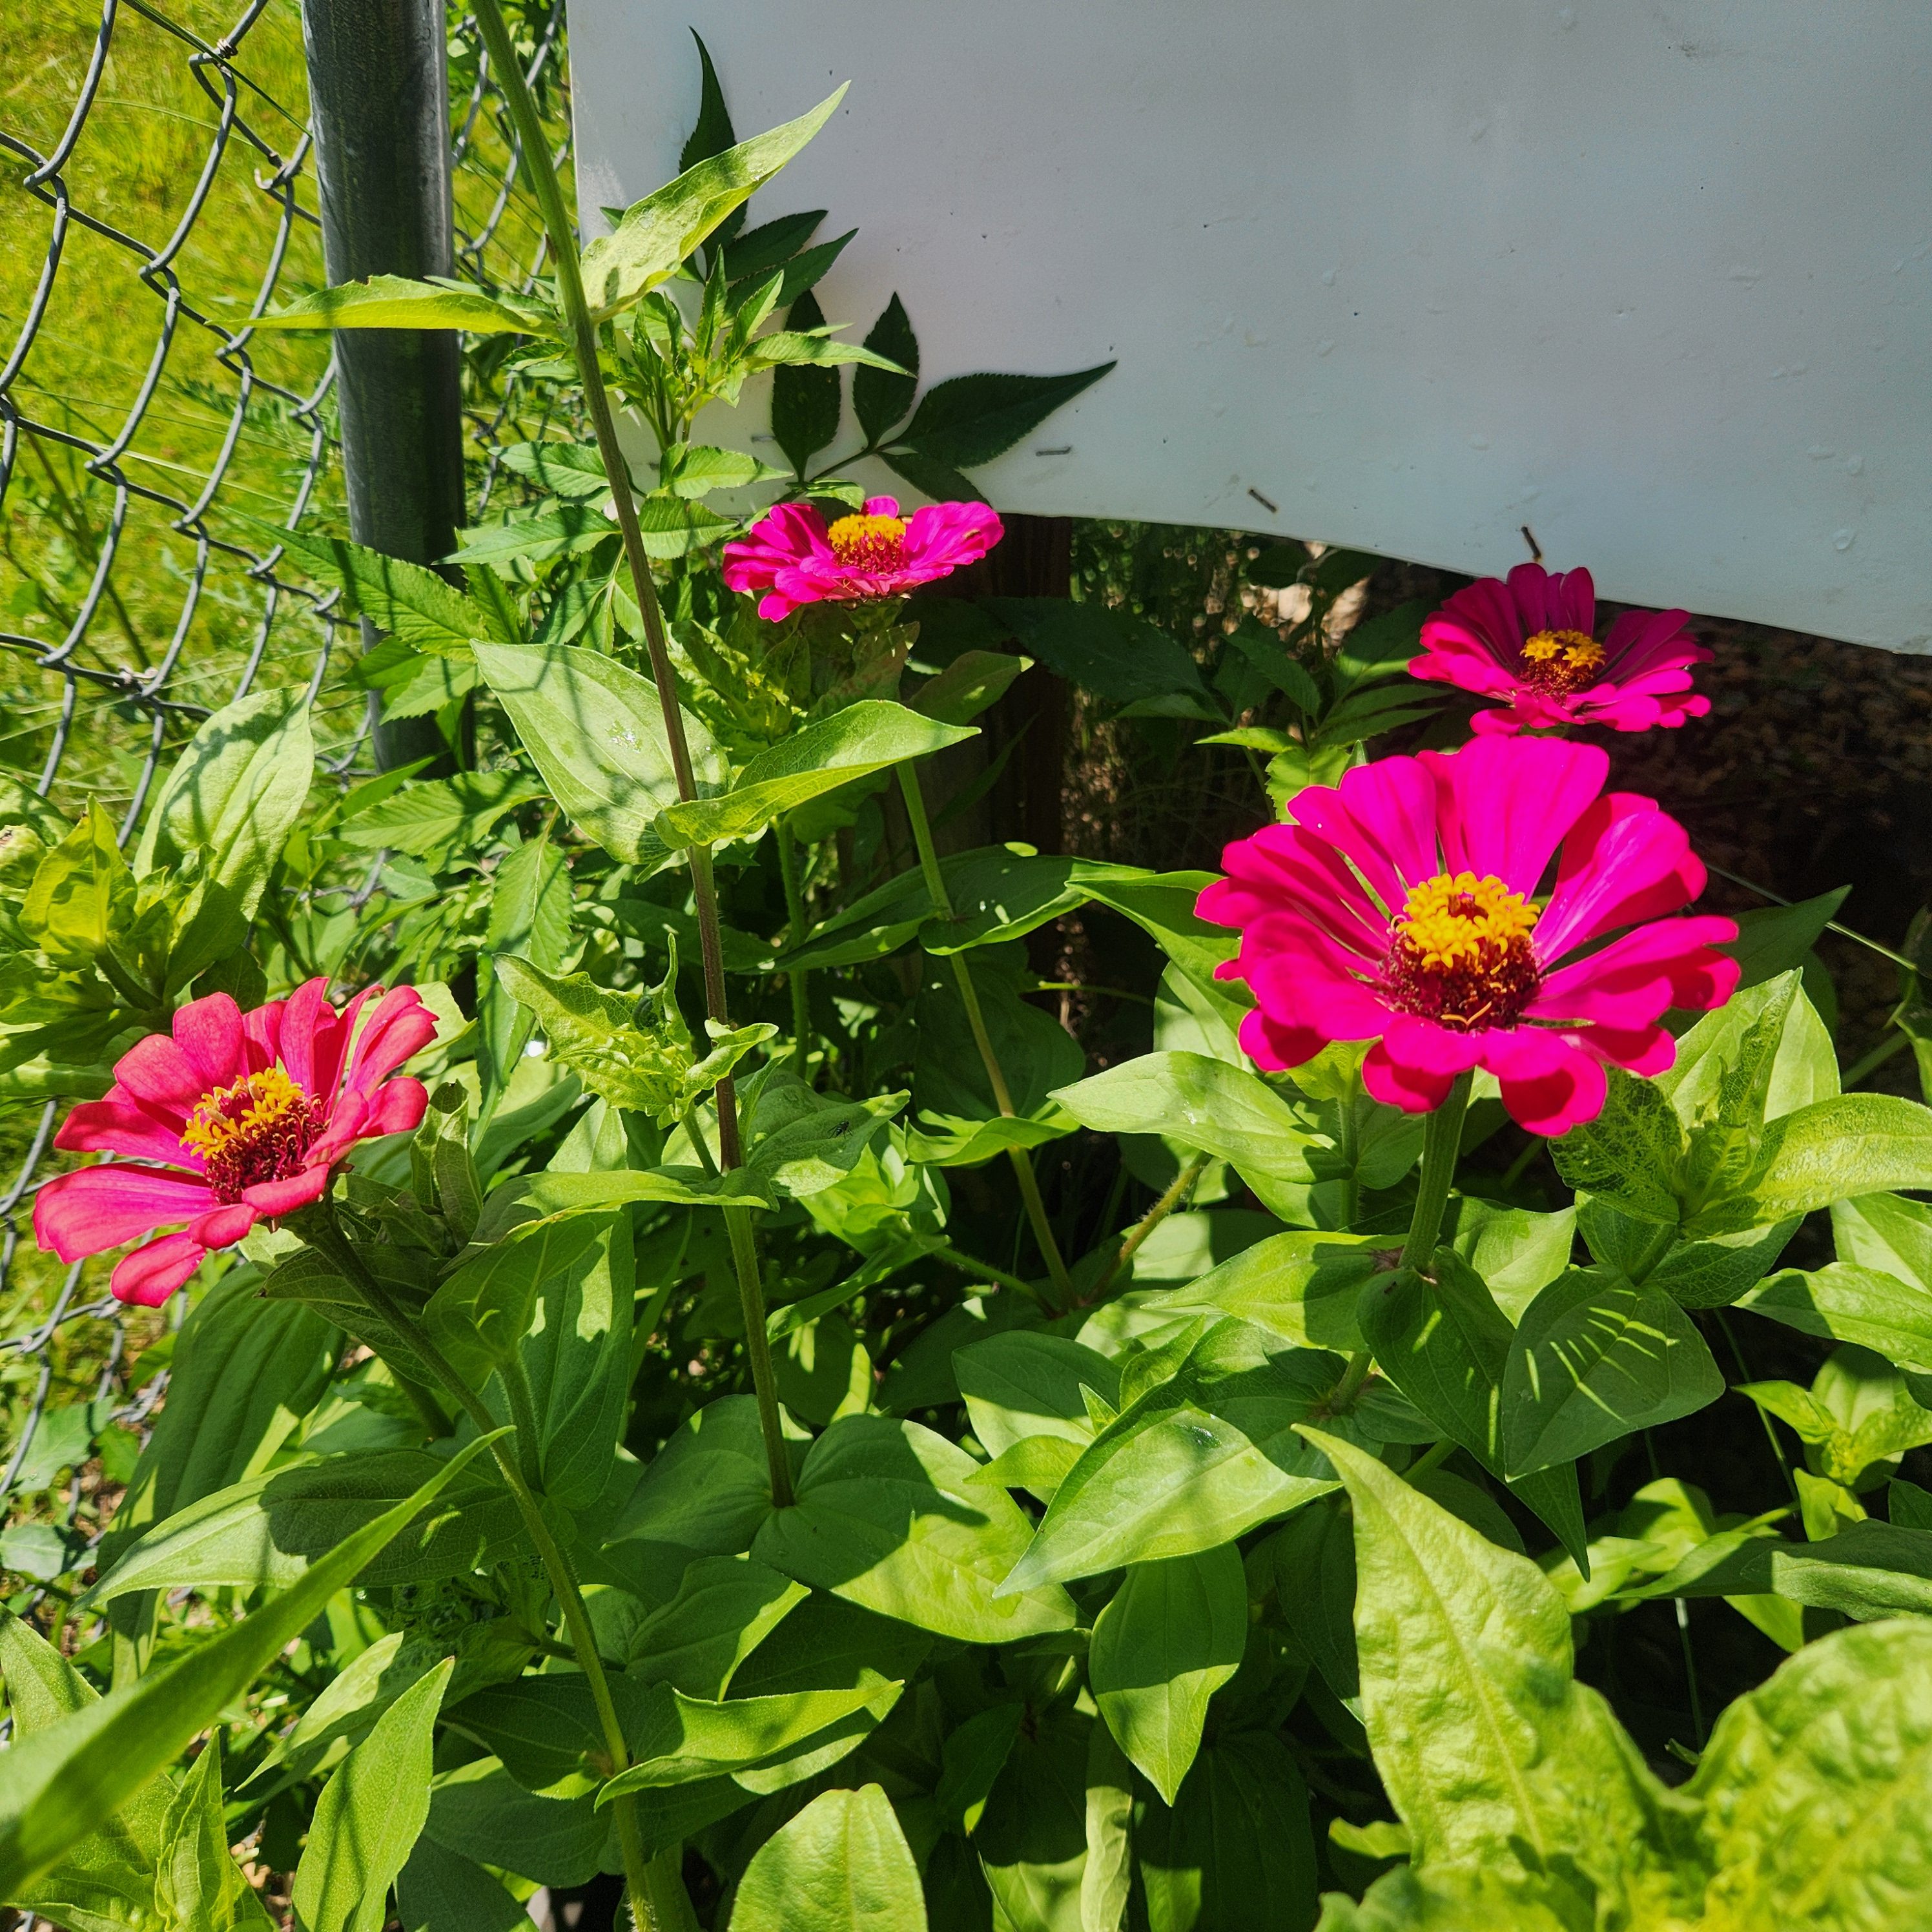
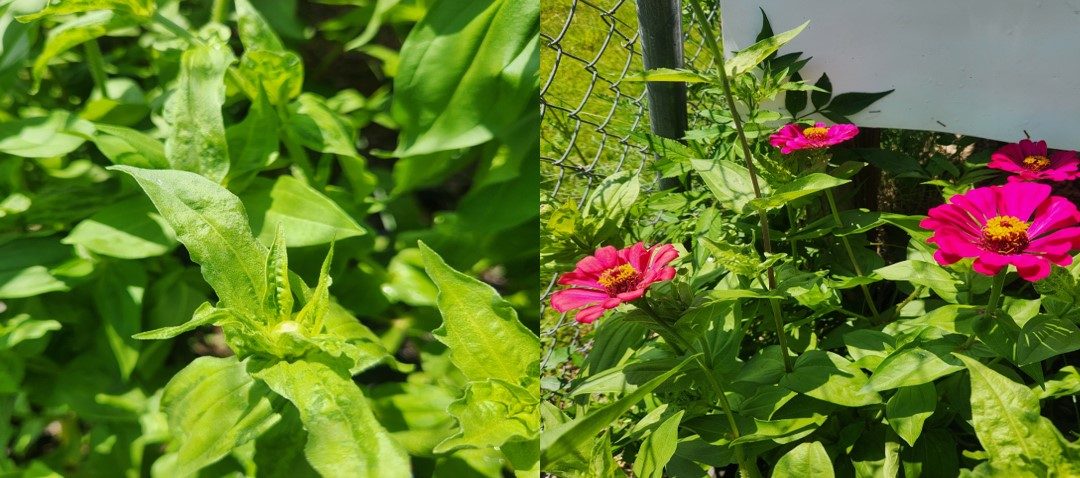
Zinnia Woes: What’s Causing Terminal Shoot Curling?
On a quiet stroll to the greenhouse early Monday morning, something unusual caught my eye—our zinnia plants looked noticeably different. Their vibrant green shoots had begun to curl at the tips, a subtle but clear sign that all was not well. Do not be alarmed if your zinnias are showing similar symptoms—it is a common issue. Curling at the terminal shoots is often a plant’s way of signaling stress. Whether it is due to environmental factors, pest activity, or nutrient imbalance, these twisted tips are clues worth investigating. Understanding the “why” behind the curl is the first step toward helping your zinnias return to their radiant, blooming selves
Common Culprits Behind Curling Zinnias
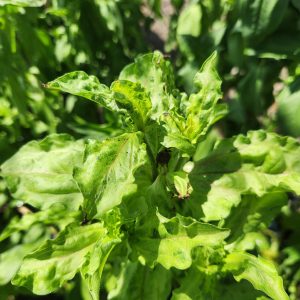
Environmental Stress: Zinnias are sun-lovers, but extreme heat, strong winds, or sudden temperature swings can cause their terminal shoot to curl as a defense mechanism.
Watering Woes: Both overwatering and underwatering can lead to leaf curls. Too much water suffocates roots, while too little causes drought stress—either way, the plant reacts by curling its leaves.
Pests: Aphids, thrips, and spider mites are notorious for feeding on tender new growth. Their sap-sucking habits distort leaves and can transmit viruses.
Diseases: Fungal infections like powdery mildew or bacterial leaf spot can cause curling, especially when combined with poor air circulation.
Nutrient Deficiencies: A lack of nitrogen, magnesium, or manganese can lead to curling and yellowing of new growth. Soil testing can help pinpoint the issue.
What You Can Do:
- Ensure consistent watering—moist but not soggy soil is ideal.
- Inspect regularly for pests and treat with neem oil or insecticidal soap.
- Improve air circulation by spacing plants properly and pruning overcrowded areas.
- Feed with a balanced fertilizer and consider a soil test if symptoms persist.
- Remove and destroy severely affected plants to protect the rest of your garden.

Healthy zinnias reward you with bold, cheerful blooms. A little detective work now can keep your garden dazzling all season long. For more information on Zinnias, contact your local Extension office or follow the links below.
https://gardeningsolutions.ifas.ufl.edu/plants/ornamentals/zinnia/
https://edis.ifas.ufl.edu/publication/FP623
https://nwdistrict.ifas.ufl.edu/hort/category/annuals-2/page/2/#:~:text=When%20planting%20zinnias%2C%20it’s%20recommended,than%20the%20foliage%20whenever%20possible.
by Julie McConnell | Jun 26, 2025

Sunflower after the rain. Photo: J. McConnell, UF/IFAS
Summer showers are finally giving gardens relief, but in addition to happy flowers, mosquitoes are also benefitting from the rainfall. Mosquitoes are not only a nuisance, but they can also transmit diseases and parasites to people, pets, and livestock so managing them on your property is a matter of public health!
The knee-jerk reaction to mosquitoes is to try to kill the blood-sucking flying fiends, but targeting this life stage will not solve the mosquito problem. Instead, focus your efforts on breaking up the breeding cycle to reduce the population. Less ideal breeding sites equals less larvae (juvenile mosquitoes) and pupae which equals less biting adults!

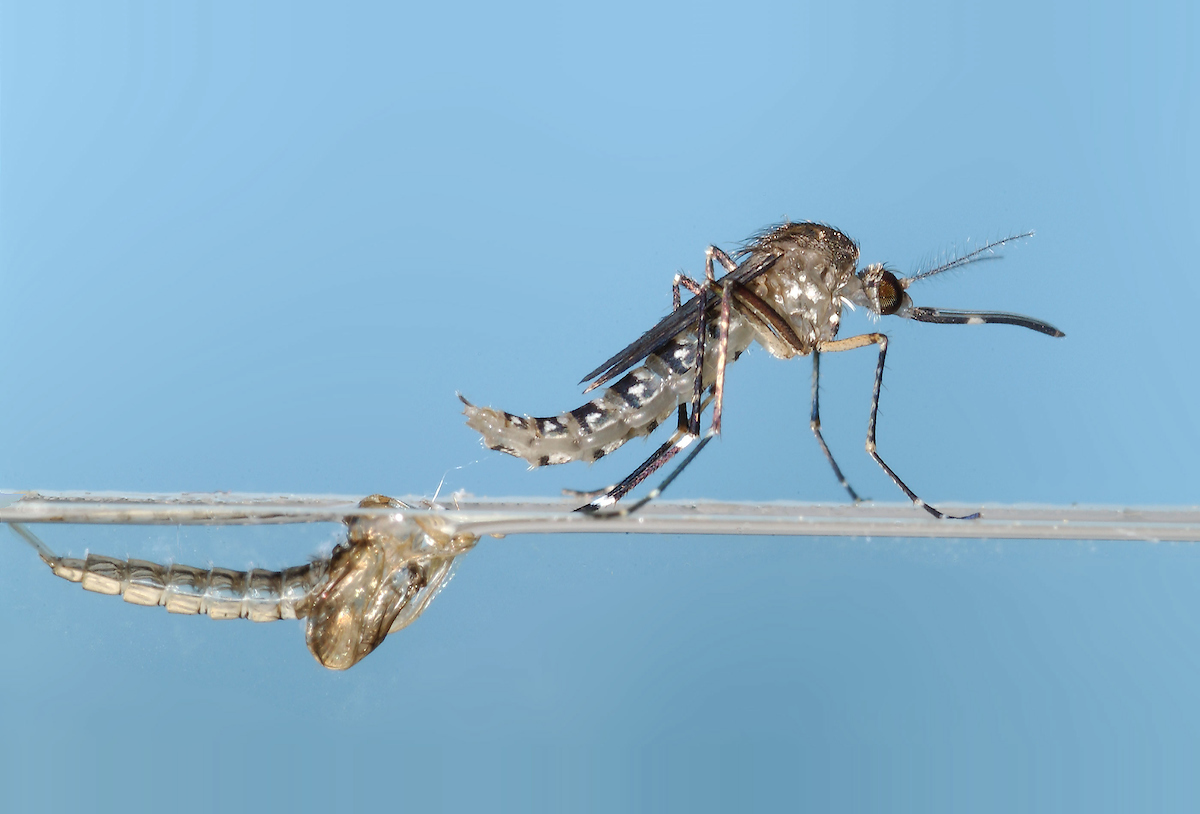
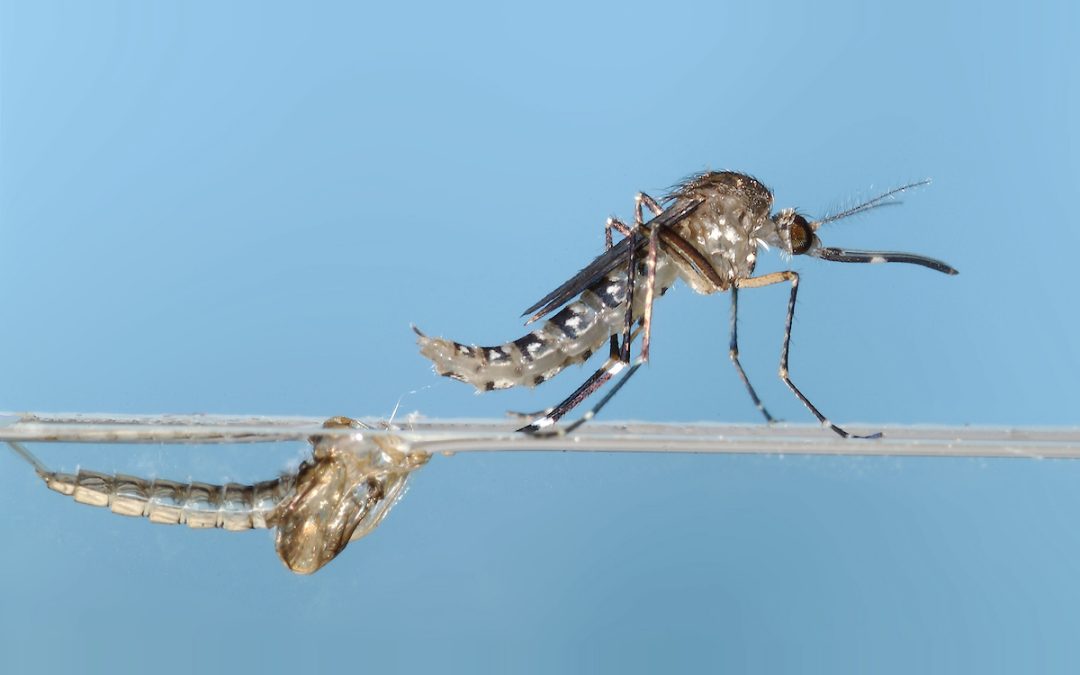
A female black salt marsh mosquito emerges from submerged pupal skin. UF/IFAS File Photo
In addition to being more effective than targeting adults that can fly away or avoid insecticides, most of your breeding site reduction methods are free or low cost; the biggest investment is your time! Step one is to recognize potential breeding sites on your property. Most people recognize that a stack of tires, buckets full of water, or even that decorative bird bath are potential breeding sites but there are also less obvious ones. A covered grill that has an indention that holds a few tablespoons of water, boats or kayaks, children’s toys, gutters that have accumulated leaves or other debris, the saucer under your container plant, or the leaf axils of bromeliad plants are all potential breeding sites.
So, what do you do about this? When practical dump or drain out the water every 3-4 days and wipe down any vertical surfaces of containers where mosquito eggs could be laid. If you are unable to drain or dump, consider treating the water with Bti (Bacillus thuriengiensis israelensis) which is a targeted biological control that only affects mosquitoes, black flies, and fungus gnats. Bti is a naturally occurring bacteria that impacts the digestive system of a few select species in the order Diptera (flies). It is not toxic to people, pets, or wildlife and depending on the formulation can last several weeks before reapplication is necessary. Commonly sold as “mosquito dunks” or “mosquito bits” this insecticide is sold at garden centers and home improvement stores and is relatively inexpensive. As with any pesticide, follow all instructions on the label.
Want to know more about these topics? Visit the references listed below:
Florida Resident Guide to Mosquito Control
CDC Mosquito Control: What you need to know about Bti