by Mary Salinas | Apr 21, 2016
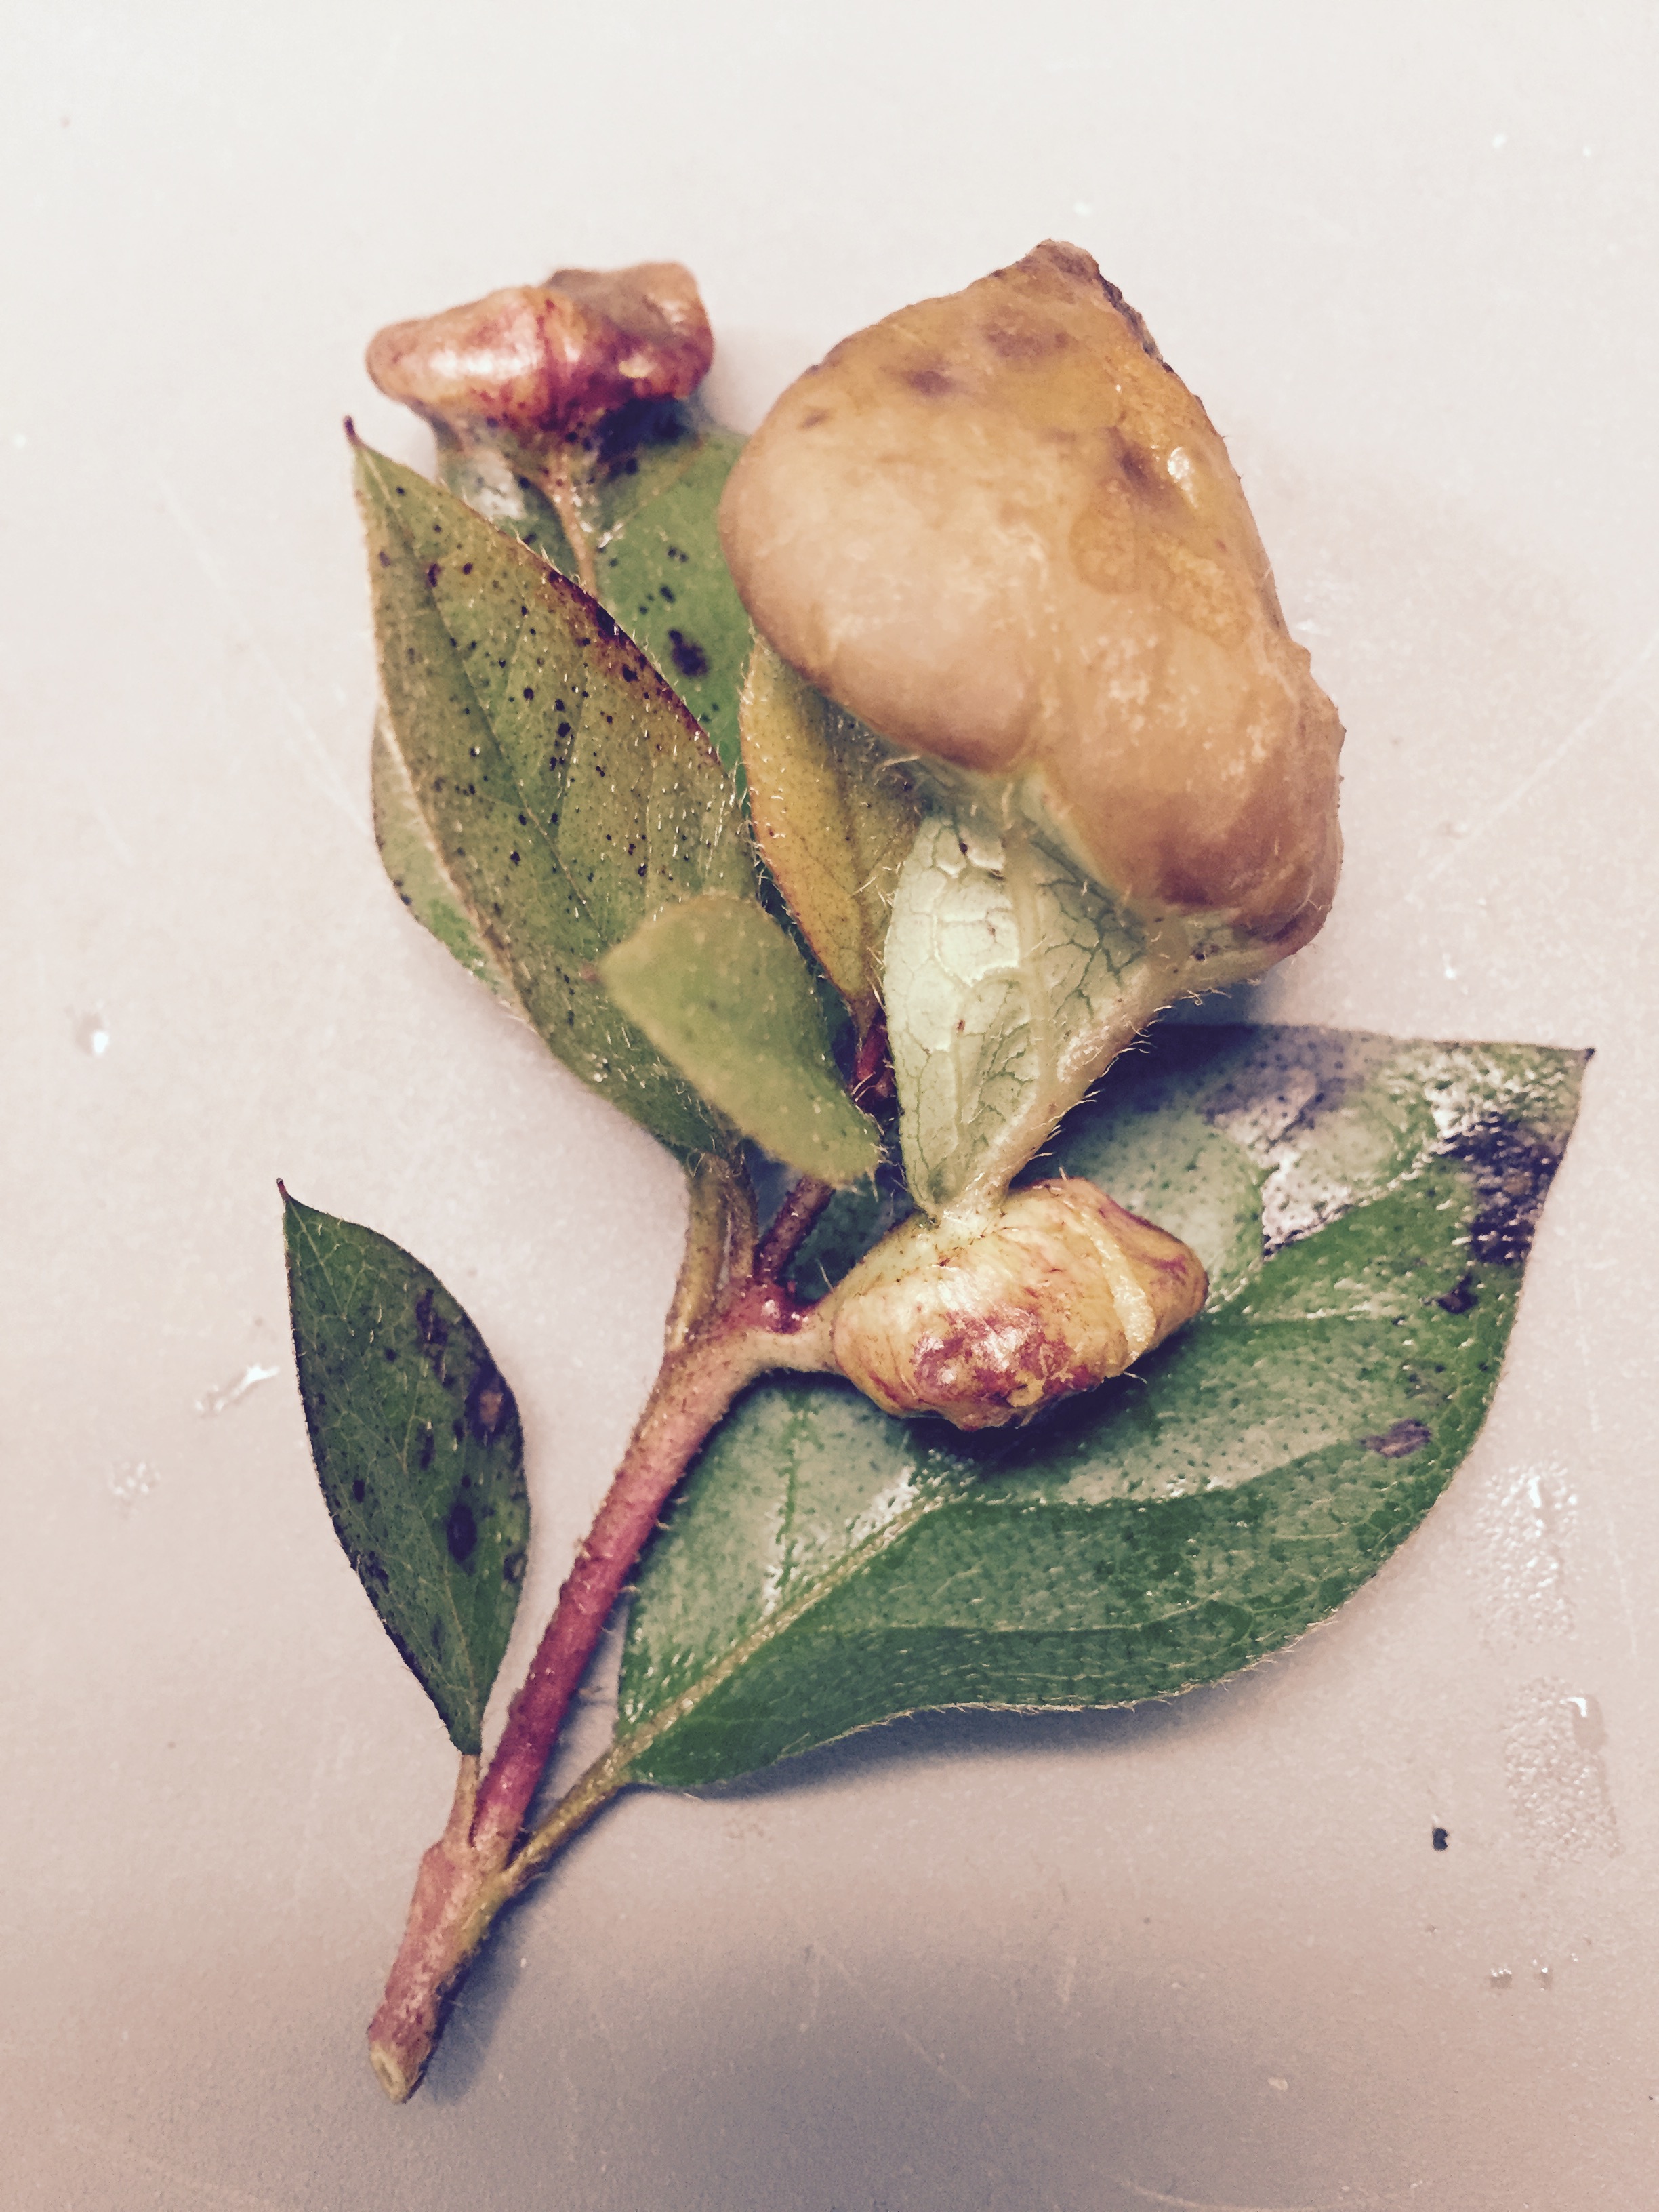
Recently, a home gardener brought in some strange looking new leaves on his camellia. The youngest leaves were thick and fleshy and looked more characteristic of a succulent type plant than a camellia. What’s wrong with these leaves?

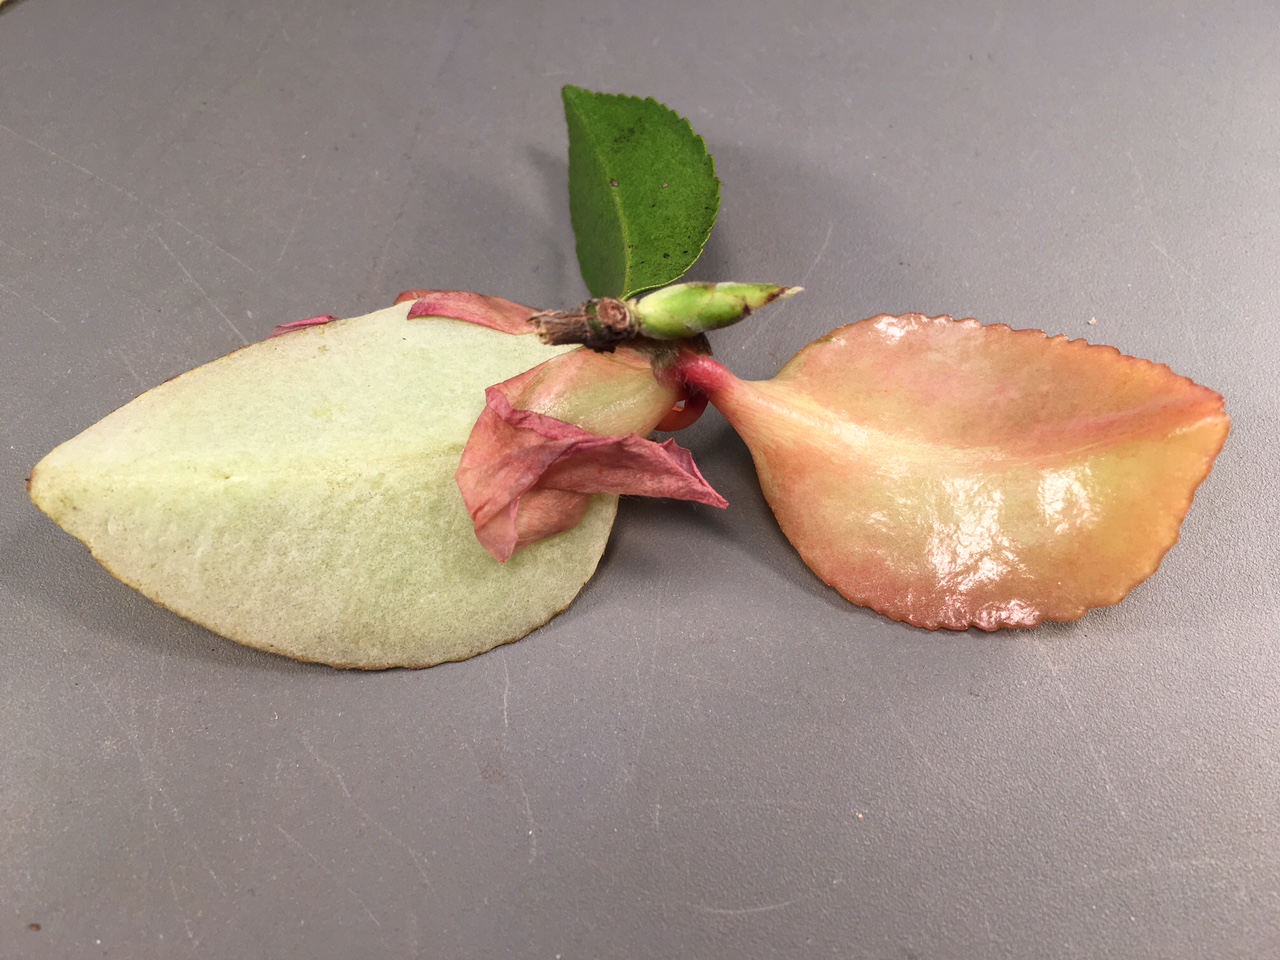
Camellia leaf gall infection resulting in fleshy light green and pink leaves. Note the contrast with a healthy uninfected leaf. Photo credit: Mary Derrick, UF/IFAS.
The culprit is a fungus Exobasidium camelliae whose spores are carried by the wind in search of camellias. This fungus infects camellias, especially sasanquas; it will not infect any other plant species. The disease it causes is known as camellia leaf gall and is most commonly seen here in the Florida panhandle in April. The frequent wet weather this winter and spring created favorable conditions for disease development.
The symptoms of the disease are easy to distinguish and really stand out against the typical dark green leaves of the camellia. Leaves become thick and fleshy and the color ranges from light green to cream to pink. As the disease progresses and the galls mature, the lower leaf surfaces of the leaves will peel away to reveal a white underside laden with fungal spores. Wind and rain will take these new spores to other parts of the camellia or other camellias in the vicinity where they will lay dormant and cause infection the following spring. Eventually the galls will turn brown and dry up.

The underside has pealed away revealing white fungal spores. Photo credit: Mary Derrick, UF/IFAS Extension.
Camellia leaf gall is not a serious disease that requires chemical intervention for the homeowner. Simply remove the galls and put them in the trash. The earlier you remove the galls the better; the risk of further infection can be reduced if the galls are removed before the undersides peel and expose their spores. Any that have fallen to the ground can spread the disease and need to be removed.
For more information:
Camellias at a Glance
Camellia Leaf Gall

by Matthew Orwat | Jan 13, 2016
Crapemyrtle Scale, UF / IFAS Extension
During cold January weather, one doesn’t often think about spraying fruit trees and ornamental shrubs for spring insects and diseases. It’s just not on the radar. The fact is January and February are the best time to apply dormant sprays to combat insect and disease issues. Many ask, “What are dormant sprays” ?
Dormant sprays act on insects or disease pathogens differently. Many insects overwinter on trees and shrubs, either as eggs or immobilized in a protective shell (scale insects). Horticultural oils applied during cool dormant conditions work by smothering the eggs of some insect species or encapsulated scale insects. Since they cannot breathe, they die.
On the other hand, dormant sprays containing copper or sulfur actually kill latent fungal spores that are ready to infect the moment weather warms. They also burn tender young plant tissue, so can only be used when the plant is not actively growing. These preventative sprays can delay disease incidence in early spring and allow for reduction or elimination of regular fungicide applications. The old adage “an ounce of prevention is worth a pound of cure” surely applies to these situations.
There are several products on the market for dormant applications.
Dormant oil is a type of horticultural oil, made of refined petroleum products, for application on trees or shrubs when the trees are not actively growing. It has been in use for over 100 years. They are effective in the suppression of scale insects and mites. Care must be used to not apply them when daytime temperatures are above 75 degrees or night temperatures below 28 degrees. Other horticultural oils exist that can be applied during the growing season to control soft-bodied insects, but not during extremely hot weather. Many different brands exist, some are certified organic by OMRI. They can be purchased at most garden centers, but the best selection is usually found at your independent nursery or farm store.
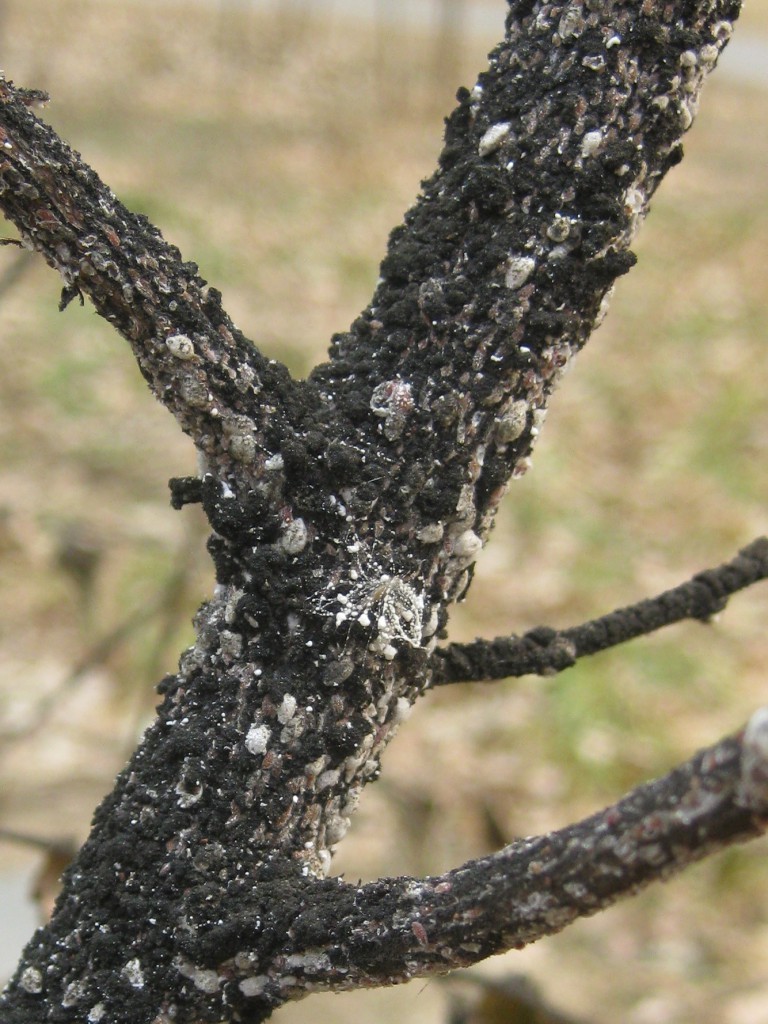
Cottony Cushion Scale, Image Credit, Matthew Orwat, UF / IFAS Extension
Dormant fungicides can be classified into two groups. Those that contain copper and those that contain sulfur. The most common preventative remedy for fungal disease is lime-sulfur. It is applied to dormant plants and actually sanitizes the stem, killing all fungal spores. It cannot be used during the growing season since it burns leafy tissue. Caution must be taken when mixing and loading since, being an acidic product, can burn the skin. Wear chemical resistant gloves when applying (bought at your local hardware store for $4.00-$10.00), safety goggles and follow all label directions carefully. Also, never apply lime-sulfur within one month of horticultural oil applications. It should be applied in early to mid February, avoiding hard freezes for the 24 hours around application time.
Dormant copper sprays are effective on both bacterial and fungal pathogens and used primarily on fruit crops for the suppression of many fruit diseases including fire blight, bacterial leaf spot, powdery mildew, downey mildew and anthracnose. One popular option, the “Bordeaux Mixture” blends copper with lime. This lime reduces the acidic nature of the copper, thus reducing tissue damage when applied to plants. Always read the label for proper personal protective equipment and dosage rates, to avoid copper toxicity.
For more information, contact your local extension agent or consult these extension publications from: Disease Management Strategies, and Pest Control Using Horticultural Oils .
by Sheila Dunning | Sep 16, 2015
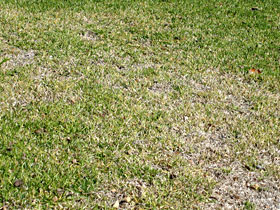
“We have replaced this grass several times over the past few years; and it’s dying again.” I have heard this complaint too many times this summer. Last summer’s heavy rain, the stress of January’s icy weather, and this year’s extended summer have contributed to widespread outbreaks of Take-All Root Rot, a soil-inhabiting fungus Gaeumannomyces graminis var. graminis.
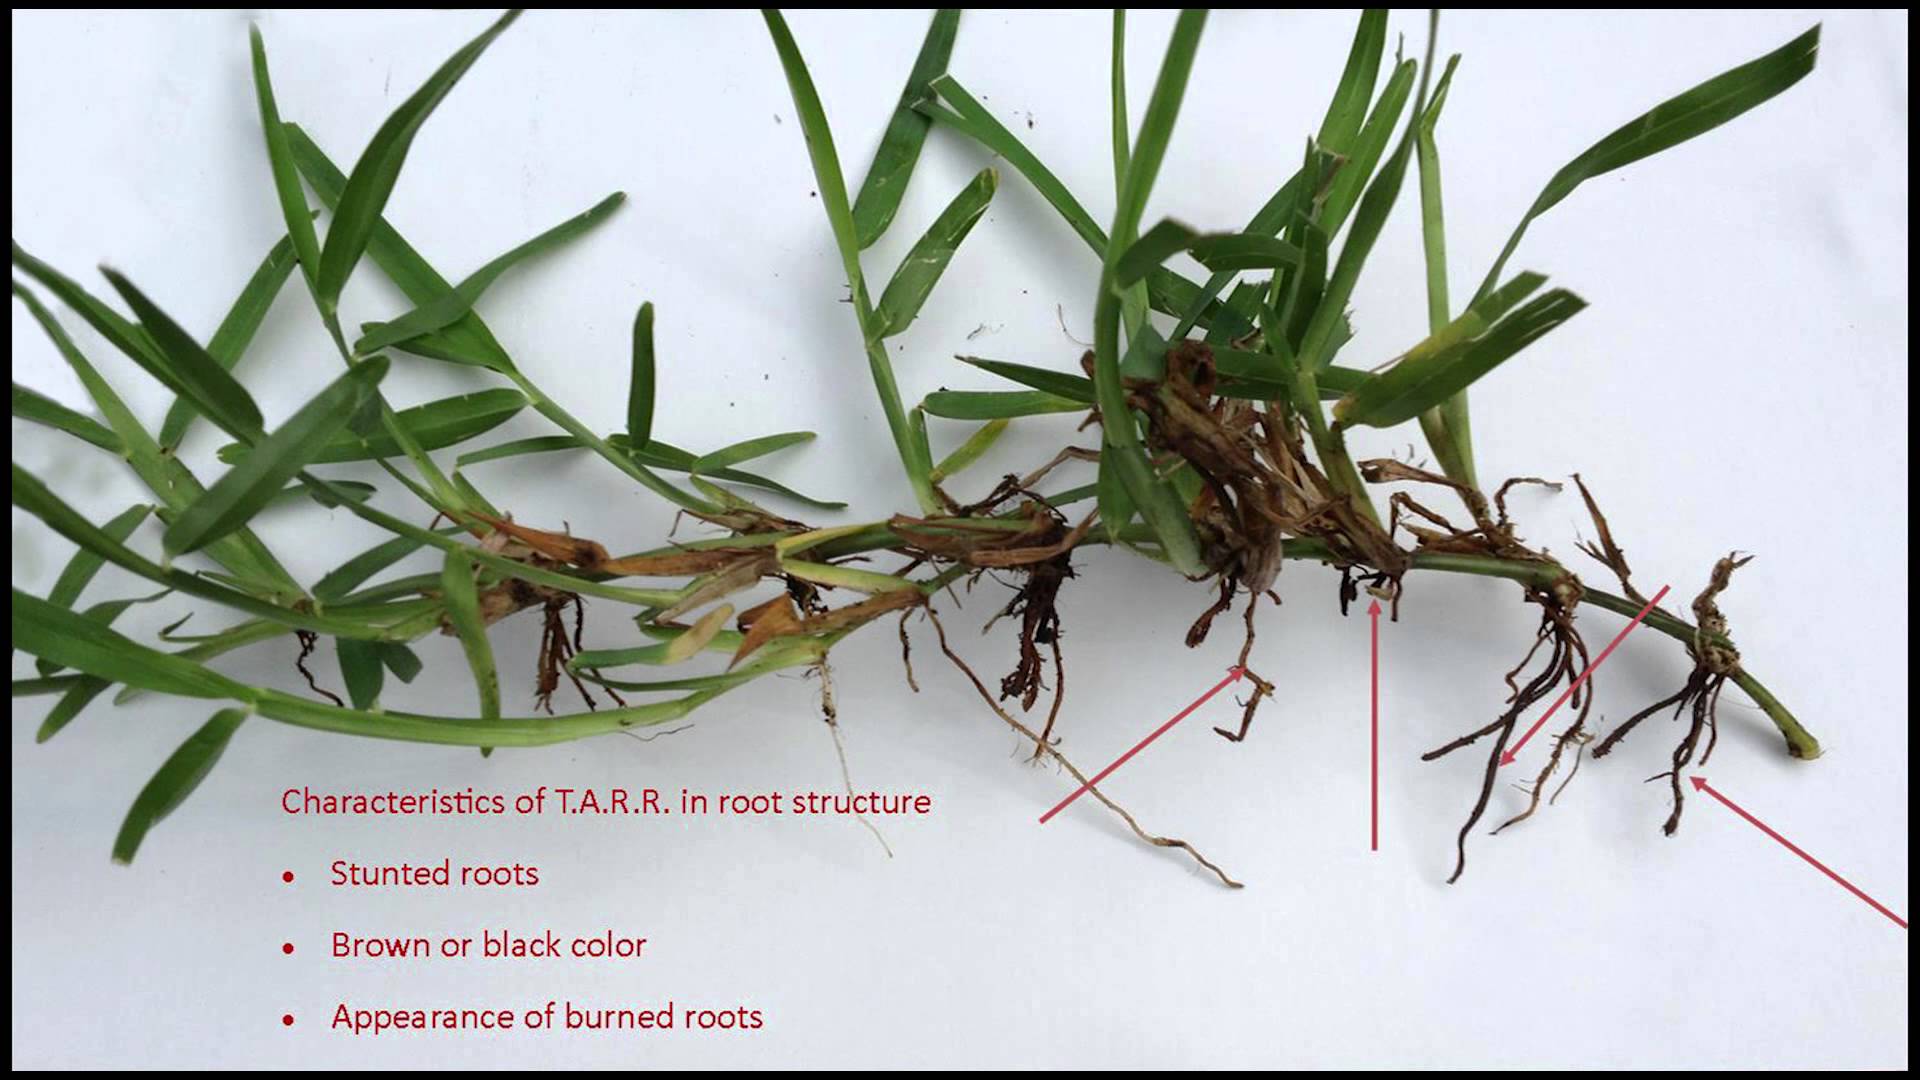
Symptoms of Take-All-Root-Rot. Photo credit: Sheila Dunning, UF/IFAS.
This disease causes yellow grass patches ranging in diameter from a few inches to more than 15 feet. The symptoms first appear in the spring, but the disease can persist all summer and survive the winter. Over time, the entire area dies as the root system rots away. The pathogen is naturally present on warm-season turfgrass roots. High rainfall and stressed turfgrass trigger the disease.
Since the roots are affected, they are not able to efficiently obtain water or nutrients from the soil, nor are they able to store the products of photosynthesis, which result in the loss of color in the leaves. By the time the leaf symptoms appear, the pathogen has been active on the roots for several weeks, probably longer; the disease has been there potentially for years. If the turfgrass is not stressed, leaf symptoms may never be observed.
This disease is very difficult to control once the aboveground symptoms are observed. Measures that prevent or alleviate stress are the best methods for controlling the disease. Any stress (environmental or manmade) placed on the turf weakens it, making it more susceptible to disease. Remember, that every maintenance practice, fertilizer application, and chemical (especially herbicide), application has an impact on turfgrass health. Cultural practices that impact the level of stress experienced by a lawn include:
- proper turfgrass species selection
- mowing at the correct height
- irrigation timing, frequency and volume
- fertilizer: nitrogen and potassium sources and application quantities
- thatch accumulation, and
- soil compaction
The selection of turfgrass species should be based on existing soil pH, sunlight exposure, use of the area and planned maintenance level.
Mower blades must be sharp to avoid tearing of the leaves. Additionally, turfgrasses that are cut below their optimum height become stressed and more susceptible to diseases, especially root rots. When any disease occurs, raise the cutting height. Scalping the grass damages the growing point. Raising the cutting height increases the green plant tissue available for photosynthesis, resulting in more energy for turfgrass growth and subsequent recovery from disease.
If an area of the lawn has an active fungus, washing or blowing off the mower following use will reduce the spread of the disease to unaffected areas.
The amount of water and the timing of its application can prevent or contribute to disease development. Most fungal pathogens that cause leaf diseases require free water (rainfall, irrigation, dew) on the leaf to initiate the infection process. Irrigating every day for a few minutes is not beneficial for the turfgrass because it does not provide enough water to the root zone, but it is beneficial for turfgrass pathogens. It is always best to irrigate when dew is already present, usually between 2 and 8 a.m., and then only apply enough water to wet the root zone of the turfgrass.
Excessively high nitrogen fertility contributes to turfgrass diseases. The minimum amount required for the grass species should be applied. Potassium (K) is an important component in the prevention of diseases, because it prevents plant stress. Application of equal amounts of nitrogen and potassium is recommended for turfgrass health. When turfgrass roots are damaged from disease, it is beneficial to apply nutrients in a liquid solution. However, nitrate-nitrogen increases the severity of diseases, so their use should be avoided when possible. Ammonium-containing fertilizers are the preferred nitrogen sources.
Heavy liming has also been linked to increases in Take-All Root Rot. Since most turfgrasses can tolerate a range of pH, maintaining soil at 5.5 to 6.0 can suppress the development of the pathogen. When the disease is active, frequent foliar applications of small amounts of nutrients is necessary to keep the turfgrass from declining.
Additional maintenance practices that need to be addressed are thatch removal and reduction of soil compaction. Excessive thatch often causes the mower to sink which can result in scalping and reducing the amount of leaf tissue capable of photosynthesizing. Thatch and compacted soil prevent proper drainage, resulting in areas remaining excessively wet, depriving root systems of oxygen. Since recovery of Take-All-Root-Rot damaged turfgrass is often poor, complete renovation of the lawn may be necessary. Removal of all diseased tissue is advised.
As a native soil-inhabiting pathogen, Take-All-Root-Rot cannot be eliminated. However, suppression of the organism through physical removal followed by proper cultivation of the new sod is critical to the establishment of a new lawn. Turfgrass management practices, not chemicals, offer the best control of the disease.
It is acceptable to use fungicides on a preventative basis while rooting in the sod. Azoxystrobin, fenarimol, myclobutanil, propiconazole, pyraclostrobin, thiophate methyl, and triadimefon are all fungicides that can be utilized to prevent disease development while having to excessively irrigate newly laid sod. Ideally, the turf area should be mowed and irrigated prior to a fungicide application. Unless the product needs to be watered in, do not irrigate for at least 24 hours after a chemical treatment. Do not mow for at least 24 hours, to avoid removal of the product attached to the leaf blades.
With all the stresses that our lawns have experienced, it is very important to continue monitoring the turf and be cautious about the cultural practices being used. Take-All Root Rot is likely to flourish. Do not encourage its development. A pathology test with the University of Florida Laboratory can confirm the presence of the disease causing organism. Before resodding again, have the dying sod tested.
For information and the submission form go to:
Sample Submission Guide
For more information on the disease go to:
Take-All-Root-Rot
by Blake Thaxton | Aug 19, 2015
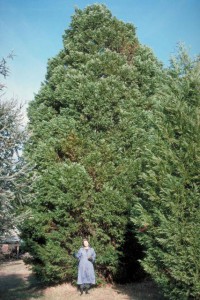
Photo Credit: Ed Gilman, UF/IFAS
Leyland cypress, x Cupressocyparis leylandii, has been hugely popular over the past 20 years as an ornamental landscape tree. It has the reputation of being a beautiful evergreen that can grow at a rate of up to 3 to 4 feet per year. Sounds like the perfect option for someone looking to make their back yard more secluded and private. Because of these traits, it has been planted widely throughout the southeastern US, including the Florida panhandle, only to succumb to intense environmental conditions and disease pressure.
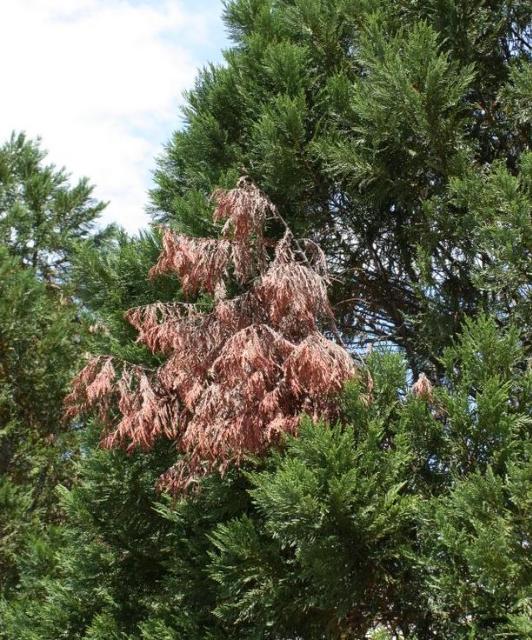
UF/IFAS suggests that other species be used in place of Leyland cypress because of the damaging effects of Seiridium canker. The disease is a fungal organism that attacks the tree after periods of drought while the tree is under stress. Once the stress has occurred and rain does arrive the fungus attacks the vulnerable trees in the wetter periods. The major symptom is “flagging” or branches that have turned brown that can be scattered throughout the tree. This is caused by a canker further up the brown branch that has been girdled,cut of from the flow of water and nutrients to the branch by diseased tissue.
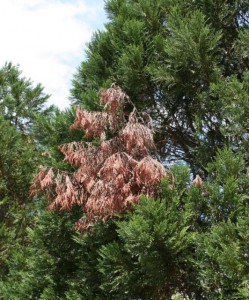
Flag branch on Leyland Cypress. Photo Credit: UF/IFAS
What are the options for Florida panhandle landscapers and homeowners? If you have a tree exhibiting symptoms of Seiridium canker, pruning the “flag” branches out several inches below the canker can prolong the life of the tree but is very unlikely to save it. The only long term sustainable option is to replace Leyland cypress with species that are resistant to the disease. The following are good examples of species that could be considered:
|
Common Name
|
Scientific Name
|
|
Atlantic white cedar
|
Chamaecyparis thyoides
|
|
Southern red cedar
|
Juniperus silicicola
|
|
Arizona cypress
|
Cupressus arizonica var. glabra
|
|
Mexican cypress
|
Cupressus lusitanica
|
|
Oriental arborvitae
|
Platycladus orientalis
|
|
“Green Giant” arborvitae
|
Thuja x ‘Green Giant’
|
|
Kashmir cypress
|
Cupressus cashmeriana
|
|
Chinese funeral cypress
|
Cupressus funebris
|
|
Chinese cypress
|
Cupressus chengiana
|
|
Hinoki cypress
|
Chamaecyparis obtusa
|
|
For more information read the University of Florida publication, Seiridium Canker of Leyland Cypress.
by Mary Salinas | Apr 28, 2015
Fleshy distortions are appearing on some azaleas this time of year. What is responsible for this? A fungus, Exobasidium vaccinia, likes our cool, wet spring weather and infects azalea leaves and flower petals. This disease likes a cool, wet, shady and protected environment.

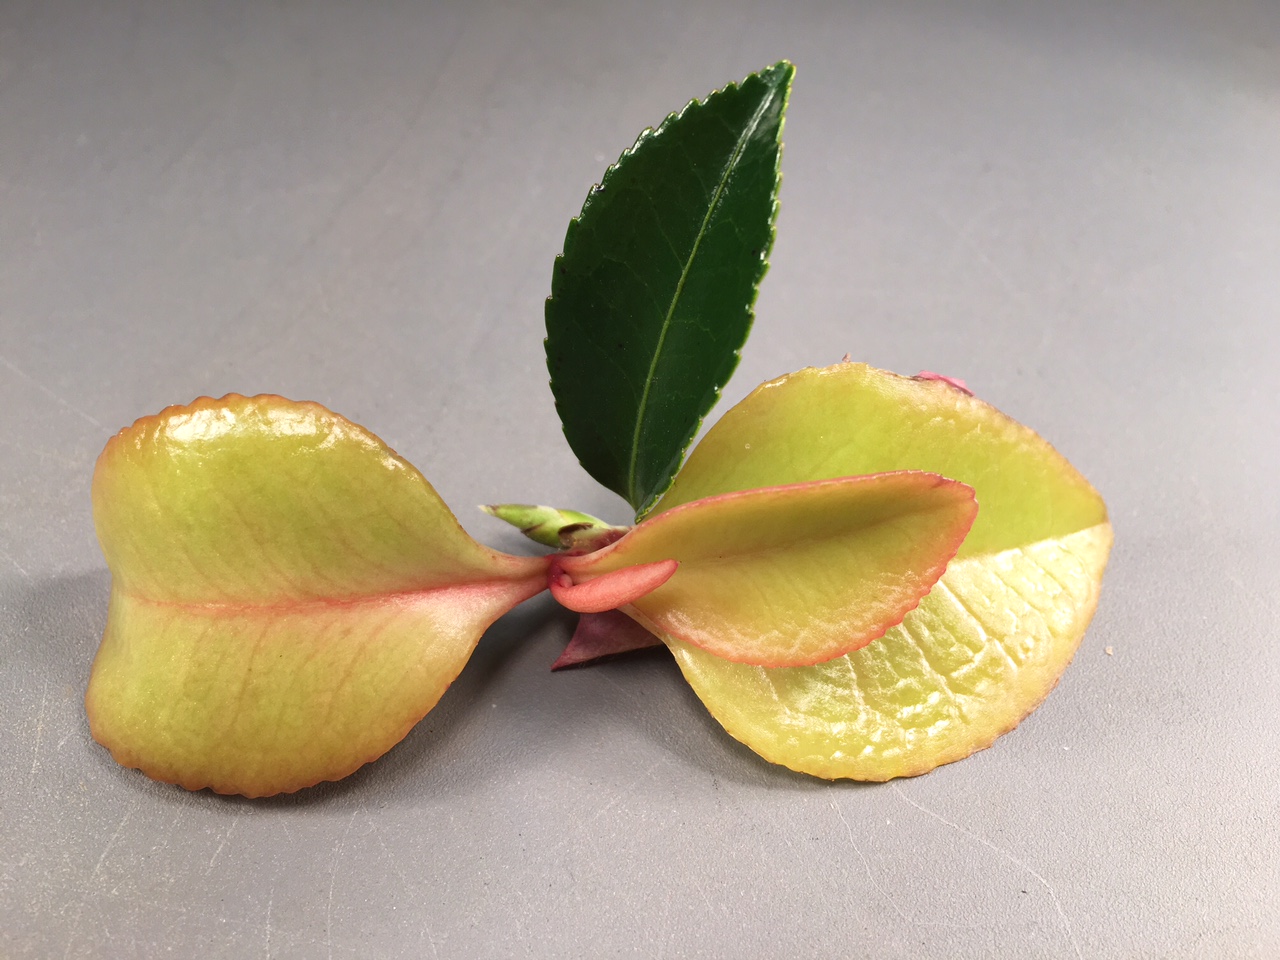
Azalea gall. Photo credit: Mary Derrick, UF/IFAS Extension.
The infection causes the plant to form large, fleshy, distorted tissues known as galls. The galls produce a white powdery coating that is capable of producing more spores that will continue to cause new infections if left on the bush. The gall will eventually turn dry and brown and fall to the ground. Sometimes there are only a few leaves infected or there may be quite a few on a bush.
Not to worry – this is not likely to cause significant harm to your azalea. The best plan of action is to remove the galls as soon as possible and dispose of them in the trash or burn them to prevent reinfection of your plants. Avoid any irrigation that sprays water onto the leaf surfaces as the moisture creates a favorable environment for disease. Once you see this gall forming, there is no chemical control that is effective.
For more information on caring for your azalea:
Azaleas at a Glance