For me, tomatoes are the most difficult (and expensive) vegetable to grow. I even try to discourage people from growing tomatoes in Florida. Tomatoes are susceptible to damage from a plethora of diseases and insect pests AND they require a lot of maintenance and fertilizer. However, I now have a tomato variety I can recommend – The Everglades Tomato.
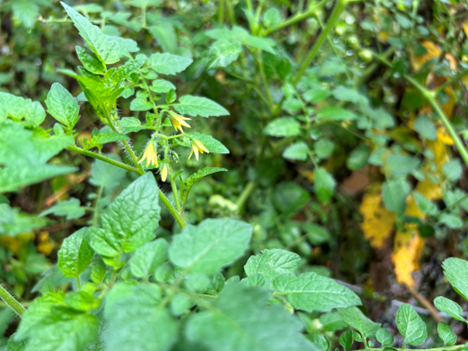
The Everglades tomato (Solanum pimpinellifolium) is a different species than the traditional tomato (Solanum lycopersicum). Other names for this tomato are the wild tomato or currant tomato. The plant produces an abundance of small tomatoes (about 1/2 inch diameter) with thin skin. Unlike most tomatoes, Everglades tomatoes keep producing throughout the heat of summer. They are even tolerant of brackish water and salt winds.
Everglades tomatoes should be cared for like any other indeterminate (vining type) tomato. Like most gardeners, I like to plant tomatoes a little deeper (two inches or so) than they were planted in the tray/pot. This allows for more adventitious roots to develop from the buried portions of the stems. I also like to trellis these plants with tall stakes and twine or some other support to improve air circulation. However, I have read that Everglades tomatoes grow just fine rambling on the ground. Make sure to give them a little more space than other tomatoes regardless if you stake them or not. Fertilize and irrigate just the same as you would for other tomatoes.
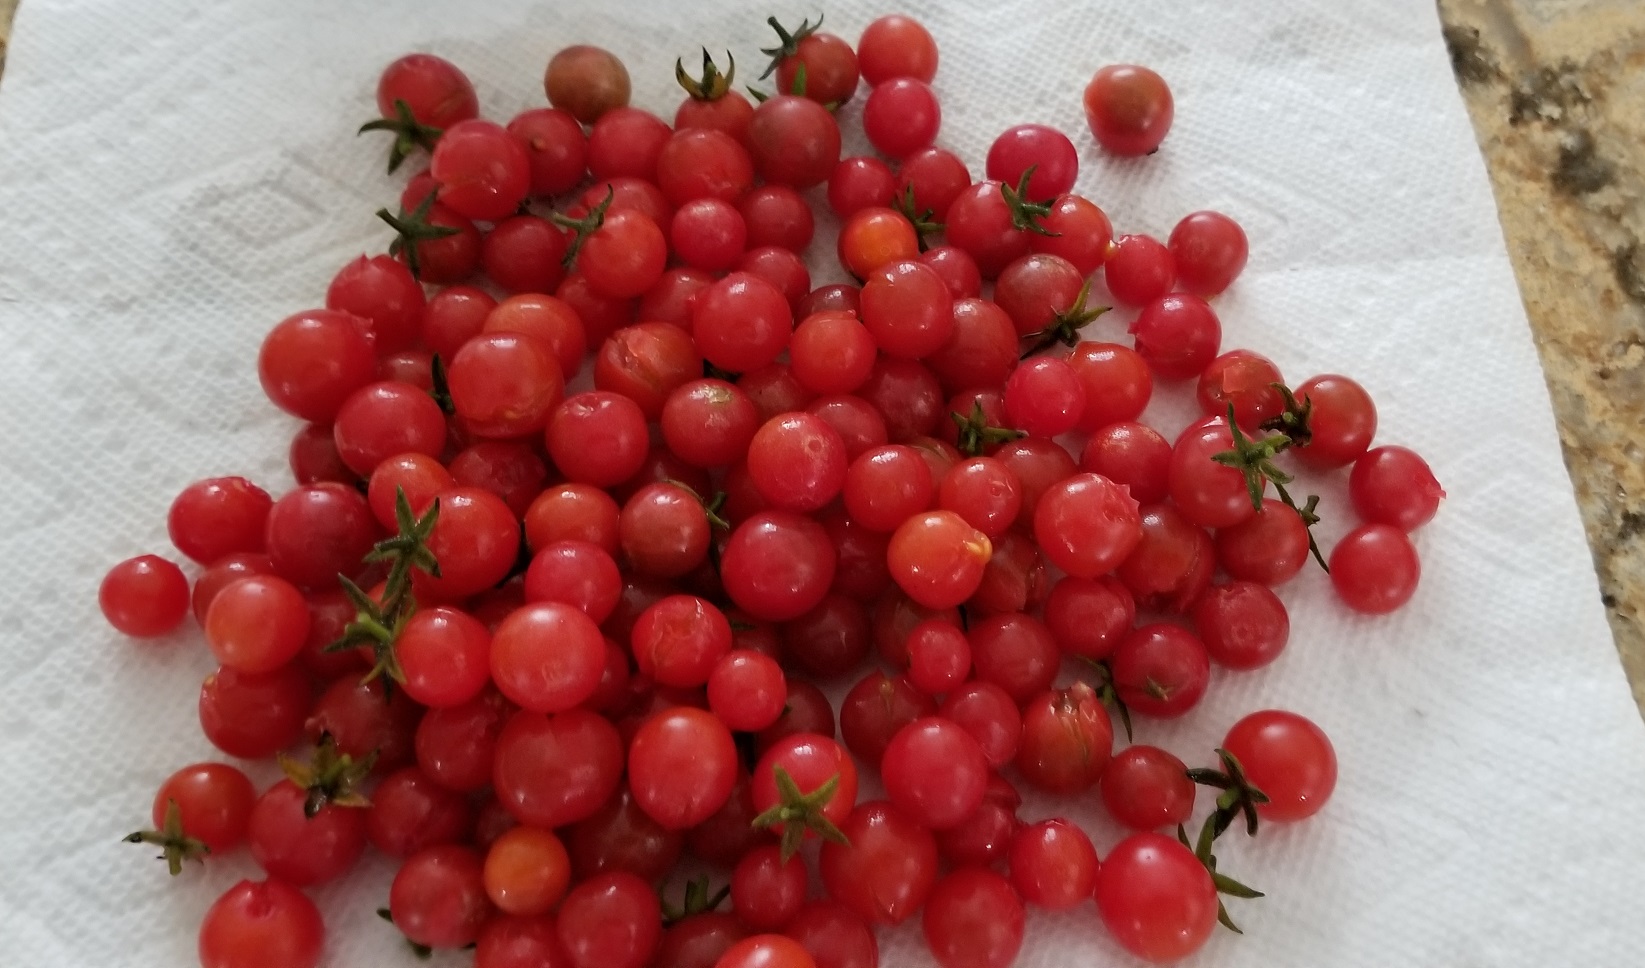
A bountiful harvest of Everglades tomatoes. Photo Credit: Connie Gladding, Master Gardener Volunteer, University of Florida/IFAS Extension – Clay County
Of course, just like any plant, Everglades tomatoes aren’t perfect. Their small size makes harvesting a little more labor intensive and their thin skin is easily torn. But I’m able to look past these faults because of their excellent flavor. I’ve also noticed Everglades tomatoes are not immune to caterpillar/moth pests. Fortunately the caterpillars only seem to feed on the leaves, because the tomatoes are so small.
Whether you’re a chef or just want a sweet snack, you should give Everglades tomatoes a try. Just search the internet for seed sources or ask a friend for a cutting.
When you hear the word “pollinator”, what is the first insect that comes to mind? If I had to guess, you would probably say honey bee. European honey bees play an important role in agriculture as pollinators and honey producers, but there are hundreds of native pollinators often overshadowed by the beloved honey bee you should know about, too!
One such group of pollinators native to Florida are sweat bees. Sweat bees get their unfortunate name from their nutritional requirements of salt that are sometimes sourced from sweaty humans. They rarely sting but are capable, and they can certainly be annoying to people when they lick salt off their skin. This behavior tends to get more attention than their important role as pollinators.
A subgroup of sweat bees are furrow bees. Furrow bees nest in the ground or rotting wood and may be solitary or eusocial. In-ground nests are composed of branching tunnels in sandy soil at a depth between 8 inches and 3 feet with a small entry roughly the size of a pencil. Within the tunnels, the mother creates individual cells stocked with nectar and pollen and lays an egg. The larva feeds on these provisions and pupates underground eventually emerging as an adult. The life cycle can vary from a few weeks to a year or more depending on species and environmental conditions.
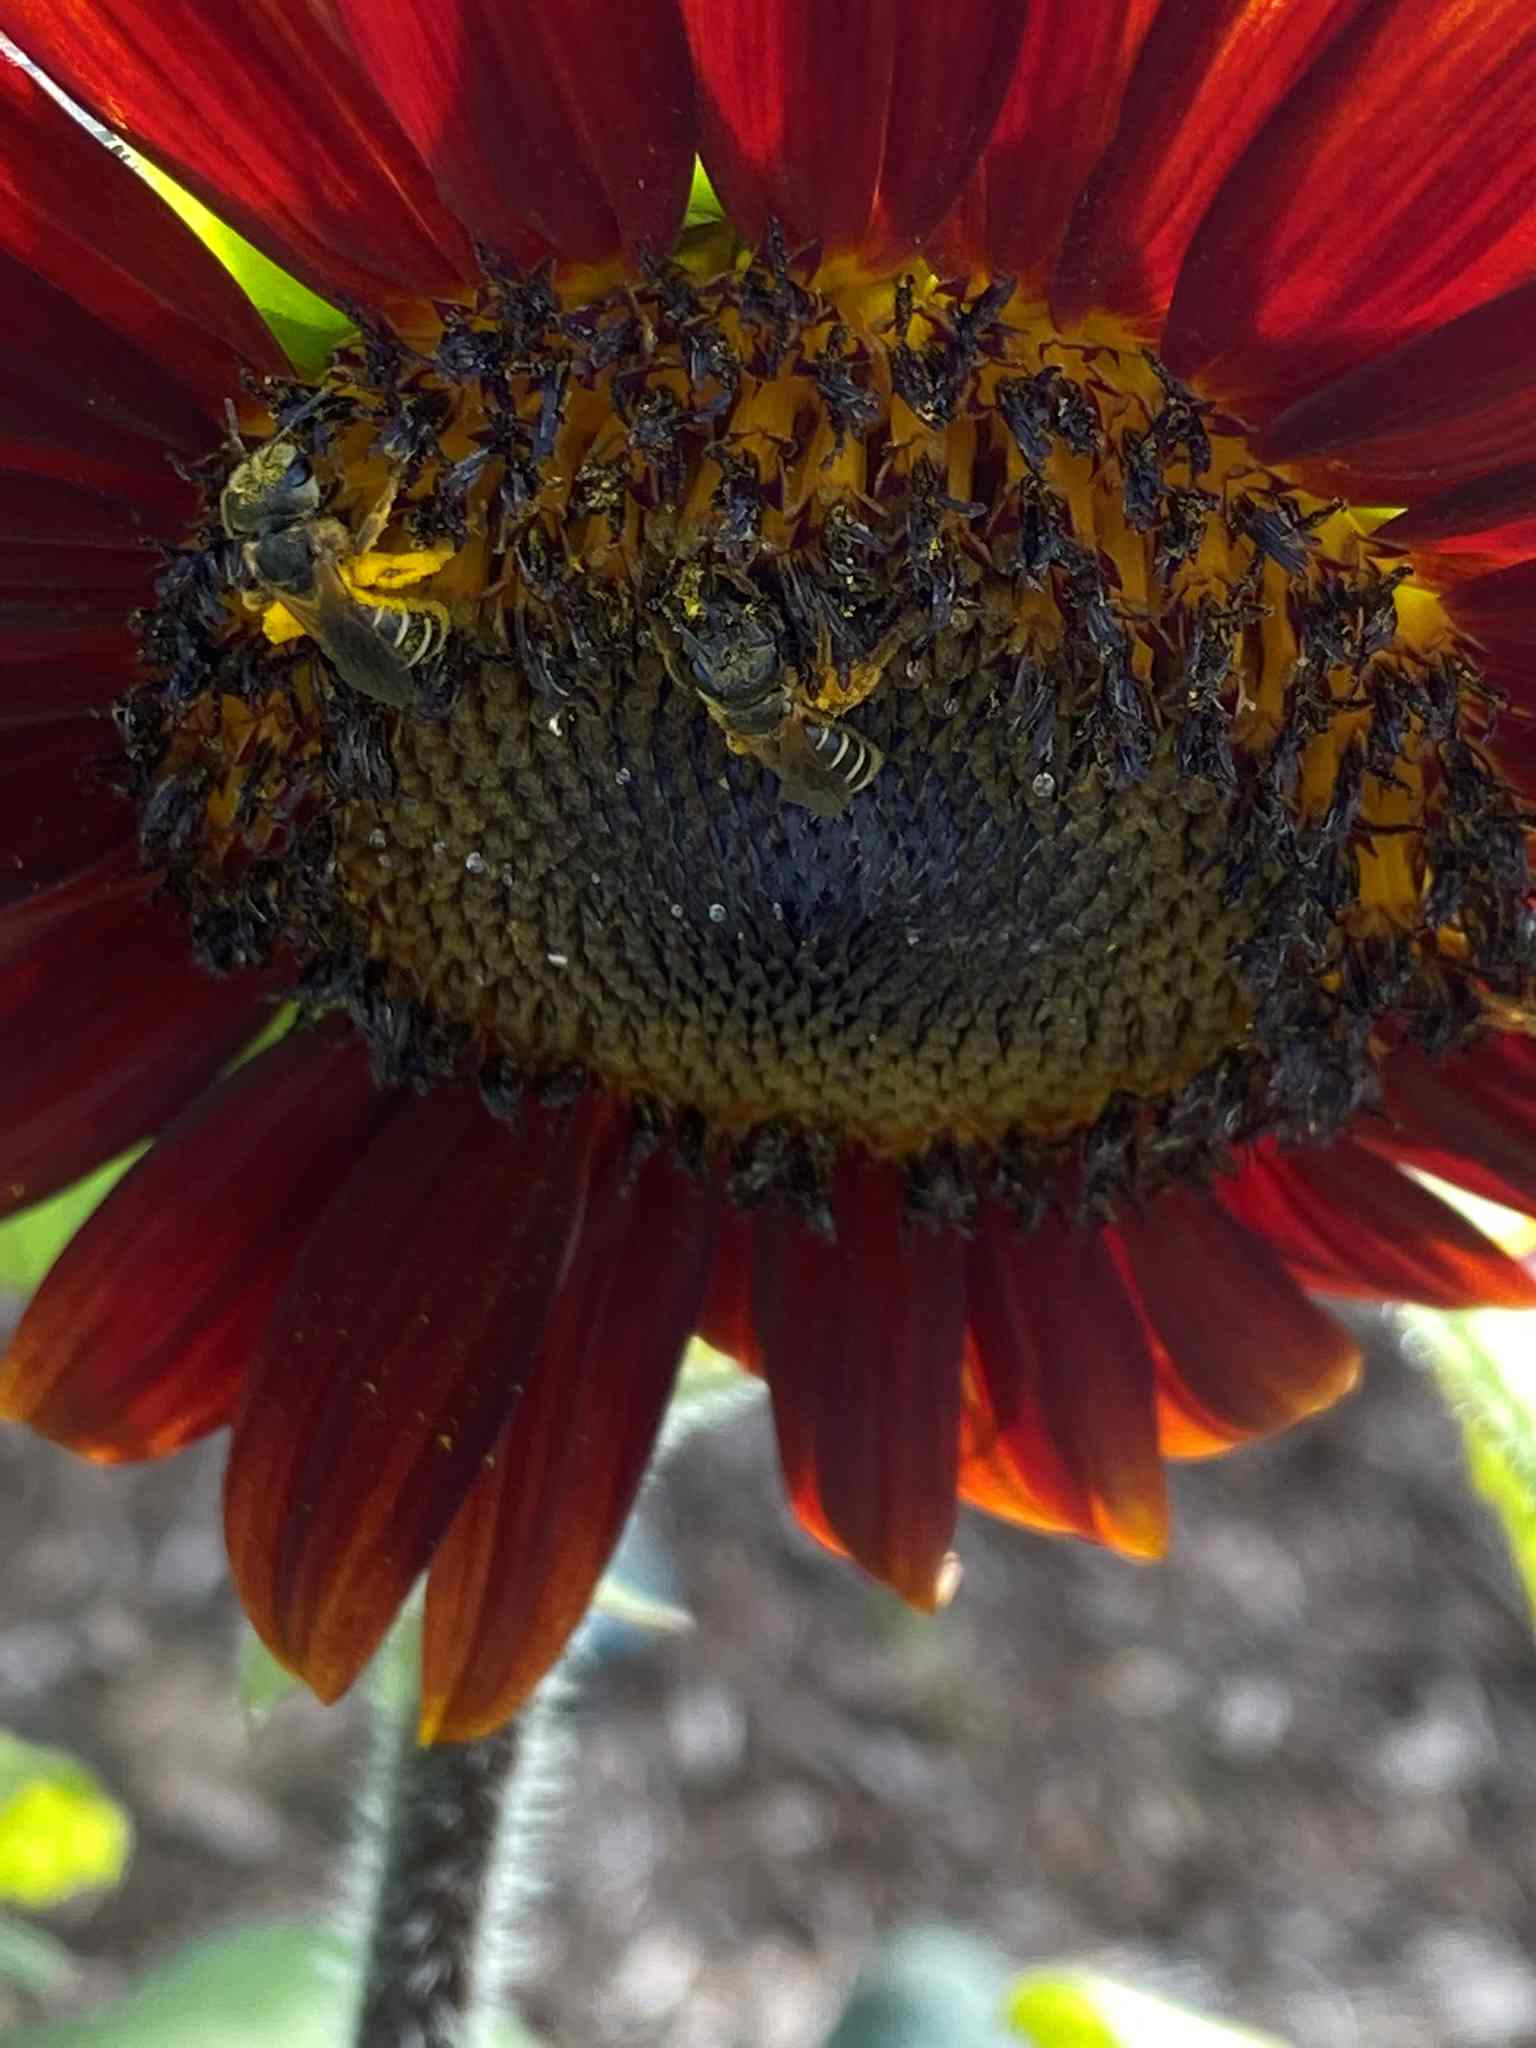
Furrow bees are generalist feeders which means they will visit many different flowers, so diverse landscapes are attractive to them. In my northwest Florida garden, I see them often on sunflowers, Black-eyed Susan, coneflower, cosmos, tithonia, zinnia, and tickseed.
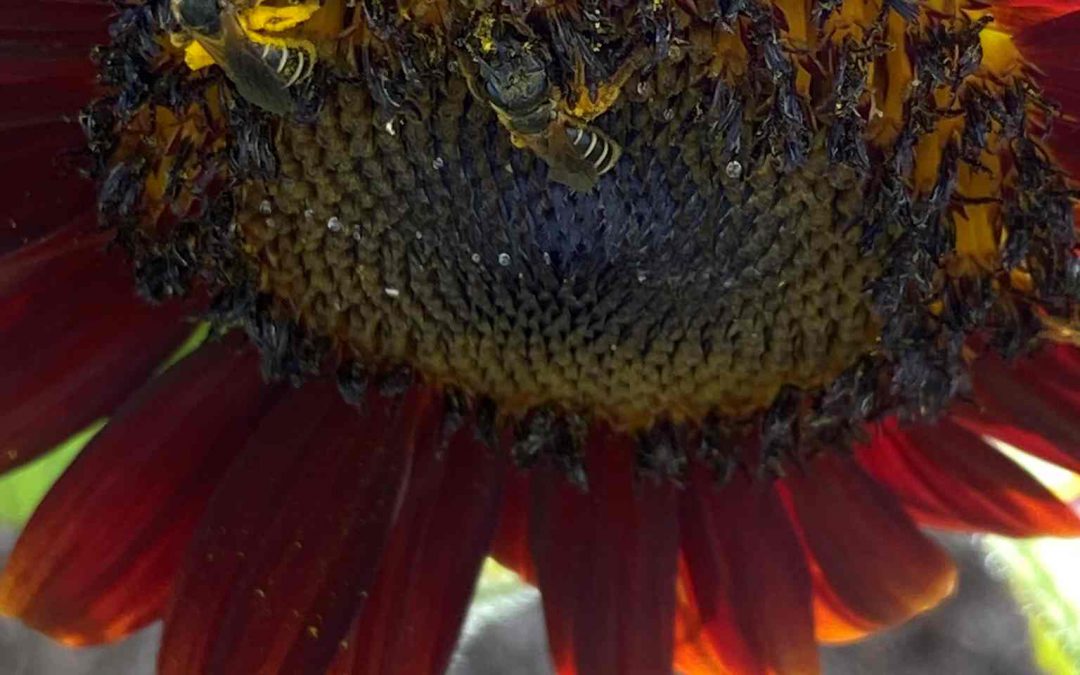
Poey’s Furrow Bee is a common visitor to sunflowers. J_McConnell, UF/IFAS
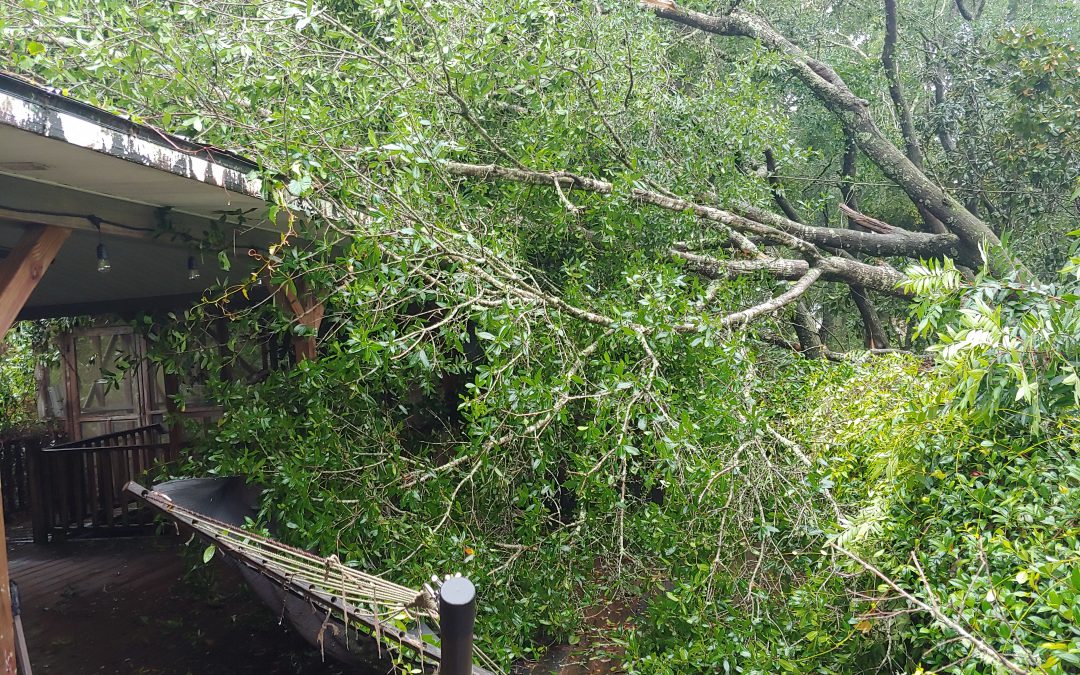
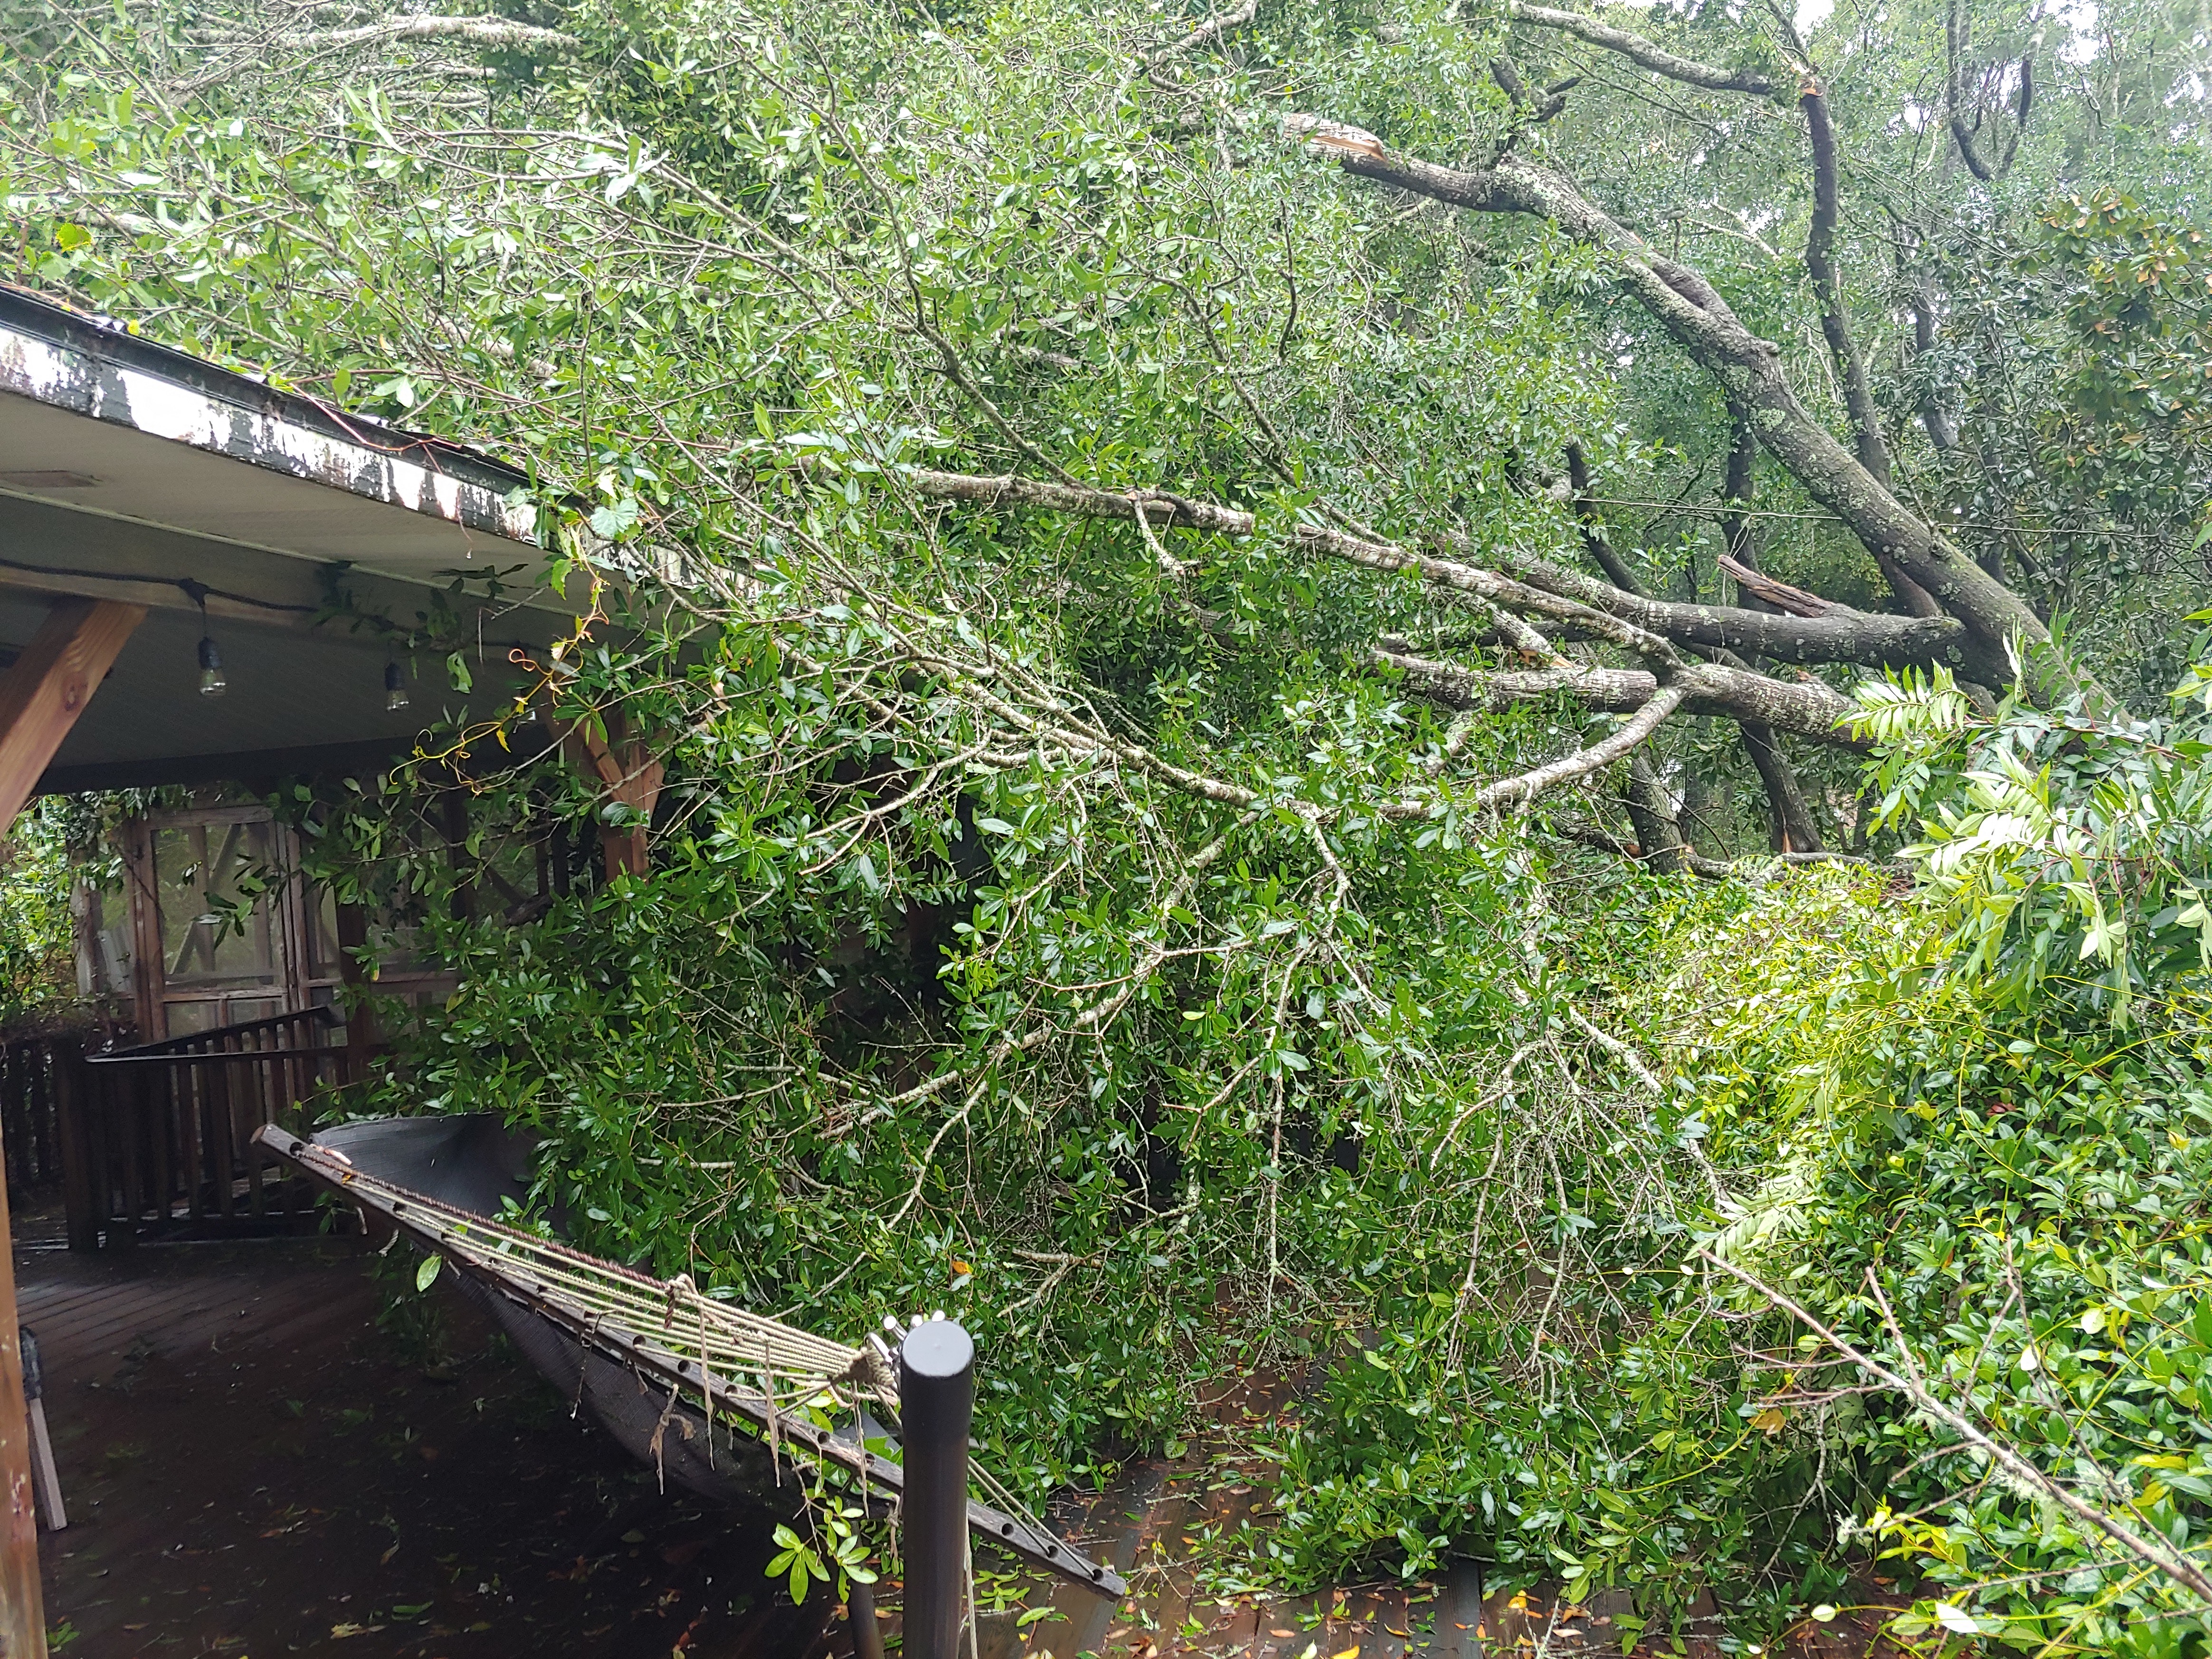
Moderate to strong El Nino conditions were predicted for this summer and I think this revelation has come true. The heat and humidity in the latter part of June were on the verge of being unbearable and the precipitation cycle is unpredictable. In the middle of the month, a series of storms with strong winds hit a number of areas in the panhandle, bringing down some large trees. University of Florida/IFAS Extension recommends removing large branches and trees that pose a threat to damaging your home and other structure before the start of each hurricane season. However, sometimes we just don’t get around to removing these trees until after they fall.
Trees laying on the corner of a house. Photo Credit: Matt Lollar, University of Florida/IFAS Extension – Santa Rosa County
Luckily only the tops of the trees in the photo above fell on the roof of the house. These are laurel oaks (Quercus laurifolia) which are fast growing but not tolerant of wind. In this situation, four trees fell together and are laying on the corner of the roof. The trees also pulled down the power, cable, and phone lines to the house.
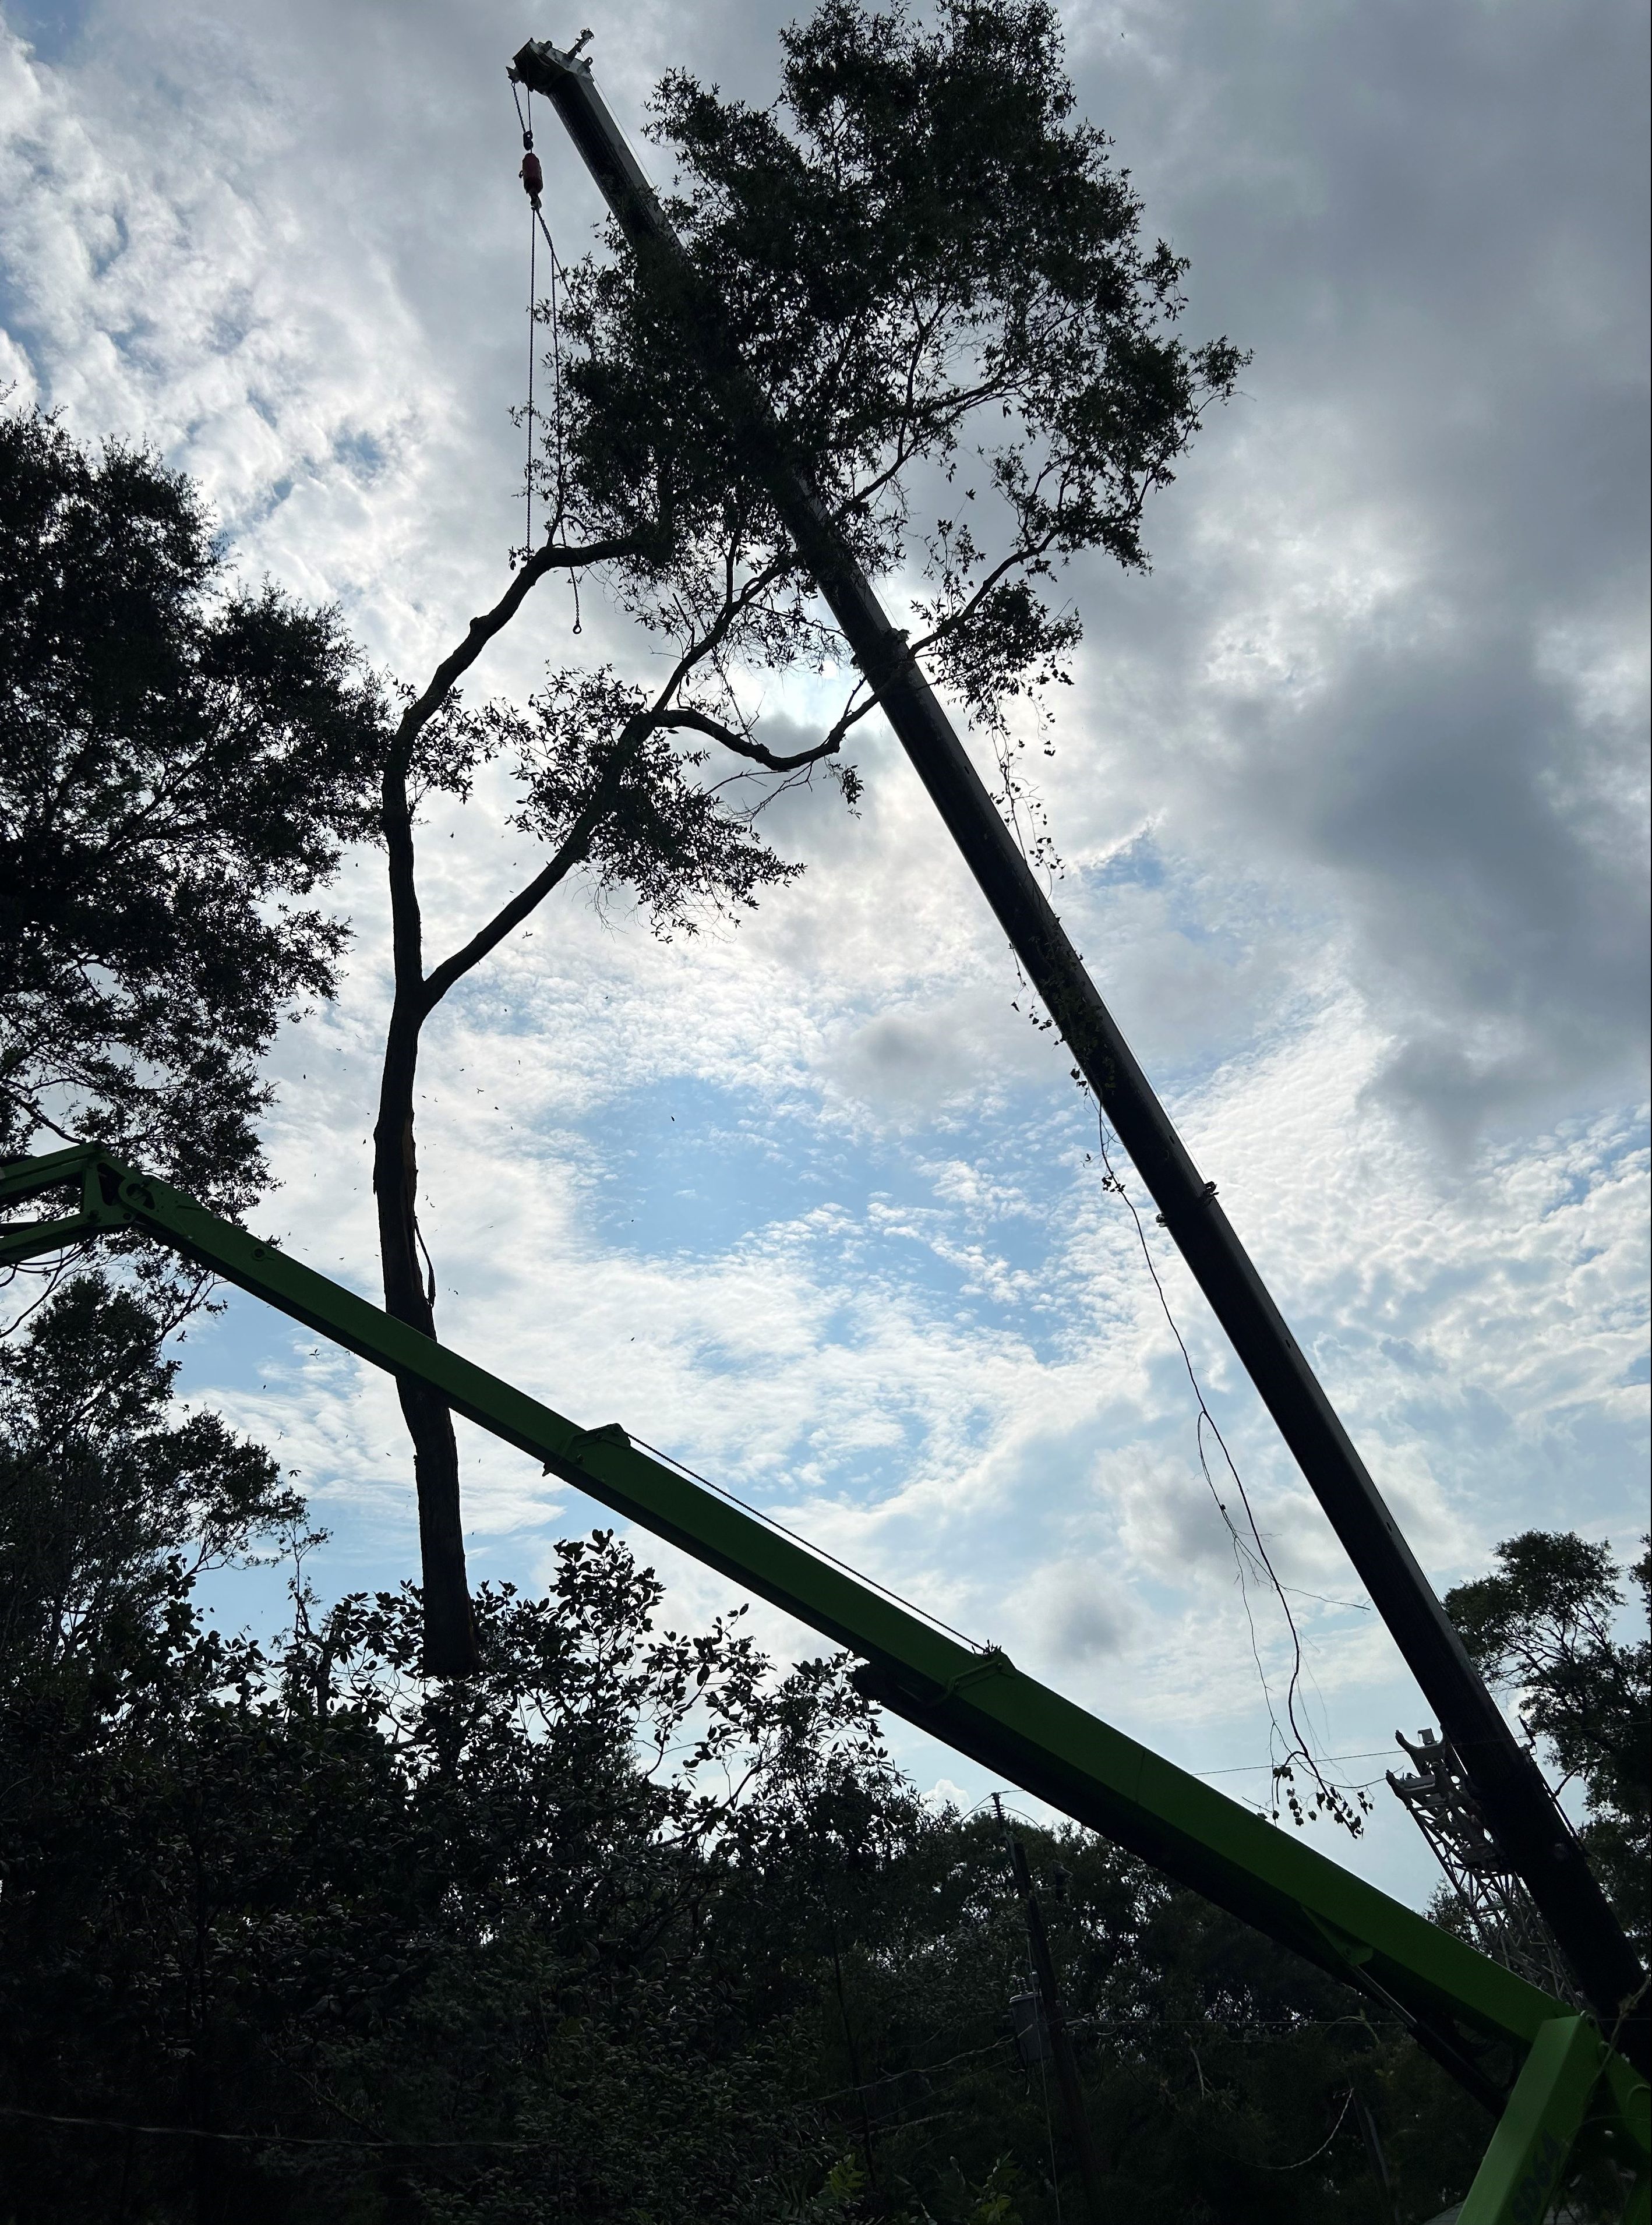
So where do we go from here? Unfortunately the trees were uprooted and pose the potential for additional harm to the house if not removed correctly. In this situation, a tree service that owns a crane was recommended to remove the trees without administering more damage to the home and other trees and plants in the landscape and to avoid knocking down the powerlines again.
A crane used in conjunction with a boom lift to cut and lift trees off of a house. Photo Credit: Matt Lollar, University of Florida/IFAS Extension – Santa Rosa County
The tree service utilized a boom lift and a crane to safely lift the trees away from the house and utility lines. The employee on the lift connected each section of the tree to the crane before each cut. The boom was then moved to a safe location before each tree section was lifted away to the road to be cut into smaller pieces.
In this situation, the homeowner was lucky. There was no damage to the house other than a couple bent panels on the metal roof. However, this little bit a damage could have been totally avoided if these weak trees had been removed before the storm hit.
The trees featured in this article fell during a thunderstorm and possible tornado. If these trees had fallen during a weather event that was Federally declared, then a portion of the cost for their removal and cleanup might have been eligible to be considered an itemized deduction on Federal income tax forms. For more information on filing this type of loss please read the publication “Income Tax Deduction on Timber and Landscape Tree Loss from Casualty” from the USDA Forest Service.
Homeowners may consider growing Frogfruit, Phyla nodiflora as a companion plant in turf areas. Learn the qualities of this groundcover with UF IFAS Extension Escambia County.
Article Written By: Khadejah Scott, Horticulture/Agriculture/Natural Resources Extension Agent, University of Florida/IFAS Extension – Wakulla County
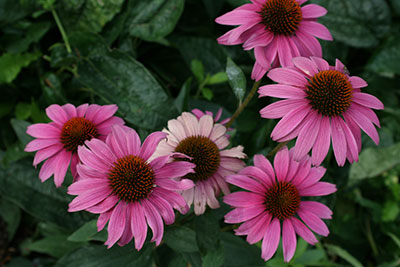
Among the notable floral species is the striking and resilient Purple Coneflower (Echinacea purpurea). With its enchanting blooms and remarkable adaptability, the coneflower has captured the attention of both nature enthusiasts and gardening enthusiasts alike. The Purple Coneflower has fascinating characteristics that thrive in our unique region.
Purple coneflowers (Echinacea purpurea). Photo Credit: University of Florida/IFAS
CHARACTERISTICS
On top of sturdy, hairy branches, this hardy perennial produces daisy-like flowers with a cone-shaped center and petals in pink, lavender, and purple hues that are either horizontal or drooping. In the spring and summer, the flowers are displayed atop sturdy, 2 – 4-foot stalks that are known to tolerate wind and rain. Nothing compares to a Purple Coneflower in full bloom.
LANDSCAPE USES
The Purple Coneflower is an incredibly useful landscape plant, and there are several cultivars available. The Purple Coneflower’s rigid look contrasts nicely with the softness of other perennials and fine-textured plants. Because of the gorgeous blossom, the plant draws a lot of attention and works well as part of a mixed perennial border. Coneflowers are also well-suited for bulk plantings since they look stunning in drifts and draw a ton of butterflies.
GENERAL CARE
Purple coneflowers prefer well-drained, acidic to slightly alkaline loam and clay soil. They thrive best in a light shade as improved drought resistance and enhanced flower and leaf color result from protection from the late afternoon sun. To encourage additional flowers, remove fading blossoms, and divide clumps every few years to maintain healthy plants. Watch out for powdery mildew and whiteflies. During damp weather, fungus-related leaf patches could emerge as well.
The Purple Coneflower stands as a remarkable testament to nature’s ingenuity and beauty. Its stunning petals, growing properties, and ability to attract a myriad of beneficial insects make it a true gem in any garden. The Purple Coneflower is more than just a visually captivating plant—it is a symbol of resilience, healing, and harmony with the natural world. For more information about Purple Coneflower, contact your local UF/IFAS Extension Office.