by Evan Anderson | May 20, 2020
Next week (May 18-22) is Florida Invasive Species Awareness Week! Join us online for an educational video each day at 9:00 am CST on invasive species that are important in our area and what to do about them. See the flyer below and join us on Facebook at https://www.facebook.com/PanhandleOutdoorsNews/ for the event!
Invasive species are living things that are not from an area and have adverse affects on people, whether it is their health, the economy, or the environment we live in. The more people who can identify and control these species, the healthier we can keep ourselves, our businesses, and the world around us!

by Daniel J. Leonard | May 13, 2020
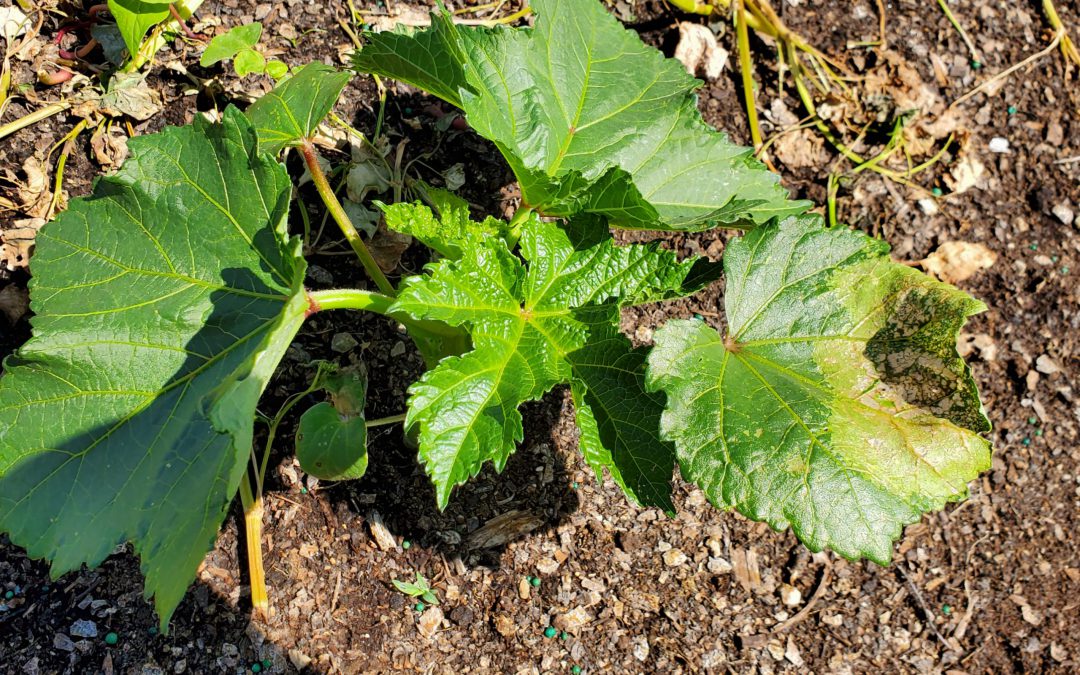
It’s been a challenging spring in this guy’s garden! Despite getting the normal early start required for successful gardening in Florida, I’ve been affected by Bacterial Leaf Spot stunting my tomatoes, cutworms that reduced my watermelon plantings by half, and an eternal test of my patience in the form of a dog that seems to think my raised beds are merely a shortcut to a destination further out in the yard. My latest adversary is the most potentially destructive yet, an outbreak of Southern Armyworm (Spodoptera eridania).
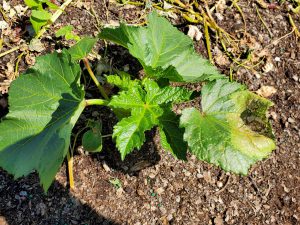
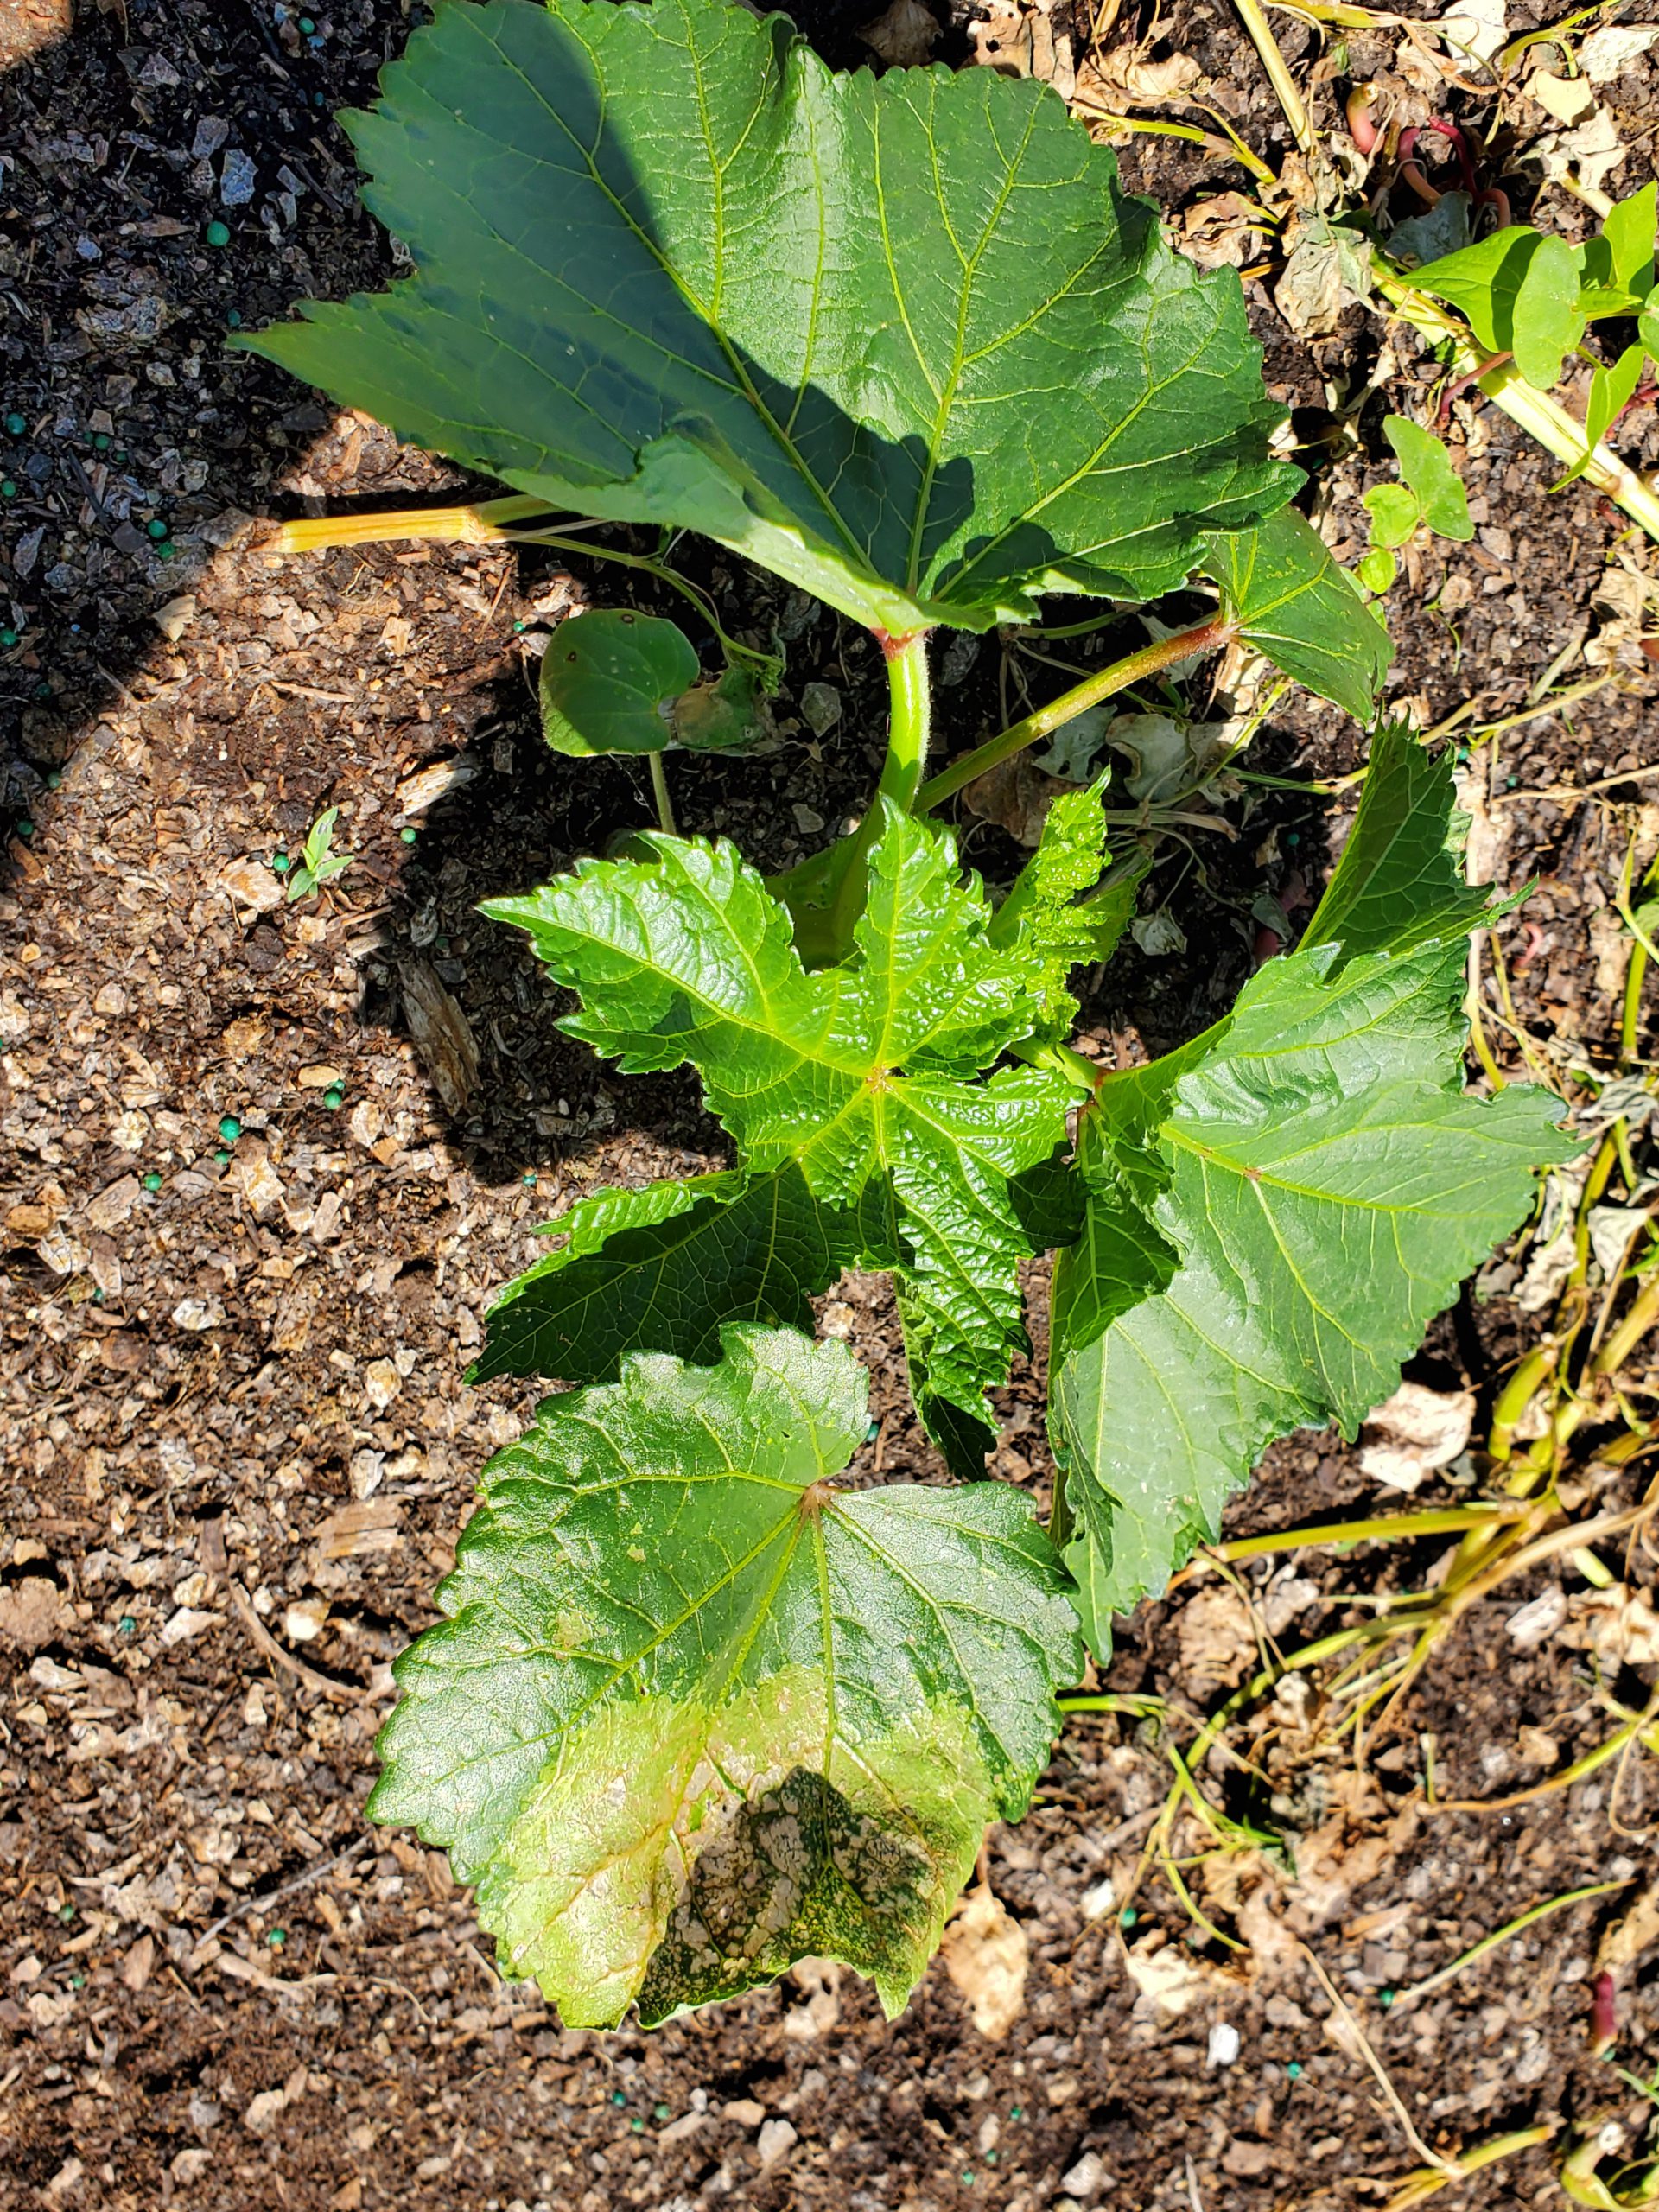
Early Southern Armyworm damage on Okra seedlings. Photo courtesy of the author.
Unlike some serious garden pests that wait until the heat of summer to emerge, Southern Armyworms begin appearing in spring gardens around the end of April. Adult moths can survive mildly cold weather and venture into the Panhandle as soon as warmer spring weather arrives. Once the adult moths arrive, egg masses are then laid on the undersides of leaves and hatch in a little under a week. Once loosed upon the world, Southern Armyworm larvae (caterpillars) become indiscriminate, voracious feeders and congregate in extremely large numbers, allowing them to destroy small, developing garden vegetable plants in a manner of days. Young larvae feed on the undersides of leaves and leave little but a skeleton. As larvae grow larger, they become solitary and begin to bore into fruit. Once they’ve eaten the good stuff (leaves and fruit), large larvae turn to branches and even plant stems!

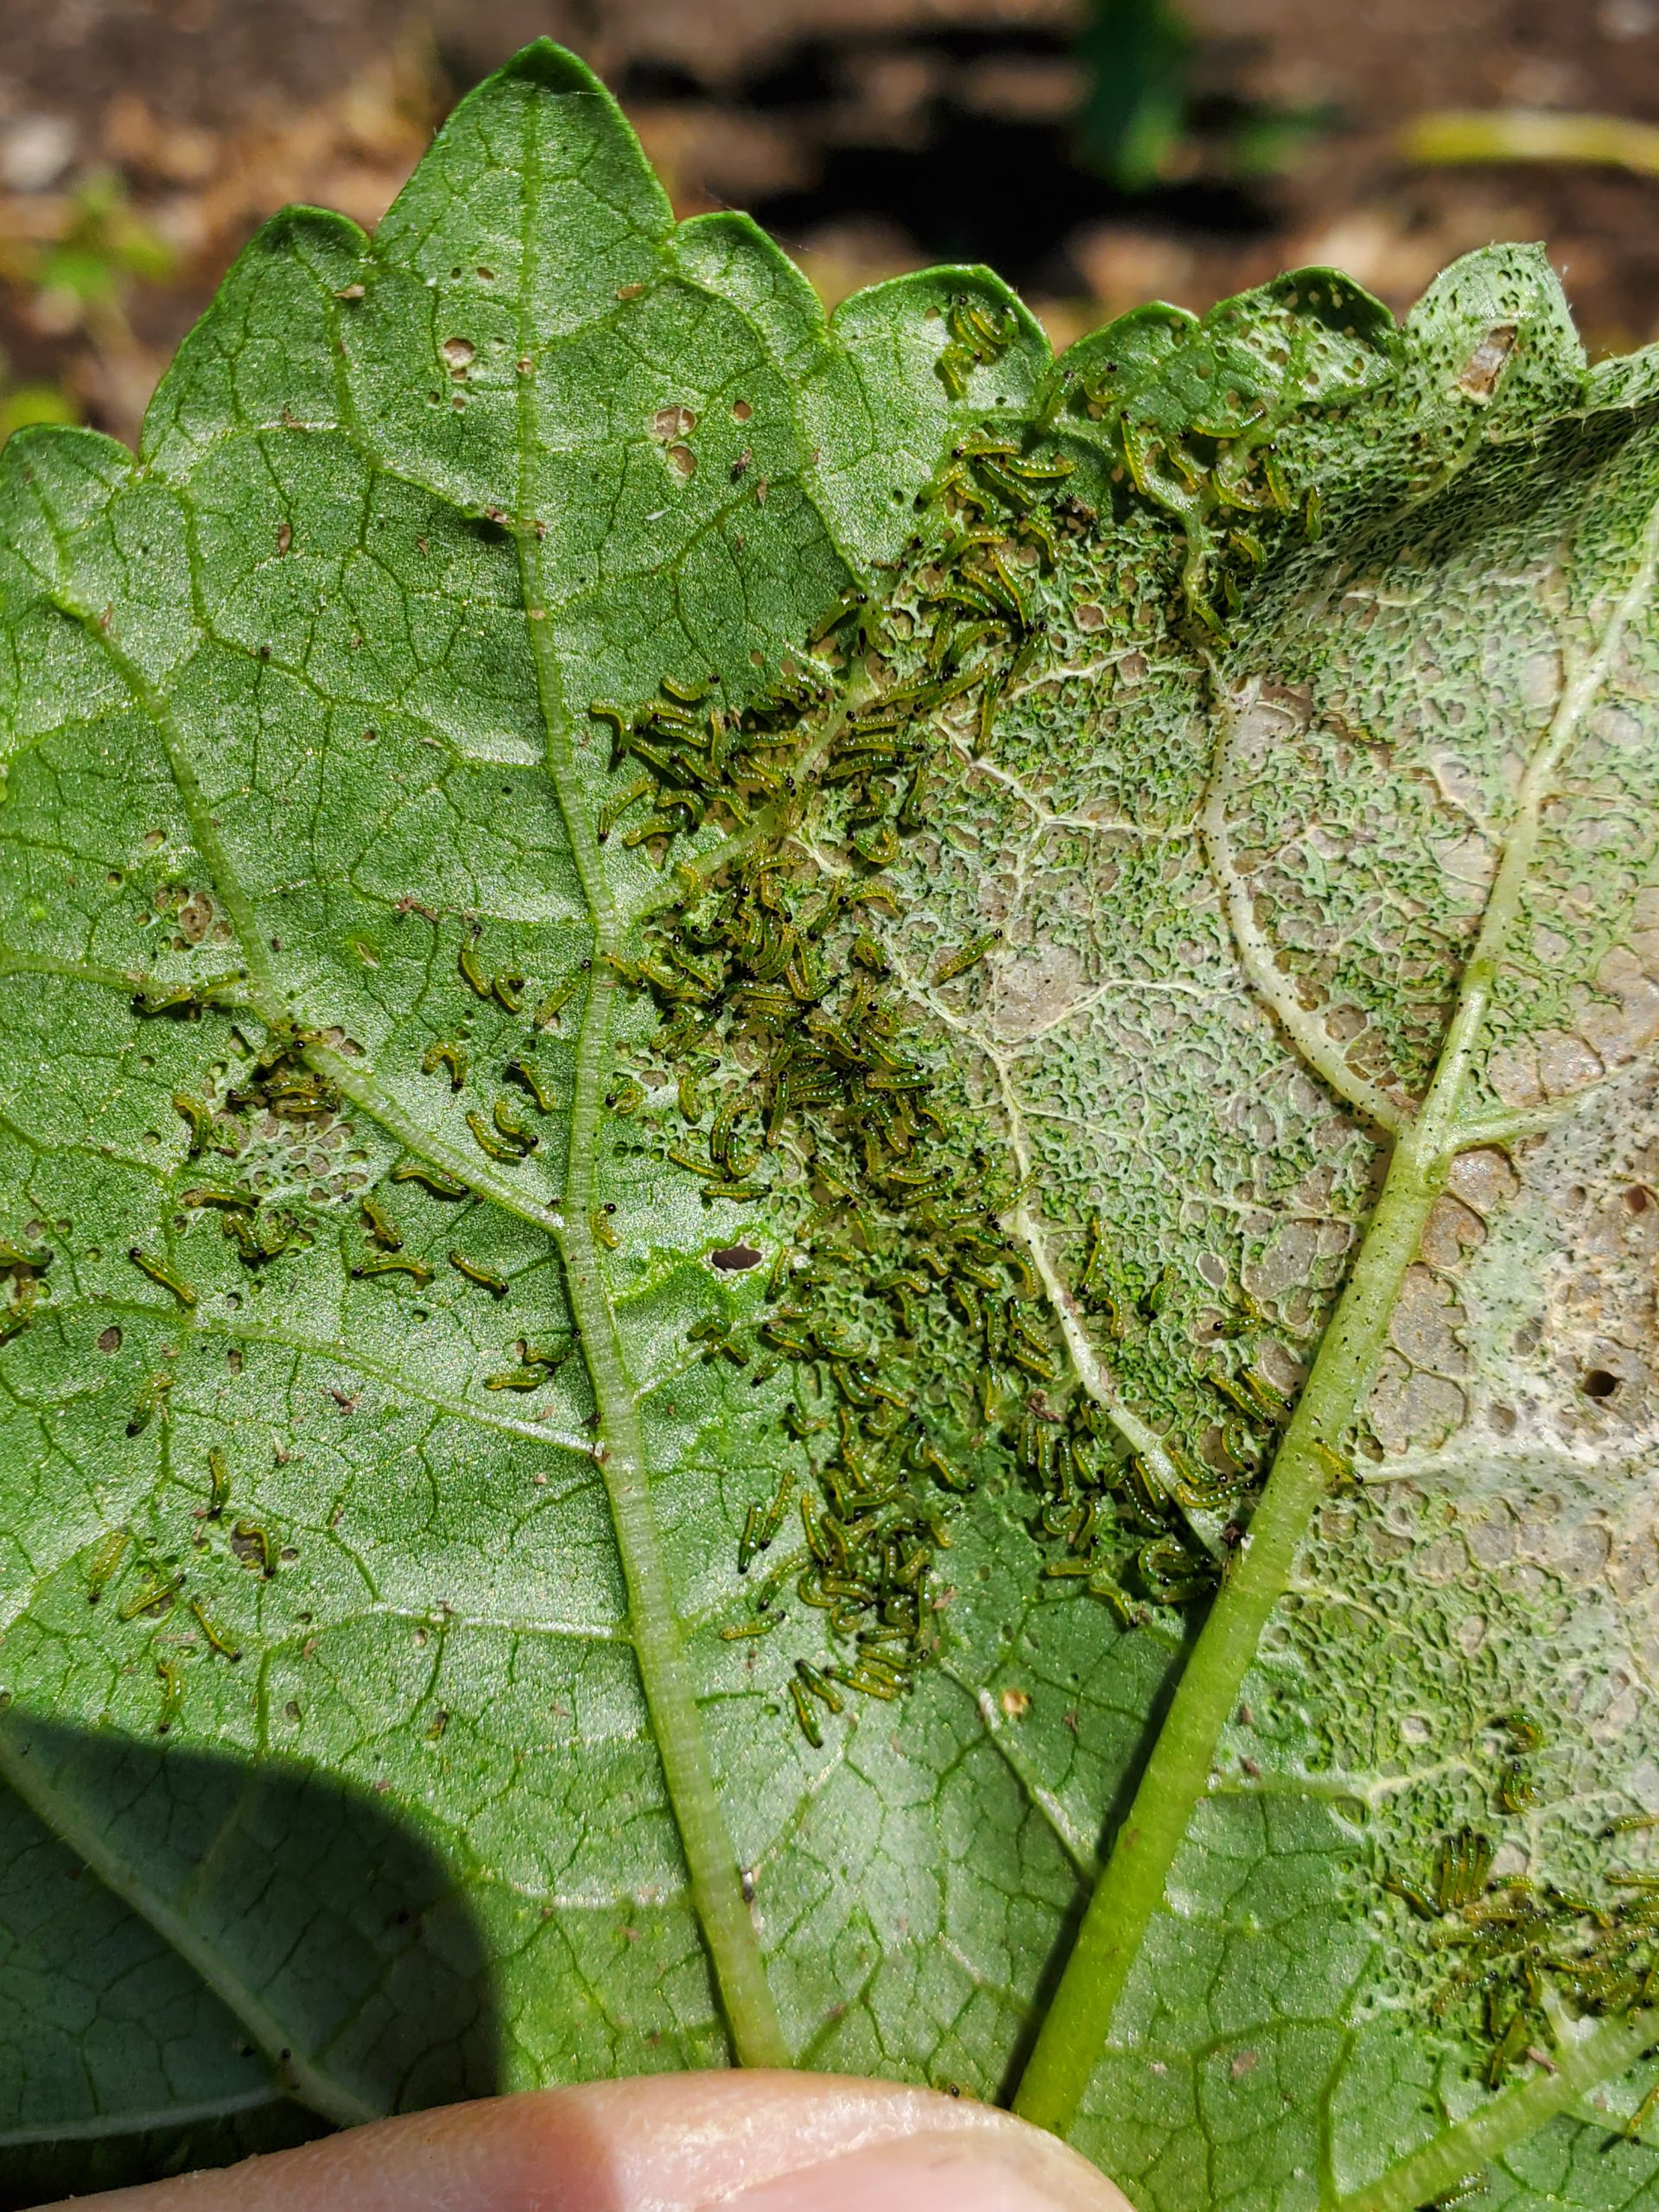
Southern Armyworm larvae feeding on Okra leaves. Photo courtesy of the author.
The good news for gardeners is that Southern Armyworm, and most other caterpillar pests, are easily controlled if outbreaks are caught early. Scouting is critical for early detection and good control. Armyworm damage generally appears from above as brownish-gray sections of affected leaves with a yellowish ring surrounding these sections, this ring indicates the current feeding zone. Affected areas will appear transparent and “lacy” due to the skeletonizing effects of larval feeding. If you see leaves that look “off” in the manner just described, check underneath for the presence of a horde of tiny greenish worms.
If found in this early stage, an application of Bacillus thuringiensis (Bt), a biological pesticide utilizing a bacterium destructive to caterpillars, is extremely effective. Bt has to be ingested by caterpillars with leaf tissue to work; thorough coverage of leaf surfaces is critical for maximum control. I generally follow up with a sequential application of Bt a day later to ensure that I achieved good coverage of the plant surfaces and, therefore, good control. Unfortunately, Bt is much less effective on older larvae. Infestations not caught early require harsher chemistries like carbamates, pyrethroids and organophosphates for adequate control.
Don’t let armyworms or other caterpillar pests destroy your garden, get out there daily and scout! You have a short window for easy caterpillar control with a harmless to people, natural product, Bt. Don’t waste it!
For more information about Southern Armyworm, other caterpillar pests, Bt, or any other horticultural topic, please consult your local UF/IFAS Extension Agent. Happy Gardening!
by Evan Anderson | May 13, 2020
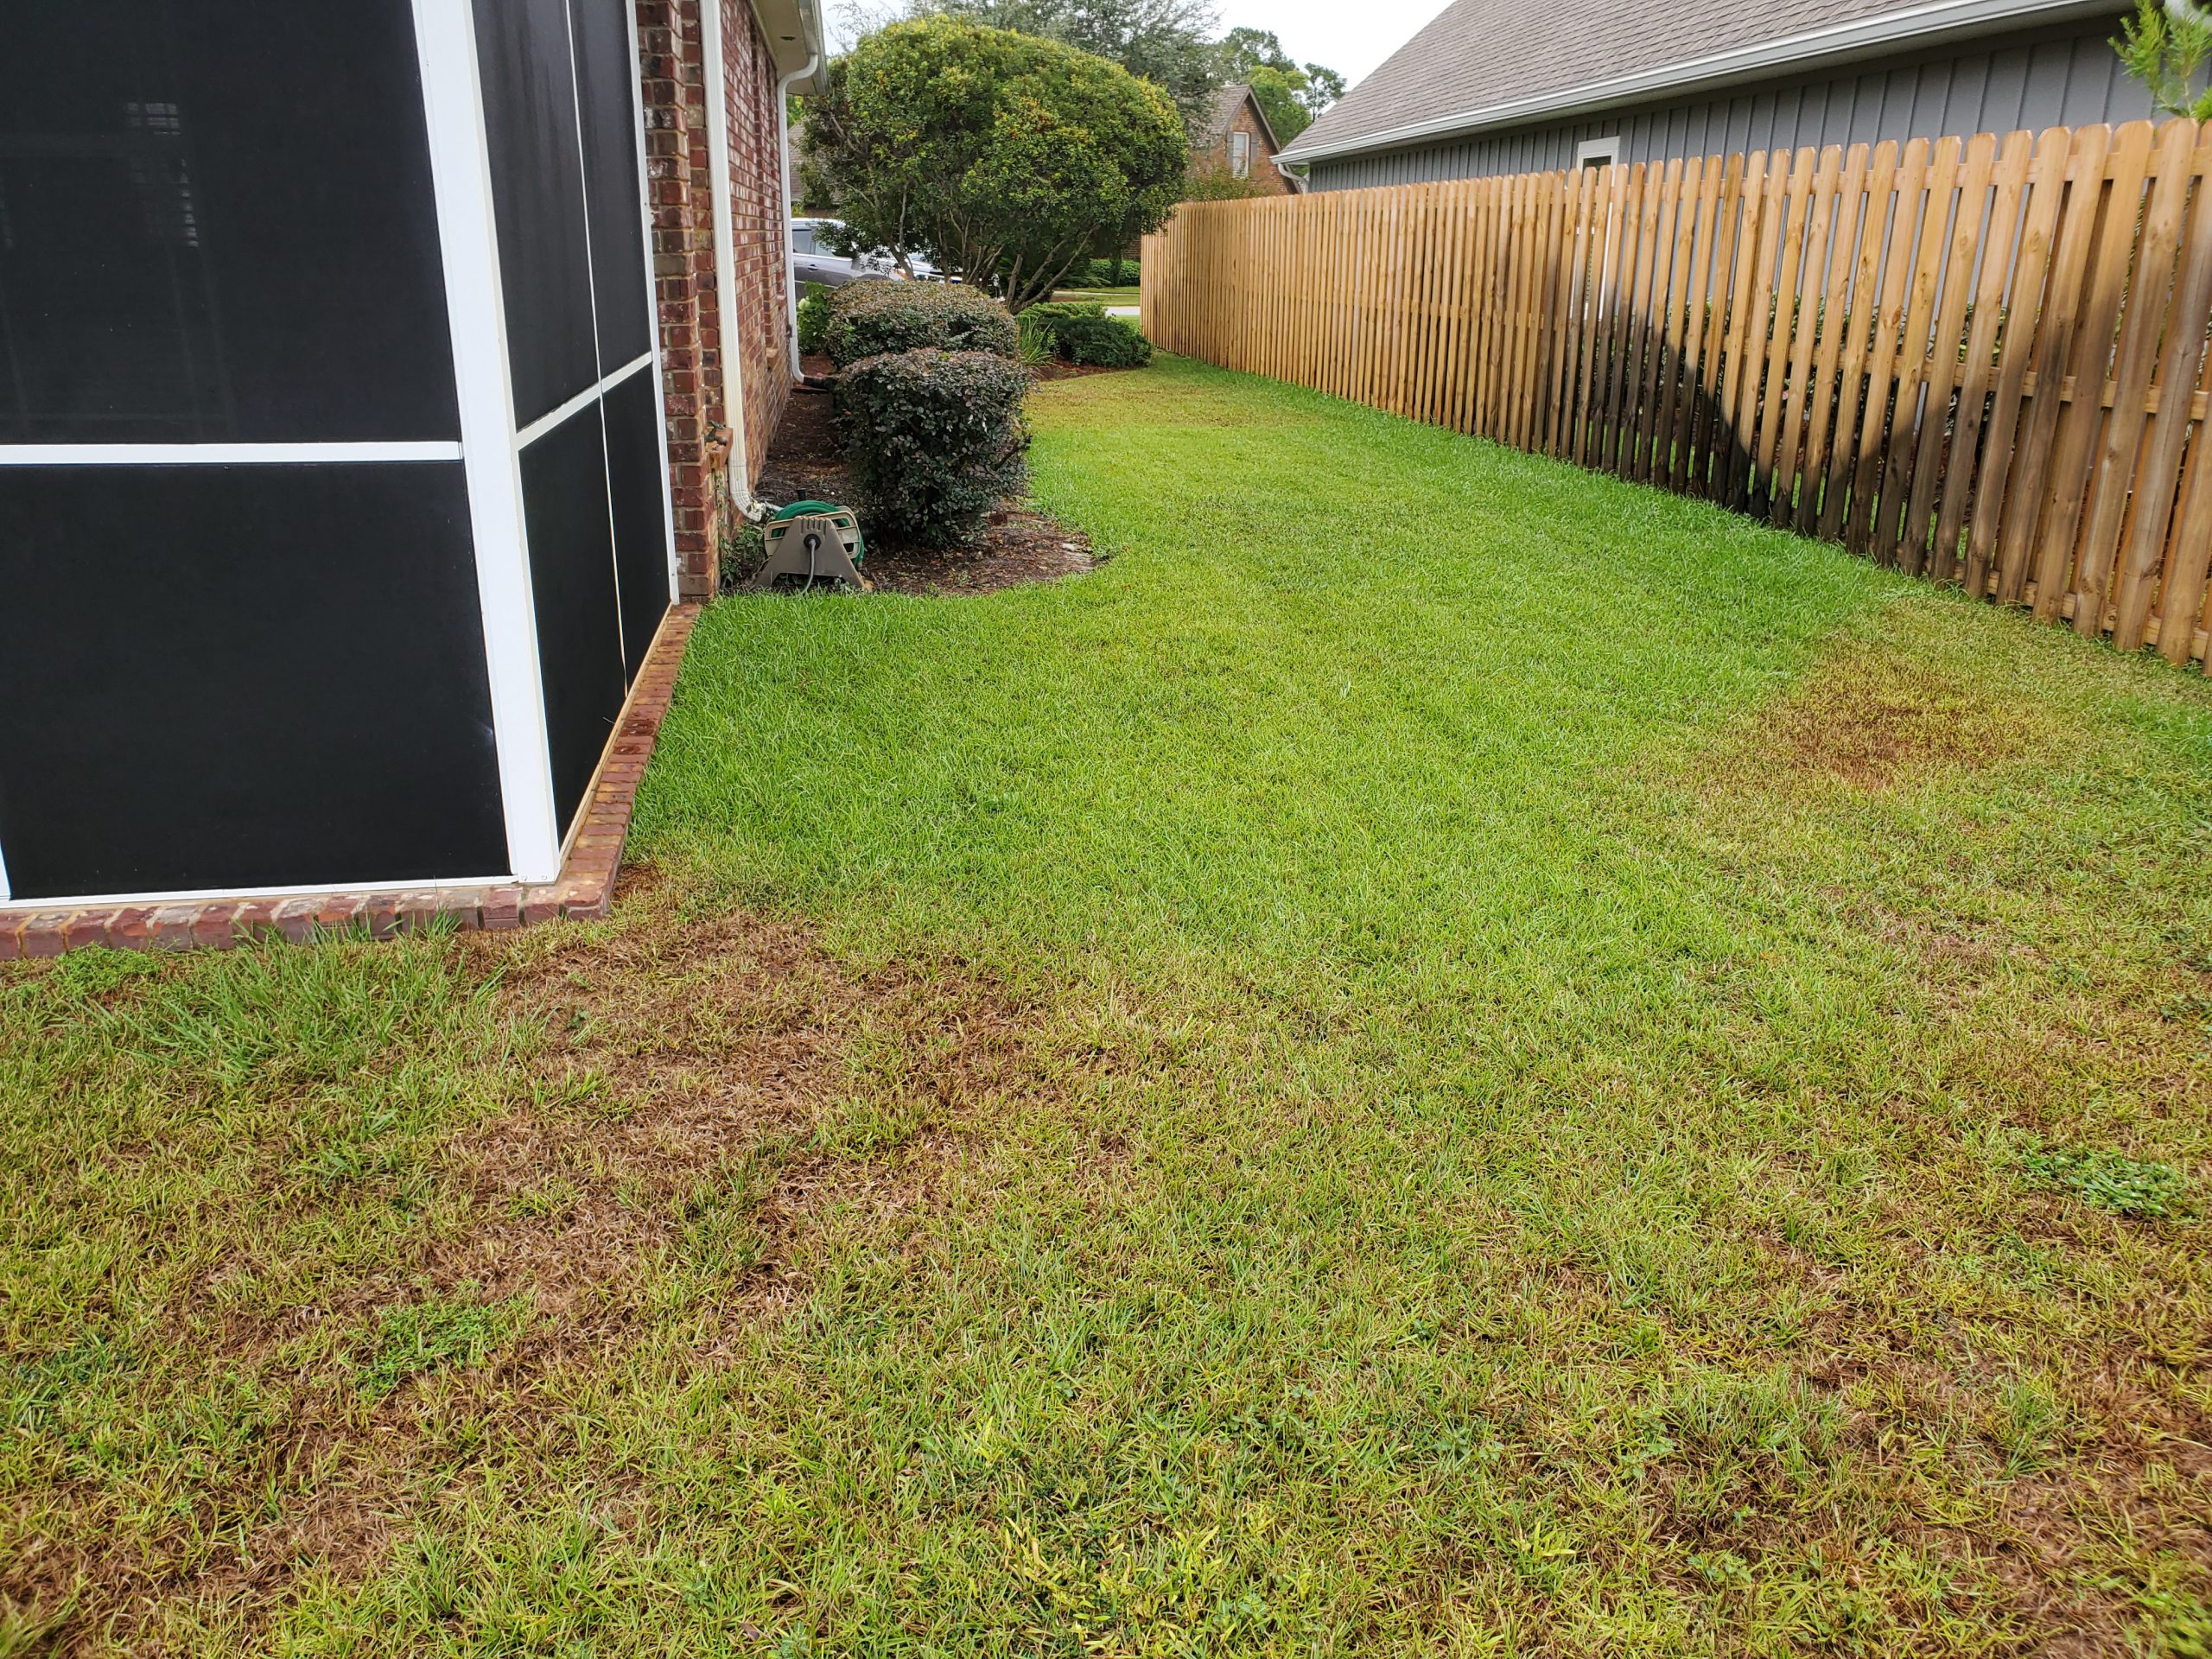
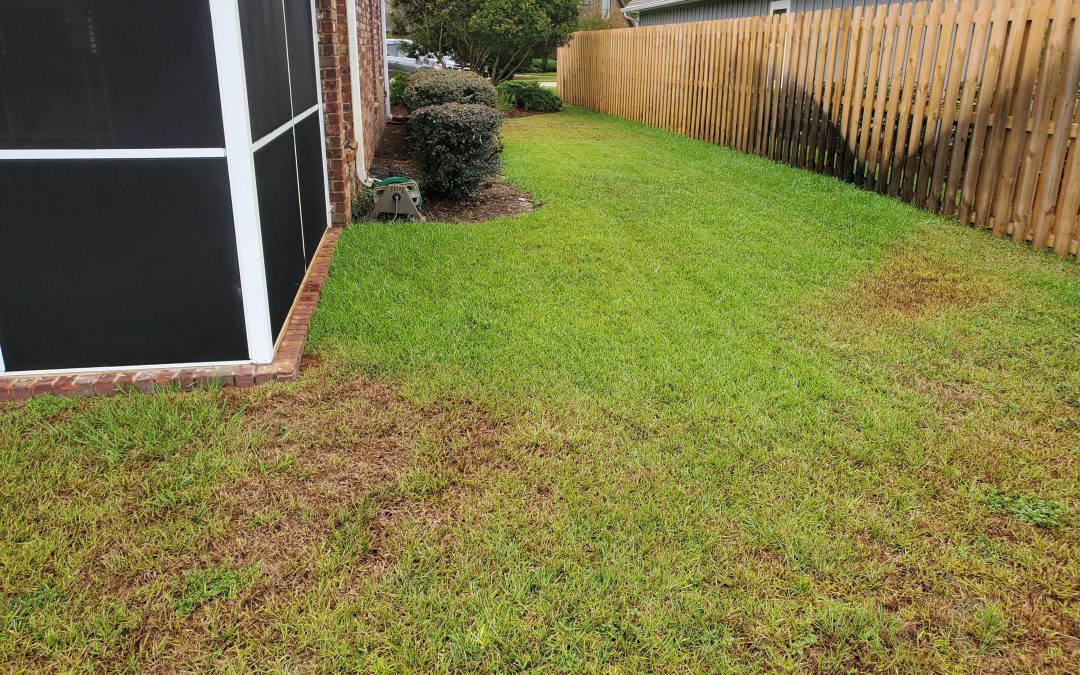
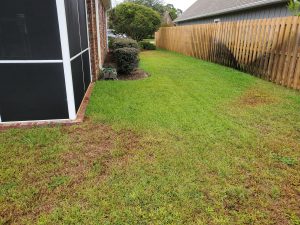
As temperatures lean more toward summertime highs, conditions can sometimes leave a landscape looking sad. Water issues can be a major source of headaches for homeowners when they cause plants to decline. The cause is not always readily apparent.
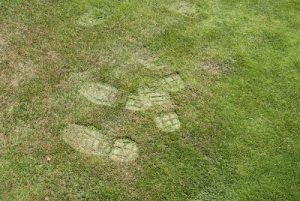
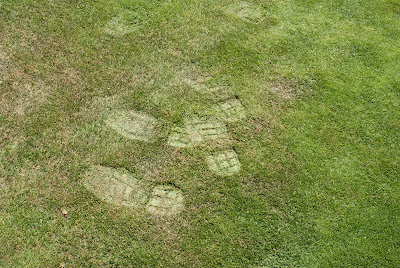
Footprints remain in droughty grass. Photo courtesy of Taylor Vandiver.
Water is something not even the meanest cactus in the driest desert can do without. Too little, and plants start to develop symptoms of drought stress. These symptoms include more than just wilting; stunted growth, curling or rolling leaves, fruit or leaves dropping, and yellowing or browning especially at leaf edges are all clues that a plant is thirsty. In lawns, underwatered grass may not spring back when stepped upon, leaving visible footprints in the turf. Long periods of drought stress can cause grass to thin. Plants exhibiting symptoms such as these may require extra water. A layer of mulch around landscaping can also help to retain moisture if soil dries out too quickly. Newly installed plants are particularly susceptible to drying out, and hot weather dries out all plants more quickly.
Plants can also be overwatered, however. Even with the well-drained, sandy soils that are present in much of the Florida Panhandle, it is possible to put too much water on a lawn or landscape. This can lead to problems that may be similar to those caused by underwatering – stunted growth, curled leaves, wilting, limbs or leaves dying, and increases in fungal disease can all occur. Lawns may become patchy and weeds, especially those that enjoy damp conditions such as sedges or dollarweed may establish themselves.
Improperly calibrated sprinklers. Photo courtesy of Evan Anderson.
Stress of any sort can also leave plants more susceptible to pest and disease issues. A healthy plant is better able to compete with weeds and fight off infestation or infection. If you notice problems with fungal disease, increased insect populations, or weed issues, it could be made worse by over- or underwatering!
To help avoid watering issues, make sure plants with similar water requirements are planted near one another. If you have irrigation for your lawn or landscape, it is important to calibrate it regularly. Make sure the system has a rainfall shutoff device and check systems for damaged or malfunctioning emitters. And remember, if you are having trouble with your lawn or landscape, contact your local Extension office for help!
You can find further information on watering in our EDIS publications located at https://edis.ifas.ufl.edu/topic_landscape_irrigation_and_fertilization, and at our Gardening Solutions website at https://gardeningsolutions.ifas.ufl.edu/care/irrigation/.
by Mark Tancig | Apr 30, 2020
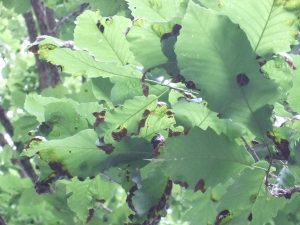
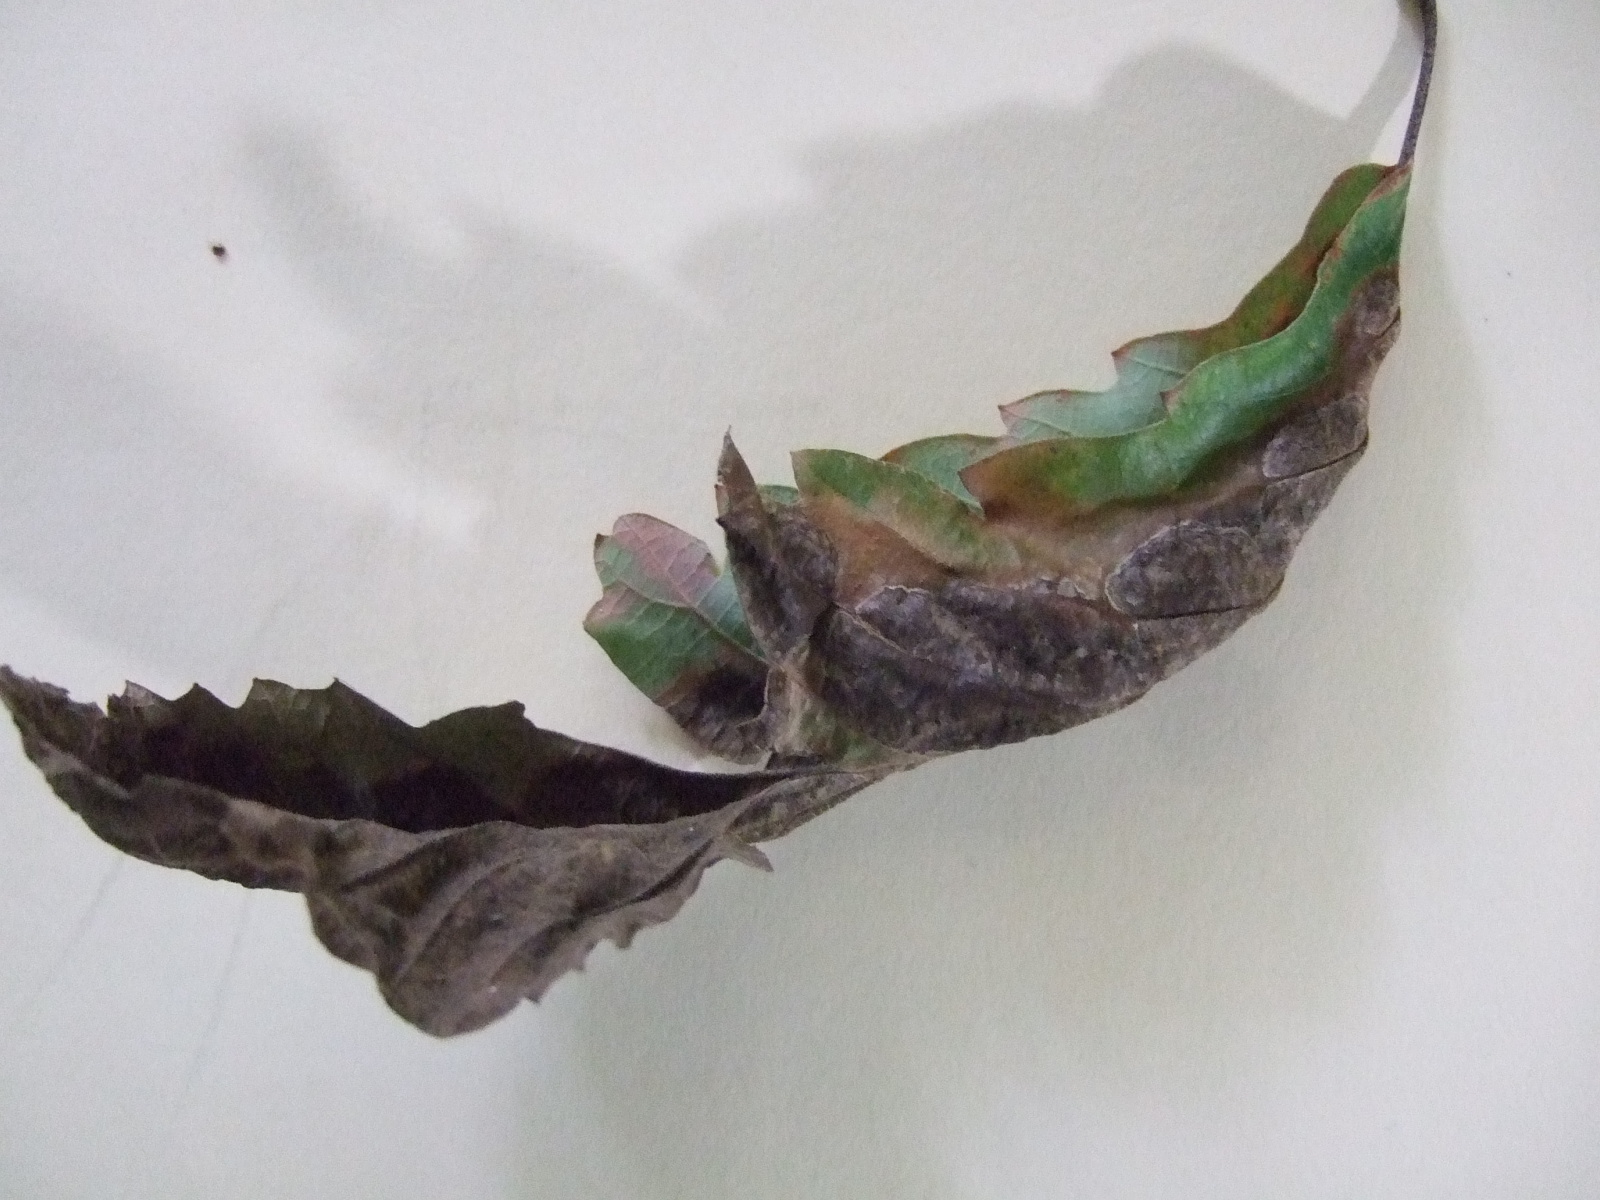
Symptoms of oak leaf blister on swamp chestnut oak. Credit: Gordon Magill.
Even during global pandemics, it’s a joy to be outside during the great north Florida spring we’ve been experiencing lately. As cold fronts come through with their rain bands, some packing a punch, they leave behind the most pleasant mornings, clear blue daytime skies, and crisp evenings. Unfortunately, we’re not the only organism that also enjoys those cool days. Many species of fungi are quite active this type of year as the rains, followed by warmer, yet not too hot temperatures, create the perfect conditions for fungal growth. Some of these fungi grow right on or in the plants we’d like to be enjoying for ourselves, stealing nutrients and causing plant decline or merely causing aesthetic damage. As this is an active time for certain species of fungi, local extension offices are getting more calls and questions regarding lawn and landscape damage due to fungal pathogens. A recent call was a new one for me and an example of a native fungi-plant interaction that looks bad but requires no intervention from us. It also highlights how correctly identifying a disease leads to the best action and can often save time and money and prevent unnecessary pesticides (in this case a fungicide) from entering the environment.
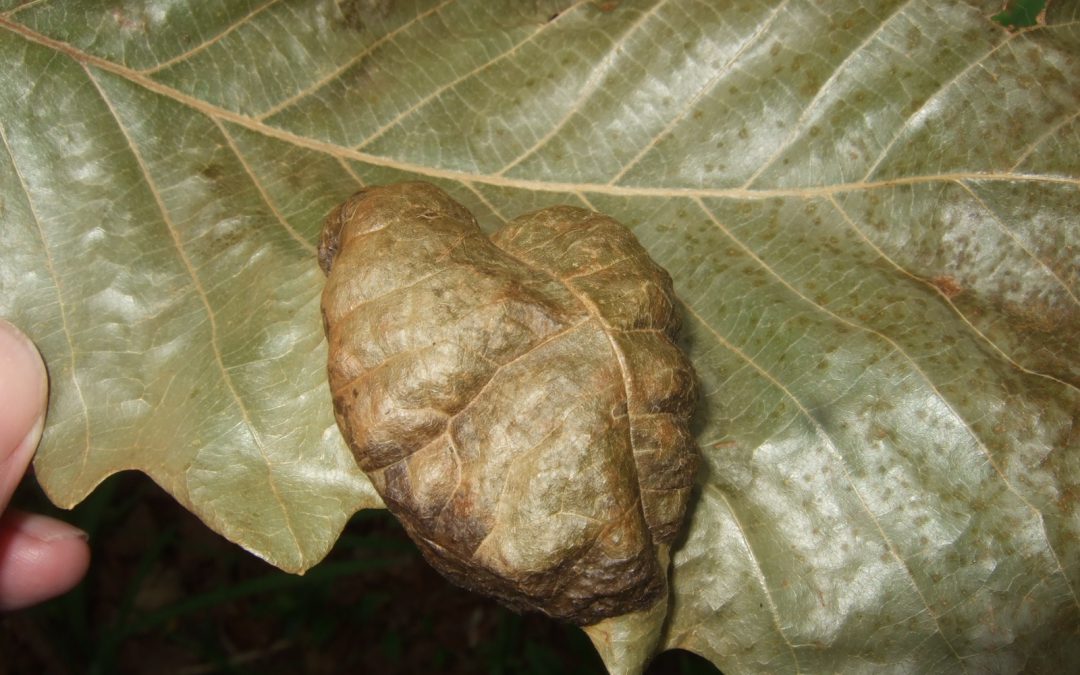
Close up of oak leaf blister on swamp chestnut oak. Credit: Gordon Magill.
The fungi and plant involved here was the oak leaf blister (Taphrina caerulescens) on a swamp chestnut oak (Quercus michauxii). It forms, you guessed it, blisters on the leaves of any of the oaks, though live oak (Quercus virginiana), laurel oak (Quercus laurifolia), and water oak (Quercus nigra) seem to be preferred hosts. The spores of the fungi, dormant since the previous summer/fall and which happen to get lodged in bud scales through wind and rain, germinate in cool, wet weather. The fungus then infects young leaves as they flush and its growth causes a disruption in the leaves’ development. This leads to the blistered look of the leaf tissue and, during extended periods of cool, wet weather, the entire leaf sort of shrivels, browns, and eventually falls off. Spores are eventually released from the fallen leaves to start the process over the next spring.
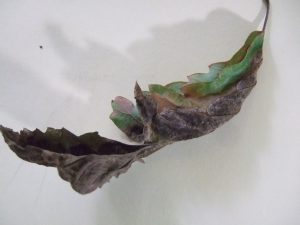
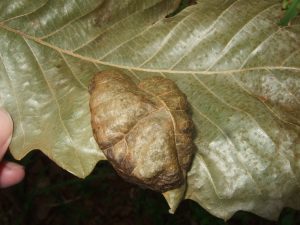
Severe oak leaf blister on swamp chestnut oak. Credit: Gordon Magill.
Though the leaves look pretty terrible, this fungal disease rarely causes plant health issues and the tree recovers just fine. Specimen trees that experience it year to year may be treated with a fungicide, but most homeowners can just let it go. Raking up and disposing of the leaves may help prevent further infections by reducing the number of spores released in the area.
As you enjoy another cool morning after an evening rainstorm, remember that the fungi all around you are also having a great day. You may want to look at your landscape plants and see if there’s anything abnormal going on. If so, take a photo and send it to your local extension office for help with identification and best methods of control, or, like in this case, just leaving it alone.
p.s. As I said this was a new one for me and I want to thank Stan Rosenthal, Extension Agent emeritus, for assisting with identification.
by Sheila Dunning | Apr 23, 2020
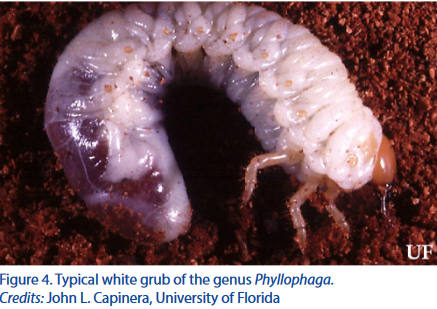
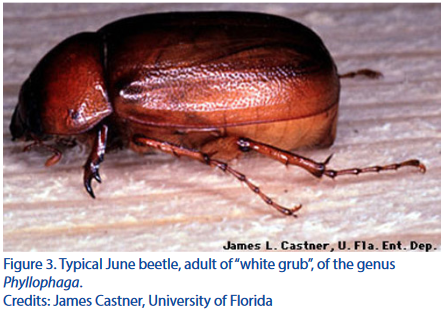
Members of the Phyllophaga genus are found throughout Florida and most of North America. One of them is the May/June beetle. Adults are most active during the rainy season. So in parts of the country where the wetter months are May or June, the common name of this insect makes common sense. But, when an area experiences extra rain earlier in the spring, the May/June beetle may emerge from the ground in March or April. That is what has happened in the western Panhandle this spring. May/June beetles have been leaving the soil and flying to the lights of people’s homes.
The life cycle of these beetles varies from one to four years. Eggs are laid in soil each spring by females. In 3 to 4 weeks, small grubs (larvae) hatch from eggs and develop through three stages (instars), with the first two stages lasting about 3 weeks. The larvae will move closer to the surface and back deeper in the soil as the soil temperature changes. While close to the surface, larvae feed on grass roots about one inch below the soil surface. Damaged grass turns brown and increases in size over time. Heavy infested turf feels spongy and moves when walked upon. The last larval stage remains in the soil from the fall through spring. The cool soil temperatures drive the larvae deeper in the soil where they remain relatively inactive. Typically, on the third year, white grubs pupate 3 to 6 inches deep in the soil and emerge as adults.
 Larvae, called grubs, vary in length from ¾ to 1 ¾ inches depending on the stages. Grubs are white with a C-shaped body with a brown head and three pairs of legs near the head. Adults have ½ to 1 inch long, shiny bodies that are dark yellow to brownish-red in color. Adults do feed on the foliage of several species of ornamental plants, but the damage is typically only aesthetic; not causing long-term harm.
Monitoring of and managing emerging adults can help with deciding on the need for insecticide control for the grubs. To catch and remove adult beetles, place white buckets containing soapy water near plants that have chew marks or areas with lights at night. Leave it overnight. The beetles can easily be disposed of the next day. If there are more than 12 in the bucket be prepared to monitor the lawn for grubs. Extra rain or frequent irrigation during the adult flight time may attract more egg-laying females.
To inspect for grubs, turn over sod to a depth of at least two-inches. If there are an average of three or more per square foot, an insecticide treatment may be needed. To confirm that they are May/June beetles inspect the darkened rear of the grub. Locate the anal slit. It should be Y-shaped with two rows of parallel bristles that point toward each other. This is referred to as the raster pattern. All grub species can be identified using their unique “butt” features.
The most effective time to control this pest is summer or early fall when the larvae are small. Remove as much thatch as possible before applying an insecticide. Spot treat the off-colored area plus the surrounding 10 feet with products containing imidacloprid or halofenozide in early summer. Follow up in the fall with insecticides such as trichlorfon, bifenthrin or carbaryl if grubs persist.