by Sheila Dunning | Jul 9, 2020
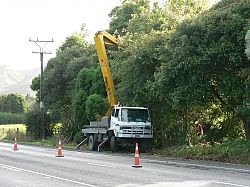
Utility tree trimming truck
With hurricane season upon us, evidence of preparation is all around us. Tree trimmers, contracted by the local electrical utility companies, have been removing trees, branches and other vegetation that is “too close” to power lines. Many homeowners are concerned over the practice.
In order to prevent power outages, the federally approved Vegetation Management Reliability Standard, FAC-033-2, requires utilities to manage vegetation growth along the path of power lines to prevent contact. A minimum clearance of fourteen (14) feet between trees and transmission lines in the right-of-way must be maintained at all times in order to achieve service reliability and public safety.
By Florida Statute 163, an electric utility is granted easement or right-of-way on private property in order to build and maintain electric power lines. Vegetation maintenance allows for the mowing of vegetation within the right-of-way, removal of trees or brush within the right-of-way and selective removal of tree branches that extend within the right-of-way by the electric utility personnel, licensed contractors or International Society of Arboriculture (ISA) Certified Arborists. The choice of how to trim trees and manage vegetation growth near a power line (e.g. pruning, herbicides, or tree removal) is primarily made by the electric utility, subject to state and local requirements and laws, applicable safety codes, and any limitations or obligations specified in right-of-way agreements. An individual may contact the utility company to obtain a copy of the right-of-way agreement for their property.
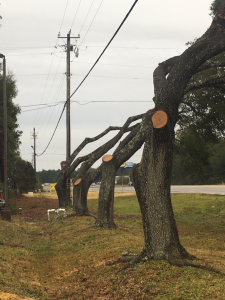
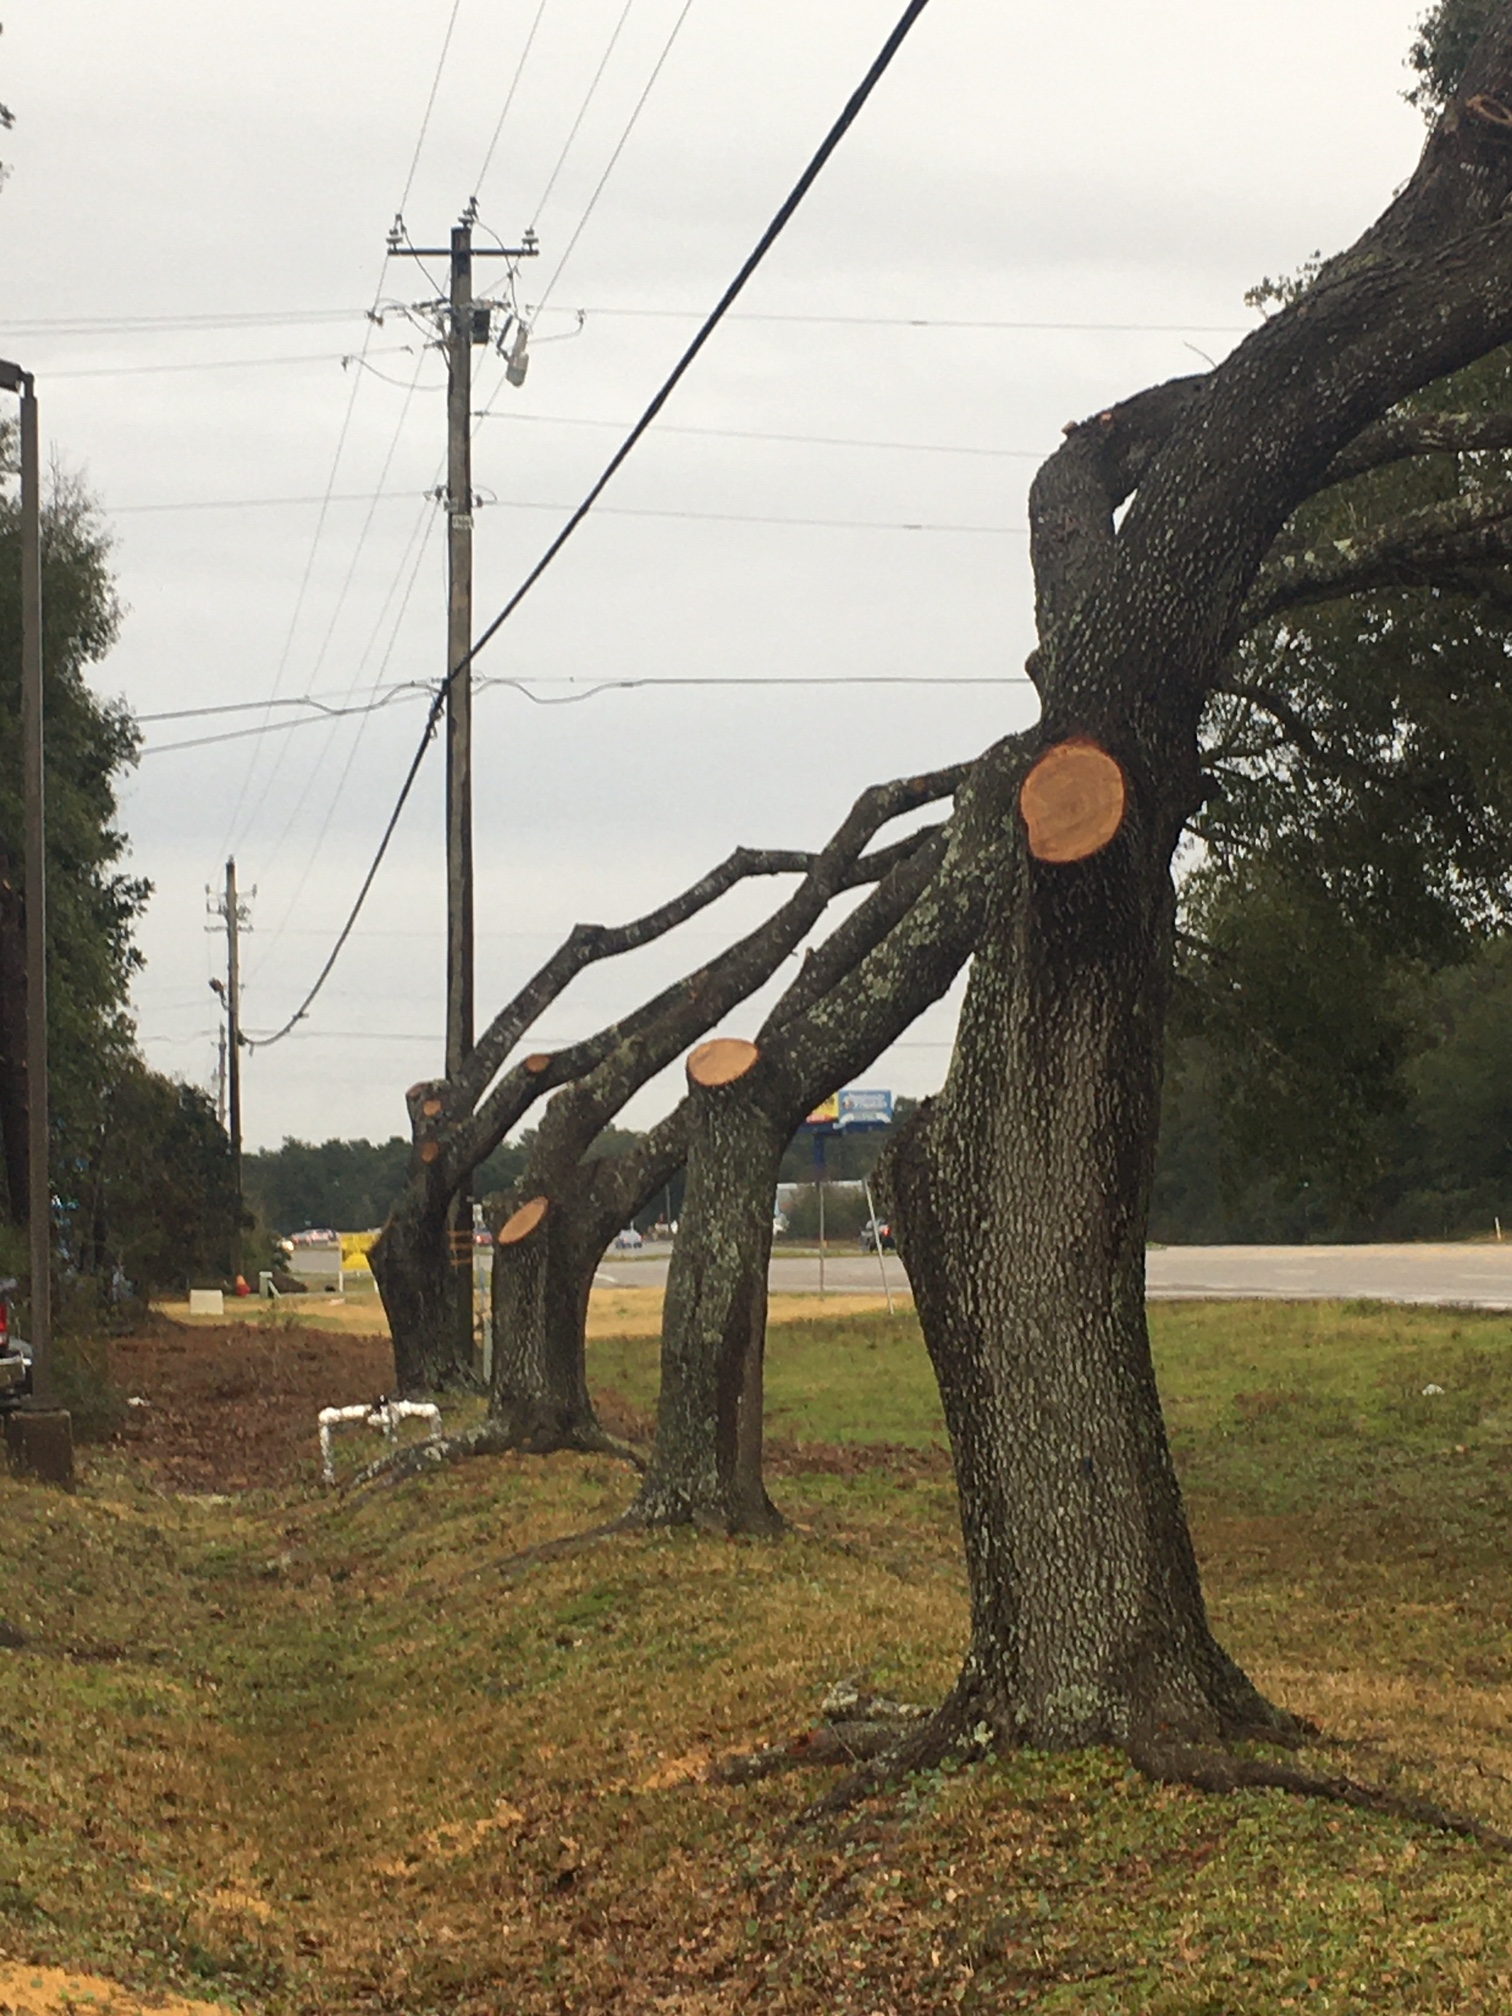
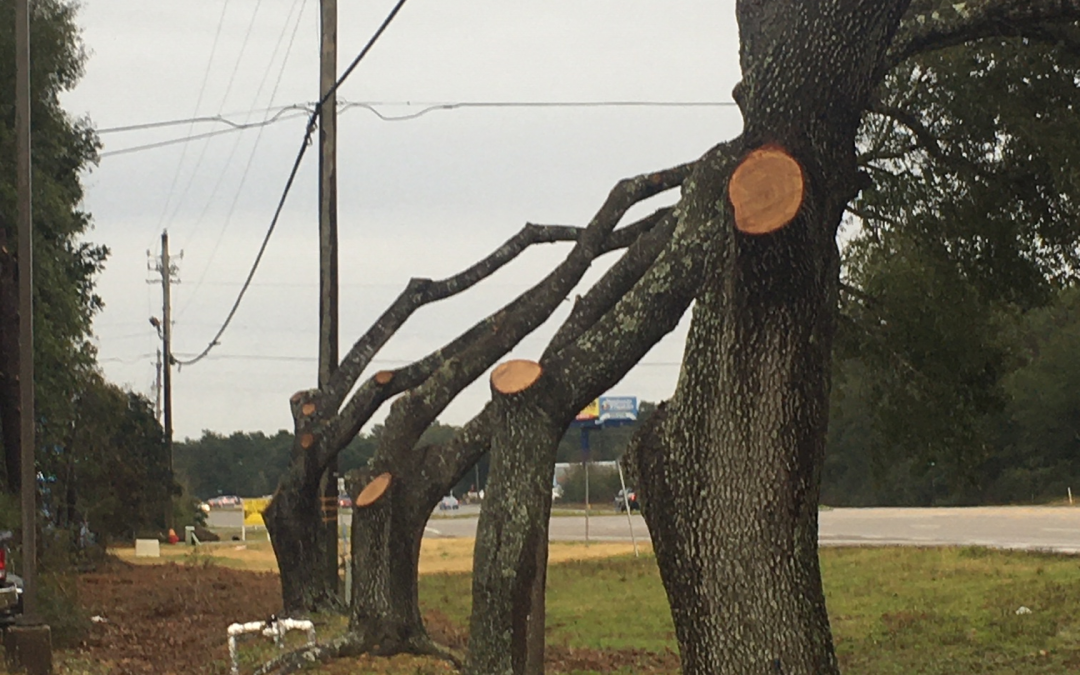
Over-pruned trees along power line
Sometimes, it appears to some that excessive vegetation has been removed. But, remember the utility companies are required to maintain the appropriate clearance “at all times.” For example, in the summer, power lines sag as they expand from rising air temperatures and heavy use. Also, wind and future growth must be taken into account when determining where to prune. Electric utilities usually prune or remove vegetation to a distance greater than the minimum clearances to account for all these factors. However, in many instances, removal of the tree would be more aesthetically pleasing and could avoid leaving a hazardous tree in the landscape. But, that is not part of their contract. That decision must be made by the property owner.
Tree trimming around power lines may seem like a local issue, but vegetation growth also affects interstate transmission lines. The U.S. Department of Energy estimates that electric utility service interruptions cost businesses and communities tens of billions of dollars annually. Tree contact with transmission lines was the leading cause of the August 2003 blackout that affected 50 million people in the Northeastern United States and Canada. In fact, that particular blackout prompted Congress to pass the Energy Policy Act of 2005, which lead the Federal Energy Regulatory Commission (FERC) to establish the Vegetation Management Reliability Standard.
Should we have a storm that impacts Northwest Florida, remember that the clearing of trees and branches provides faster access for first responders, line repair crews, and other emergency service personnel. So, as you watch the preparation work being done, think about where you will be planting a tree so that it can reach full maturity without threatening power lines, therefore, not requiring “ugly pruning!”
Spacing between trees and power lines
The urban forest is much different from a natural forest. Trees often develop a form that is more susceptible to breakage when grown in developed commercial and residential environments. As a result, trees need preventive pruning to develop strong structure. Research and observation show that well pruned trees can create a more wind resistant urban forest.
Pruning to create stronger tree structure is an ongoing process. To minimize the likelihood of tree damage it is necessary to reduce the length of limbs with a weak attachment to the trunk and to balance the canopy by reducing the length of limbs on the side where weight is concentrated. Do not remove interior branches, as this concentrates foliage at the tips of branches and causes them to break in strong winds.
Limbs that are more than ½ the diameter of the trunk and multiple trunks of similar size must be reduced in order to form strong branch unions and eliminate co-dominant leaders. A reduction cut is pruned back to a smaller lateral branch. Good pruning cuts avoid cutting into the collar. The collar is the swollen area at the base of the branch where it joins the trunk. The tissue is rich in energy reserves and chemicals that hinder the spread of decay.
Preventative pruning only applies to woody tree species. Palms need fronds to protect the bud and provide nutrients for growth. Arborists report that results from previous storms revealed that palms that had been “hurricane pruned” suffered more damage than those that were not pruned. Do not wait until the last minute to prepare your trees for hurricane season. Take action now. For more information on pruning visit: http://hort.ifas.ufl.edu/woody/pruning.shtml.
If you want professional help evaluating your trees or performing the proper corrective actions, visit: https://www.treesaregood.org/findanarborist to locate a Certified Arborist working in your area.
by Matt Lollar | Jun 23, 2020
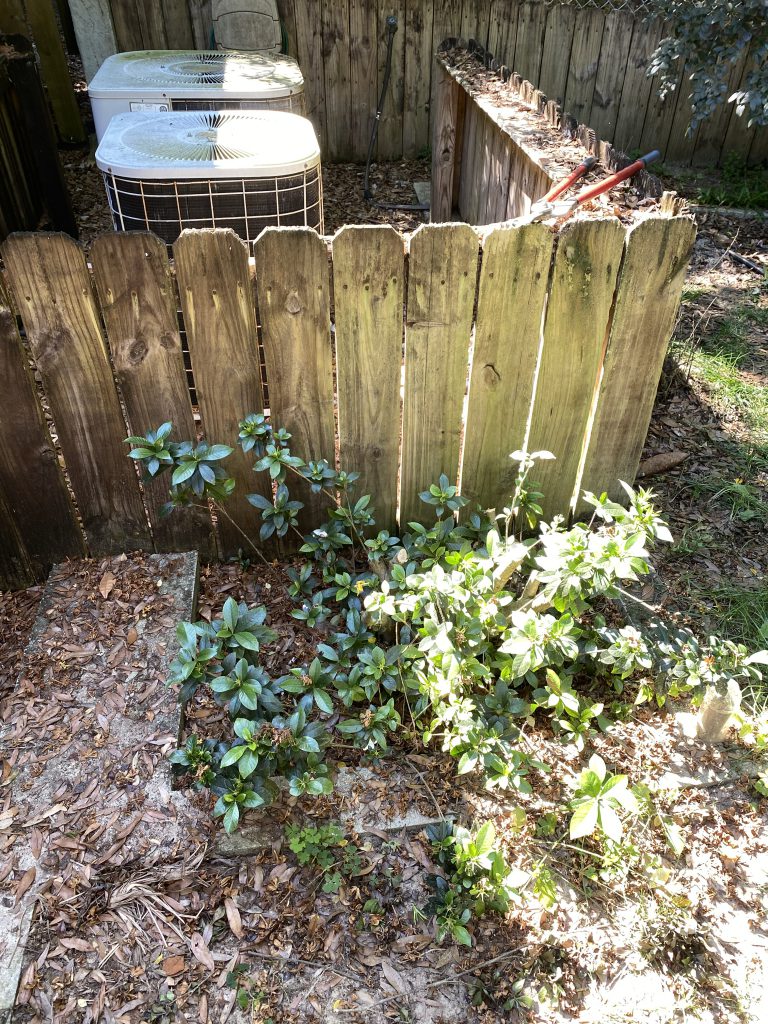
I live in the woods, so I mainly have a “natural” landscape. I remove trees, shrubs, and weeds as I see fit, but for the most part things just grow wild. However, there are a few spots in the yard where the previous owners did a little landscaping. Unfortunately, these spots have become a bit overgrown. One spot in particular features some gardenia plants around the HVAC units. At first, I was a little hesitant to prune these shrubs because they provide some shade to the units. However, they have become overgrown and I know they will grow back. I was patient to wait for them to finish flowering.
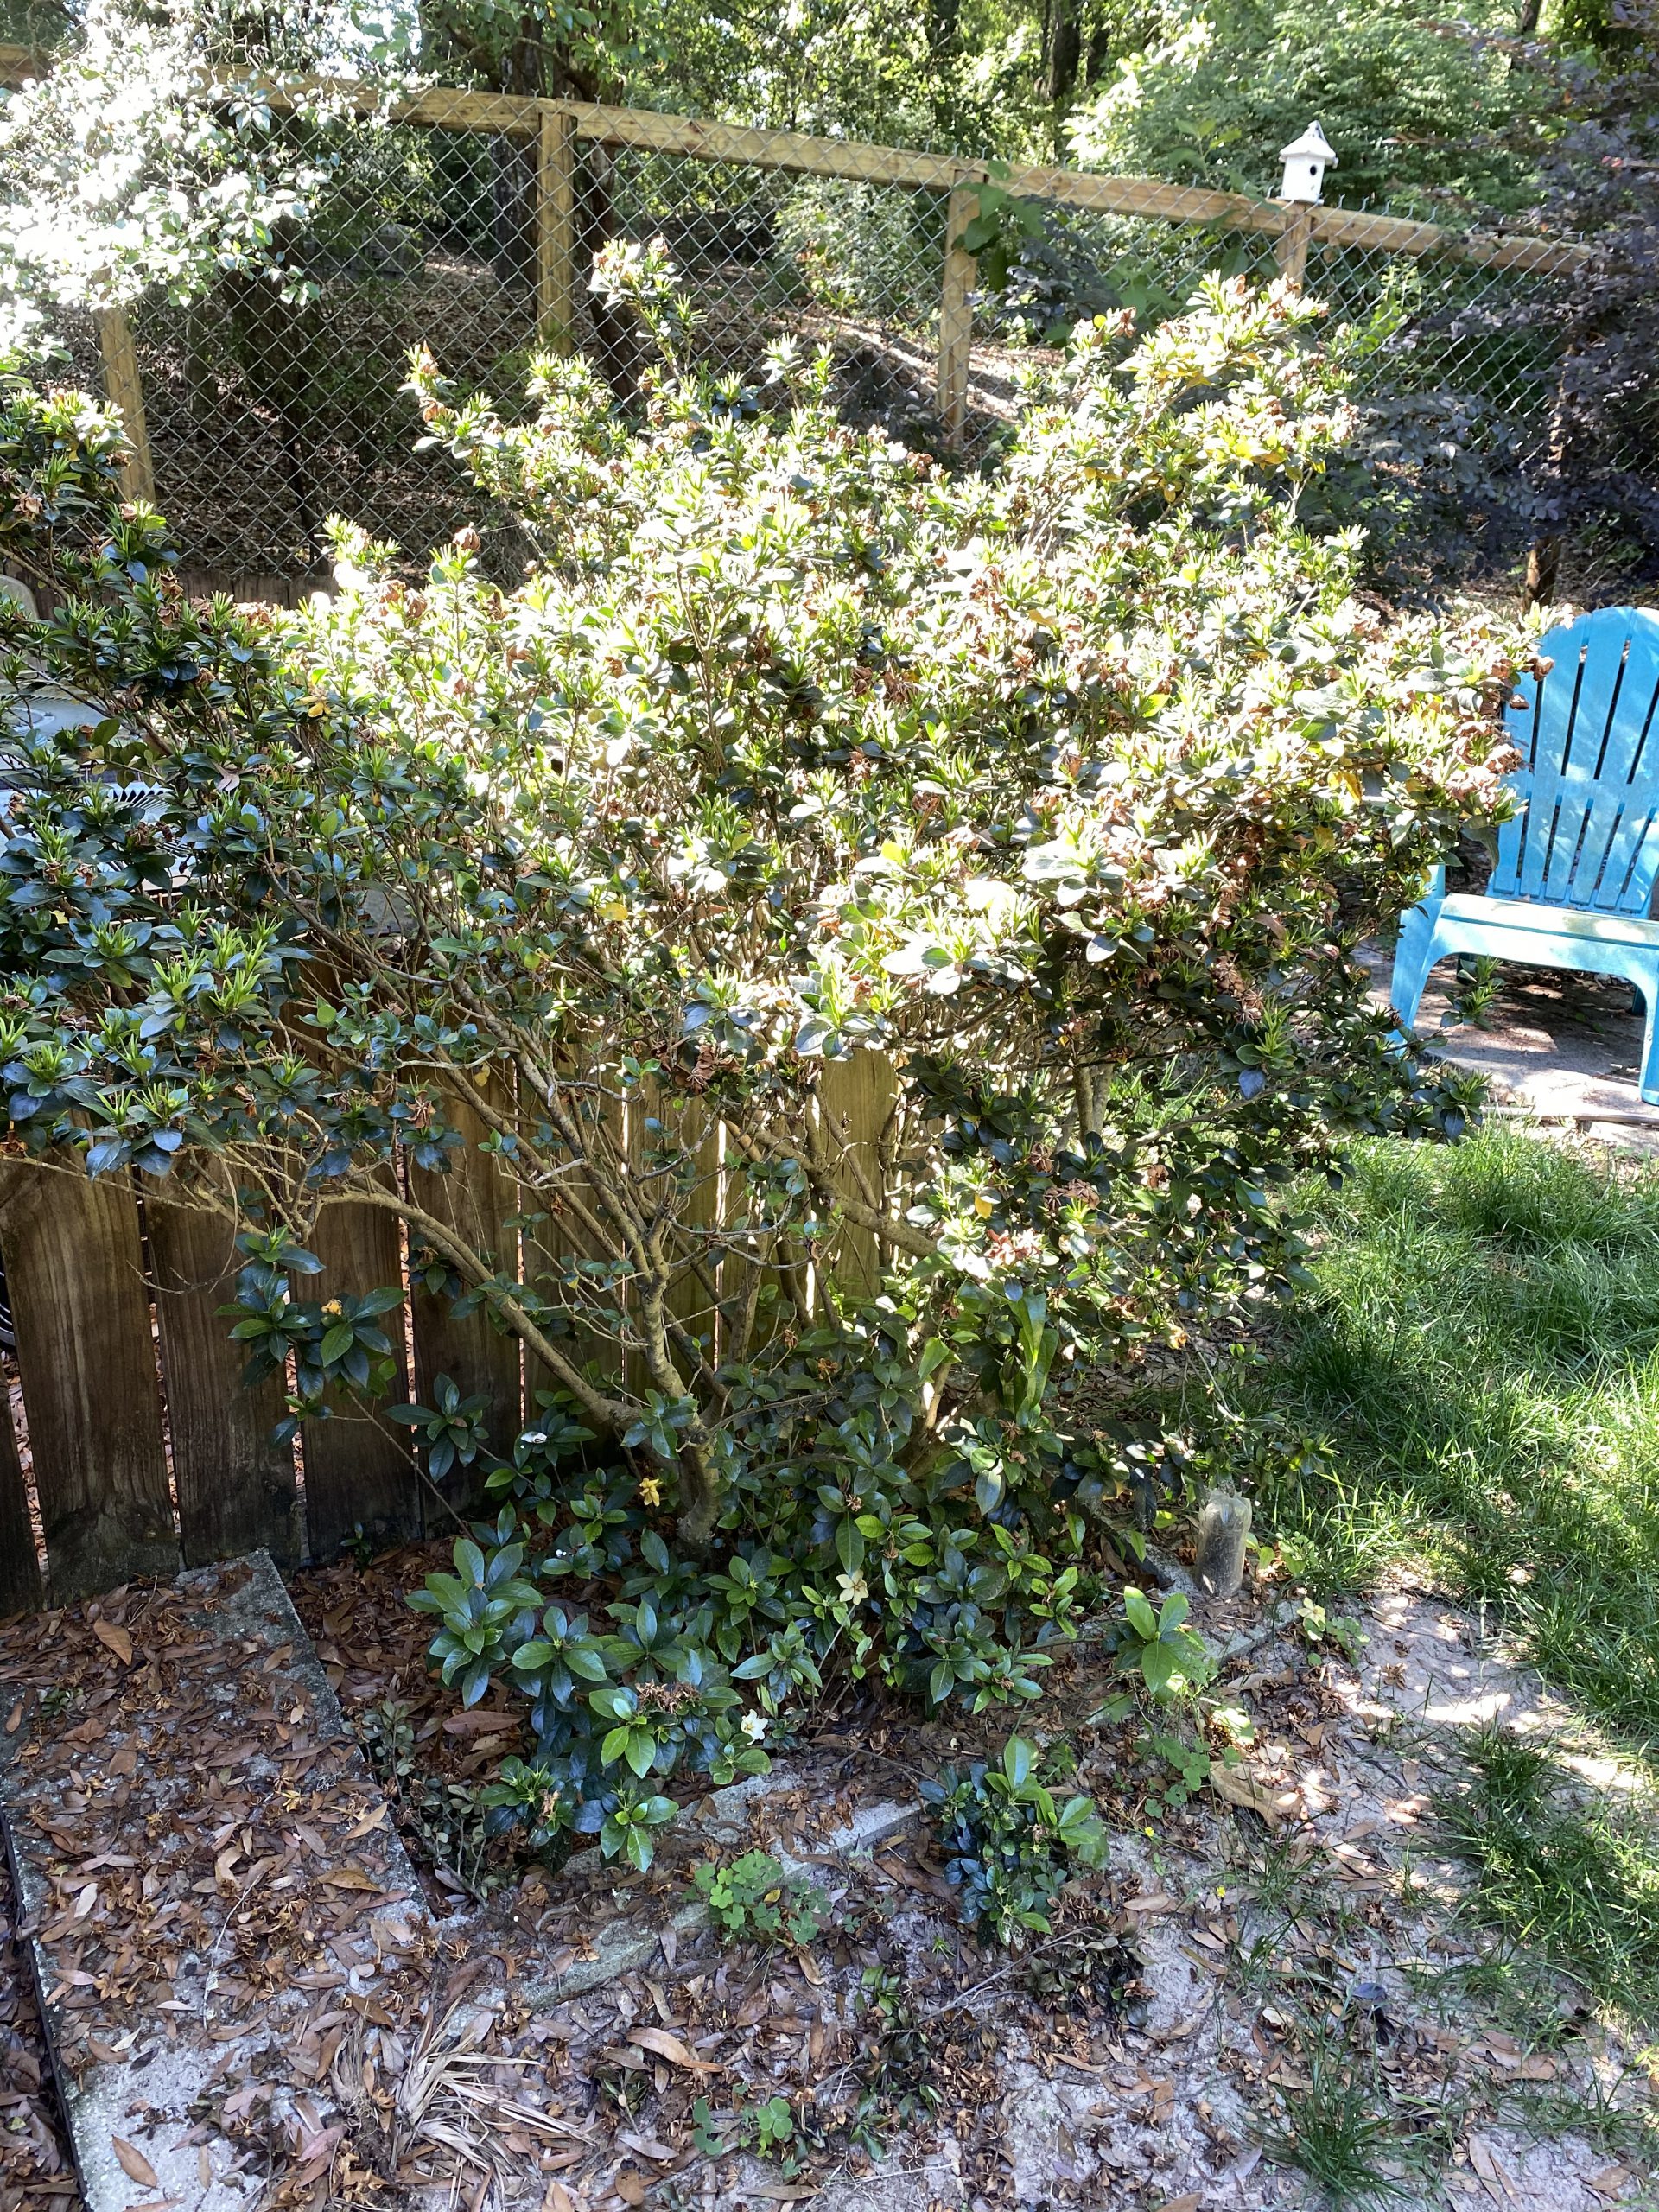
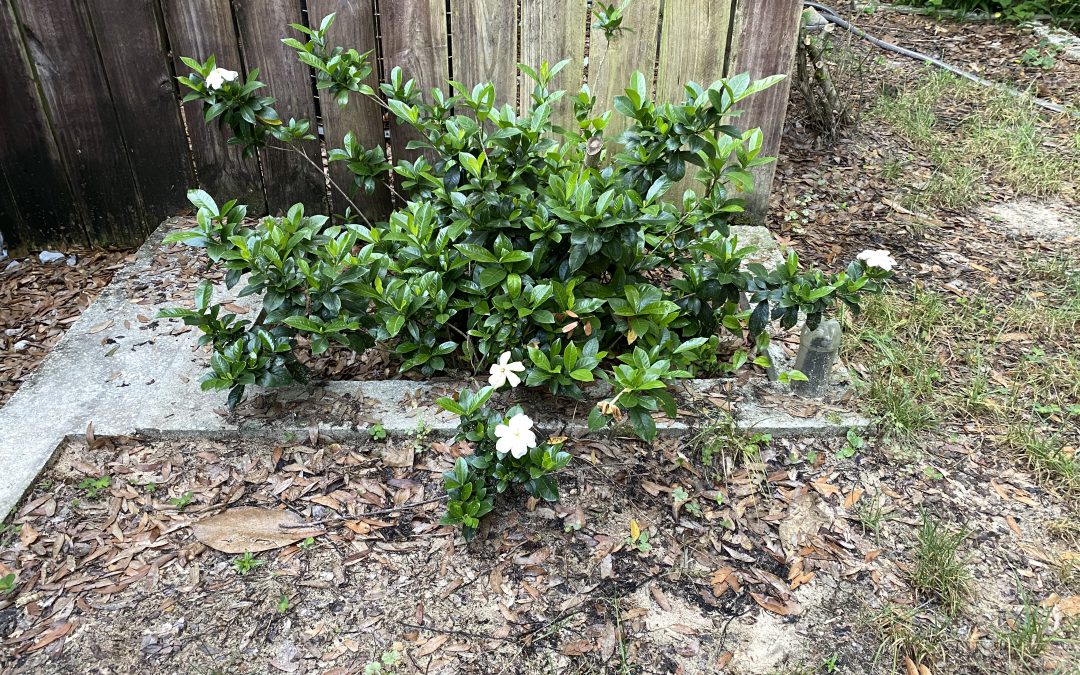
A gardenia shrub that has become a bit overgrown. Photo Credit: Matt Lollar, University of Florida/IFAS Extension – Santa Rosa County
As you can see in the photo above, this gardenia has become a bit leggy. It is important to also note the good amount of branching and new growth at the base of the plant. There are a few pruning options available for shaping shrubs such as hedging/terminal pruning, selective pruning, and renewal pruning. While a tree form gardenia can be attractive, it wasn’t desired in this situation. This particular case called for renewal pruning to improve the form of the plant. Renewal pruning is probably the easiest type of pruning, because it requires the least amount of thinking. It basically involves removing the majority of old growth.
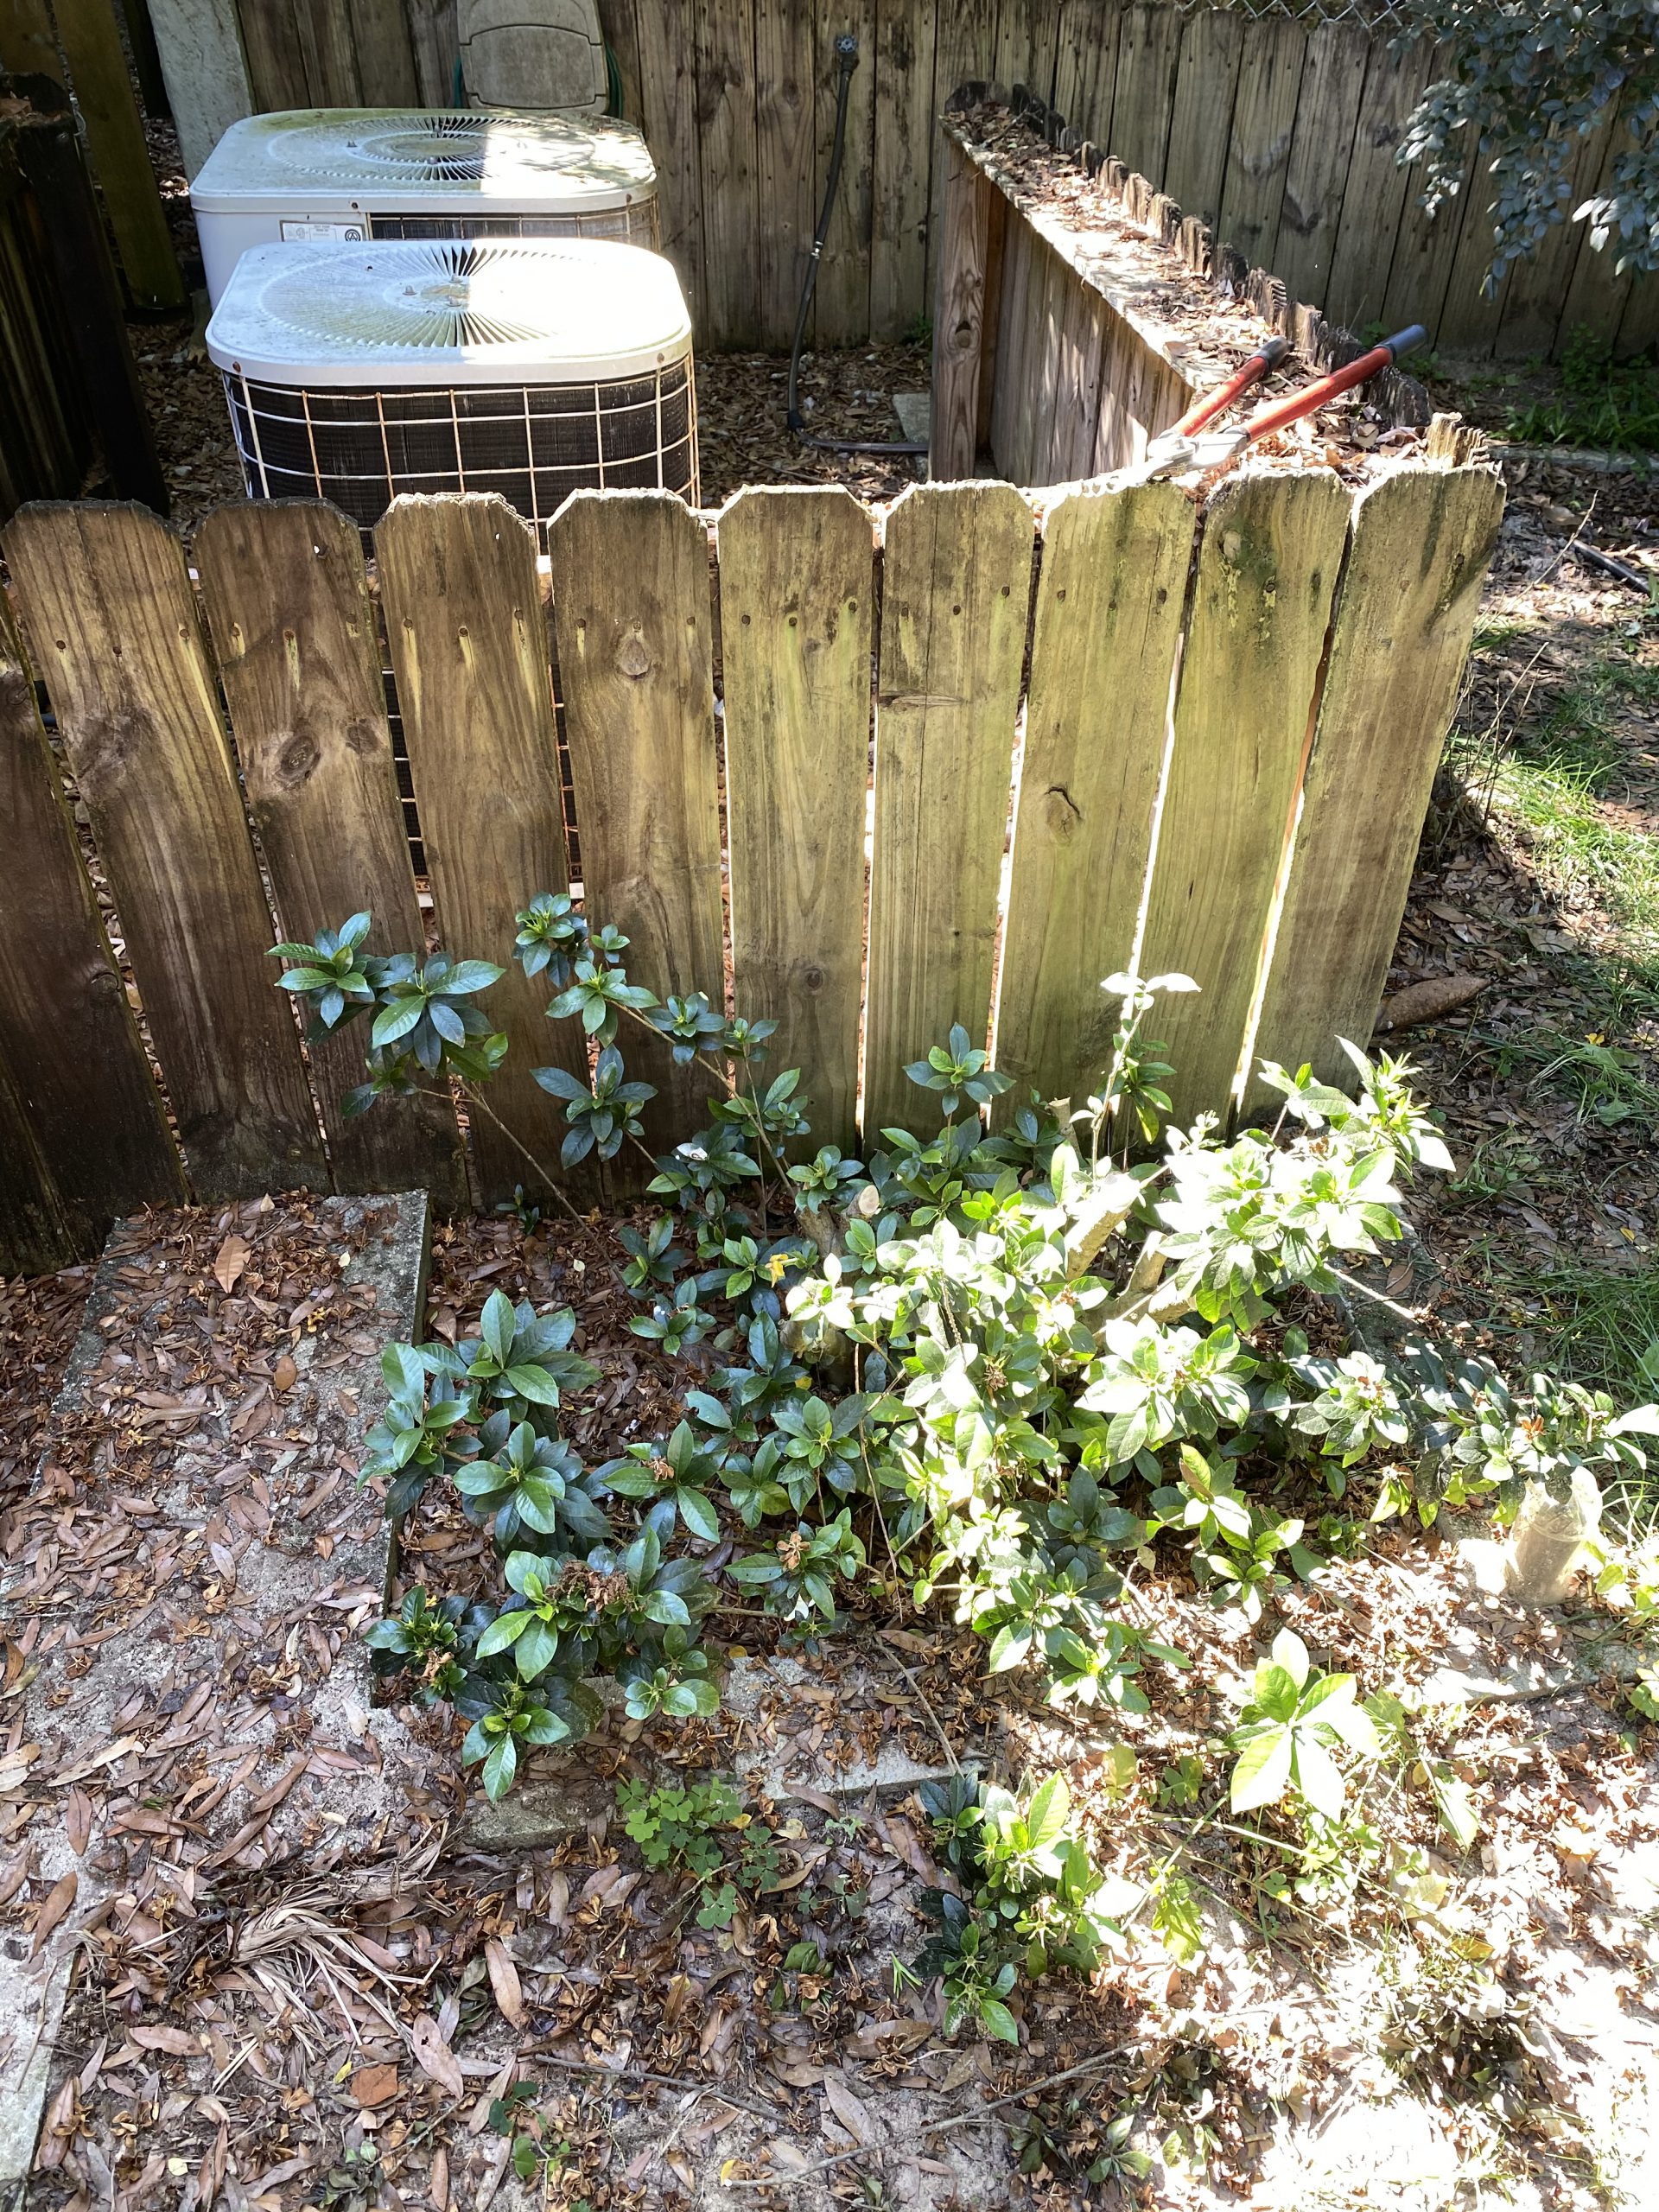
A gardenia shrub that has been renewal pruned. Photo Credit: Matt Lollar, University of Florida/IFAS Extension – Santa Rosa County
The picture above is of the same shrub that has been pruned heavily. Not only have the older, leggy branches been removed, but some of the newer growth has been removed to allow for better air circulation within the shrub. This will help reduce the incidence of disease.
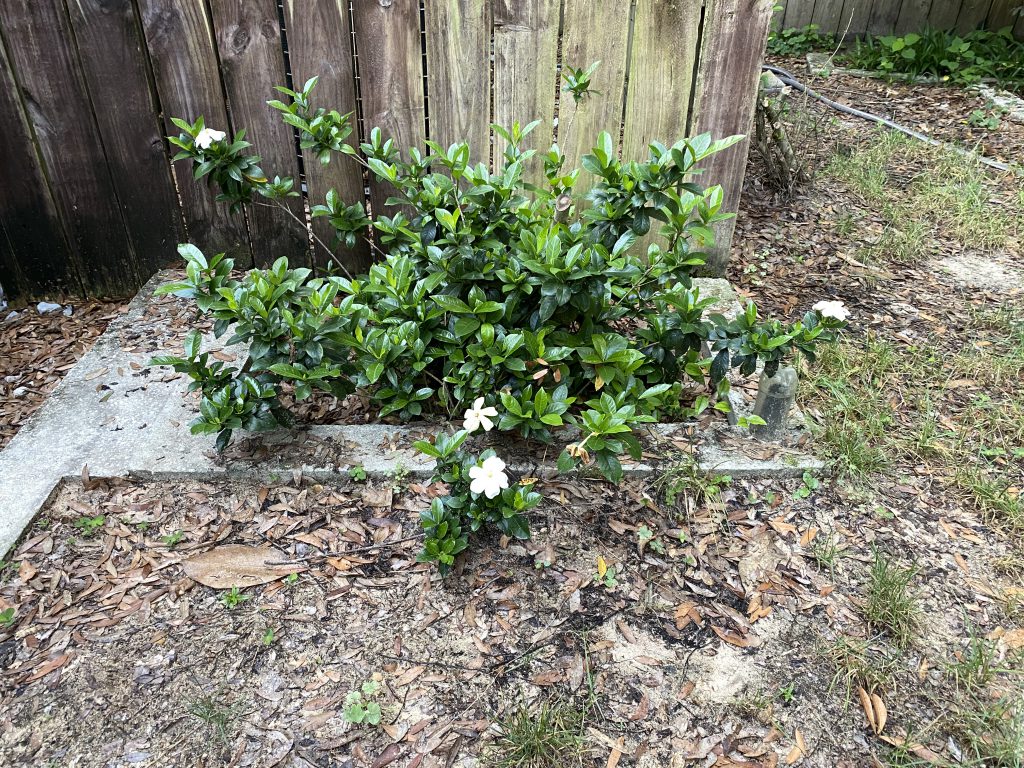
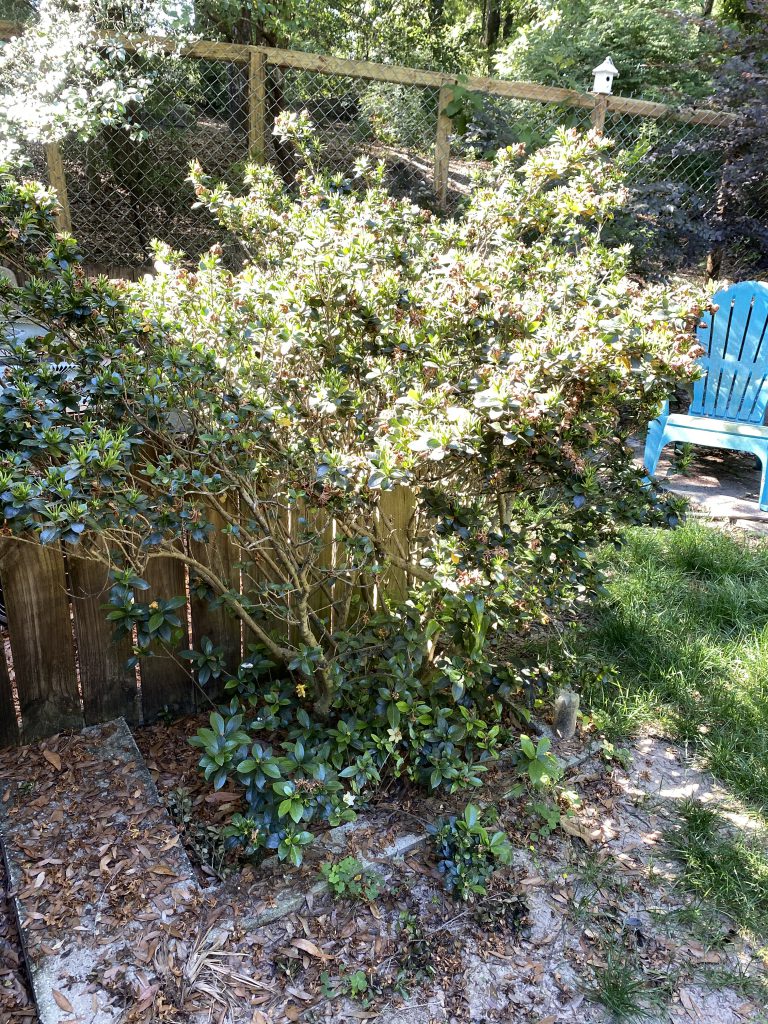
A gardenia shrub six weeks after renewal pruning. Photo Credit: Matt Lollar, University of Florida/IFAS Extension – Santa Rosa County
Six weeks after being pruned, this shrub is flowering for a second time. In a matter of short time it will be providing much needed shade for the HVAC units again. (That is..if I remember to selectively prune throughout the year.) For more information on how to prune and what to prune, please visit the UF/IFAS Gardening Solutions page on pruning.
by Ray Bodrey | Jan 22, 2020
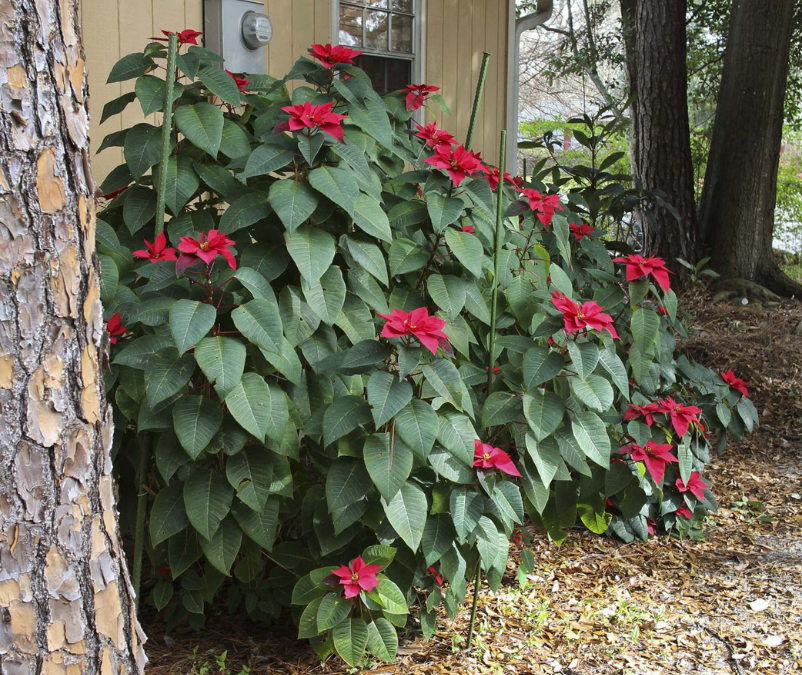
Many of us enjoy potted poinsettias during the holiday season. However, we often give up on the poinsettia, once the season is over and the festive color has been lost. With some care, a poinsettia can be around for seasons to come, if planted in your home landscape.

Photo: A mature poinsettia planted outside of a home.
Credit: UF/IFAS, Robert Annis.
Once your poinsettia starts to fade after the holiday, you can prepare it for transplanting. Since we live in the cooler, northern area of the state, you’ll have to hold your plant in a protected area until the danger of frost has pasted. During this period, the poinsettia should be allowed to become dormant. Water it occasionally, just enough to keep it from drying out. A thorough soaking about once a week should be sufficient. Poinsettias are especially sensitive to extremes of heat and cold, as well as sudden temperature changes. Because of this, keep your potted poinsettia away from hot air vents, cold windows and doorways, where temperature fluctuates rapidly. Keep your poinsettia in a brightly lighted area, but never in direct sun.
When you’re ready to plant the poinsettia in your landscape, you should carefully consider its placement relative to the amount of light it will receive. Poinsettias are “short day” plants. This means they will set buds in the fall only if the daily period of light they receive is relatively short. If you plant your poinsettia where it’s exposed to extra illumination from porch, window, or street lights, it may never bloom.
Poinsettias will grow in a wide range of soils, sand, muck, marl, and clay and they will need fertilizer. For the correct nutrients, apply a complete fertilizer, such as a 8-8-8 or 10-10-10, three times a year, beginning when growth starts in the spring, in June, and finally in the late fall, after the bracts (flowering leaves) have set. This last application promotes large bracts with showy color. Apply 1 ½ pounds of 8-8-8 or 10-10-10 per 100 square feet each application of fertilizer.
In late winter or early spring, after blooming is over and the danger of frost is no more, poinsettias should be pruned back to within 12 to 18 inches off the ground. If they’ve been frozen, you may have to cut even lower. To insure compact, showy plants at flowering time, poinsettias should be pruned several times during the growing season. Each time new growth reaches a length of 12 inches, it should be cut or pinched back, leaving four leaves on each shoot. This operation should be continued until about September 10th, but no later. Because poinsettias begin to set buds as days become shorter, pruning after September 10th may reduce flower production.
Following these tips should reward you with another beautiful burst of color next holiday season. For more information contact your local county extension office.
Information for this article was provided by UF/IFAS Extension Horticulturist Dr. Robert Black. More information on the poinsettia can be found at https://gardeningsolutions.ifas.ufl.edu/plants/ornamentals/poinsettia.html
UF/IFAS Extension is an Equal Opportunity Institution.
by Matthew Orwat | Sep 17, 2019

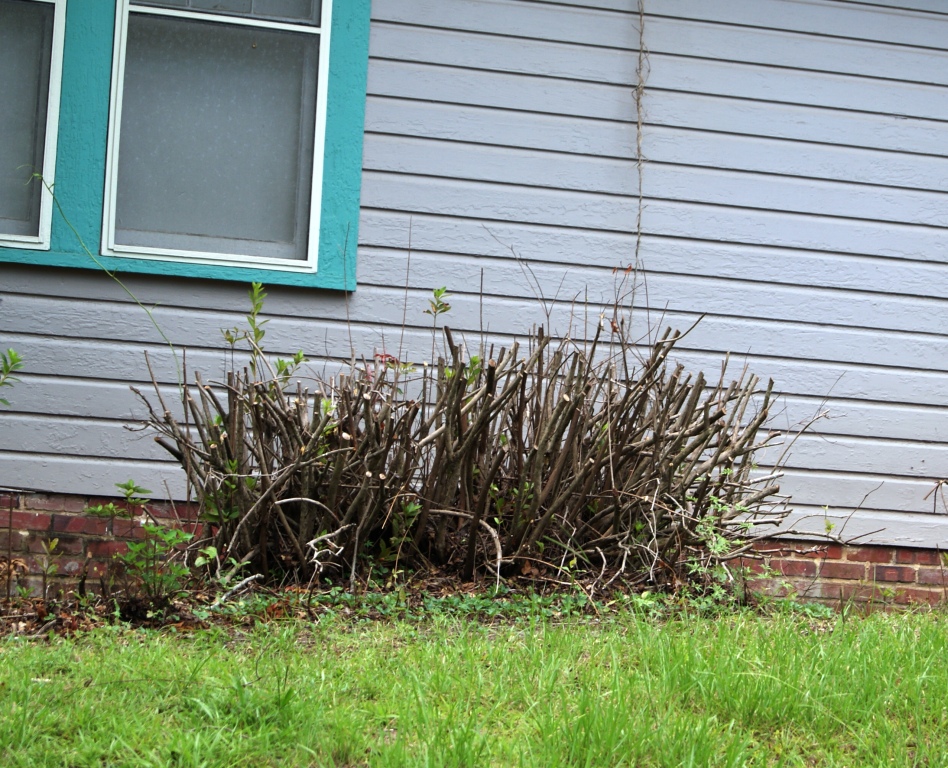
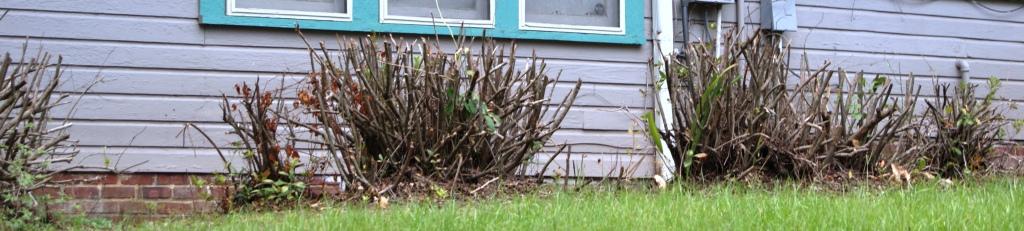
Fall Pruned Azalea. Image Credit Matthew Orwat
Although Northwest Florida is well known for its beautiful Azalea displays every spring, many do not understand that these shows of bloom could be sacrificed completely by pruning at the wrong time.
Pruning Azaleas in the fall will result in a loss of spring bloom the following spring, since flower buds are initialized on previous year’s growth for most azalea cultivars.This means that they flower on growth put on throughout the previous growing season. If a gardener removes the previous season’s new growth, they are removing the blooms as well.
So, when is the proper time to prune Azaleas? The ideal time to prune is directly after the spring bloom. This will give the plant enough time to generate abundant new growth, thus maximizing bloom next spring. One might think that when growing the repeat blooming Encore azaleas, pruning time doesn’t matter. Should the need arise to prune these compact, repeat blooming shrubs the optimal time is directly after spring bloom and not after the final fall bloom cycle.
For more information on pruning Azaleas or on general Azalea culture, please read the UF / IFAS publication Azaleas at a Glance or check out the Pruning Azalea page on Gardening Solutions.
by Daniel J. Leonard | May 27, 2019
Talk to nearly any Panhandle gardener and one of the first things brought up in conversation is the difficulty growing large, beefsteak/slicing tomatoes (Solanum lycopersicum) in their home garden. Large tomatoes are indeed among the more challenging garden vegetables in North Florida, affected by myriad pests, pathogens and abiotic issues. However, giving up growing this garden favorite is unwarranted as success can be had by following a couple of often overlooked, simple steps to ward off potential problems.
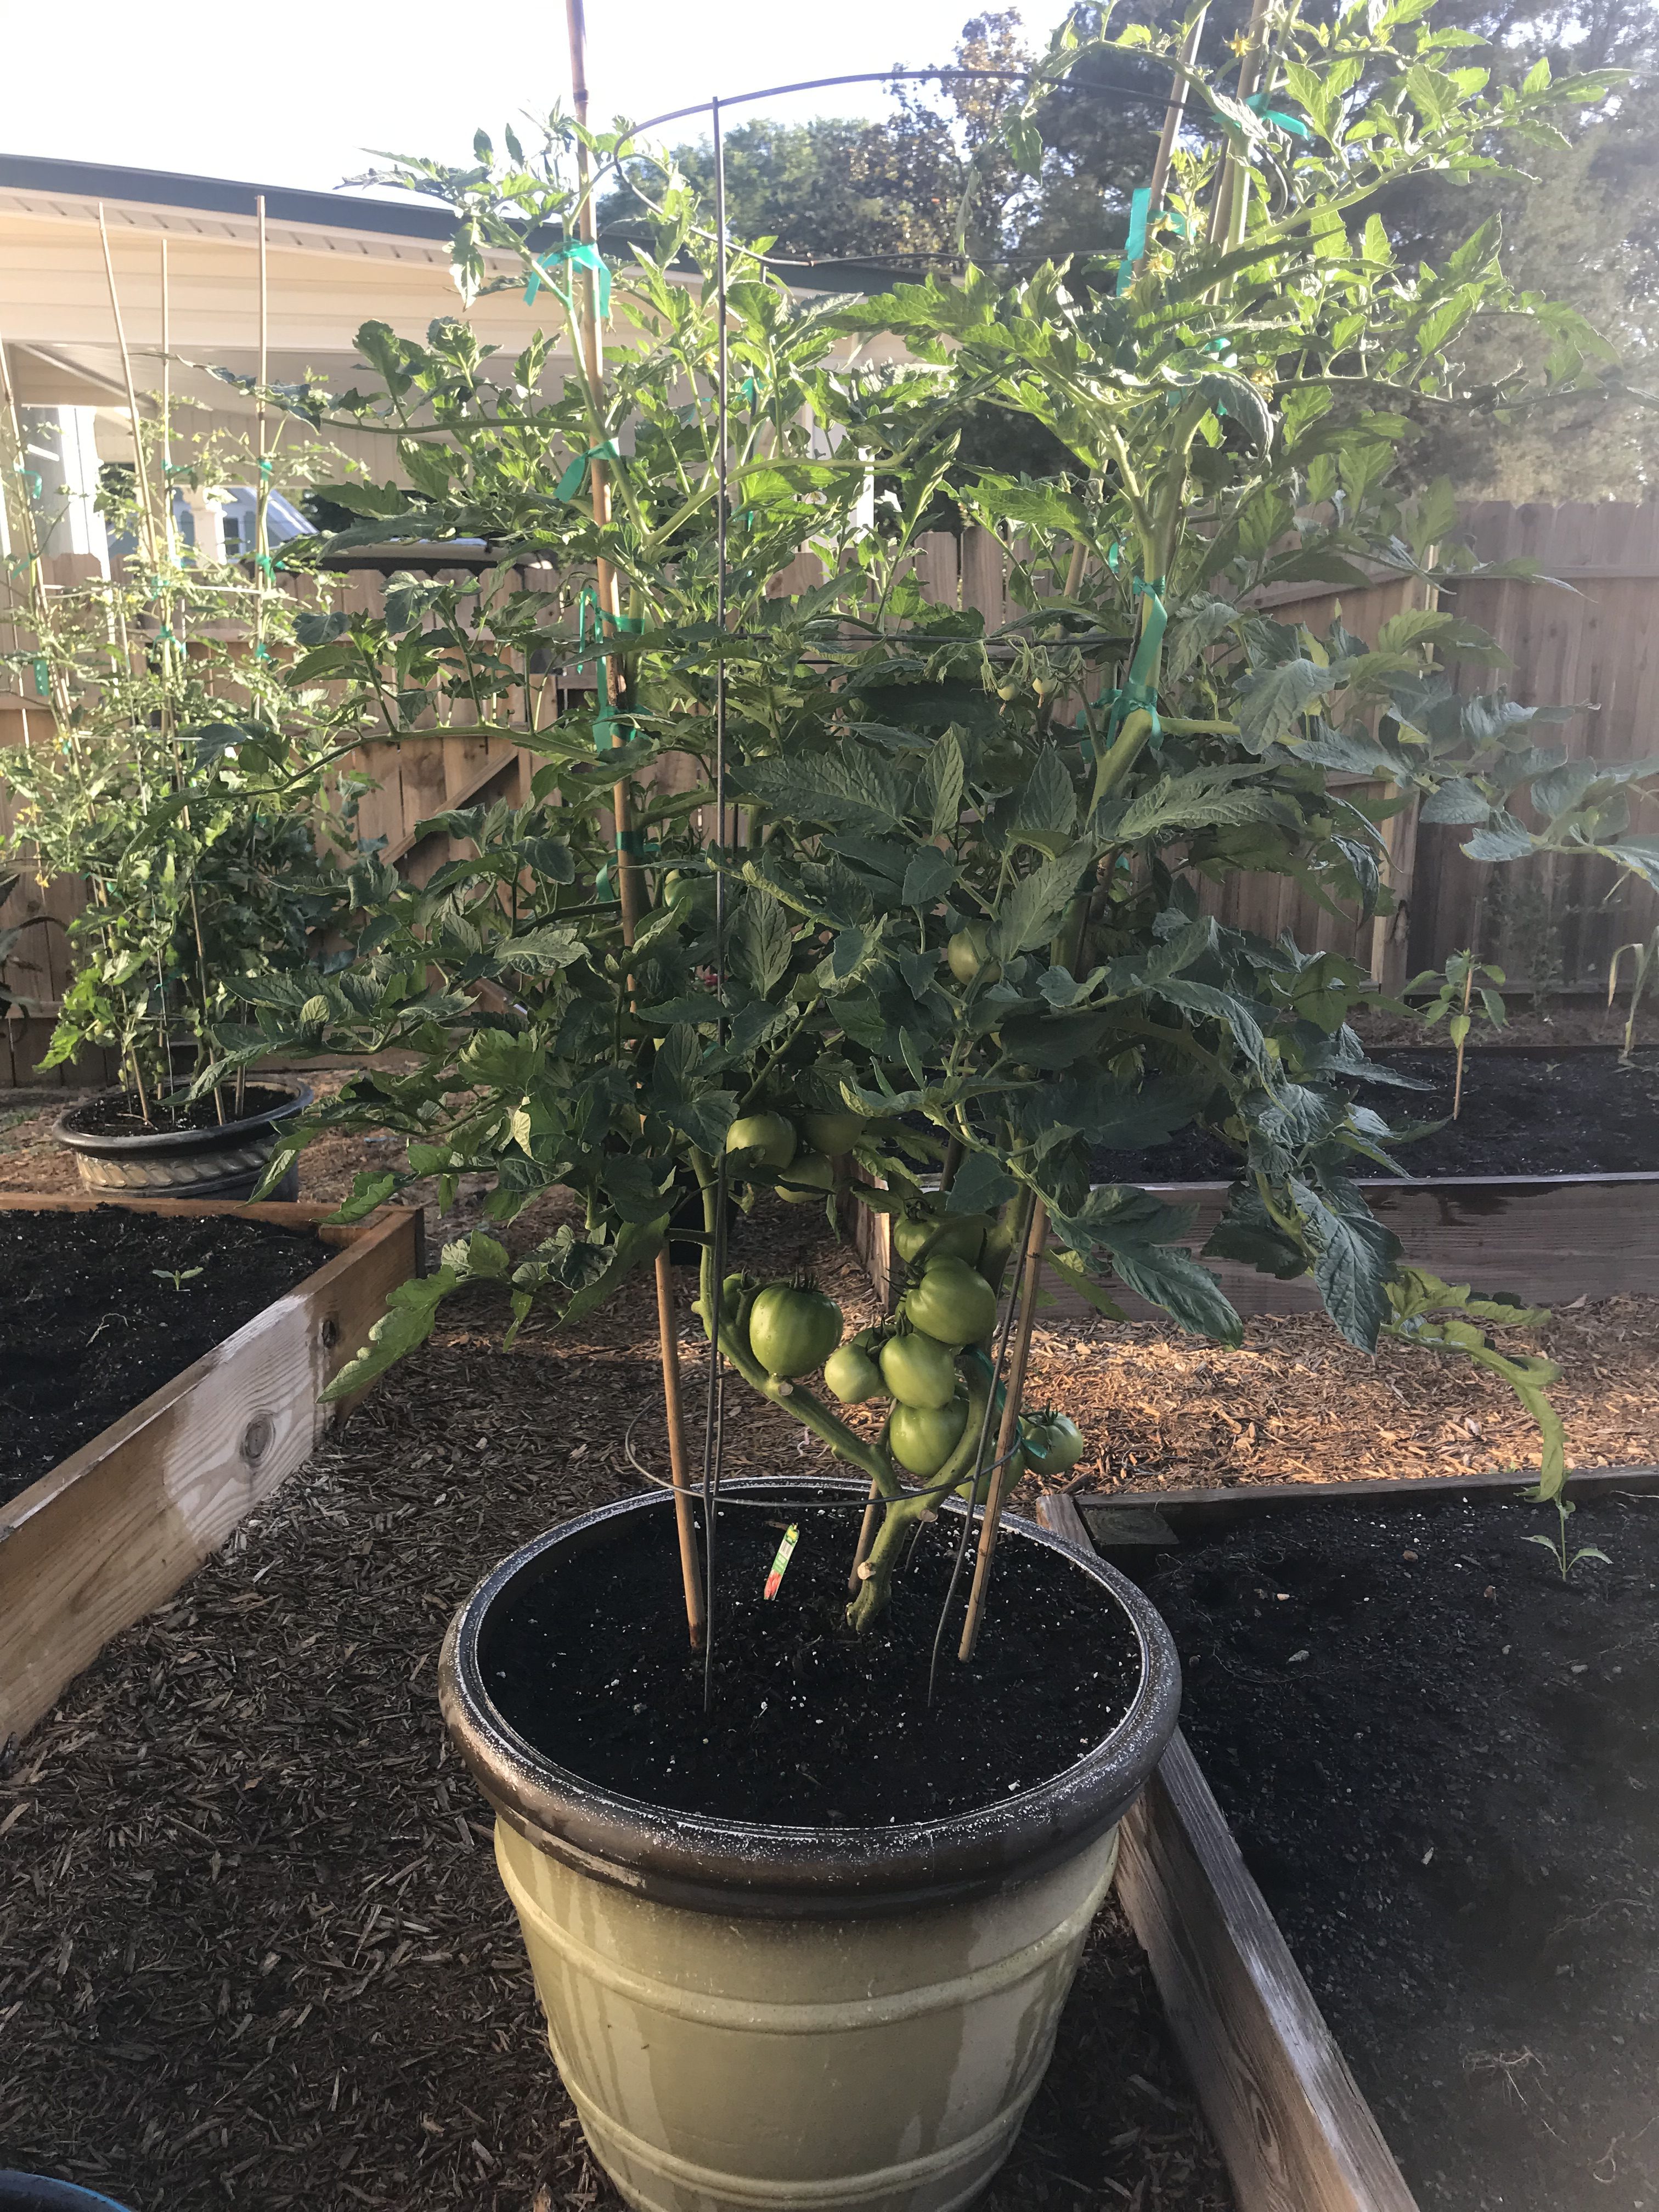
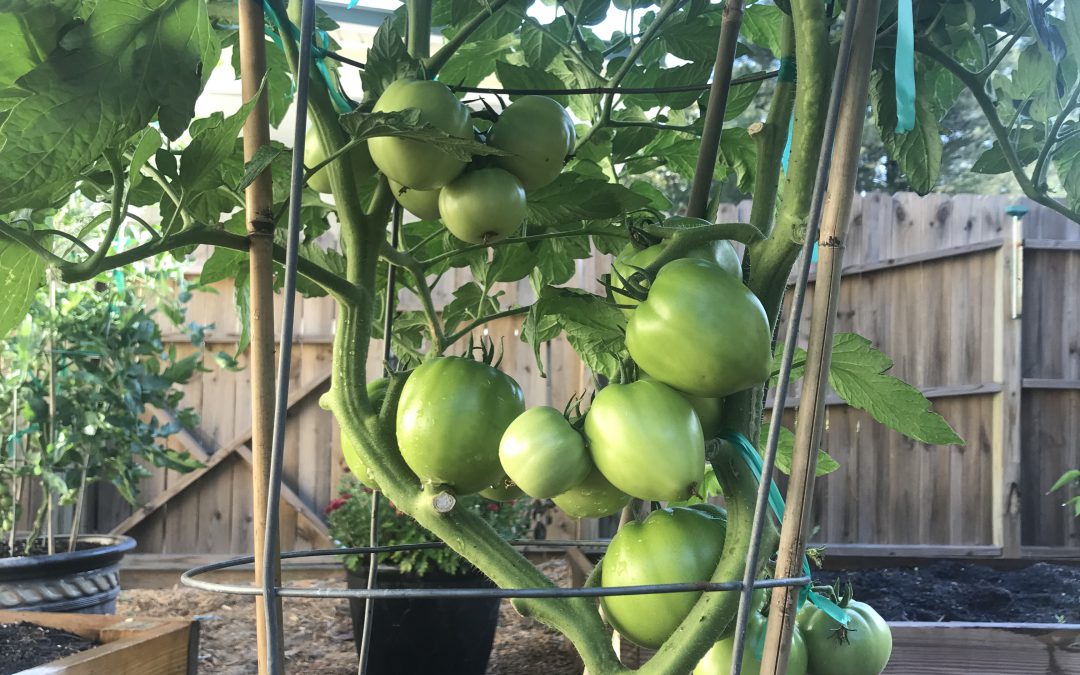
Choose Resistant Cultivars – One of the major recent gardening trends is the rise of heirloom veggies, particularly heirloom tomatoes. While many of these varieties certainly are interesting and often possess superior flavor/texture, heirlooms are, as a group, extraordinarily susceptible to disease in our climate. Fortunately for gardeners, there are a number of excellent varieties available with large resistance profiles to many common diseases and a similar taste profile to heirloom favorites! ‘Big Beef’ (pictured), ‘Better Boy’, ‘Celebrity’, and ‘Skyway’ are just a few of the many great cultivars with extensive disease resistance available as transplants at garden centers or as seed from quality online seed vendors.

Tomato ‘Big Beef’ in 15 gallon decorative container
Start Early – Once, you’ve selected the proper cultivar, the next key is to get them in the ground early! I’m convinced one of the primary reasons folks fail with tomatoes is waiting for “traditional” garden planting dates. For instance, an old tradition in the South is to plant your garden on Good Friday before Easter. However, according to Johnny’s Selected Seeds Southeast Sales Representative Blake Thaxton, tomatoes should be germinated and growing in the garden no later than March 15. Mr. Thaxton notes two primary reasons for this, the most important being pest/disease avoidance. Beefsteak tomato varieties take around 70 days from planting to harvest, so a March 15th planting date yields ripe tomatoes around the third or fourth week of May, when pest/disease pressure is still manageable. Pests and disease occurrence becomes exponentially worse in the Panhandle as May trickles into June and July, therefore it is critical that your fruit begin ripening prior to this onslaught. An important second motivation to plant early is that tomatoes stop setting fruit when nighttime temperatures rise above 75°F. At these temperatures, tomato pollen is rendered sterile and though the plant will continue flowering, no fruit will be set.
Mulch – Another overlooked best management practice in backyard veggie gardening is mulching! Those of us who tend flower beds already know many benefits of mulch like soil temperature moderation, weed prevention, and moisture conservation. But for tomato growers, mulch has another benefit – disease prevention! Several serious diseases that affect tomato are soil-borne pathogens (i.e. Early Blight, Late Blight, Bacterial Spot, etc.). These pathogens find their way onto plants either indirectly via water splashing from soil onto leaves or direct contact from leaves and fruit resting on the soil. To prevent these pathogens from infecting plant tissue, apply an organic mulch (preferably wheat straw or tree leaves) under and around plants. This simple step goes a long way toward season-long, yield-saving disease prevention.
Consistent Watering – Everyone knows plants need water but what you might not know is that irrigation consistency makes a huge difference in plant health, particularly tomatoes. Consistent watering is key in helping ward off one of the most frustrating tomato maladies, blossom end rot (BER) – you know, the one where the bottom end of your perfectly good tomato fruit turns to a brownish mush! Though BER is caused by calcium deficiency, the condition is commonly induced by creation of distinct wet and dry periods from non-regular watering, interfering with calcium uptake and availability to the plant. So, while you may have adequate soil calcium, if you don’t water correctly, the condition will happen anyway! It’s also good to keep in mind that mature tomato plants use large quantities of water daily, so during the heat of summer, plants in containers may need to be watered multiple times daily to maintain consistently moist soil. Think about it, you don’t drink 8 glasses of water when you wake up and then never drink again throughout a hot day. A tomato is no different. Allowing your plants to wilt down before providing additional water ruins productivity and can induce BER.
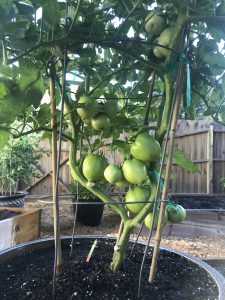
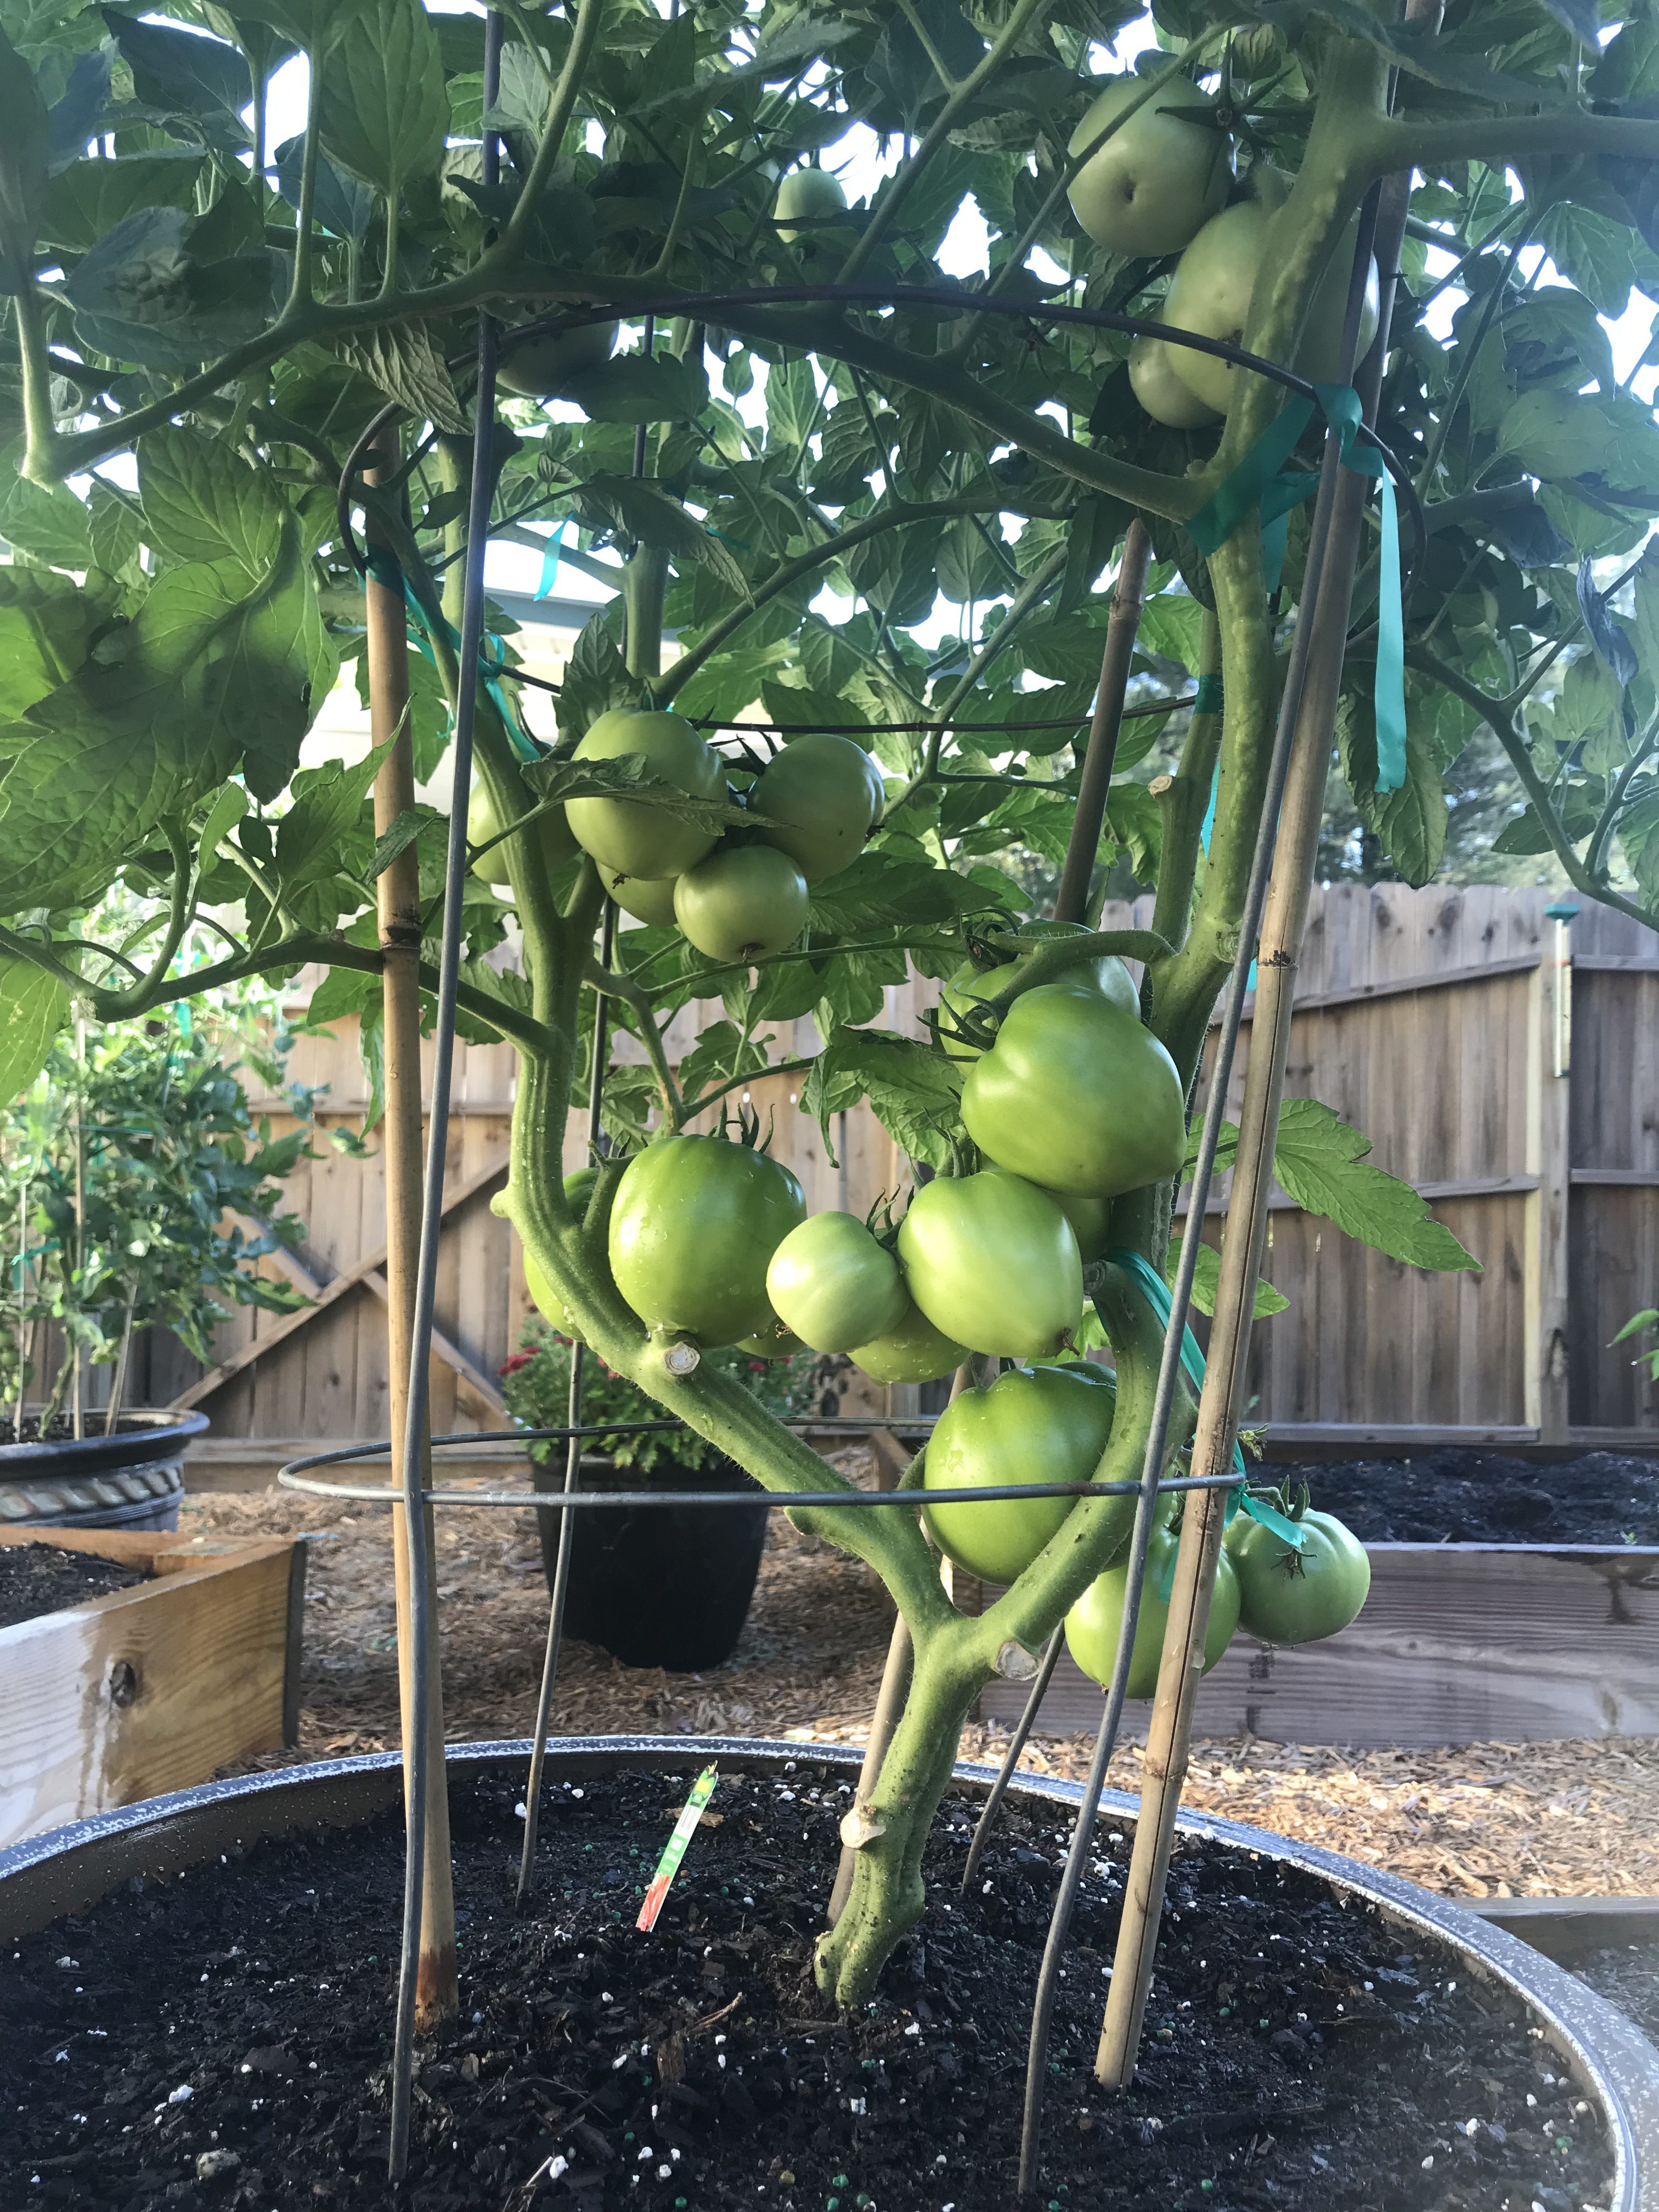
Tomato ‘Big Beef’ demonstrating pruning for soil clearance and airflow.
Pruning – I get it. Once you’ve nursed your baby tomato from a wee transplant or seed into a rapidly growing and flowering plant, it seems counter-intuitive to break out the pruners, but to keep your tomato plant as healthy as possible for as long as possible, that is what you must do! Pruning tomatoes should accomplish two things. First, remove the bottom layer of foliage from the plant base, so that water will not readily splash onto the lowest remaining leaves. (I tend to remove all leaves up to the second set of flowers 8-12” from the soil’s surface.) As with mulching, this prevents bacterial and fungal pathogens from spreading easily from the soil surface onto your plant. Second, tomato plants, especially the vigorous indeterminate varieties, often grow more foliage than is necessary for fruit production. This excess foliage can prevent airflow and trap moisture in the canopy of the plant, promoting disease. To open up the canopy and allow for more airflow, I prune off leaves that grow from the primary stems inward to the center of the plant. The idea is to keep the inside of the plant open while allowing enough leaves to power photosynthesis and shade the developing fruit below.
Tomatoes are notoriously hard to grow, but by following a few easy preventative practices, gardeners can greatly increase their chances of realizing harvestable fruit come summer. Please keep in mind that this is not an exhaustive list that will ensure disease-free plants over the entire growing season (you should also get a soil test to make sure your pH and soil fertility are correct and ideally you’d never work in your tomatoes when they are wet, etc., but this is a good place to start!). However, a little bit of planning and prevention early in the season can make growing tomatoes a lot less frustrating! As always, if you have questions regarding tomatoes or any other horticultural topic, please contact your local UF/IFAS Extension Office. Happy gardening!