by Mark Tancig | Mar 6, 2019
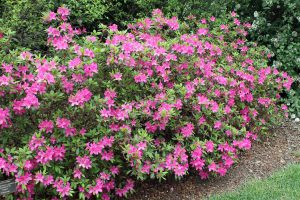
Azaleas are a beautiful shrub for the north Florida landscape, especially if pruned properly. Source: Larry Williams, UF/IFAS
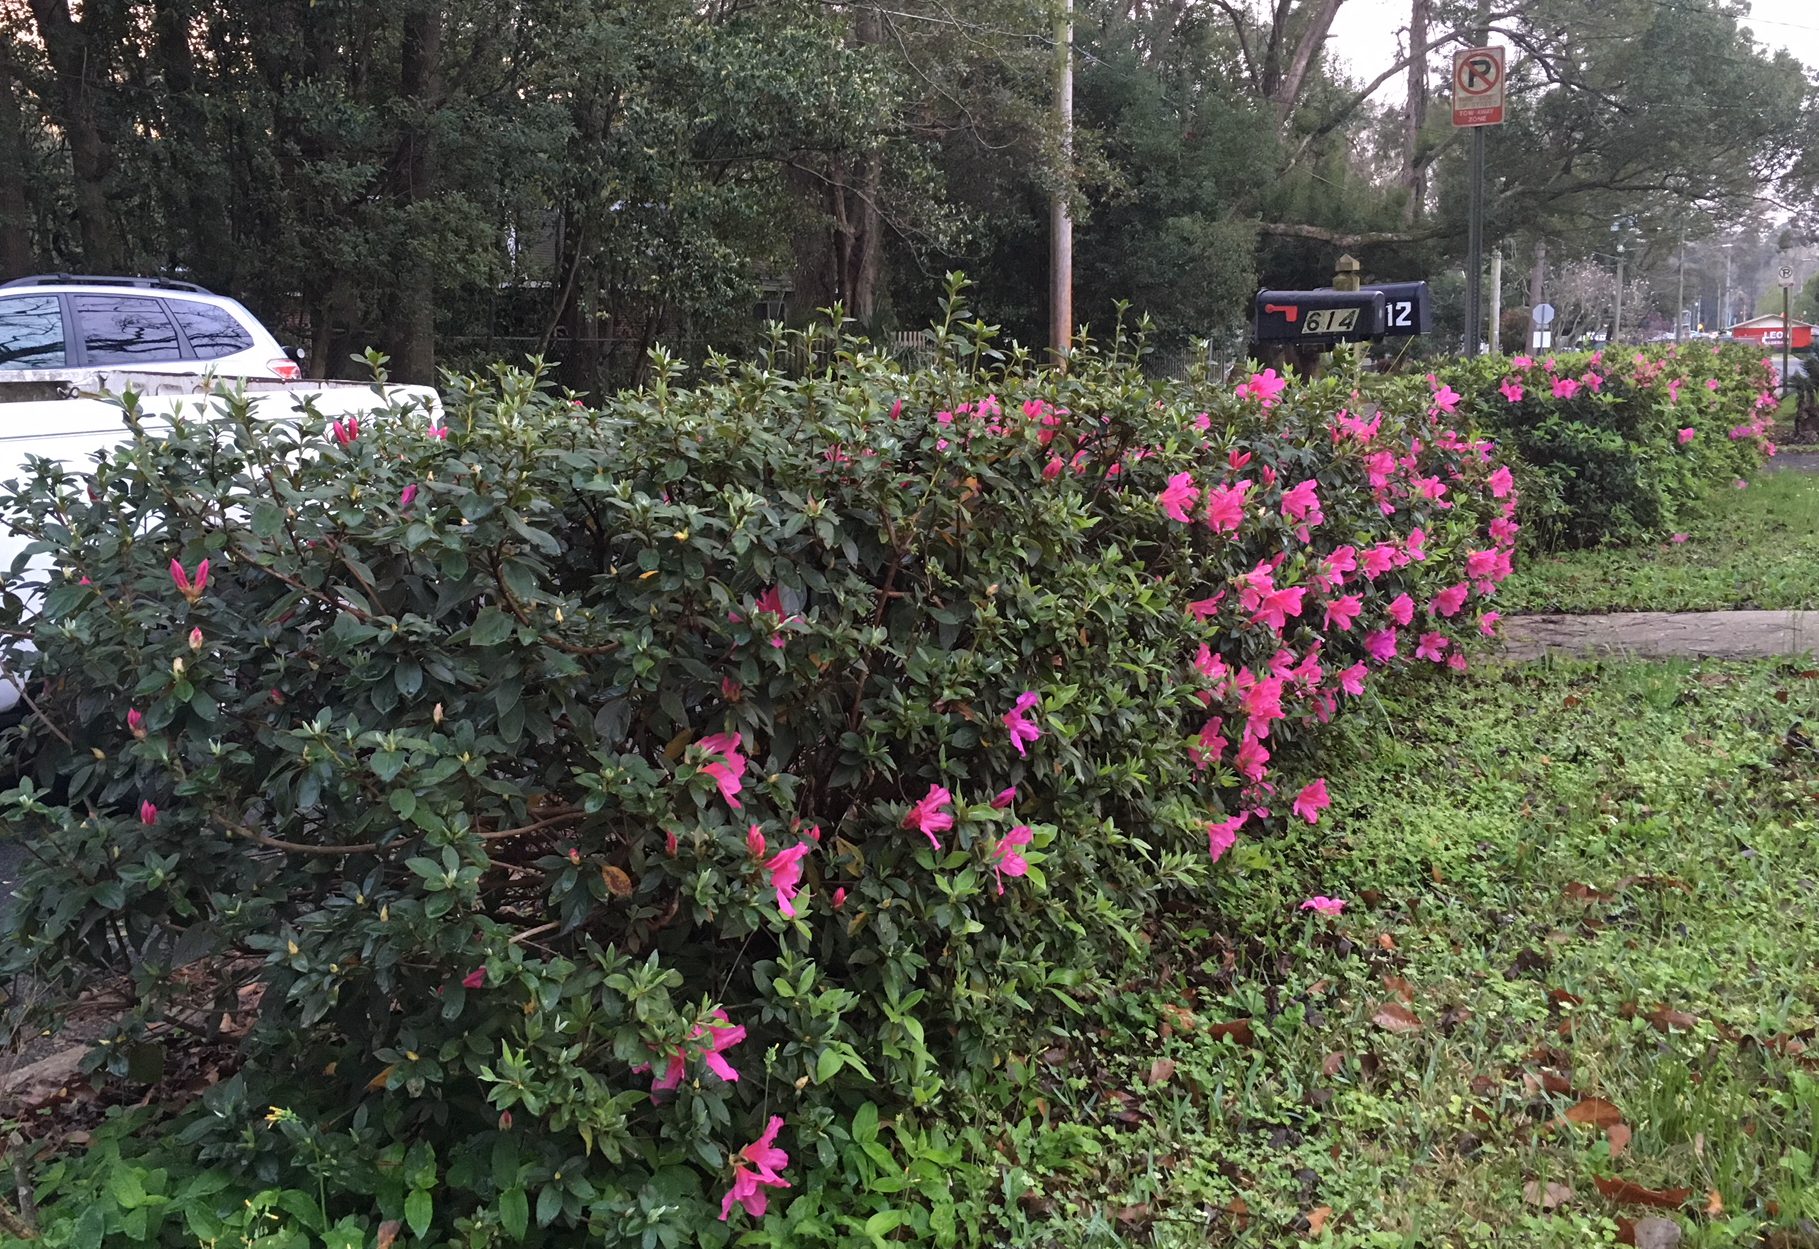
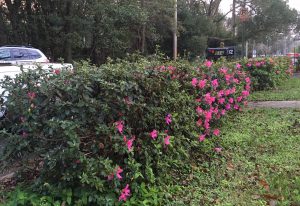
The sight of azaleas in the north Florida spring just makes you feel good. They are so vibrant, and with such variation, that you can’t take your eyes off them. As an appreciator of these beautiful displays of color, nothing pains me more than to see an improperly pruned azalea during this time. If you must prune your azaleas, please, please only prune them once a year and only soon after flowering has ended! This public service announcement will hopefully ensure we all get to see the full azalea show. Otherwise, we’ll be left with mostly green hedges, some flowers uncomfortably tucked in the interior of the plants, or flowers poking out the sides like a middle-aged man’s balding head.
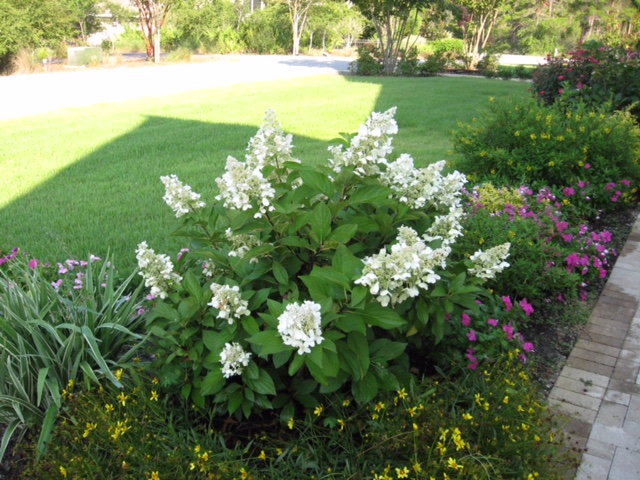
If pruned properly and at the right time, this azalea shrub would be a mass of flowers. Source: Mark Tancig, UF/IFAS.
The common flowering azaleas in landscaped settings are native to Japan and a relative of blueberries. They comprise many different hybrids, cultivars, and varieties of plants in the genus Rhododendron (Greek for rose-tree) and have been cultivated for centuries. Long ago, I’m sure, those who studied plants and tinkered with azaleas realized that their vegetative growth (new leaves and stems) ends soon after flower bud initiation. This means that later prunings, or multiple prunings throughout the year, will be taking off more developing flower buds than new leaf and stem growth.
To prevent depriving us all of less flowers, consider why – or if – they need pruning in the first place. Proper planning and planting can prevent azaleas, which naturally want to be a sprawling shrub, from growing into the sidewalk or driveway. If you’ve inherited azaleas that may be the right plant, but slightly in the wrong place, they can be heavily pruned every couple of years to keep them in check, and can even be transplanted. Azaleas are not a good choice for formal hedges. If given the right place and enough space, the only required pruning would be dead, diseased, or crossing branches.
If you decide you need to prune – whether to knock back for space or for general shape – only bust out the loppers once the flowers have withered on the ground… and then lock those loppers away so that you won’t be tempted. If you have landscapers working for you, remind them to keep the hedge trimmers away from the azaleas.
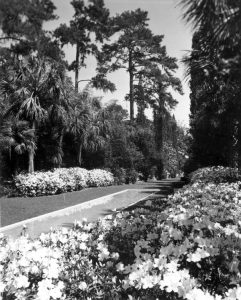
Azaleas are vibrant, even in black and white! Source: Florida State Archives, Florida Memory Project.
For the love of flowers, please prune azaleas thoughtfully, and share this information with others
P.S. We also have several species of native azaleas (including Rhododendron austrinum and Rhododendron canescens) that can be a beautiful addition to the landscape.
by Matt Lollar | Sep 6, 2018
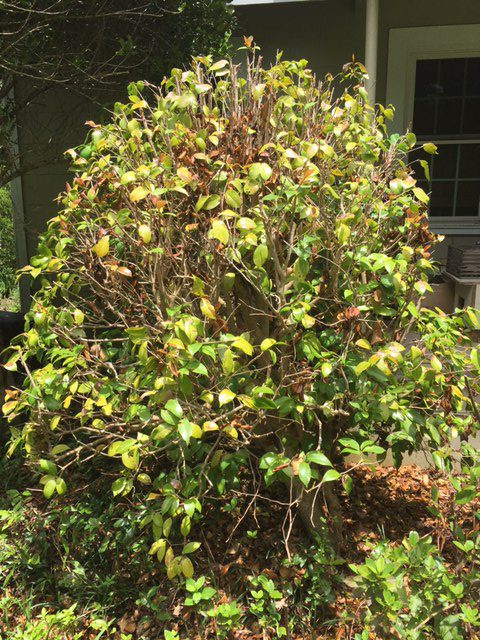
A few months ago I visited a property that had been renovated to clean up some limbs that were in danger of falling on the house. Pruning tree limbs that are in danger of hitting a structure is always a good idea, but it’s important to look at the impacts this practice may have on the rest of a landscape. Any time the light profile of a landscape is changed, current and future plant selection must be considered. One often seen example occurs when trees grow to full size and shade out the lush lawn that’s underneath. However, in this case, removal of limbs allowed more light to shine on some beautiful, old camellia bushes.
Camellia Planting and Care
Camellias do best in locations that receive filtered sunlight and are protected from the wind. They like acidic, well-drained soils. Trees and shrubs are generally planted 2″ to 3″ above the soil grade. (2″ to 3″ of root ball should be exposed above the soil grade when the tree/shrub is planted.) To help improve root oxygen exposure and help prevent a root rot situations, camellias can be planted slightly shallower than the previously stated recommendation. For more plant establishment guidelines, please visit: UF/IFAS Planting and Establishing Trees Guide
Scenario and Diagnosis
As mentioned above, the property in question was visited to diagnose sick camellia bushes. Upon further inspection of the property, asking about recent changes to the landscape, and inspecting the bushes, it was clear that the camellias were receiving too much sunlight. Sunlight damage was expressed by large brown sunscald spots on the yellowing leaves.
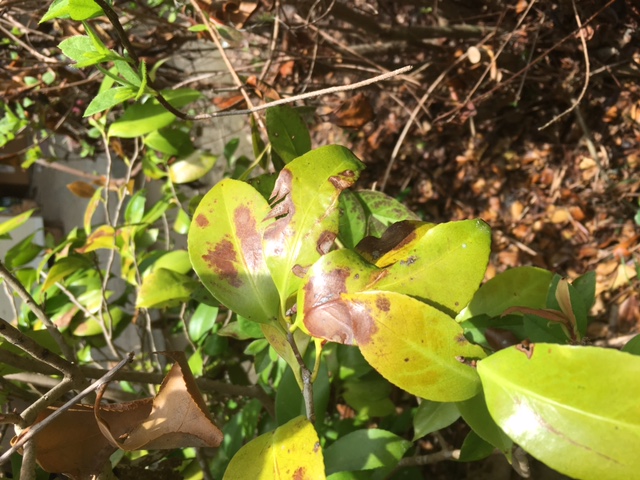
Sunscald damage on camellia leaves. Photo Credit: Jed Dillard
The camellias had also been pruned incorrectly. Camellias require minimal pruning. They are normally pruned to control size or promote a tree form structure if desired. Any pruning should be done before flower buds form in late summer.
An incorrectly pruned camellia bush. Photo Credit: Jed Dillard
Solution
The best solution in this scenario was to dig up the affected camellias and move them to a location with more shade. Sun loving shrubs were suggested as options to replace the camellia bushes. It’s important to note that Camellia sasanqua cultivars are usually more tolerant of sunlight than Camellia japonica cultivars. The recommendations were based on the Florida Friendly Landscaping principle of “Right Plant, Right Place”.
If you’re trying to find the right plants for you own yard, then you should check out the Florida Friendly Landscaping Interactive Plant Database. The database gives you plant selection options for each area of your yard based on location in the state, plant type, and soil and light conditions.
by Matt Lollar | Jun 4, 2018
Normally we think of rust as something that deteriorates metal, but a number of different fungal rusts can affect plants in the garden. Rust disease can affect corn plants, cedar trees, and even blueberry bushes. Just like the broad range of plant species that can be plagued by rust, there are a number of species of rust fungal spores floating around and ready to infest your garden. This article will focus on leaf rust of blueberry.

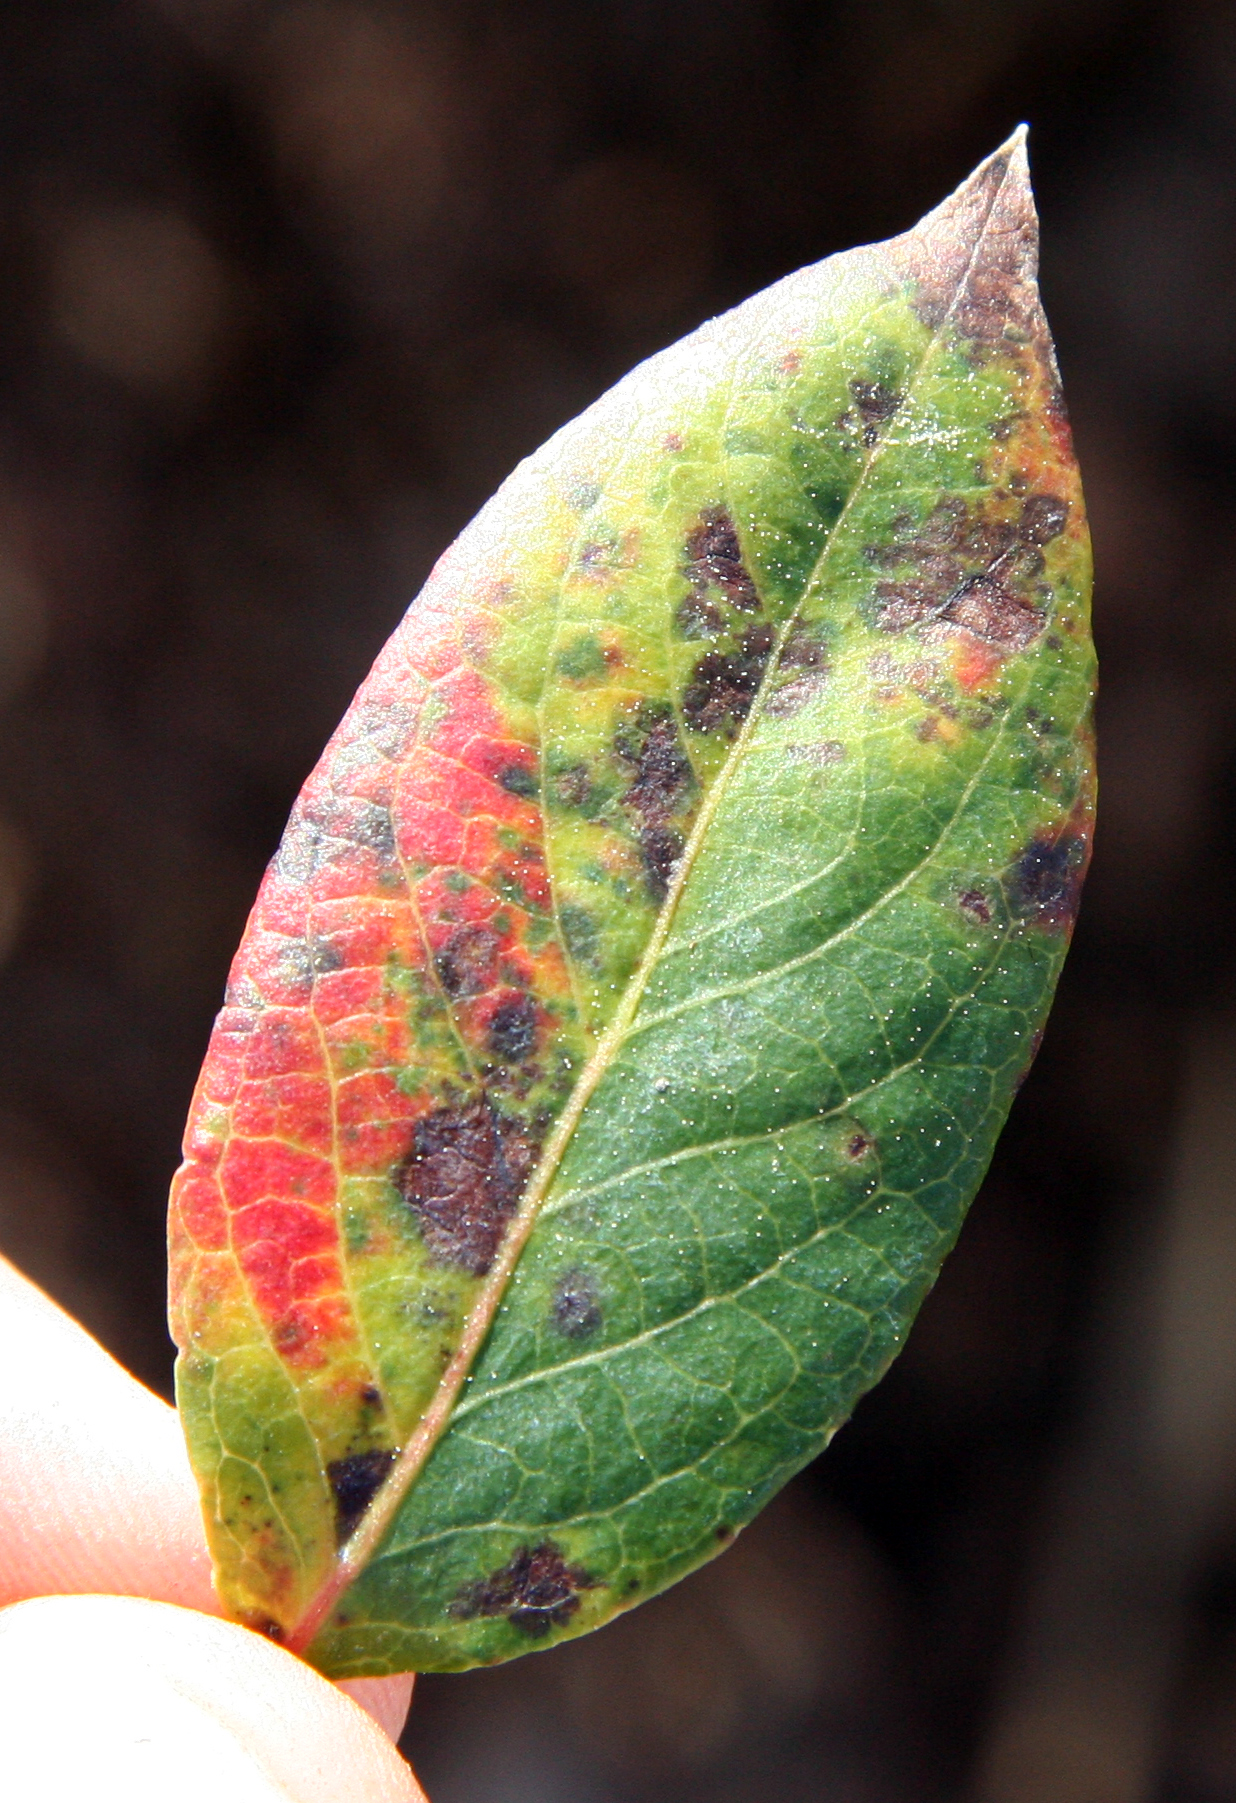
Blueberry leaf rust on the top of a leaf. Photo Credit: Philip Harmon, University of Florida/IFAS Extension.
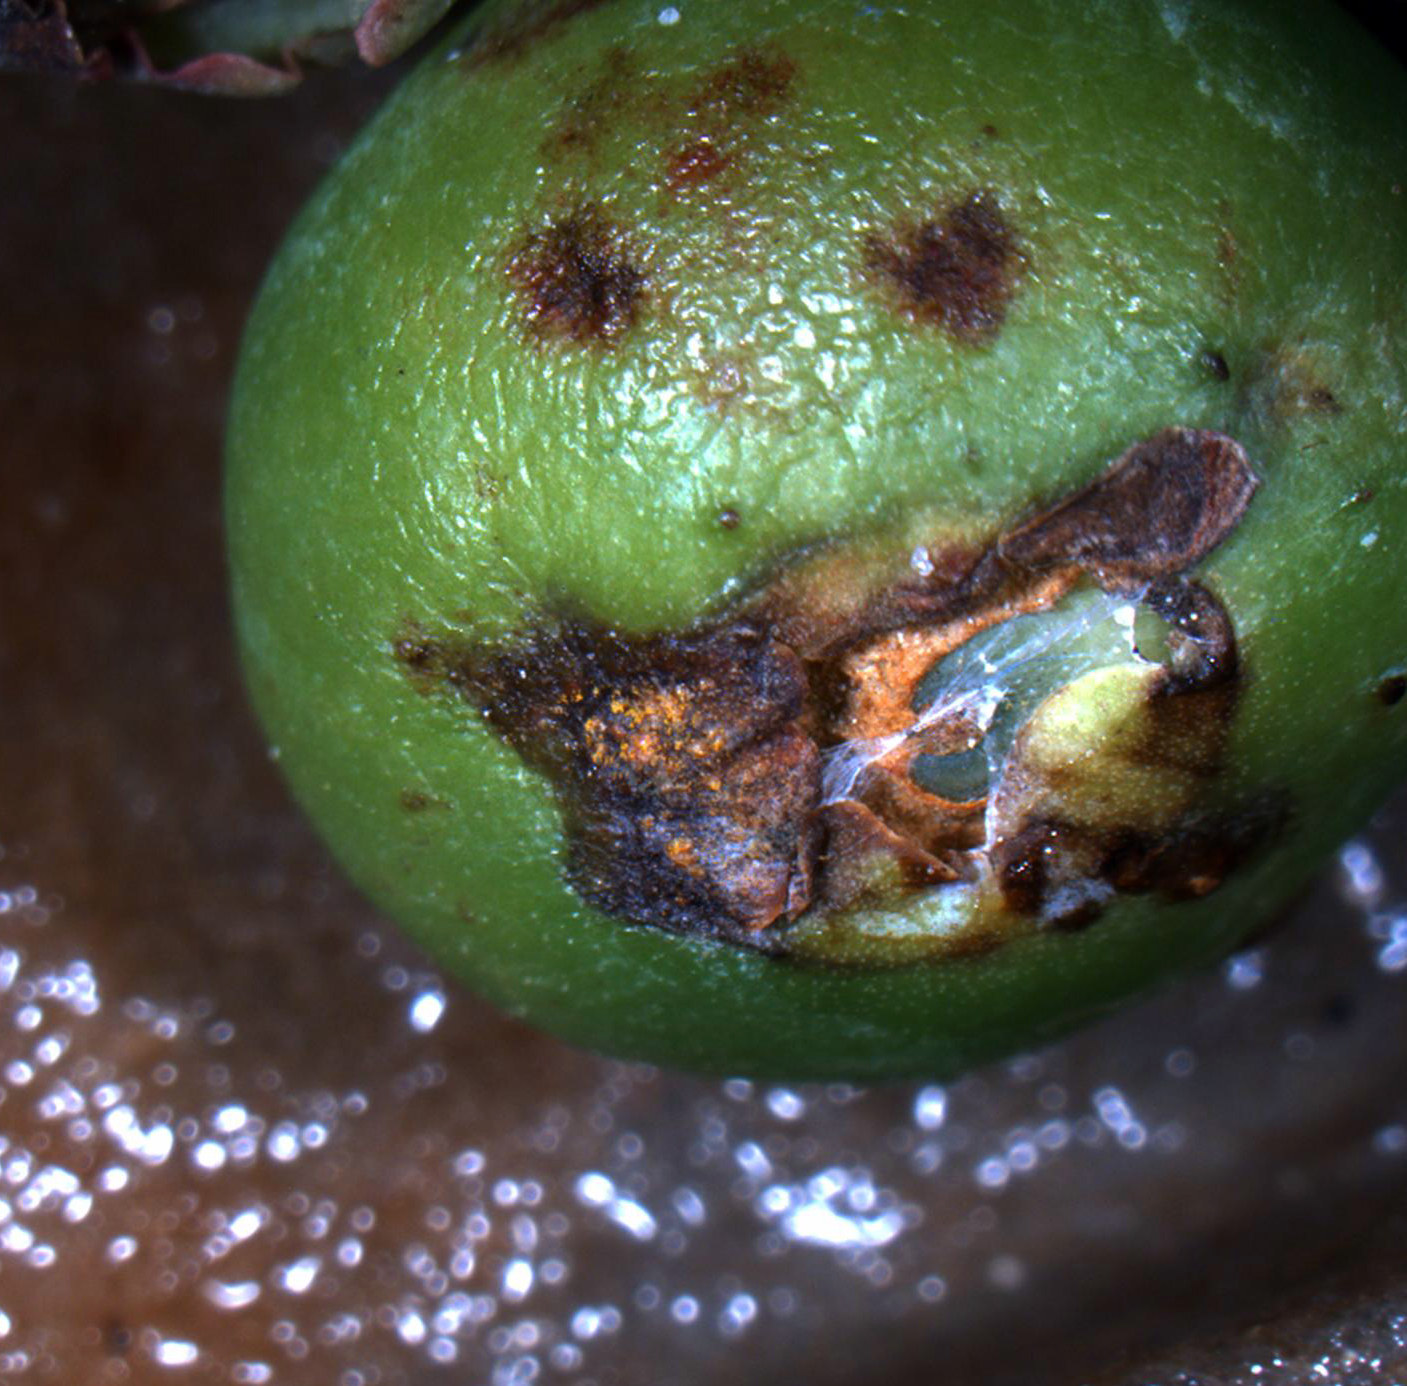
Leaf rust of blueberry in Florida is caused by the fungus Pucciniastrum vaccinii. Although the common name of the disease is “leaf rust”, the disease can also infect the stems and fruit of blueberry plants. The disease causes small, round spots visible on the tops of leaves. Spots will multiply and the leaves will eventually yellow and fall off. Young stems and green fruit can also become infected as the disease progresses. Bright orange lesions will form on stems and fruit as the thousands of microscopic spores conjoin. The clusters of spores are easily wiped or washed off of plant material. When spores dry out, they become airborne and can be transferred to nearby plants.
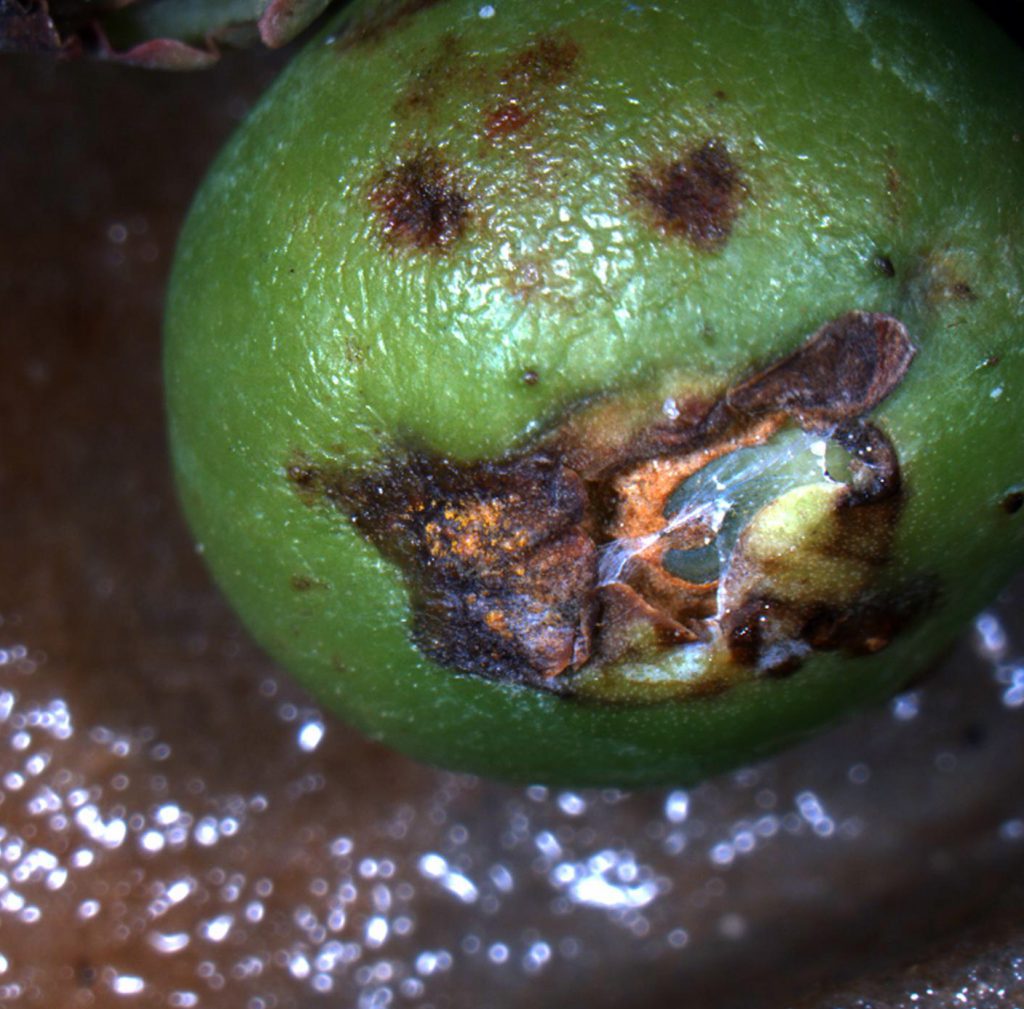
Blueberry leaf rust on fruit. Photo Credit: Philip Harmon, University of Florida/IFAS Extension
The rust fungus thrives in hot, humid, wet conditions. A number of cultural practices can be adopted to reduce disease progression and survival.
-
Irrigation
Disease persistence can be reduced by limiting the amount of water that contacts the plant leaves. Water the base of plants or install drip irrigation for your bushes rather than watering from overhead. If overhead irrigation is the only option, then water plants in the morning rather than in the evening. This allows the leaves to dry out over the course of the day.
-
Pruning
Removal of approximately 25% of the oldest canes in late winter before spring growth begins will stimulate the production of new canes and should result in plants with canes of different ages and will provide a good mix of vigorous branching and fruit production. Moderate summer pruning can also improve yield and shoot growth. When pruning, cut out vigorous shoots that are growing well beyond the desired canopy height and are in the interior portion of the bush. This will promote a more open growth habit and help with air circulation on the remaining plant material. Some vigorous canes developing from the ground and growing on the outside of the bush can be topped to stimulate branching and flower bud formation.
-
Mulch
Pine bark mulch helps with establishment of young plants and helps keep soil pH low in existing plantings. A layer of aged pine bark 3 inches deep extending about 2 feet out from the plants will provide a good growing medium for surface feeder roots. Pine straw can be used if pine bark is unavailable. Mulch also moderates soil temperature, helps keep weeds at bay, and adds organic matter to the soil. Make sure to keep mulch raked back about three inches away from the plant canes to provide good air circulation to the roots.
Hopefully this article has given you some tips to have a good blueberry crop for years to come. For more information on growing blueberries in Florida, please visit the University of Florida/IFAS EDIS Publication: Blueberry Gardener’s Guide.
by Daniel J. Leonard | May 4, 2018
H. macrophylla ‘Bloomstruck’
Photo courtesy of Andrea Schnapp
Generally, when folks find out what I do for a living, among the first questions asked is “What is your favorite plant?” Being somewhat of a plant nerd, that can be a tough question to answer! However, I usually circle back to the same answer, “Hydrangea”. There are many reasons my fellow gardeners and I love hydrangeas. It’s undeniable that few plants conjure more fond memories of summers gone by or cause more impulse purchasing at nurseries than a hydrangea in full, billowy bloom. Additionally, few specimen shrubs give more floral firepower and ask so little of the gardener in return. My own love affair with hydrangea stems from my first propagation experience, a softwood cutting of Hydrangea macrophylla ‘Nikko Blue’ (taken with the help of someone who knew a lot more about what they were doing than I did) that, seemingly magically, sprouted roots in a makeshift greenhouse, a cypress box with an old, crusty, sliding glass door. Hydrangeas hooked me. However, even with all of those attributes to its name, Hydrangea, as a genus, remains underappreciated and underutilized in modern landscapes. Let’s shed some light on the two primary reasons for gardeners’ failure and frustration with hydrangeas in the landscape and highlight some of the best Hydrangea species and cultivars to look for at the nursery!
First, hydrangea has a reputation as being a high water user. As the name (hydrangea comes from “hydor”, which is Greek for water) might suggest, hydrangeas are indeed water sensitive. However, this does not necessarily mean they require more or less water than other plants, rather they simply betray drought quicker than most other plants. This feature makes hydrangea particularly useful in the landscape as an indicator plant. As a general rule, hydrangeas (particularly those planted in too much sun) wilt in the afternoon heat; this is totally normal. However, if the plants remain wilted the next morning, it is an indicator to the gardener that irrigation is required! If they don’t get irrigation soon after telling you they need it, the plants may begin to decline. Rather than being viewed as a drawback, think of this feature as an early warning system. Name another plant that looks out for us gardeners like that!
The second primary reason people fail with hydrandea is improper site selection. Attempting to grow hydrangea in full sun in Florida leads to less than spectacular results. All species of hydrangeas are most happy when sited to receive at least some afternoon shade, if not filtered shade throughout the entire day. Exposure to blistering afternoon sun is problematic and results in increased wilting from heat stress, increased irrigation requirements and “bleached” flower coloration. Remember, there are fewer frustrating things than growing the right plant in the wrong place!
Now that you know how not to fail with hydrangeas, it’s time to select the proper plant for your property! Three primary species perform noticeably better here than the rest of their kin and deserve the gardener’s consideration in Northwest Florida: H. macrophylla (Bigleaf Hydrangea), H. quercifolia (Oakleaf Hydrangea), and H. paniculata (Panicle Hydrangea).
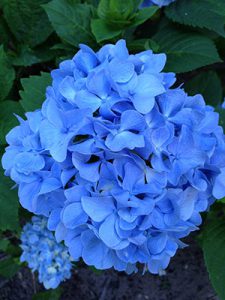
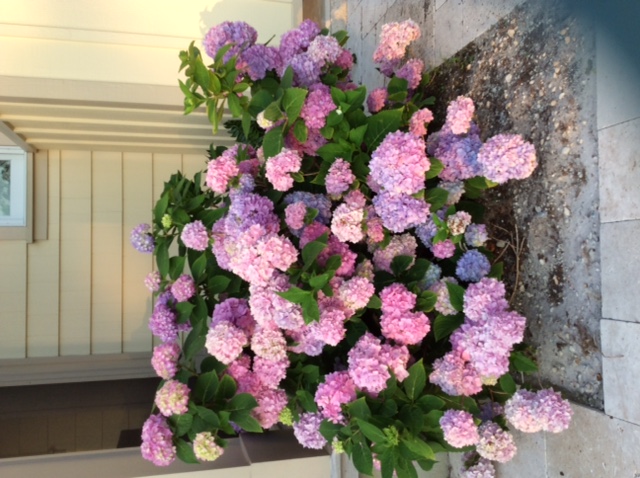
H. macrophylla
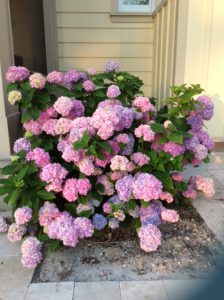
H. macrophylla, the old-fashioned hydrangea everyone’s grandmother grew, is truly one of the standouts in the shady, Southern landscape and commands attention when in flower. Sporting giant “mopheads” of inflorescences in gorgeous hues of blue (or pink, depending on soil pH), H. macrophylla is an extremely low maintenance plant, requiring only periodic irrigation and infrequent fertilizer; H. macrophylla even tolerates salt spray and can be grown on the Gulf Coast! By far, the greatest percentage of questions I receive concerning H. macrophylla involve plants not flowering because of pruning at the wrong time of year. For best flowering results, time pruning of once-blooming traditional cultivars like ‘Nikko Blue’ soon after flowering is finished in late summer. These plants set flower buds on the previous season’s wood; pruning older cultivars in the fall or winter may rejuvenate the plant but will prevent flowering the next year! Fortunately, over the last twenty years, advances in Hydrangea breeding have given gardeners the option of planting remontant cultivars that bloom on current season’s wood. Commonly sold remontant cultivars like ‘Endless Summer’, ‘Penny Mac’, ‘Bloomstruck’, and ‘All Summer Beauty’ have an early summer flower display like the traditional types but then continue to flower periodically throughout the rest of the summer! Even better, they may be pruned at any time without worry of damaging the next season’s flower show!
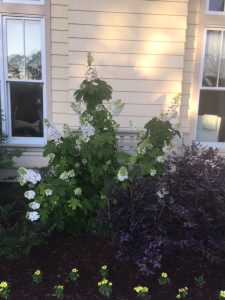
H. quercifolia (Oakleaf Hydrangea) Photo Courtesty of Andrea Schnapp
Those looking to diversify their hydrangea collection should next look to the native Oakleaf Hydrangea (H. quercifolia). The Oakleaf Hydrangea is a Florida native, growing wild on the steep, shady ravines along the northern end of the Apalachicola River. If the plants never flowered, the Oakleaf would be worth planting; its massive leaves, oak-shaped as the name suggests, can grow up to a foot in length and provide some of the best fall foliage color available to Floridians. However, the real show, as with all hydrangea species, are the flowers. This species flaunts 8”-10” white, panicle shaped flowers that are held elegantly above the coarsely textured foliage. In addition to these features, Oakleaf Hydrangeas couldn’t be easier to grow; obtaining heights up to 10’ and asking very little of the gardener other than adequate irrigation and some shade in the heat of the day! Look for the author’s favorite cultivars: ‘Alice’, ‘Semmes Beauty’, and ‘Snowflake’. Each of these cultivars and selections of the common species H. quercifolia perform very well in Northwest Florida.

H. paniculata ‘Quickfire’
Photo courtesy of Andrea Schnapp.
Finally, the newest hydrangea species introduced to Florida gardens, H. paniculata, has made significant inroads in the landscape industry over the last decade. Primarily grown as the cultivar ‘Limelight’, H. paniculata overcomes some of the weaknesses of the two aforementioned species, namely it tolerates full-sun and persists on much less water, making it a potentially more sustainable plant for many landscapes. This plant, like the remontant H. macrophylla cultivars, blooms on new wood and even seems to enjoy a hard pruning each winter; plants pruned this way seem to be more vigorous the next season and produce larger greenish-white flower panicles than unpruned specimens. Though it is a relative newcomer, H. paniculata, particularly ‘Limelight’, is a worthy addition to any landscape.
As you can see, there is a hydrangea for every yard and no true Southern landscape is complete without a few. When perusing your local garden center this summer, look for the selections and species mentioned above, plant properly, and enjoy the ensuing annual flower show for many years into the future! Who knows, you may be hooked by hydrangeas as I once was!

by Sheila Dunning | Feb 5, 2018
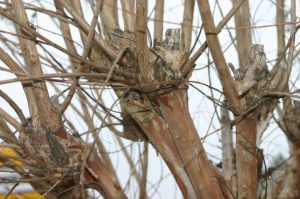 Pruning is one of the most controversial aspects of maintaining crapemyrtle. Traditionally, many crapemyrtles are routinely topped, leaving large branch and stem stubs. This practice has been called “crape murder” because of the potential impacts on the crapemyrtle health and structural integrity. Topping is the drastic removal of large-diameter wood (typically several years old), with the end result of shortening all stems and branches.
Hard pruning (topping) stimulates crapemyrtle sprouting from roots, upper stems, or the base of main stems. If basal and root sprouts are not removed, one or more may form woody stems that eventually compete with existing main stems. These additional or competing stems may result in poor form and structure, such as stems that rub against each other.
Topping typically delays flowering up to one month compared to unpruned crapemyrtle. On some cultivars, topping also shorten the season of bloom. Long-stem sprouts emerge just below large-diameter cuts that result from topping. These sprouts usually develop into upright, unbranched stems that eventually flower, often bending under their own weight. Rain or wind storms can cause extreme bending and some will break because they are weakly attached to the main stem.
Topping removes large amounts of starches and other food reserves stored within branches. Topping dramatically reduces the size of the plant canopy, ultimately decreasing the plant’s ability to produce food (starches) through photosynthesis. The large branch stubs caused by topping result in large areas of exposed wood that allow access by insects and wood-rotting organisms, weakening the plant’s structure. Finally, topping results in many dead stubs throughout the tree.
Proper pruning may be needed, just like any other tree. Lower limbs of crapemyrtle are removed to increase clearance for pedestrians or vehicles. Stems are cut to increase branching. Other pruning may be conducted to direct growth away from structures, stimulate flowering, and remove spent flowers, seed capsules, and dead or damaged branches and twigs.
Properly placed, crapemyrtle is a low-maintenance plant needing little or no pruning. Problems with overgrown, misshapen, or misplaced crapemyrtle can be greatly reduced with proper selection of crapemyrtle cultivars, proper plant selection at the nursery, and proper placement in the landscape. For more information on cultivar selection go to: http://edis.ifas.ufl.edu/mg266.
If pruning is necessary, use the following recommendations:
- Pruning for safety may be done anytime. This may involve removing damaged or weak branches or pruning lower limbs for pedestrian and vehicle clearance and visibility.
- Pruning to improve plant structure, redirect growth, or alter plant shape and appearance should occur when plants are leafless and dormant–typically December through February. Although this can be accomplished at any time, without leaves, the branching structure is clearly visible to more easily determine appropriate branches for pruning.
- Prune to remove crossing or rubbing branches.
- Prune dead, damaged, or diseased branches at the branch collar.
- Remove vigorous branches growing toward the center of the canopy.
- Severe pruning should be performed late in the dormant period. Pruning too early might stimulate new growth that could be damaged by low temperatures.