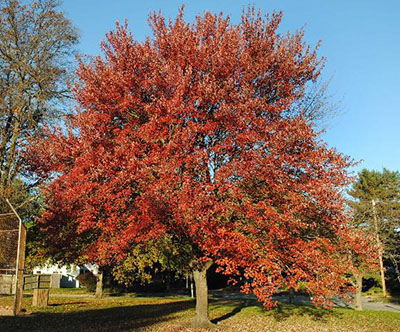
Red Maple in flower. Photo courtesy of Carrie Stevenson.
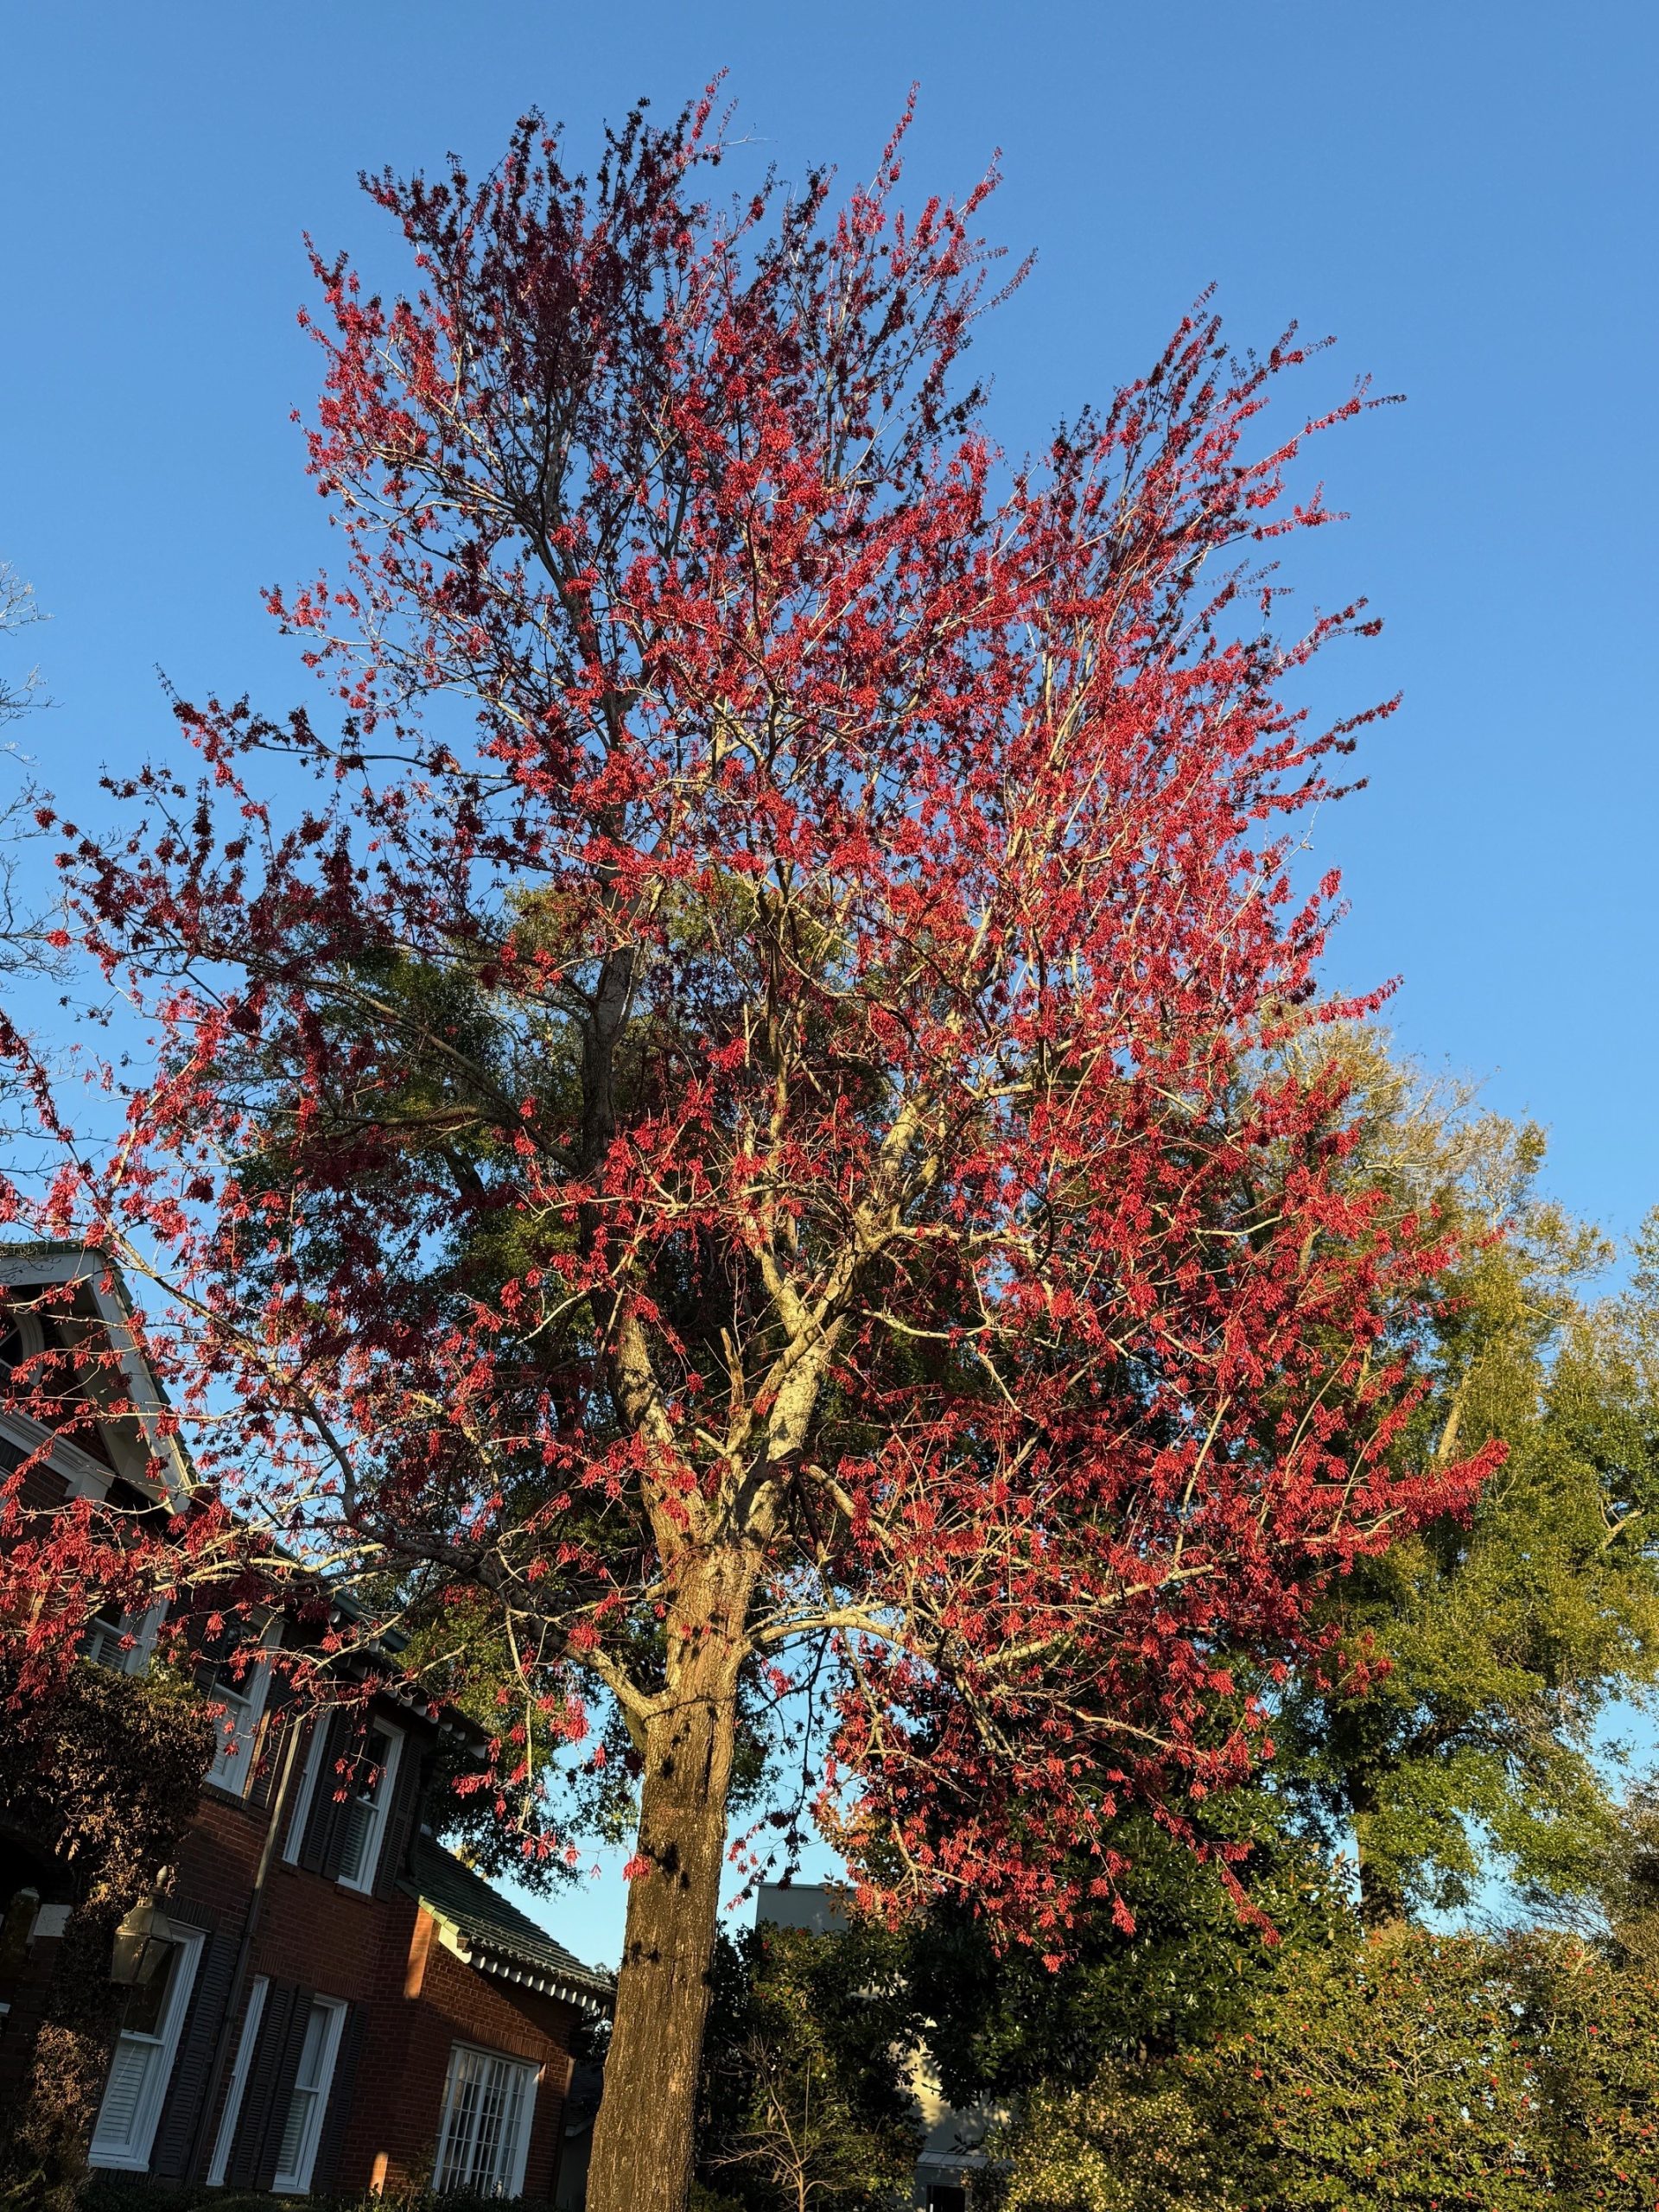
A month ago, when the Panhandle was covered in snow, it would have been hard to imagine that spring was just around the corner. But warm spring weather has arrived, and with it, the first of our native trees to bloom each year – the venerable Red Maple (Acer rubrum). Reliably heralding spring in Northwest Florida each February, Red Maples adorn our roadsides and low-lying natural areas with brilliant red blooms. Spotting a Red Maple blooming amongst the otherwise drab landscape means winter is on its way out and spring has sprung – or will shortly.
Beyond the blooms, Red Maple has much to offer as a landscape tree. For one, it is unbelievably adaptable. Across its native range – one of the most expansive of any species in the US, occurring naturally from Maine all the way down to the Everglades,* the tree can handle soils that range from periodically inundated along streams and other wet areas to more well-drained upland sites. Adding to its adaptability, in the Panhandle, Red Maple typically tops out around 40’ in height and around 20’ wide with a spreading vase shape, rarely growing out of scale with most landscapes.
*Since Red Maple occurs over a huge area of the US, it’s important to purchase seedlings or named varieties that hail from areas with like climate conditions to the Panhandle. Avoid varieties from northern states for best performance.
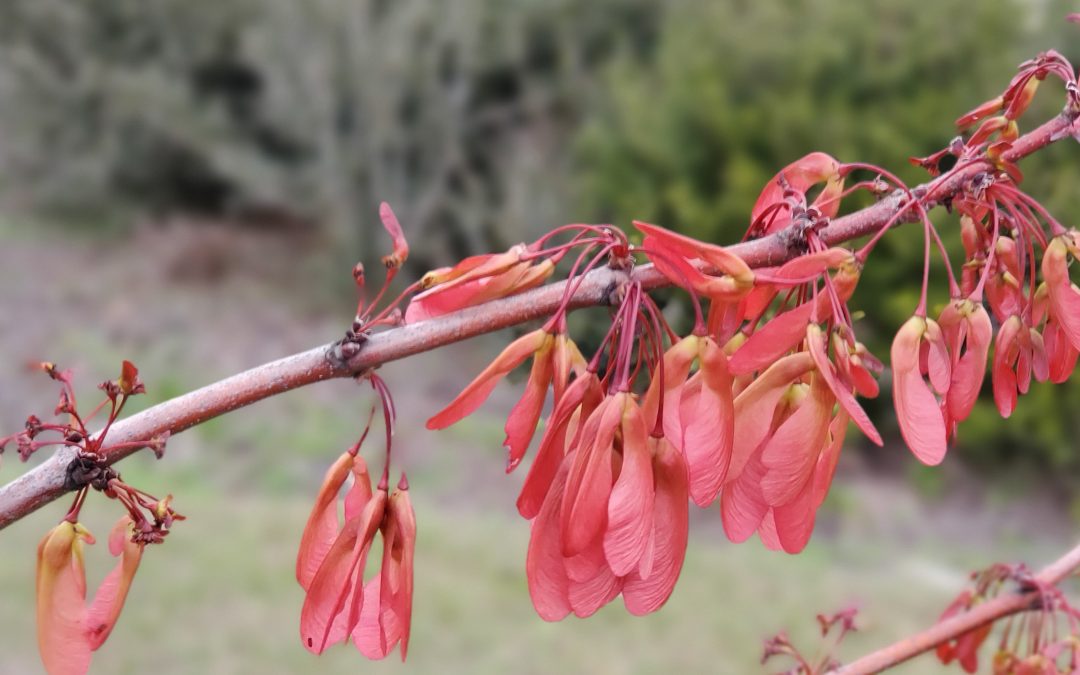
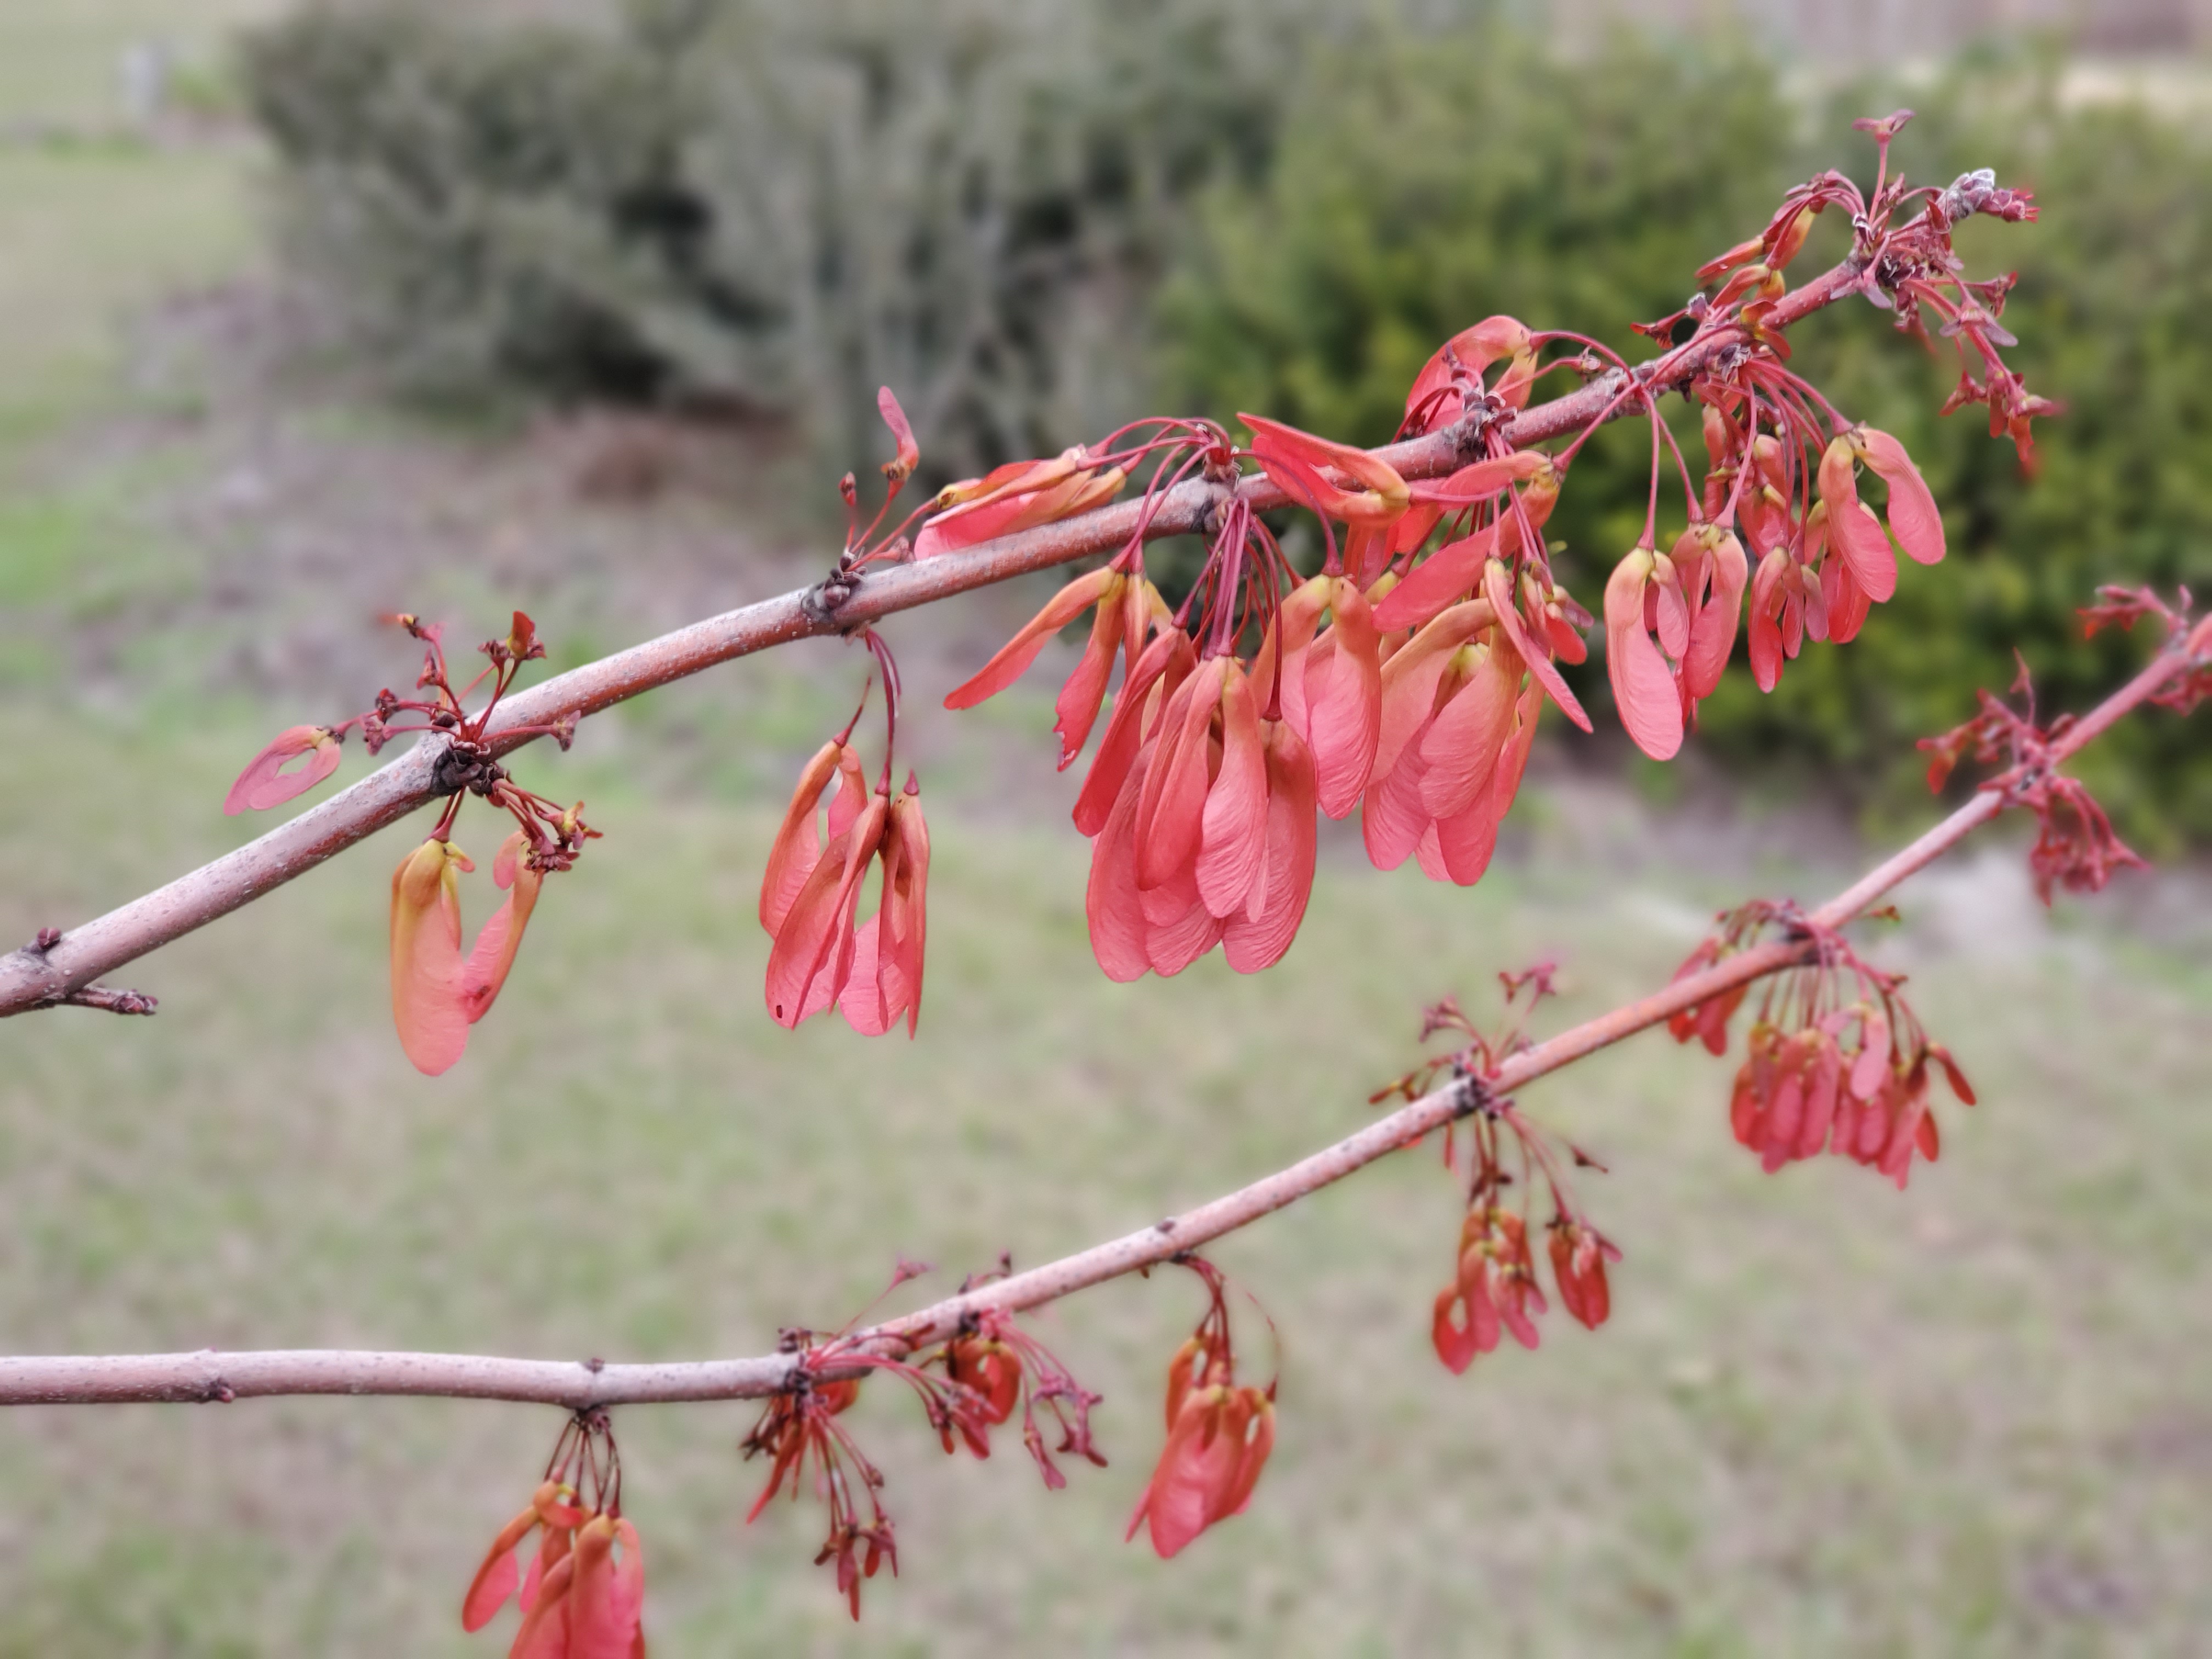
Red Maple is one of the few shade trees that has true four-season interest in our area. We’ve already talked about its spring flowers, but it also has attractive deep green foliage in the summer (some selections, like ‘Summer Red’ are even known for reddish purple new growth), famous fall color (though it is more muted in Florida than locales farther north), and unique ridged light gray bark in the winter. The seeds of Red Maple are even pretty. These two-winged seed structures, called a samara, follow the spring flower show, appear pinkish red, and are a favorite of squirrels and other critters.
Red Maple samaras. Photo courtesy of Daniel Leonard.
Red Maple is a quick growing, low maintenance tree as well. If planted correctly and properly cared for, the species can grow several feet per year in its youth. Site the tree in a moist site that receives full sun, plant slightly higher than the soil level of the container the tree was purchased in to compensate for soil settling post-planting, and water regularly until established. After establishment, periodic fertilizing with a balanced fertilizer will help ensure Red Maple’s nutritional needs are met and maximum growth achieved.
If you’ve been looking for a medium-sized, native, flowering shade tree with four-season interest, Red Maple may be just the tree for your landscape. Plant one today! For more information on Red Maple, other recommended landscape plants, or any other horticultural topic, contact your local UF/IFAS Extension office.
The Borneo camphor tree (Dryobalanops aromatica) exhibits a perfect example of crown shyness. Photo from Wikimedia commons at the Kuala Lumpur Research Forest
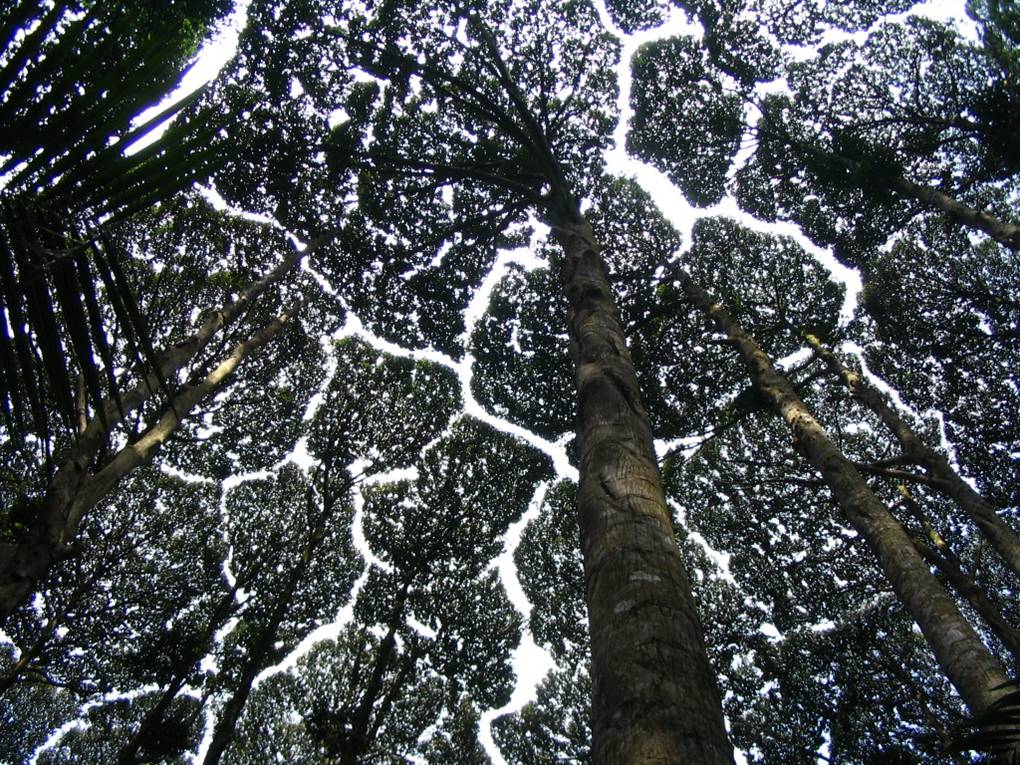
I spent a lot of time in my childhood lying in our backyard hammock, reading. Inevitably, I’d take a break and stare up at the tree canopy above me. We had sweetgum trees in that corner of our yard, and I’d watch squirrels chasing each other through the branches. One thing I noticed, but never really investigated, was how the highest branches spread out towards each other from the clump of trees, yet didn’t touch or overlap each other. You could nearly always see gaps of sunlight outlining the individual trees.
The canopy of mature oak trees exhibiting crown shyness. Photo credit: Carrie Stevenson, UF IFAS Extension
The term for this is “crown shyness.” As anthropomorphized as that seems, it’s an apt description for this seemingly polite growth pattern. The topmost branches of any given tree are in constant competition with each other for sunlight. Being photosynthesizers, sunlight is life. No growth can happen without the basic ingredients of sunlight, water, and carbon dioxide. So, from a tree’s perspective, there is an inherent disincentive to send growth beneath their own existing branches or those of an adjacent tree. The result of this is a botanical dance of sending branches out, neighboring trees doing the same, and multiple trees subtly angling for light. It’s like sharing an armrest on an airplane with a stranger. There’s a limited and highly desirable resource (the armrest), resulting in a (hopefully) gentle back and forth where someone either claims the space fully or you make an unspoken agreement to share it. If you do share it, it’s rare your arms touch; most of us want to keep some personal space!
Like Blue Angel jets in the diamond formation, trees will keep just a bit of sunlight between them and their neighbor. Photographed by Mass Communication Specialist 1st Class Ian Cotter. Official U.S. Navy Photograph.
While we may consciously shuffle for position in crowded public spaces, this happens for trees at a metabolic level. Evidence from an Argentinian study demonstrated that trees can “detect the presence of neighbors before being shaded by them,” using an internal sensor that detects light on the red:far red spectrum. This botanical spidey-sense comes from light-receptor proteins called phytochromes, which send out an alert that they’re close to another tree and may want to stop sending branches that direction. Growing into an adjacent tree quickly brings diminishing returns for absorbing sunlight, and it is in the tree’s best interest to keep a safe distance.
Single-species stands of pine trees exhibit crown shyness. Photo credit: Tyler Jones, UF IFAS
Crown shyness appears to be more pronounced in groves of same-species trees. Monocultures like pine plantations, or even large stands of black mangrove, exhibit the same growth patterns and timing, adapting to environmental factors the same way—particularly if they were planted or germinated at the same time. Foresters or ecologists trying to maximize the space for timber, fruit, or ecosystem restoration may want to deliberately encourage a diverse array of species, which fill in the gaps beneath the canopy and survive on less direct sunlight.
Maybe we could call it “crowd” shyness when people step back to give folks room to dance, avoiding “mechanical abrasion”! Photo credit: Cole Stevenson, University of the South
Another contributing factor to crown shyness, and perhaps one of the more crucial ones, is “mechanical abrasion.” University of Florida botanist Francis “Jack” Putz conducted research on this in Costa Rica back in the 80’s, which is still frequently cited in more recent publications. His team’s findings showed that crown shyness was “positively correlated with the distance pairs of trees adjacent to the gap swayed in the wind.” When tree branches physically bumped into one another on a regular basis, they kept their distance to prevent bud, bloom, and branch tip damage. For this scenario, imagine someone dancing enthusiastically in the middle of a big music festival—if there’s room, people will often spread out. The more the person flails, the more space you give them. If they’re just minimally swaying back and forth, you might stand closer. Putz, et. al observed this same principle in the coastal mangrove forests—more flexible branches adjacent to one another gave each other more space, while those with “stiff crowns” that couldn’t move much grew closer together.
When space opens up due to the loss of a neighboring tree or branch, the infusion of sunlight/fuel spurs a tree to send energy quickly to gain the advantage over adjacent trees. Tree species vary in their capability and success in doing this. An earlier article on pioneer species (the first to occupy a newly open space) and the process of succession sheds more light on this natural phenomenon. In a mature forest, the end result is a balanced mosaic of tree branches reaching out and nearly touching one another, but leaving each other space to grow.
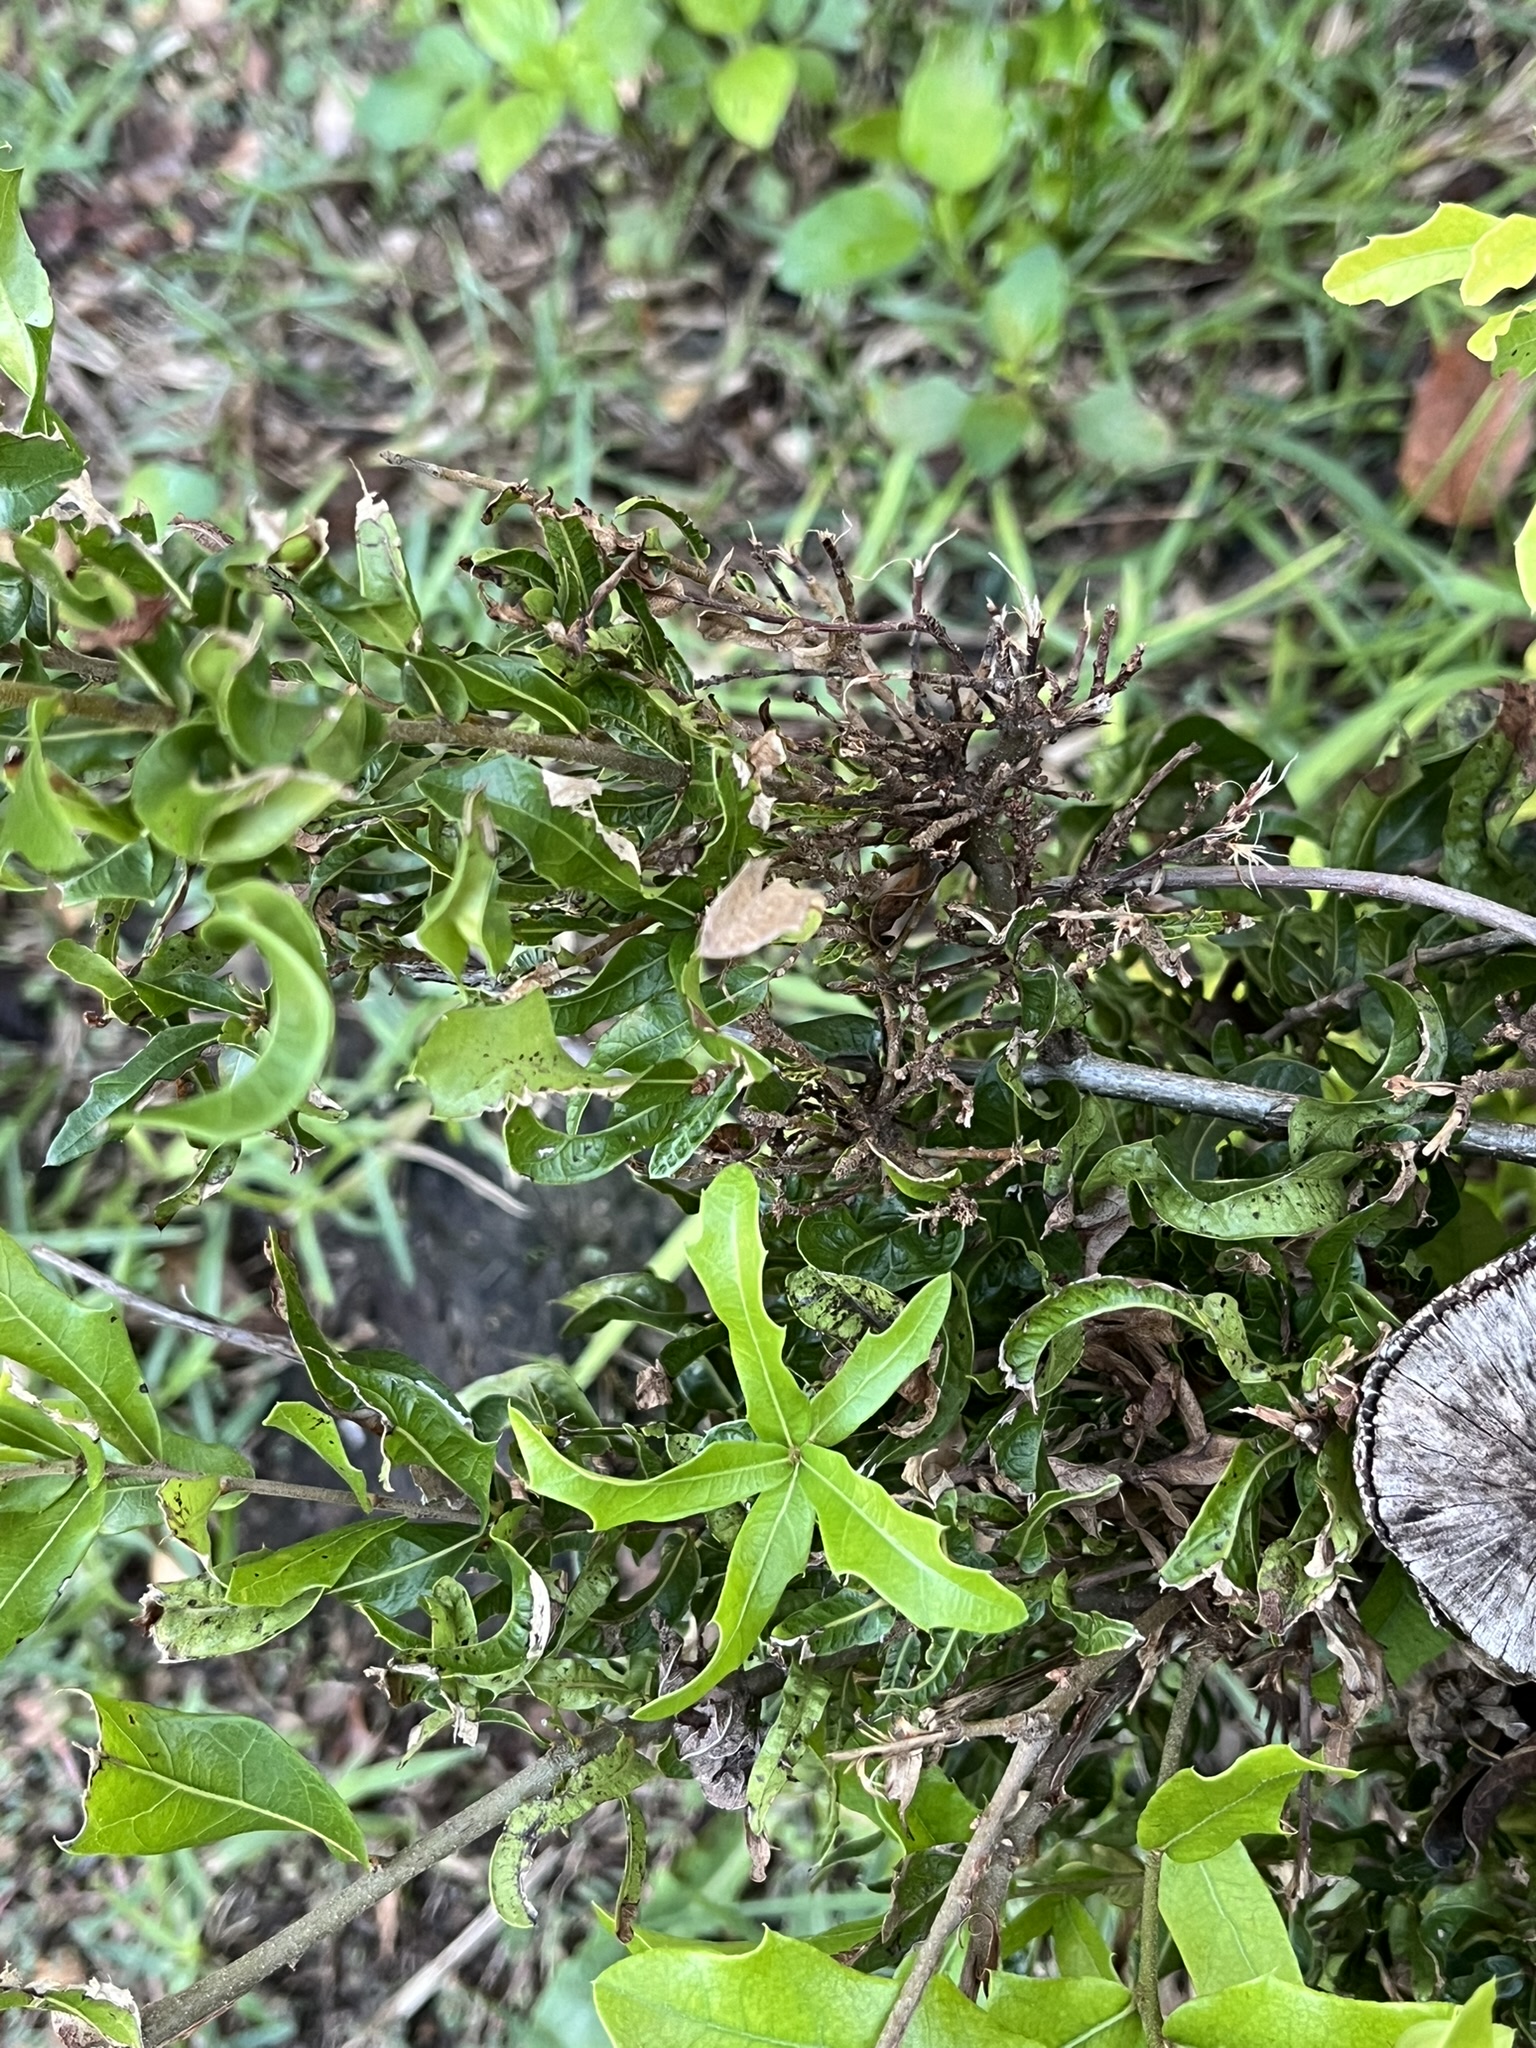
Not all trees and woody species are welcome in the landscape. In fact, some woody species can be pesky and problematic and for lack of a better term “weeds”. Despite the fact that some of these species are native trees, bushes, and vines, many can be aggressive and problematic in the home landscape and urban settings. If you have ever cared for a flower bed or garden in the Panhandle, you are probably well acquainted with these and have pulled seedlings and small saplings out of beds, hedges, and seemingly any other nook and cranny of your landscape. If you cut them off using loppers or a saw you also know how aggressively they resprout and how extensive their root system can become. Vegetation grows quickly and often aggressively in our humid sub-tropical climates. If you leave an area of land vacant for very long here, it quickly becomes a thicket in no time. Some of our oaks, particularly water and laurel oaks, can be pesky and troublesome. It seems like I am constantly battling problem oaks in my home landscape, with varying degrees of success. I will pull out, cut out, and apply herbicide only to look up and see a substantial oak sapling rocketing up through azaleas or other hedges. Without fail this is a water or laurel oak nearly 100% of the time, with some other hardwood trees and shrub species thrown in occasionally.
Oak sapling overtaking shrubbery in a local landscape Escambia County, FL Photo Credit: Ian Stone
What is the best way to tackle these pesky woody “weeds” when they cause persistent problems and pop up in undesirable spaces? The answer is to either mechanically removal them or employ very careful and targeted herbicide application. As a professional forester I have spent a large part of my career controlling these brush species using a host of mechanical and herbicide control methods and very well planned prescribed fires. Obviously using large heavy machinery and prescribed fire in urban and suburban settings and landscapes is not an option but using hand tools for mechanical removal and herbicides where needed and best suited is a winning combo for the home landscape.
First you want to determine what species you are dealing with and what stage of development it is in. As I mentioned, water oak and laurel oak are usually the problem oaks we encounter and can reproduce at extremely high rates and create undesirable crowded stands of stunted oak. These species are what foresters call early successional, meaning they tend to establish in forest openings and areas impacted by a disturbance such as a hurricane or windstorm. They produce large amounts of small acorns and grow very fast and they also have poor characteristics where they are susceptible to wind throw and disease. Effectively, they reproduce heavily, grow fast, and die young; that is their natural adaptation and life cycle and what causes them to be pesky and weedy in the home landscape. We don’t realize it, but our home lawns and flower beds create the perfect early successional habitat for these oaks and other brush species such as yaupon holly, titi, wax myrtle, and others. It doesn’t stop there – in heavily shaded areas, very shade tolerant oaks, brush, and vines tend to become established. Vines such as Virginia creeper, greenbriers (Smilax spp.), pepper-vine, and others are particularly annoying as these woody species also love to grow up in fences, particularly chain link, and are difficult to remove.
So what are the best methods to handle problem woody species in the home landscape? The best option is to catch them as seedlings and young plants and pull them up by the roots and all. If you can do this, you will avoid issues with resprouting. If you have larger, more well-established brush and small trees in your landscape, you can cut them back close to the ground, but you are likely to have issues with resprouting. This can be very frustrating and can result in a persistent problem. By consistently cutting these back you may be able to exhaust the plant’s reserve, but this is unlikely. Depending on the size of the root system you may be able to dig up the roots using some elbow grease and a shovel or mattock, but if significant roots are left behind, some woody species can resprout from the remaining roots. This is when simply cutting off the main stem or other mechanical methods often are not sufficient for long term control.
When dealing with well-established woody species with a significant stem size, using a properly labeled and effective herbicide can be a big time and hassle saver. You want to use a herbicide that is labeled for hack and squirt applications and/or cut stump applications. Many brush control and tough brush herbicides are labeled this way and can be applied using these methods. Herbicides with the active ingredients of triclopyr or glyphosate are the most effective for these methods and readily available for home use. Triclopyr products are usually the most effective on tough brush and woody species. Make sure the species you are targeting is listed on the label and follow the label directions exactly for the methods and concentrations to apply the herbicide correctly.
Oak resprouting from stump after herbicide treatment. Note the deformed leaves on the regrowth showing herbicide damage. Photo Credit: Ian Stone
Cut stump and hack and squirt applications require a bit of a different method of application. Instead of spraying foliage, you apply the herbicide into fresh cuts using a squirt bottle or a paint brush. You should wear proper protective equipment when working with any herbicide and this is also listed in the label. Long sleeves and pants along with chemical resistant gloves and eye protection is usually the minimum recommended. For hack and squirt, make a series of connecting cuts in a ring around the problem stem and squirt the herbicide mixture into the fresh cuts using the squirt bottle. For cut stump treatments cut the stem(s) of the problem tree or shrub off slightly above the ground and apply the mixture using a paint brush or squirt bottle, focusing on the outer portion of the stump right next to the bark. These methods work by introducing the herbicide to the cambium layer, which is the actively growing and live tissue just under the bark in woody plants. By doing this it will travel through the tissue and kill both the roots and stems. It is very important that the cuts are fresh, and the application must be made as soon as possible after the cuts are completed. Once the brush is killed back, you can wait for the stem or stump to rot or remove it once it has completely died. This method is effective at controlling resprouting but is not 100% effective on all applications. If the woody plant in question continues to resprout, you can make fresh cuts and reapply. An advantage of this method is it can be done in winter even when the plant is dormant, as it does not rely on foliage to uptake the herbicide. That means you can use it year-round, and you can take advantage of the cooler winter weather to do this labor-intensive work.
With careful work and proper technique, these methods can be beneficial to control persistent brush problems in the home landscape. When using herbicides it is very important to be aware of off target damage to desirable plants. One of the advantages of hack and squirt and cut stump applications is that they are very targeted and minimize issues with off target damage and drift. Care should be taken not to get the herbicide mixture on the stems of desirable shrubs and trees, and they can penetrate the bark and do damage, especially on thin barked species. If you have questions about how to properly use a herbicide or reading the label contact your local extension office.
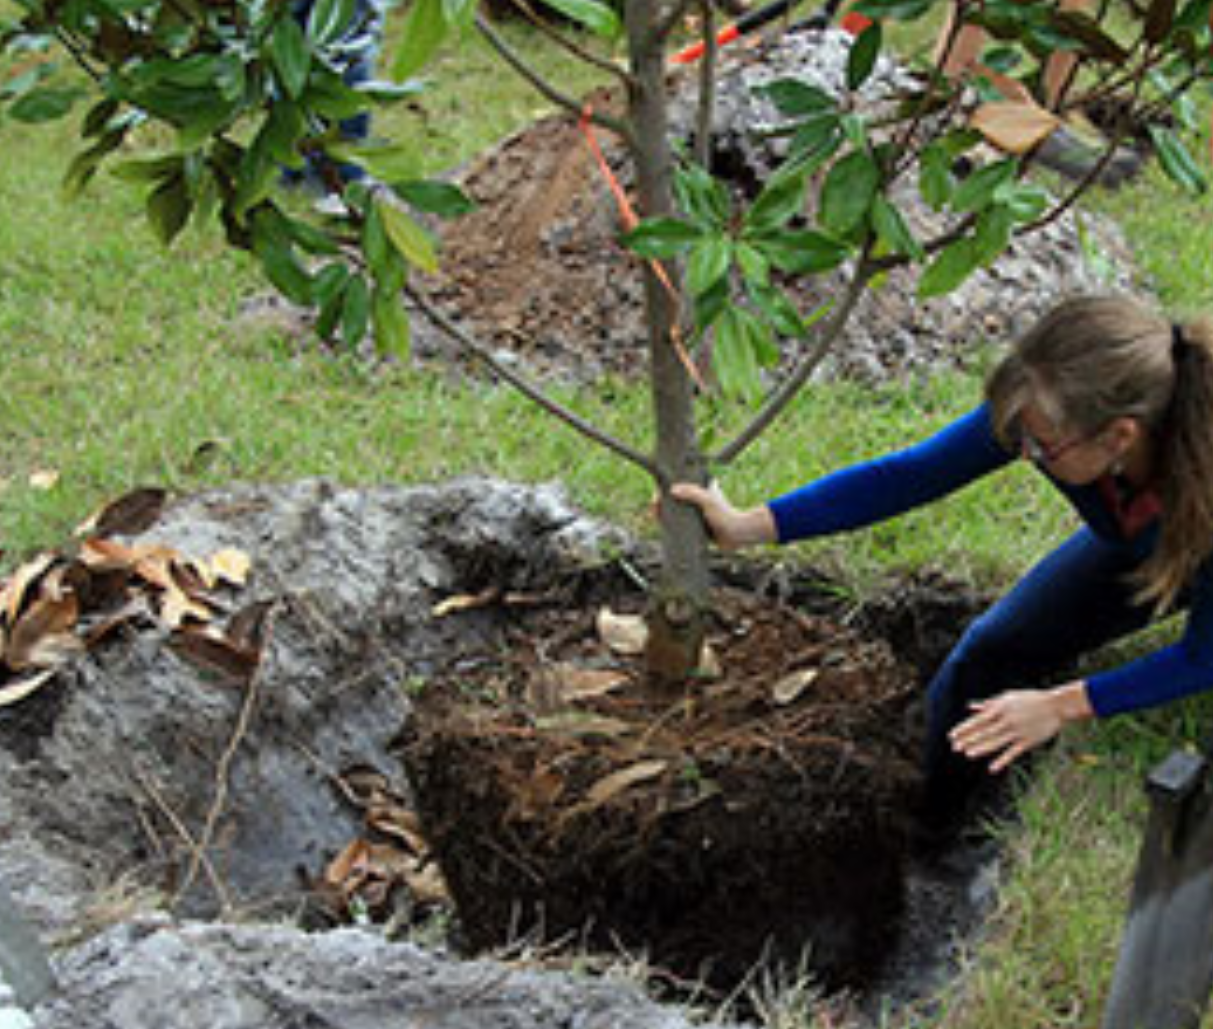
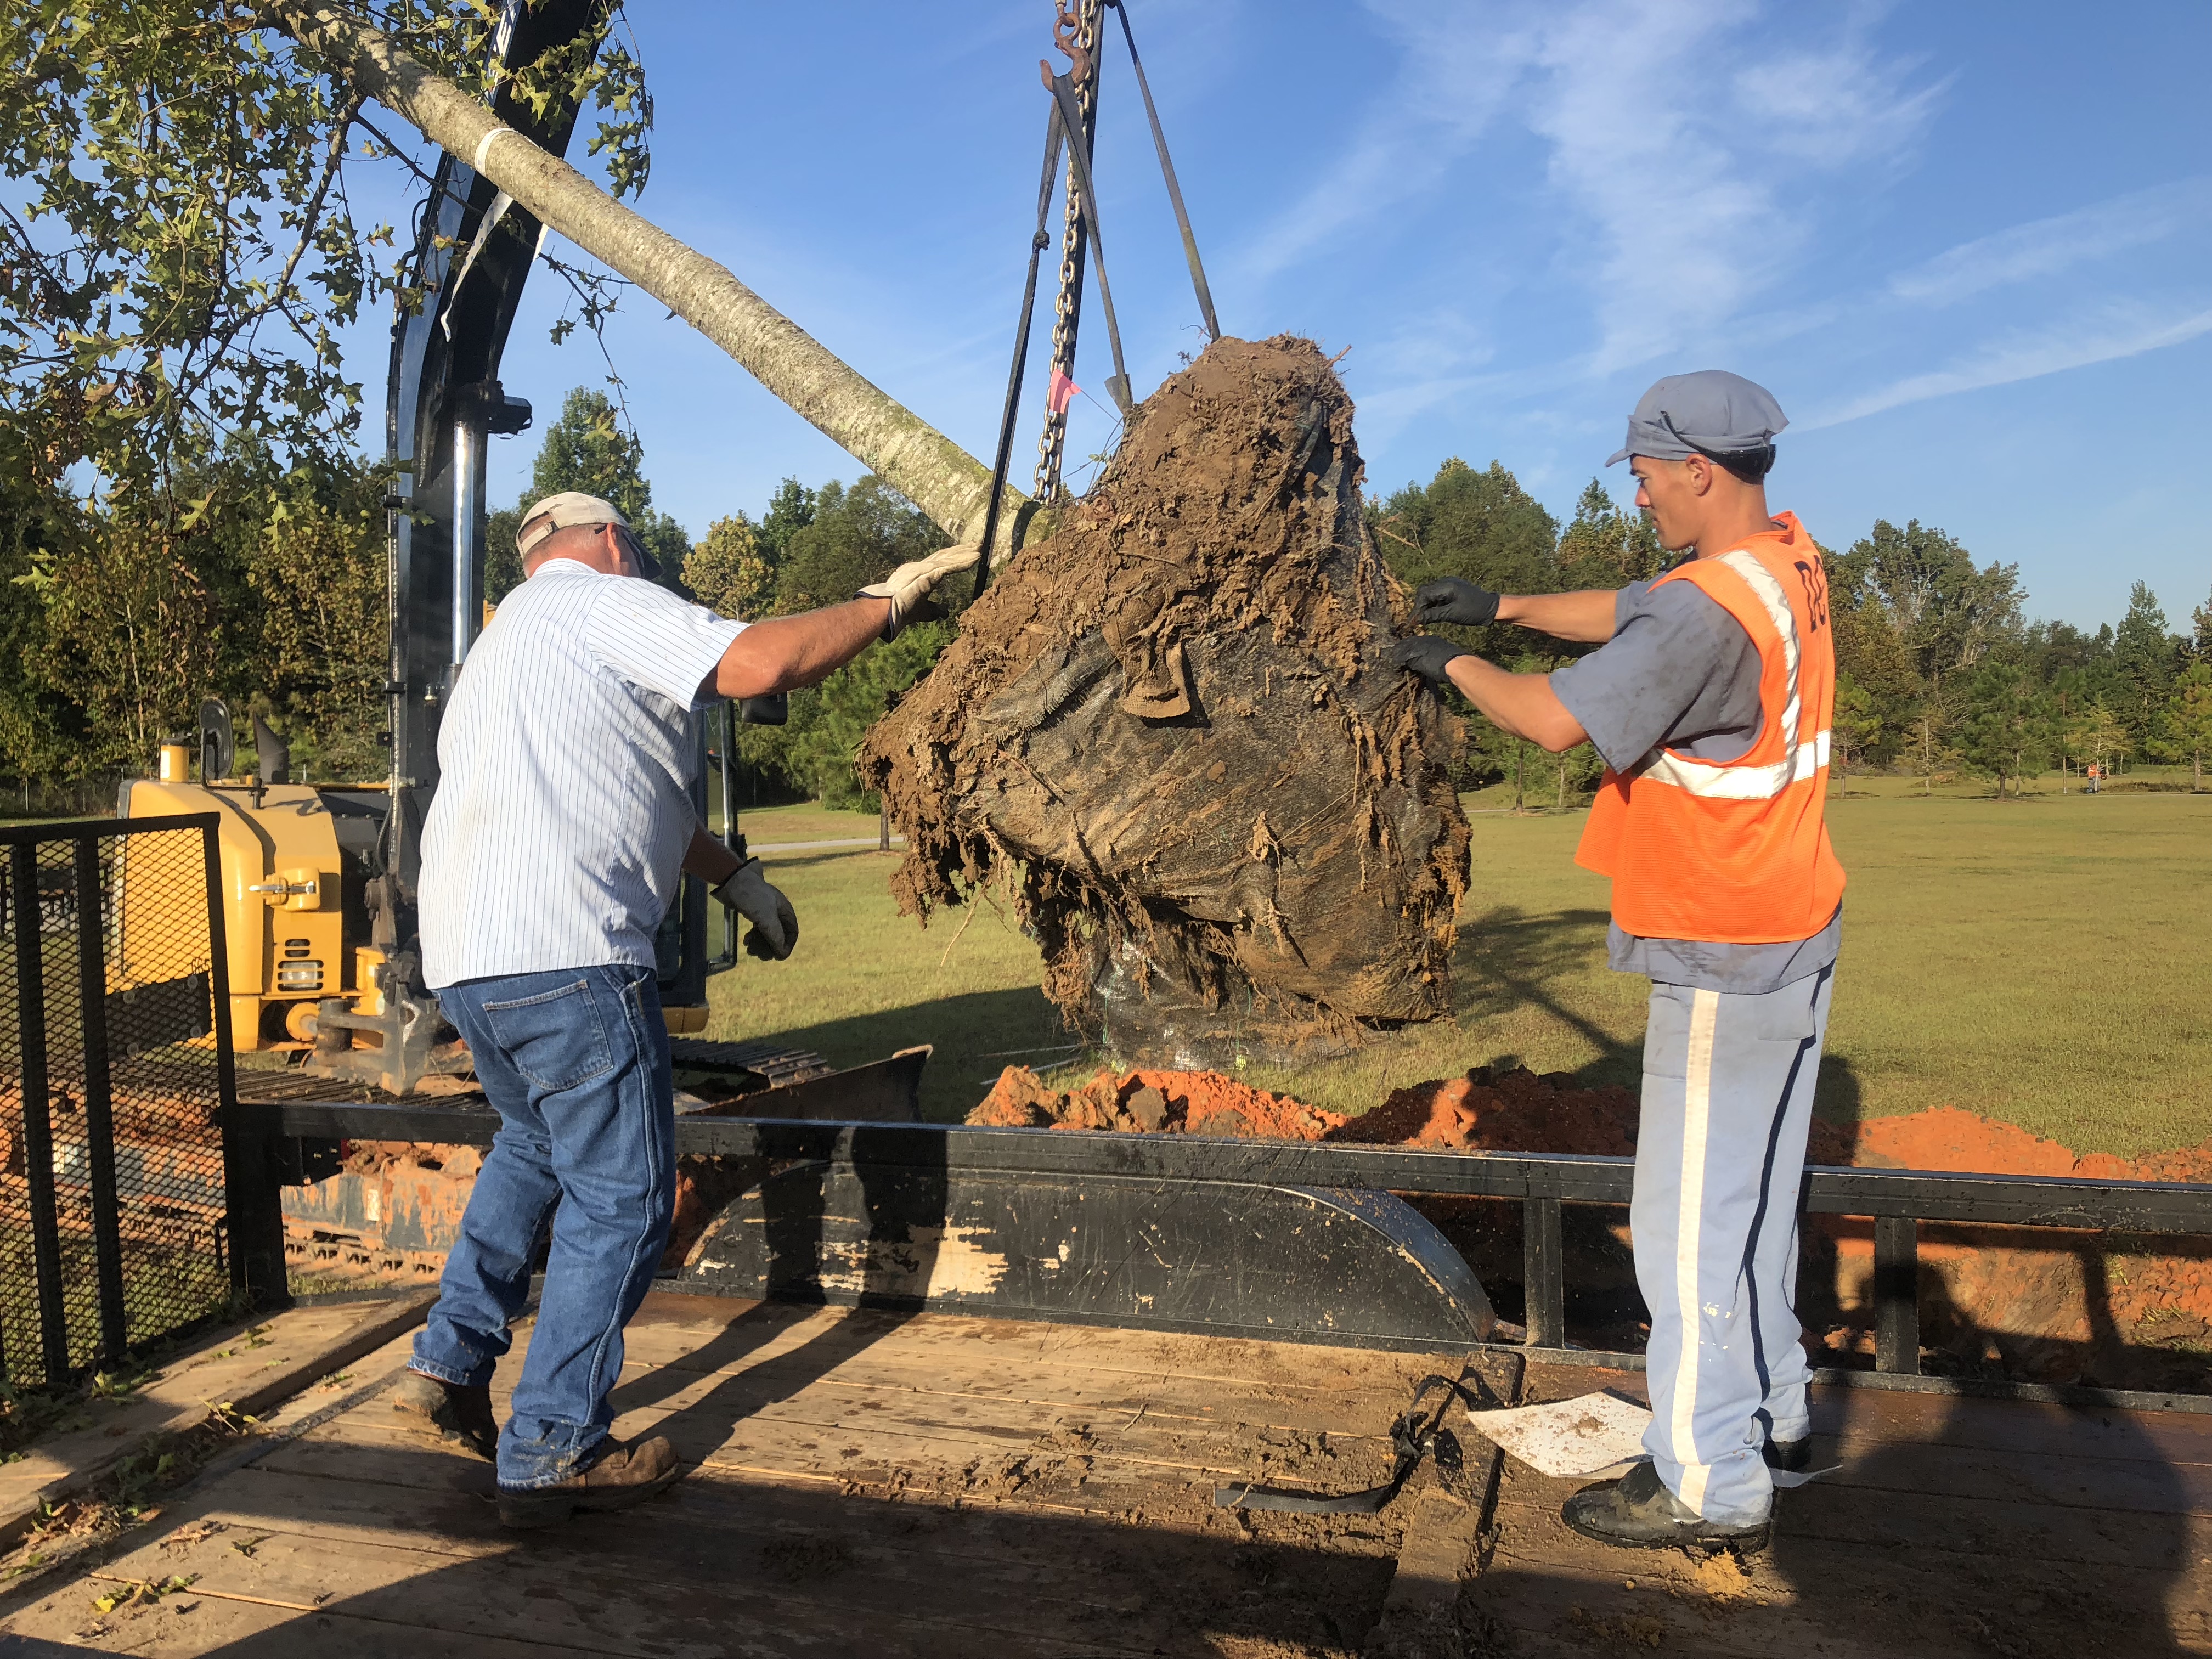
A planted tree with water retention berm. Photo Credit: Matt Lollar, University of Florida/IFAS Extension – Santa Rosa County
Extension agents are frequently tasked with evaluation of unhealthy plants in the landscape. They diagnose all sorts of plant problems including those caused by disease infection, insect infiltration, or improper culture.
When evaluating trees, one problem that often comes to the surface is improper tree installation. Although poorly installed trees may survive for 10 or 15 years after planting, they rarely thrive and often experience a slow death.
Fall is an excellent time to plant a tree in Florida. A couple of weeks ago beautiful Nuttall Oak was planted at Bagdad Mill Site Park in Santa Rosa County, FL. Here are 11 easy steps to follow for proper tree installation:
Look around and up for wire, light poles, and buildings that may interfere with growth;
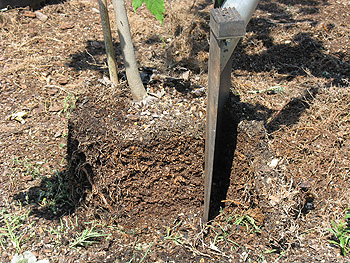
Dig a shallow planting hole as wide as possible;
Find the point where the top-most root emerges from the trunk;
Slide the tree carefully into the planting hole;
Position the point where the top-most root emerges from the trunk slightly above the landscape soil surface;
Straighten the tree in the hole;
Remove synthetic materials from around trunk and root ball;
Slice a shovel down in to the back fill;
Cover the exposed sides of the root ball with mulch and create water retention berm;
Stake the tree if necessary;
Come back to remove hardware after establishment.
Digging a properly sized hole for planting a tree. Photo Credit: Matt Lollar, University of Florida/IFAS Extension – Santa Rosa County
Removing synthetic material from the root ball. Photo Credit: Matt Lollar, University of Florida/IFAS Extension – Santa Rosa County
Straightening a tree and adjusting planting height. Photo Credit: Matt Lollar, University of Florida – Santa Rosa County
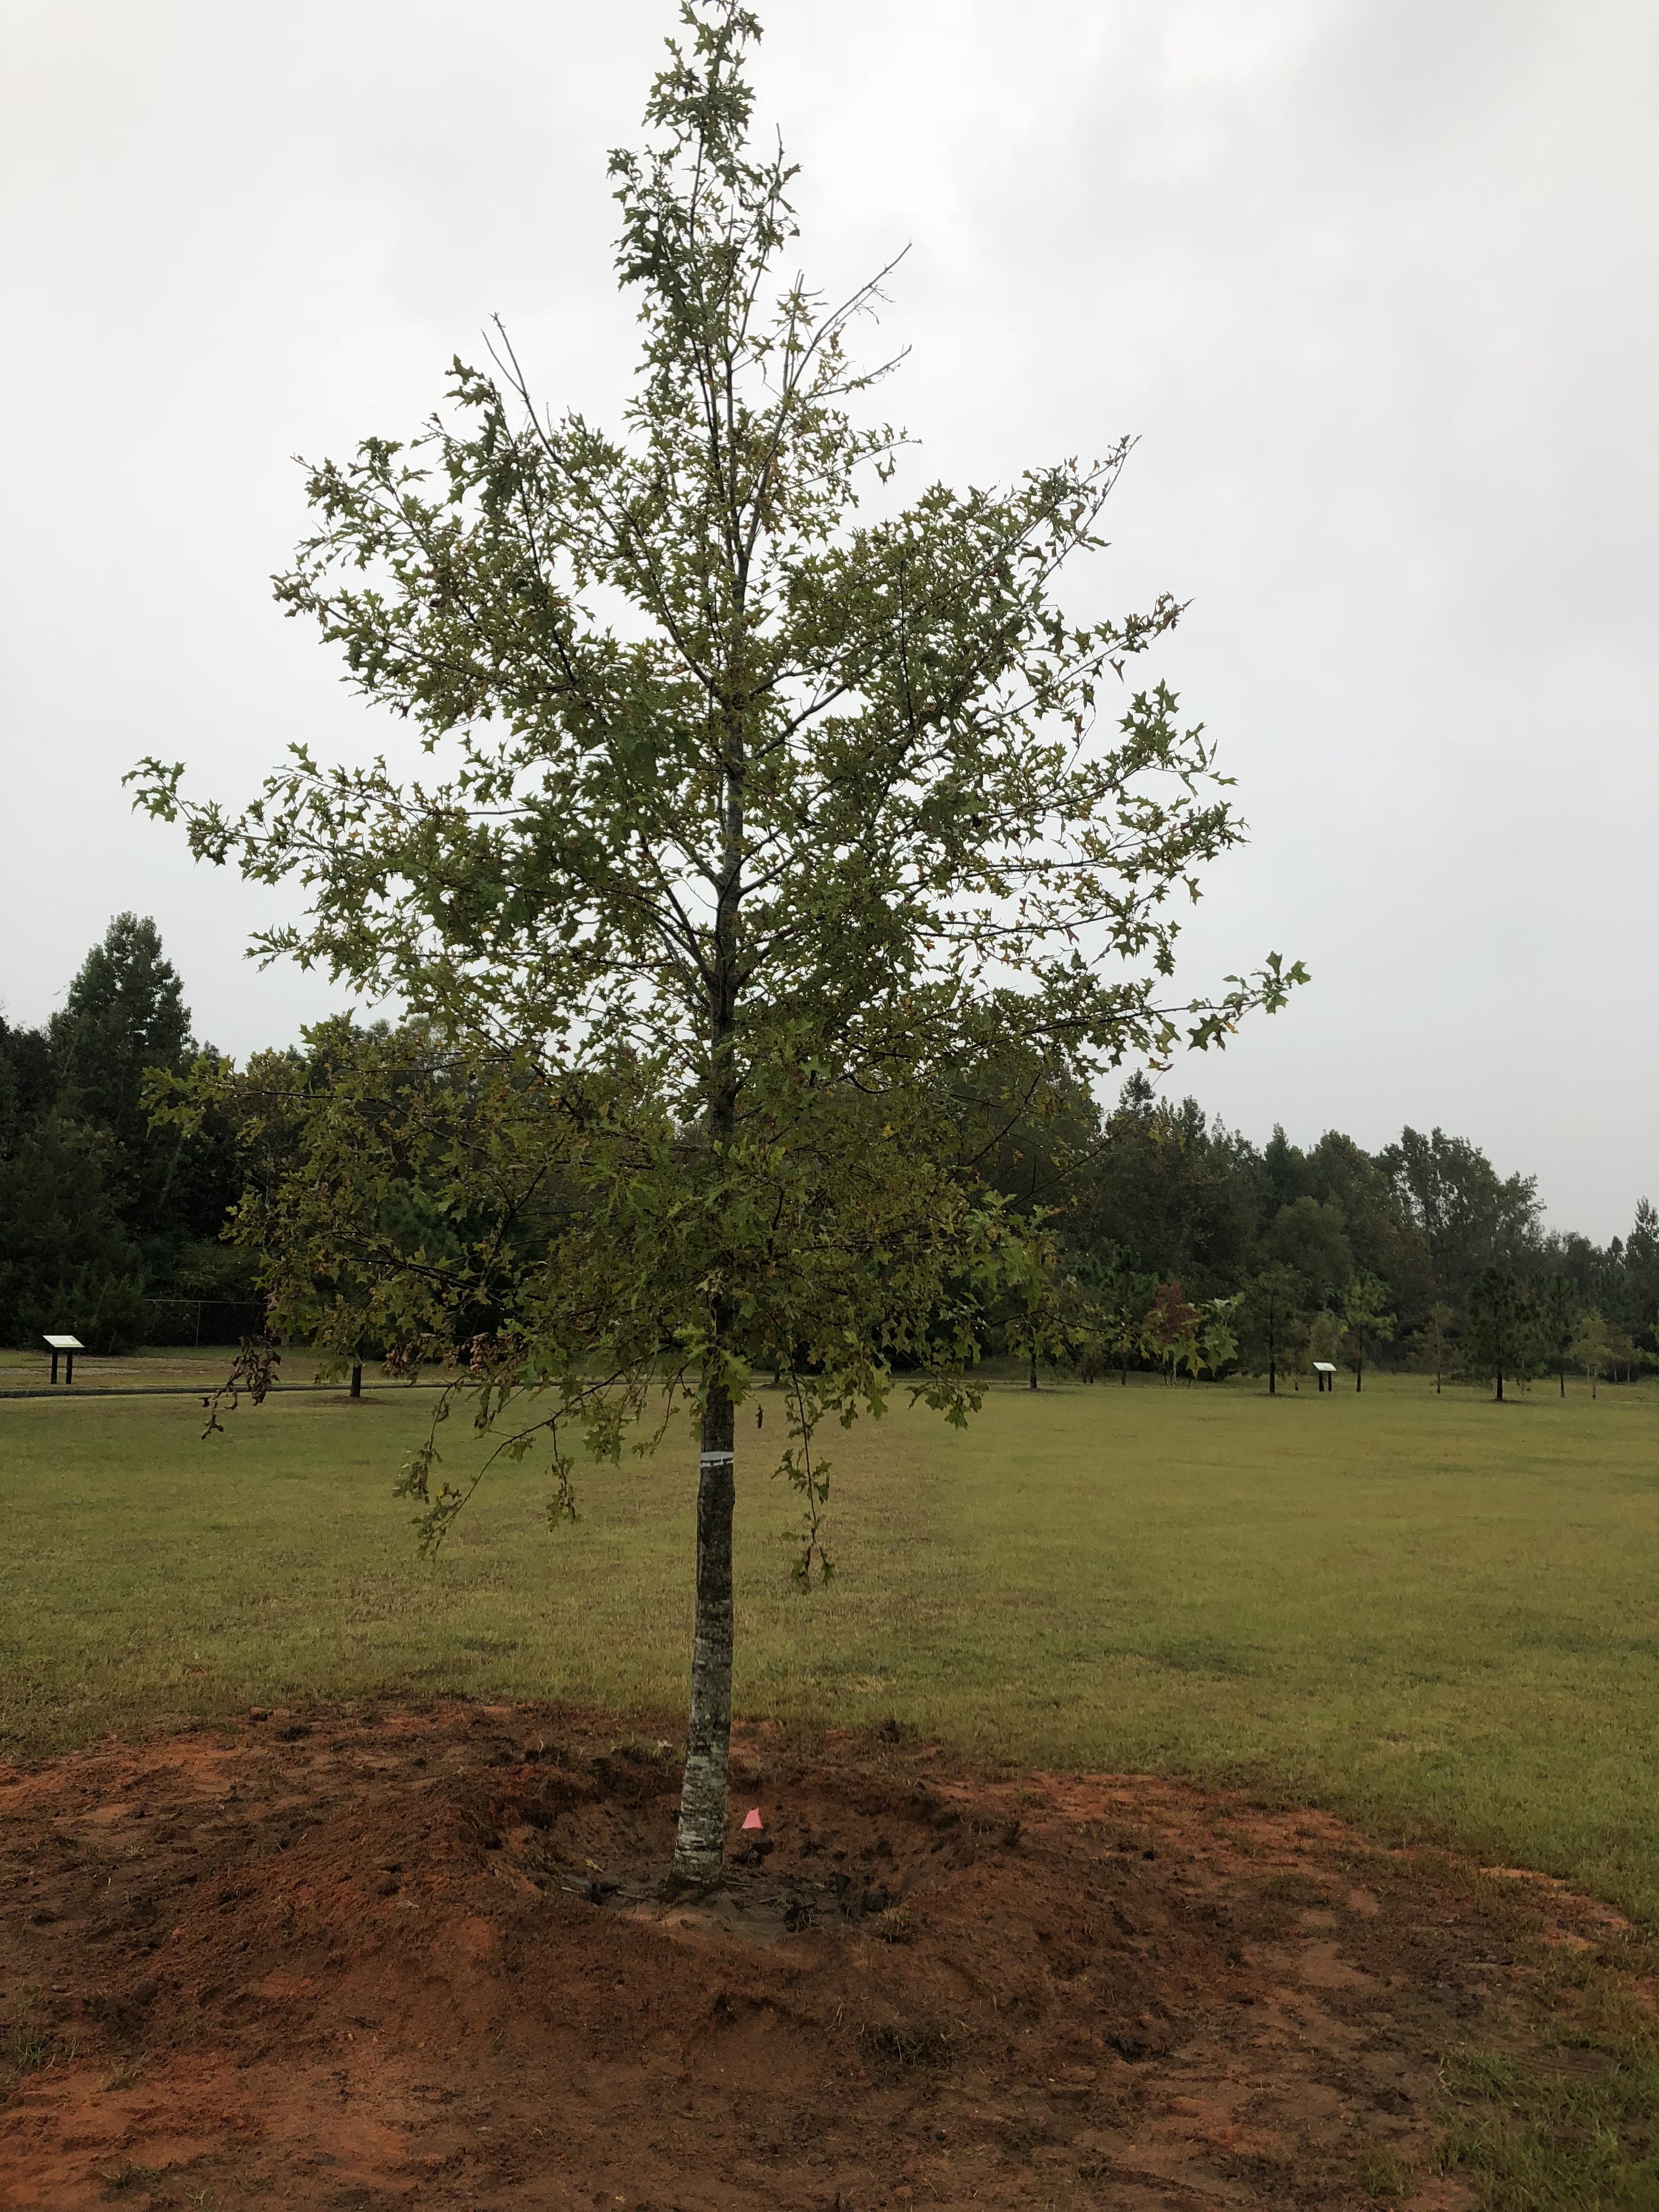
Though the calendar says November, the weather in Northwest Florida is still producing summer or at least spring-like temperatures. The nice days are wonderful opportunities to accomplish many of those outside landscape chores. But, it is also a good time to start planning for next month’s colder temperatures. Since we don’t experience frozen soil, winter is the best time to transplant hardy trees and shrubs. Deciduous trees establish root systems more quickly while dormant; versus installing them in the spring with all their tender new leaves.
Remove an inch or more for extremely rootbound trees.
Here are a few suggestions for tasks that can be performed this month:
Plant shade trees, fruit trees, and evergreen shrubs.
Do major re-shaping of shade trees, if needed, during the winter dormancy.
Check houseplants for insect pests such as scale, mealy bugs, fungus gnats, whitefly and spider mites.
Continue to mulch leaves from the lawn. Shred excess leaves and add to planting beds or compost pile.
Replenish finished compost and mulch in planting beds, preferably before the first freeze.
Switch sprinkler systems to ‘Manual’ mode for the balance of winter.
Water thoroughly before a hard freeze to reduce plants’ chances of damage.
Water lawn and all other plants once every three weeks or so, if supplemental rainfall is less than one inch in a three week period.
Fertilize pansies and other winter annuals as needed.
Build protective coverings or moving devices for tender plants before the freeze warming.
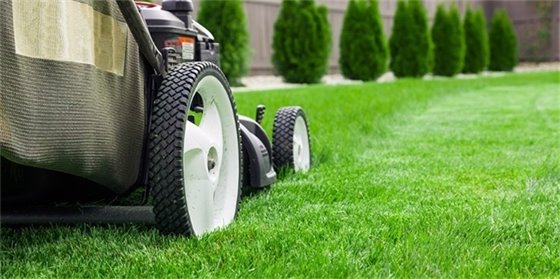
Be sure to clean, sharpen and repair all your garden and lawn tools. Now is also the best time to clean and have your power mower, edger and trimmer serviced.
Be sure the mower blade is sharpened and balanced as well.
Provide food and water to the area’s wintering birds.
Mowing a lawn. Photo Credit: University of Florida/IFAS