by Matt Lollar | Dec 16, 2021
Trees provide shade, aesthetics, and perspective to the landscape. However, they only serve as burdens if not properly selected and maintained. To help determine what trees do best under certain conditions and to provide information on tree care, this month’s Gardening in the Panhandle LIVE! was all about trees.

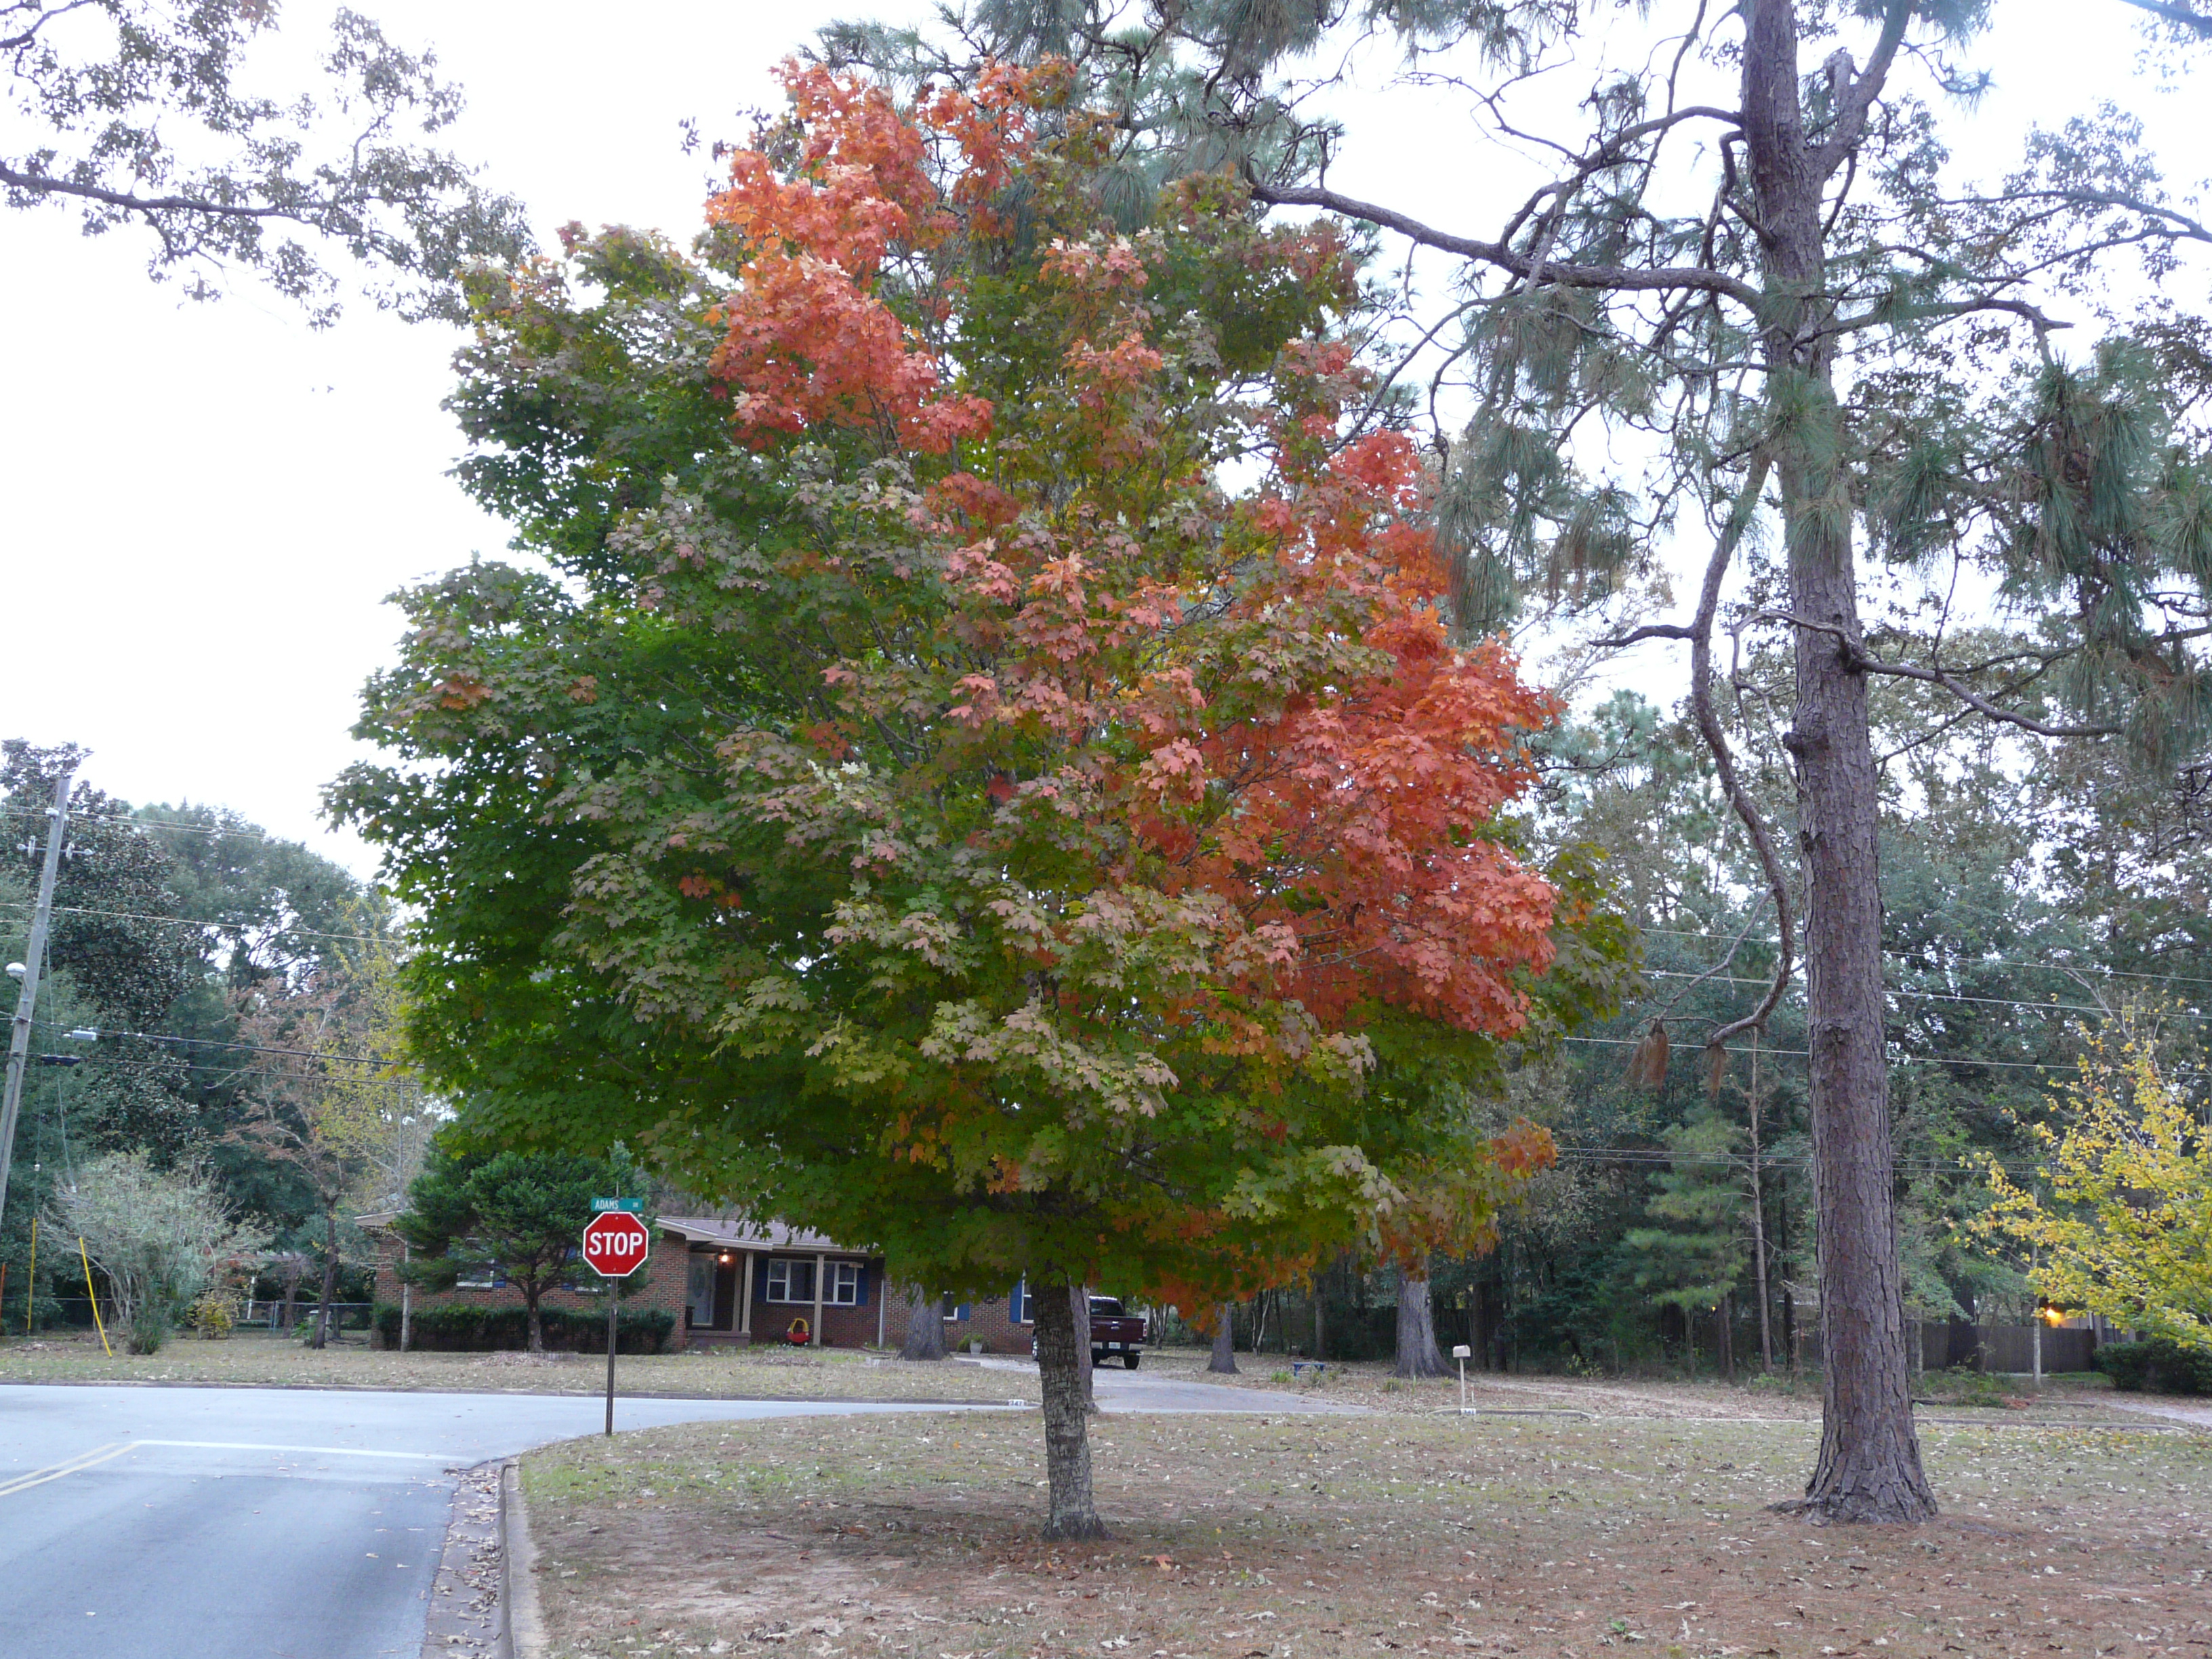
Florida maple beginning to exhibit fall color. Photo credit: Larry Williams, University of Florida/IFAS Extension – Okaloosa County
Tree Selection
Some trees grow faster than others. That’s not always a good thing, but if you’re trying to select a tree that grows fast and will provide shade in your yard then you might want to give the following species a try. Click on the links for more information.
A lot of times you’ll read a particular tree species prefers moist, well-drained soil. Some coastal soils are very well drained and require supplemental irrigation after establishment to keep some species alive. One tree that does well in sandy, well-drained soils without supplemental irrigation is the sand live oak. Another tree, that would never win a popularity contest, but does well in sandy soils is the sand pine. This tree has a gnarly growth habit, which would make it an interesting focal point in the landscape. Turkey oaks are another option for dry spots.
There are a lot of fruit tree species that can be grown successfully in the panhandle. The key to good fruit production is selecting trees that are adapted to the average number of chill hours (usually calculated by the number of hours between 34ºF and 45ºF) your yard receives on a yearly basis. Some peaches, plums, and nectarines have been developed for our climate. Citrus such as satsumas and tangerine hybrids grow well in the panhandle, but sometimes require cold protection. Persimmons, loquats, and pears are other fruit trees that grow well.
If you already have mature trees in your yard, then you may be looking for smaller, understory trees to enhance your landscape.
Living this far south, you often have to really seek out trees that change color in the fall. Dogwoods, Florida maples, and blackgum trees all have great fall color. Some of the red oaks also have nice fall color. Two that come to mind are the nuttall oak and the Shumard oak.
Trees can cause a lot of damage if planted too close to sidewalks or buildings. To determine if a tree will fit in a confined space, you will need to consider its mature trunk flare diameter.
Florida is the southern extreme for growing ginko trees. If you decide to plant a ginko tree, make sure to select a male cultivar to avoid stinky, slippery fruit.
To successfully plant a tree, you need to start with a healthy tree. If the tree you purchase was grown in a pot, make sure it isn’t rootbound and doesn’t have encircling roots. You also should inspect the tree’s form, branching structure, and look for the presence of included bark. Please read “Selecting Quality Trees from the Nursery” for more tips on what to look out for when purchasing a healthy tree.
Some trees are more tolerant than others of high winds and flooding. Please read this publication about tree failure from hurricanes to help determine what tree species are better adapted to these weather events.

Santa Rosa County Master Gardener Pruning a Stone Fruit tree at the WFREC. Photo Credit: University of Florida/IFAS Extension
Tree Maintenance
Armillaria is a common fungal pathogen that infects trees from their roots. Other major diseases are more specific to certain species. A more comprehensive list of tree and shrub diseases can be found on the Ask IFAS website.
Tree establishment period depends on a lot of factors. Once a tree is established, it’s roots can be equal to about three times the distance from the trunk to the dripline.
Part of the beauty of a bald cypress is its knees. However they can also be a nuisance for mowing and other yard maintenance. The purpose of cypress knees is a bit of a mystery and there are a lot of theories on the subject.
Fallen leaves can help add nutrients back to your yard. Even if you are trying for a manicured lawn, you may want to rake up the leaves and use them elsewhere in the landscape.
Regardless of the species, most fruit trees benefit from a good pruning. Deciduous fruit trees should be pruned to maintain good branch structure and form, while citrus may benefit from a light hedging.
Trees are a wonderful addition to any landscape, but it’s important you select the right tree for the right place. Hopefully this article provided some information to guide you in the right direction.
by Matthew Orwat | Nov 22, 2021
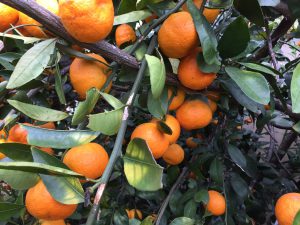
Citrus: Bearing Branches. Image Credit Matthew Orwat, UF/IFAS
Many dooryard fruit growers have asked me this Fall: When is the correct time to prune citrus? How do I prune Citrus right now? The answer may seem obvious, but when we delve into the question further, we find out that it is not.
Two different pruning strategies exist depending upon the citrus plants age. When training young citrus plants, it is essential to develop three to four main scaffold branches with wide crotch angles. This is done by selecting branches growing different directions that intersect with the trunk or each other at the widest angle possible. Other branches need to be pruned off and these need to be left alone to develop into the main scaffold. Once the branching system has been developed, traditional heading back, as seen in peaches and apples, is unnecessary.
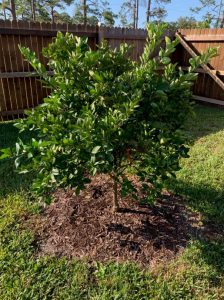
Young Citrus Tree with good vase shape
There are several instances in which pruning mature citrus trees is beneficial. First, branches should be pruned approximately one foot off the ground so developing fruit is not sitting on the ground. This also helps with weed control and fertilization. Next, it is important to remove growth that is positioned extremely upward or inward to promote an open, vase-shaped habit. Finally, it is necessary to remove any dead wood resulting from winter dieback.
Many growers are eager to remove branches that have been bent downward by heavy citrus crops. This is not necessary; they will bear well in subsequent years.
The last pruning item to consider is removal of suckers from below the rootstock. If the tree is grafted, this is necessary so that the rootstock does not overtake the scion cultivar. Trees propagated from seedage or cuttings will not need this type of pruning since root suckers will be true to type.
It has been noticed that when trees are not over pruned, they exhibit greater cold hardiness. Keeping that in mind, any pruning of citrus should be done at the beginning of March or later, not in the fall or early winter. With proper pruning practices, gardeners should expect healthy trees with bountiful harvests. For further information please consult the publications listed below or contact your local Extension office.
Citrus Culture in the Home Landscape
Cold Hardy Citrus for North Florida
Louisiana Home Citrus Production Manual

by Ray Bodrey | Oct 14, 2021
Tree dieback is a complex syndrome and slow developing. Dieback is essentially a process in which trees lose leaves and limbs. This usually occurs as a result of severe stress to the tree’s bark or root system, but could be a result of a declining life cycle.
It’s important to note that there is a significant balance between a tree’s root system and the number of leaves and limbs it can support. For example, if a tree loses part of its root system, possibly due to disease or lawn equipment damage, the tree will forfeit a portion of its leaves. Dieback doesn’t happen overnight, though. It’s a slow process, with larger trees taking much longer time for signs of stress to emerge. However, a large tree root system is very sensitive to damage, whereas a small tree will adapt quickly and is much more resilient to damage. So, what can be done to prevent dieback in trees?
First and foremost, trees, like all living things, have a natural life cycle. Regardless of how you care for your trees, dieback will occur. The most important management measure in extending the life of a tree is to protect the root system and bark.
With each passing year, a tree grows new bark in the rejuvenation process. The bark replacement process inevitably becomes more difficult as the tree gets older and in turn the tree is more and more susceptible to dieback. If the bark becomes damaged, especially later in the tree’s life cycle, then fungi and insects have a much greater chance to cause serious harm. Treating bark damage with a wound dressing to prevent decay is the recommended procedure.

Lichens come in many forms and are commonly blamed for the decline and death of trees and shrubs, however they do not cause harm. Credit. Sydney Park Brown and Joseph Sewards, UF/IFAS.
A common misconception is that epiphytes, such as lichens and Spanish moss, are tree diseases. Epiphytes are known as “air plants” and thrive in the Panhandle. They survive on moisture and nutrients in the atmosphere and are harmless to trees. However, a tree that becomes inundated with epiphytes may be an indicator of excessive soil moisture, which may lead to root rot.
Lawn weed killers can have detrimental effects to trees, even if the application seems to be from a safe distance. When using a weed killer near a tree’s root system, confirm on the label that the product is designed to kill green growth only. It can’t be overstated that excessively fertilizing an old tree will greatly accelerate the decline of the tree. Some may think this will stimulate a tree and extend its life, but instead it will do the opposite. Young trees can tolerate fertilizer applications, as they need crown growth. Older trees will simply become top heavy, and structural damage will likely occur.
Don’t forget, trees need space too. A mature tree forced to occupy a small space will simply not adapt. Be sure to have adequate spacing when planting younger trees and shrubs in the vicinity of older trees. Also, keep your trees pruned away from touching structures and utilities.
Tree dieback is a complex issue to manage. By following these measures, you can help extend the life of your trees and continue to have a picturesque landscape.
For more information on tree dieback, contact your local county extension office.
Please visit Florida Friendly Landscaping, http://fyn.ifas.ufl.edu/, for more information on maintaining your landscape.
For more general information on lichens, please see UF/IFAS EDIS document “Spanish Moss, Ball Moss and Lichens-Harmless Epiphytes” by Joe Sewards and Dr. Sydney Park Brown: https://edis.ifas.ufl.edu/pdffiles/EP/EP48500.pdf
UF/IFAS Extension is an Equal Opportunity Institution.
by Ray Bodrey | Sep 9, 2021
Growing Key Limes in the home landscape is not only a fun and unique addition, but is also delicious – any way you slice them.
The key lime, Citrus aurantifolia, originated in southeast Asia. Genetically speaking, the key lime is likely a tri-hybrid cross between the “odd ball fruits”, known as citron, pummelo and a microcitrus species, Citrus micrantha. There is little commercial key lime production nowadays in Florida, but the fruit remains a very popular landscape option.
The key lime is a small, bushy tree that makes harvest and pruning a breeze. Like most citrus, it’s self-pollinating. The key lime is also an ever-bearing fruit, so there is no real seasonal harvest. The tree could technically bloom any month of the year. There are very few varieties, as trees mostly come from true seed or air layering.
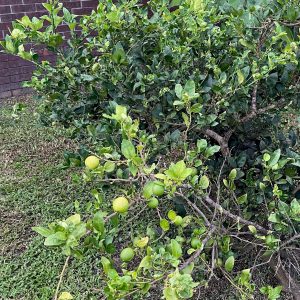
Key Lime fruit at various degrees of ripeness. Photo courtesy of Ray Bodrey, UF/IFAS Extension Gulf County.
Climate is an important factor when deciding to plant a key lime. They are sensitive to cold temperatures, especially below freezing. For the Panhandle, it’s wise to keep key lime trees as patio citrus. In other words, keep the trees in pots so that they can be moved indoors for protection during the winter months. In the ground, trees should be planted in an area where there is a significant wind block. Once a few years have passed and tree has become more mature and acclimated to the environment, they may be able to survive on their own, though it is recommended to cover the tree under sub-freezing temperatures. However, it is important to remember that sunlight is a catalyst for citrus fruit production, be sure to plant the tree in an area with full sun.
The usual suspects of citrus insect pests apply to the key lime also. Citrus leaf miner and mites are the most common culprits. Horticultural and insecticidal oils will certainly help to combat these threats. For planting, key lime is well adapted to a variety of soil conditions in Florida. Be sure to water newly planted trees every other day for the first week and then one to two times a week for the first couple of months. Water periodically after that, making sure the soil doesn’t stay completely dry for long periods. A 6-6-6 fertilizer works great for the key lime. Please follow the fertilizer schedule found in the UF/IFAS EDIS publication, “Citrus Culture in the Home Landscape” by Robert E. Rouse and Mongi Zekri: https://edis.ifas.ufl.edu/pdf/HS/HS132/HS132-11822781.pdf
A final interesting thing about the key lime is the ripening stages of the fruit. Because key limes are ever-bearers, blooms can develop at sometimes widely varying times. This causes an uneven development of fruit across the tree. Be sure to wait until the fruit turns begins to turn yellow before harvest. That’s when it’s mature to eat! Fruit can be stored for up to a week in the fridge or can be juiced and stored in the freezer for later use.
Please contact your local county Extension office for more information. Happy Gardening!
Information for this article can be found in the UF/IFAS EDIS publication, “Key Lime Growing in the Florida Home Landscape” by Jonathan H. Crane: https://edis.ifas.ufl.edu/publication/CH092
UF/IFAS Extension is an Equal Opportunity Institution.
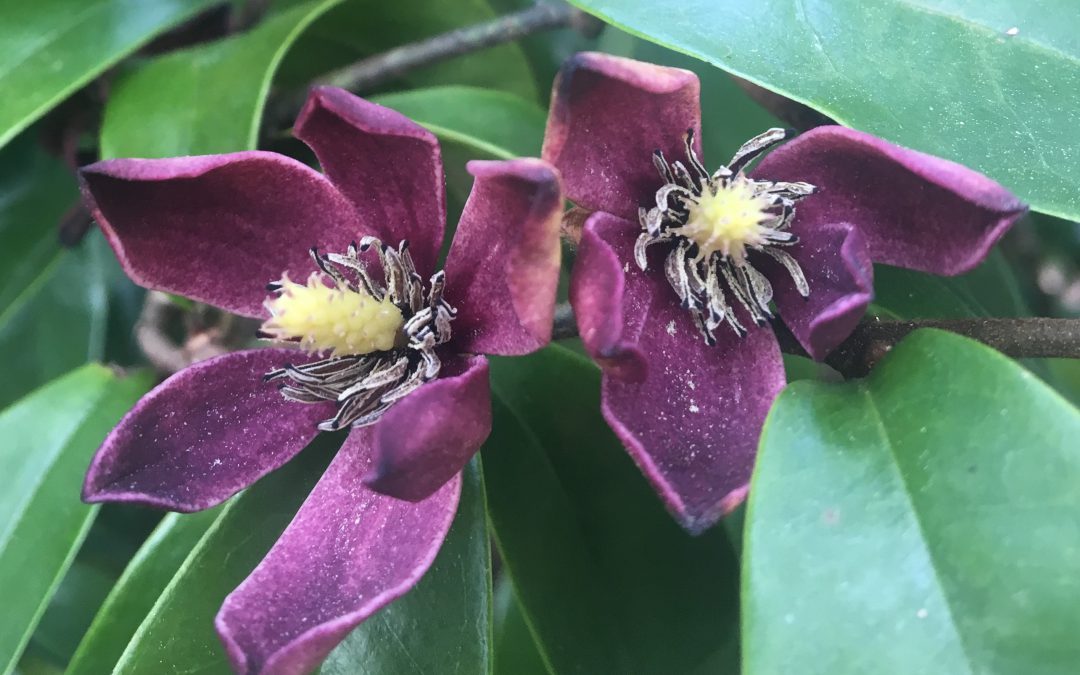
by Gary Knox | Sep 2, 2021
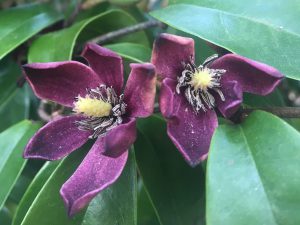
‘Stellar Ruby’ is a new purple-flowered hybrid banana-shrub that will soon be released nationally
You just learned about a fabulous new plant, and you HAVE to have it. How can you acquire this rare treasure?
Many of us gardeners have experienced this desire for a “new” plant but have quickly become frustrated with trying to locate and buy that particular plant. It’s not easy, or else that plant wouldn’t be new or rare, but the four P’s outline a few strategies for satisfying a “new” plant passion: plant societies, plant institutions, patience and payment.
Plant societies are one of the best avenues for acquiring new plants. Most plant societies consist of members with intense interest in particular plants or plant groups, so find the society that supports the plant that interests you. Plant society members often include breeders or plant explorers who introduce new plants. Whether magnolia or camellia or conifers or other plants, membership in such societies can give you a leg up on learning about, seeing, and accessing new plants. Consequently, fellow society members are often the first to acquire the newest plants, and that could be you!
Beyond this, participation in generalist plant groups can also give you unexpected benefits of networking with like-minded people. Thus, don’t overlook groups like Master Gardeners, garden clubs, or garden/park support groups. Their members often include passionate plant people like you who may have more connections (or special plants) than you realize.
Similarly, plant institutions such as universities or botanic gardens are another way to learn about and acquire new plants. These institutions often hold plant sales or fund-raising plant auctions that include new, unusual or rare plants. Online plant sales or auctions are becoming more common, so distance is less of an obstacle than it used to be. However, these institutions are less focused on particular plants, so it may be hit-or-miss to find that particular plant you want. To increase the chances of finding your desired plant, contact these institutions and ask to be notified about these events. You may even find a plant you didn’t know you wanted!
Patience is a virtue when trying to acquire new plants. Some plants take a long time to propagate or are not easy to propagate or grow. If you have the patience to wait, many plants will become more available – – – and at a more reasonable cost – – – as nursery production catches up to demand.
Finally, “payment”: let’s face it, money talks! If you have the funds, you can usually find the means to acquire the plants you desire. Most new or rare plants usually enter the market through specialty nurseries, operations that often maintain their own breeding or plant exploration programs or have exclusive arrangements with those who do. This is an expensive means of obtaining new plants, and therefore these specialty nurseries rightly charge more for their plants.
Another way money works to your advantage is the ability to travel. Many specialty nurseries, collectors, etc. often aren’t found in our part of Florida. If you can travel to these nurseries, botanic gardens, etc., it will be much easier to acquire unusual plants. If you can’t afford special trips to these sites, consider taking vacations to areas near these specialty nurseries, or to areas where these specialty nurseries are “on the way” to your vacation destination.
It goes without saying that you should learn about a “new” plant as much as possible before investing in an extensive hunt. Simple internet searches should tell you if that plant will be adapted to the climate and soil of your garden. At the other extreme, check resources like the IFAS Assessment (https://assessment.ifas.ufl.edu/) to make sure that particular plant won’t become invasive in your region of Florida.
Gardening is a very fulfilling activity, and the excitement of “new” plants just makes gardening more fun! Happy hunting!