by Ray Bodrey | Feb 17, 2022
Are you “chomping at the bit” to get started gardening this year, but not sure what you can do at this point? Well, good news, there’s plenty of things that can be done whether landscaping or vegetable gardening is your passion.
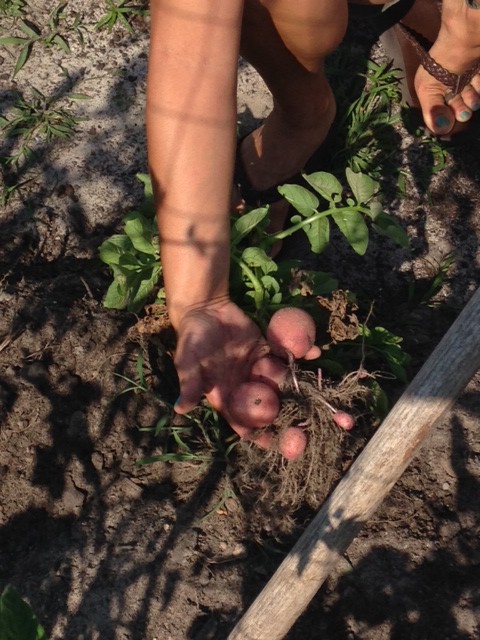
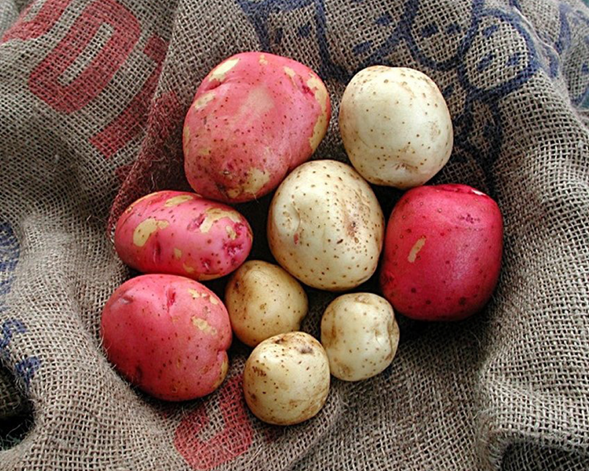
“New” potatoes grown in Florida. Photo Credit: C. Hutchinson, UF/IFAS
Temperatures can drop significantly in the Panhandle this month, and with short notice. If you want to enhance your flower beds, be sure to use annual bedding plants that can withstand the chill. Dianthus, pansy, viola and dusty miller are some good suggestions to plant. It’s a good time to plant bulbs too. Dahlias, crinum and agapanthus are good choices this time of year. Be sure to provide adequate mulch and water during this cold weather month. There are plenty of trees and shrubs that are beginning to bloom this time of year also. If you’re like me, your allergies will tell you this too. Red maple and star magnolia, just to name a couple, will soon be in bloom.
As for vegetable gardening, the potato is a good choice for Florida gardens. As Americans, we consume approximately 125 pounds per person a year. Potato farming is done commercially in Florida, but mostly with “new” potatoes. These are the small, rounded immature potatoes that have a thin skin and are perfect for low country boils.
It’s February, so it’s Irish potato planting season. The planting season for this cultivar for the Panhandle is from February 1st to mid-March. Sweet potatoes can be planted beginning in late March through June. A hundred pounds of seed potatoes should yield approximately ten bushels. Buy healthy certified seed potatoes from a garden center. Avoid using table stock potatoes. Often, table stock will not sprout successfully. Store bought potatoes are often treated with sprout inhibitors too. This treatment can cause development issues if used as seed potatoes.
Raised beds, at least 6”, are the best way to grow potatoes. Be sure to fertilize the bed soil mixture and fertilize again down furrows when planting. Irish potatoes require copious amounts of fertilizer. For fertilizer, use a general, complete formulation like 10-10-10. Before planting, be sure to dust the seed potatoes with a fungicide to reduce the chance of decay. Plant seed potatoes 3” in depth, at 12” apart and allow for 36” row spacing.
Please take these gardening tips into consideration this month and the next. Spring is just around the corner. Happy gardening! For more information please contact your local county extension office.
Supporting information for this article can be found in the UF/IFAS EDIS Publications, “ Florida Vegetable Gardening Guide” by Sydney Park Brown, Danielle Treadwell, J. M. Stephens, and Susan Webb : http://edis.ifas.ufl.edu/pdffiles/VH/VH02100.pdf and “Growing Potatoes in the Florida Home Garden”, by Christian T. Christensen, Joel Reyes-Cabrera, Libby R. Rens, Jeffrey E. Pack, Lincoln Zotarelli,Chad Hutchinson, Wendy J. Dahl, Doug Gergela, and James M. White: http://edis.ifas.ufl.edu/pdffiles/HS/HS18300.pdf
Supporting information can also be found on the UF/IFAS website under “Florida Gardening Calendar” by Sydney Park Brown: http://solutionsforyourlife.ufl.edu/lawn_and_garden/calendar/pdfs/February_North.pdf

by Ashley Stonecipher | Jan 26, 2022

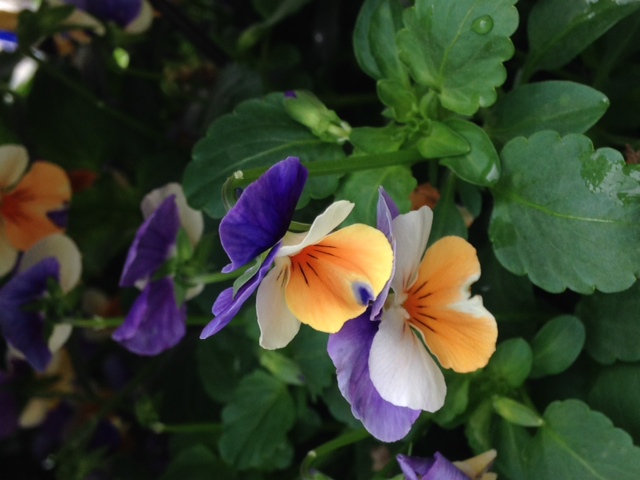
Violas. Photo Credit: University of Florida/IFAS Extension
It is freezing cold this week and hard to believe that we are already talking about “What to Plant” and “What to Do” to get started early. In North Florida there are cool-season annuals that can be planted now. The list includes pansies, violas, petunias, and snapdragons. As we are coming to the end of January it is time to plant crinum, agapanthus and gloriosa lily bulbs. Make sure to mulch these areas after planting to protect them from the cold temperatures. This is also the month to plant camellias, which these come in many colors and forms that your local nurseries will carry this time of year. If you haven’t planted all your cool season crops there is still time to do that now such as broccoli, kale, carrots, and lettuce. Irish potatoes can be planted now as well.
Now you might be asking “What can I do?”. January is a great time to prune non-spring flowering shrubs and trees to improve their form. This is a good time to plant deciduous fruit trees, this will give their roots time to develop before the warmer spring temperatures. Since existing trees are dormant, it is a good time to prune and fertilize them. When the temperatures are near freezing many of the tender plants will need to be covered to minimize damage. It’s a good time to plant a tree. Hurricane-resistant trees include live oaks, bald cypress, cabbage palms, and southern magnolias. It’s time to remove those dead spent seed pods on your crape myrtles and removing any crossing branches and twiggy growth will improve the appearance and the form of the plant.

Potatoes planted in mid-February were ready to harvest in mid-May in Bay County. Photo: Vicki Evans, UF/IFAS Master Gardener of the plant.
As we go into February it will soon be time to apply a preemergence weed killer to your lawns to prevent warm-season weeds. Temperatures must rise to 65°F for 4 to 5 consecutive days before you do a preemergence application and make sure you are not using a weed and feed fertilizer. Citrus and other fruit trees can be fertilized at this time. The amount and frequency will depend on the age and type of fruit tree you are growing. Avoid pruning Citrus until spring to avoid any injury since cold temperatures are still possible. It is time to prune those roses this month to remove damaged canes and improve the overall form. After the pruning is complete you can fertilize and apply a fresh layer of mulch. They should begin blooming within 8 to 9 weeks after being pruned.
Dianthus, pansies, violas, and dusty millers are annuals that can take a chill and should be planted in February. You can continue to plant crinum and agapanthus this month and add on amaryllis and rain lily bulbs as well. If it has been dry make sure to provide plenty of water for the bulbs to establish and continue to protect them from the cold by adding mulch. Trees and shrubs will begin to bloom this month including red maples and star magnolias. Continue planting potatoes throughout the month and towards the end of February warm-season crops like tomatoes and pepper can be planted but be prepared to protect them from any late frosts.
by Matt Lollar | Jan 6, 2022
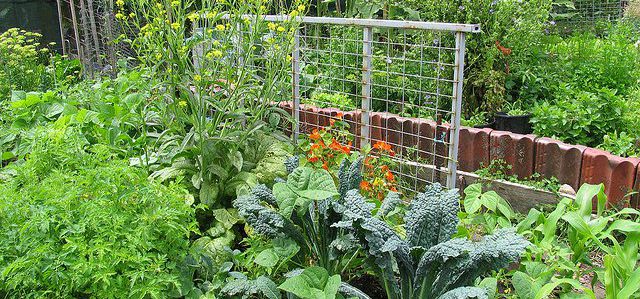
A mixed vegetable garden. Photo Credit: eXtension.org.
It’s never too early to start thinking about your spring vegetable garden. Have you ever wondered how much it costs to grow your own vegetables? Does it cost less to grow your own vegetables or buy them from the grocery store or farmers market? A number of factors are involved with answering these questions and budgeting for your home garden.
Materials
The materials used are specific to your own vegetable garden. If you do everything by hand you may need a hoe, rake, and spade along with a number of other tools you can use from year to year. When budgeting for you garden you would need to think about the life expectancy of these tools. Let’s say a $20 rake lasts for 10 years. In that case, you would budget $2/year ($20 ÷ 10 years = $2/year) for the rake. This might also be the case with a bag of fertilizer. You may buy a 50 pound bag of fertilizer and use half the bag in year one and the other half in year two, so the cost of the fertilizer would be cut in half for your yearly budget. Other materials may be purchased for just one growing season such as pine straw for weed suppression or you may buy only enough seeds for the season.
Labor
A lot of work goes into growing your own vegetables. If you have the time and enjoy gardening then you may choose to charge yourself nothing for your work. However, from a cost analysis perspective you may want to put a value on your work. This will give you a better comparison to buying vegetables.
Budgets
Of course you could create your own budget based on all the costs that go into gardening. But why do that, when it’s already been done for you. The UF/IFAS Costs and Benefits of Vegetable Gardening publication includes a Microsoft Excel Cost Workbook to help answer some of these cost questions. This budget template is customizable, so it’s important that you consider all the costs for your vegetable garden. If you are looking for more detailed crop budgets, there are a lot of North Florida Enterprise Budgets available from UF/IFAS.
by Matt Lollar | Oct 14, 2021
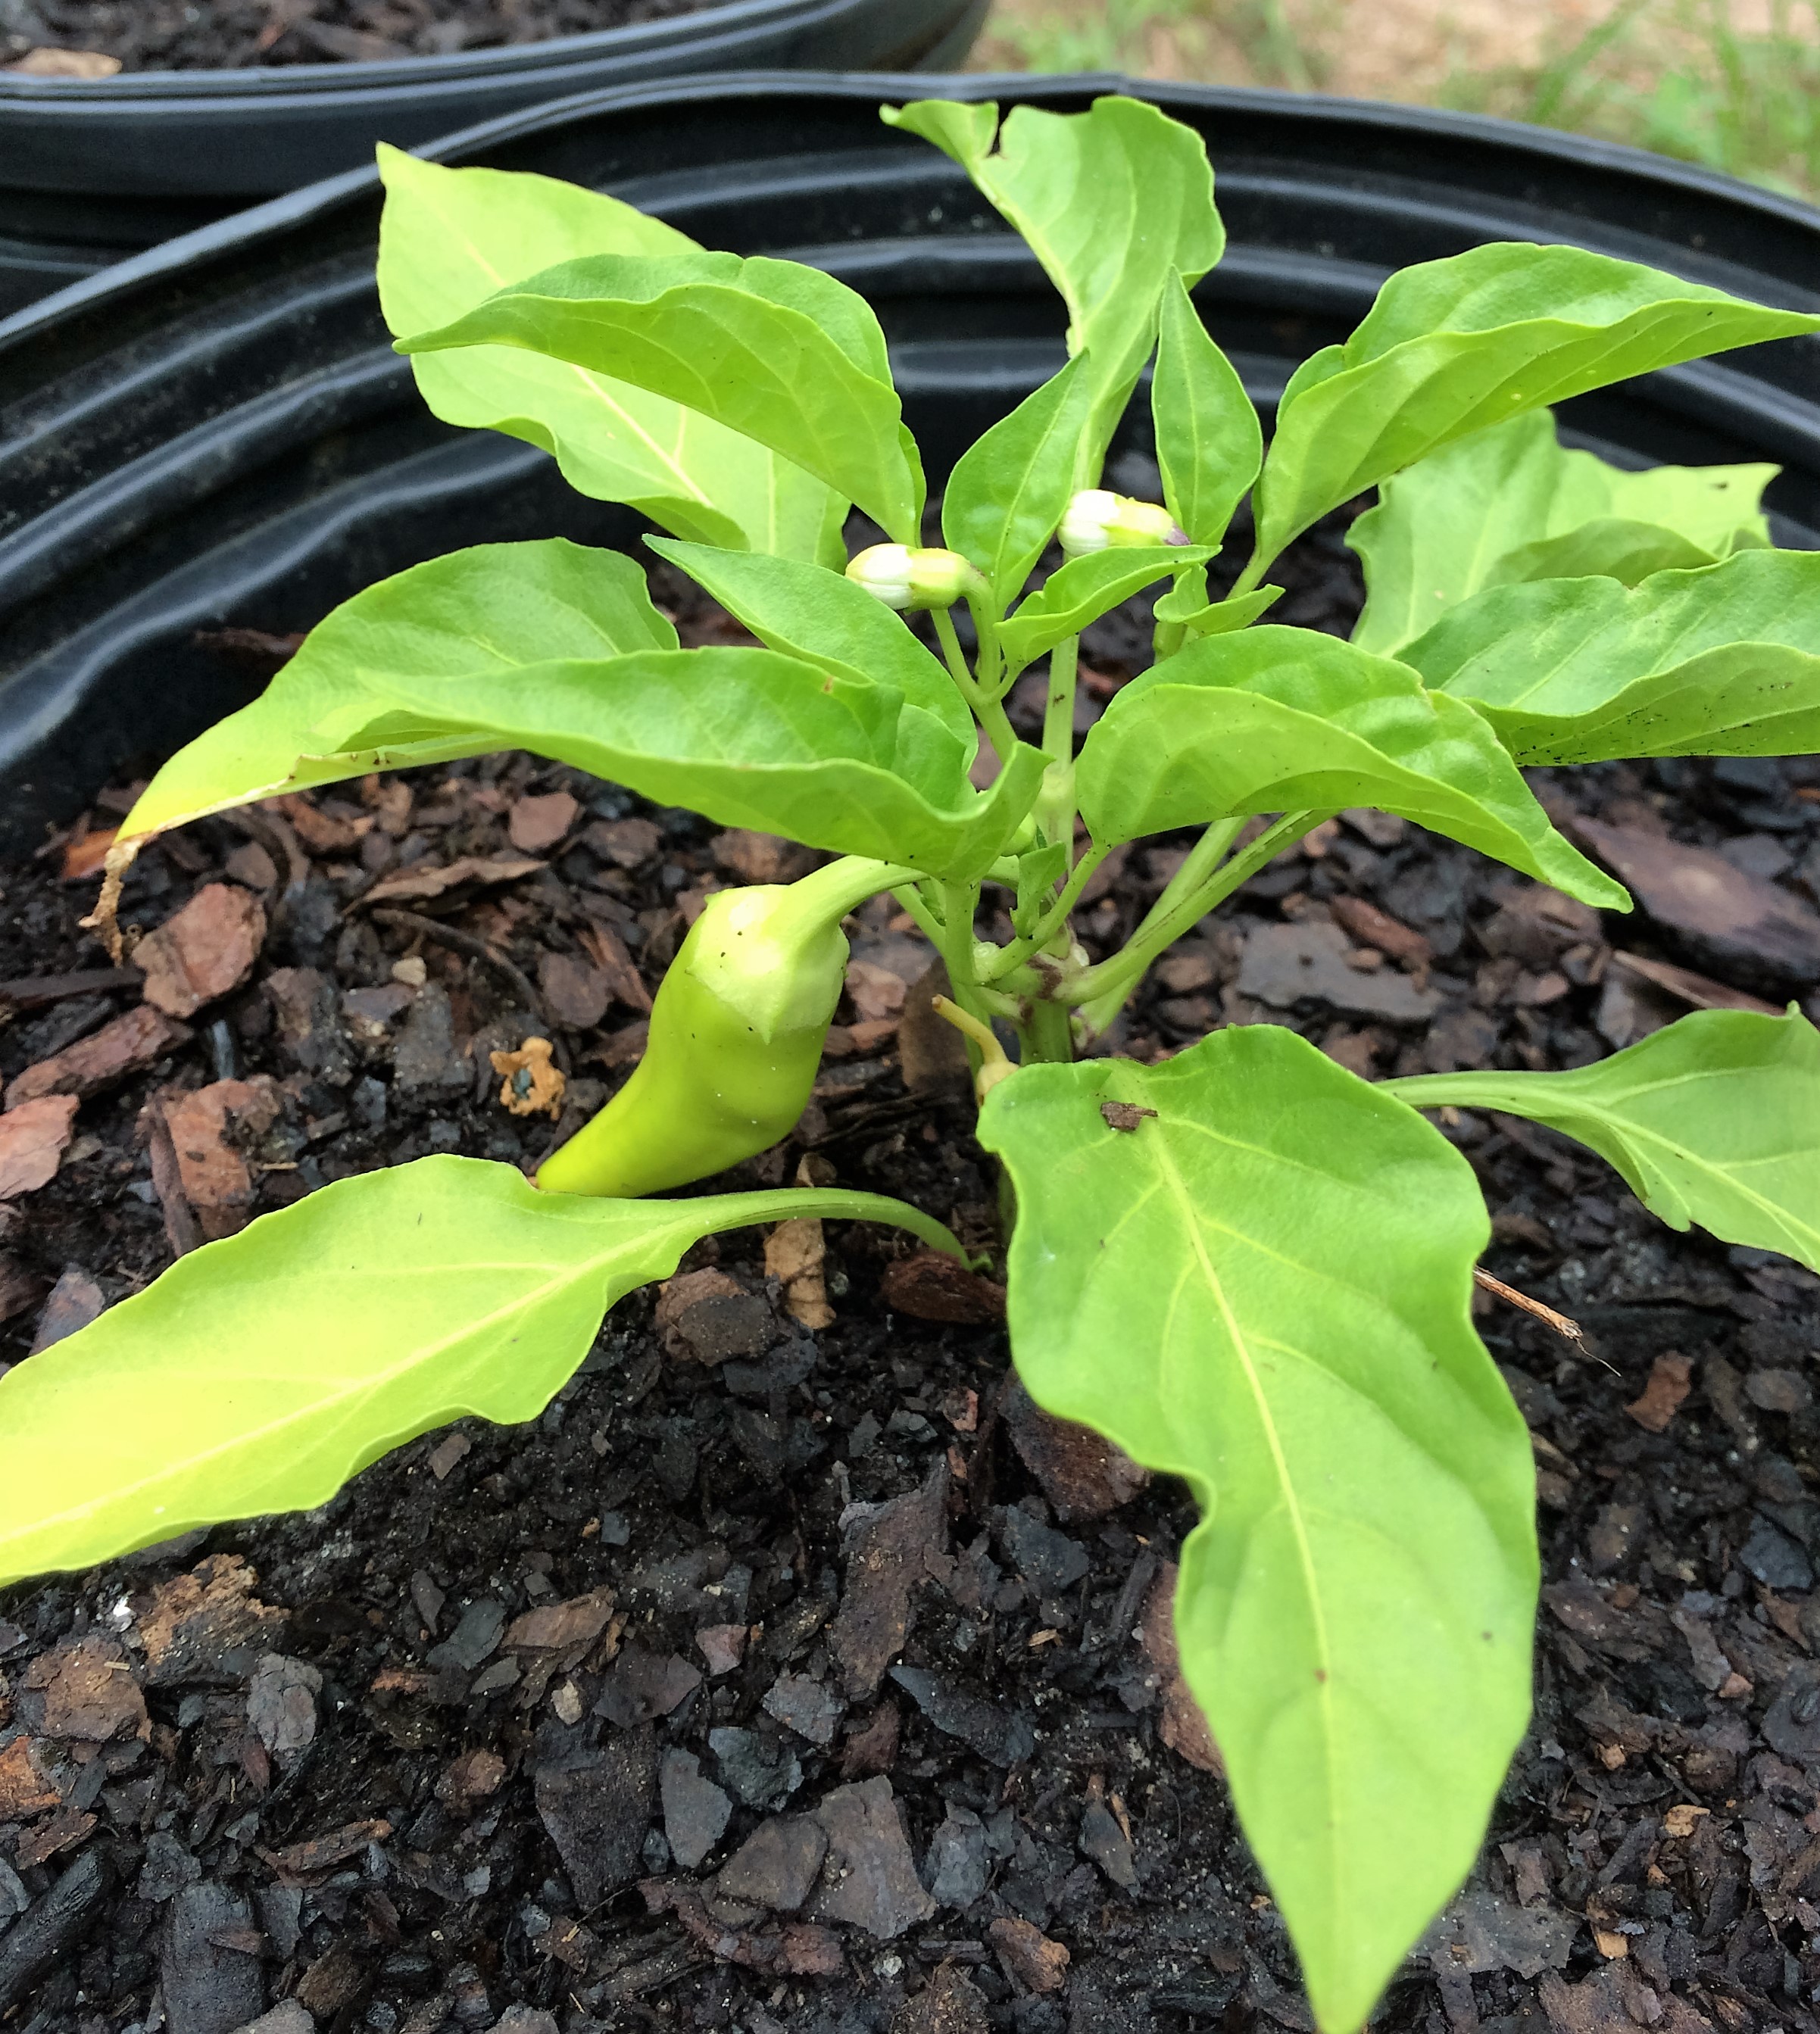
There seems to be a lot of interest in being sustainable and saving seeds is one way to be food sustainable. Should you save seeds from your garden? When it comes to peppers and a number of other vegetables in your garden…it depends.

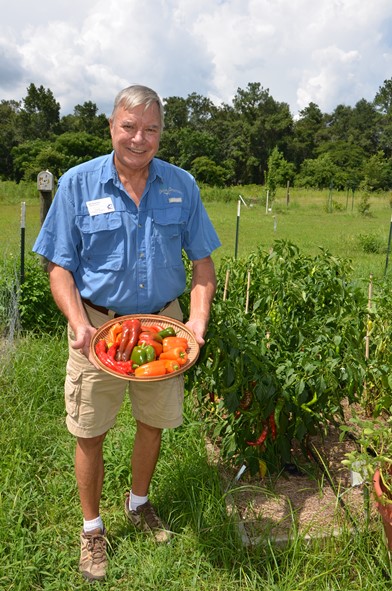
Wakulla Master Gardener Bill Osborne shows off some of the peppers he grew.
Hybrid vs. Open-pollinated
If you plan to save seed from your peppers, you first need to determine whether you planted open pollinated or hybrid peppers. Hybrid varieties are produced from two distinct pepper varieties and are often designated by “F1” appearing after the variety name. The seed from hybrid varieties is not usually saved because it does not produce plants and fruit that are true to the original variety. Open-pollinated varieties are developed from inbreeding plants for multiple generations to develop a stable genetic make-up. Seeds saved from these varieties will produce plants and fruit that are true to type.
How to Save Seed
To save seed of a known variety, it is important to isolate flowers or plants to ensure cross pollination from other varieties does not occur. There are four common ways to isolate flower/plants.
- Isolate plants from pollinizer insects by growing them indoors or in a greenhouse.
- Cover individual plants with insect exclusion netting.
- Separate different varieties by at least 400 feet.
- Put a small bag over an emerging flower until it has self-pollinated. Then remove the bag for fruit development.
The options above will help ensure your plants produce seed true to type. A fun experiment would be to save seed from plants/fruit that are not isolated and planted near other pepper varieties. There are endless possibilities on the peppers your new varieties would produce and you may end up developing your own named cultivar. You could also choose one of the isolation techniques listed to selectively cross different pepper plants. One misconception about growing peppers is that hot peppers planted near sweet peppers will influence the flavor of the sweet peppers. As you may have gathered from the information about crossing varieties, the flavor of the next generation will be influenced by hot and sweet pepper being allowed to cross pollinate.
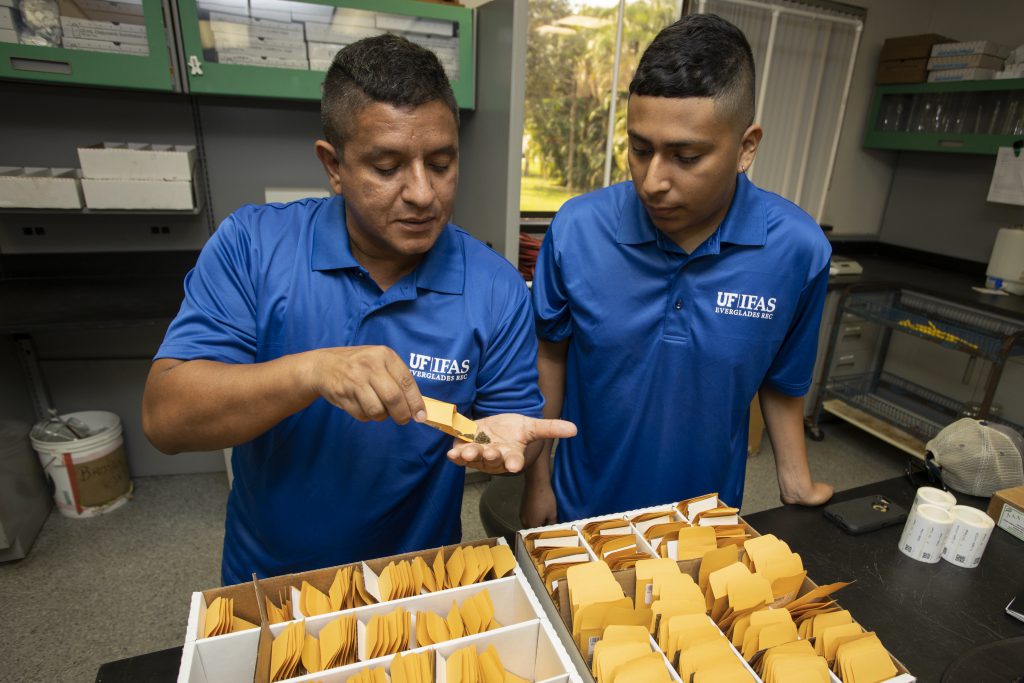
German Sandoya (left) examining seed samples in a lab at the Everglades Research and Education Center. Photo University of Florida/IFAS
Harvesting and Processing Seed
Peppers should be allowed to mature before seed is harvested. In fact, germination rates are higher when peppers are allowed to dry for at least one month before seeds are harvested. Make sure that no mold or disease is on the peppers, because this could affect germination rates. To harvest the seeds, simply remove them from the pepper and remove any flesh from the pepper. If the seed was harvested from fresh peppers, rinse the seed thoroughly and allow to dry before placing in a sealable bag or container. If the peppers were allowed to dry before seed harvest, then the rinse step can probably be skipped. Store the seed in a cool, dark, and dry location such as a refrigerator.

by Daniel J. Leonard | Apr 22, 2021
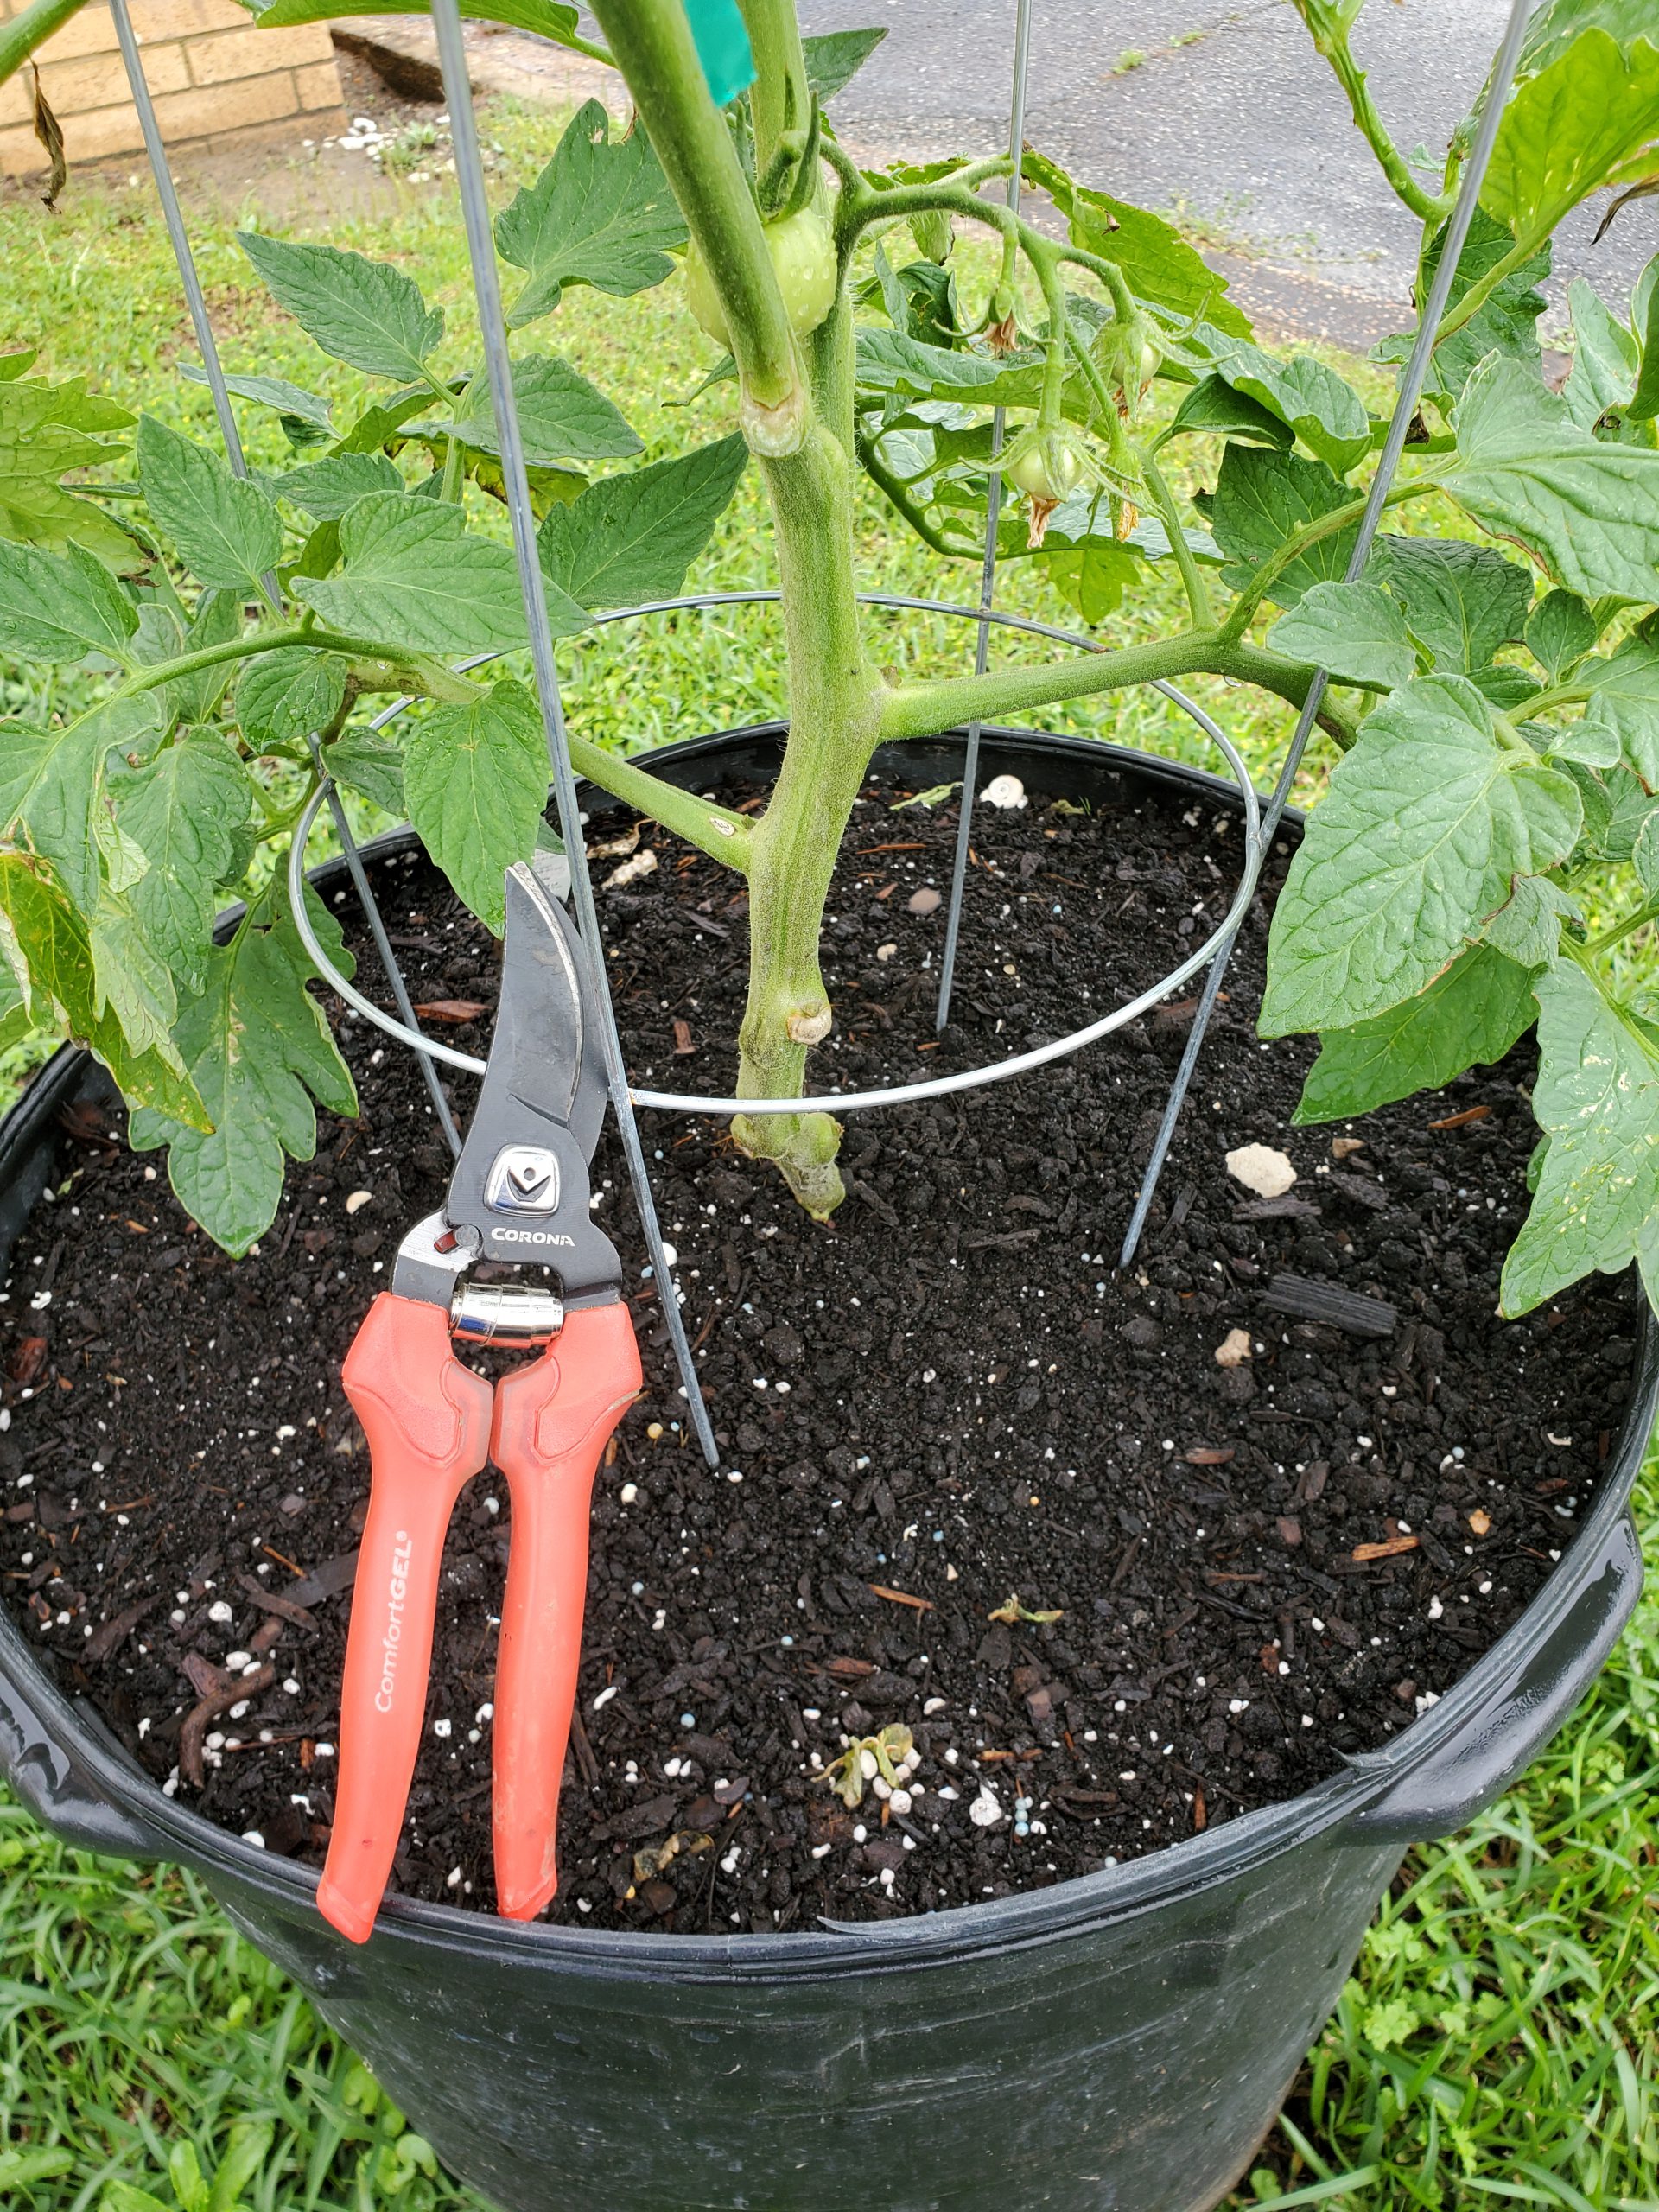
With the traditional planting date of Good Friday behind us, the home tomato gardening season in the Panhandle is in full swing. While tomatoes are the most persnickety veggie we grow, there are several practices you can adopt to help you succeed: selecting an adapted variety; regularly scouting for insects and disease; and watering and fertilizing appropriately. However, the most overlooked practice for success gardeners can adopt is proper pruning.

‘Big Beef’ Tomato with lower leaves removed. This is an excellent disease reduction practice. Photo courtesy of Daniel Leonard.
Correct pruning does a couple of positive things for tomatoes. First, it reduces the incidence of disease by preventing leaf contact with the soil, opening the interior of the plant, and allowing better airflow. This is important as many plant pathogens reside in the soil and only need a splash of water to travel onto plant leaves. Also, densely foliaged plants trap warm, moist air in their canopies, creating a perfect environment for disease to flourish. Letting the plant canopy “breathe” through pruning prevents that negative environment from forming! Second, correct pruning of “suckers” (extra growth points that can develop into shoots) helps tomato plants develop optimum yield and fruit quality. By removing suckers, more water, nutrients, airflow, and light are directed to the main stems, where the majority of tomato fruit production occurs. Failing to remove suckers (especially on indeterminate varieties) can result in reduced yields, increased disease, and generally messy plants!
With the reasons for pruning tomatoes established, the next step is learning exactly what to prune and how to do it in a sanitary matter.
- Get rid of any foliage that could encounter the soil, generally all leaves occurring on the lower 12-16″ of the plant. All kinds of nasty tomato destroying diseases, like Early Blight and Bacterial Leaf Spot, reside in the soil and are just waiting to be splashed onto your plants – don’t let that happen.
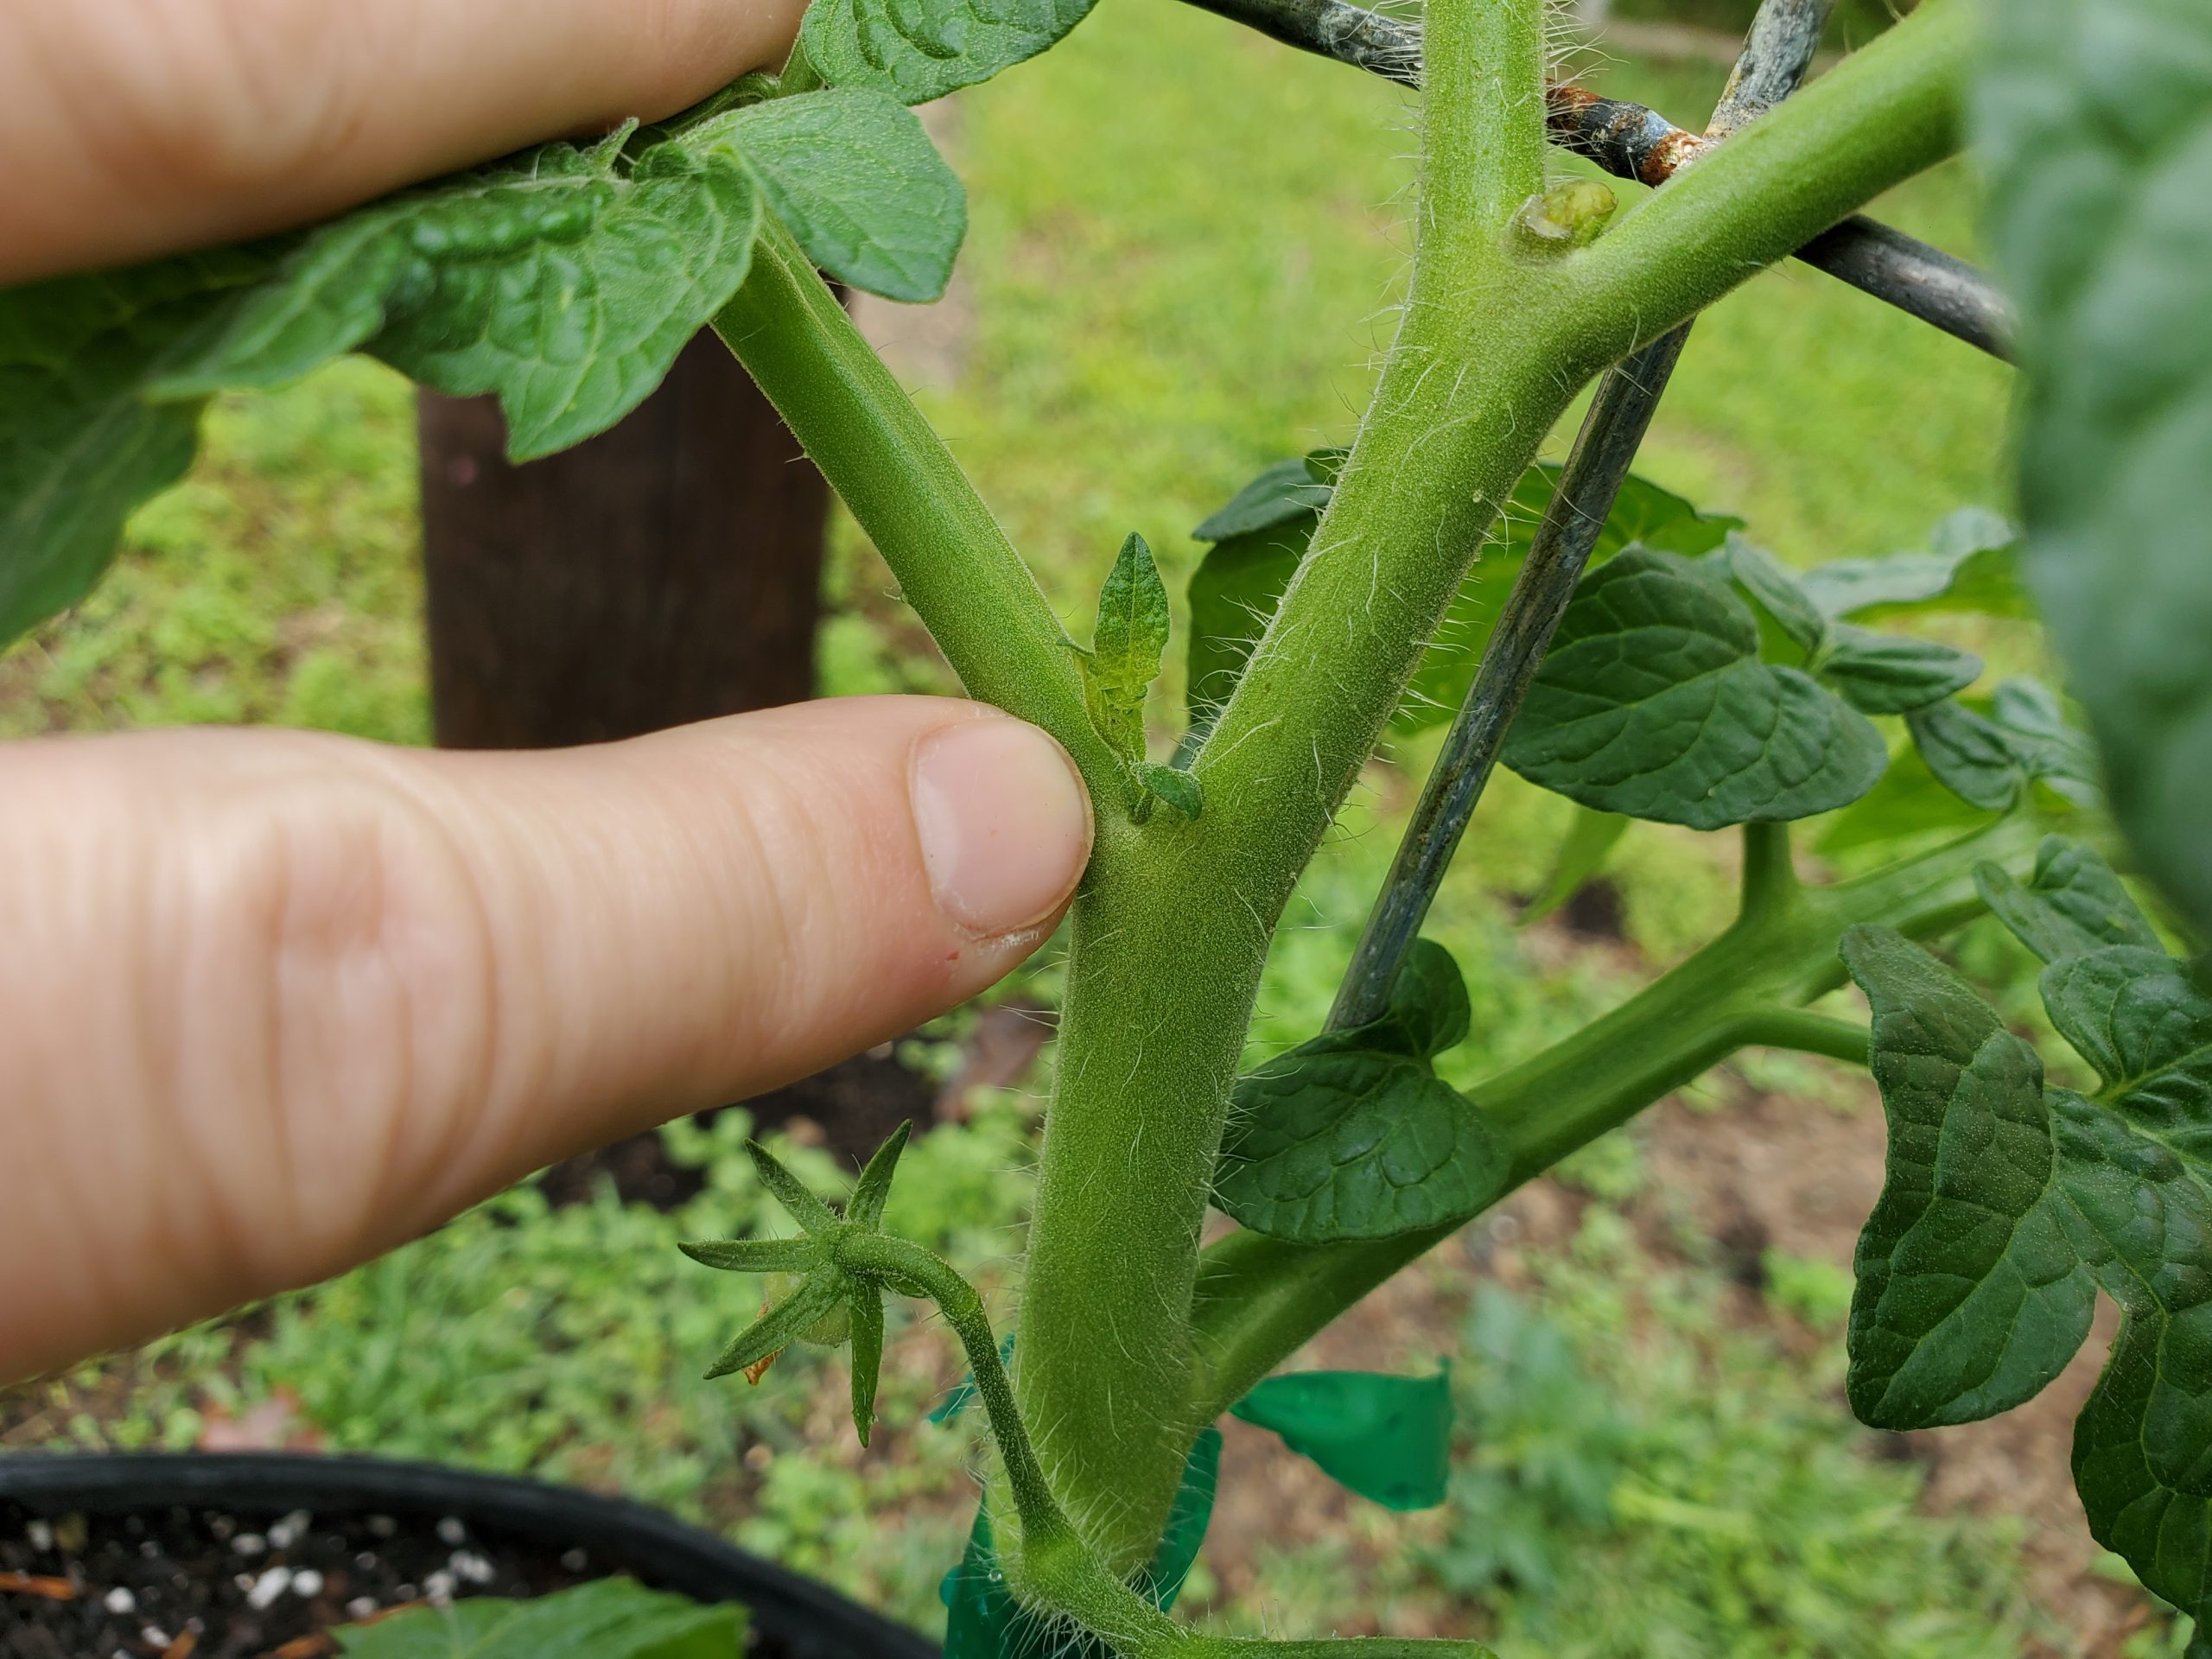
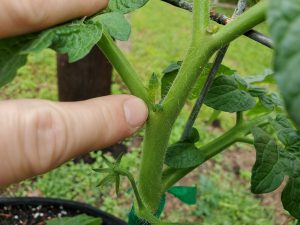
- Determine how many primary shoots you want your plant to have. Leave enough lower suckers to achieve that number (generally just one, two, or three as more than 3 primary stems gets hard to manage), and prune or pinch out all the rest. To prevent stress from pruning, be diligent in removing suckers when they are still small, 2” or less.
- Always clean and disinfect your pruners before making a cut on a tomato plant. This is best accomplished by rinsing the blades with warm soapy water, drying, and following with by a quick alcohol spray. A 10% bleach solution will also work, but if not thoroughly rinsed after, bleach can corrode pruner blades and other working parts. If you make cuts on a plant that appears diseased, repeat the sanitizing process before you begin pruning another plant as “dirty” pruners are an easy way to spread pathogens in the garden.
Developing vegetative “sucker” that will need to be removed. Photo courtesy of Daniel Leonard.
While tomatoes are indeed a difficult vegetable to grow, learning to prune them correctly will greatly help to make this a successful season. If you just keep leaves off the ground, suckers pinched, and pruners cleaned, you’ll be well on your way to less disease, prettier plants, and more tomatoes to pick. For more information on growing tomatoes and any other horticultural topic, please contact your local UF/IFAS County Extension office. Happy Gardening!