2020 has not been the most pleasant year in many ways. However, one positive experience I’ve had in my raised bed vegetable garden has been the use of a cover crop, Buckwheat (Fagopyrum esculentum)! Use of cover crops, a catch-all term for many species of plants used to “cover” field soil during fallow periods, became popular in agriculture over the last century as a method to protect and build soil in response to the massive wind erosion and cropland degradation event of the 1930s, the Dust Bowl. While wind erosion isn’t a big issue in raised bed gardens, cover crops, like Buckwheat, offer many other services to gardeners:
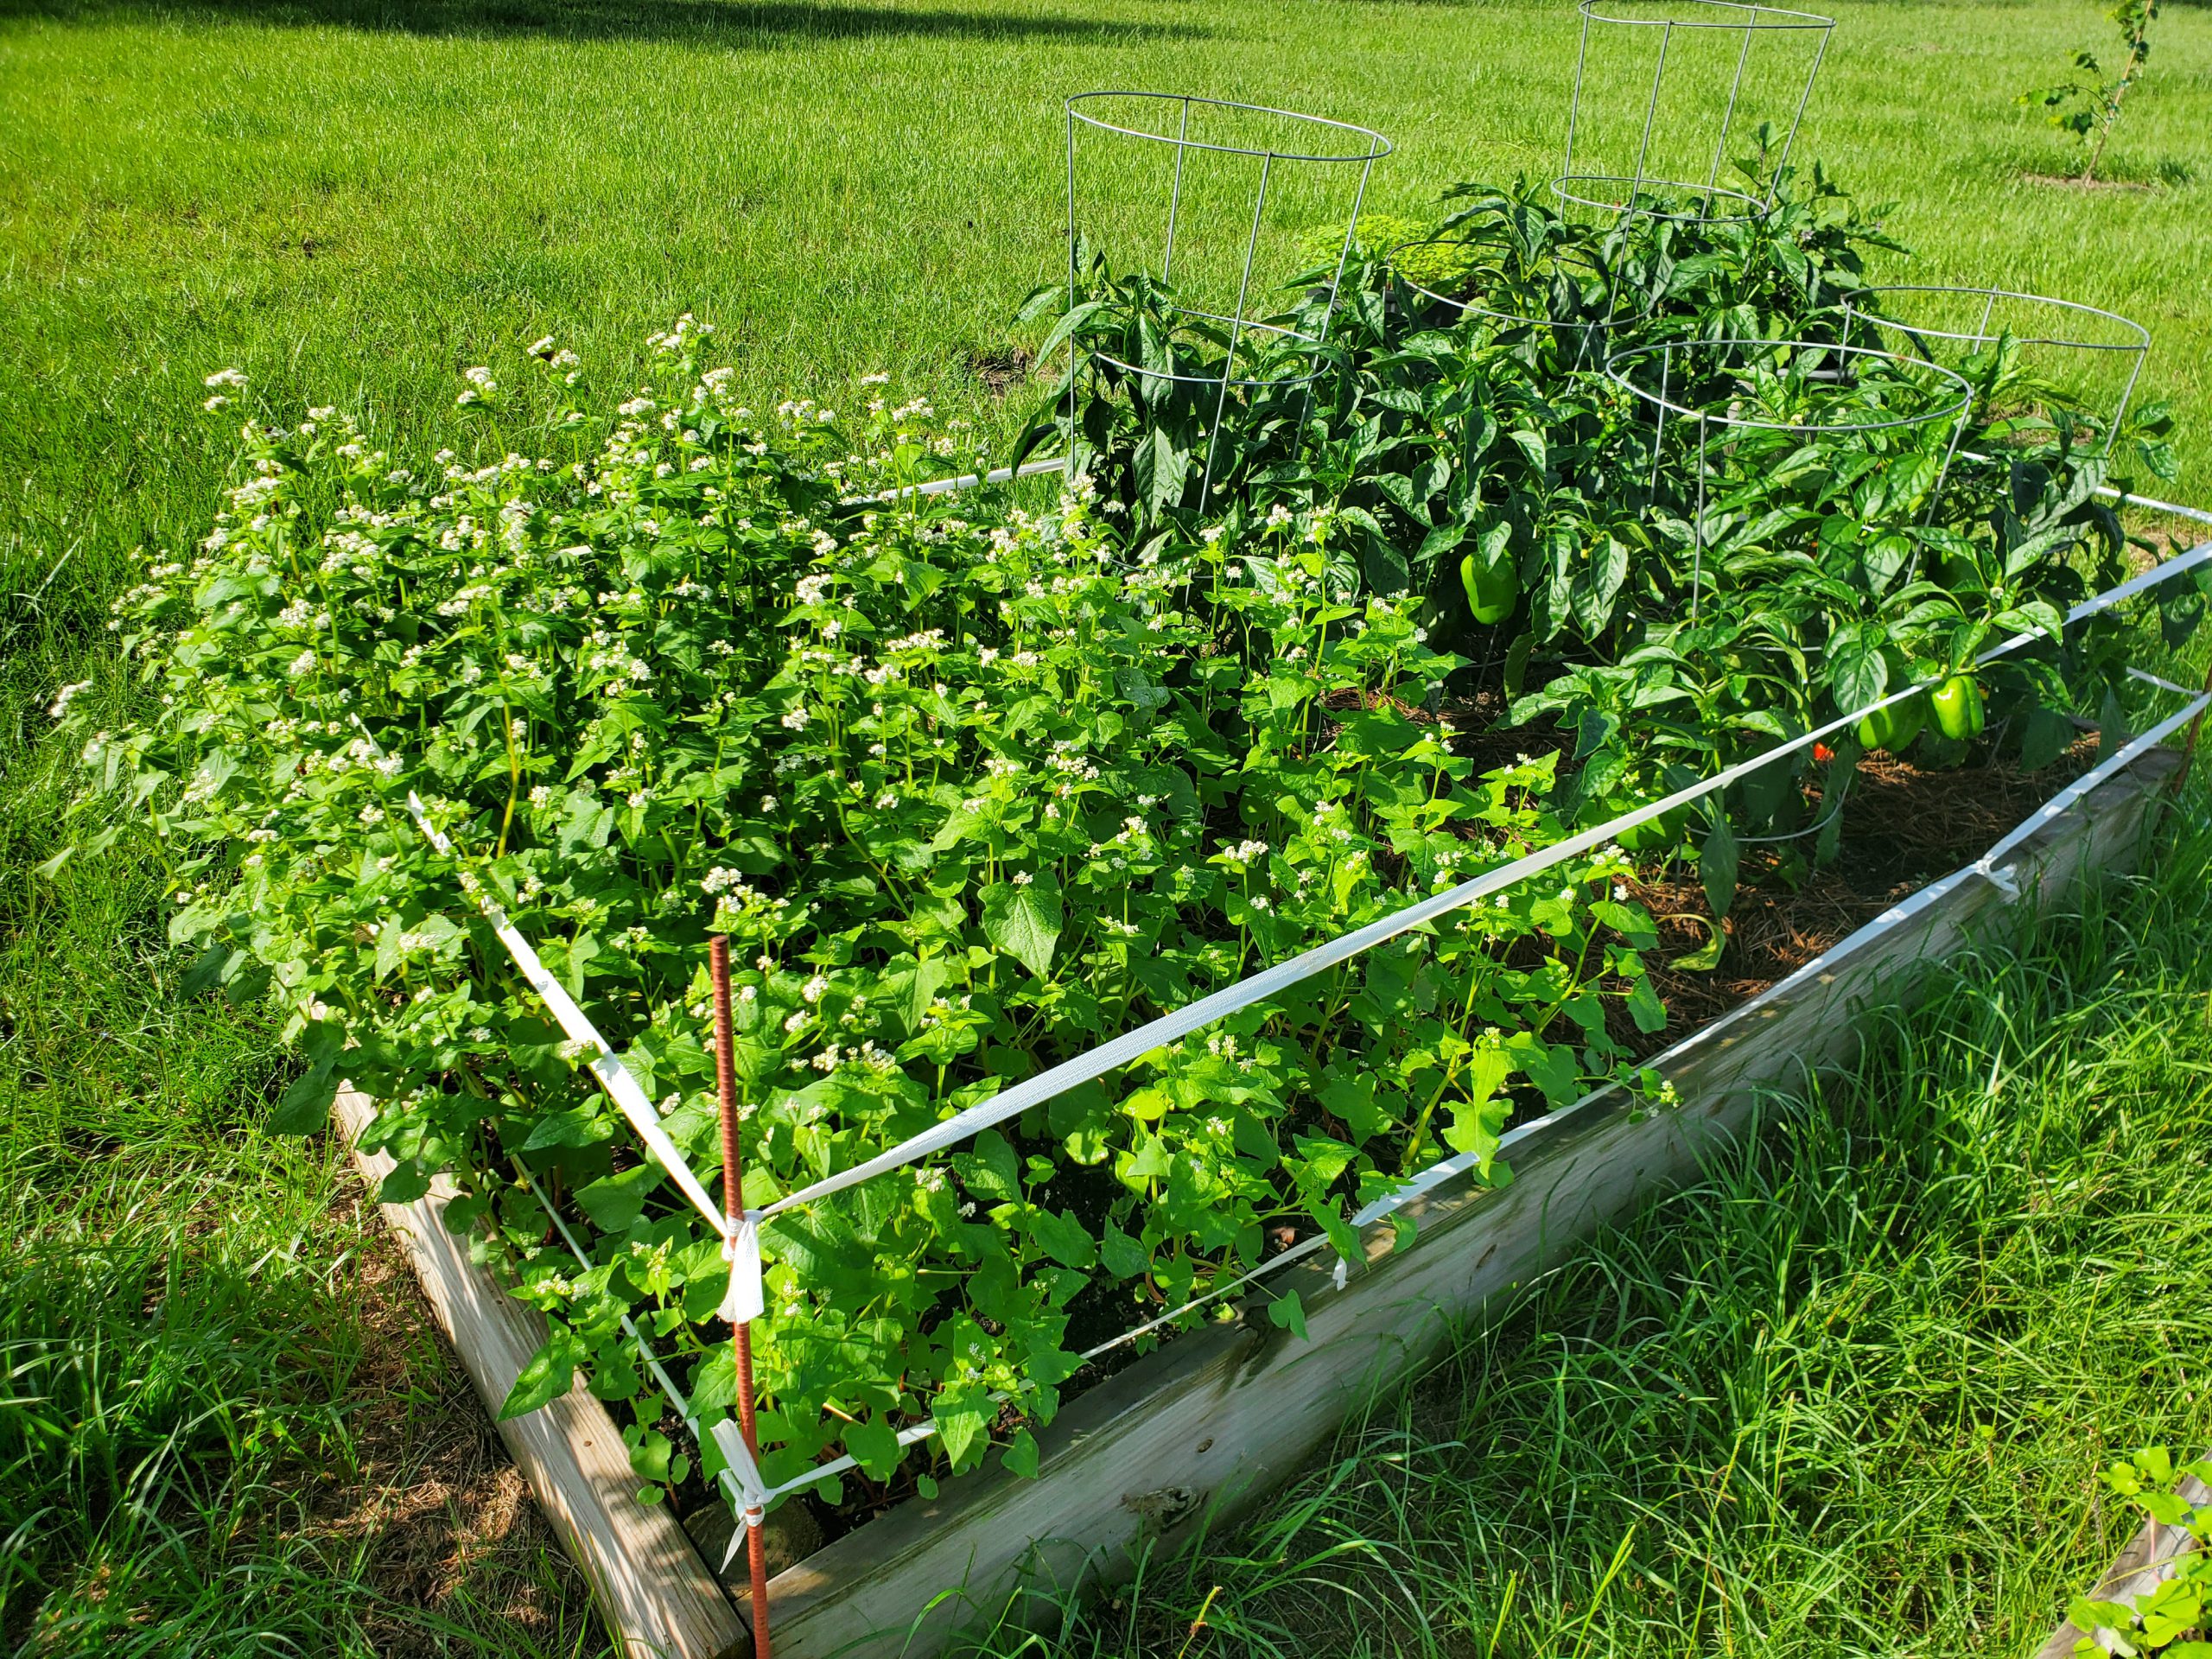
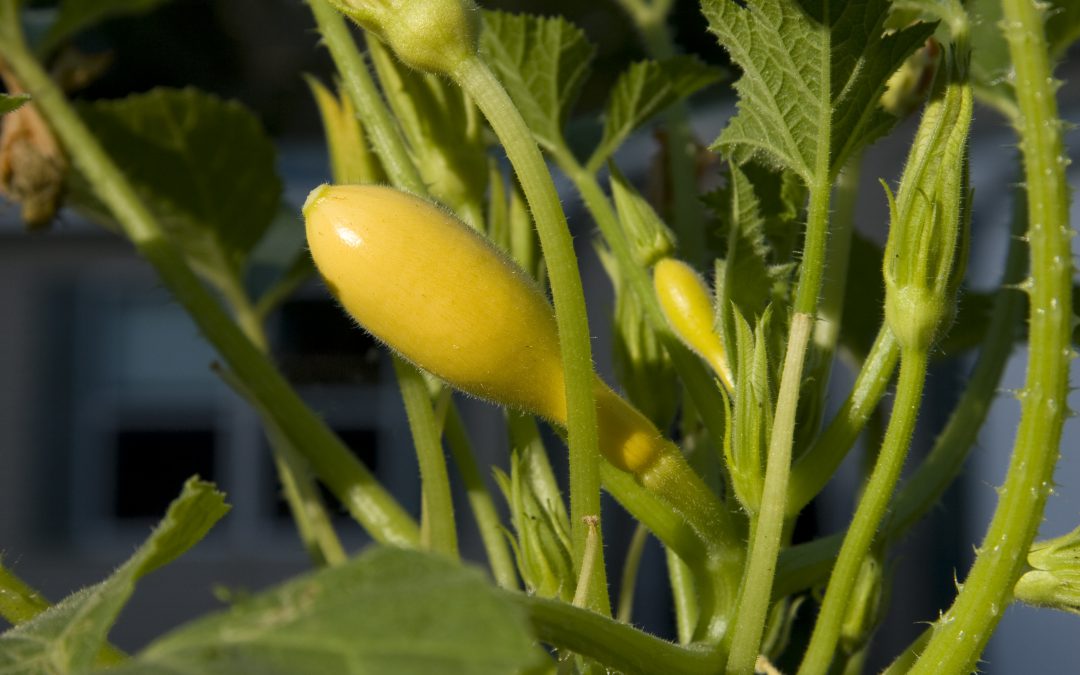
Buckwheat in flower behind summer squash. Photo courtesy of Daniel Leonard.
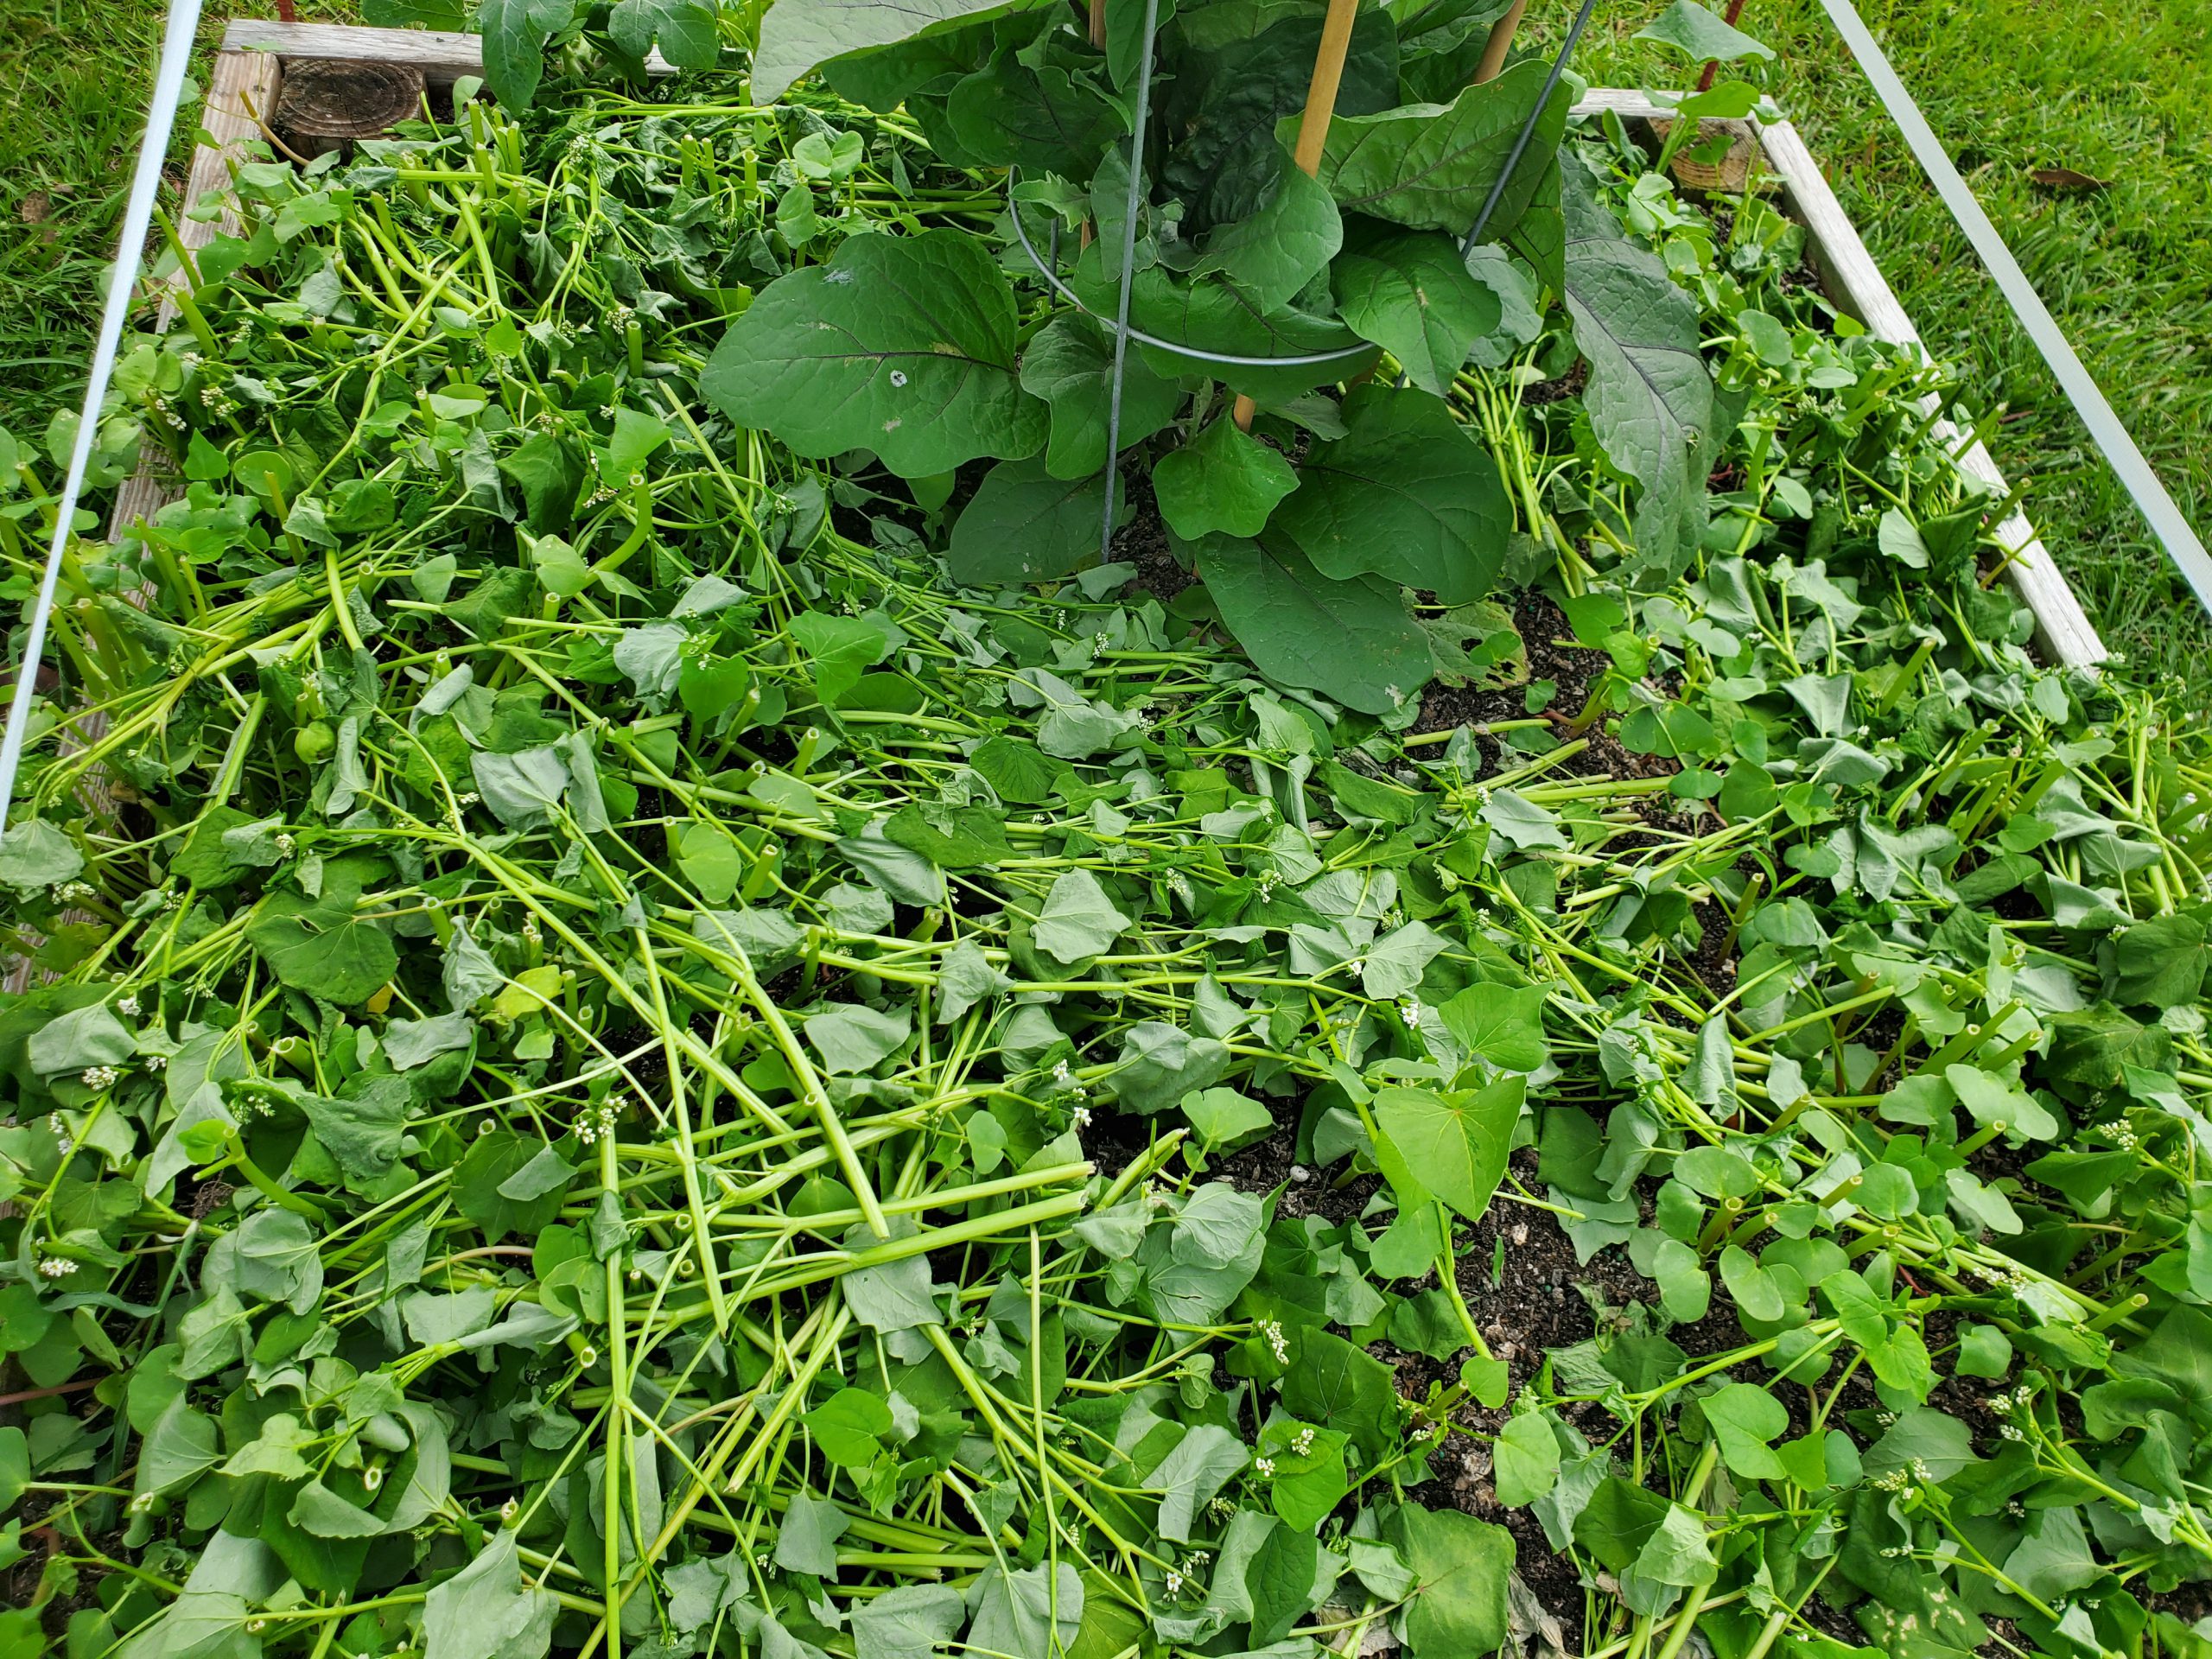
Covers, like Buckwheat, provide valuable weed control by shading out the competition. Even after termination (the cutting down or otherwise killing of the cover crop plants and letting them decompose back into the soil as a mulch), Buckwheat continues to keep weeds away, like pinestraw in your landscape.
Cover crops also build soil. This summer, I noticed that my raised beds didn’t “sink” as much as normal. In fact, I actually gained a little nutrient-rich organic matter! By having the Buckwheat shade the soil and then compost back into it, I mostly avoided the phenomena that causes soils high in organic matter, particularly ones exposed to the sun, to disappear over time due to breakdown by microorganisms.
Many cover crops are awesome attractors of pollinators and beneficial insects. At any given time while my Buckwheat cover was flowering, I could spot several wasp species, various bees, flies, moths, true bugs, and even a butterfly or two hovering around the tiny white flowers sipping nectar.
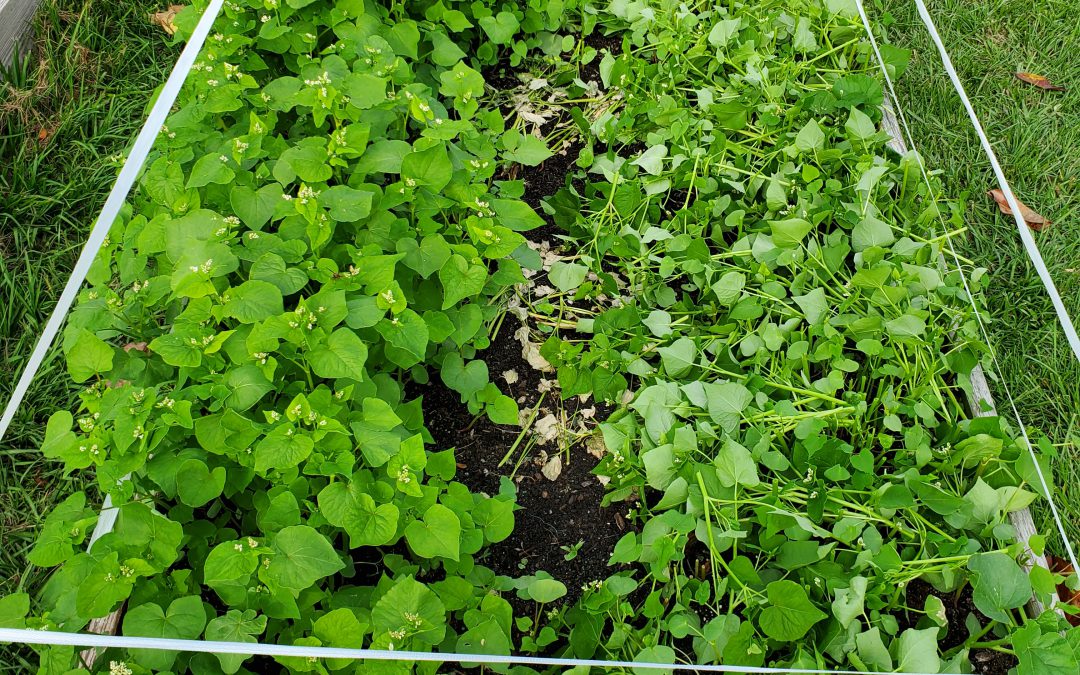
Covers are a lot prettier than bare soil and weeds! Where I would normally just have either exposed black compost or a healthy weed population to gaze upon, Buckwheat provided a quick bright green color blast that then became covered with non-stop white flowers. I’ll take that over bare soil any day.
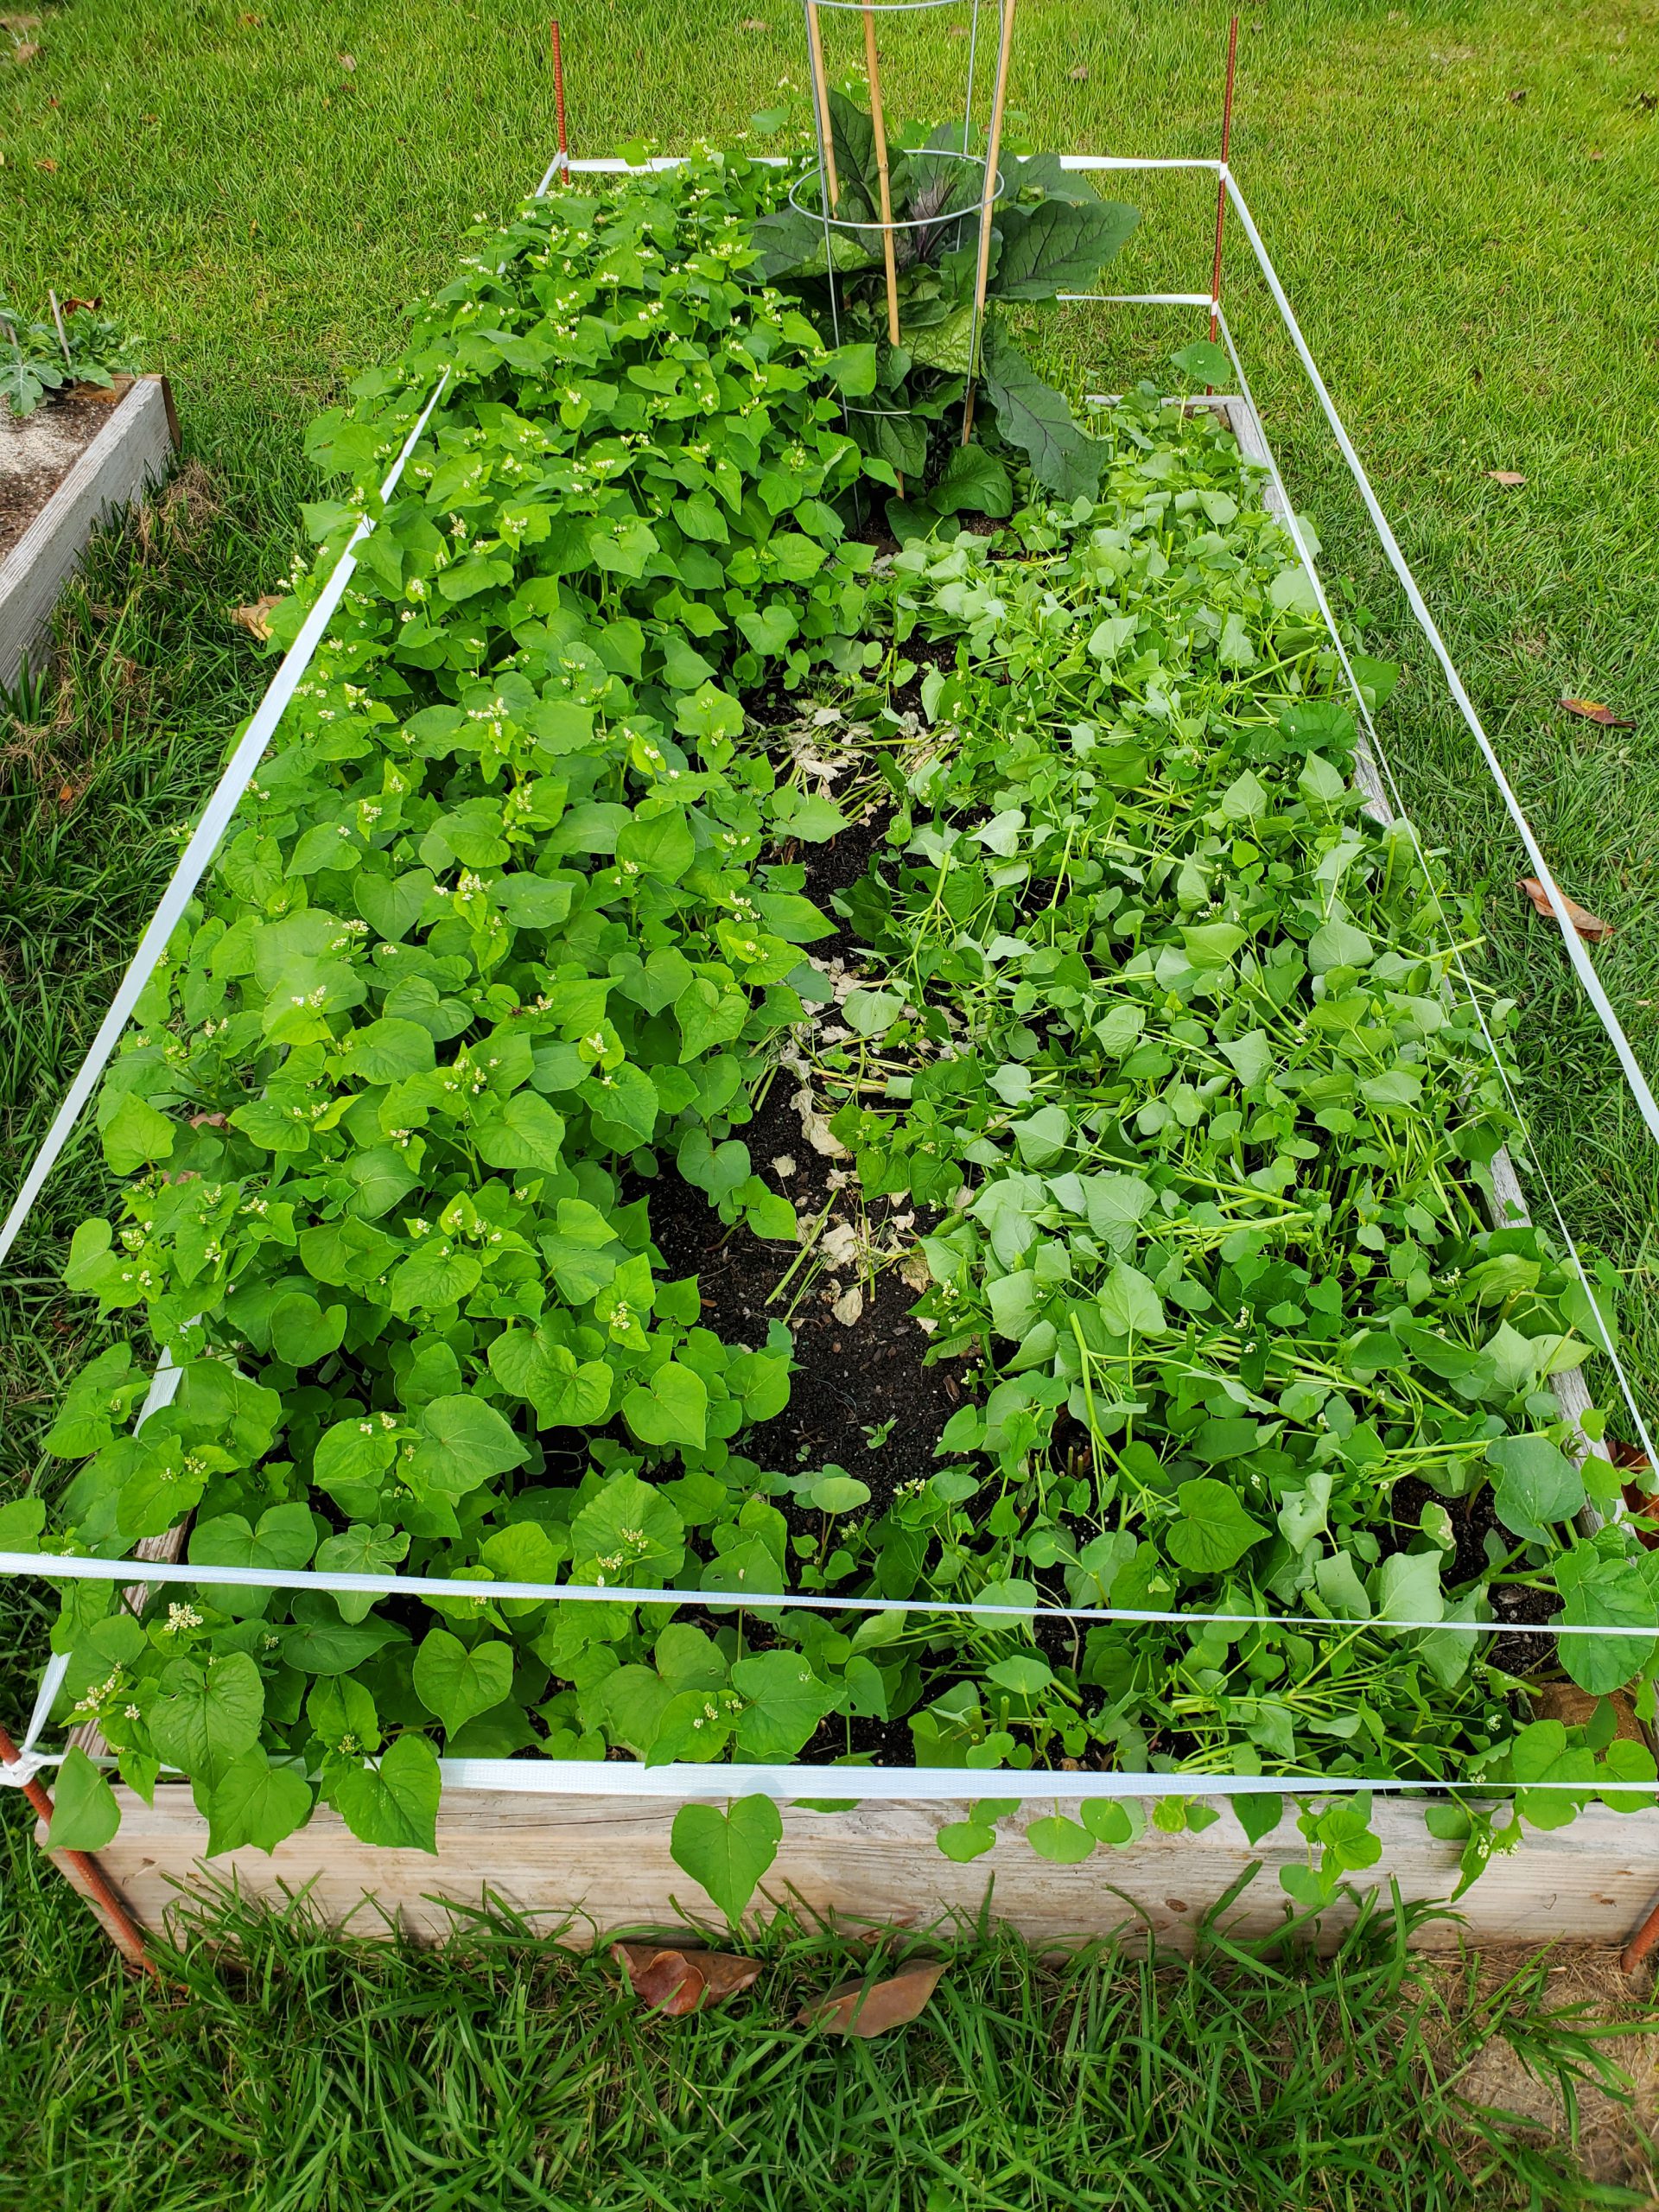
Buckwheat cover before termination (left) and after (right) interplanted with Eggplant. Photo courtesy Daniel Leonard, UF/IFAS Calhoun County Extension.
Now that I’ve convinced you of Buckwheat’s raised bed cover crop merits, let’s talk technical and learn how and when to grow it. Buckwheat seed is easily found and can be bought in nearly any quantity. I bought a one-pound bag online from Johnny’s Selected Seeds for my raised beds, but you can also purchase larger sizes up to 50 lb bags if you have a large area to cover. Buckwheat seed germinates quickly as soon as nights are warmer than 50 degrees F and can be cropped continuously until frost strikes in the fall. A general seeding rate of 2 or 3 lbs/1000 square feet (enough to cover about thirty 4’x8’ raised beds, it goes a long way!) will generate a thick cover. Simply extrapolate this out to 50-80 lbs/acre for larger garden sites. I scattered seeds over the top of my beds at the above rate and covered lightly with garden soil and obtained good results. Unlike other cover crops (I’m looking at you Crimson Clover) Buckwheat is very tolerant of imperfect planting depths. If you plant a little deep, it will generally still come up. A bonus, no additional fertilizer is required to grow a Buckwheat cover in the garden, the leftover nutrients from the previous vegetable crop will normally be sufficient!
Buckwheat “mulch” after termination. Photo courtesy of Daniel Leonard, UF/IFAS Calhoun County Extension.
Past the usual cover crop benefits, the thing that makes Buckwheat stand out among its peers as a garden cover is its extremely rapid growth and short life span. From seed sowing to termination, a Buckwheat cover is only in the garden for 4-8 weeks, depending on what you want to use it for. After four weeks, you’ll have a quick, thick cover and subsequent mulch once terminated. After eight weeks or so, you’ll realize the plant’s full flowering and beneficial/pollinator insect attracting potential. This lends great flexibility as to when it can be planted. Have your winter greens quit on you but you’re not quite ready to set out tomatoes? Plant a quick Buckwheat cover! Yellow squash wilting in the heat of summer but it’s not quite time yet for the fall garden? Plant a Buckwheat cover and tend it the rest of the summer! Followed spacing guidelines and only planted three Eggplant transplants in a 4’x8’ raised bed and have lots of open space for weeds to grow until the Eggplant fills in? Plant a Buckwheat cover and terminate before it begins to compete with the Eggplant!
If a soil building, weed suppressing, beneficial insect attracting, gorgeous cover crop for those fallow garden spots sounds like something you might like, plant a little Buckwheat! For more information on Buckwheat, cover crops, or any other gardening topic, contact your local UF/IFAS County Extension Office. Happy Gardening!
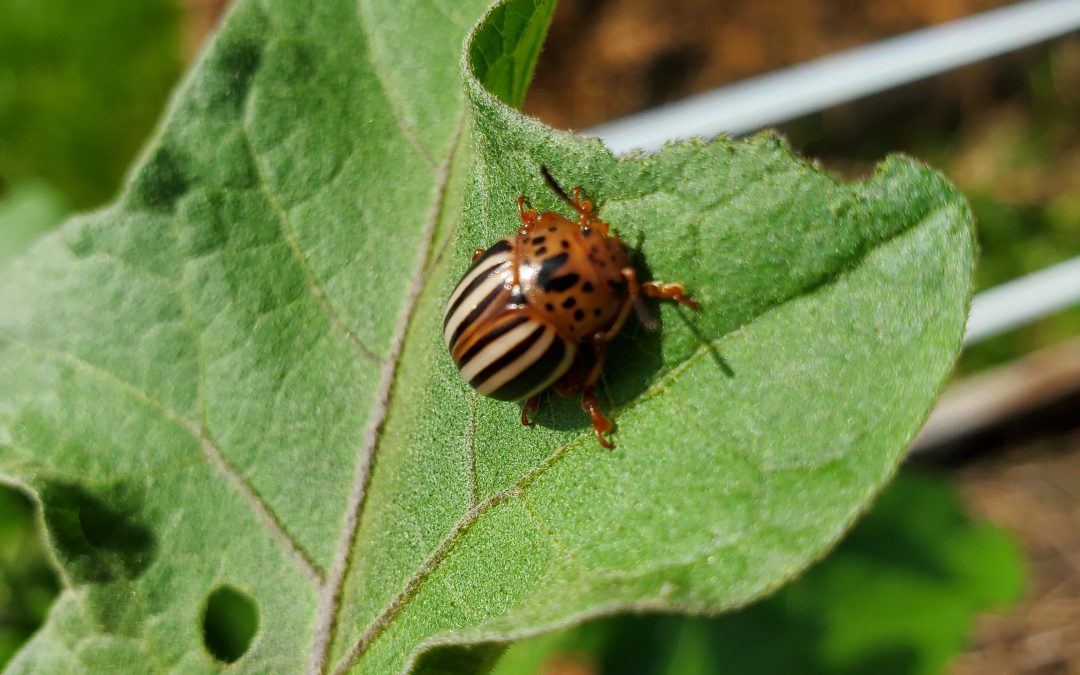
August is awful. Its heat makes one miss the relative cool of July. Its rain is so sporadic that it invokes nostalgia for the rainy afternoons of early summer. But if there is a silver lining in August for gardeners, it is the simplicity that it brings. The weaker spring crops, tomatoes, squash and the rest, are all gone now, destroyed or rendered fruitless by insects, disease, and heat. This leaves only the hardened, usually pest and disease-free survivors Okra, Pepper, Sweet Potato and Eggplant. I say usually because, this year, my eggplant bed is under attack by a new-to-me pest, the False Potato Beetle!
I’ve dealt with Colorado Potato Beetles (CPB) before. Those orangish, black-striped terrors often attack my spring potato crops and occasionally bother early tomatoes. However, I’ve never seen them in late summer on Eggplant. This raised suspicion. Also, I spotted unusual, round, whitish purple creatures munching on leaves from the same plants; these appeared to be the larval stage of the unidentified beetle. A little digging led me to identify these garden pests as the lesser known, lookalike cousin of CPB, the False Potato Beetle.
False Potato Beetle munching on an Eggplant leaf in the author’s garden.
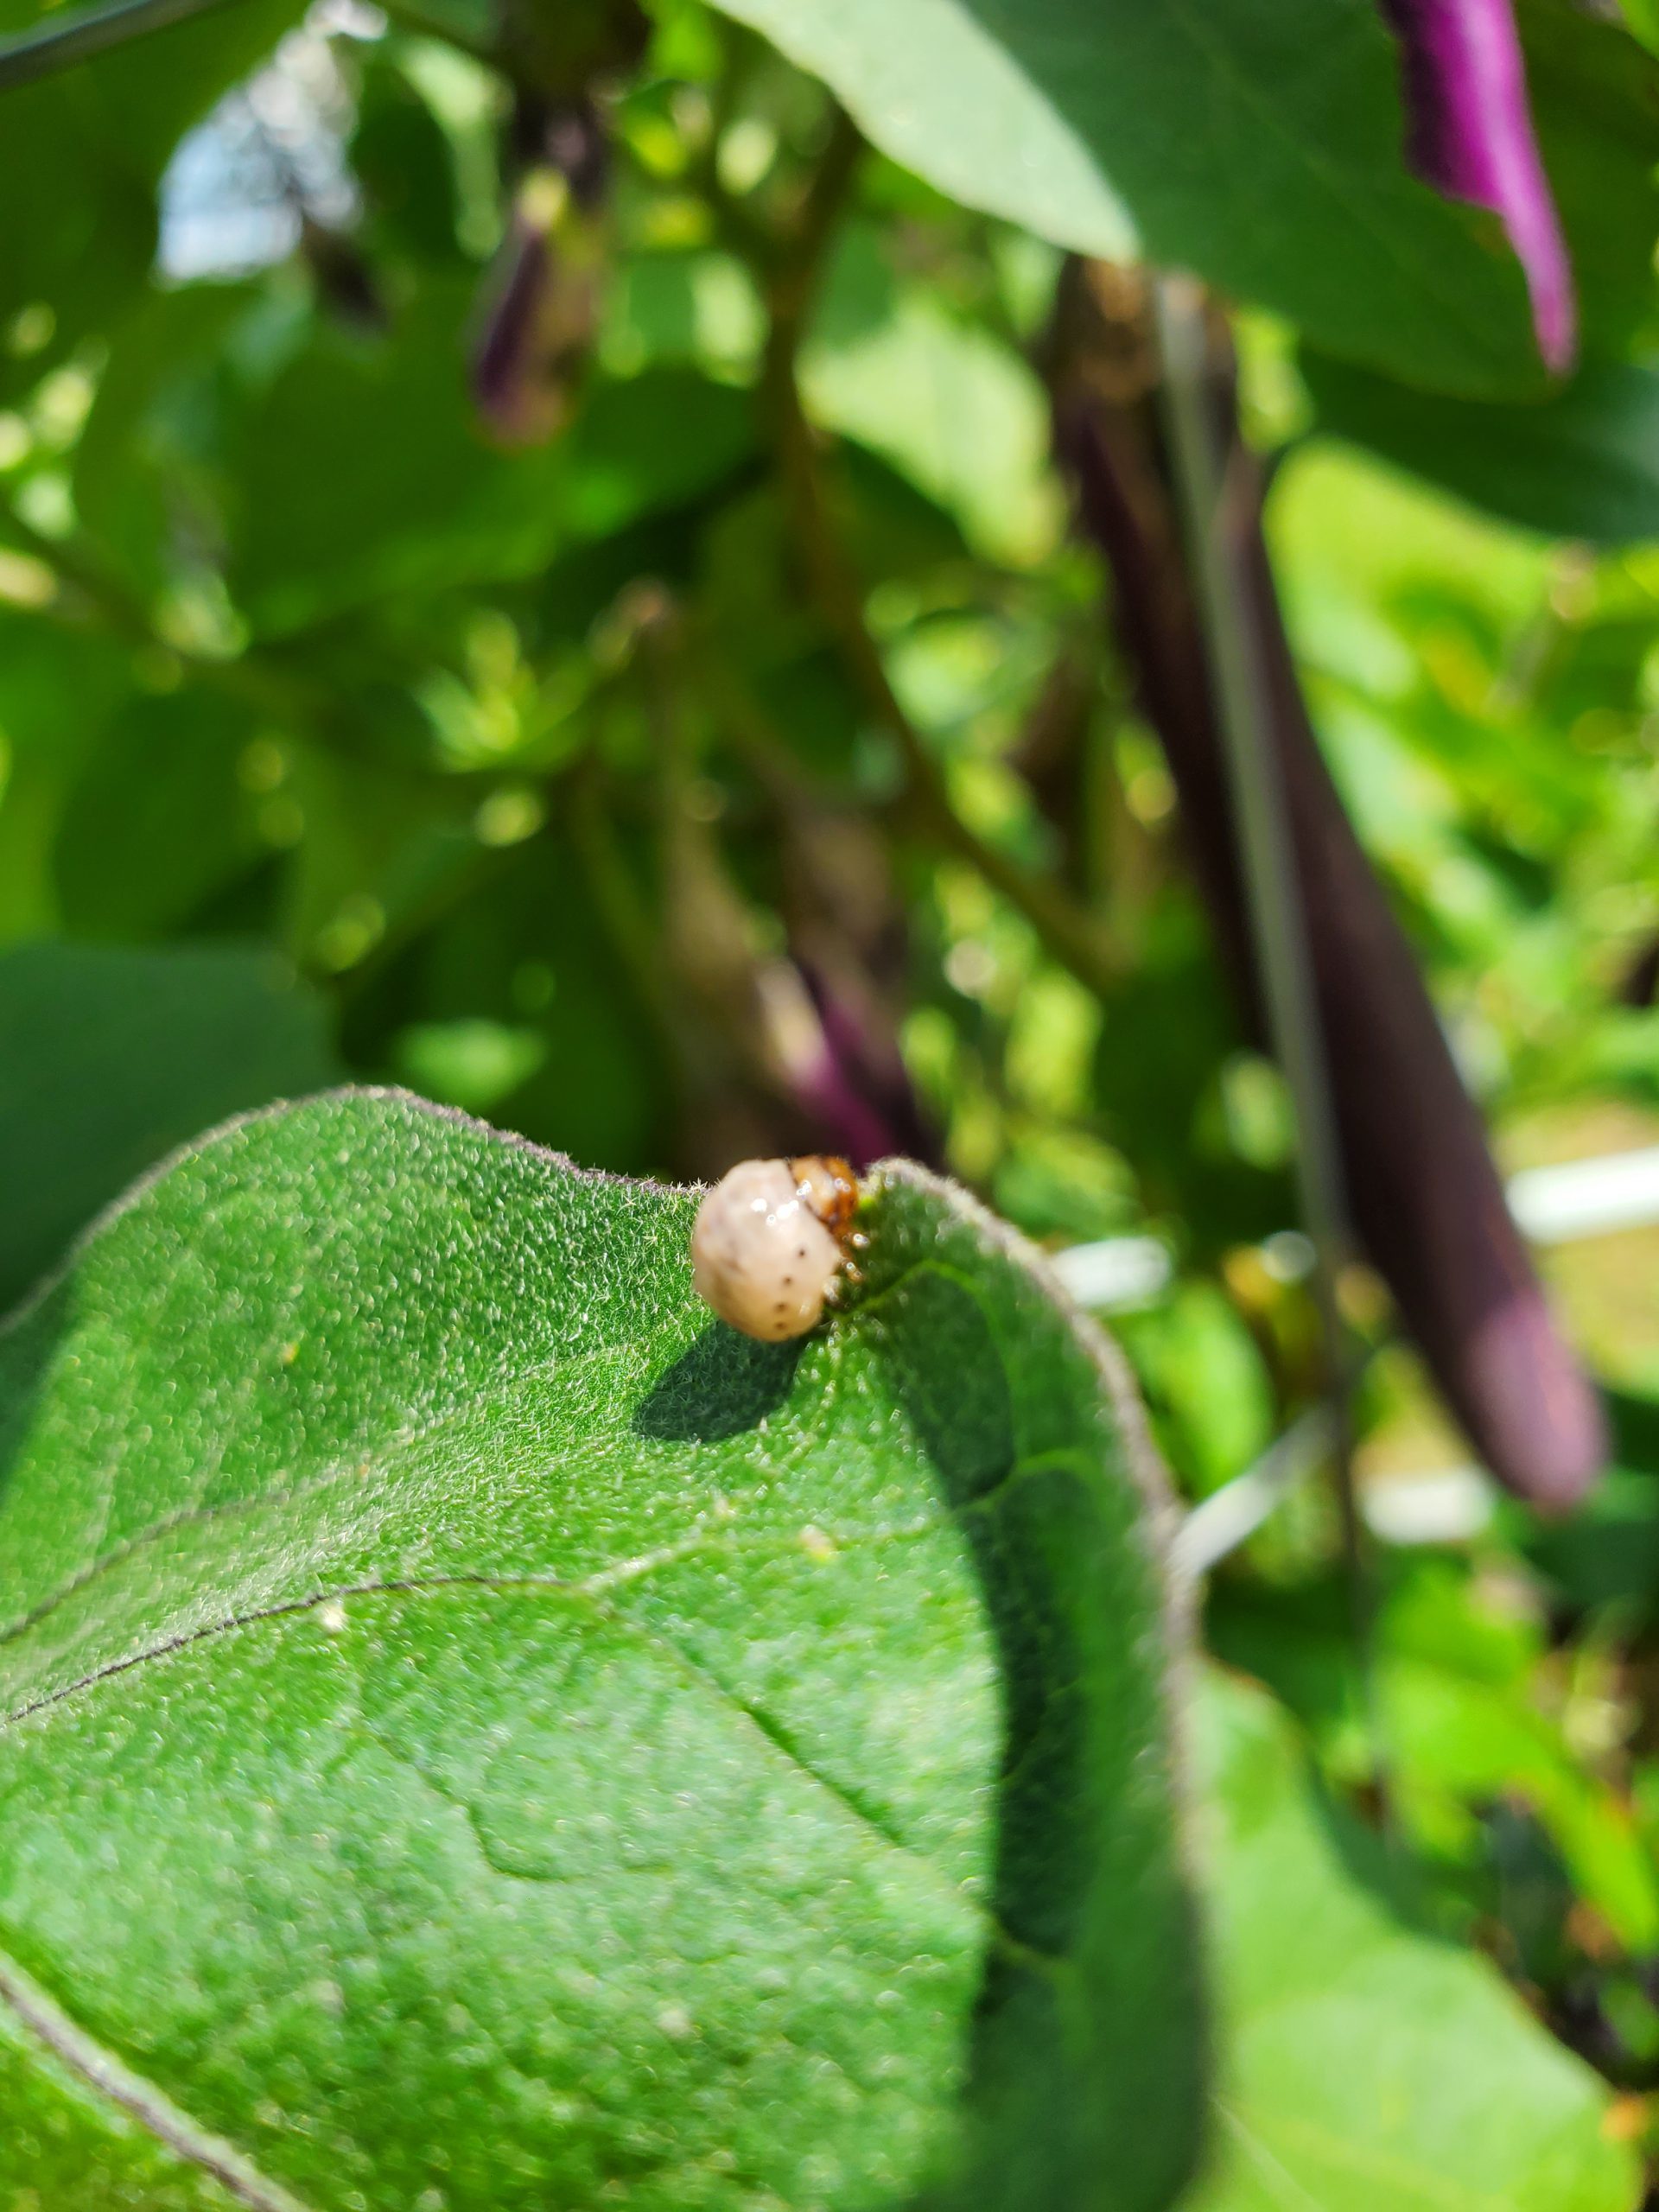
False Potato Beetle (FPB) looks nearly identical to its cousin in the adult stage. They are similarly shaped and colored, though a close look reveals subtle differences between species. While both have yellowish-orange heads and pale-yellow backs with dark stripes, the FPB’s back is slightly lighter hued, more of a whitish, cream color. Also, the CPB’s underside and legs are a very dark orange to brown, with the False Potato Beetle having lighter colored legs and underside. If you’re saying, “These old eyes will never be able to tell the difference, County Agent. Cream and light-yellow look the same to me.”, I get it. Fortunately for those of us with poor vision, the larval stage (babies) of the two beetles looks very different and is the key to correct ID! FPB larvae are larger and have a whitish coloration. CPB larvae, in contrast, are a similar burnt orange color to the adult beetle. I promise, the difference is very distinguishable!
False Potato Beetle is considered a minor garden and agronomic pest as they typically only bother Eggplant, and they don’t usually destroy entire plants. However, if you get a FPB outbreak in your Eggplant garden, they can still be pretty destructive. These beetles feed in the same manner as caterpillar pests, chewing away entire sections of leaves and stems. Unchecked infestations can defoliate entire sections of plants. So, if you find these little beetles eating away at your eggplant garden, what can you do?
False Potato Beetle larvae. Photo courtesy of the author.
First, if you scout regularly, you’ll notice the beetles and their larvae in relatively small numbers before outbreaks become widespread. I had pretty good success this year just catching infestations early and picking off the beetles I saw and squishing them. Continue scouting and squishing for a few days and pretty soon, the population is reduced to a manageable level. However, if squishing makes you squeamish, you also have some common pesticide options at your disposal. I normally encourage clients to start their chemical pest control strategy with “softer” products like Pyganic, a pyrethrin make from an extract from the Chrysanthemum plant. Pyganic works great but is a little harder to find; you may have to order online or ask your local retailer if they can get it for you. If you are unable to find Pyganic or it doesn’t perform for you, the old standby products with carbaryl or pyrethroids (Sevin, Ortho Bug-B-Gone, and others) also work well.
False Potato Beetle can be a late summer garden pain, but with regular scouting, proper insect ID, lots of squishing, and maybe a timely pesticide application or two, you should be able to continue to harvest eggplant deep into fall! If you have FPB in your garden or have another horticultural question, give your local UF/IFAS County Extension office a call! Happy Gardening!
I enjoy starting my garden from seeds. Ordering seed opens so many more options relative to the limited old-fashioned seed and transplant selections that line garden shelves. Picking newer, improved varieties has several other advantages as well, including increased disease resistance, earlier fruiting, unusually colored/shaped fruit, and generally more vigorous plants. One of the most exciting days of the year in my house is when the cardboard box full of the season’s seed packets comes in the mail! However, I garden exclusively in small, 4’x8’ raised beds and only need a couple of plants of each veggie variety to fill the fridge with fruit; meaning I always have leftover seeds in the packets! In the past, I’ve thrown the excess seed away and chalked it up to the cost of gardening in small spaces, but this spring, as seeds became somewhat hard to come by and several of the varieties I normally grow were out of stock, I started saving and storing my leftover seed packets for future seasons to ensure I have what I want! You can save and store seeds too, here’s how.
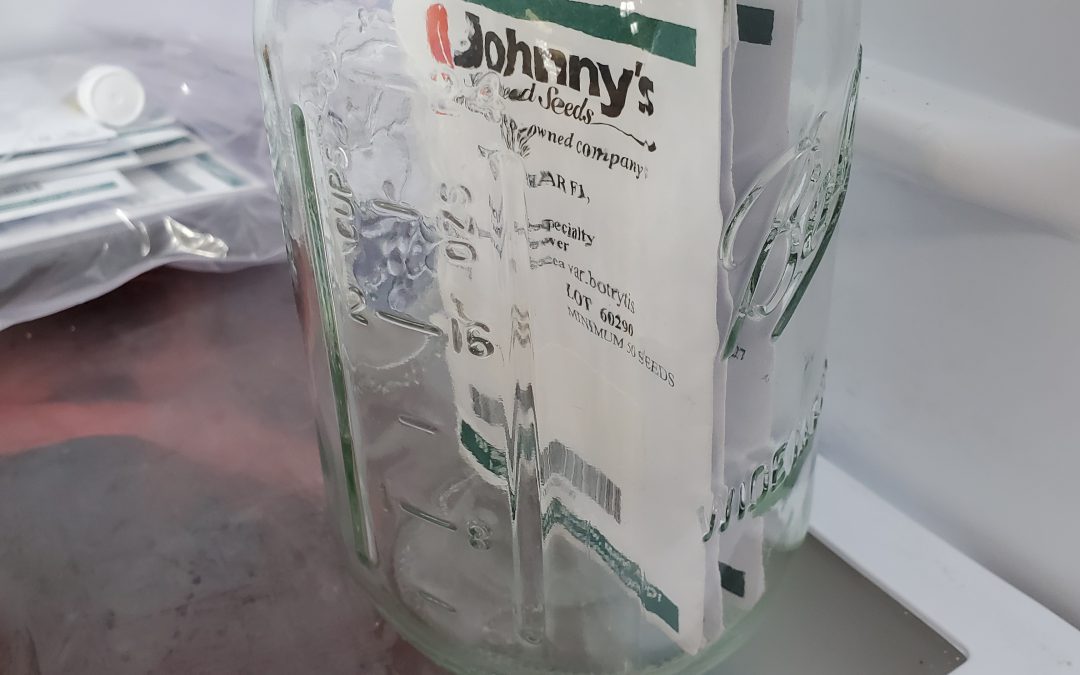
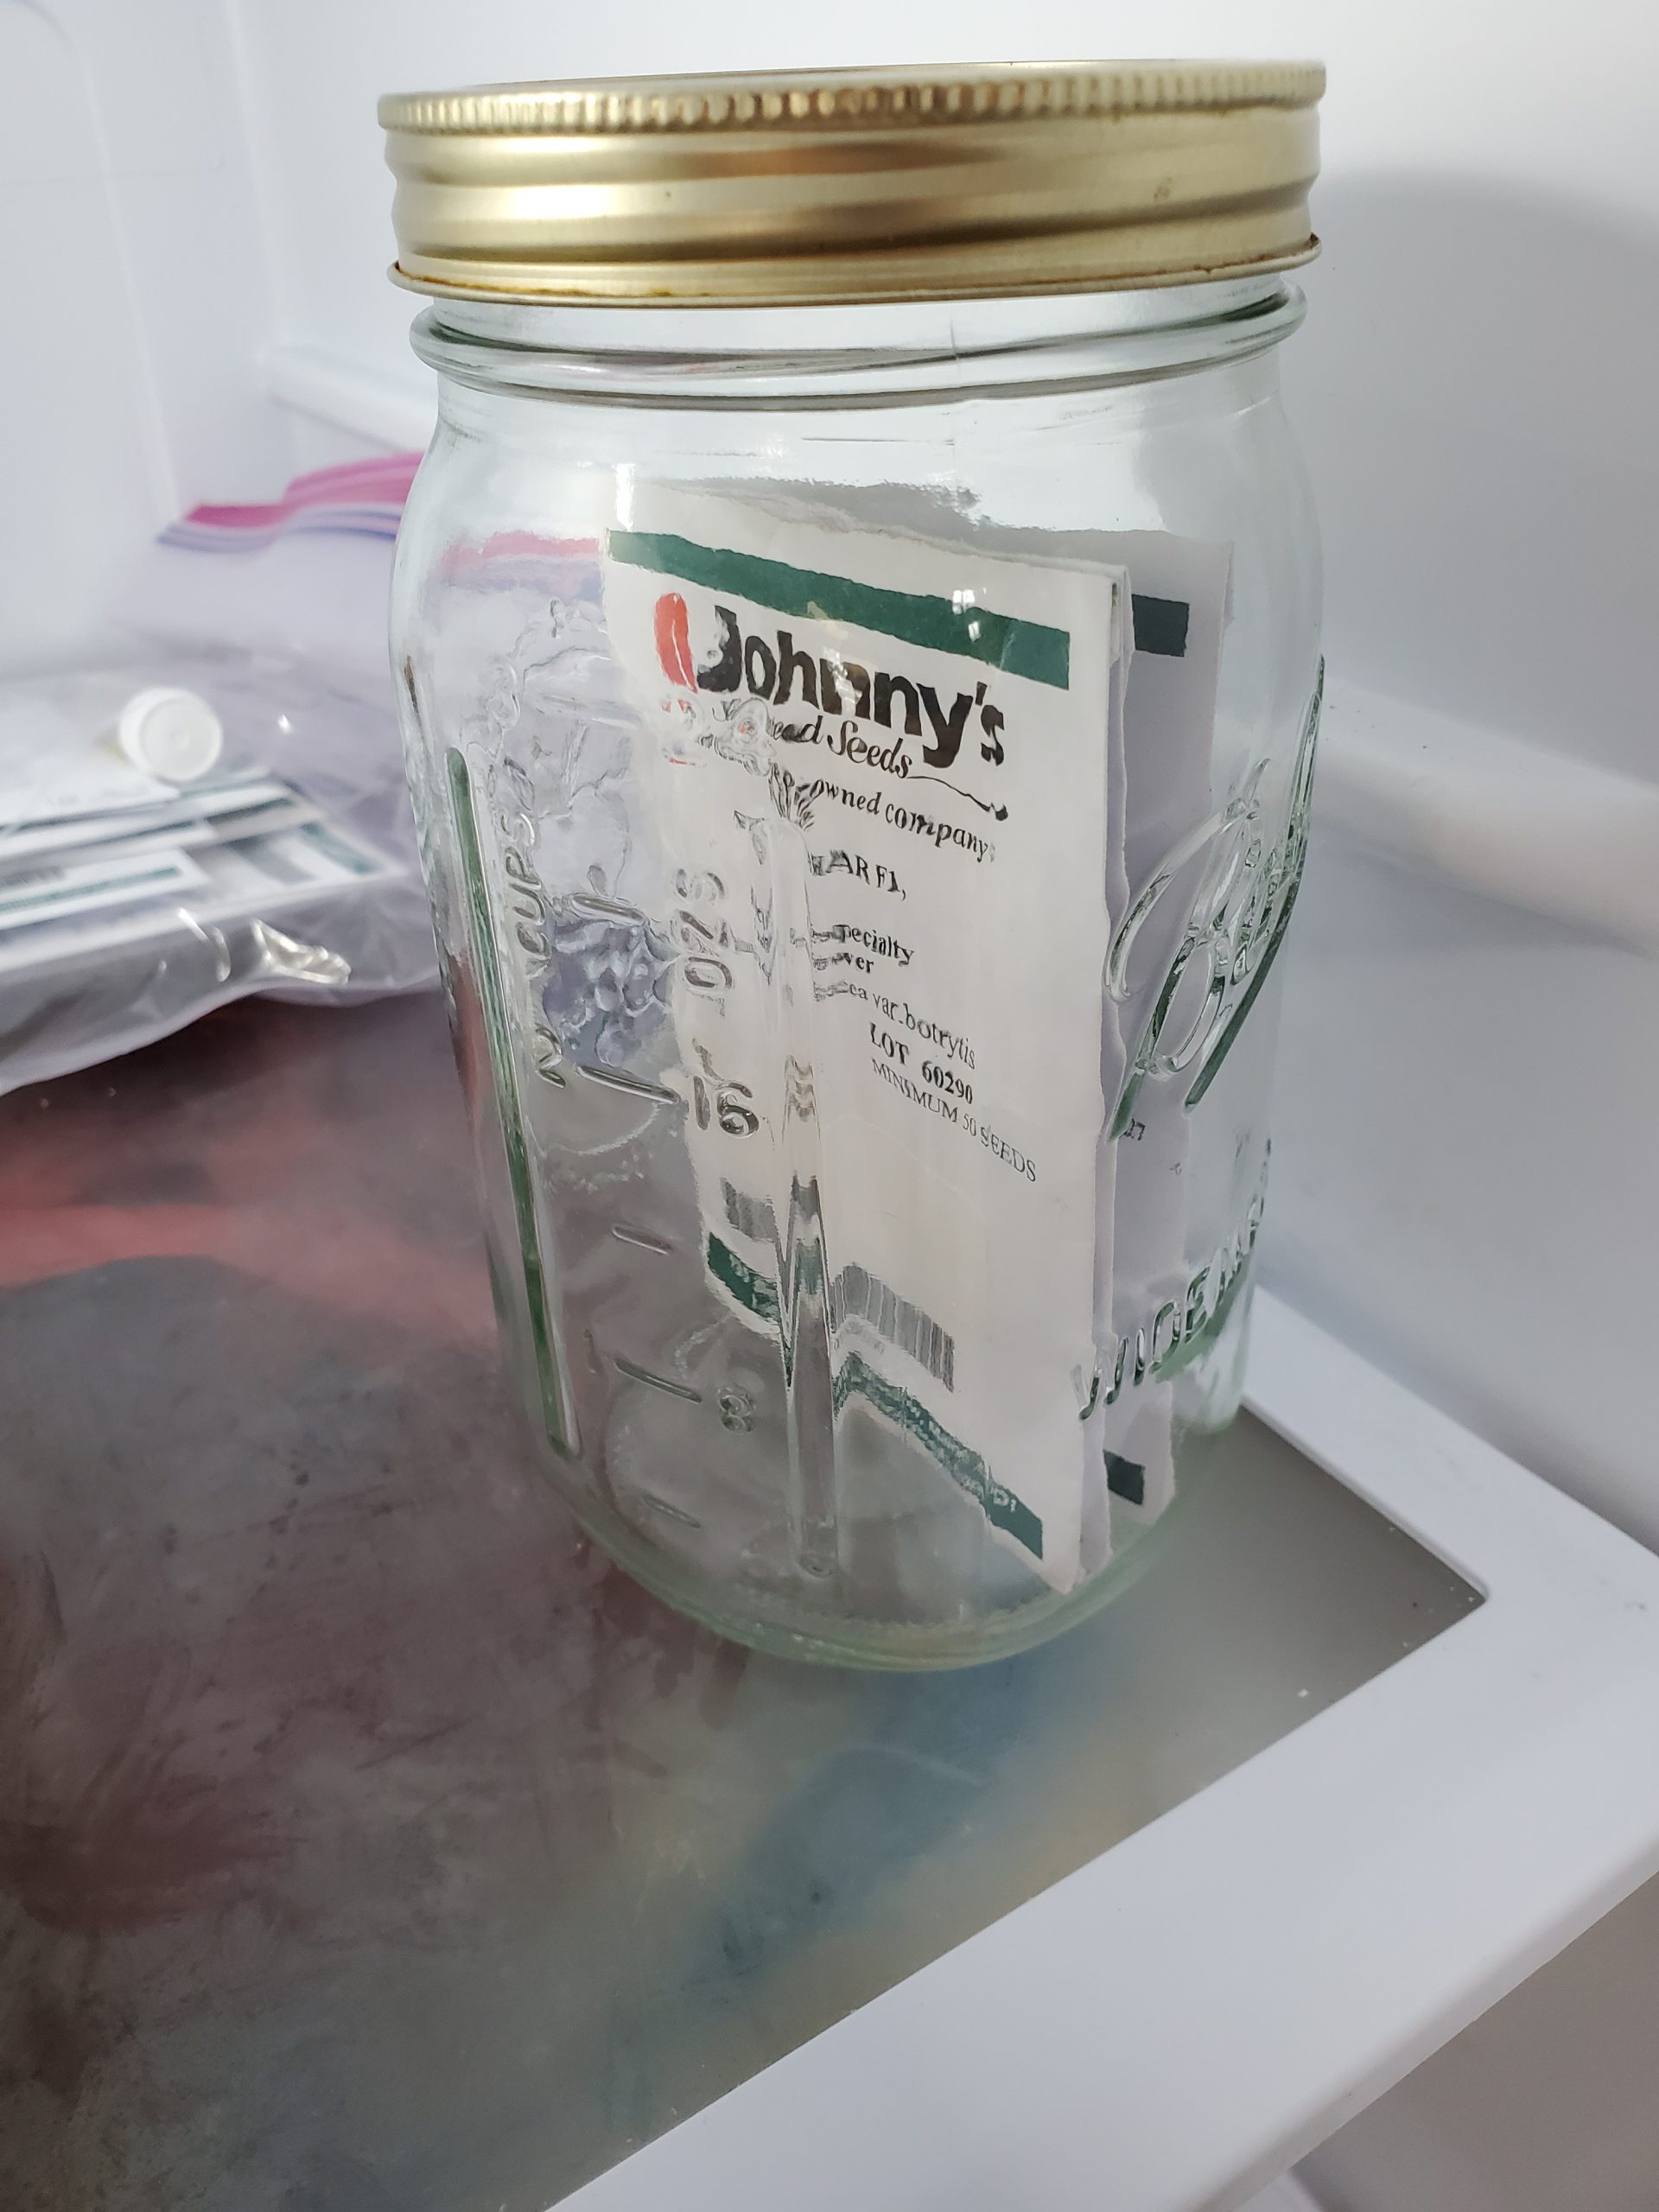
Cauliflower seed waiting for the fall garden in the author’s refrigerator.
Properly storing your leftover seeds is a relatively simple process. While seed longevity definitely varies somewhat according to species, regardless of how they are treated by you, remembering the following few tips can help improve the stored seeds’ viability and vigor for the next season.
Store Cool. Seeds like to be stored in a refrigerator around 40 degrees F. Seeds stored warmer, near room temperature, or colder, as in a freezer, will decline much more rapidly than those in the fridge.
Keep it Dry. Humidity or moisture in the seed storage area is a sure way to reduce the shelf life of seeds. Store dry in plastic bags or glass containers and add a dessicant. Dessicants help keep storage containers dry and can be found for around $1 each from various online purveyors, making them a cheap insurance policy for your home seed bank!
Don’t Store Pelleted Seed. These days, you can buy pelleted seed for many of the smaller seeded vegetable varieties, like lettuce and carrots. The pelleting process and materials used, while making it easier for old eyes and those of us with fumbling fingers to plant, reduces seed longevity. Do your best to plant all the pelleted seed you purchase. If you store pelleted seed, don’t say you weren’t warned when next season’s germination is poor!
Plant All Stored Seed the Next Season if Possible. Remember, that while most non-pelleted vegetable species’ seed can remain viable in storage for more than a year, it’s best to only store seeds until the next season and use them up. Regardless of how well you store them, seed germination percentage (how many in the lot will sprout when planted) and vigor (how strong the germinating seedlings are) decline in direct proportion to time spent in storage.
Plant Old Seed Heavy. As germination rates in storage may have declined, it’s best to plant stored seed a little thicker than you normally might. If you need a squash plant in a certain spot, instead of just planting one seed, put three or four in the hole to ensure you get a plant. You can always thin extras later, but time lost replanting cannot be regained.
By following these few simple tips, you can waste a lot less seed and ensure that you have what you want to plant for the following year! As always, if you have any questions about saving and storing seed or any other agriculture or horticultural topic, please contact us at the UF/IFAS Calhoun County Extension Office. Happy Gardening!
The following resources were used as references when writing this piece and may prove helpful to you also, check them out:
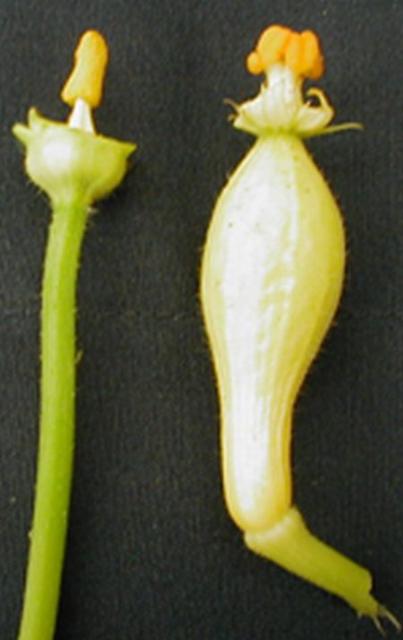
Figure 1. “Flowers from Yellow Crookneck squash. Male flower on left with petals removed to expose male anther with pollen. Female flower on right with petals removed to show stigma.” EDIS Publication #HS1149 Credits: E. Thralls
This spring, I have received several questions about spring squash. Some of the most worried gardeners asked me why their squash was not producing? Initially, I thought it was a pollination issue. It turns out, in more than one case, their plants were not producing female flowers. Botanically, squash are monecious, meaning that one plant will produce different flowers, some male and some female.
So, why were these squash plants not producing female flowers? The answer is somewhat complected. If squash were planted later in the season and exposed to primarily hotter temperatures, there will be a bias for production of male flowers. This is particularly true when nights are above 70 degrees F and days are above 90 F. I noticed that this spring, squash were only producing male flowers when we were having several days of sustained daytime temperatures over 90 F, but once highs came down into the 80s, production of female flowers resumed. This makes sense from a biological standpoint, since it is very stressful for plants to produce fruit during times of extreme temperature and plants will conserve energy to later be able to produce fruit under more favorable circumstances.
Another factor that can influence production of female flowers is the level of nitrogen in the soil. If nitrogen levels are extremely high, likely due to over fertilization, then plants will remain in a vegetative growth stage for much longer. Growth will be vigorous and dark green, but little female flower production will occur. To avoid this scenario, only apply fertilizer at recommended rates.
Hopefully, if you have run into this problem, this article will help you have better production success in the future. An excellent source that describes this phenomenon further is this article from Iowa State University titled ” Where are the Female Flowers?”