by Daniel J. Leonard | Mar 29, 2017
Everyone, or at least everyone fortunate enough to grow up in the South, has a fond memory tucked away of a sight or smell of a plant that reminds them of the good old days. Maybe it’s the ancient camellia at your grandmother’s house that just feels like home when you see it. Maybe it’s a persimmon tree with fruit weighing on the branches, the smell of baked persimmon bread cooling in the kitchen close behind. For me and countless others, it’s the sight of the iconic native flowering dogwood (Cornus florida) blooming each spring in the understory of Panhandle forests. However, if you’ve been paying attention, the spring dogwood bloom has diminished with each passing year, leaving many folks wondering what happened. As with many things, the answer is multi-faceted and complicated.
First, as homeowners who have grown dogwoods for many years are well aware, dogwoods are notoriously susceptible to harsh site conditions. In the landscape setting, much of the difficulty in growing dogwoods may be attributed to Florida’s frequent extended droughty periods and improperly citing the trees in a full-sun location. dogwoods naturally prefer a cool, moist root zone and protection from the hot afternoon sun; failure to provide such a setting will most likely lead to scorched-appearing foliage, overall poor performance and a short-lived tree.
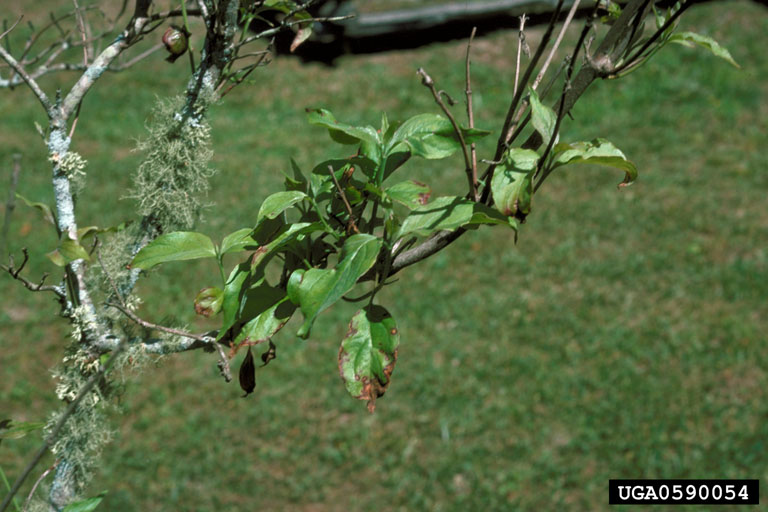
Various Dogwood Leaf Spots
More problematic are the many diseases dogwoods are prone to, including several fungal leaf spots, cankers and mildew diseases, all of which impair their ability to create energy and store the needed nutrients to survive tough periods (frequent droughts). All of these diseases are much more problematic in the unseasonably warm, wet winters and cool, wet springs Floridians have been experiencing with regularity over the last decade. It is good practice to actively clean up any fallen, diseased leaves as well as to prune out any obviously dead or diseased wood to prevent problems from spreading further, but total suppression of these diseases is impractical for most homeowners.
As if all of those problems weren’t enough, the most sobering issue currently facing flowering dogwood is a fungal disease known as dogwood anthracnose (Discula destructiva). D. destructiva has been confirmed responsible for the decline of dogwoods in more upland areas around the foothills of the Appalachians and has been surmised to have moved south into the coastal plain, although its presence in our area has largely been undocumented. As with other pathogens, disease incidence is increased in already stressed trees as well as in mild, wet-weather conditions in the spring and fall. Symptoms of D. destructiva usually begin with purplish spots on the margins of leaves in early summer, with infected leaves hanging onto the tree through winter. The disease then spreads down through the tree and manifests itself as a sort of dieback of twigs and limbs, eventually forming cankers and killing the tree.
As dire as the dogwood situation may seem, there are some potential solutions. First, if you must plant a flowering dogwood, make sure you give it an ideal situation. Irrigate when rainfall is inconsistent, apply a layer of an organic mulch (pinestraw, wood chips, etc.) at a depth of 2”-3”, and plant in a protected, shady situation. If growing a native dogwood might seem too challenging, there is a related species from Asia called kousa dogwood (Cornus kousa) that deserves to be planted more. Kousa dogwood is not a perfect tree but it retains most everything we love about native dogwoods without the disease issues!
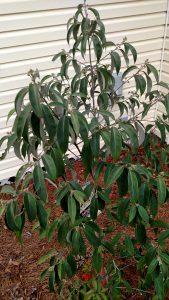
Young ‘Empress of China’ in the author’s lawn.
Kousa’s retain the classic creamy white flowers, attractive berries in fall, and layered branching (called sympodial branching) of our native dogwoods but also bring a few extra attributes to the table. Kousa dogwood grows to a rounded 15’-20 in height and width, is much more tolerant of cultural extremes than flowering dogwood and is resistant to the various diseases that plague native dogwoods. Also, there is a subspecies of kousa dogwood, Cornus kousa var. angustata that is even evergreen in our area, no more barren limbs in the winter! The most popular selection of this subspecies is a beautiful little tree being marketed as ‘Empress of China’ through the southern living plant collection; I am currently trialing this tree in my yard and it has impressed so far.
So to wrap up, if the decline of the dogwoods has you down, there are three things you can do:
- Give your existing dogwoods some TLC, keep them well-watered in droughty periods and mulch to keep the roots cool.
- Cut out any dead or diseased branches in existing dogwoods and rake and dispose of leaves from previous years that are lying around.
- If you want to plant a new dogwood, try a kousa dogwood (Cornus kousa) as this species is a more than adequate replacement for Cornus florida!
As always, consult your local UF/IFAS Extension Office with any questions or concerns you have regarding your landscape and happy gardening!
by Mary Salinas | Mar 20, 2017
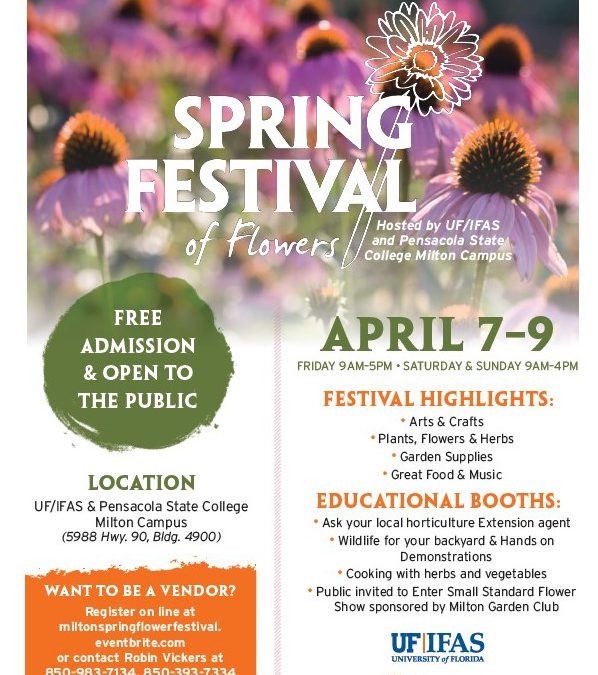
About the Spring Festival of Flowers
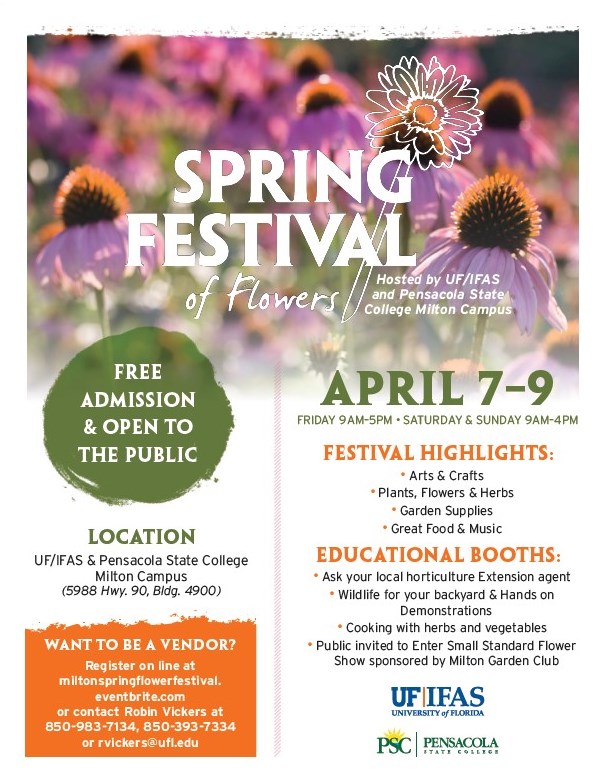
The University of Florida, IFAS and the Pensacola State College Milton Campus invites you to join them for one of the largest festivals of the season. This is a popular event that draws plant enthusiast from near and far. This festival features plant nurseries, UF student club plant sale, arts & crafts, great food, music and educational opportunities.
Location
University of Florida, IFAS and the Pensacola State College Milton Campus located at 5988 Highway 90, Milton.
Dates and Times
Friday, April 7, 2017 * 9 AM – 5 PM
Saturday, April 8, 2017 * 9 AM – 4 PM
Sunday, April 9, 2017 *9 AM – 4 PM

by Matt Lollar | Mar 20, 2017

A type III fairy ring. Photo Credit: Alex Bolques, Assistant Professor, Florida A&M University
Mushrooms often are grouped in a circle in your lawn. This is due to the circular release of spores from a central mushroom. “Fairy Ring” is a term used to describe this phenomenon. Fairy rings can be caused by multiple mushroom species such as Chlorophyllum spp., Marasmius spp., Lepiota spp., Lycoperdon spp., and other basidiomycete fungi.
Occurrence
Fairy rings most commonly invade your yard during the summer months, when the Florida panhandle receives the most rain. The mushrooms cause the development and spread of the rings by the release of spores. Spores produce more mushrooms and are similar to the seed produced by plants.
Fairy Ring “Types”
Fairy rings can be seen in three forms:
- Type I rings have a zone of dead grass just inside a zone of dark green grass. Weeds often invade the dead zone.
- Type II rings have only a band of dark green turf, with or without mushrooms present in the band.
- Type III rings do not exhibit a dead zone or a dark green zone, but a ring of mushrooms is present.
The size and fill of rings varies considerably. Rings are often 6 ft or more in diameter. The fill of a ring can range from a quarter circle to a semicircle or full circle.
Cultural Controls
The rings will disappear naturally, but it could take up to five years. Although it is possible to dig up the fairy ring sites, it is a good possibility the rings will return if the food source (buried, rotting wood or other organic matter) for the fungi is still present underground.
In some situations, the fungi coat the soil particles and make the soil hydrophobic (meaning it repels water), which will result in rings of dead grass. If the soil under this dead grass is dry but the soil under healthy grass next to it is wet, then it is necessary to aerate or break up the soil under the dead grass with a pitchfork or other cultivation tool.
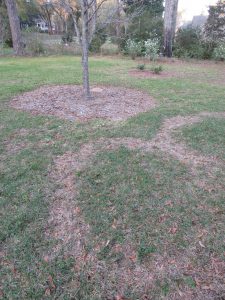
Rings of dead turf due to fairy ring fungi. Photo Credit: University of Florida/IFAS Extension.
Chemical Controls
Effective fungicides include products containing the active ingredients azoxystrobin, flutolanil, metconazole, pyraclostrobin, and triticonazole.
Fungicides inhibit the fungus only. They do not eliminate the dark green or dead rings of turfgrass and do not solve the dry soil problem.
A homeowner’s guide to lawn fungicides can be found at the University of Florida/IFAS Extension Electronic Data Information Source (EDIS) website (http://edis.ifas.ufl.edu/document_pp154).
by Sheila Dunning | Mar 20, 2017
 Now is the time to prevent your azaleas from being attacked by lace bugs. The azalea lace bug, Stephanitis pyrioides, overwinters as eggs on the underside of infested leaves. Eggs hatch in late March and early April. The insect then passes through five nymphal instars before becoming an adult. It takes approximately one month for the insect to complete development from egg to adult and there are at least four generations per year. Valuable plants that are susceptible to lace bug damage should be inspected in the early spring for the presence of overwintering lace bug adults, eggs and newly hatched nymphs. Inspect these plants every two weeks during the growing season for developing lace bug infestations.
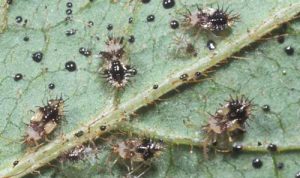
Both adults and nymphs have piercing-sucking mouthparts and remove sap as they feed from the underside of the leaf. Lace bug damage to the foliage detracts greatly from the plants’ beauty, reduces the plants’ ability to produce food, decreases plant vigor and causes the plant to be more susceptible to damage by other insects, diseases or unfavorable weather conditions. The azalea can become almost silver or bleached in appearance from the feeding lace bug damage.
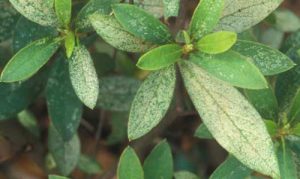 However, lace bugs often go undetected until the infested plants show severe damage sometime into the summer. By then several generations of lace bugs have been weakening the plant. Inspecting early in the spring and simply washing them off the underside of the leaves can help to avoid damage later and the need for pesticides.
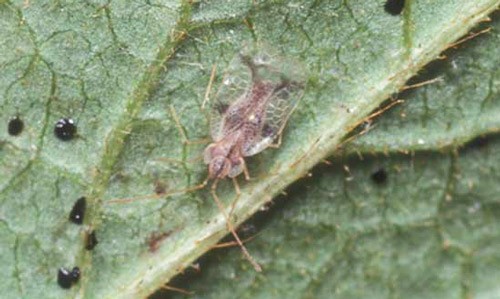
Adult lace bugs are flattened and rectangular in shape measuring 1/8 to 1/4 inch long. The area behind the head and the wing covers form a broadened, lace-like body covering. The wings are light amber to transparent in color. Lace bugs leave behind spiny black spots of frass (excrement).
Lace bug nymphs are flat and oval in shape with spines projecting from their bodies in all directions. A lace bug nymph goes through five growth stages (instars) before becoming an adult. At each stage the nymph sheds its skin (molts) and these old skins often remain attached to the lower surface of infested leaves.
Azalea lace bug eggs are football-shaped and are transparent to cream-colored. Lace bug eggs are found on the lower leaf surface, usually alongside or inserted into a leaf vein. Adult females secrete a varnish-like substance over the eggs that hardens into a scab-like protective covering.
For more information go to: http://entomology.ifas.ufl.edu/creatures/orn/shrubs/azalea_lace_bug.htm

by Ray Bodrey | Mar 20, 2017

Figure 1: Edible Landscaping.
Credit: Dr. Gail Hansen, Environmental Horticulture-UF/IFAS
Edible landscaping has become a trend for many gardening enthusiasts. A combination of edible plants along with traditional ornamentals can create an artful presentation. There are some challenges when designing such a landscape, but in those challenges opportunities’ may be found. One of the most difficult challenges is making sure your garden or landscape is healthy and vibrant year-round since many edibles are short-lived annuals. These include plants such as eggplant, pepper, lettuce, artichoke and some annual herbs. There is a solution to this concern. First, know your edible plant’s propagation and maturity months. This way you can offset plantings to ensure color in your landscape. Another key measure is to mix some evergreen ornamentals in with short season edibles and long season edibles. Examples of long season edibles include berry shrubs, fruit trees and biennial or perennial herbs.
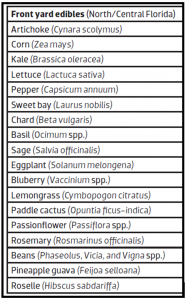
Table 1: North/Central Florida Front Yard Edibles.
Credit: Dr. Gail Hansen, Environmental Horticulture-UF/IFAS.
When designing your edible landscape, think about style and theme to help guide you through the process. A formal design has more straight edges and geometric shapes, whereas the more natural approach has meandering edges and irregular shapes. A color scheme in harmony is very important. Remember, an edible landscape should not just be a production food garden but a visual treat. The goal is not to grow a high yield garden, but only to produce supplemental edibles to make the endeavor worthwhile.
Dr. Gail Hansen, Associate Professor of Environmental Horticulture at the University of Florida, has developed twelve ideas when creating an edible landscape:
- Combine reliable, low-maintenance ornamental with edible plants. Use evergreen ornamentals to maintain enough green structure, so that potential cool season bare spots are not visual.
- Use support structures for an artistic effect and to assist in growth of some plants. Trellises, arbors and even tomato cages are some examples that can be used.
- Use containers in areas to keep the landscape more organized. Planters will also help in maintenance, as plants will be easier to reach and the soil will be easier to manage.
- Create some hard edges in your landscape. Raised beds, garden walls and borders will give defining lines to the landscape and promote a clean appearance.
- A pathway through the landscape will both provide an access to plants and give an inviting appeal. Brick pavers, gravel and mulch are good examples of pathway material.
- Remember color is key. Create a visually pleasing combination of plant color, form, texture and sizes.
- Always start by keeping it simple. So, start small and simple. Then, you can begin filling in the landscape.
- Look for one unique feature to create an added interest to you landscape and provide growth to plants. This could be a shade house for ferns and other hanging baskets or a hay bale, where lettuce, tomatoes or peppers could grow upon.
- Select appealing and easy to grow plants that you want to eat!
- Let plants reach maturity before taking them out of the landscape. For example, rainbow chard will grow larger, if allowed to continue to grow after seed has been produced.
- Use the Florida-Friendly Landscaping principle, “Right Plant, Right Place”, when adding edibles to your landscape. Match the growing needs with the most suitable location.
- Consider your location and layout for irrigation. All plants need some degree of water. An above ground drip irrigation system is usually the most flexible and adjustable irrigation method in regards to overall plant watering needs in a landscape.
Following Dr. Hansen’s ideas will help you create the edible landscape of your dreams. For more information on edible landscaping, please contact your local county extension office for more details.
Supporting information for this article can be found in the UF/IFAS EDIS Publications, “Landscape Design with Edibles” by Dr. Gail Hansen: http://edis.ifas.ufl.edu/pdffiles/EP/EP47500.pdf
UF/IFAS Extension is an Equal Opportunity Institution.


