by Danielle S. Williams | Mar 4, 2021
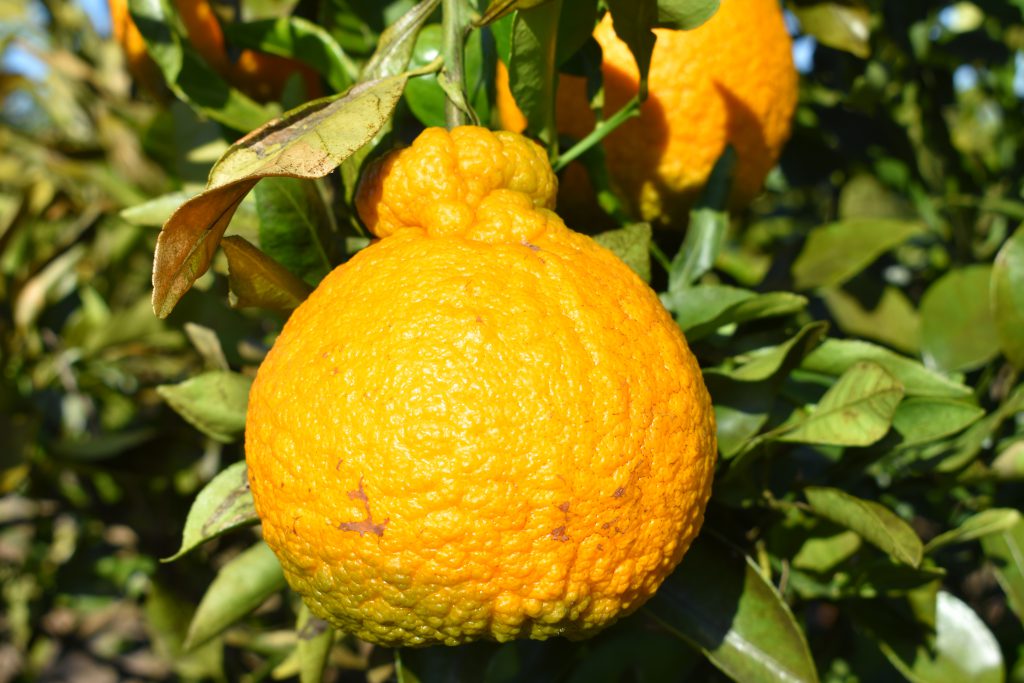
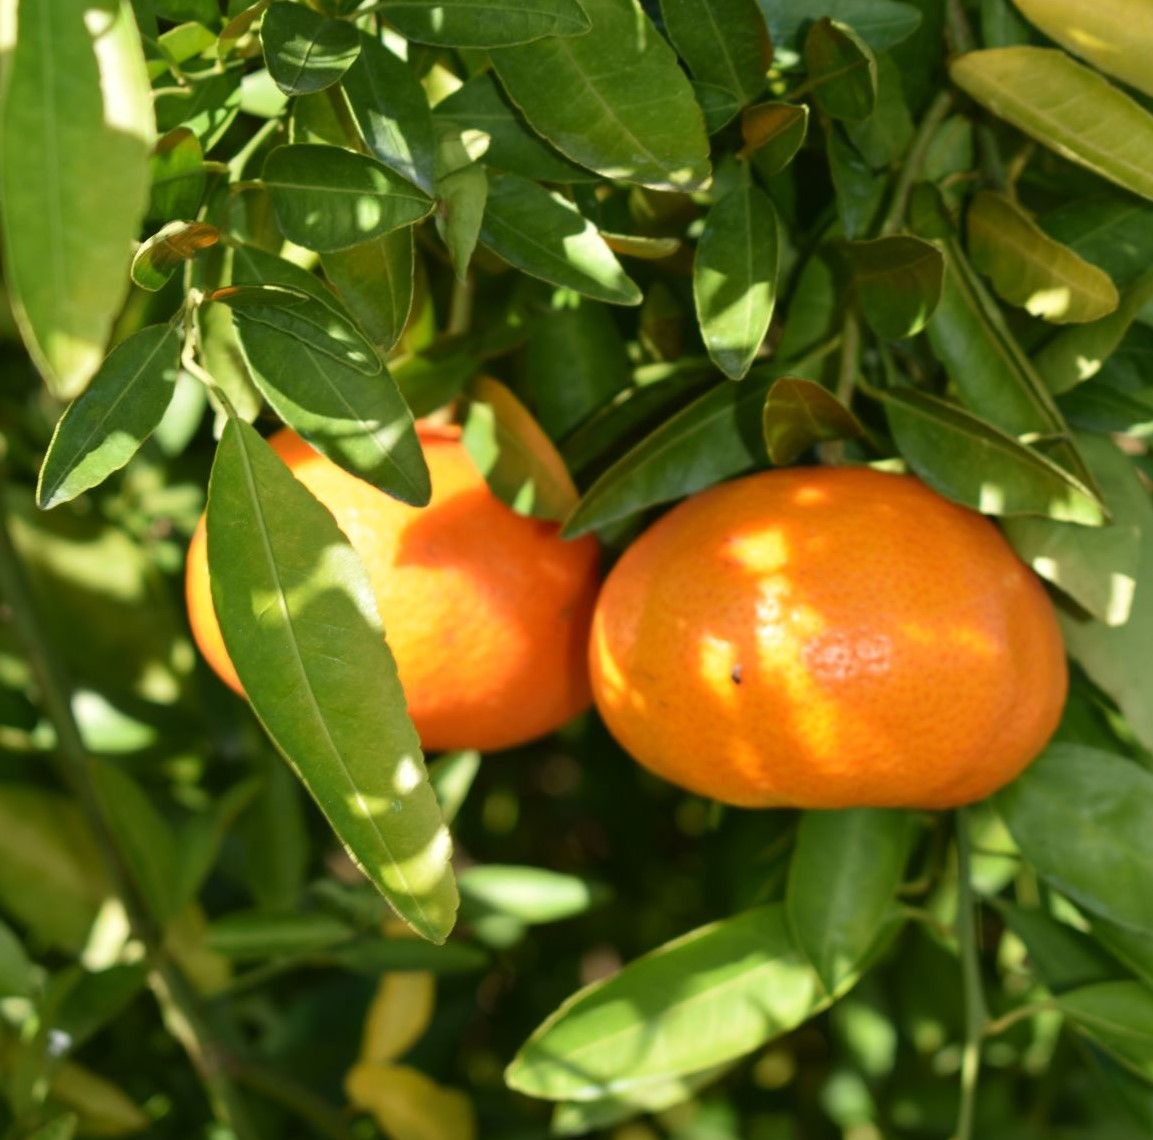
Shiranui mandarin
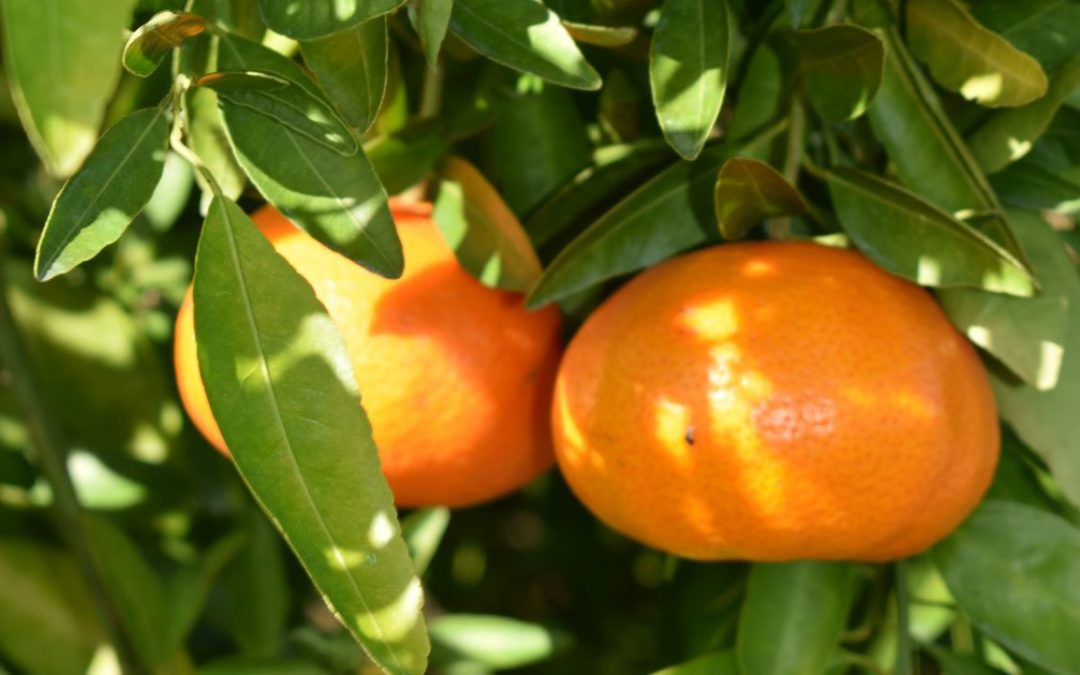
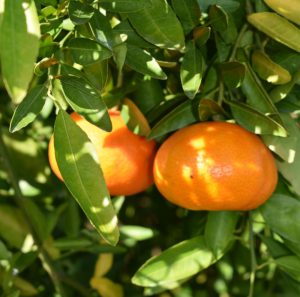
You’ve likely seen them in the grocery stores, and you’ll see them now through April. A large, lumpy (some may say ugly) piece of orange fruit with a bump near the stem. But what exactly is this special looking fruit? It’s a Shiranui mandarin!
The name ‘Shiranui’ is the generic term for this variety of citrus. You may have seen the same variety of mandarin marketed in grocery stores as ‘Sumo Citrus’ which is a trademarked name for the variety. In Japan, they are widely known as ‘Dekopons’. No matter what you call them, they are easily recognized by their distinctive appearance.
The Shiranui mandarin is a hybrid between a Ponkan tangerine and a Kiyomi Tangor (sweet orange x satsuma mandarin). They are easy to peel, sweet, and seedless. Shiranuis are considered to be one of the sweetest and most flavorful varieties of citrus on the market. The fruit are large and have a large protruding bump near the stem that resembles the top knot hairstyle of a Japanese sumo wrestler (hence the trademarked name ‘Sumo Citrus’).
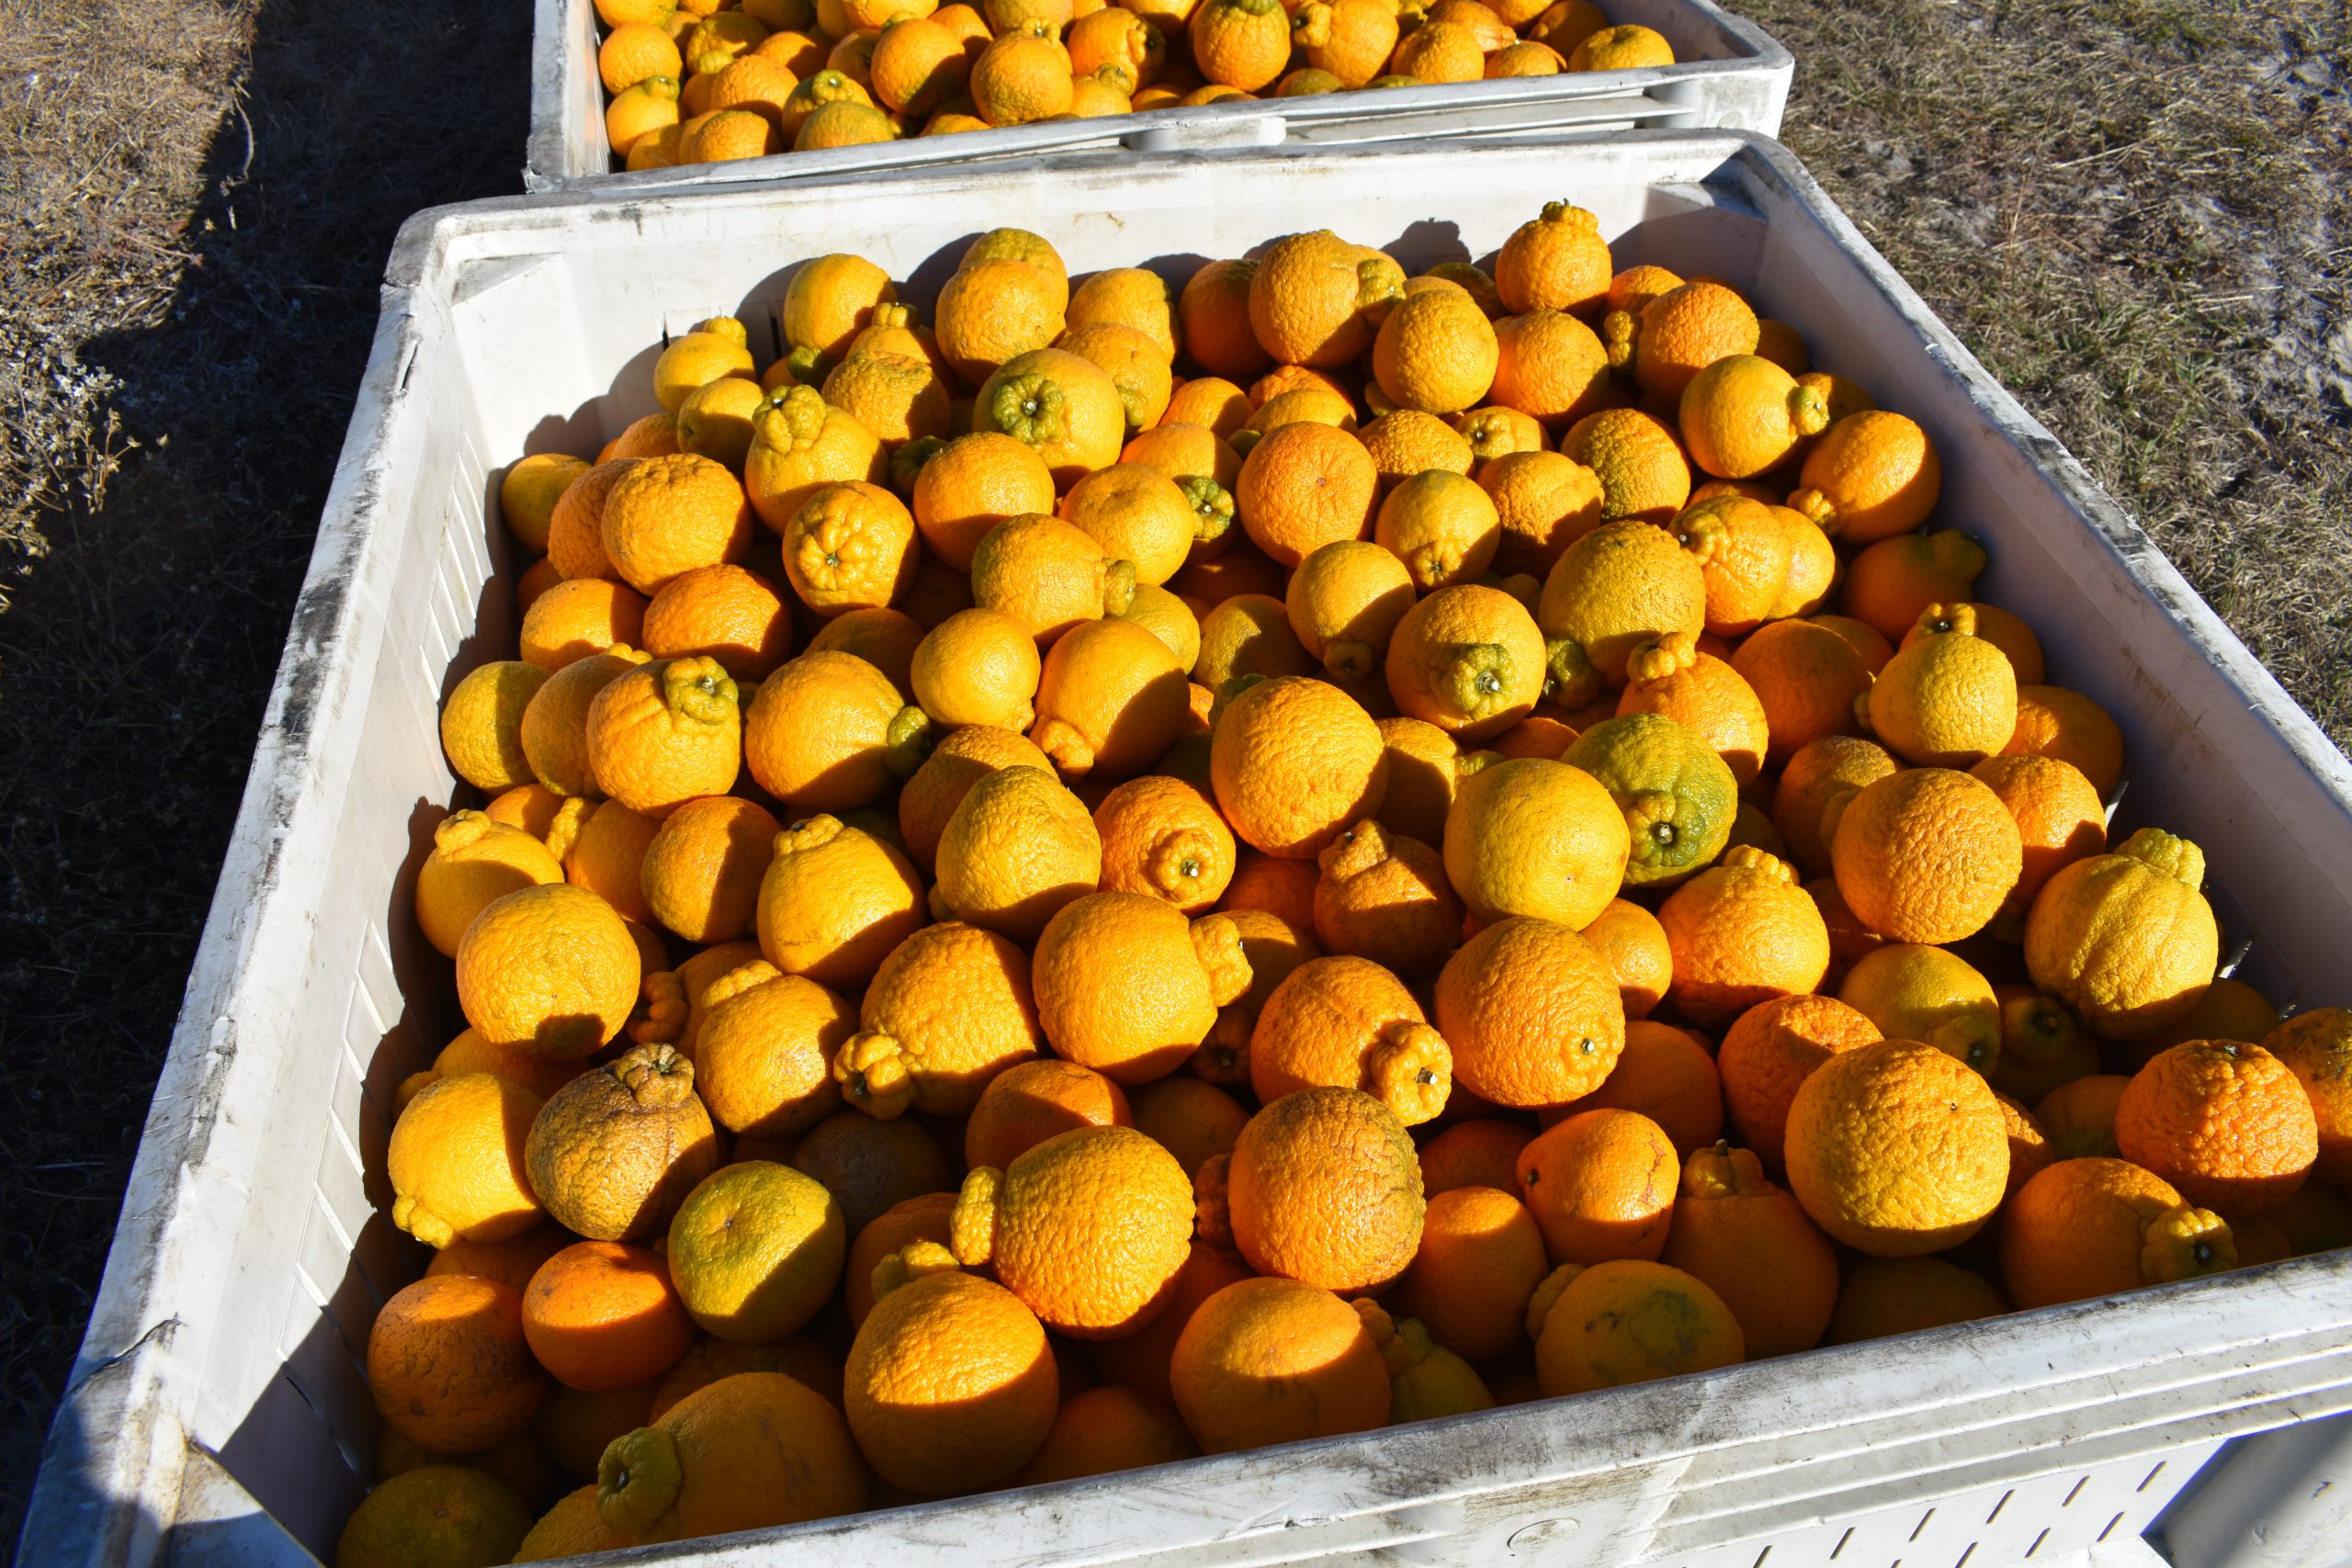
While the majority of Shiranui mandarins on the market are grown in California, the variety can be grown here in Florida and several citrus growers in North Florida and South Georgia have began to experiment with plantings in the region. Homeowners, too, can try their hand at growing the variety as many Florida certified citrus nurseries carry the variety. For more information on different citrus varieties, contact your local UF/IFAS Extension Agent.
by Danielle S. Williams | Nov 13, 2020
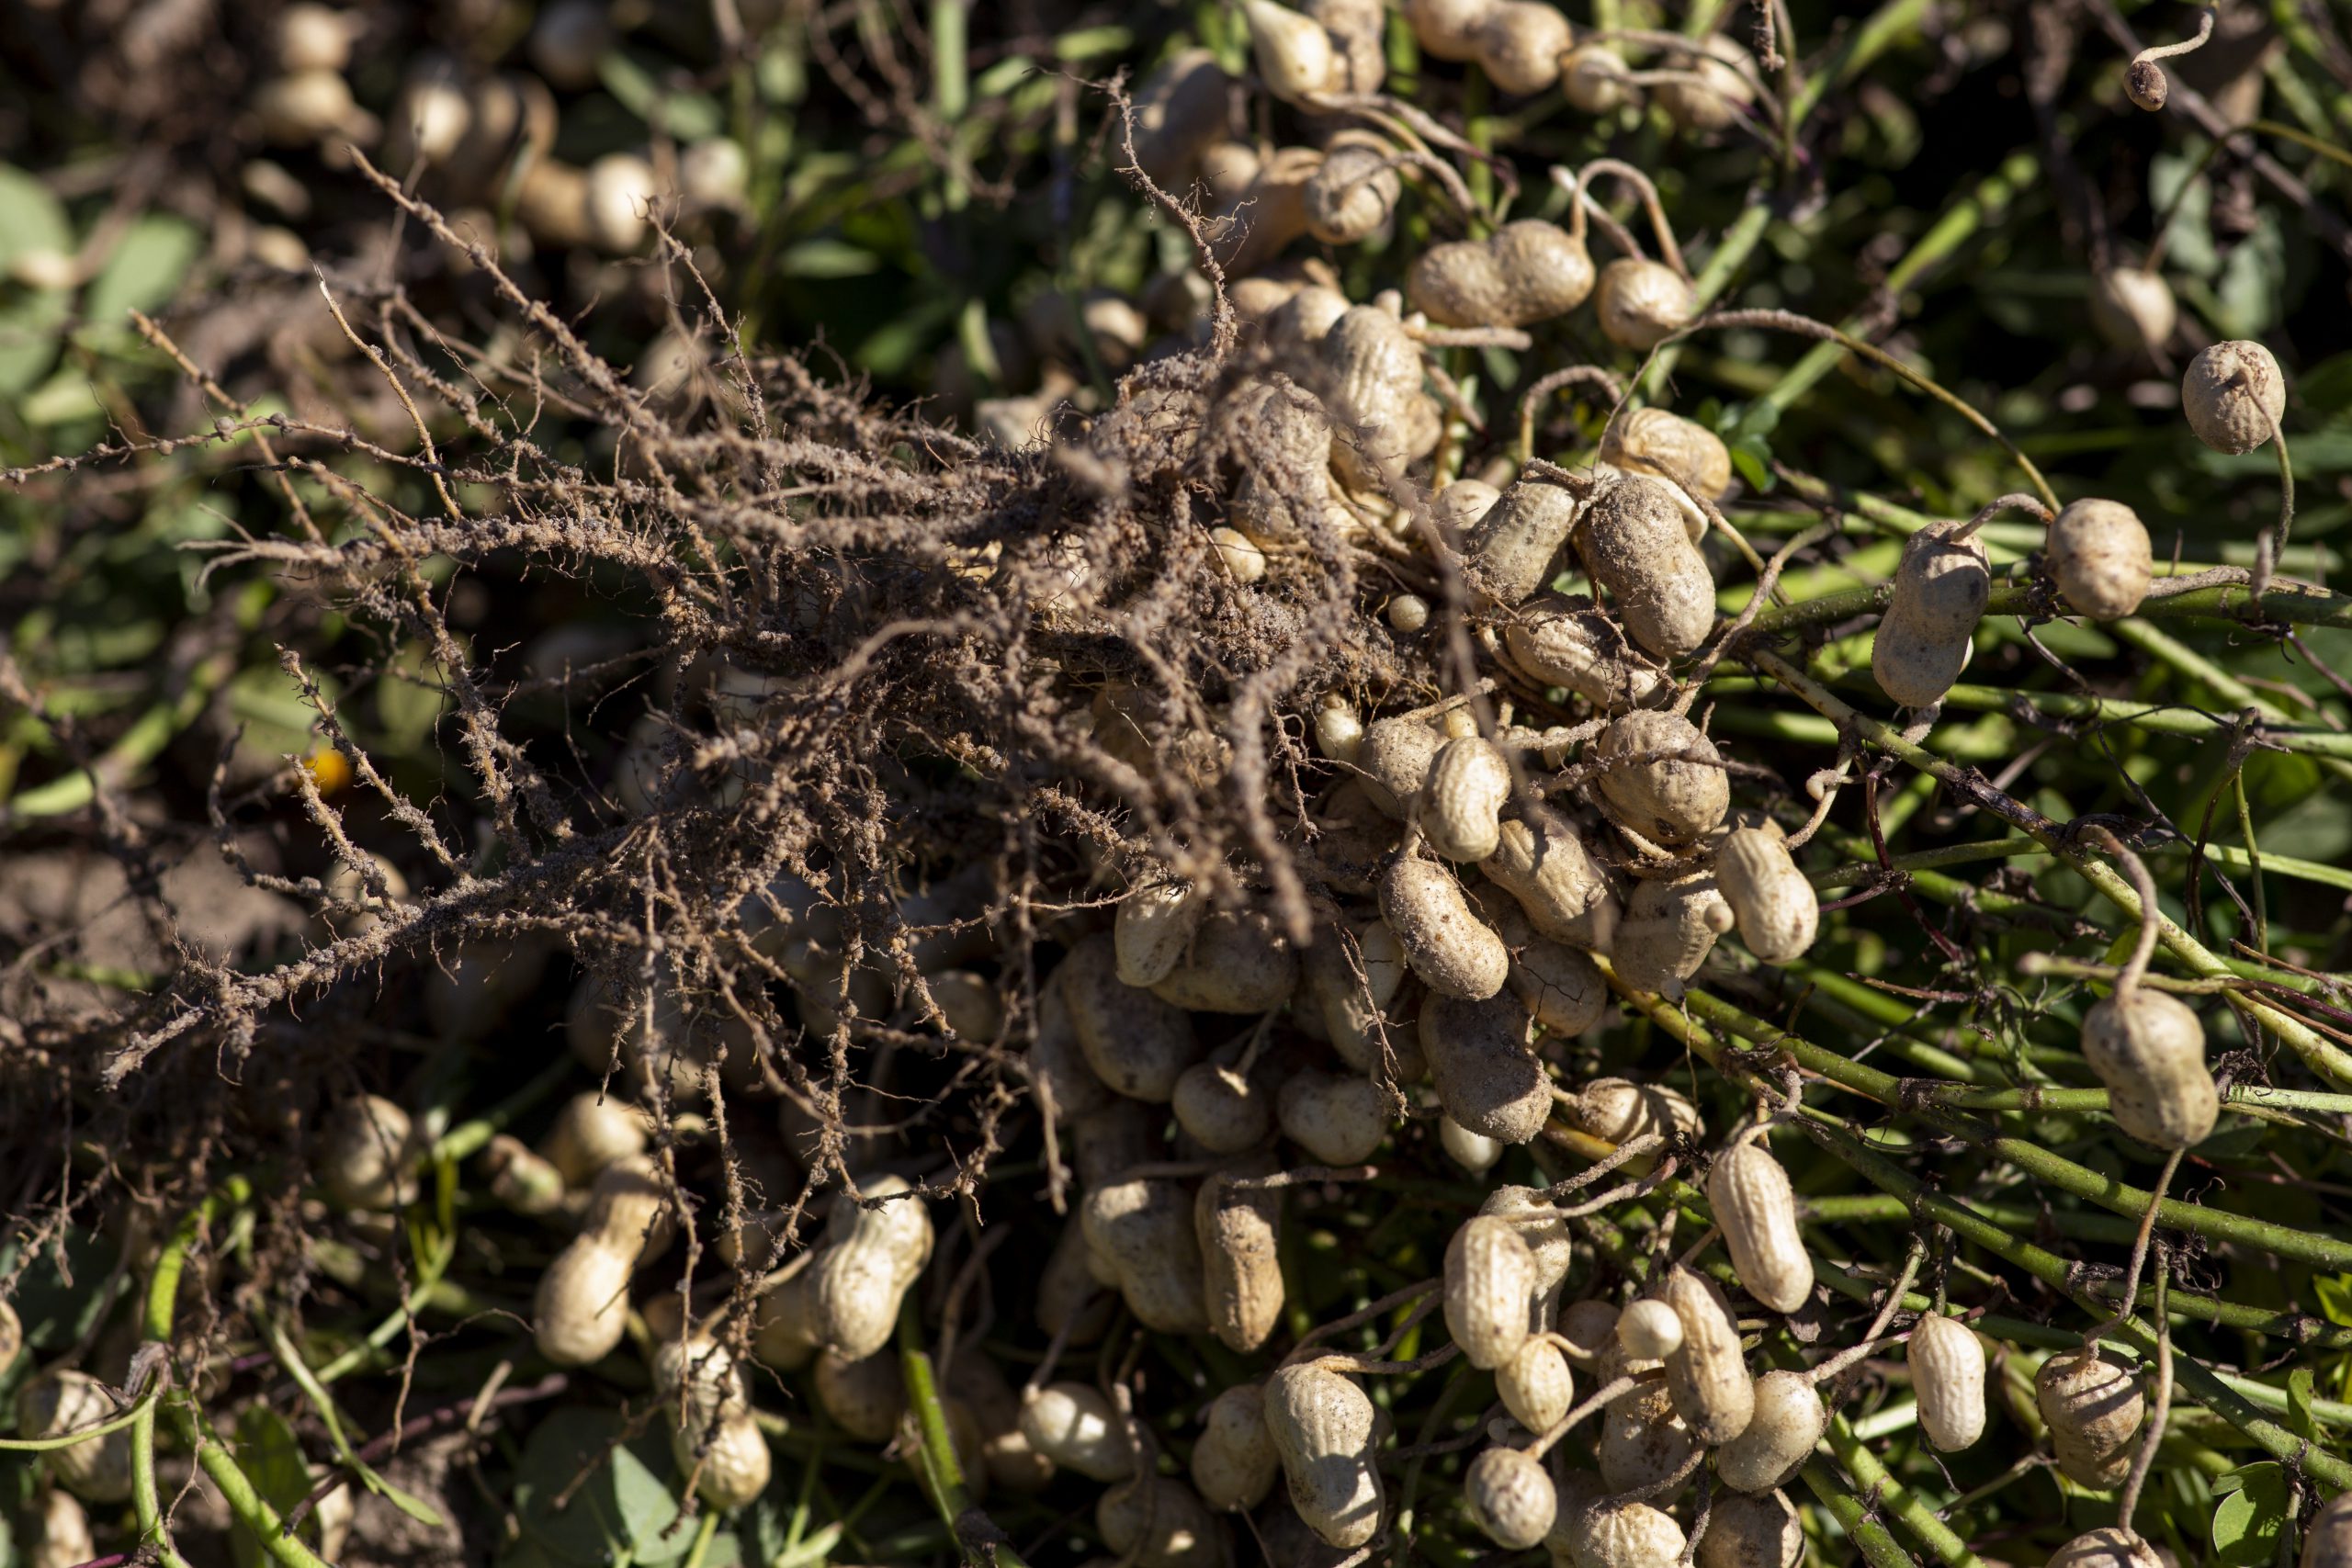
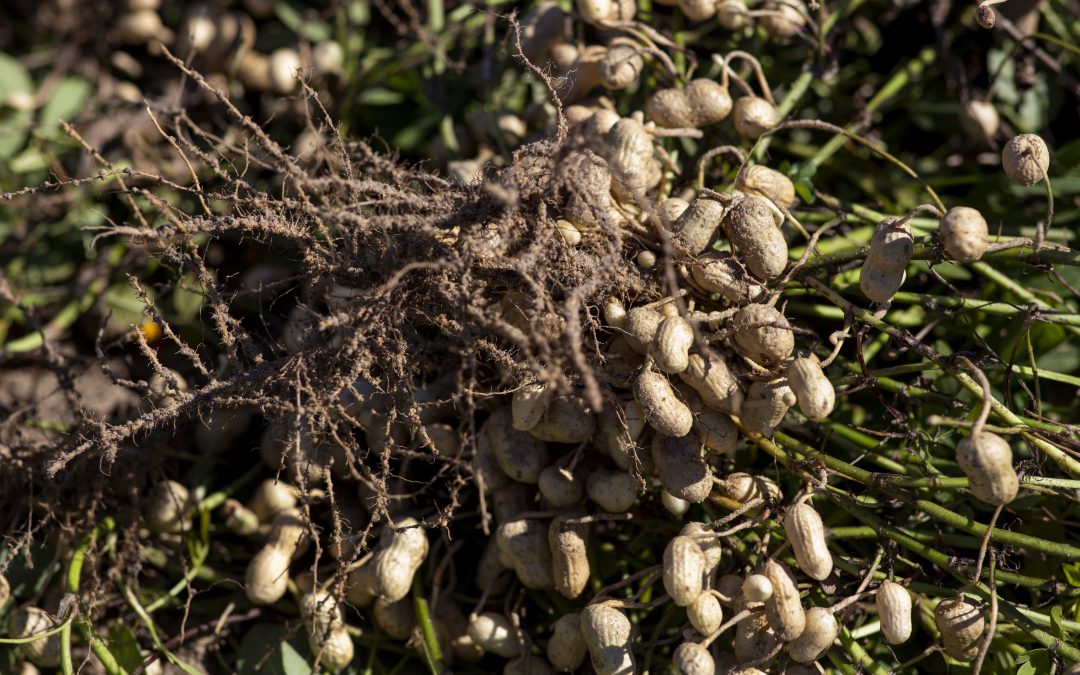
Peanuts, also known as groundnuts, earthnuts or goobers have a long history of cultivation. Unlike other nuts, peanuts are grown underground and not on a tree (hence the name nickname groundnut or earthnut). Originally native to South America, peanuts made their way to North America from Africa, where they were introduced by African slaves in the early 1800’s.

Overturned peanuts in a field ready to be harvested. Photo credit: UF/IFAS
First grown in Virginia, peanuts were grown mainly for oil, food, and as a cocoa substitute. During this time, they were regarded as food for livestock and the poor. It wasn’t until the late 1800’s did their demand increase as there was a need for an affordable, high-protein food during the Civil War and world wars. Their popularity also increased when P.T. Barnum began selling hot roasted peanuts at circuses.
In the 1900’s, peanuts became a significant agricultural crop when the cotton boll weevil threatened the South’s cotton crop. Through the research findings and suggestions of Dr. George Washington Carver, peanuts were grown as a successful cash crop and contributed greatly to the sustainability of the farm. Though Dr. Carver did not invent peanut butter, he did invent more than 300 new uses for the peanut and peanut byproducts including shaving cream, leather dye, coffee, ink and shoe polish.
Now, peanuts are grown in 13 states, across the United States and the U.S. is the third largest producer of peanuts in the world. In 2019, Florida grew 155,000 acres of peanuts with a production value of roughly $119 million. Did you know you can even grow peanuts in your home garden? Check out the UF/IFAS EDIS publication: Producing Peanuts for Home Use to learn more!
Peanut Fun Facts:
- 99% of peanut farms are family-owned, businesses averaging 200 acres
- There are four different types of peanuts – Runner, Valencia, Spanish and Virginia
- Peanut plants are legumes and fix beneficial nitrogen back into the soil
- Peanut butter is an excellent source of niacin, and a good source of vitamin E and magnesium
- Peanuts do not contain cholesterol and are low in saturated fat
- Peanut butter accounts for half of all peanuts eaten in the U.S.
- It takes about 540 peanuts to make a 12-ounce jar of peanut butter
- There are enough peanuts in one acre to make 35,000 peanut butter and jelly sandwiches
- The average person will eat almost 3,000 peanut butter and jelly sandwiches in their lifetime
- Women and children prefer creamy peanut butter, while most men opt for chunky
- Peanut allergies affect just 0.6% of the U.S. population
UF/IFAS Peanut Butter Challenge
Help us fight hunger in the Panhandle by donating unopened jars of peanut butter to the Peanut Butter Challenge! Every year UF/IFAS Extension Offices across the Panhandle coordinate the Peanut Butter Challenge to address hunger and food insecurity in our area. You can support the challenge and help fight hunger by donating unopened jars of peanut butter, now through November 25th to your local UF/IFAS Extension office. Through a partnership with the Florida Peanut Producers Association and the Florida Peanut Federation, for every one pound of peanut butter you donate, TWO pounds are given back locally to those in need!


by Danielle S. Williams | Nov 4, 2020
 Danielle Sprague is the Agriculture and Natural Resources Extension Agent in Jefferson County, Florida and has been for almost three years. Danielle is originally from the land of Indian River Grapefruit, otherwise known as Vero Beach, Florida! Her Extension program areas include Agriculture, Horticulture and Natural Resources.
As a young girl, Danielle always thought she would be a nurse. She always wanted to help others and make a difference in her community. It wasn’t until she was exposed to the agriculture industry through 4-H in high school, did she realize there were other avenues to do so. With a newfound appreciation and passion for the agriculture industry, Danielle changed career paths completely.
She went on to earn her Bachelor’s degree in Agriculture Studies from Warner University in Lake Wales, Florida. While at Warner University, she completed internships at the UF/IFAS Citrus Research and Education Center as well as with Dow AgroSciences. Following that, she earned her Master’s degree in Entomology from the University of Florida where she worked as a Graduate Research Assistant at the UF/IFAS North Florida Research and Education Center in Quincy. She considers her current position as an Agriculture Extension Agent her dream job.
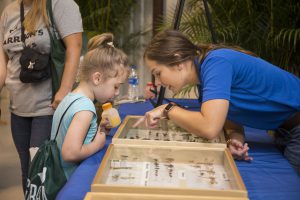
Danielle teaching about insects.
When she isn’t working, Danielle enjoys boating, fishing, hunting, camping, visiting different agritourism operations, pretty much anything outdoors! She also enjoys cooking and baking.
by Danielle S. Williams | Sep 14, 2020
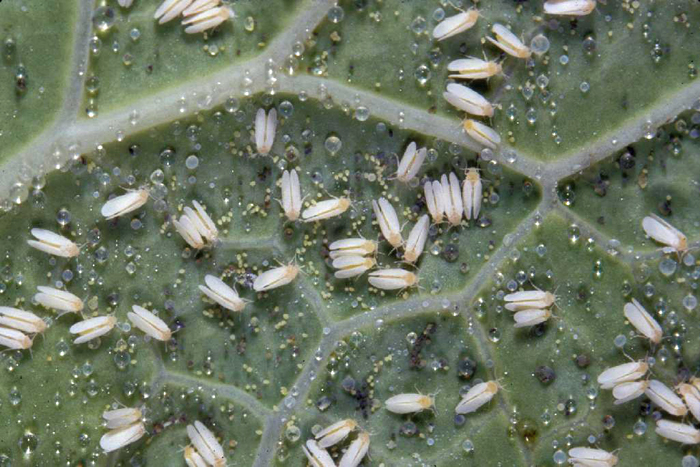
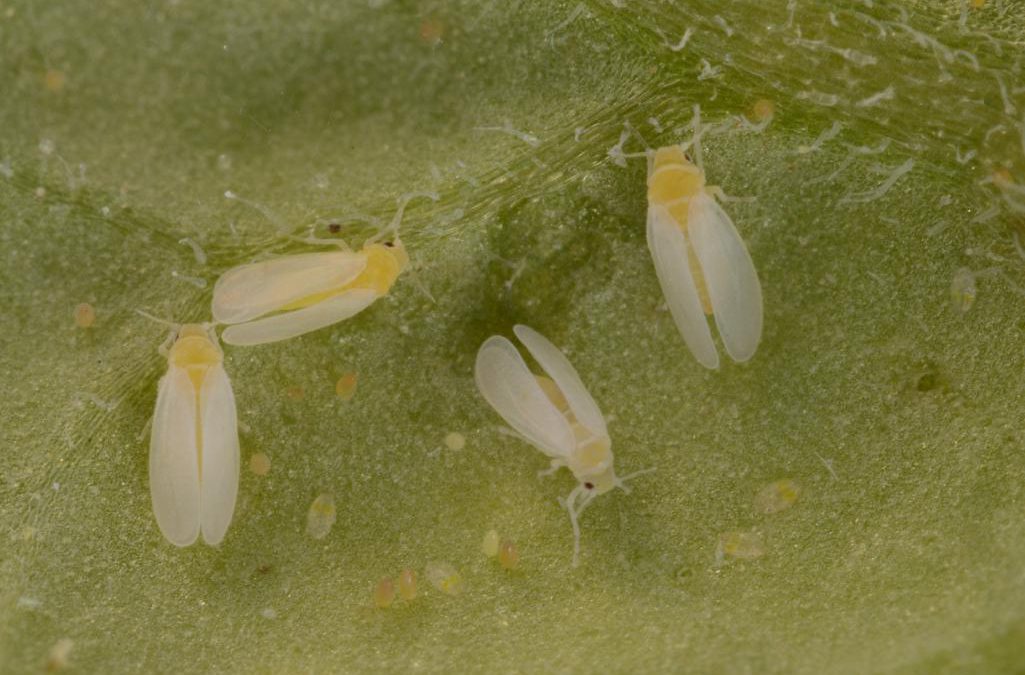
Whitefly adults and eggs. Photo Credit: James Castner, University of Florida, IFAS.
Whiteflies are a pest we typically see in the fall but if you look around, you’ll notice high densities of them now. Despite their name, whiteflies are more closely related to an aphid or scale insect than a fly. They are 1/16 of an inch long (about the size of a gnat) and resemble small moths. They can be found on the undersides of host plant leaves and their behavior is easily recognizable as they scatter from the leaves when they are disturbed.
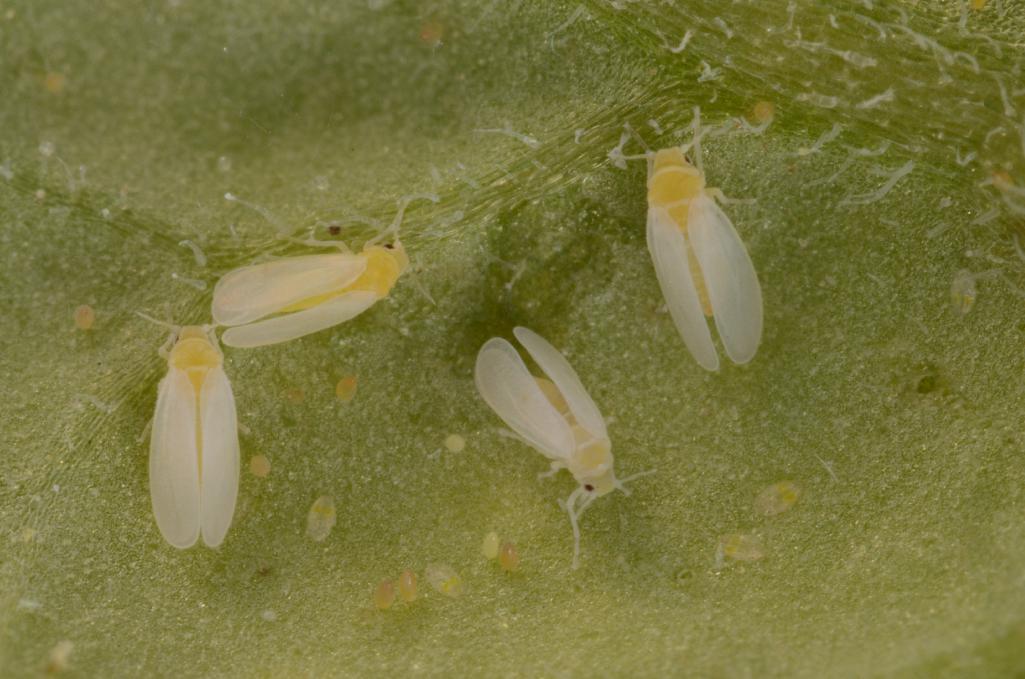
Silverleaf Whitefly. Photo by Lyle Buss, UF/IFAS
You’ll find whiteflies on a variety of plants ranging from ornamentals such as ficus, poinsettia, hibiscus, and ivy to vegetables like tomato, pepper, eggplant and okra. Some species feed on sweet potatoes, vegetables in the cabbage family, and citrus.
There are several species of whiteflies in Florida but the three main species of agricultural and horticultural concern are the silverleaf whitefly (also known as the sweet potato whitefly), citrus whitefly, and the ficus whitefly. Whiteflies have piercing-sucking mouthparts with which they feed on plants. The top side of leaves on infested plants may become pale or spotted due to whiteflies feeding on the undersides of leaves. It’s not uncommon for an infestation of whiteflies to go unnoticed until leaves turn yellow or drop unexpectedly. Some whitefly species can cause greater damage by transmitting plant viruses.
Whiteflies, along with aphids, scales and mealybugs excrete a sugary substance known as honeydew. This honeydew coats the surface of the plant where the insect feeds and facilitates the growth of a black fungus called sooty mold. Ants and wasps also feed on the honeydew secreted by these insects and may serve as an indicator that a plant is infested with whiteflies or other honeydew secreting insects.
Adult female whiteflies can lay anywhere from 200-400 eggs in her lifetime. The eggs are laid on the undersides of leaves. These eggs hatch into nymphs (also known as crawlers) after 4-12 days. From there, the crawlers will insert their mouthparts into the leaves of host plants where they will molt, pupate and then become adult whiteflies. This process takes anywhere from four weeks to six months, depending on temperature and humidity.
Whiteflies are difficult to control due to their prolific reproductive cycle. It is difficult to get rid of whiteflies once there is an infestation. As with dealing with most insects, proper plant selection, irrigation, and fertilization are critical for managing whiteflies. Removing sources of infestation such as weeds around the garden or old plant debris around the yard can help prevent whitefly populations from carrying over to the next season. Natural predators such as lady beetles, lacewings and predatory mites can help keep whitefly populations in check.
Insecticides such as insecticidal soap or horticultural oil can be used to help reduce whitefly populations. Be sure to always read the label for instructions. For more information on whiteflies, please contact your local UF/IFAS Extension Office.
by Danielle S. Williams | May 7, 2020
‘Early Pride’ Tangerine. Photo courtesy of Danielle Sprague.
Citrus is not only a vital part of our economy in Florida but it’s also a major component in our landscapes. Having grown up in the major grapefruit producing region of Florida, the citrus industry is near to my heart. So for me, it is very exciting to see all of the interest in the citrus industry in North Florida despite the devastation the industry is facing in South Florida. With many folks spending more time outdoors and working in the landscape, I wanted to share some ways homeowners can enjoy citrus in their landscape all while protecting the future of the citrus industry in North Florida!
First thing’s first…identification!
It’s important to be aware of some of the major pests and diseases affecting citrus. Fortunately for us in the Panhandle, many of the major pests and diseases troubling citrus to the south haven’t become quite as widespread in our area, and with your help we can keep it that way! Regularly scouting the citrus in your landscape and detecting any major pests or diseases early will be very important to prevent it from spreading.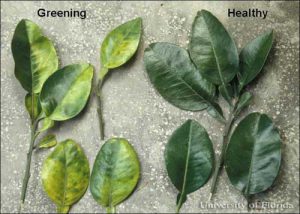
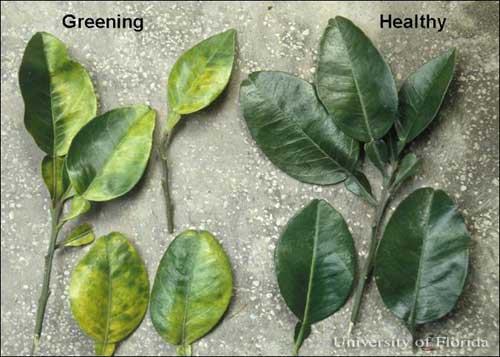
The first major disease all Floridians should be aware of is citrus greening. Citrus greening or huanglongbing (HLB) is the major disease affecting the citrus industry worldwide. It is a bacterial disease caused by the bacteria Candidatus Liberibacter. The bacterium is spread from tree to tree by a tiny insect known as the Asian citrus psyllid. Psyllids spread the disease by feeding on infected trees and moving on to non-infected trees. Once the tree is infected, there’s little hope for survival as there is no cure for citrus greening.
Citrus greening can be difficult to diagnose as it can be easily confused with nutrient deficiency. Symptoms of citrus greening include yellowing of the veins and a blotchy mottle pattern. Nutrient deficiencies tend to have a symmetrical pattern on each side of the leaf vein whereas citrus greening is asymmetrical. Overall, a tree infected with citrus greening will appear unhealthy with discolored leaves, a thin canopy, and reduced fruit production.

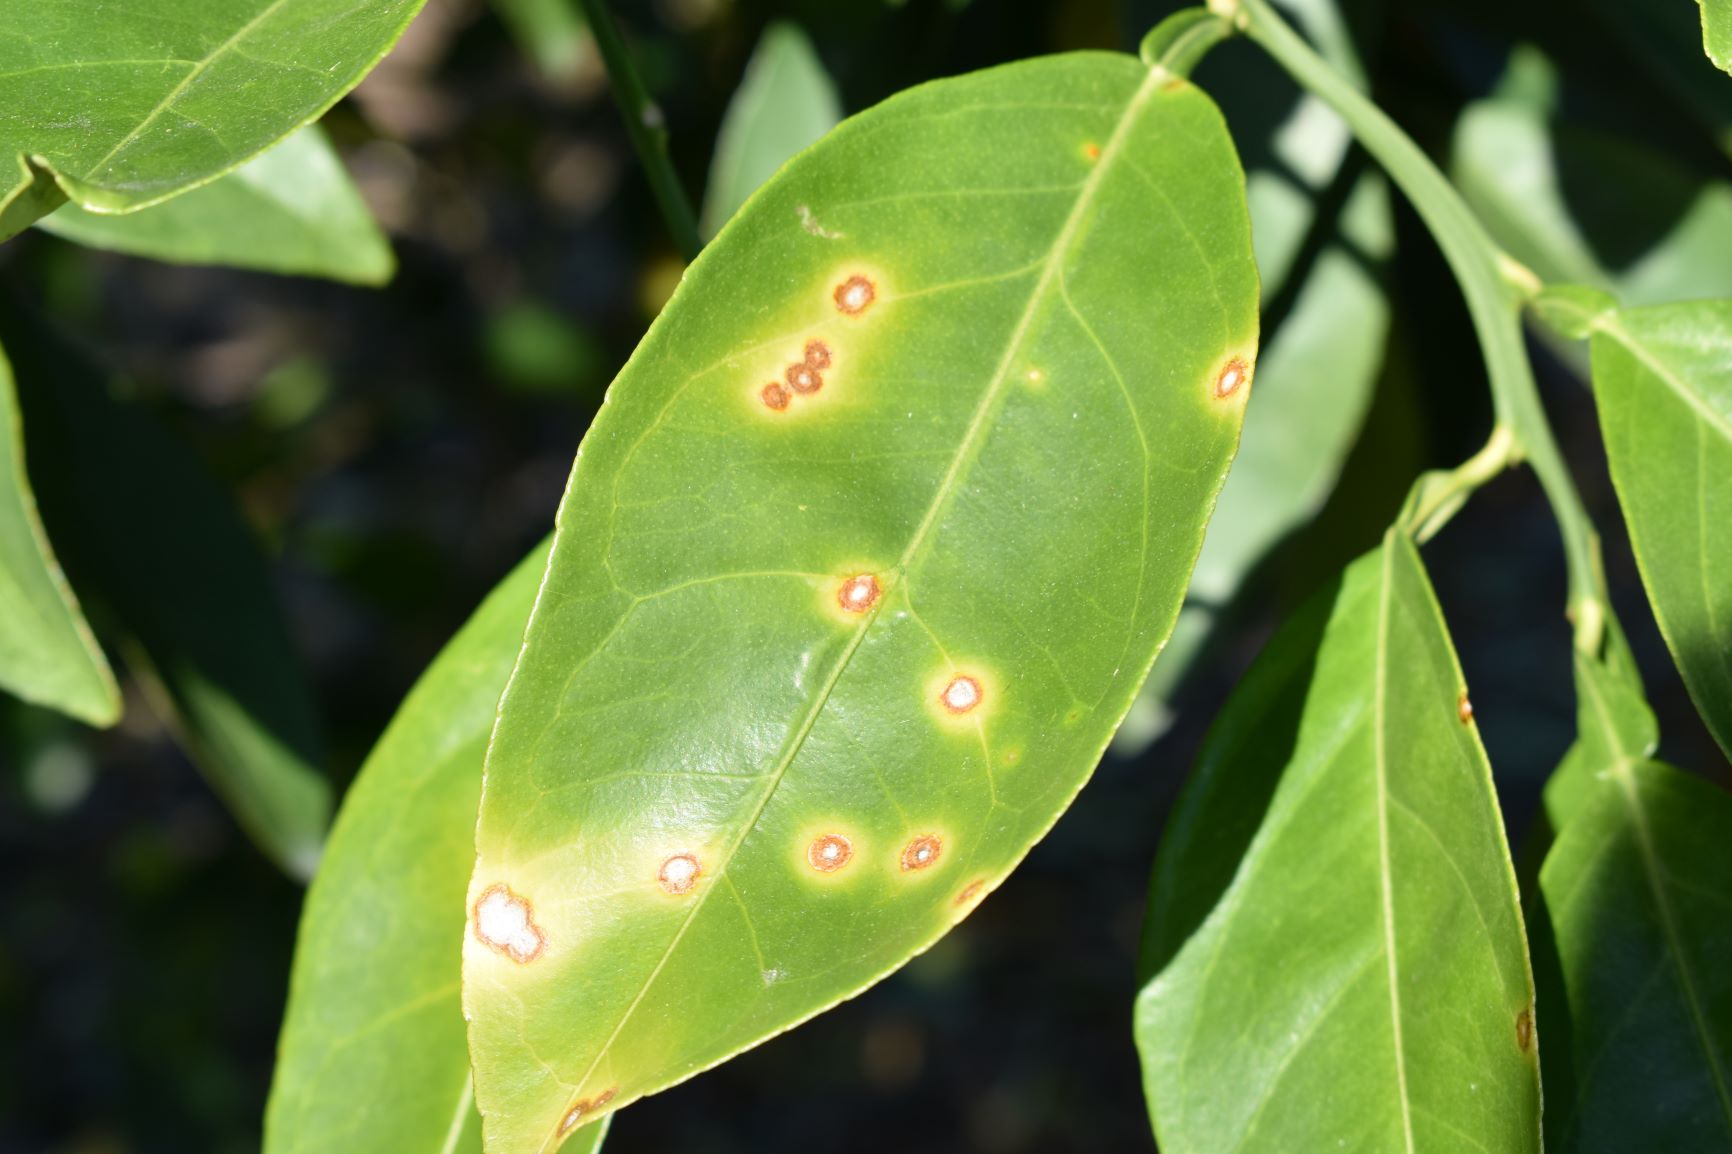
Citrus Canker presenting on a leaf. Photo courtesy of Danielle Sprague.
Another disease to be on the lookout for is citrus canker. Citrus is also caused by a bacterial pathogen but is spread primarily though wind, rain and human movement. Citrus canker is highly contagious and can spread very rapidly. Transporting infected plant material from an area where canker is present is the primary means of spreading the pathogen.
Purchase from a certified nursery!
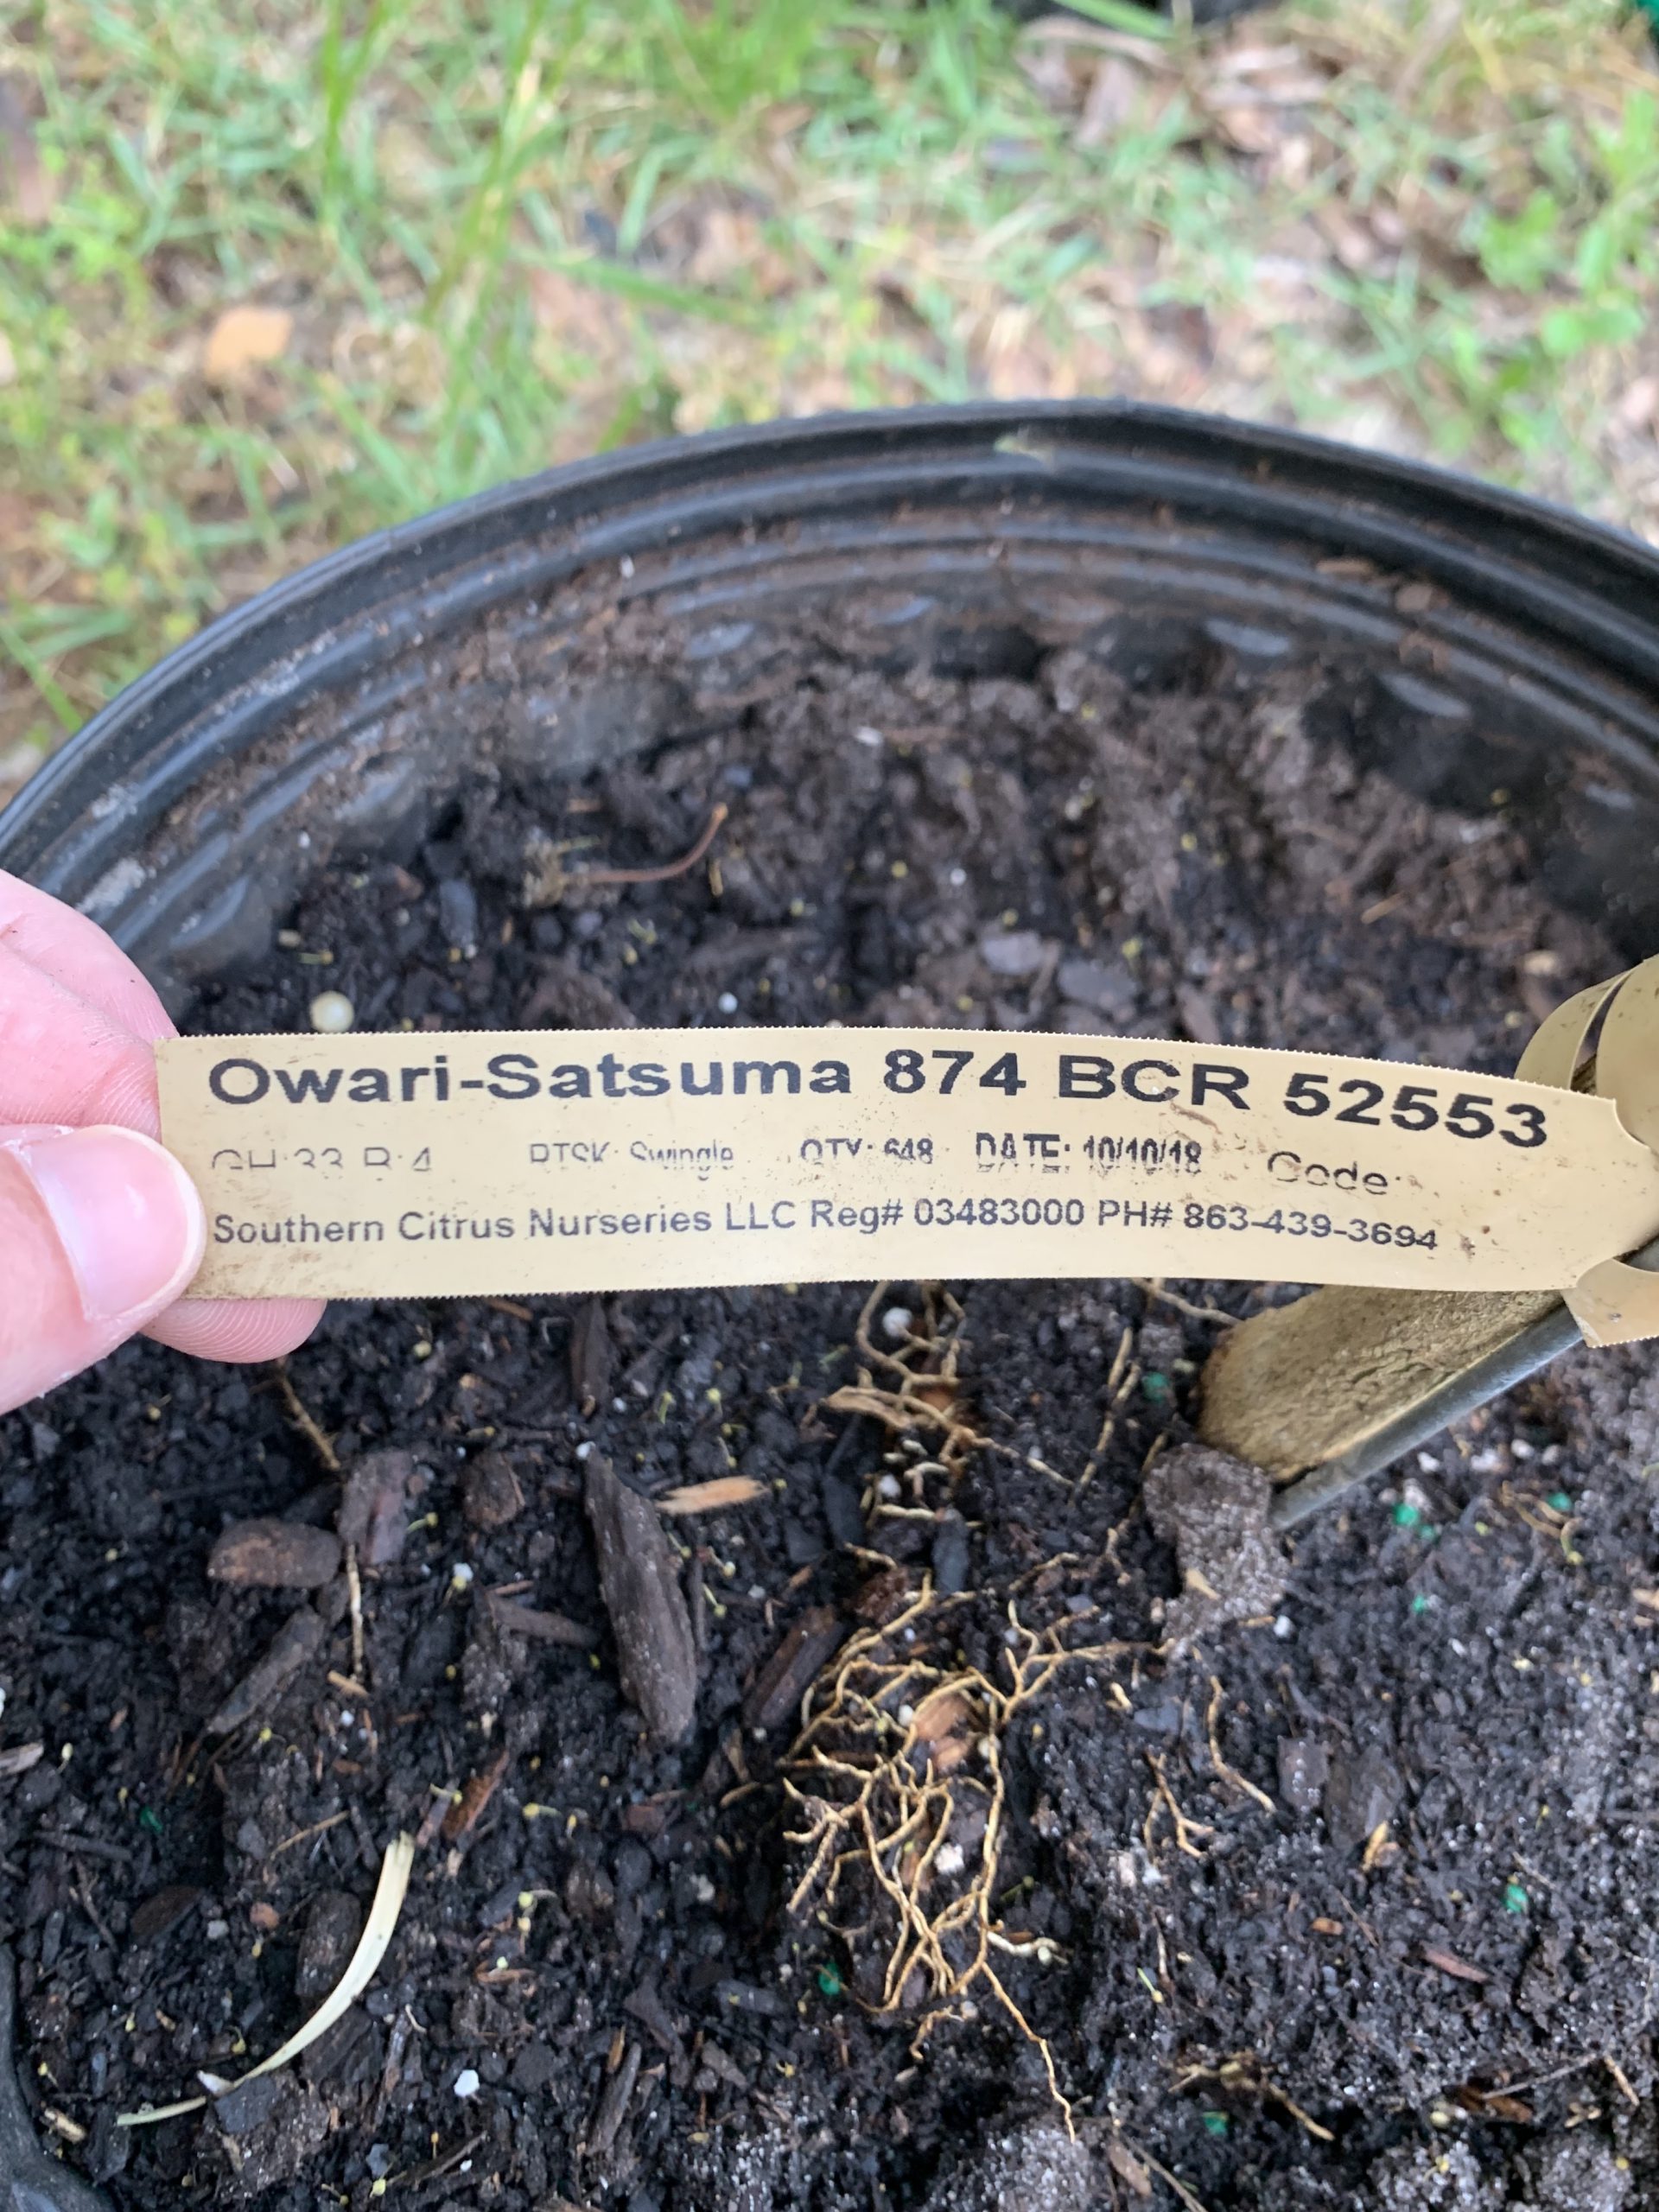
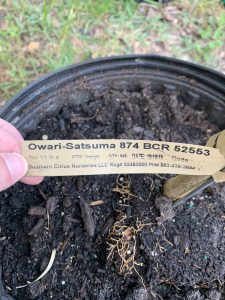
One of the absolute most important things you can do if you are planting citrus is to purchase your trees from a certified citrus nursery! A certified nursery has been inspected by the state to confirm that the nursery is producing clean, disease free trees. Citrus trees grown in a certified nursery will have a tag with the name of the nursery, registration number, the tree variety, and rootstock.
When buying a tree from a secondary retailer, you will want to be sure to examine the tree for any signs and symptoms of pests and diseases. A healthy tree will have dark green leaves, a smooth trunk and show no signs of wilt.
Certified nursery label. Photo courtesy of Danielle Sprague.
Other ways to protect citrus:
- Learn how to properly care for citrus trees. Proper watering an fertilization will make them less susceptible to pest and disease.
- Report any suspected pest and diseases to the Florida Department of Agriculture and Consumer Services (FDACS) Division of Plant Industry by calling 1-888-397-1517
- Don’t bring back plants or fruit into Florida! They could introduce new pests and diseases.
Keeping the Panhandle free of citrus greening and citrus canker will play a major role in the success of the citrus industry in North Florida. For assistance with pest and disease identification or for more information, contact your local Extension agent.