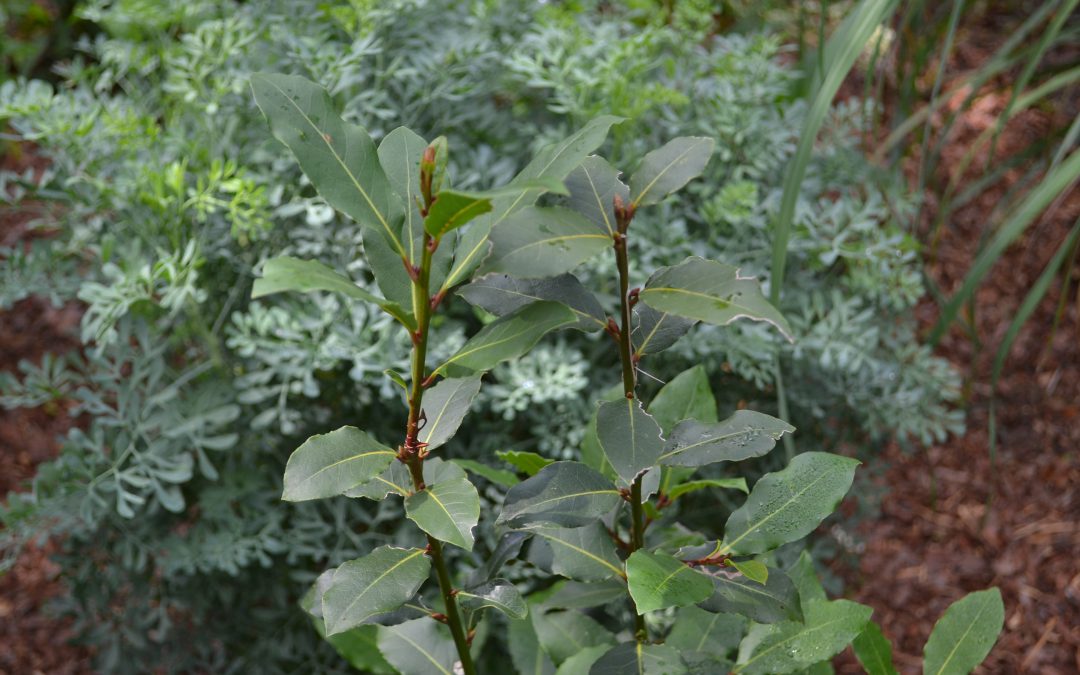
The bay laurel tree in the Escambia County Demonstration Garden had some dead branches on the outer canopy. Further investigation led us to the culprit, the black twig borer. Learn more In the Garden with UF IFAS Extension Escambia County.
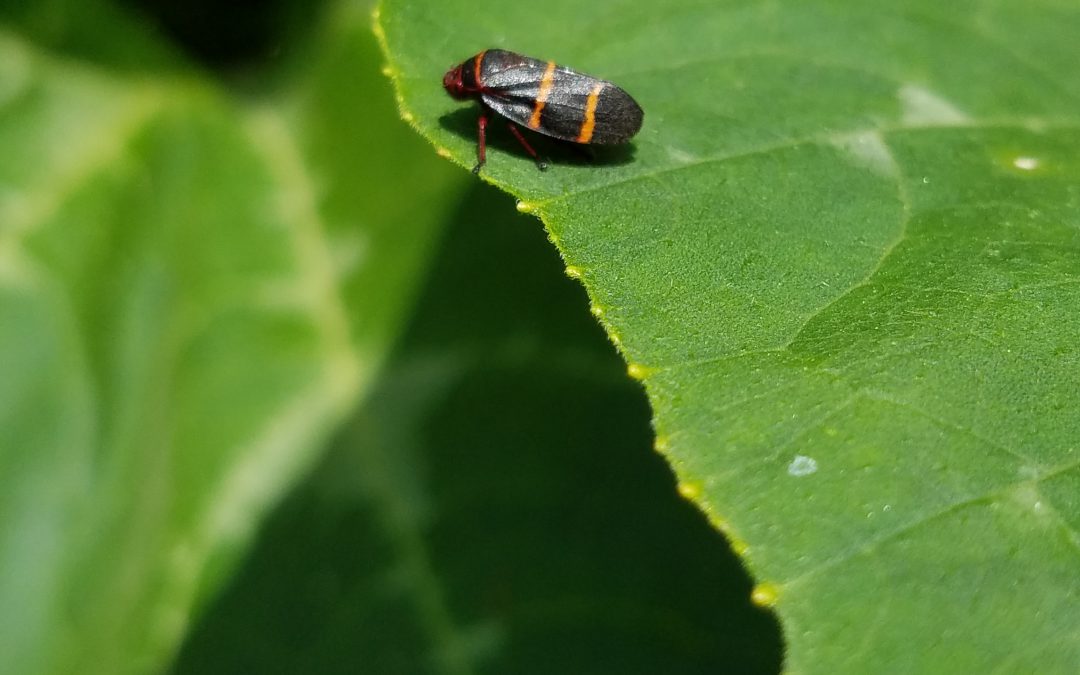
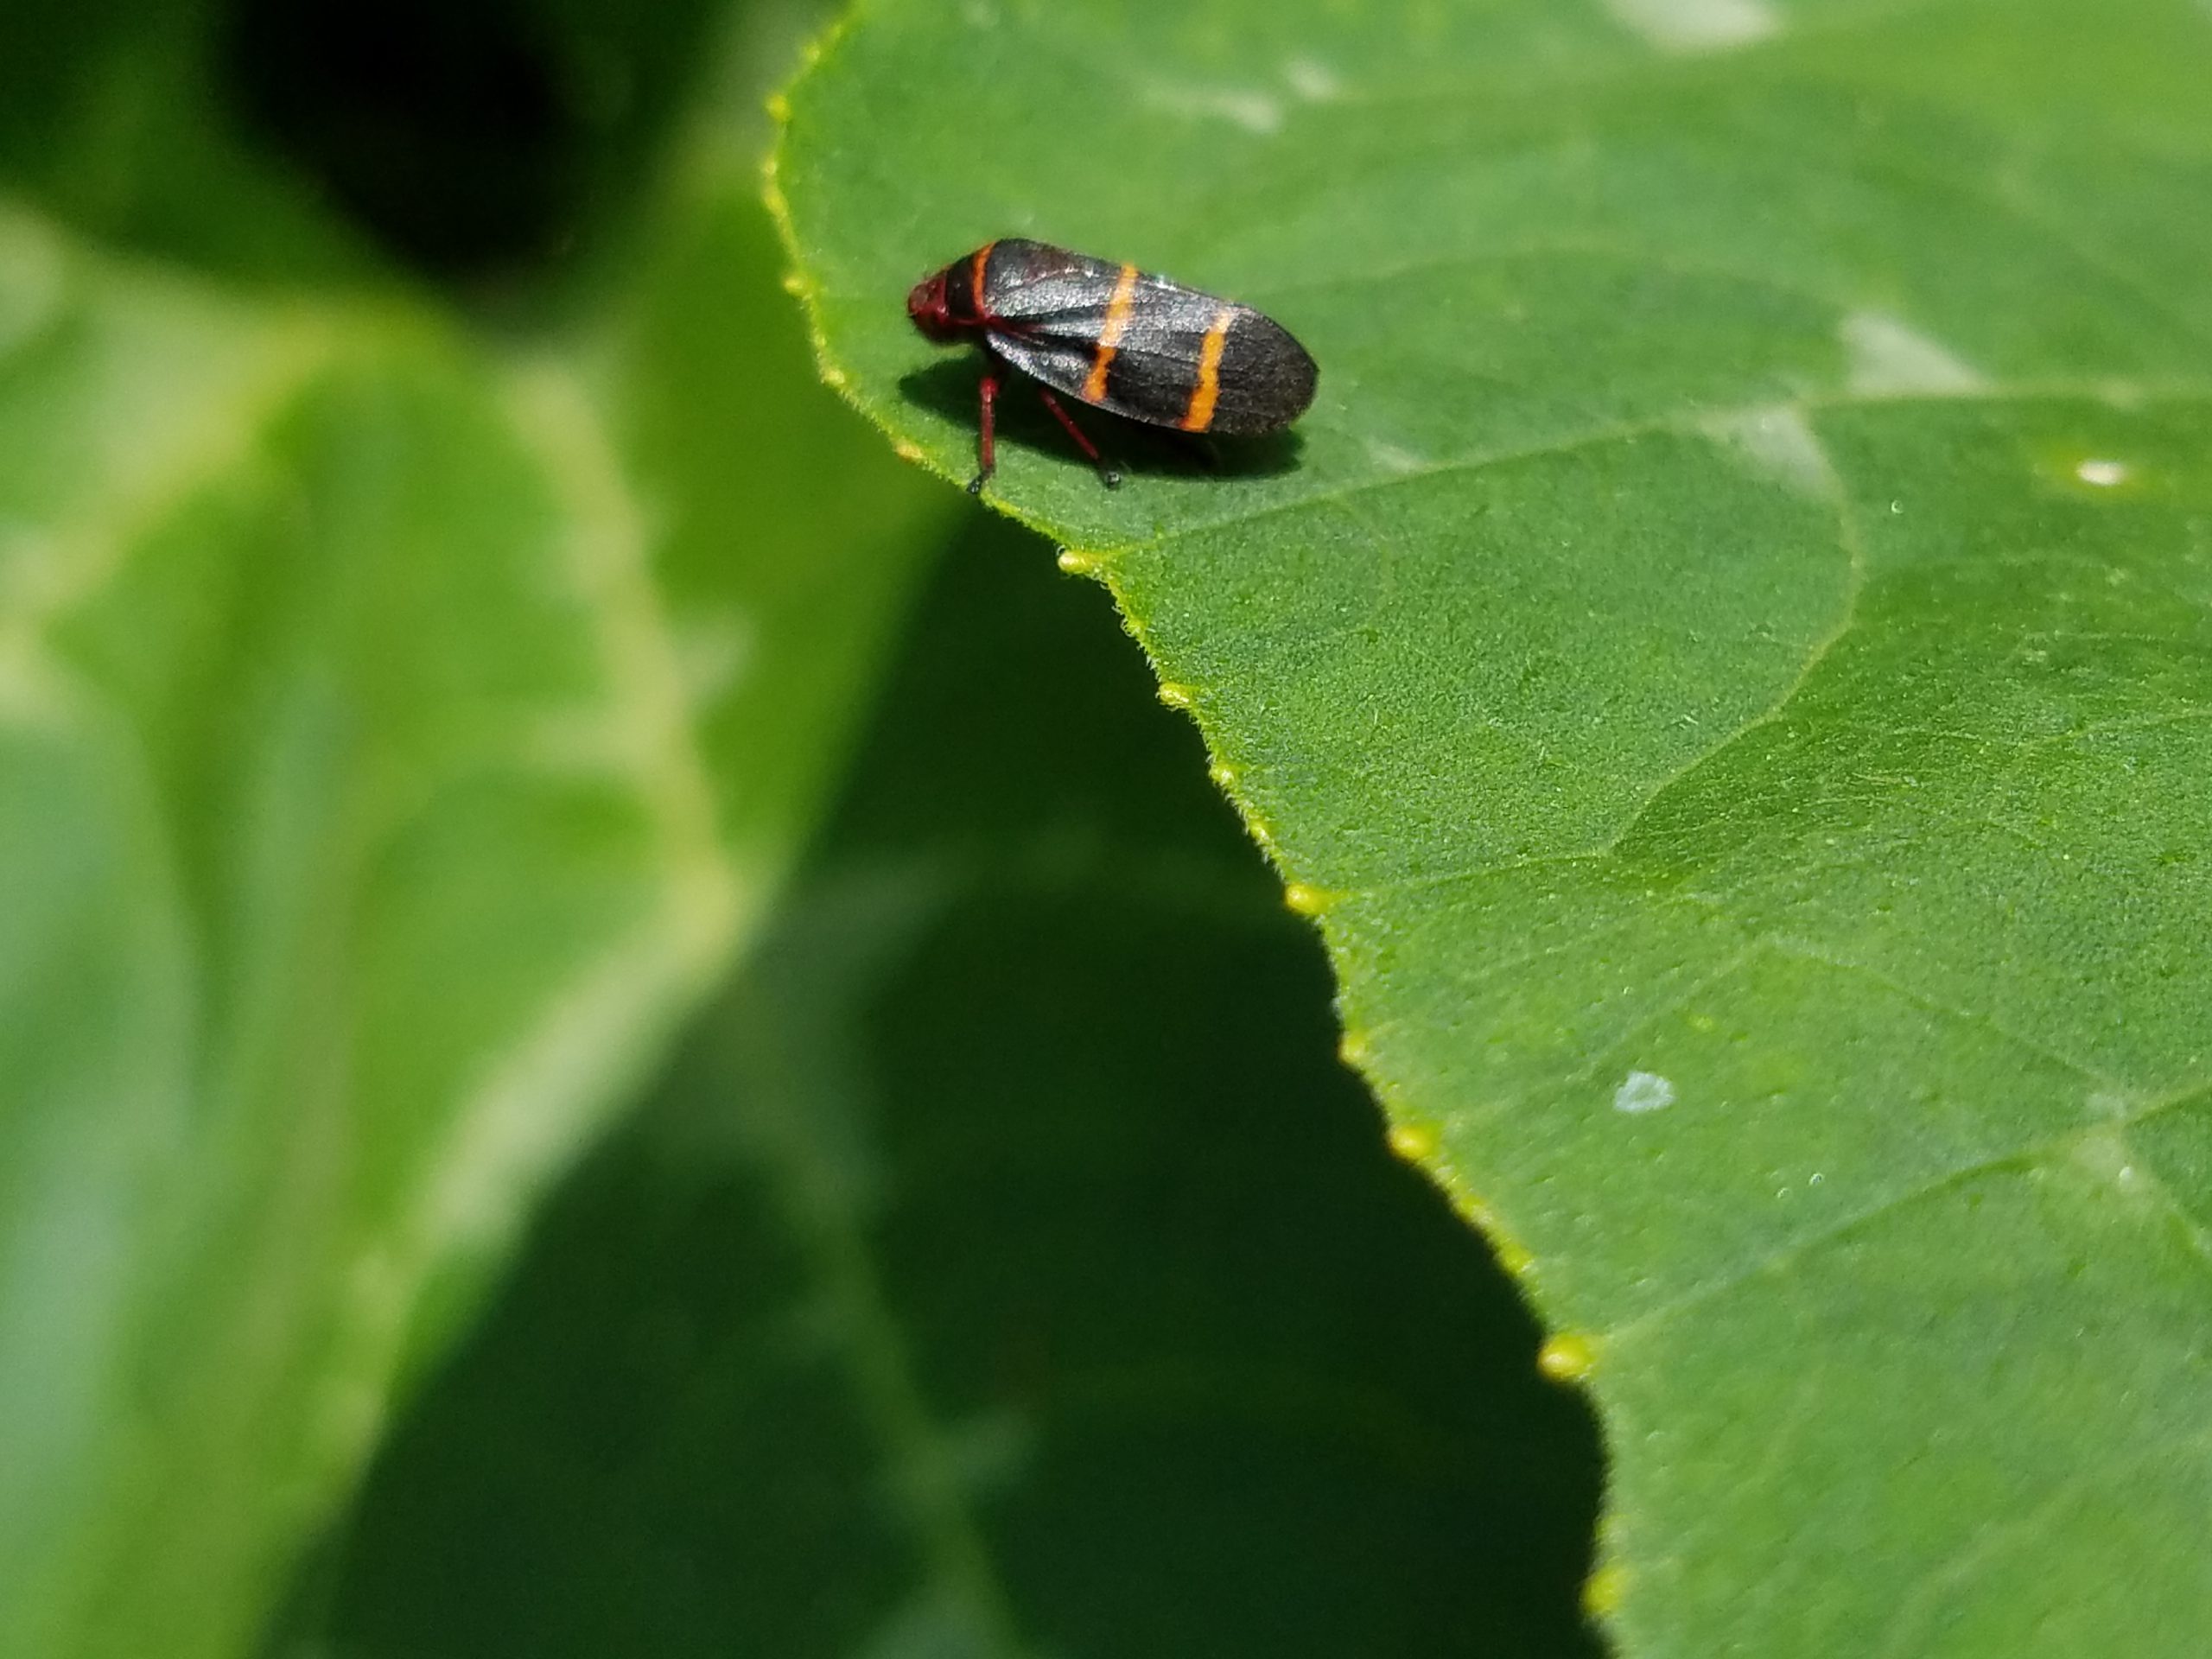
Two-Lined Spittlebug. Photo courtesy of Evan Anderson.
Problems with turfgrass come in all shapes and sizes. One that may affect your lawn is an insect that has two very distinct life stages. Named for the two distinct stripes on its back, the two-lined spittlebug looks like a plant or leafhopper during its adult life. When it is young, however, it is often camouflaged and not readily visible. The small green nymph hides in a mass of white froth or spittle that it secretes for protection.
The two-lined spittlebug is not a picky eater, though it cannot harm people or pets. It feeds on a variety of plants, piercing the stem or leaves with its mouthparts and sucking out the juices within. While it may not be picky, it does have favorites. Holly bushes are one food of choice for this pest and centipedegrass is another, so those growing this grass should keep an eye open. The protective spittle masses are usually close to the ground, so they may not be readily visible from above.
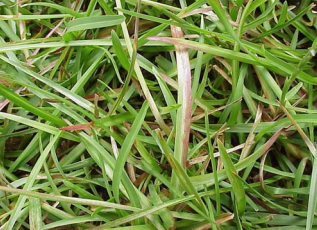
Centipedegrass displays feeding injury from spittlebugs in the form of purple or white striping along its leaf blades. If infestations are particularly heavy, the grass may turn yellow, then brown, and eventually curl up as the leaves die. Populations of the adults that cause most of this damage are typically largest in June, with another spike around August or September as the year’s second generation matures. Years with excess rainfall in spring and summer will see increased numbers of spittlebugs.
Spittlebug damage on Centipedegrass. Photo courtesy of Larry Williams, Okaloosa County Horticulture Agent.
If you are having a problem with these pests, make sure you are keeping your lawn as healthy as possible with good cultural practices. Proper watering, fertilization, and mowing to the appropriate height can all help to keep grass strong enough to withstand pests. Remove excess thatch, as it holds moisture and can favor the growth of spittlebugs.
Insecticides may be used to help with control as well. Options for Florida include pyrethroids such as bifenthrin, permethrin, and cyfluthrin. Products with the active ingredients imidacloprid and carbaryl are other options. Read the label of any product you choose. If you have questions or need help in identifying a pest problem in your lawn, contact your local Extension office.
During these unusual times, the Gardening in the Panhandle Team has been working to bring you quality remote content through this online newsletter. In that vein, we have developed some new educational programming for our loyal readers.
We are providing one hour “Gardening in the Panhandle LIVE!” sessions on Zoom. These will occur during lunch hour, from 12:00 to 1:00 CDT. They will also be hosted on the Gardening in the Panhandle Facebook page and recorded if you can’t participate live. So, whether you are at home or work, bring your lunch up to your desk (or smart device) and enjoy Gardening in the Panhandle Live!
Click on the topic below to pre-register and submit your questions one week in advance.
Archived videos with closed captioning are linked to topics about one week after event airs.
When we go through dry periods in North Florida some residents become interested in drought-tolerant plants to include in their landscapes. The need for irrigation can be reduced when drought-tolerant plants are used. But don’t overuse these plants. Remember we have periods of rainy weather, too.
Gulf Muhly Grass in Flower. Photo credit: Larry Williams
Some drought-tolerant plants have poor tolerance to the other extreme – too much water. There are a few plants that can tolerate both extremes but they are the exception. Avoid using drought-tolerant plants on naturally wet or poorly drained sites. But if you have the typical deep sandy well drained soil Florida is famous for, you’d do well to include some drought-tolerant plants on your site.
Drought-tolerant plants are especially well suited for areas that receive little to no irrigation.
Some plants are genetically better able to withstand drought. They have a built-in tolerance of drought. Many of our Florida native plants are designed to grow in our poor water holding sandy soils. Many of the plants native to arid areas of the world possess high drought-tolerance. These plants have characteristics that allow them to better survive dry weather. These features include thicker or waxier leaves, large surface root areas or deep roots and the ability to drop leaves in drought and regain them when moisture is adequate.
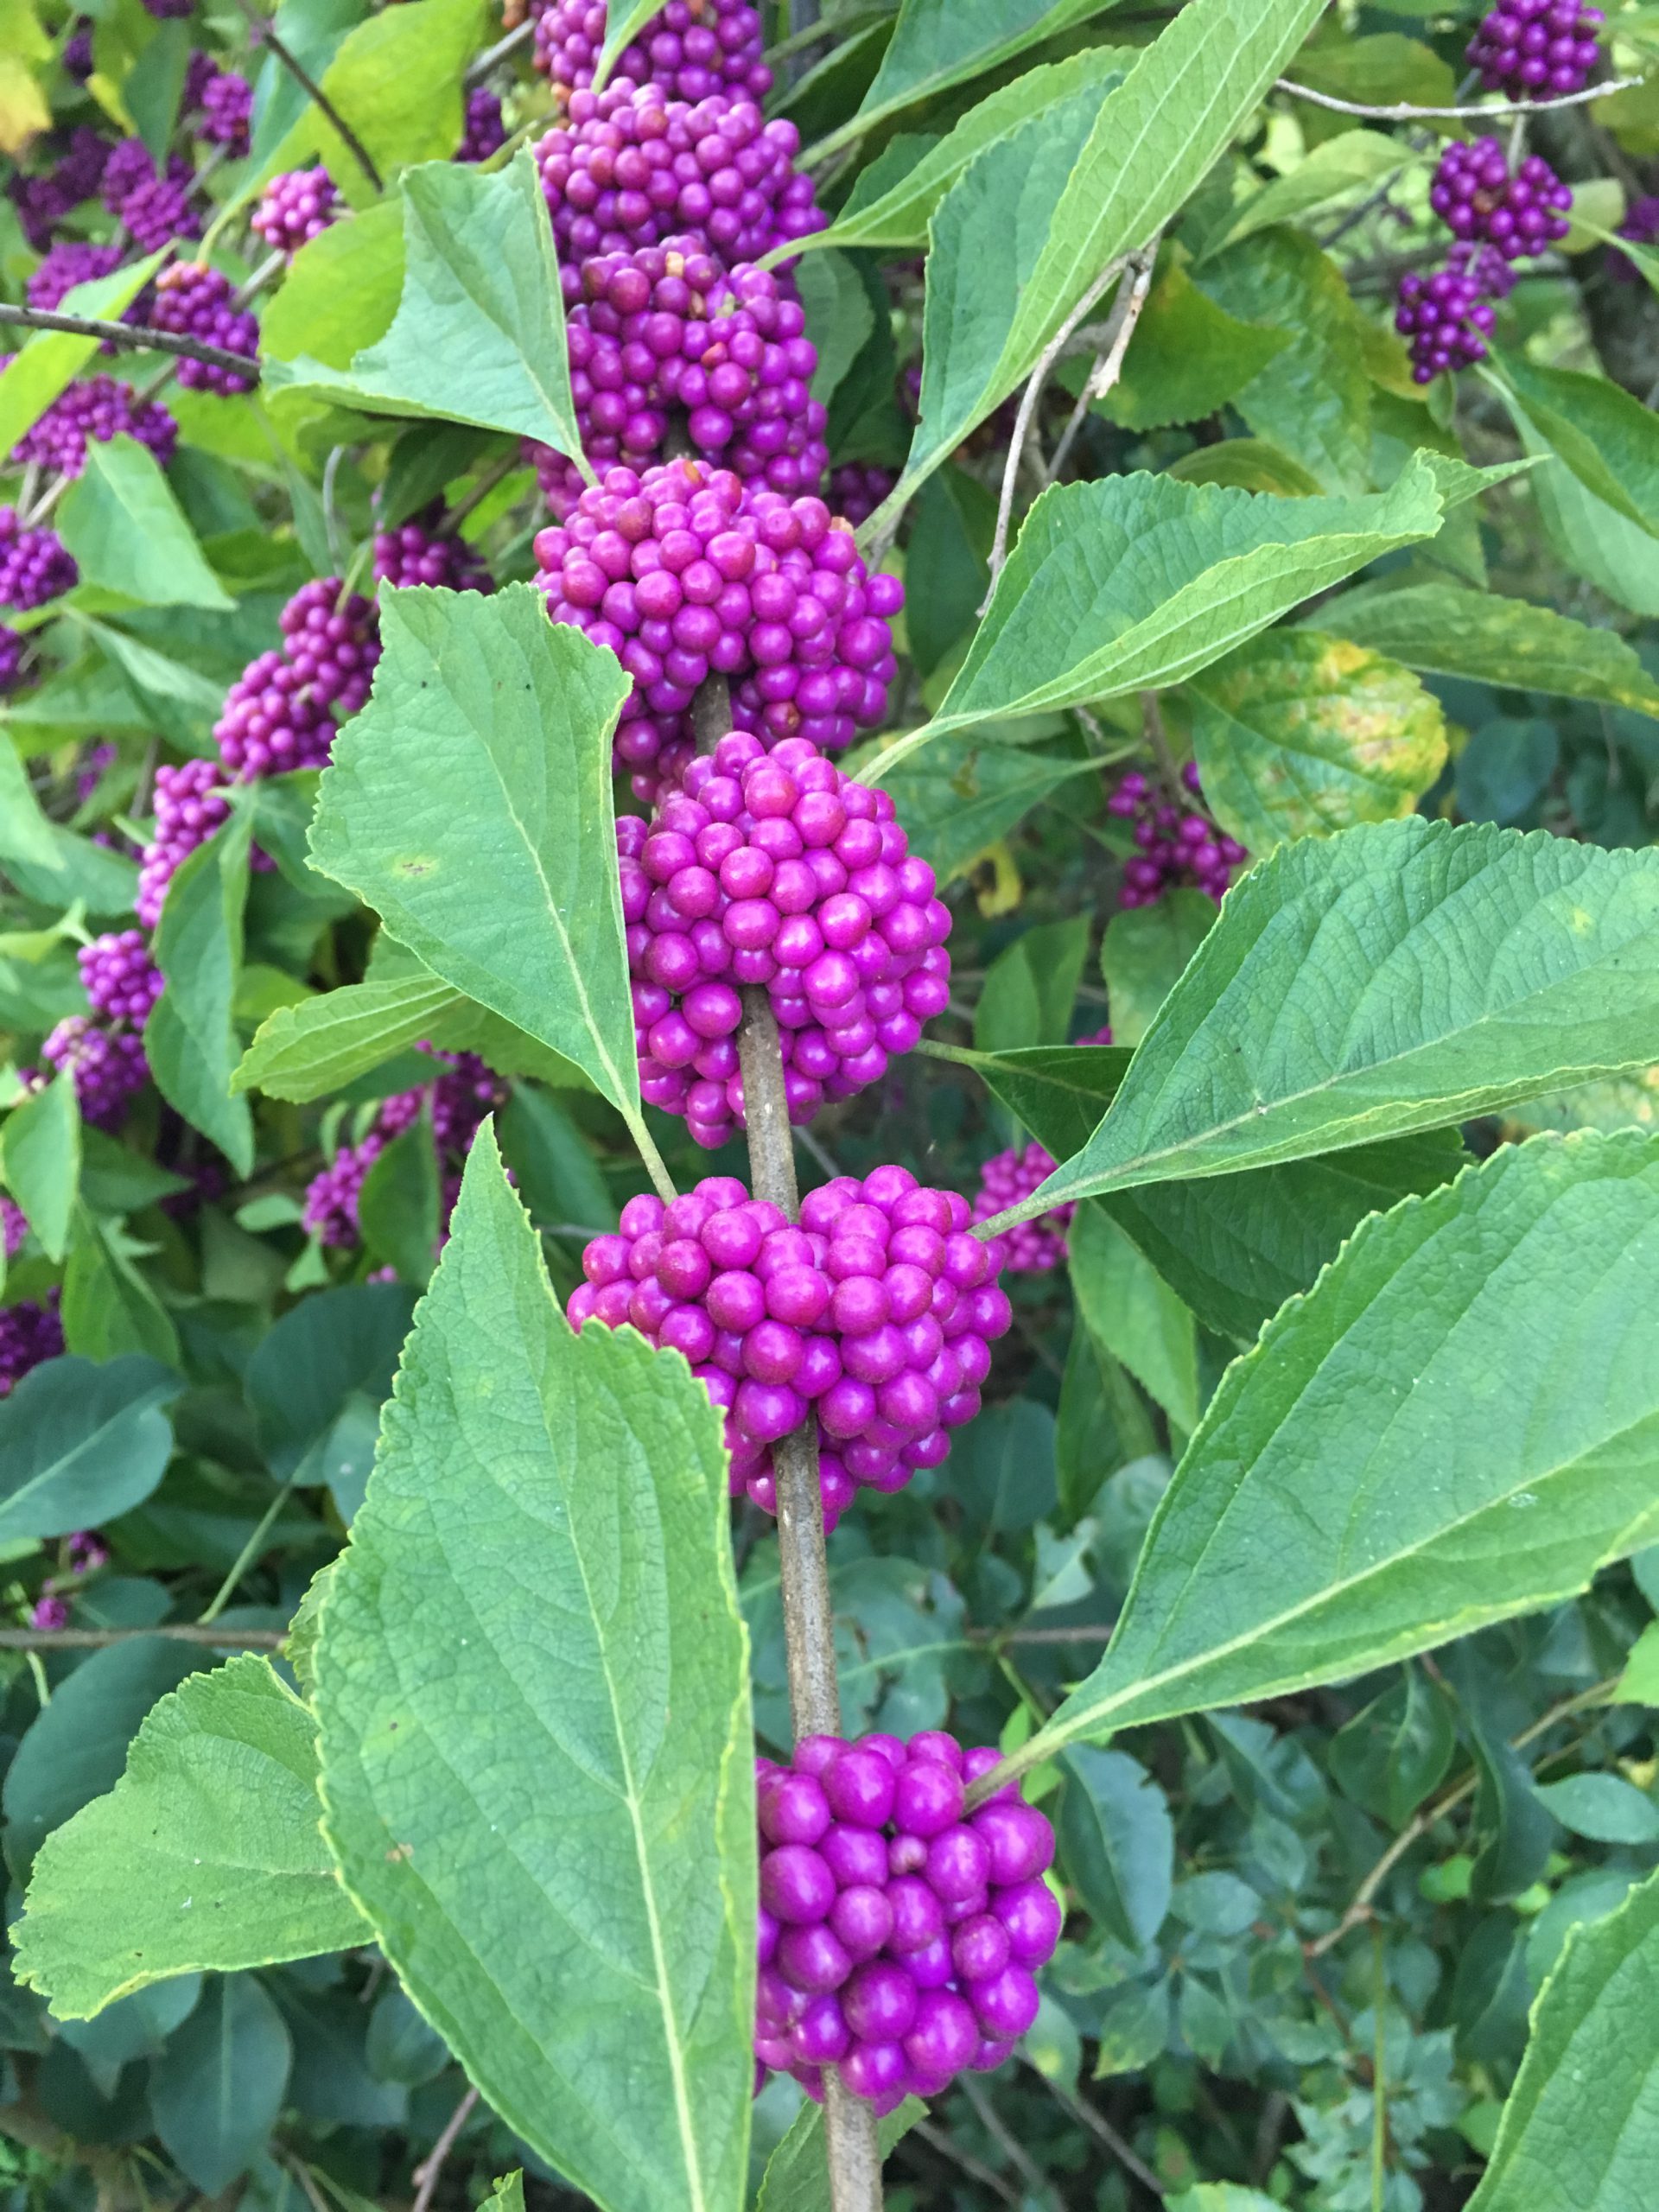
Beautyberry with fruit. Photo credit: Larry Williams
It’s important to realize that these plants must first establish a root system before they can cope with severe dry weather. Plan to irrigate during dry periods for the first season to allow them to become established.
Some outstanding trees to consider include crape myrtle, redbud, Chinese pistache, cedar (Cedrus species), hawthorn (Crataegus species), American holly, yaupon holly, Southern red cedar (Juniperus species), Live oak, Sand live oak, winged elm, pond cypress and bald cypress. Some people are surprised to learn that pond cypress and bald cypress have high drought-tolerance because these trees are associated with swamps, many times growing in standing water. But once established on a dry site, they exhibit very good drought-tolerance.
Some outstanding shrubs with drought-tolerance include glossy abelia, dwarf yaupon holly, Indian hawthorn (Rhaphiolepis species), beauty berry (Callicarpa americana), pineapple guava, junipers, oleander, spiraea, blueberry or sparkleberry (Vaccinium species), viburnum, Chaste tree (Vitex agnus-castus) and coontie (Zamia pumila).
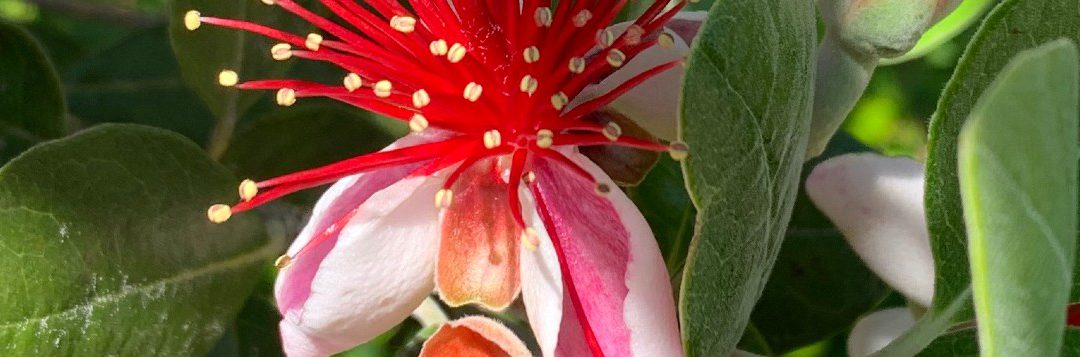
Pineapple guava in bloom. Photo credit: Larry Williams
Some outstanding drought-tolerant groundcovers to consider include beach sunflower (Helianthus debilis), daylily, juniper, lantana, liriope, rosemary (Ceratiola ericoides), Asiatic jasmine and society garlic. Many of the ornamental grasses such as Gulf muhly are good choices as well.
For more ideas on developing a Florida-friendly, water wise landscape, contact the UF/IFAS Extension Office in your County or visit the below website. https://ffl.ifas.ufl.edu/index.html
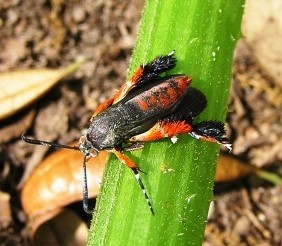
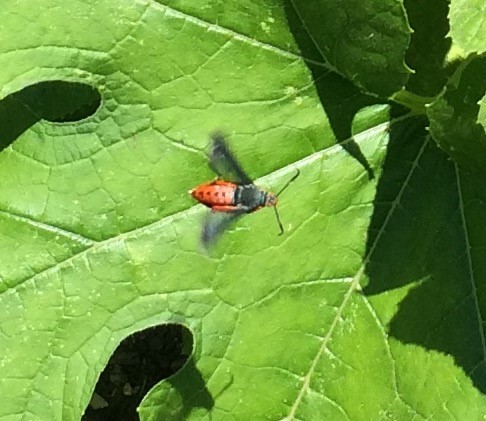
Adult squash vine borer moths are easy to identify, as they are reddish orange and have black dots along their upper abdomen. Photo by Theresa Friday.
It’s been a few weeks, and your squash seedlings are really starting to take off. The days are blushing with summer warmth and the flicker of lightning bugs in the evening indicates the cool nip of spring is winding down. In your garden, this has culminated in lengthening cucurbit stems that now show off a beautiful bright shade of green. Squash blossoms appear overnight and begin to expand and take shape, nestling themselves under the backdrop of slightly darker green squash leaves.
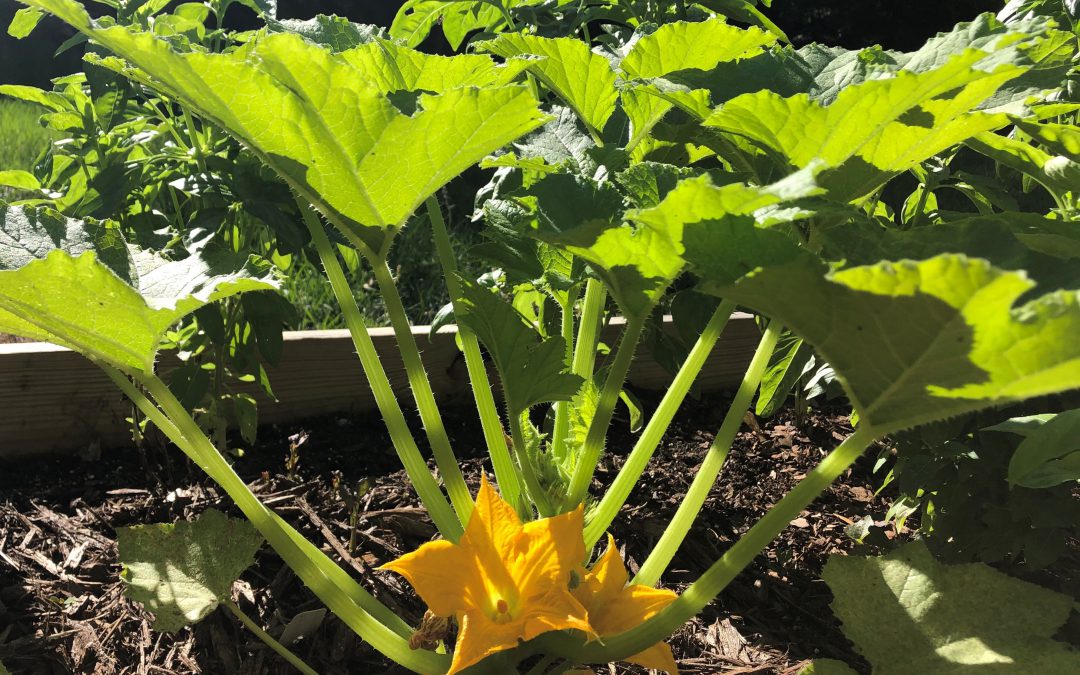
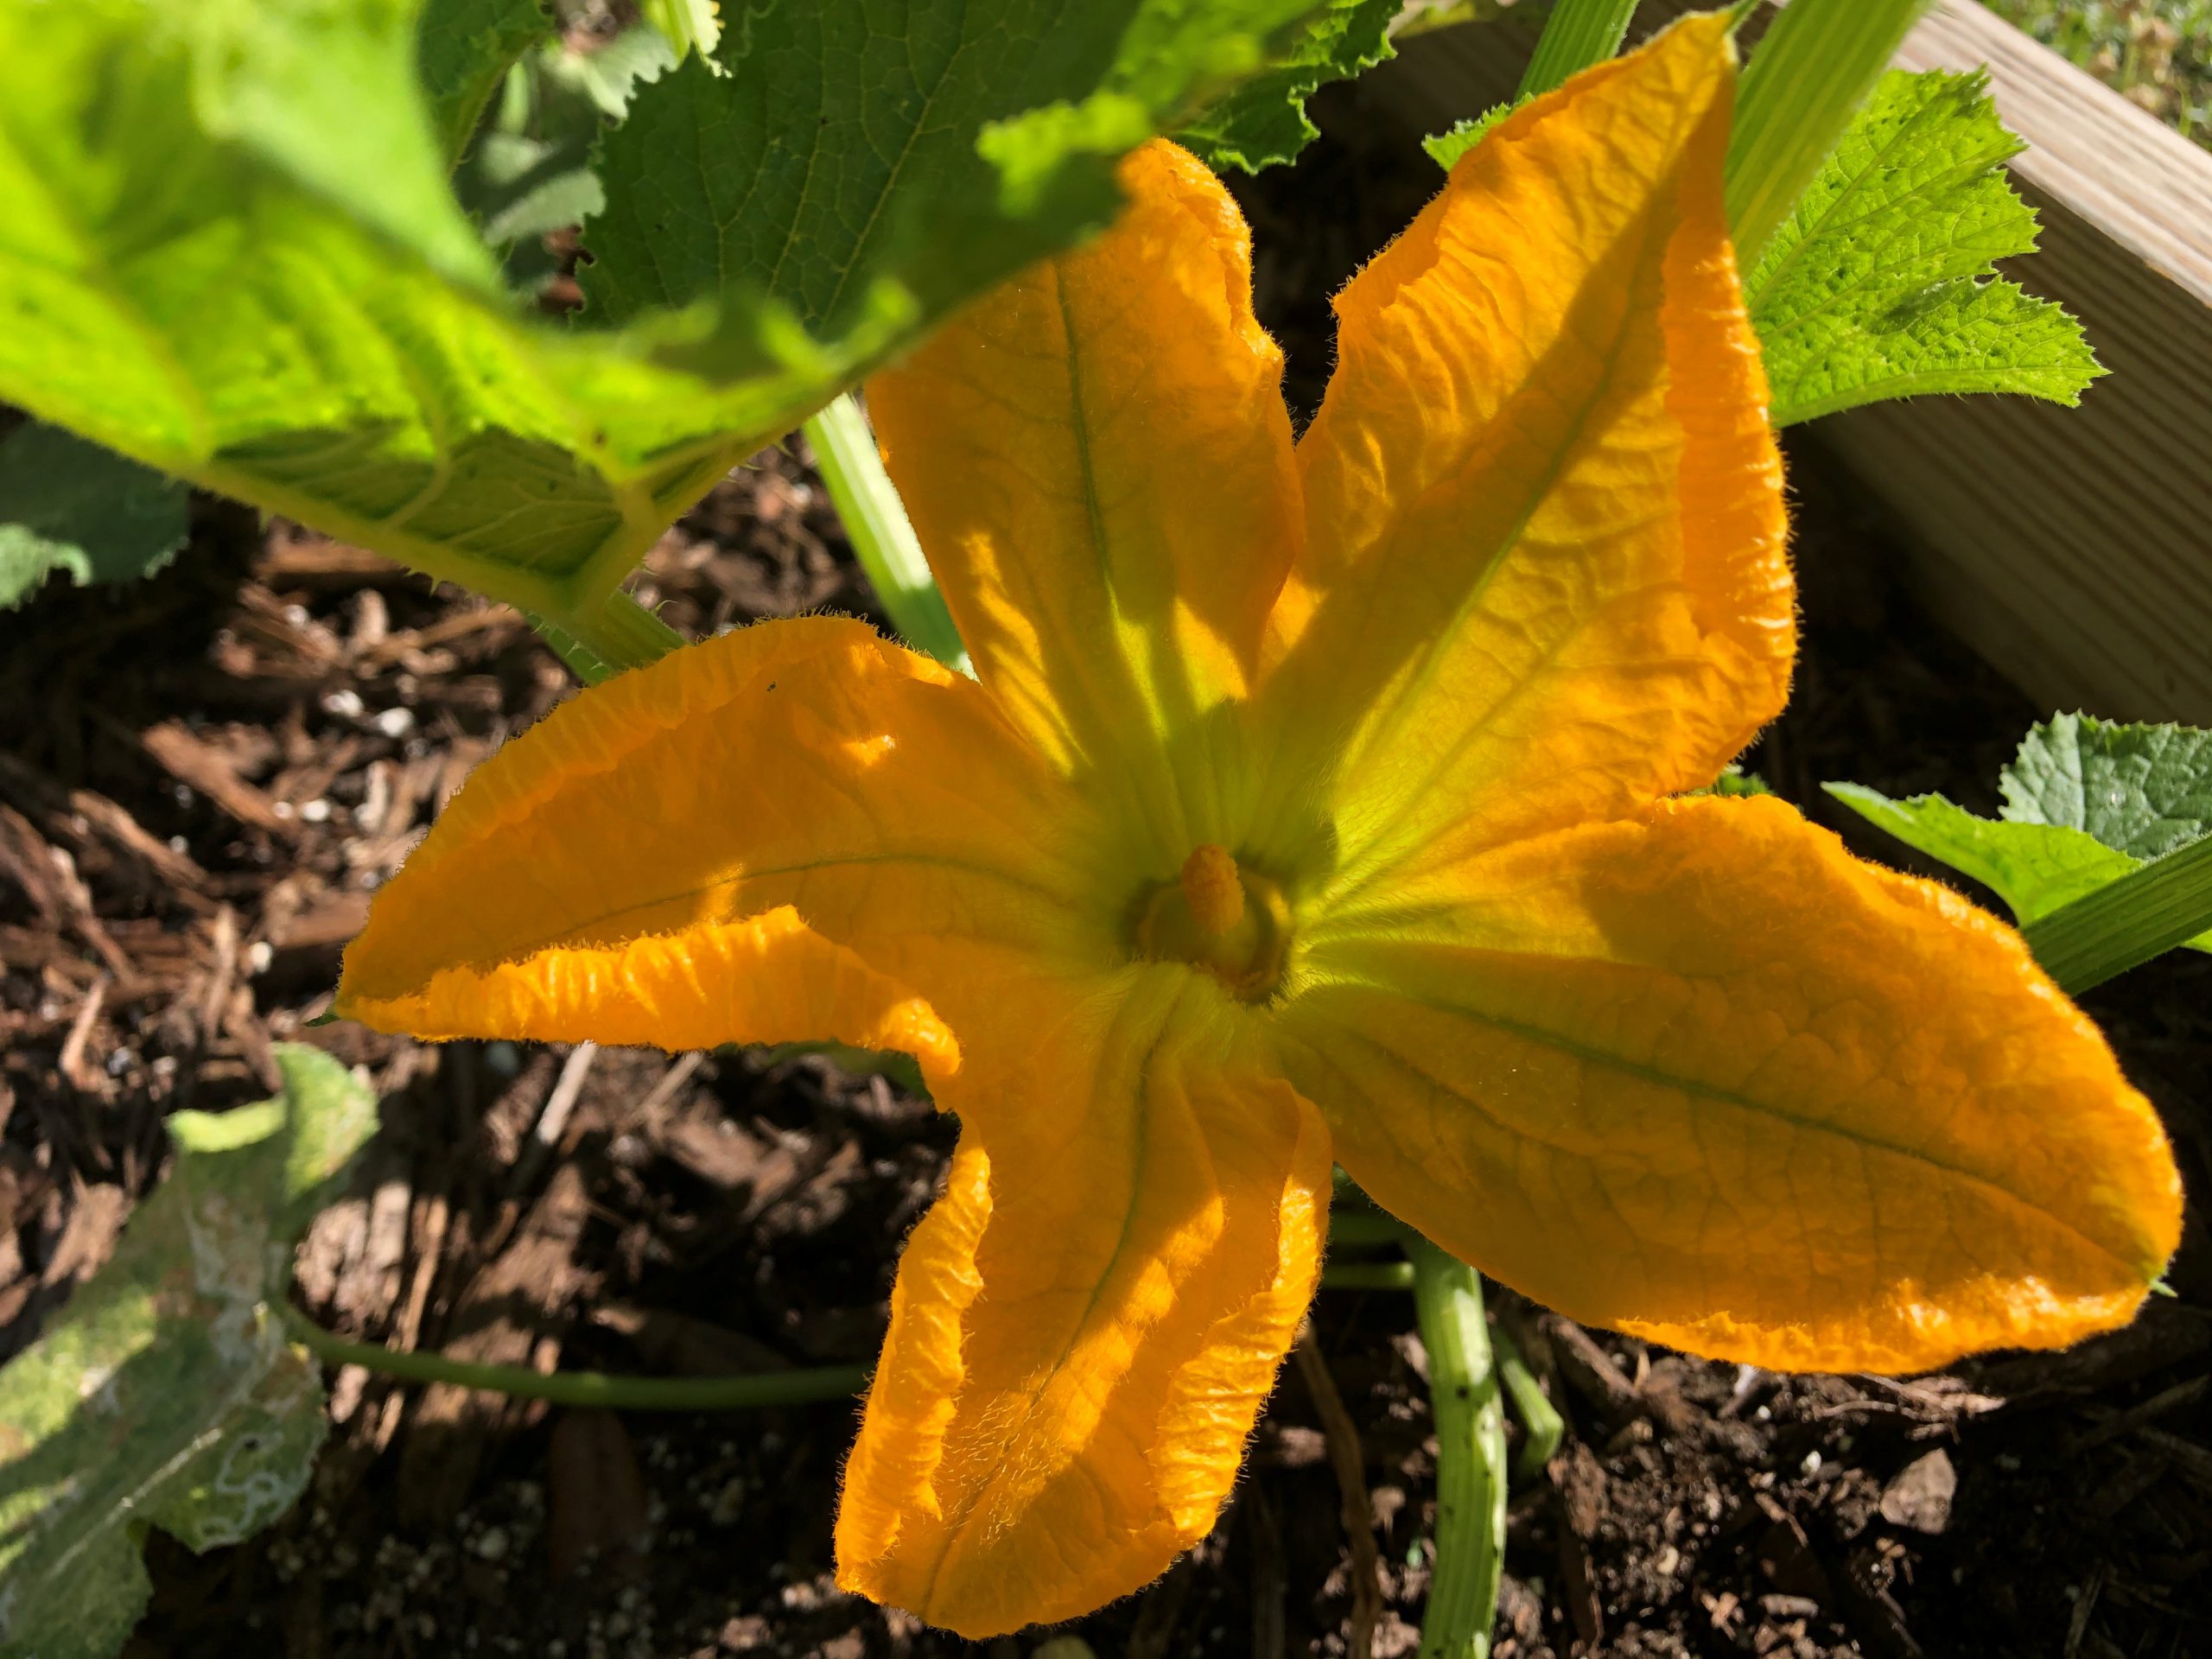
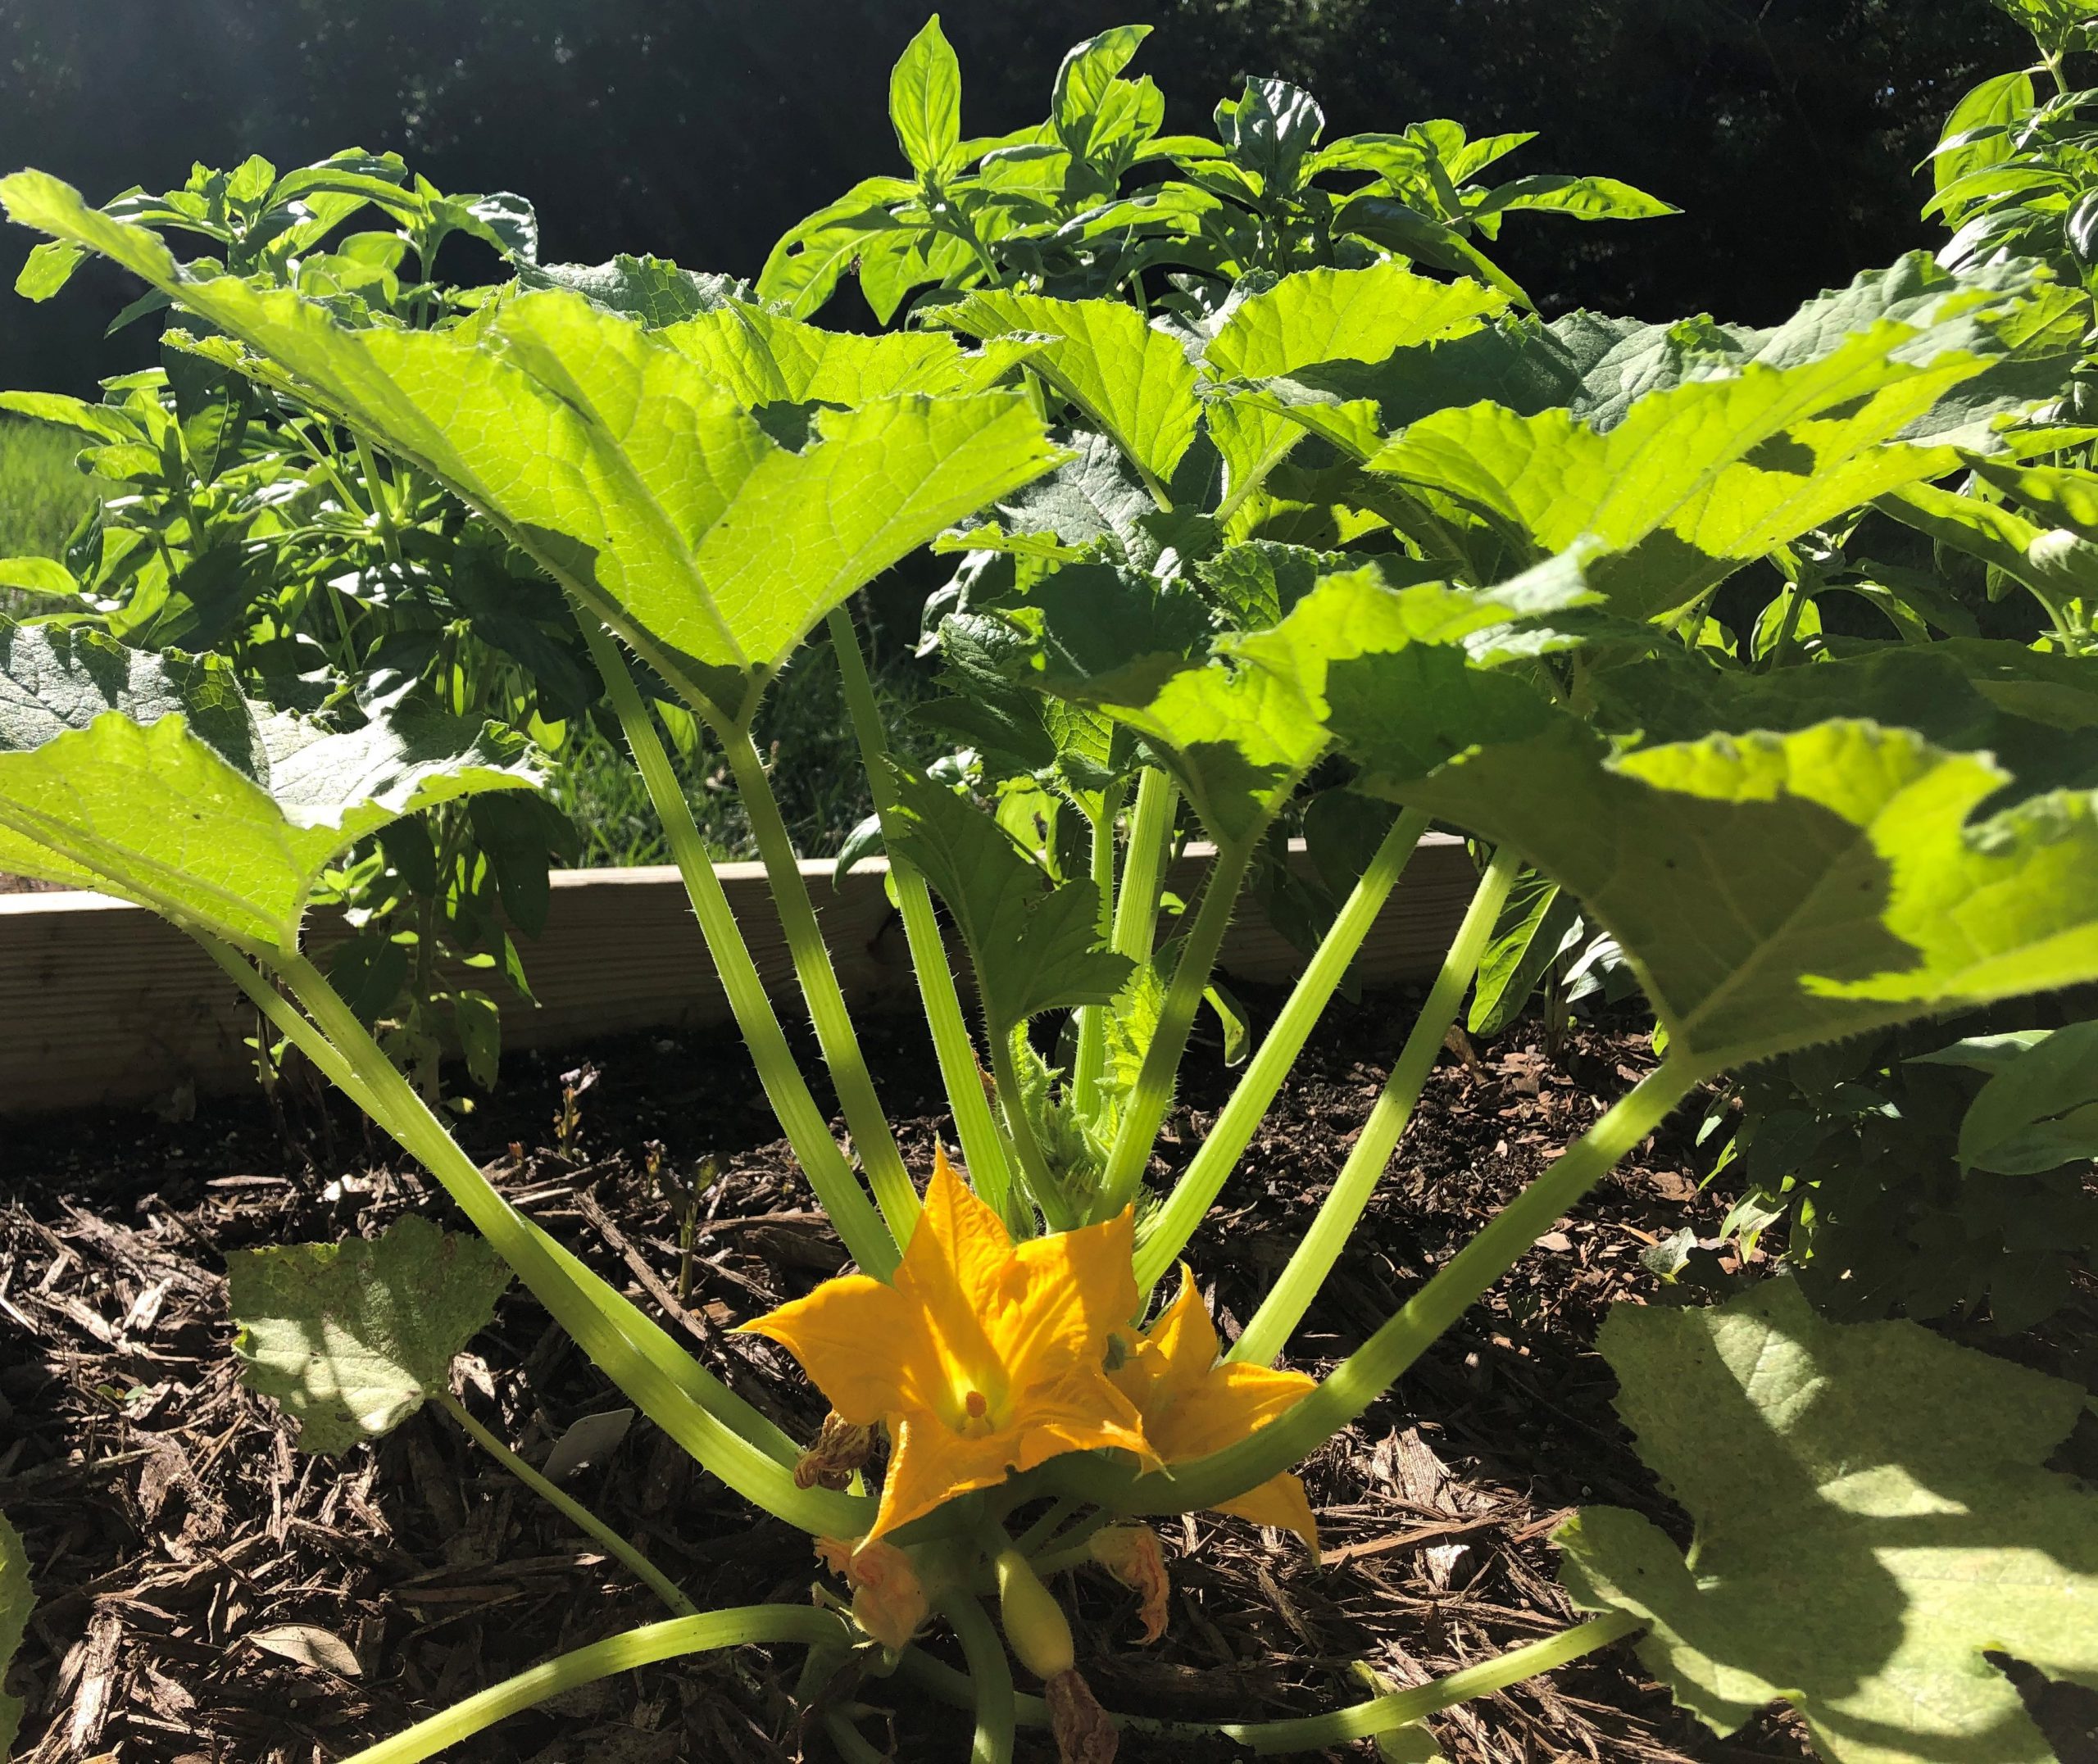
Black beauty zucchini blossom in the morning sun. Photo by Molly Jameson.
A few more nights go by, giving you a chance to explore some recipes. Maybe it’s time to fire up the grill and make grilled summer squash, sprinkled with fresh mint or thyme. Perhaps you’ll make a summer squash pesto pizza. Afterall, your basil is ready for its first harvest. If you are ahead of the game, you might even have some vine-ripening tomatoes that would pair nicely with squash in a creamy pasta sauce.
Your culinary dreams are running wild when you start to notice the wilt. You panic, and think you’ve forgotten to water the garden. But no, you’ve given your garden a consistent dose of water every morning. Your basil looks fine. Your tomatoes look great. What is going on?
Squash vine borer adult in flight. Photo by Molly Jameson.
You have fallen prey to the dreaded squash vine borer (Melittia cucurbitae).
These garden pests rely strictly on plant species within the genus Cucurbita. If the squash vine borer didn’t wreak such havoc in your summer garden, you might find its striking red and black features fascinating. Unfortunately, if your squash plants are wilting unexpectedly, this daytime roaming moth may have already done its damage.
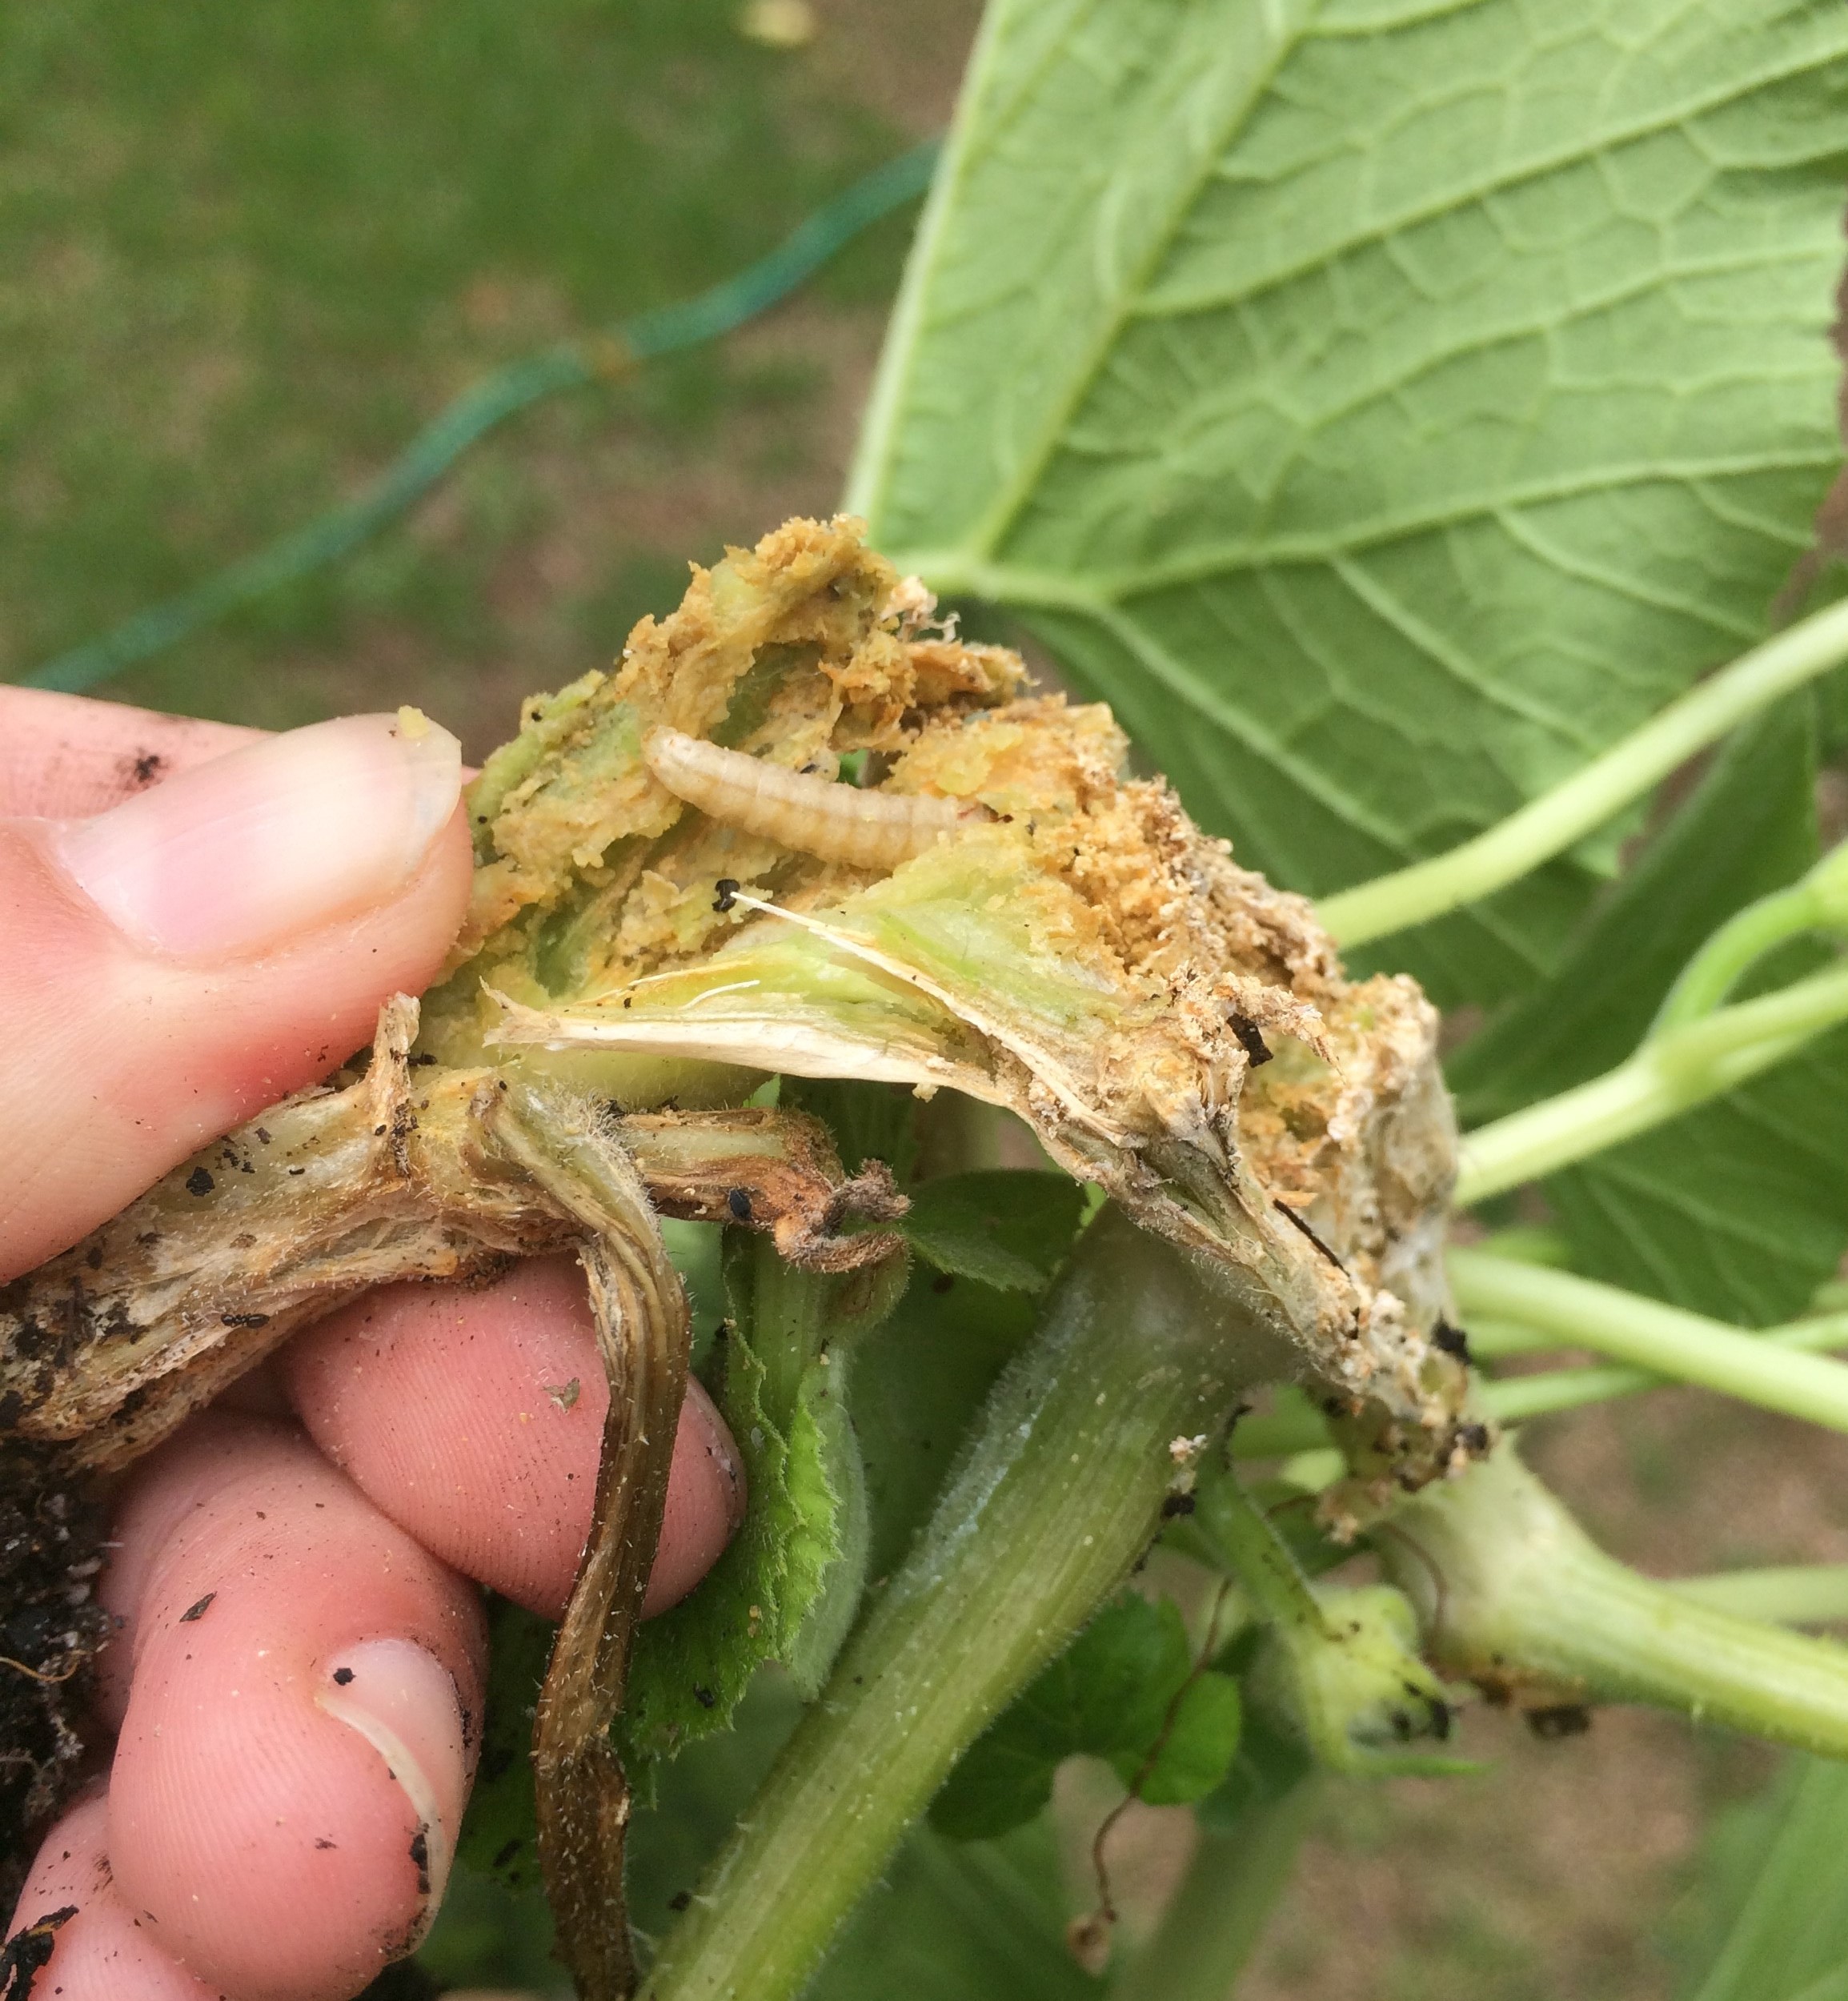
Adults lay single reddish-brown, millimeter-long eggs on the lower end of the main stem – or on leaves, leaf stalks, fruit buds, or in the soil near the squash plant. Within one to two weeks, larvae hatch, bore into the stem of healthy cucurbits, and begin to chew their way up. Multiple larvae can infect a single plant. This blocks the transport of water and nutrients, leading to the dreadful wilt that often signifies that it is too late.
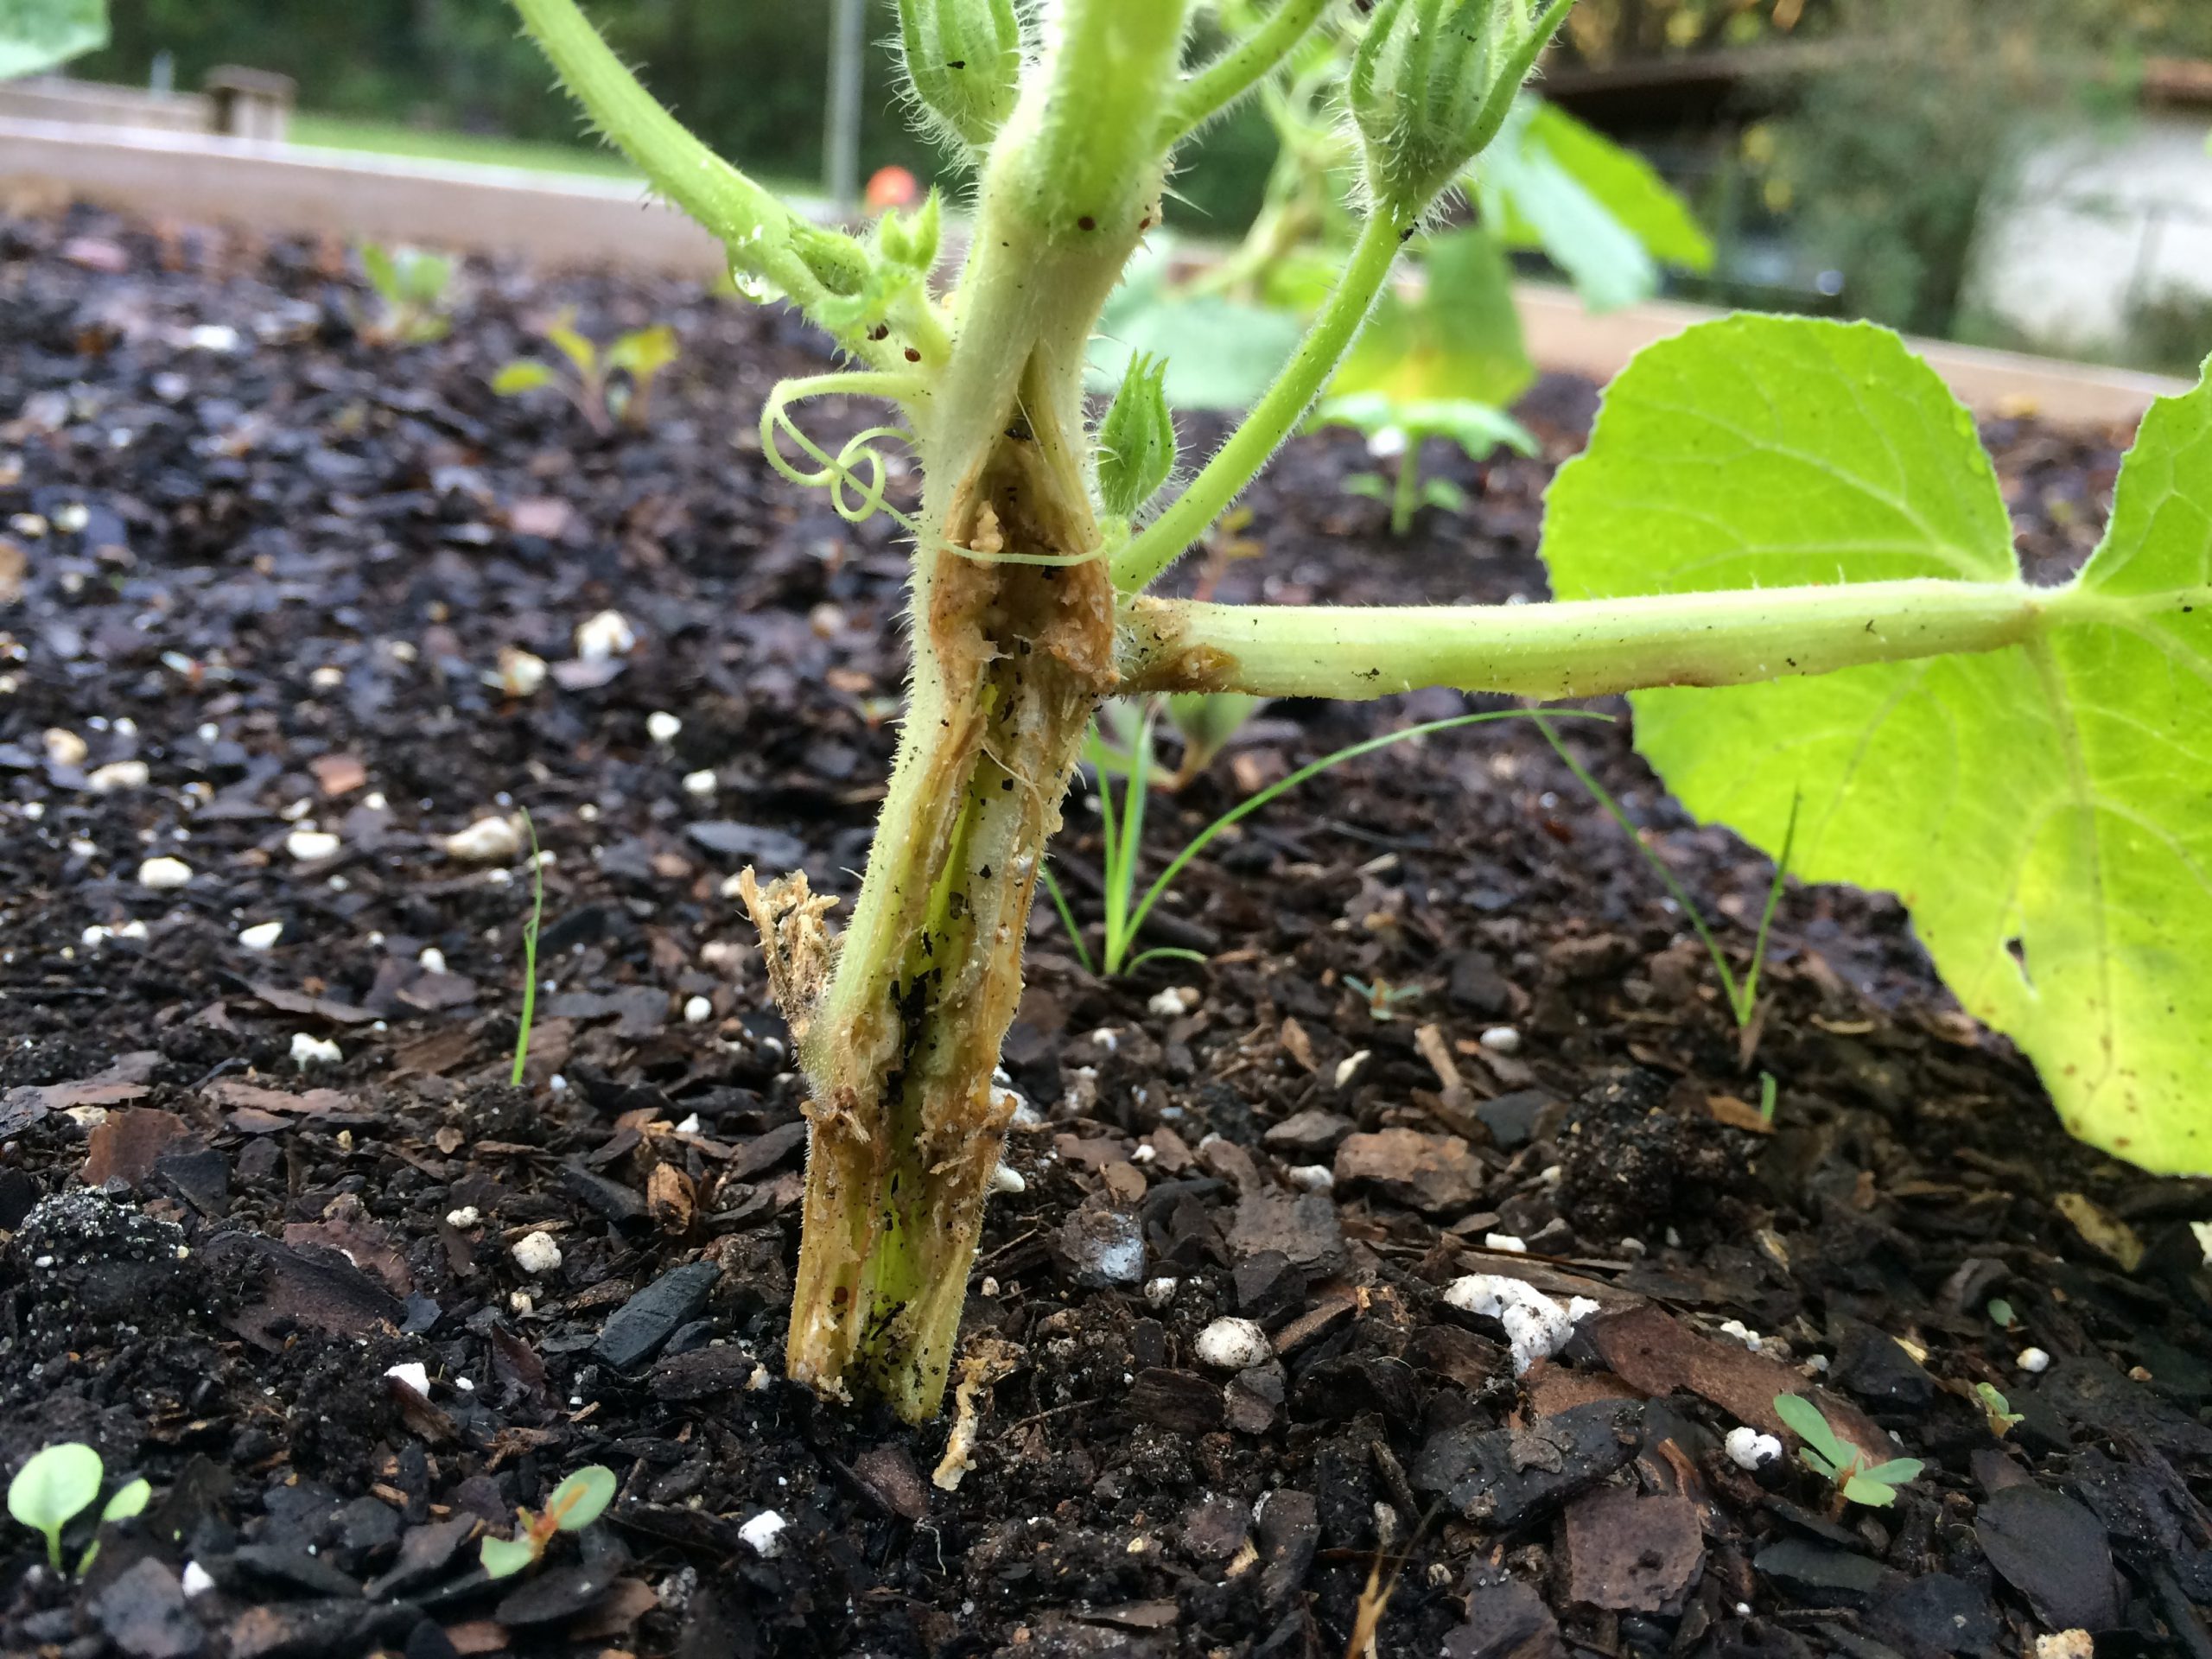
A squash plant severely damaged by squash vine borer larvae. Photo by Molly Jameson.
So, what can be done? Once the wilting has begun, you may be able to reap a small harvest, depending on the timing of infestation. Adult females emerge from cocoons from May to October in Florida and have two generations per season. They prefer cucurbit varieties with large tubular stems, such as yellow squash, zucchini, and pumpkins, but can also infest watermelon and cucumbers.
If you have some cucurbits that do not show signs of infestation but others that are on the decline, it might be worth removing and destroying the infested plants. At the end of the season, cultivate your soil one to two inches deep, as this is where they overwinter in cocoons. Destroying infested plants and cultivation can help reduce the overwintering population.
Squash vine borer larvae inside a squash stem. Photo by Molly Jameson.
In North Florida, try seeding squash indoors in March and plant seedlings in the garden in early April. The earlier you plant, the better chance you have of beating the borers. Of course, you must balance the risk of borers with the risk of a late frost.
You may also want to install lightweight floating row covers that can prevent the female from depositing her eggs. But again, it’s a delicate balance, as you do not want to prevent beneficial insects from pollinating your squash once it is producing blossoms.
Scout your plants diligently each day and keep on the lookout for eggs and adults. Adults are attracted to the color yellow, so yellow sticky traps or yellow bowls of water may lure them in. Build up the soil around developing plants to act as a shield against egg laying and boring.
A healthy straightneck squash plant beginning to set fruit. Photo by Molly Jameson.
Once your plants slow their fruit production and you’ve had your fill of grilled squash, squash pizza, and creamy squash pasta, go ahead and remove the plants to prevent late infestations that can then overwinter. Lastly, rotate areas in which you plant cucurbits each year to break borer life cycles.
Vegetable gardening involves innovation and ingenuity. A clever gardener is always striving to balance weather, timing, insects, plants, soil, and everything in between. With a little planning and persistence, I know you can prevail against the tenacious squash vine borer.
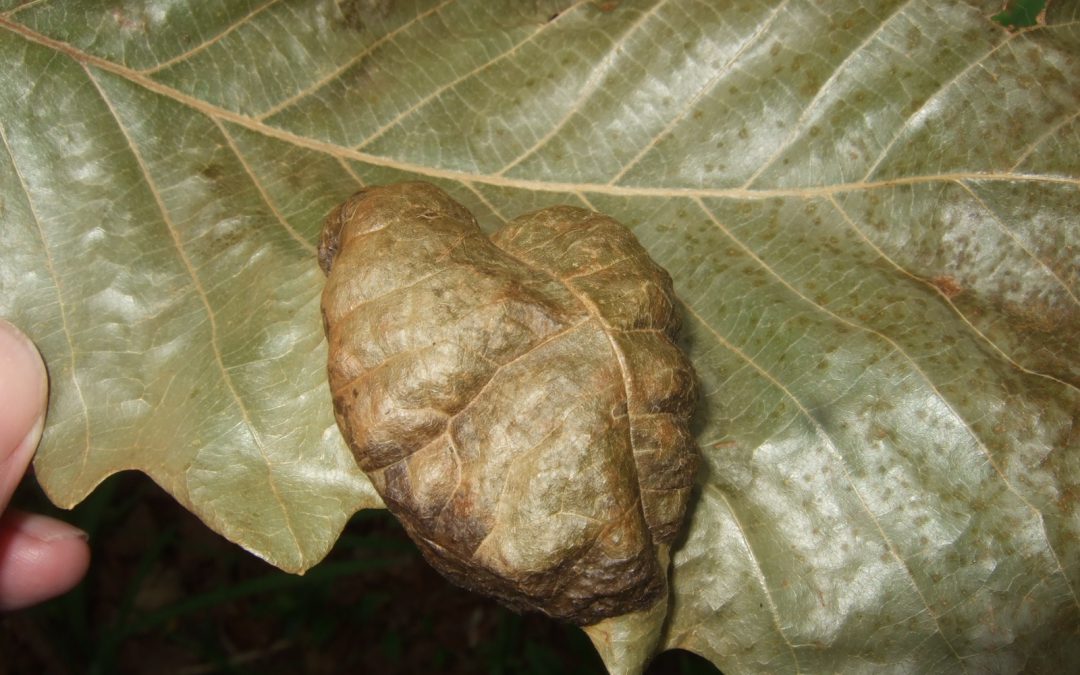
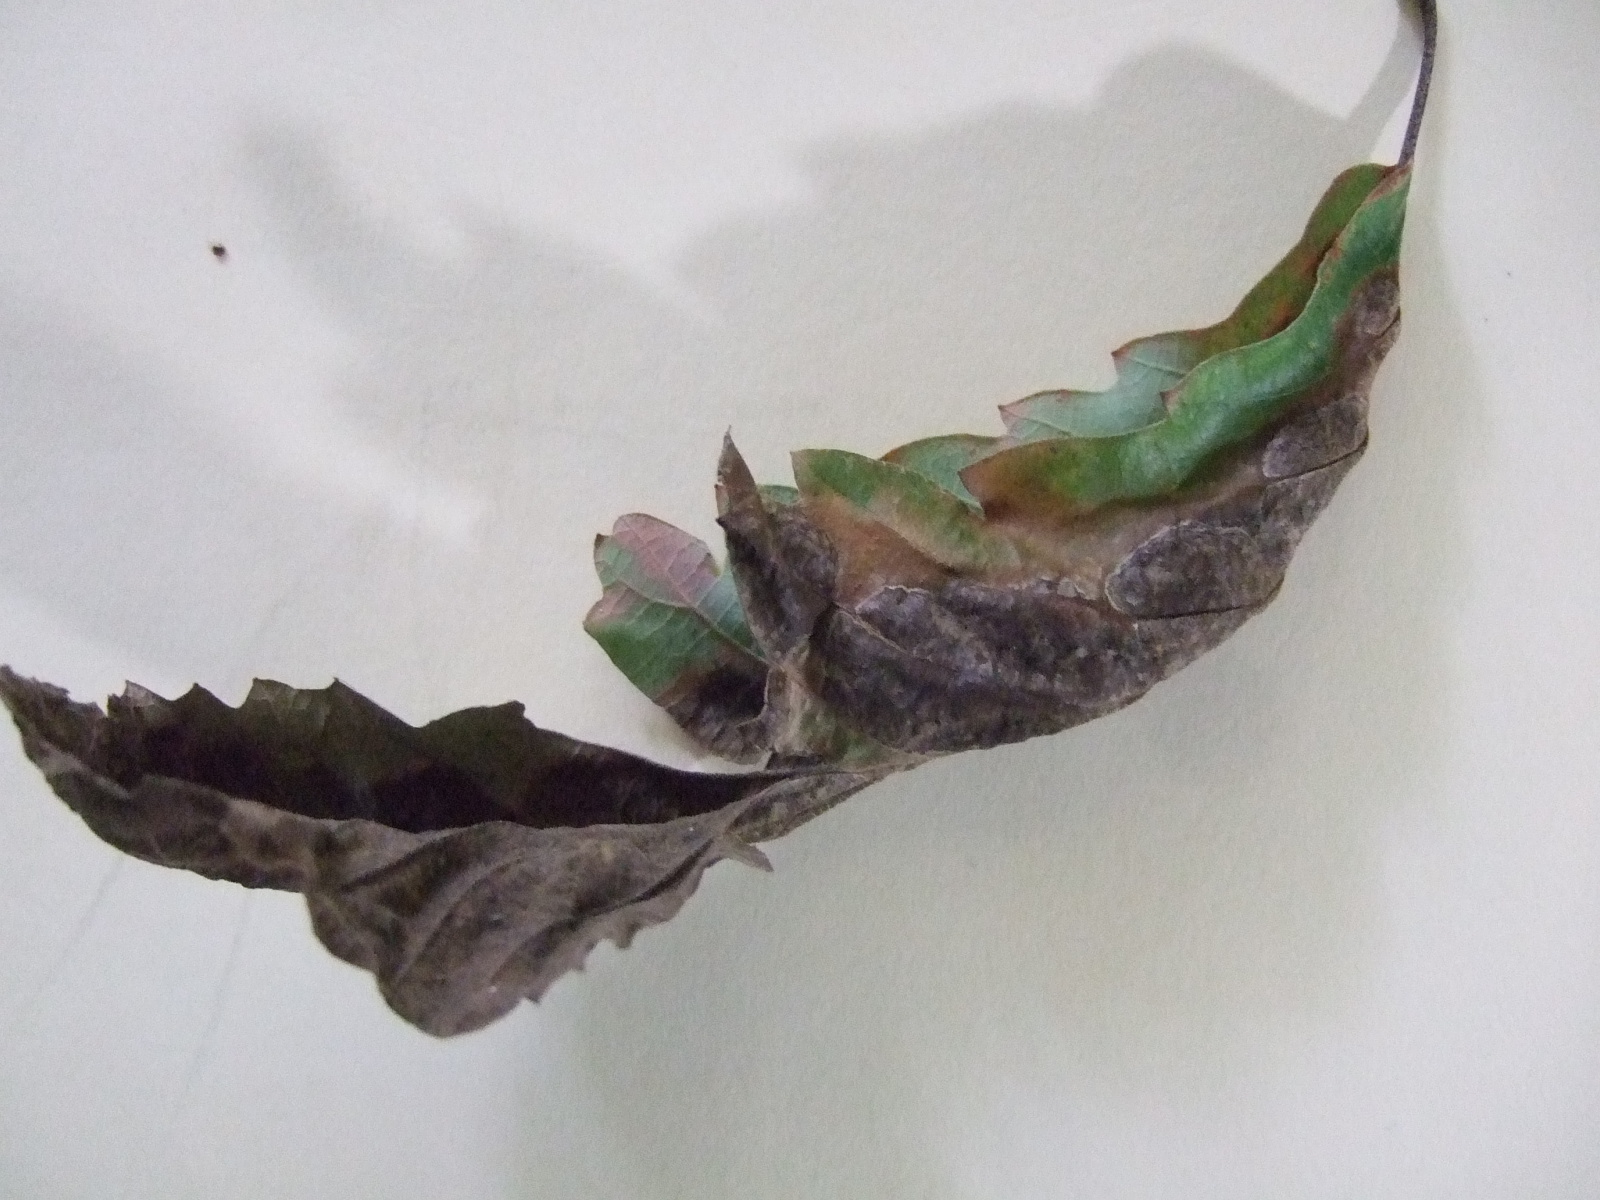
Symptoms of oak leaf blister on swamp chestnut oak. Credit: Gordon Magill.
Even during global pandemics, it’s a joy to be outside during the great north Florida spring we’ve been experiencing lately. As cold fronts come through with their rain bands, some packing a punch, they leave behind the most pleasant mornings, clear blue daytime skies, and crisp evenings. Unfortunately, we’re not the only organism that also enjoys those cool days. Many species of fungi are quite active this type of year as the rains, followed by warmer, yet not too hot temperatures, create the perfect conditions for fungal growth. Some of these fungi grow right on or in the plants we’d like to be enjoying for ourselves, stealing nutrients and causing plant decline or merely causing aesthetic damage. As this is an active time for certain species of fungi, local extension offices are getting more calls and questions regarding lawn and landscape damage due to fungal pathogens. A recent call was a new one for me and an example of a native fungi-plant interaction that looks bad but requires no intervention from us. It also highlights how correctly identifying a disease leads to the best action and can often save time and money and prevent unnecessary pesticides (in this case a fungicide) from entering the environment.
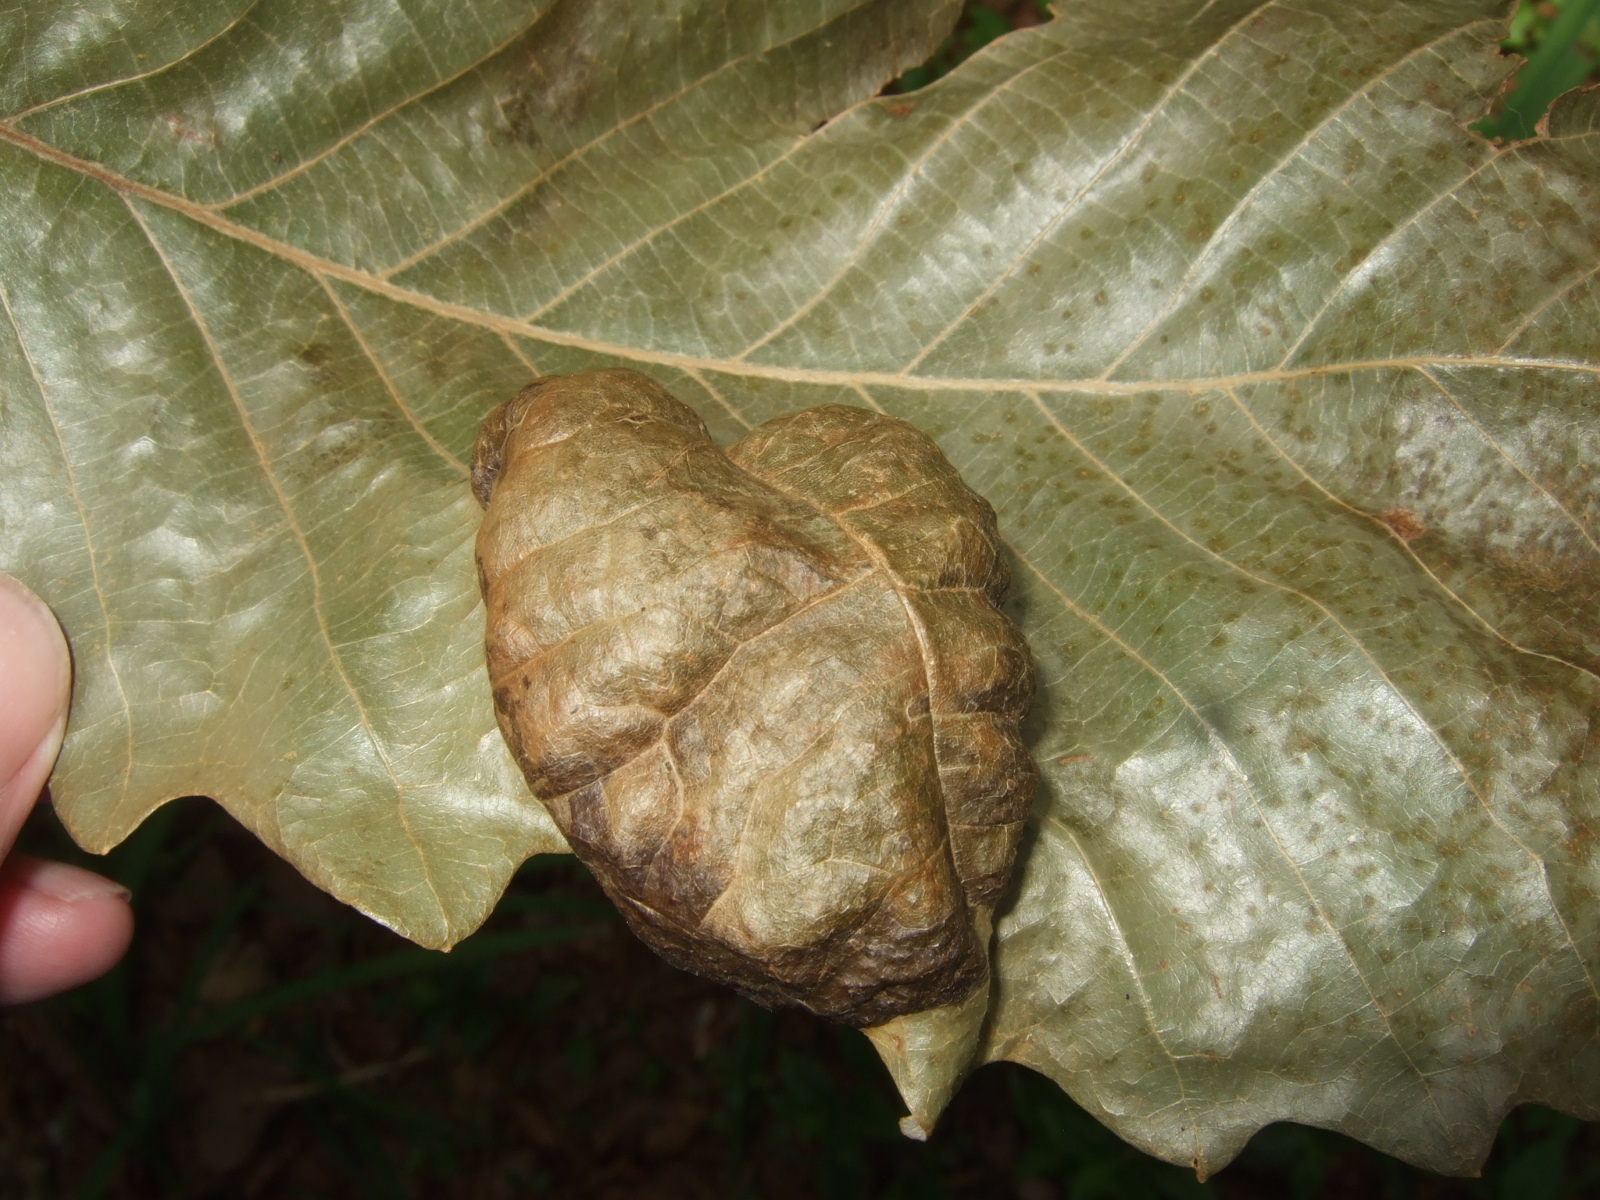
Close up of oak leaf blister on swamp chestnut oak. Credit: Gordon Magill.
The fungi and plant involved here was the oak leaf blister (Taphrina caerulescens) on a swamp chestnut oak (Quercus michauxii). It forms, you guessed it, blisters on the leaves of any of the oaks, though live oak (Quercus virginiana), laurel oak (Quercus laurifolia), and water oak (Quercus nigra) seem to be preferred hosts. The spores of the fungi, dormant since the previous summer/fall and which happen to get lodged in bud scales through wind and rain, germinate in cool, wet weather. The fungus then infects young leaves as they flush and its growth causes a disruption in the leaves’ development. This leads to the blistered look of the leaf tissue and, during extended periods of cool, wet weather, the entire leaf sort of shrivels, browns, and eventually falls off. Spores are eventually released from the fallen leaves to start the process over the next spring.
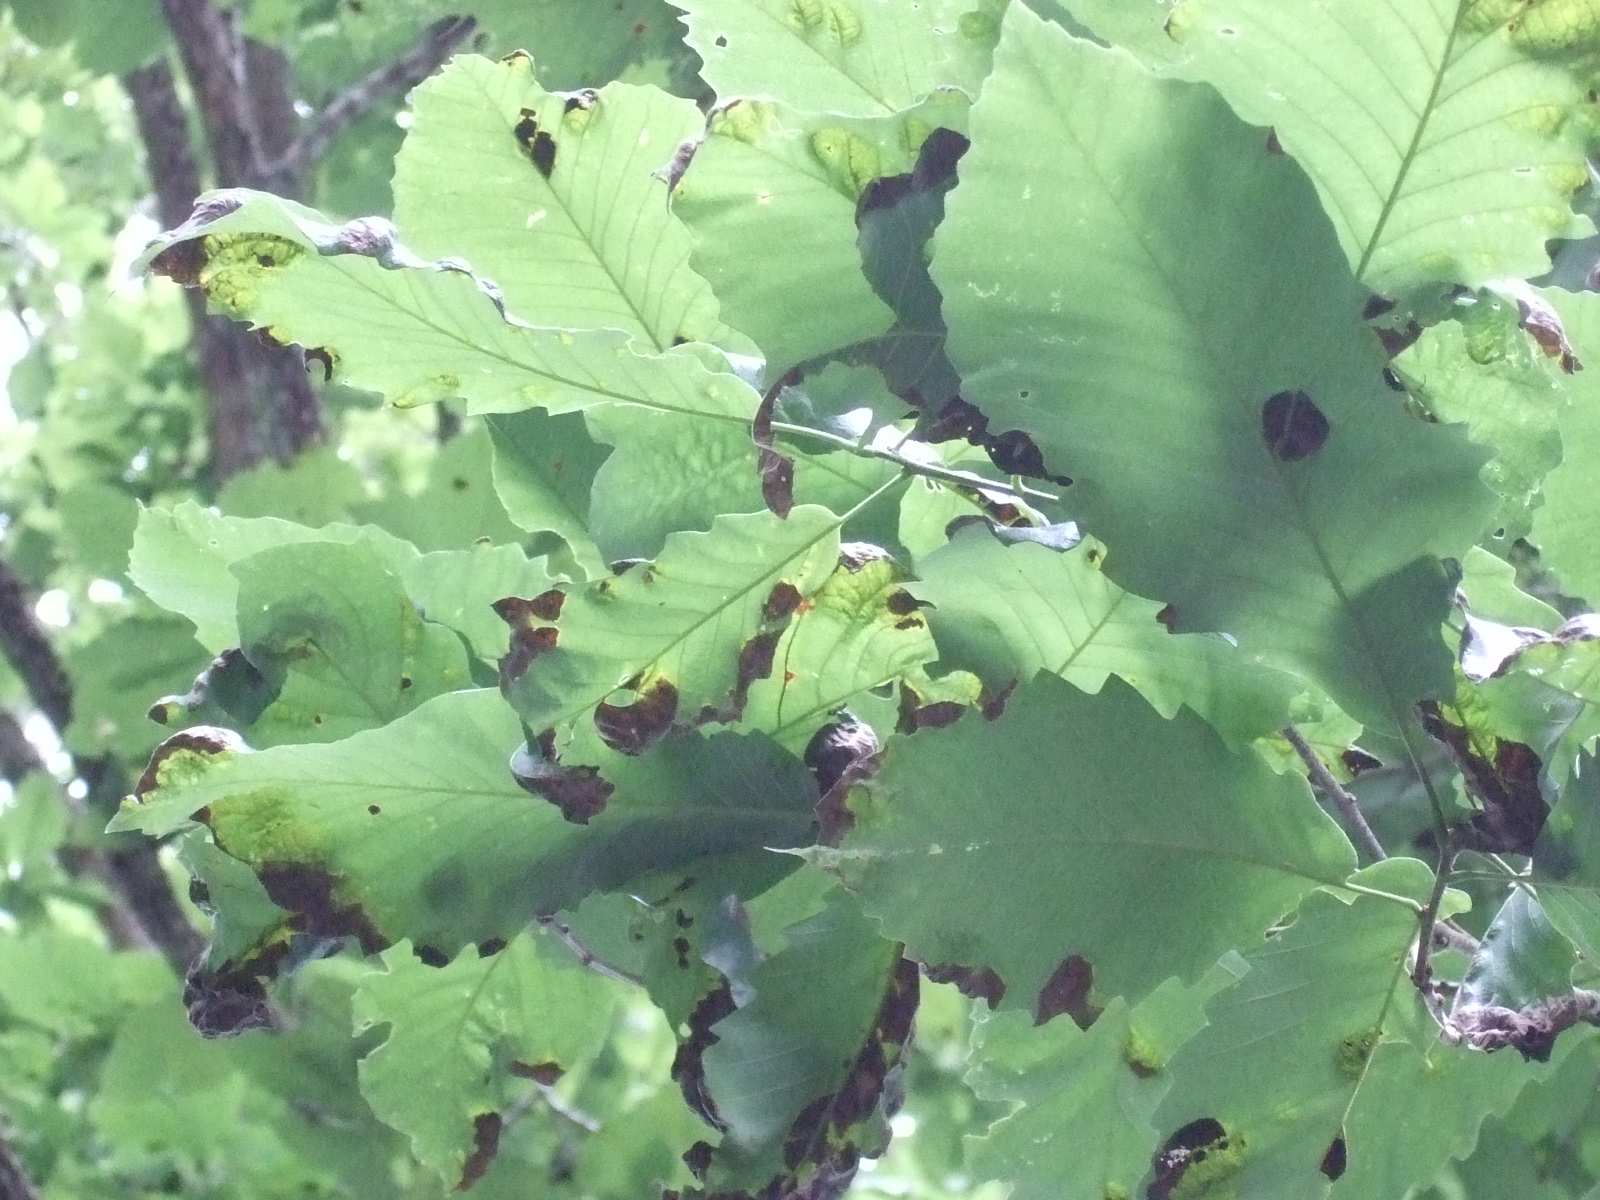
Severe oak leaf blister on swamp chestnut oak. Credit: Gordon Magill.
Though the leaves look pretty terrible, this fungal disease rarely causes plant health issues and the tree recovers just fine. Specimen trees that experience it year to year may be treated with a fungicide, but most homeowners can just let it go. Raking up and disposing of the leaves may help prevent further infections by reducing the number of spores released in the area.
As you enjoy another cool morning after an evening rainstorm, remember that the fungi all around you are also having a great day. You may want to look at your landscape plants and see if there’s anything abnormal going on. If so, take a photo and send it to your local extension office for help with identification and best methods of control, or, like in this case, just leaving it alone.
p.s. As I said this was a new one for me and I want to thank Stan Rosenthal, Extension Agent emeritus, for assisting with identification.