by Daniel J. Leonard | Jan 18, 2019
Many Americans have a remarkably unrefined taste in salads; my brother has long counted himself in this group. Dice up some crunchy Iceberg type lettuce, splash on a dollop of ranch dressing, maybe chop a leaf of romaine up if you’re feeling frisky and call it a salad, this is the way we’ve been trained to eat. I’m here, a voice in the supermarket produce aisle wilderness calling, to tell you it’s time to open up your palate, look beyond lettuce, live a little, and add some spice to your life and salad bowl with three of my favorite easy to grow leafy greens: Mizuna, Frilly Mustard, and Italian Dandelion.
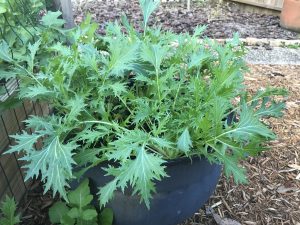
Mature Mizuna plants in the author’s container garden.
Before we get into species specifics, let’s cover a couple of reasons you should grow them at home! Growing your own flavor-packed greens has many benefits. First, leaves from these plants can be difficult to find anywhere but specialty health food stores or high-end supermarkets. Growing your own ensures a consistent supply, especially if one utilizes the “cut and come again” harvesting method (just remove the leaves and stems you need that day, leave the crown intact and allow the plant to regrow for next week’s harvest). Second, you do not have to worry about the too common food safety recalls and other health scares involving “leafies”. If you follow standard safety practices (clean irrigation water, wash picked leaves and store properly, etc.), you’ll be eating scrumptious salads when everyone else is begrudgingly trashing entire bags of recalled store-bought greens. Finally, each of these species double as gorgeous accent plants in
‘Scarlet Frills’ Mustard in the author’s container garden.
raised beds or containers. I love plants that do heavy lifting as both eye-catching ornamentals and delicious edibles!
Mizuna is a little known member of the mustard family that is quickly becoming one of my favorite leafy greens! It faces no major pest or disease problems in the garden and it is extremely tolerant of the cold weather Floridians periodically face through the winter, laughing off frost. Mizuna possesses lovely, deeply cut, pale green, fringy leaves complete with crispy white stems, all of which are edible – no need to separate stems when processing to eat! This lovely little Asian green has a mild peppery taste (think a toned-down Arugula) and adds perfect flavor and texture to any salad!
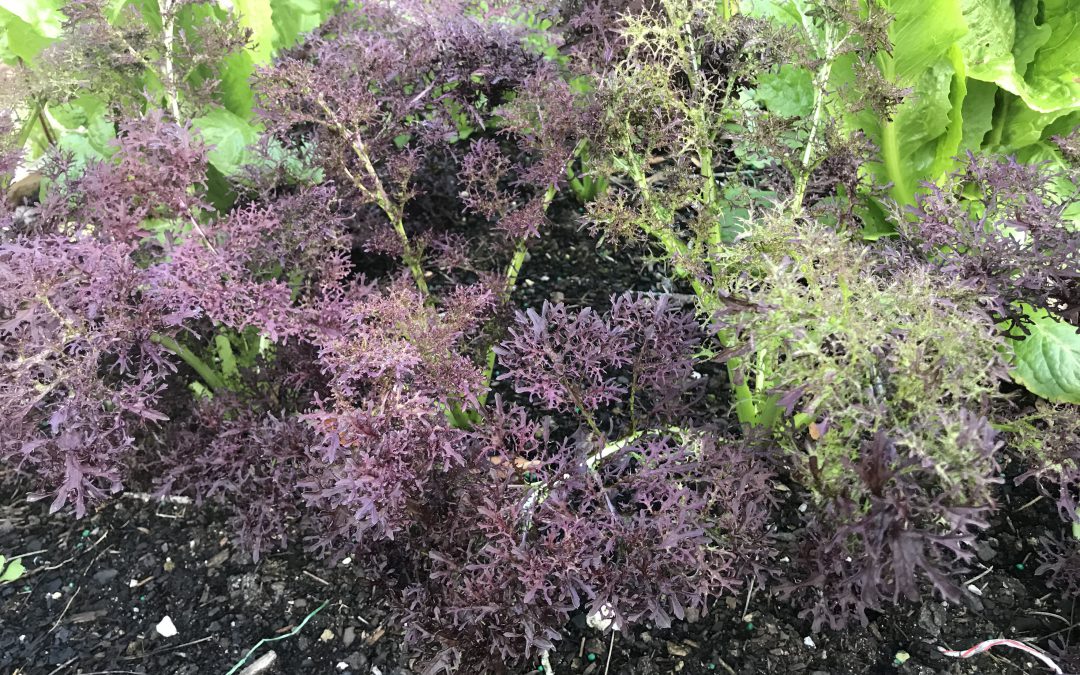
Many Southerners are well acquainted with traditional Mustard greens and their preparation (more than a little bacon and salt) but may not be aware of newer Mustard cultivars that give the species a bit of refinement and make it a salad celebrity! This winter, I’m growing a cultivar of Mustard called ‘Scarlet Frills’ (aptly named with finely serrated burgundy-red leaves) and really enjoy its peppery horseradish taste as a foil to the mildly sweet taste of traditional salad greens like lettuce and spinach. Mustards are extremely cold tolerant and slow to bolt, making it a mainstay in the salad garden all winter long; you really get your money’s worth from a few Mustard plants! However, even if this leafy green wasn’t delicious, it would be worth growing. The “fancier” Mustard cultivars are highly ornamental and deserve a spot in any cool season container garden.
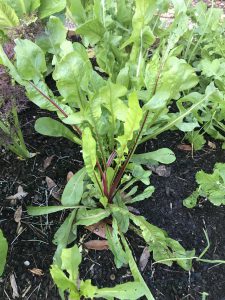
‘Italiko Red’ Italian Dandelion in the author’s container garden.
Finally, the one that turns up the most noses when I mention growing and eating it, Italian Dandelion (Cichorium intybus)! I’m not advocating foraging in your turfgrass to find dinner, in fact, Italian Dandelion is not a true dandelion (it’s actually a chicory). However, it does share a number of features with its weedy cousin, including leaves that are similar in appearance and a vigorous taproot. That’s where the comparisons stop though, as Italian dandelion is a superior garden plant, more upright growing, much larger, and deeper green (some varieties including the one I grow ‘Italiko Red’ have red veined leaves) than its wild cousin. Unlike Mizuna and some of the milder mustards, Italian Dandelion is a bit of an acquired taste. It imparts a strong bitter flavor that may be cut with milder greens in a salad or cooked down to reduce bitterness. Either way you try it, put Italian Dandelion on your cool season garden next year!
Mizuna, Frilly Mustard, and Italian Dandelion all require similar growing conditions. In Florida, leafy greens are cool season vegetables, growing through the fall, winter and spring months. Seeds should be sown in late September and can be stagger-sown (plantings every couple of weeks) to ensure a steady supply through spring. As a rule, they prefer rich, well-drained soil high in organic matter. These soil conditions are achievable with either quality commercial potting mixes or homemade concoctions of compost and pine bark. The beds or containers you fill with the aforementioned soil should be sited near a good water source (plants that aren’t convenient to water get neglected, trust me) in an area that gets 6-8 hours of full sunlight. I like to topdress at planting (if using transplants) or after germination (if using seed) with a good general purpose, slow-release fertilizer, many formulations and brands that work are widely available for purchase. Finally, be sure to purchase seed from a quality source. Online purveyors Johnny’s Selected Seeds, Baker Creek Heirloom Seeds, and Sow True Seeds are good places to start, though the options are nearly endless!
Next year, when planning your cool season garden, remember to add a little spice with these three leafy greens, Mizuna, Frilly Mustard, and Italian Dandelion! For more information about cool season gardening and other topics, consult your local UF/IFAS Extension Office.
by Molly Jameson | Nov 21, 2018
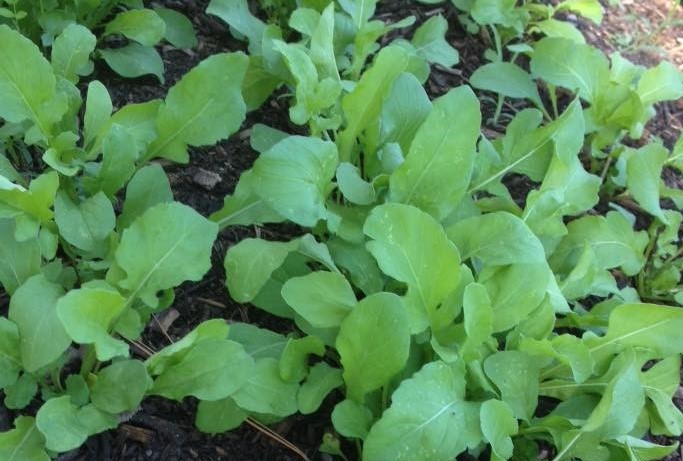
Arugula is a pungent, peppery leafy green native to the Mediterranean. It is in the Brassica or crucifer family, which also contains vegetables such as broccoli, kale, radishes, and cabbage, but is perhaps less common in the edible garden landscape. Although arugula is typically considered a fall vegetable, it can be seeded all year long with a little bit of protection from extreme cold or heat.
Arugula is an easy green to grow and adds pungent, peppery flavor to salads, pizzas, and many other dishes. Photo by Turkey Hill Farm.
Matter of fact, you can plant arugula every few weeks year-round to enjoy young tender leaves anytime. Since arugula has a compact root system, sow seeds one to two inches apart, thin out young whole plants as they fill in, and add them to salads for some extra dinner pizazz. Once plants are four to six inches apart, begin to harvest just arugula leaves, leaving the plants to grow taller in height. Leaves make great toppings on a sandwich or pizza, can be tossed in pasta just before serving, or can be steamed, stir-fried, or pureed and added to a plethora of dishes.
Although arugula is not as flashy as many of its fall garden counterparts, it is often the easiest to manage and last to get pest and disease problems. While your lettuce is attacked by slugs, kale crawling with aphids, and cabbage chewed up by armyworms, arugula often shines unblemished. And in late fall and winter, arugula will only need cold protection if we have a hard freeze (temperatures below 28 degrees for more than four hours). In these cases, cover your plants with frost cloth, bed sheets, or simply buckets, if your arugula patch is small. Just remember to secure your cover to the ground, such as using bricks to pin the cloth, to prevent gaps for air to escape. If done correctly, you can raise air temperatures eight degrees.
From June to September it will be helpful to plant your arugula in partial shade or use shade cloth with 40 to 60 percent density to cut the intensity of the heat. Spring and summer planted arugula may go to seed faster than in fall or winter, but because it is such an easy plant to sow and manage, you can be planting your next round just as your previous crop begins to senesce.
Throughout the life cycle of arugula, you will notice changes in the intensity of the plant’s complex flavor. This is due to fluctuations in sulfur compounds called glucosinolates, which increase as the plant matures.
So be brave, clear some space in your garden plot, and give this spicy cabbage cousin a try!
by Sheila Dunning | Nov 8, 2018
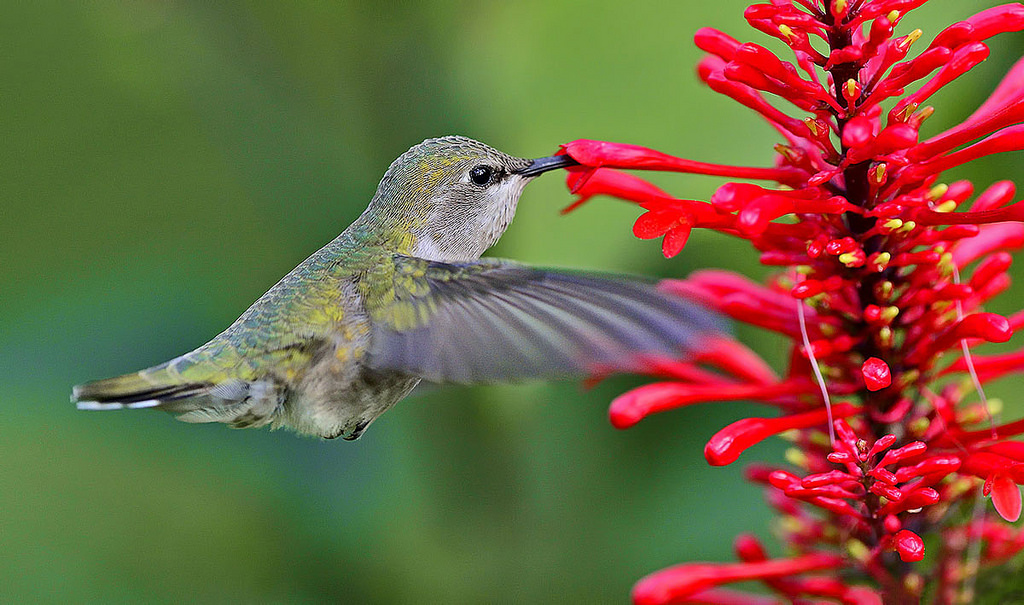
 Looking to add something to brighten your landscape this autumn? Firespike (Odontonema strictum) is a prolific fall bloomer with red tubular flowers that are very popular with hummingbirds and butterflies. It’s glossy dark green leaves make an attractive large plant that will grow quite well in dense shade to partial sunlight. In frost-free areas firespike grows as an evergreen semi-woody shrub, spreads by underground sprouts and enlarging to form a thicket. In zones 8 and 9 it usually dies back to the ground in winter and resprouts in spring, producing strikingly beautiful 9-12 inch panicles of crimson flowers beginning at the end of summer and lasting into the winter each year. Firespike is native to open, semi-forested areas of Central America. It has escaped cultivation and become established in disturbed hammocks throughout peninsular Florida, but hasn’t presented an invasive problem. Here in the P
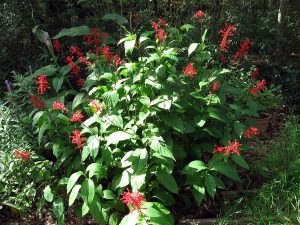 anhandle, firespike will remain a tender perennial for most locations. It can be grown on a wide range of moderately fertile, sandy soils and is quite drought tolerant. Firespike may be best utilized in the landscape in a mass planting. Plants can be spaced about 2 feet apart to fill in the area quickly. It is one of only a few flowering plants that give good, red color in a partially shaded site. The lovely flowers make firespike an excellent candidate for the cutting garden and is a “must-have” for southern butterfly and hummingbird gardens. Additional plants can be propagated from firespike by division or cuttings. However, white-tailed deer love firespike too, and will eat the leaves, so be prepared to fence it off from “Bambi”.
by Sheila Dunning | Oct 2, 2018
 Each fall, nature puts on a brilliant show of color throughout the United States. As the temperatures drop, autumn encourages the “leaf peepers” to hit the road in search of the red-, yellow- and orange-colored leaves of the northern deciduous trees. In Northwest Florida the color of autumn isn’t just from trees. The reds, purples, yellow and white blooms and berries that appear on
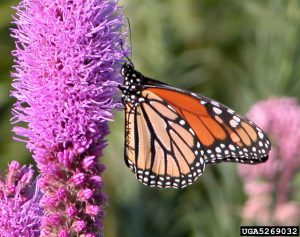
Monarch butterfly on dense blazing star (Liatris spicata var. spicata).
Beverly Turner, Jackson Minnesota, Bugwood.org
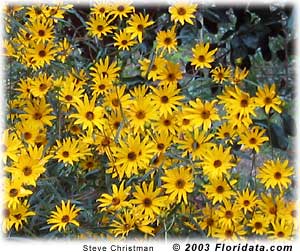
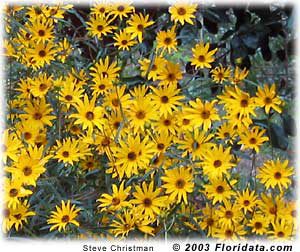
many native plants add spectacular color to the landscape. American Beautyberry, Callicarpa americana, is loaded with royal-colored fruit that will persist all winter long. Whispy pinkish-cream colored seedheads look like mist atop Purple Lovegrass, Eragrostis spectabilis and Muhlygrass, Muhlenbergia capillaris. The Monarchs and other butterfly species flock to the creamy white “fluff” that covers Saltbrush, Baccharis halimifolia. But, yellow is by far the dominant fall flower color. With all the Goldenrod, Solidago spp., Narrowleaf Sunflower, Helianthus angustifolius and Tickseed, Coreopsis spp., the roadsides are golden. When driving the roads it’s nearly impossible to not see the bright yellows in the ditches and along the wood’s edge. Golden Asters (Chrysopsis spp.), Tickseeds (Coreopsis spp.), Silkgrasses (Pityopsis spp.), Sunflowers (Helianthus spp.) and Goldenrods (Solidago spp.) are displaying their petals of gold at every turn. These wildflowers are all members of the Aster family, one of the largest plant families in the world. For most, envisioning an Aster means a flower that looks like a daisy. While many are daisy-like in structure, others lack the petals and appear more like cascading sprays. So if you are one of the many “hitting the road in search of fall color”, head to open areas. For wildflowers, that means rural locations with limited homes and businesses. Forested areas and non-grazed pastures typically have showy displays, especially when a spring burn was performed earlier in the year. Peeking out from the woods edge are the small red trumpet-shaped blooms of Red Basil, Calamintha coccinea and tall purple spikes of Gayfeather, Liatris spp.
Visit the Florida Wildflower Foundation website, www.flawildflowers.org/bloom.php, to see both what’s in bloom and the locations of the state’s prime viewing areas. These are all native wildflowers that can be obtained through seed companies. Many are also available as potted plants at the local nurseries. Read the name carefully though. There are cultivated varieties that may appear or perform differently than those that naturally occur in Northwest Florida. For more information on Common Native Wildflowers of North Florida go to http://edis.ifas.ufl.edu/ep061
by Daniel J. Leonard | Sep 25, 2018
Florida is known for many things, however sweeping vistas of hillsides covered in the orange, red, and yellow foliage of fall is not one of them. Our long, hot summers and short, cool (not cold) winters, and lack of anything of substance resembling a season in between, precludes the fall color show our neighbors to the north enjoy. Don’t settle for synthetic Halloween decorations or faux painted leaves to add festivity to the autumn landscape design. When football season kicks off and summer blooming annuals begin to fade, it’s time to reach into the horticultural toolbox and pull out a couple fall-y Florida Friendly annual foliage species, perfect for the balmy Panhandle “autumn”: ‘Alabama Sunset’ coleus and ‘Petra’ croton.
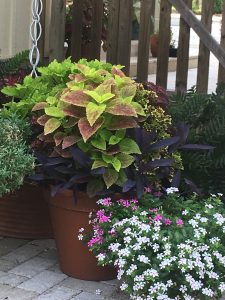
‘Alabama Sunset’ Coleus in mixed container – Photo Courtesy Andrea Schnapp
The first plant to consider when looking for outstanding heat tolerant foliage is the common coleus (Solenostemon scuttellarioides), particularly the cultivar ‘Alabama Sunset’. As the name indicates, ‘Alabama Sunset’ offers leaves in shades of red and yellow, perfect for designing fall containers or mixing into planting beds. This popular summer annual is known for its ability to add interesting color and texture to shady areas.
Recently with the arrival of the ‘sun coleus’ series (to which ‘Alabama Sunset’ belongs), coleus is permissible in situations with greater sunlight. Coleus is incredibly easy to grow and easy to find since nearly every nursery stocks at least a few cultivars. What’s more, these plants are generally free of pests and disease problems! Even sun coleus does appreciate a little protection from the hot afternoon sun and occasional deadheading of flowers.
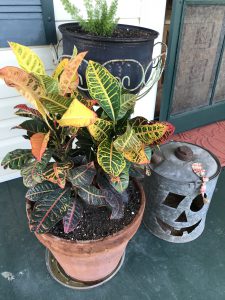
‘Petra’ Croton. Photo courtesy Daniel Leonard.
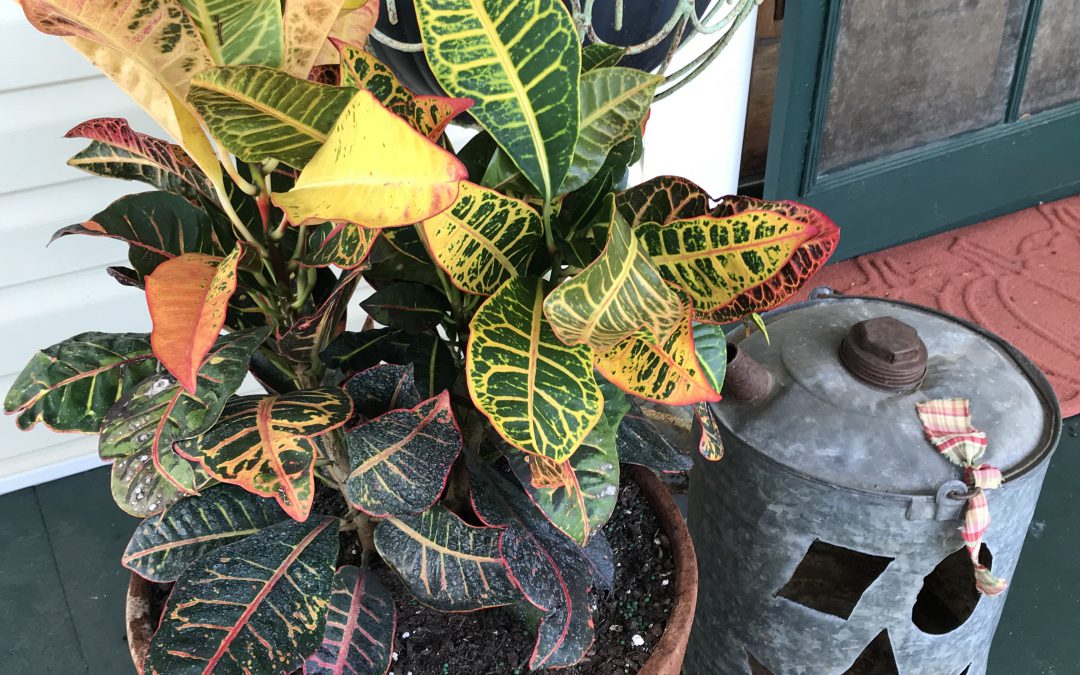
The second plant in the fall foliage arsenal is ‘Petra croton’ (Codiaeum variegatum ‘Petra’). Primarily known as a tropical foliage or indoor houseplant, Petra croton is criminally underused in fall landscape and container design. Petra croton sports bold magnolia-sized leaves striped with colors of yellow, red, orange, and black. A great Halloween plant to complement those front-porch Jack-O-Lanterns!
Like coleus, Petra croton is extremely easy to grow either in a container or in the ground. It should be located in either in full sun or partial shade and watered through establishment. Otherwise, this species is quite drought tolerant and can be killed with kindness if watered too frequently!
Although croton is a perennial shrub in the tropics, in Northwest Florida it may be killed by frost and best treated as an annual. Croton can be expected to reach 30-36” in height in a single season, its size and the boldly colored foliage make it a true focal point in the autumn landscape!
Appalachian-grade fall color may be unattainable in the Panhandle in the literal sense, but with these novel plant selections the autumn mood may be present even as the emerald waves hit the sugar white sand. By using annual foliage plants that possess traditional fall colors throughout their life cycle, anyone can add a splash of Autumn to their mixed containers or landscape beds. ‘Alabama Sunset’ coleus and ‘Petra’ croton are the perfect match for this time of year, pairing ease of culture with bold, seasonal color. Plant a couple today!

by Molly Jameson | Aug 20, 2018
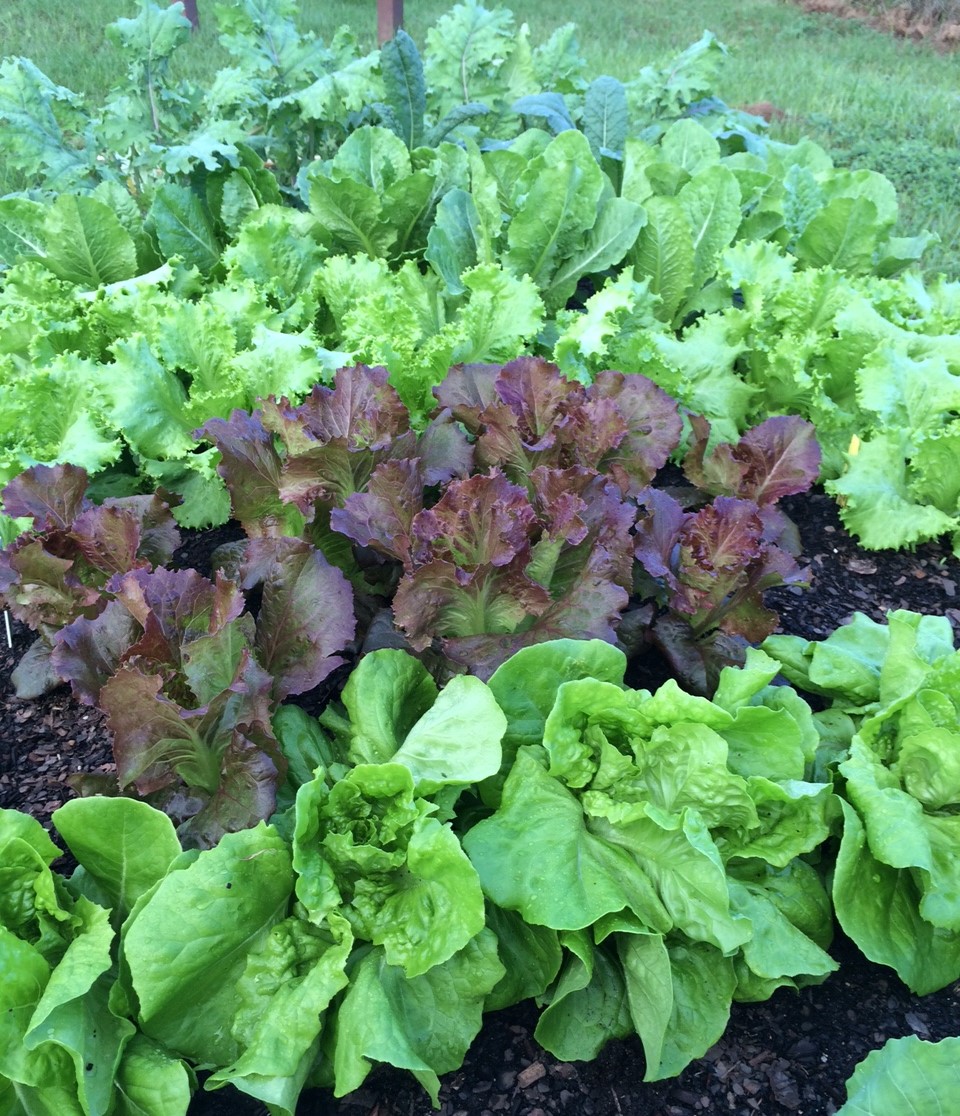
Start preparing now so your fall garden will be full of dark leafy greens, multi-colored lettuces, and root vegetables of all shapes and sizes. Photo by Molly Jameson.
August is a double-edged sword. The oppressive heat is at its pinnacle – where even the thought of spending time in the garden makes you break into a sweat – but it is also the time of year that visions of fall start coming into focus, and you can’t help but peek at the weekly forecast for signs of declining temperatures.
If your garden looks anything like mine, there are sweet potato vines weaving in and out of every corner of sunlight they can find. The sweet peppers you let fully ripen are bright red and sweeter than ever. You may have already reaped the reward of your watermelons, but you’re still hoping you can get the harvest timing right for the late season bloomers. Your okra is as tall as you – maybe even taller – and you’re grateful, for their big oblong heart-shaped leaves are shading out at least some of those warm-season weeds.
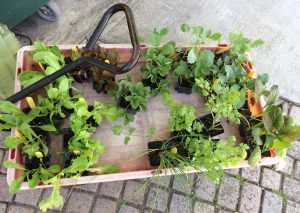
Fall is the time to start growing kale, lettuce, onions, parsley, mustard greens, and much more. Photo by Molly Jameson.
But the seasons are-a-changing, and soon you’ll be pulling up the last of your summer garden to make room for dark leafy greens, a cornucopia of roots, and a rainbow of lettuce varieties.
If this is making you want to rush to your nearest plant nursery and unearth all your half-used fall seed packets, then come on down to the Leon County Extension Office in Tallahassee to join us for our annual Fall Backyard Gardening Series!
This is a two-part series, running from 6:00 to 8:00 p.m. on September 4 and 6:00 to 8:00 p.m. on September 11, 2018, at 615 Paul Russell Road. I, along with Extension Agents Mark Tancig and Trevor Hylton, will discuss garden site selection, soil and fertilization, and fall planting and gardening techniques. As a bonus, you’ll leave with freshly planted vegetable seeds to take home to later transplant into your garden.
Please register on Eventbrite. The cost for both evenings is $10, and light refreshments will be provided. For more information, contact Molly Jameson at mjameson@ufl.edu or by phone at 850-606-5219.
And if you’re not in the Tallahassee area, check with your local extension office to see what fall gardening events they may have available. Tending a fall garden in Florida can be one of the most rewarding outdoor endeavors you can experience!


