by Beth Bolles | Aug 7, 2019
We are always on the lookout for an attractive plant for our landscape. At the nursery, some plants have a more difficult time gaining our attention. They may not be as showy, possessing neither colorful flowers nor bold foliage. In these cases, we could be missing out on low maintenance plant that offers its own form of beauty in the right landscape spot.
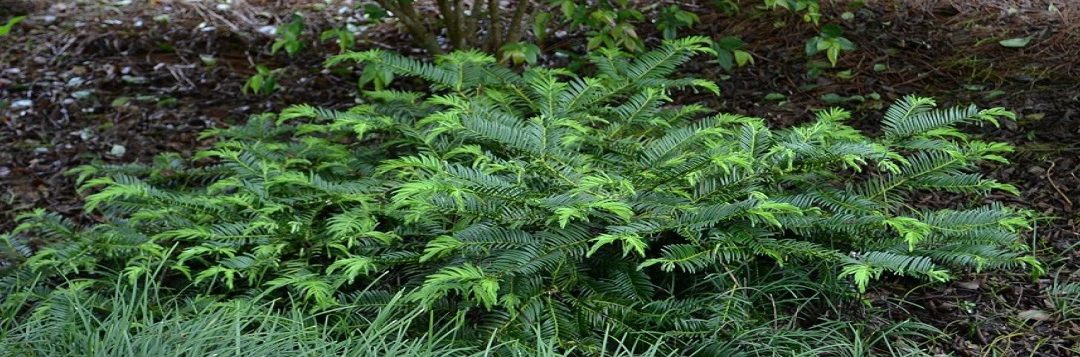
One plant that I love is the Japanese plum yew (Cephalotaxus harringtonia), especially the spreading form ‘Prostrata’. In the nursery container, this plant is nothing special but once established in the landscape it performs well. The conifer type leaves are an attractive dark green and the ‘Prostrata’ selection is low growing to about 2 to 3 feet. An advantage too is that growth is slow so it won’t take over or require routine pruning.
Japanese plum yews grow best in partial shade and once established will be fine with rainfall. For a shadier side of the home, the spreading plum yew has a place as an evergreen foundation plant too.
Japanese plum yew in a shaded garden. Photo by Beth Bolles, UF IFAS Extension Escambia County
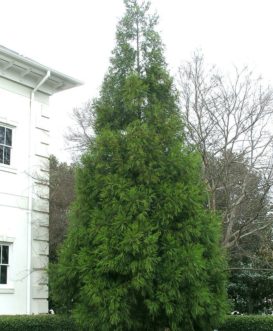
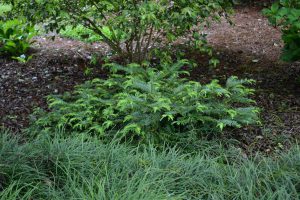
If the ‘Prostrata’ selection is too low growing for you, consider the ‘Fastigiata’ cultivar that will grow upright to about 8 feet with a 5 foot spread.
A year old planting of upright Japanese plum yew in filtered light. Photo by Beth Bolles, UF IFAS Extension Escambia County
by Molly Jameson | Aug 7, 2019

Rachel Mathes, Leon County Horticulture Program Assistant
Article by Rachel Mathes, Leon County Horticulture Program Assistant
Sensory gardens are a great way to involve children and people with special needs with gardening. Gardens provide a no-judgement zone for creative expression and allow us to get down in the dirt every now and then. Because sensory gardens are designed to be appreciated by more than just the sense of sight, they are an approachable way for disabled and non-disabled users alike. By engaging taste, feel, smell, hearing, and more, sensory gardens allow visitors of all ages and circumstances to engage in gardening.
To make your own sensory garden, think about what feeling you would like to experience while visiting your garden. Do you want a calm healing place of introspection or perhaps a vibrant playful area for engaged learning in nature? Having a theme can help you choose the different elements you would like to include in your sensory garden, which can be an entire yard or as small as a container. They are being used more and more in memory care units of nursing homes as well as preschools and elementary schools, but you can make your own right at home.
Water features provide enticing sounds for human visitors and a water source for wildlife. Can you spot the honeybee enjoying the fountain? Photo by Rachel Mathes.
The sound of moving water is calming to many, so a small fountain can be a great addition to your sensory garden. It will also benefit local wildlife by offering them a small watering hole. As long as the water is moving, mosquitos should not be a problem, but mosquito dunks or even the incorporation of mosquito fish are easy solutions to solving mosquito problems in small ponds or fountains. Some plants to consider for their sounds include false indigo (Baptisia australis), switchgrass (Panicum virgatum), and mountain oats (Chasmanthium latifolium). False indigo produces seed pods great for rattling, and when it is windy, switchgrass and mountain oats provide a gentle rustle.
A variety of textures offers the gardener a safe place to interact with nature without worrying about the dangers of poison ivy and other plant irritants. Plants like muhly grass (Muhlenbergia capillaris) offer a multitude of interactions as they sway in the wind, have bright white and pink blooms, and can be braided together in a variety of patterns. The native sunshine mimosa (Mimosa strigillosa) is a low growing ground cover that puts out pink powderpuff flowers and folds up when touched. Some other plants to explore by touch are lamb’s ear (Stachys byzantine), maiden grass (Miscanthus sinensis), the mildly dangerous points of aloe, and the many textures of southern magnolia (Magnolia grandiflora).
There are plenty of smelly plants to entice your nose in the garden. From rosemary to dill, mint and beyond, many herbs do very well here in the Florida Panhandle. Lemon balm and lemongrass bring a punch of citrus without the need for a big citrus tree. Beyond herbs, pine needles give a resinous scent when compressed, gardenias offer heavy sweetness from their voluminous white blooms, and sweet almond verbena (Aloysia virgata) delights with a vanilla almond aroma that carries pleasantly in the wind.
Fragrant blooms can offer pleasant aromas to enhance a sensory garden. Photo by Rachel Mathes.
When it comes to tasting in a sensory garden, fruits and vegetables are an obvious choice. Plenty of annual vegetables can be grown year-round, from leafy greens in the fall, winter, and early spring, to tomatoes and peppers in the summer. Blackberries are an easy to grow favorite in this part of the state, are available as thornless varieties, and take well to growing on a trellis in small spaces. A great edible that many children favor in the Demonstration Garden at the Leon County Extension Office is cranberry hibiscus. The bright red leaves of new growth are a sweet and sour treat they equate to Sour Patch Kids candy. The older leaves can be added into stir fries and salads and the flowers can be cooked into a syrup for making purple lemonade. Herbs can be used for their taste factor as well. But if your sensory garden will be visited by the general public without supervision, I recommend clear delineation for the tasting area so that no one eats anything unpalatable or poisonous by accident.
When setting up your sensory garden, be sure to involve your intended audience. Small children thrive when given a job to do and will enjoy planting sweet herbs alongside you. Even regular maintenance of the garden can involve the participants you hope to engage. The simple acts of weeding and watering can foster a sense of responsibility and empowerment as the visitors gain sensory enrichment through these activities and see the fruits of their labor with time.
Rachel Mathes is the Horticulture Program Assistant for UF/IFAS Extension Leon County.
by Logan Boatwright | May 27, 2019
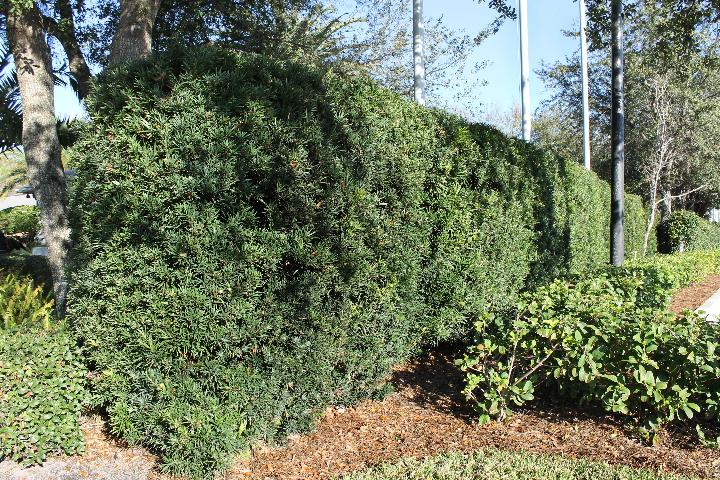
Everyone likes their privacy. Usually, a large eight-foot privacy fence is built for that reason. That option tends to be expensive. What is a different approach for a similar result? A natural wall!
One advantage of having a natural wall is that a homeowner has options when choosing plants. When it comes to choosing plants for a natural wall, the first thing to decide is if a wall needs to be year round or seasonal. Size would be the next factor to determine.
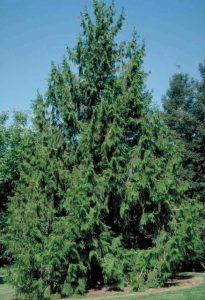
Japanese Cedar (Cryptomeria japonica) has the capability of growing 40 to 60 feet in height and 15 to 20 feet in width. There are some smaller varieties to pick from, but where is the fun in having a small wall?
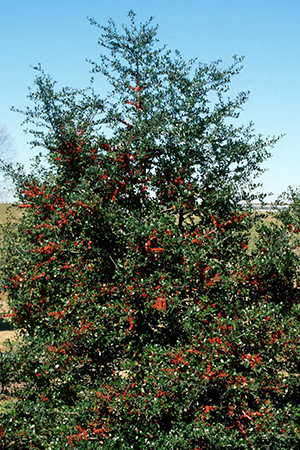
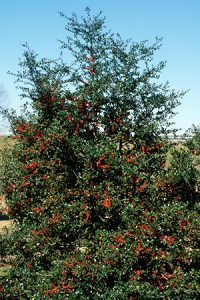
Another plant option that would require pruning, but make an excellent natural wall is Japanese Yew (Podocarpus macrophyllus). This specimen will grow 30 to 40 feet tall and 20 to 25 feet in width if left unpruned, however, it is a slow grower. Yaupon Holly (Ilex vomitoria) comes in several selections of various sizes so the height range is 3 to 20 feet. The width range is 5 to 15 feet.
The Emerald Green Arborvitae is a fast grower that would be ideal for the homeowner who does not want a tall wall. It keeps a tight pyramid shape that will reach heights up 12 to 14 feet and needs 4 to 6 feet of space. Green Giant Arborvitae or Thuja Giant (Thuja standishii x plicata ‘Gre) is an excellent tree to pick for a natural wall. It has the capability to reach 50 to 60 feet in height and spreads out 12 to 20 feet at maturity. This arborvitae is considered to be a fast grower since it can increase more than 24” per year.
The larger selections of Loropetalum are other shrubs that homeowners have used to establish their privacy wall. One can expect a height up to 15 feet if left unpruned and pinkish to purple strap-like flowers, which makes for a great wall height.

‘Yoshino’ Japanese cryptomeria
Photo by Karen Russ, ©HGIC, Clemson Extension
A yaupon holly cultivar (Ilex vomitoria ‘Roundleaf’). John Ruter, University of Georgia, Bugwood.org Creative commons license.
Thuja plicata: Giant Arborvitae. Credit: Ed Gilman, UF/IFAS

Podocarpus macrophyllus or Japanese Yew. Credit: UF/IFAS
These plants are some of the selections homeowners may choose to start their natural walls. Given time, these shrubs will develop into a dense screen for the interruption of unwanted light or noise. To learn more about the aforementioned plant material, contact your local UF / IFAS extension agent.
by Matt Lollar | May 27, 2019
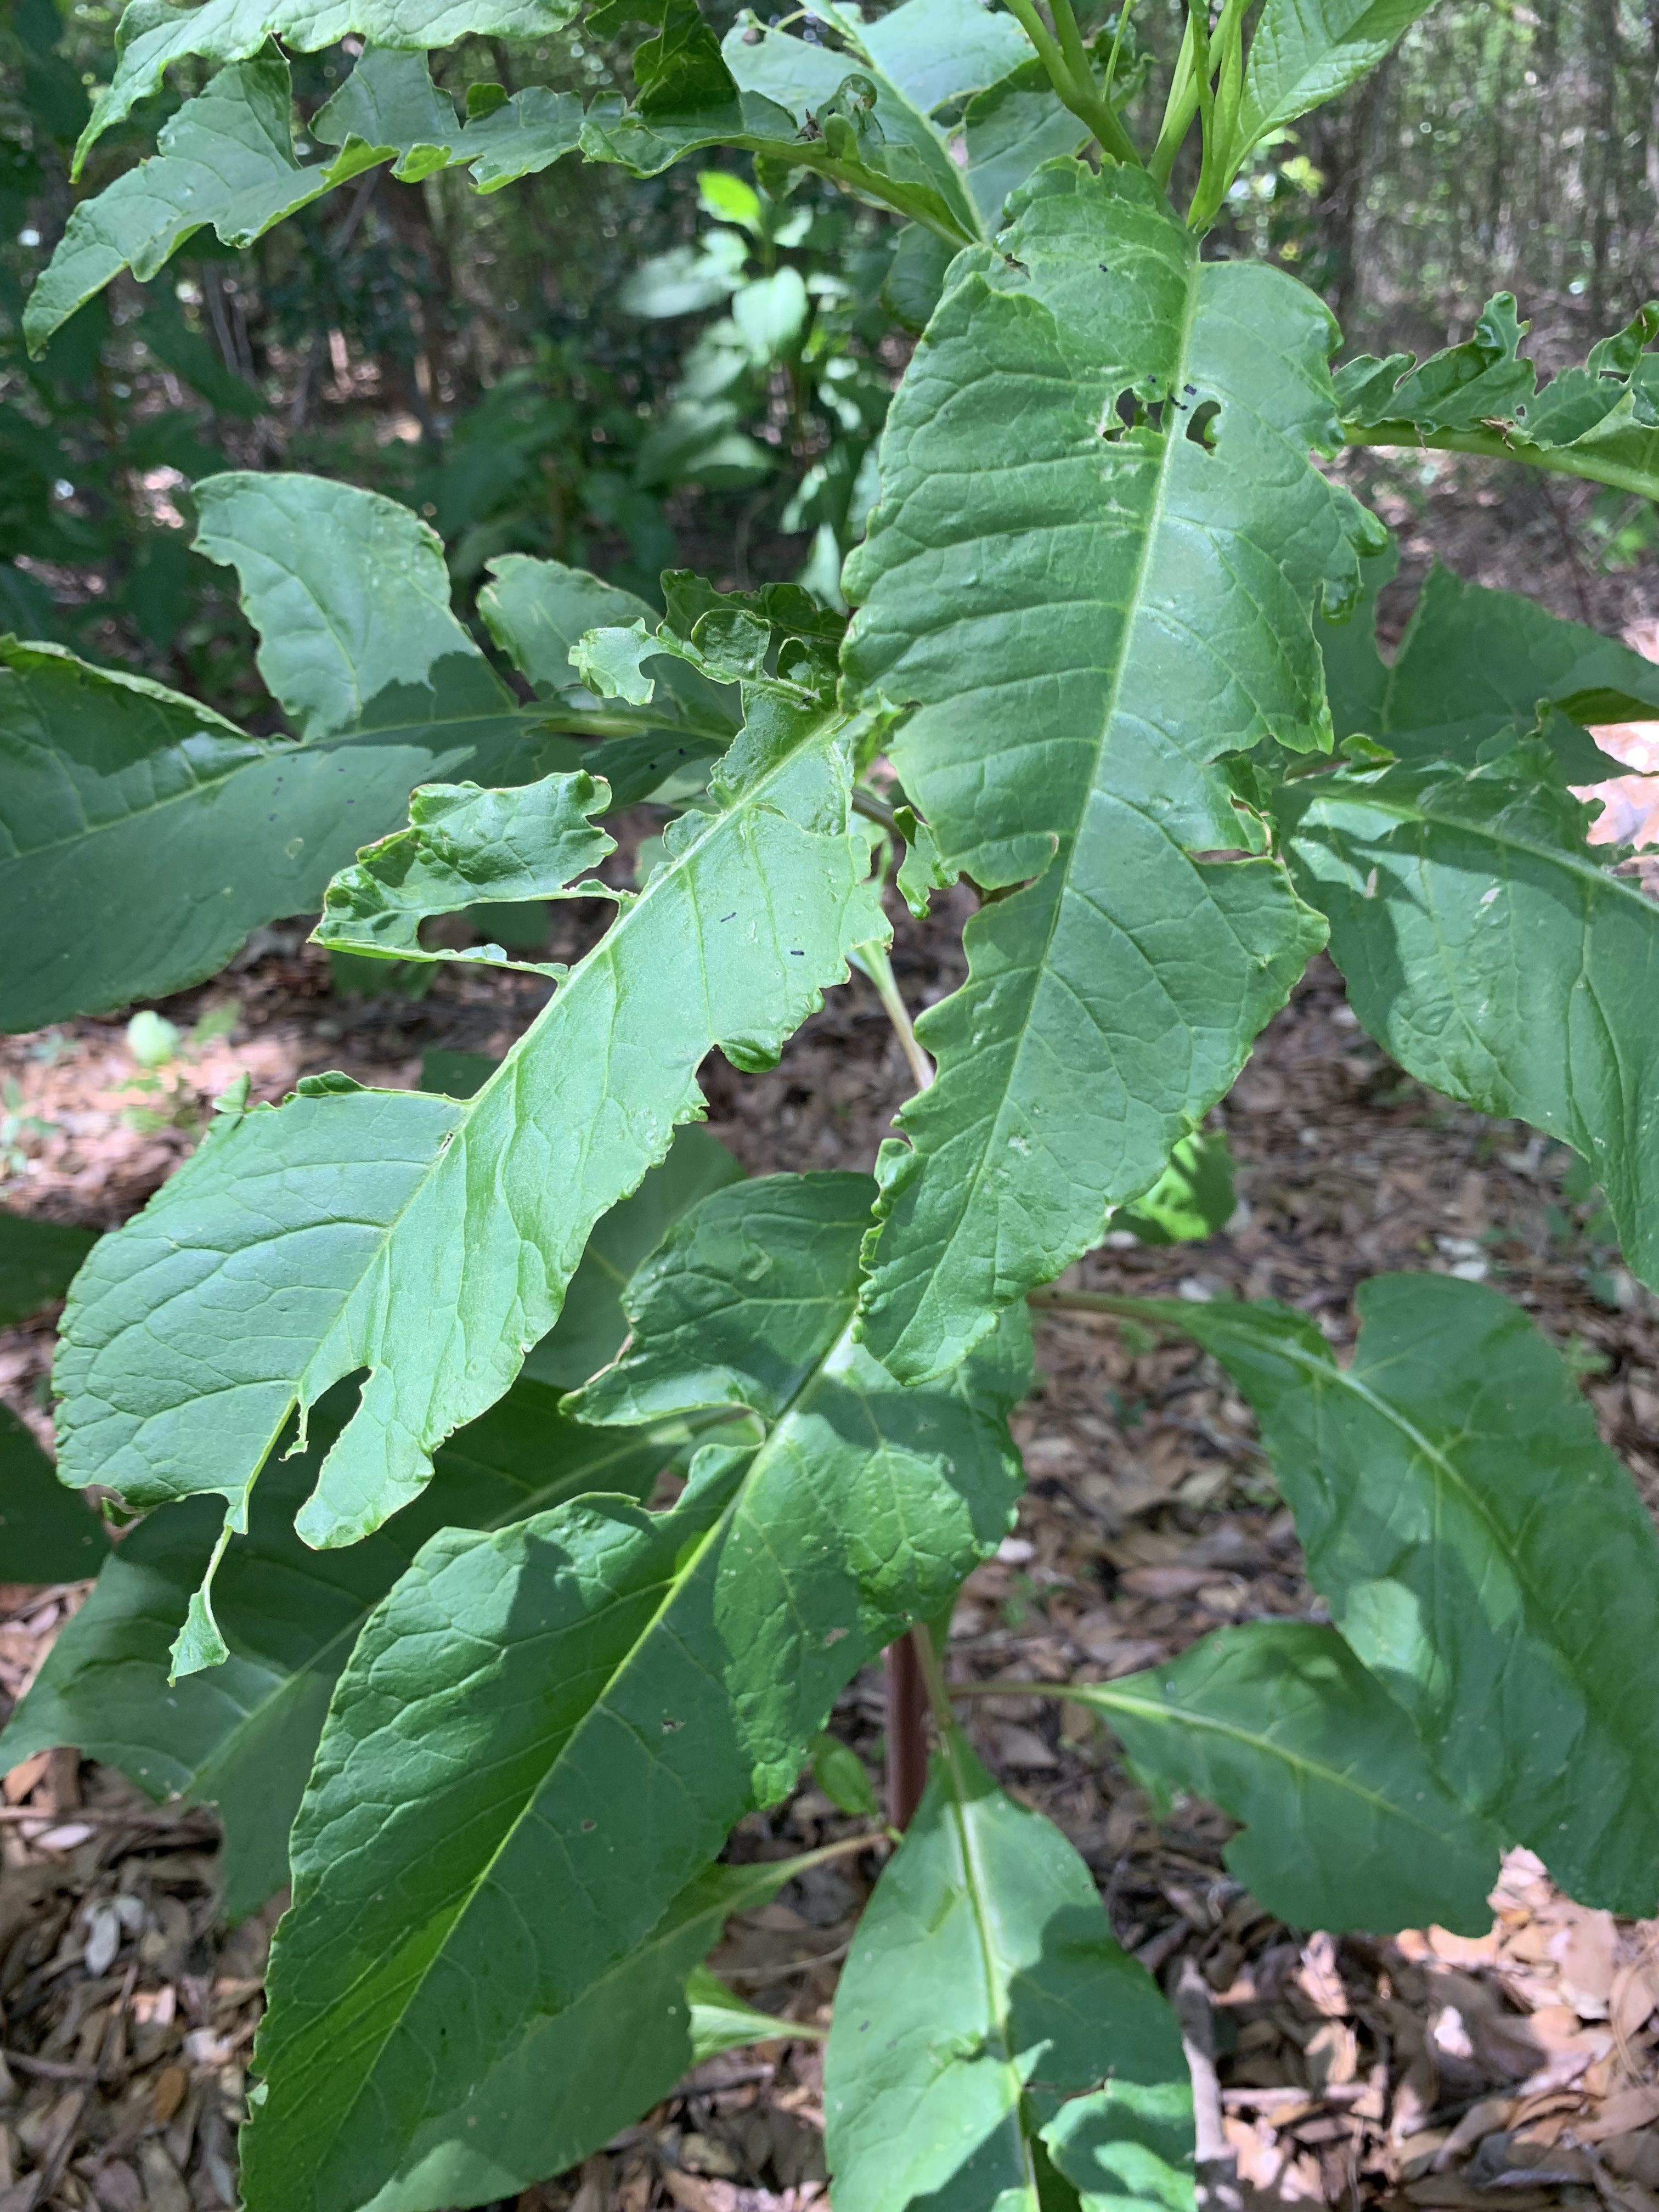
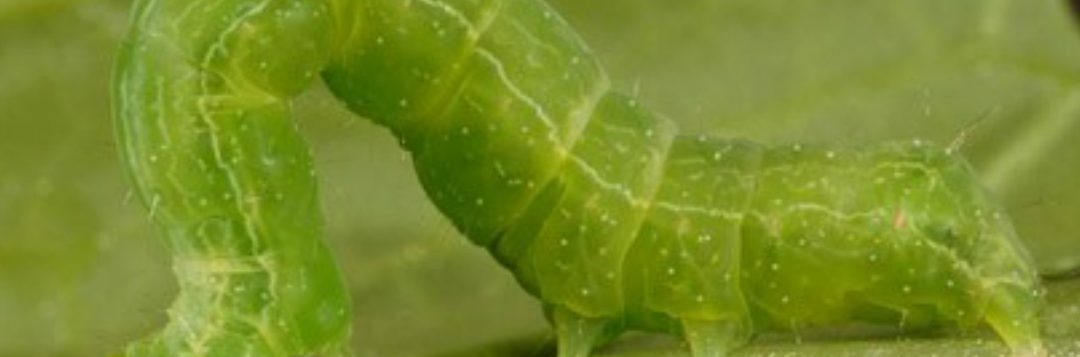
Nobody likes weeds in their garden. Weeds are not only ugly, they can host insects and diseases that later spread to your garden. This situation commonly occurs when weeds belong to the same plant family as the desired landscape or vegetable species, but some insects and diseases have diverse palettes. For example, I recently witnessed a looper caterpillar on a pokeweed plant.

Looper damage on a pokeweed plant. Photo Credit: Matt Lollar, University of Florida/IFAS Extension at Santa Rosa County
Loopers are common pests of vegetable gardens and in the landscape. Probably the most common loopers found in North Florida gardens are cabbage loopers (Trichoplusia ni) and soybean loopers (Chrysodeixis includens). Cabbage loopers can be found feeding on cabbage, of course, as well as leafy greens, cucumbers, tomatoes, chrysanthemums, and snapdragons. Weeds that attract this looper are lambsquarters, dandelions, and curly dock. Soybean loopers like to feed on sweet potatoes, tomatoes, watermelons, geraniums, and sunflowers. They can also be found feeding on oxalis, kutzu, and lantana.

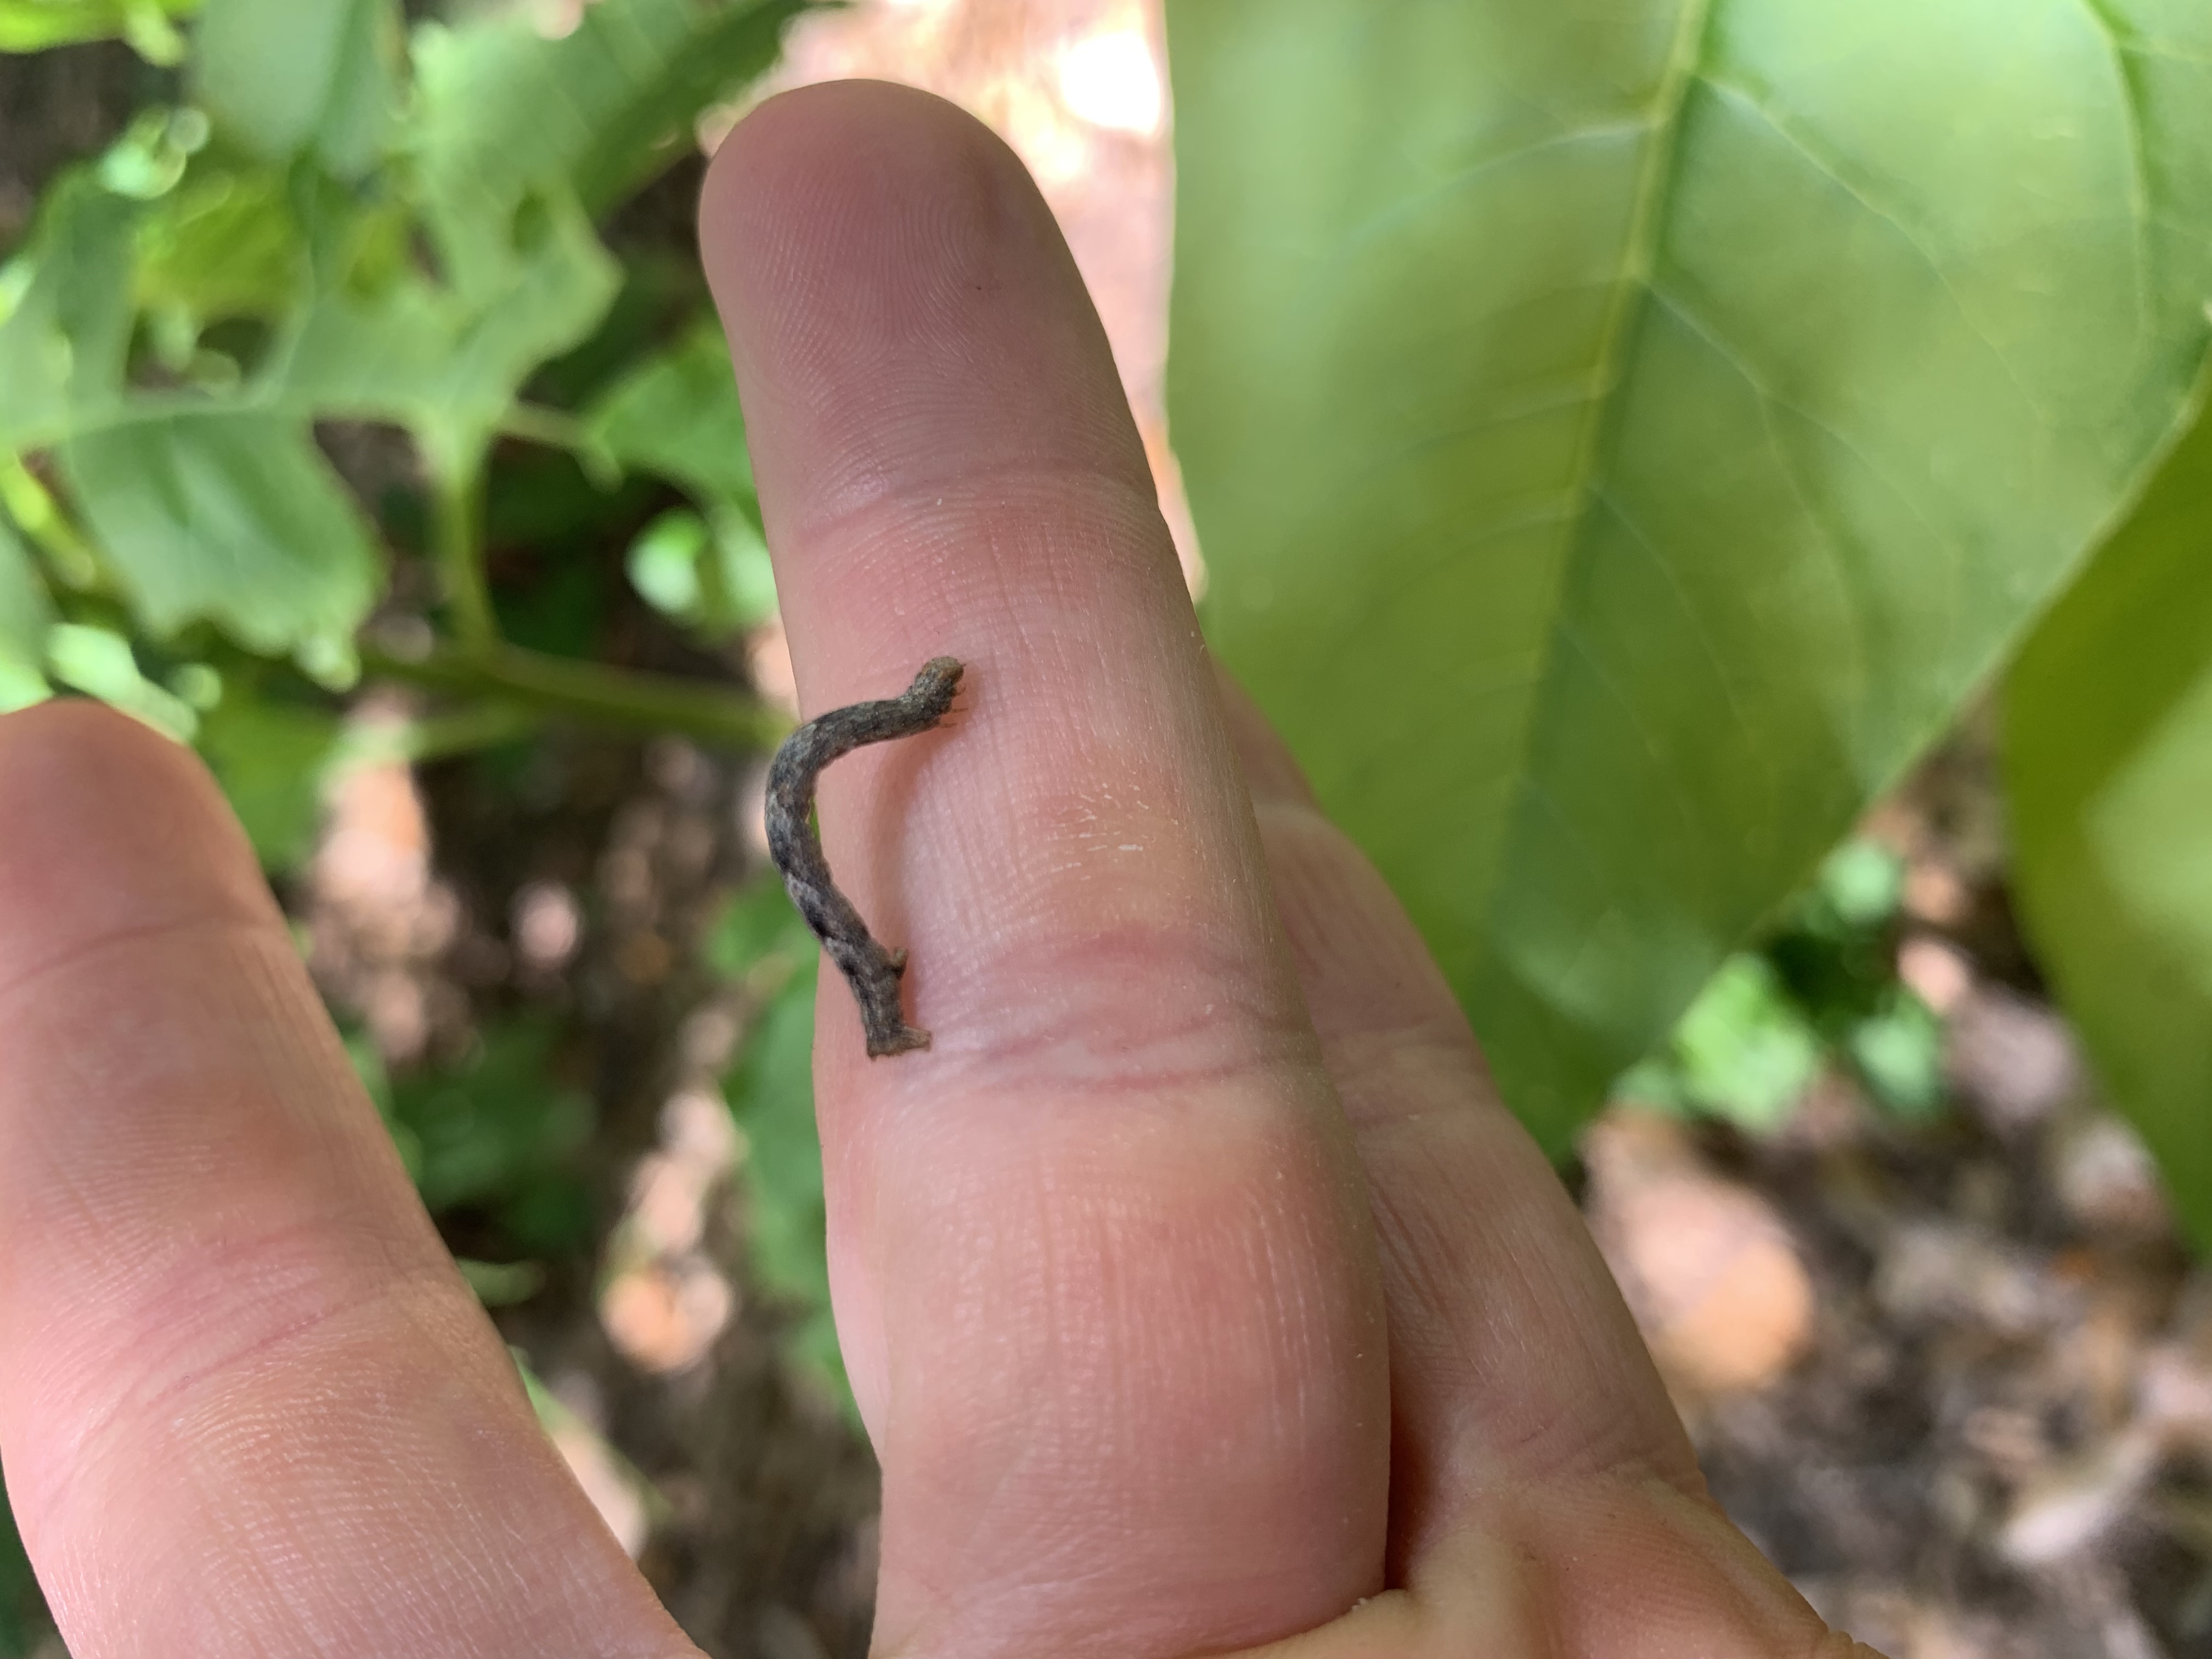
Looper found on pokeweed plant. Photo Credit: Matt Lollar, University of Florida/IFAS Extension at Santa Rosa County
Although weeds can be hosts for pests, they may be used advantageously. Trap crops can be planted at a garden’s perimeter or windward portion to attract pests away from the desired crop. A trap crop draws the pest crop away from the main crop. The trap crop is then destroyed or sprayed with insecticide when the pest insect is found feeding on it. This allows for a reduction or elimination of insecticidal use on the desired crop. However, it is important that both the trap crop and the desired food crop or ornamental crop are regularly scouted to keep track of pest populations.
For more information on trap crops and other insect and disease diversion methods you can read the EDIS Publication: Intercropping, Crop Diversity and Pest Management.
by Molly Jameson | May 20, 2019
Spring is in the air, and that means temperatures are warming up and tank-tops, shorts, and flip-flops will soon be your preferred attire. Once those highs are steadily in the 80s and 90s, any outdoor activity will become coupled with a bottle of water and the occasional ice-cold glass of lemonade.
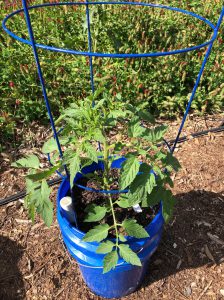
Self-watering containers allow you to continue gardening even if you plan on going on vacation this summer. Photo by Molly Jameson.
If you’re a gardener, you will notice the hot sun doing its best to dehydrate not only you, but your spring vegetable and flower beds too. And although April showers bring May flowers (and Mayflowers bring pilgrims) in many parts of the country, spring is historically one of the driest periods for the Florida Panhandle.
While spring in the Florida Panhandle can be quite dry, it is the relentless heat of summer that really drives up transpiration and evaporation rates. And herein lies the dilemma: the kids are soon to be on summer break, family vacations are on the horizon, and all your favorite summer veggies are on the brink of delivering their bounties.
If you do not have a reliable irrigation system and timer or the fortune of a very generous green-thumbed neighbor, you risk your hard work in the garden succumbing to the heat while you are away. If you find yourself sacrificing a summer garden in place of a vacation, don’t despair. There is a low-cost, homemade solution that can step in while you are away: a self-watering container garden.
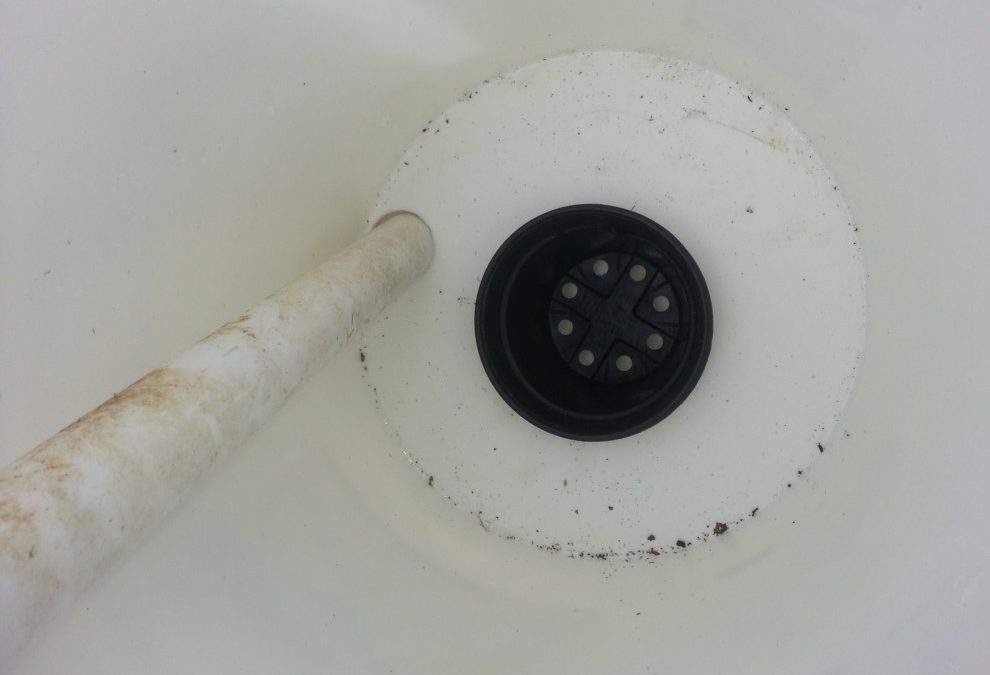
Self-watering containers use the process of capillary action, where water molecules are pulled upward from a water reservoir into soil above and then into and through plant roots. The forces of cohesion, in which water molecules stay close together, and adhesion, in which water molecules “stick” to other substances, create this important phenomenon.
A wicking basket uses capillary action to pull water molecules up from the water reservoir and into the soil. Photo by Trevor Hylton.
While store-bought versions can be costly, you can make a self-watering container for less than $10 with just a few materials and tools. There are multiple designs for creating a self-watering container at home. Typically, designs include two five-gallon food-grade plastic buckets to hold the soil and plant; a knife or hole saw to access the water reservoir; a wicking basket or strips of cotton from an old towel, pants, or shirt to generate the capillary movement of water; a drill and drill bit for drainage; and a plastic pipe for easy filling of the water reservoir.
To make your own, view these Extension-produced self-watering container garden resources and follow the step-by-step instructions that work best for you:
by Logan Boatwright | Apr 16, 2019
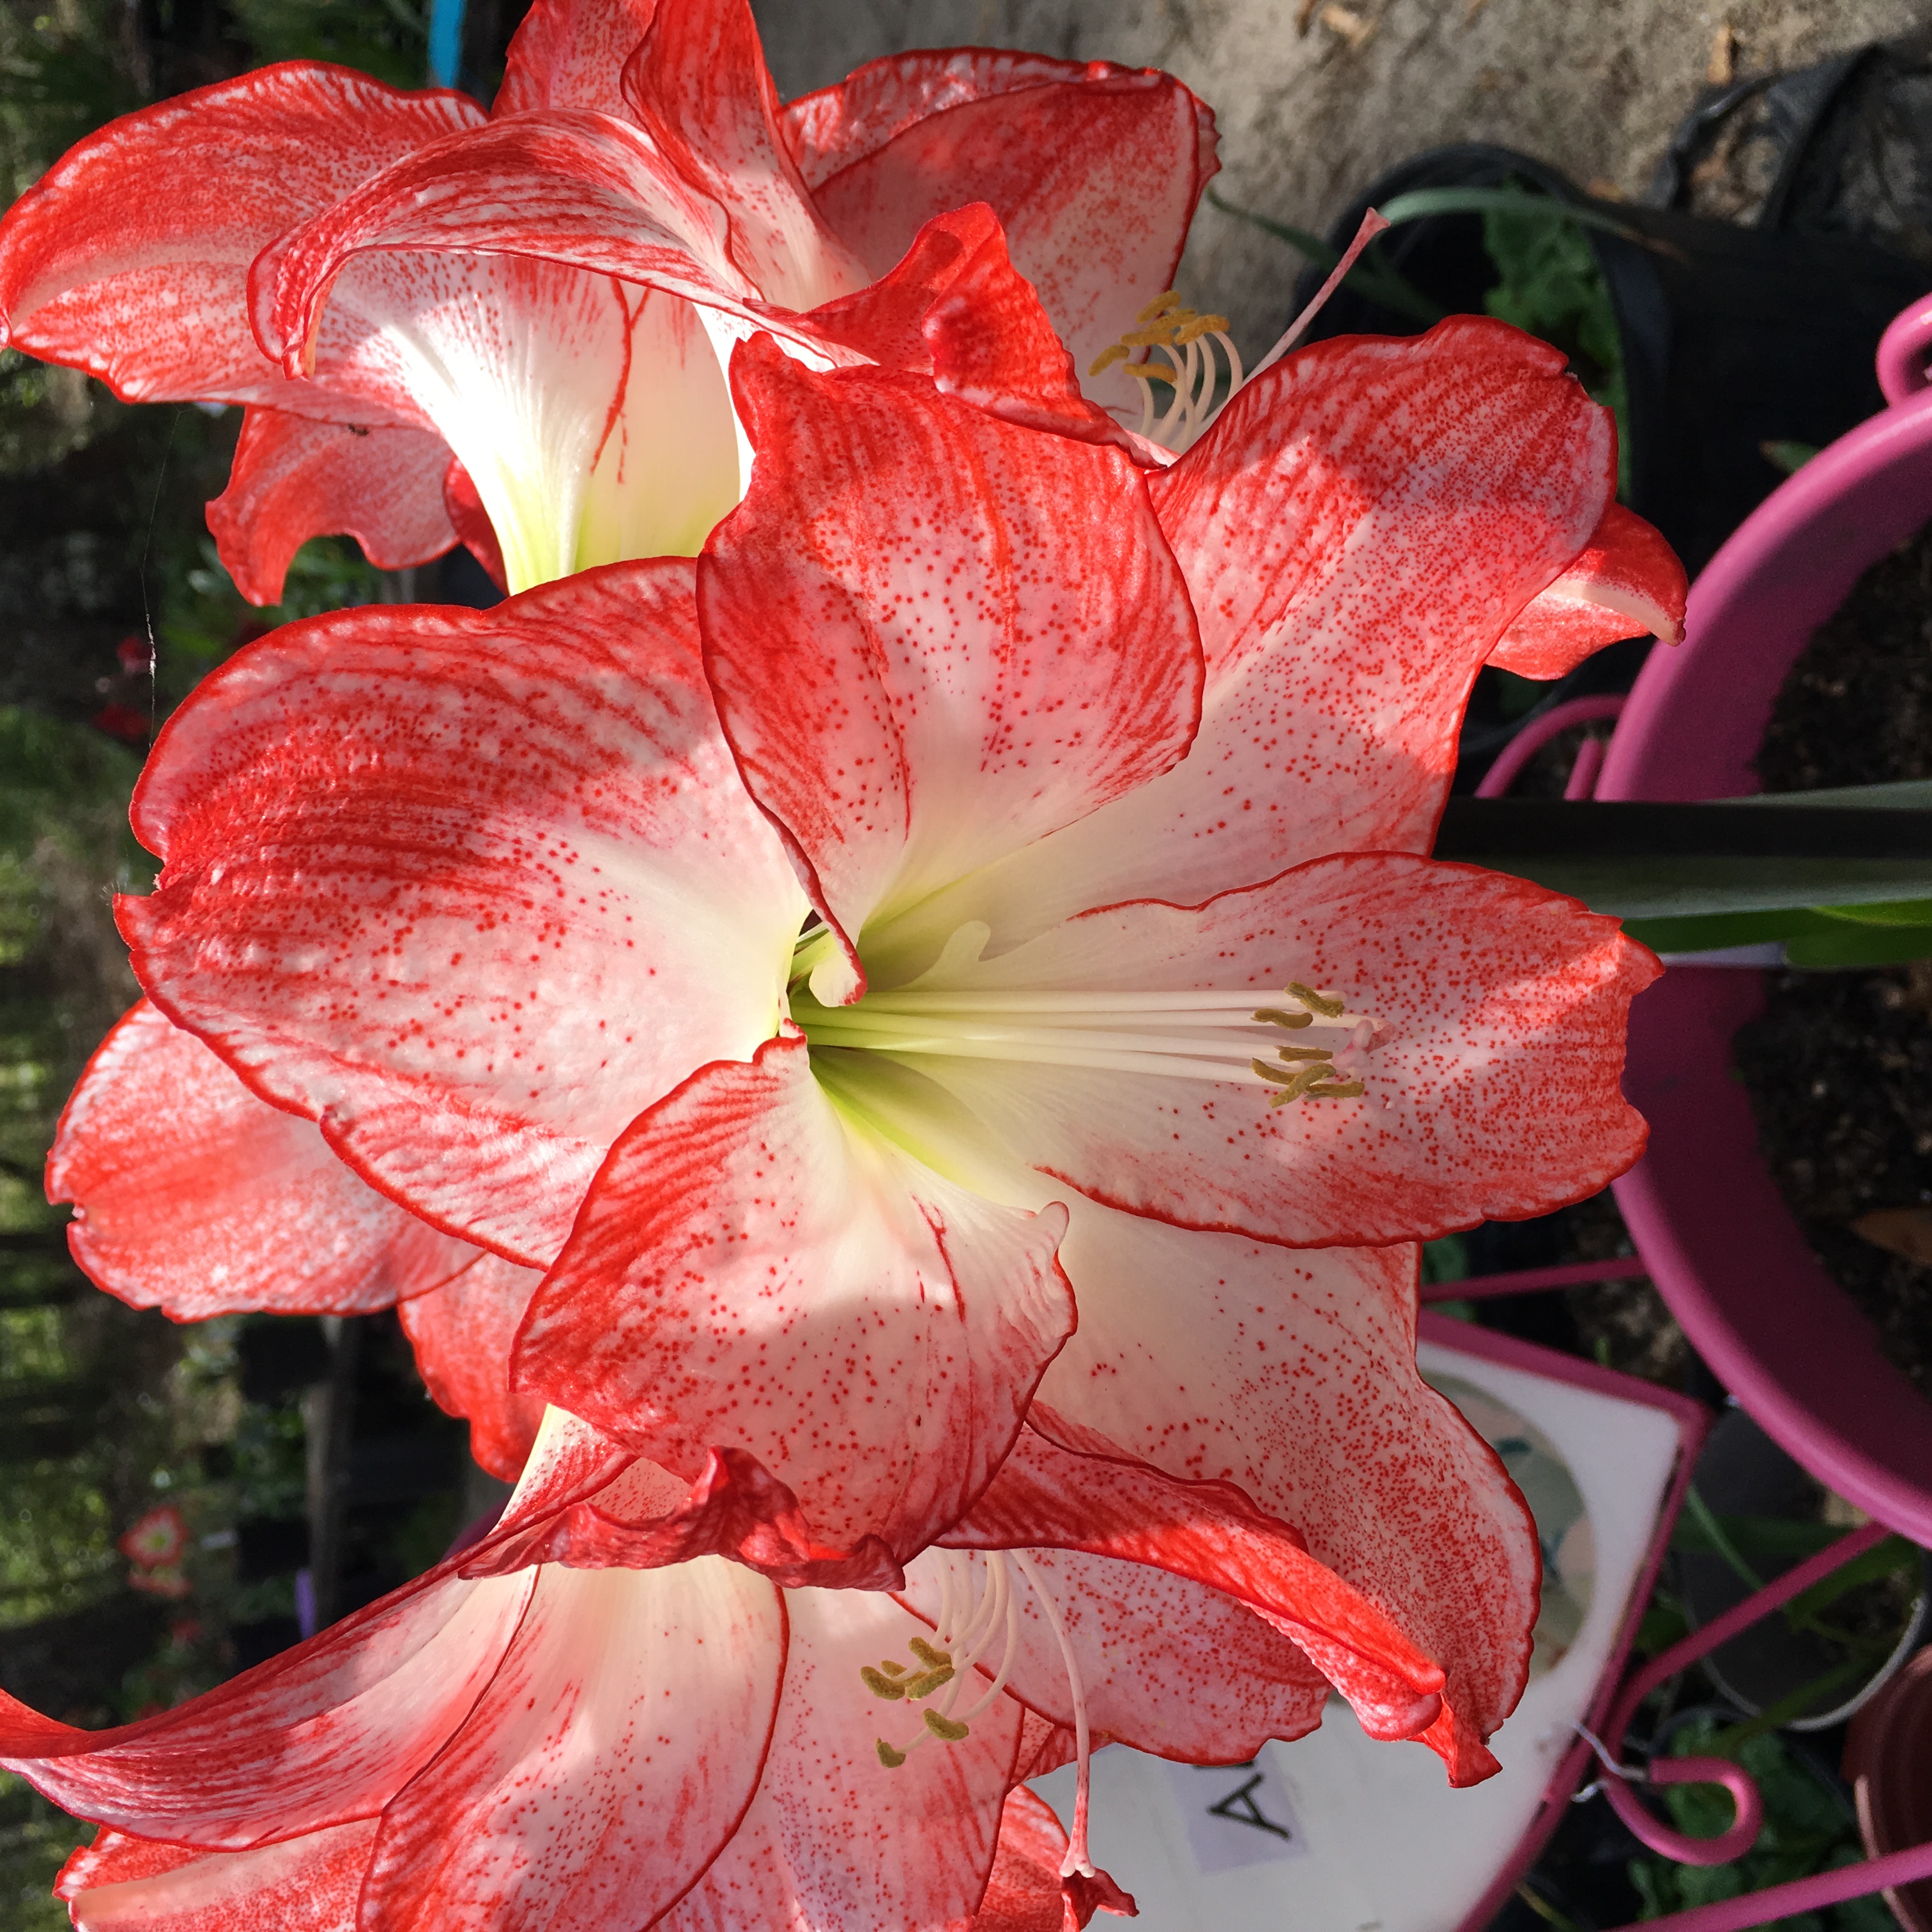
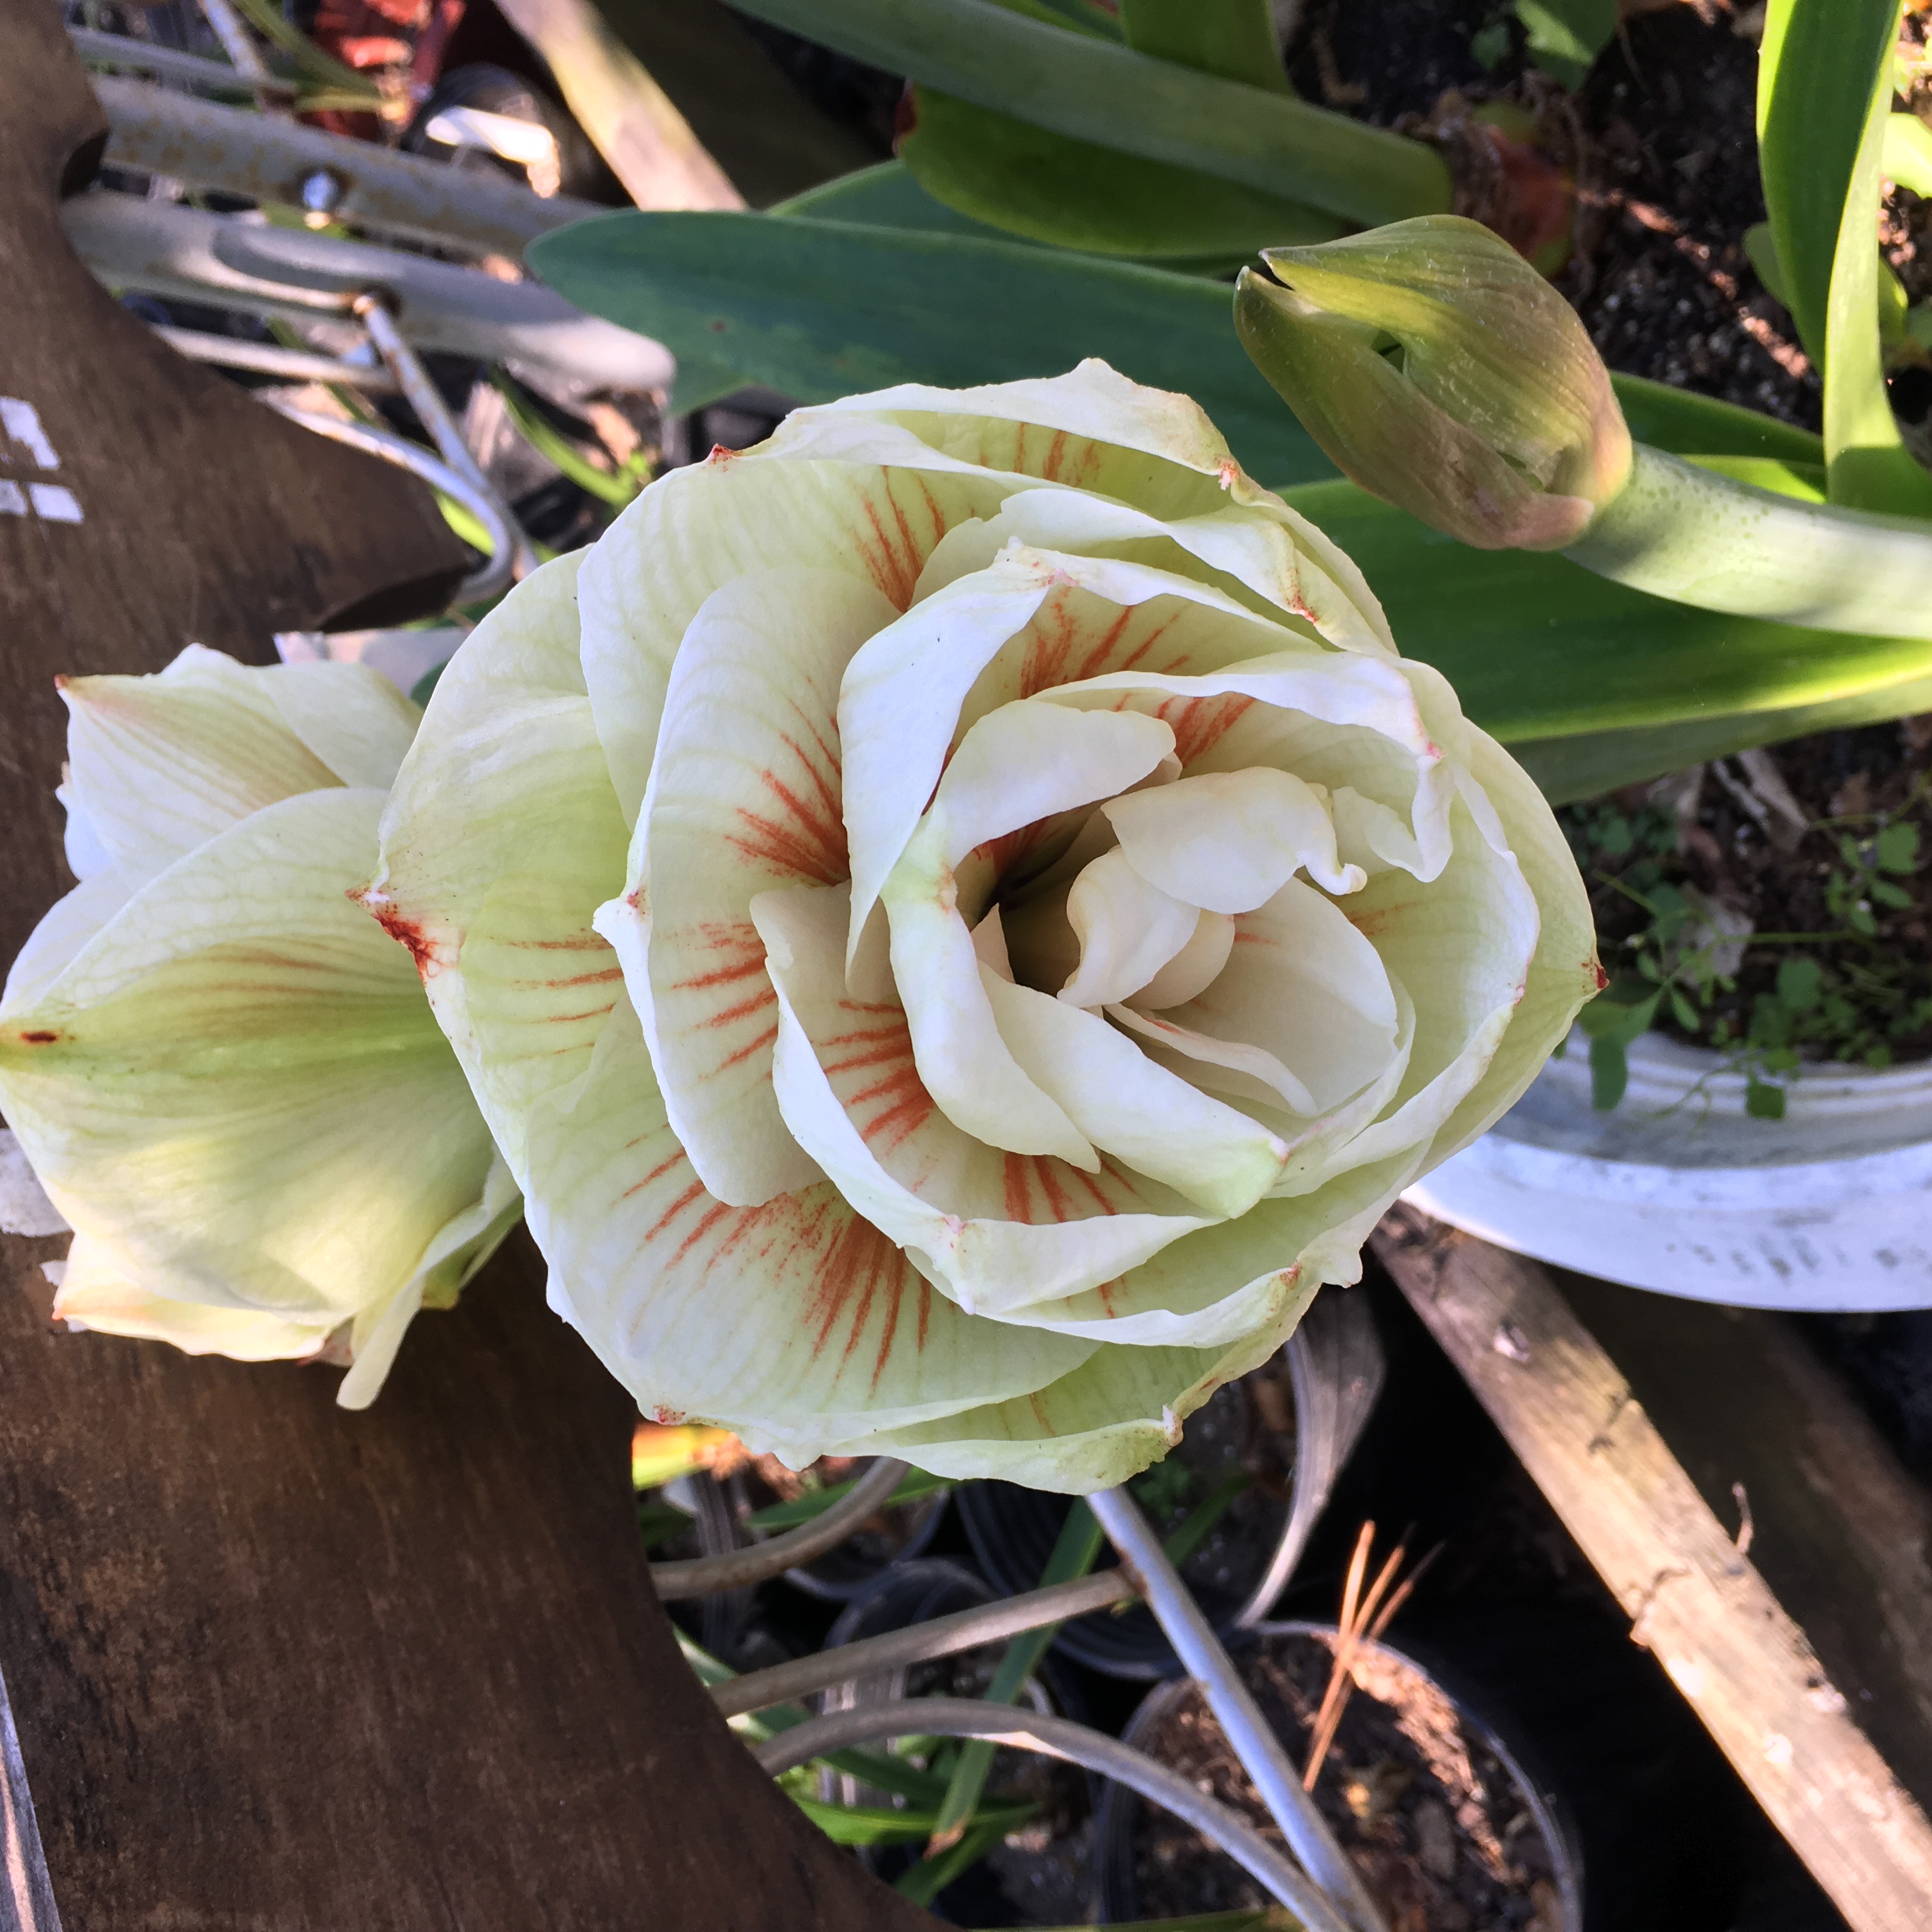
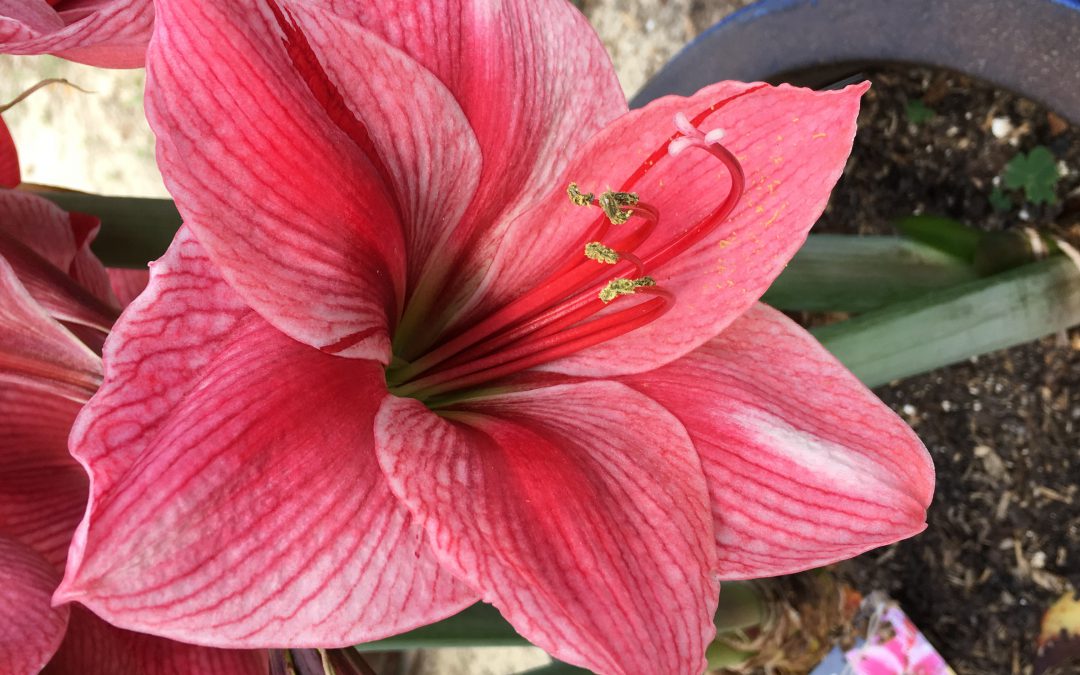
Blooming amaryllis flower. Photo by Logan Boatwright
Are you tired of seeing only green from your shrubs such as boxwood or yew? Are the areas next to your home walls, fences, terraces, tree islands, gate entrances, and/or borders barren? Do you want to add color to these areas? You may want to consider planting these areas with the beautiful amaryllis (Hippeastrum x hybridum).
Amaryllis grows from a tough, dependable bulb that will bloom during the spring after winter dormancy. The strap-shaped leaves will emerge first and grow about 1.5 inches wide, up to three feet long, and persist much of the year in Florida. They are reduced later in the summer and ultimately die back from frost.
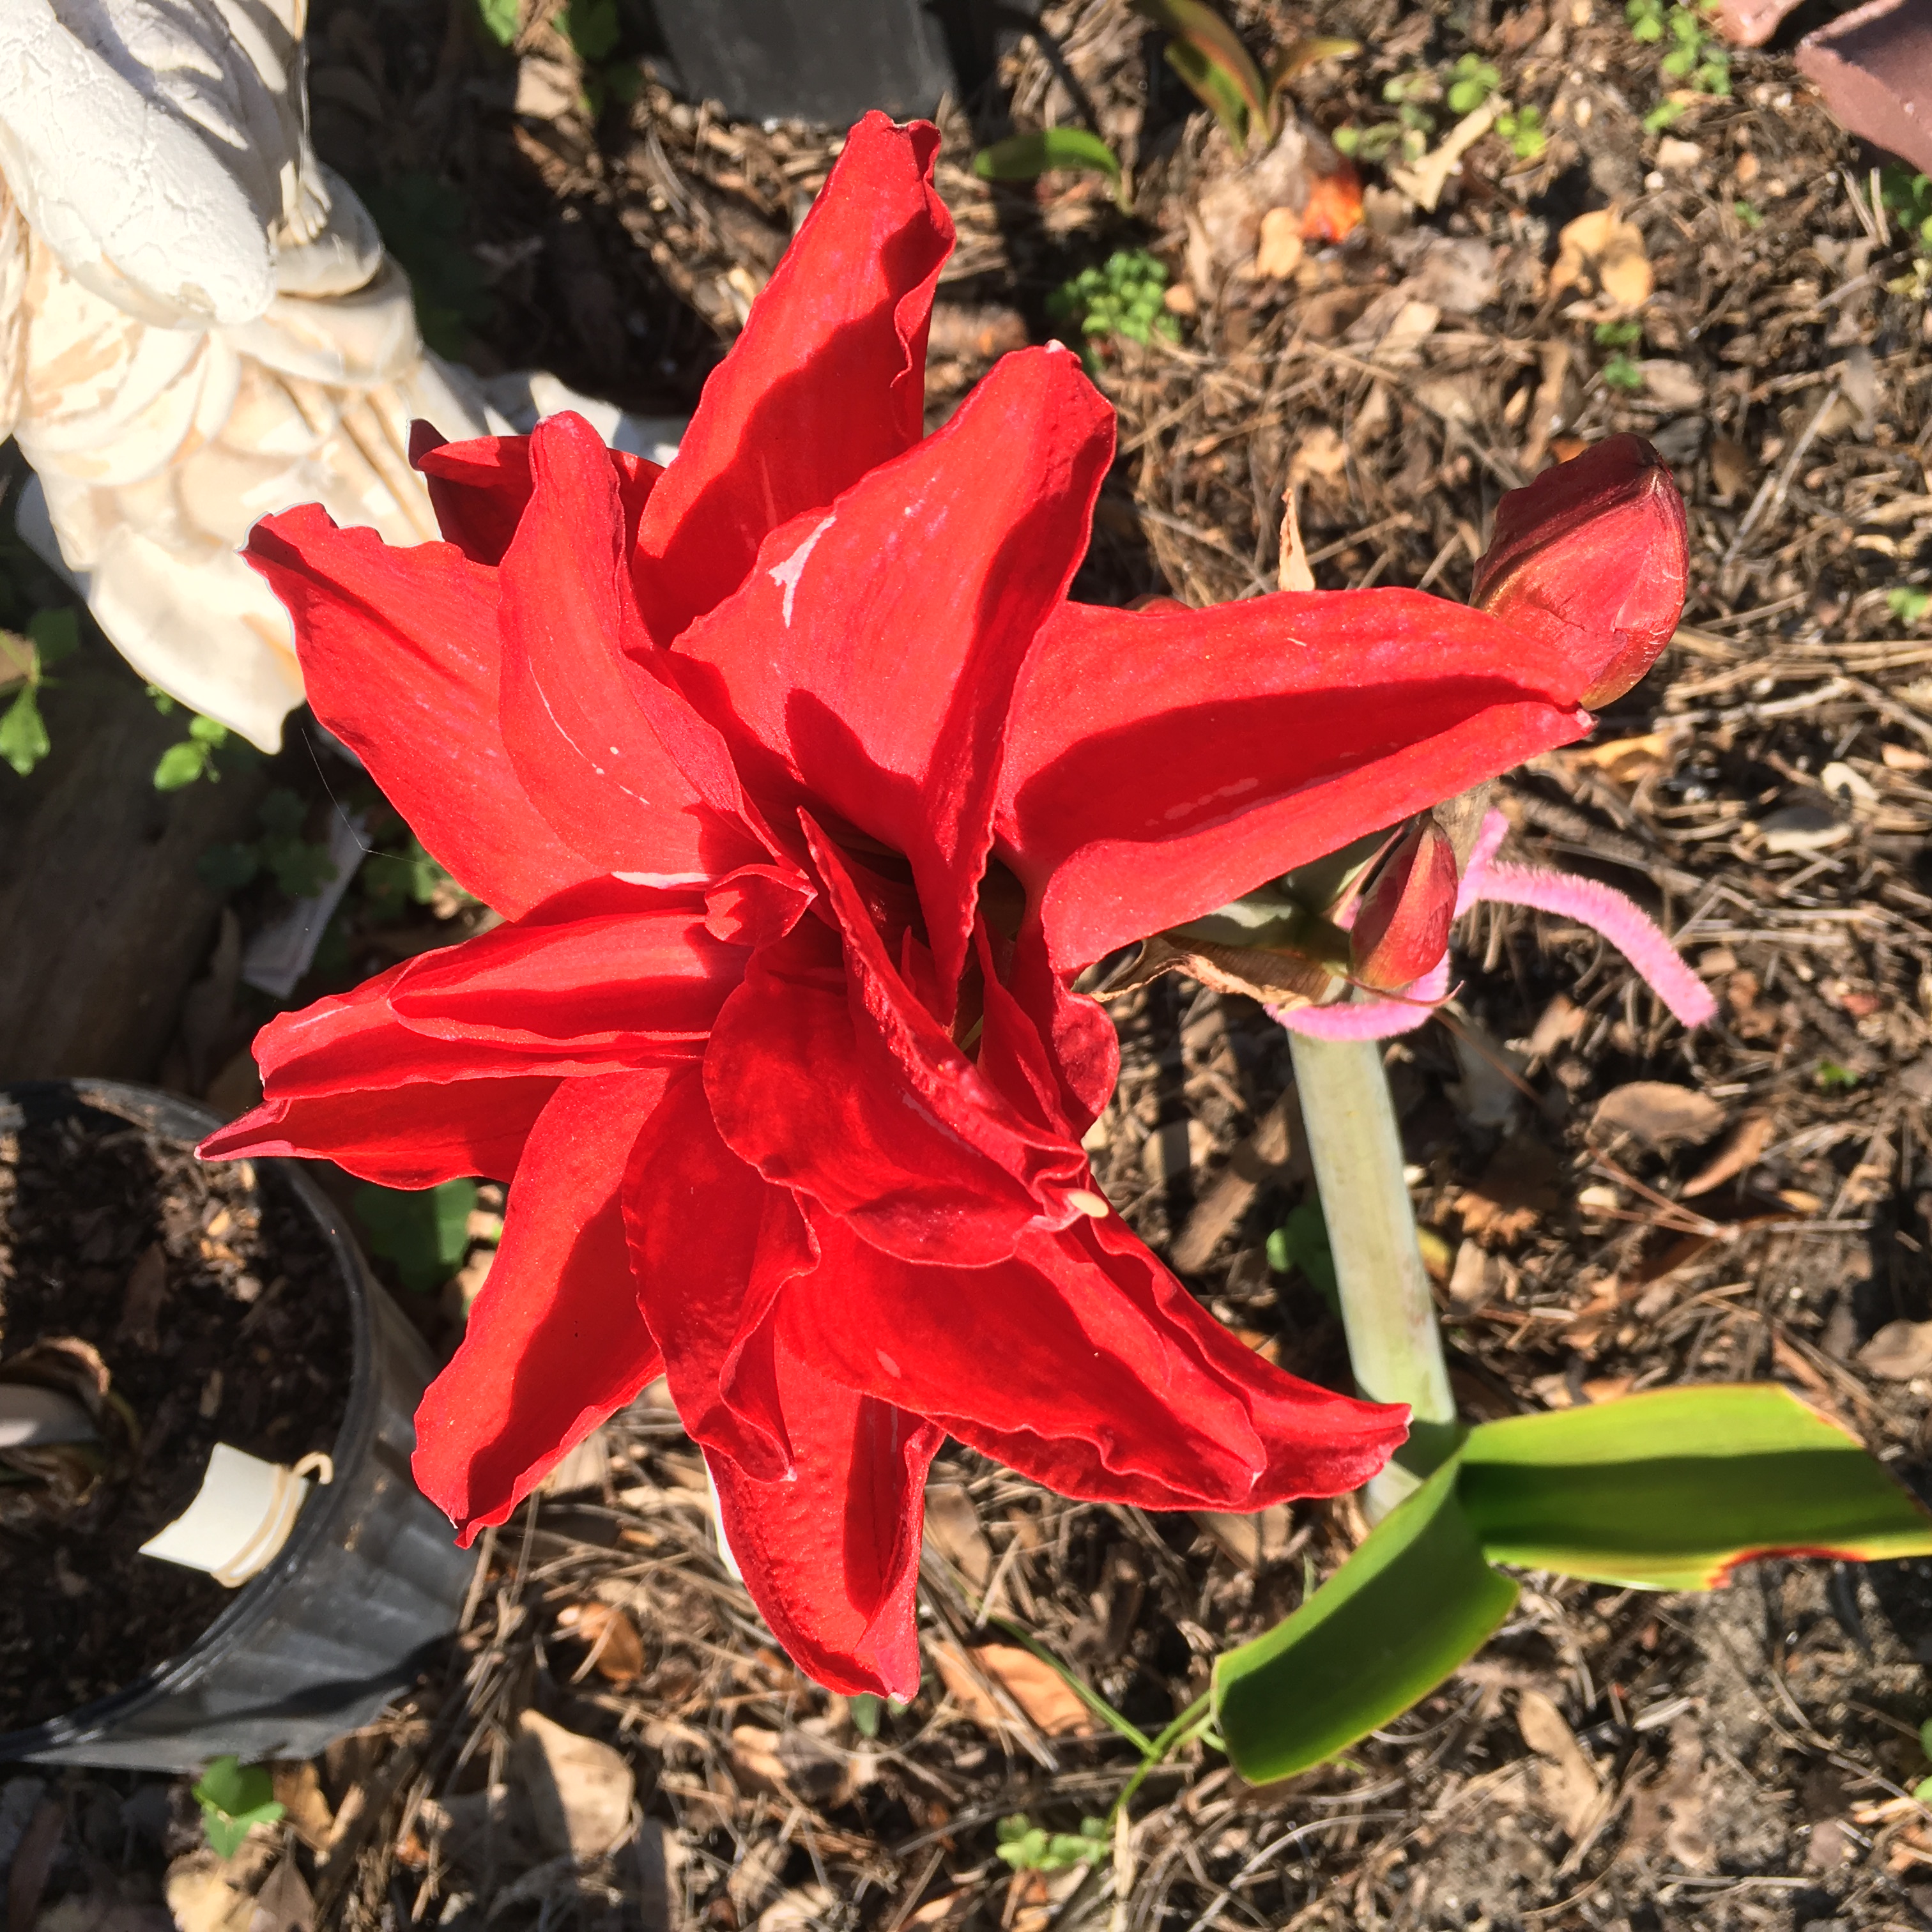
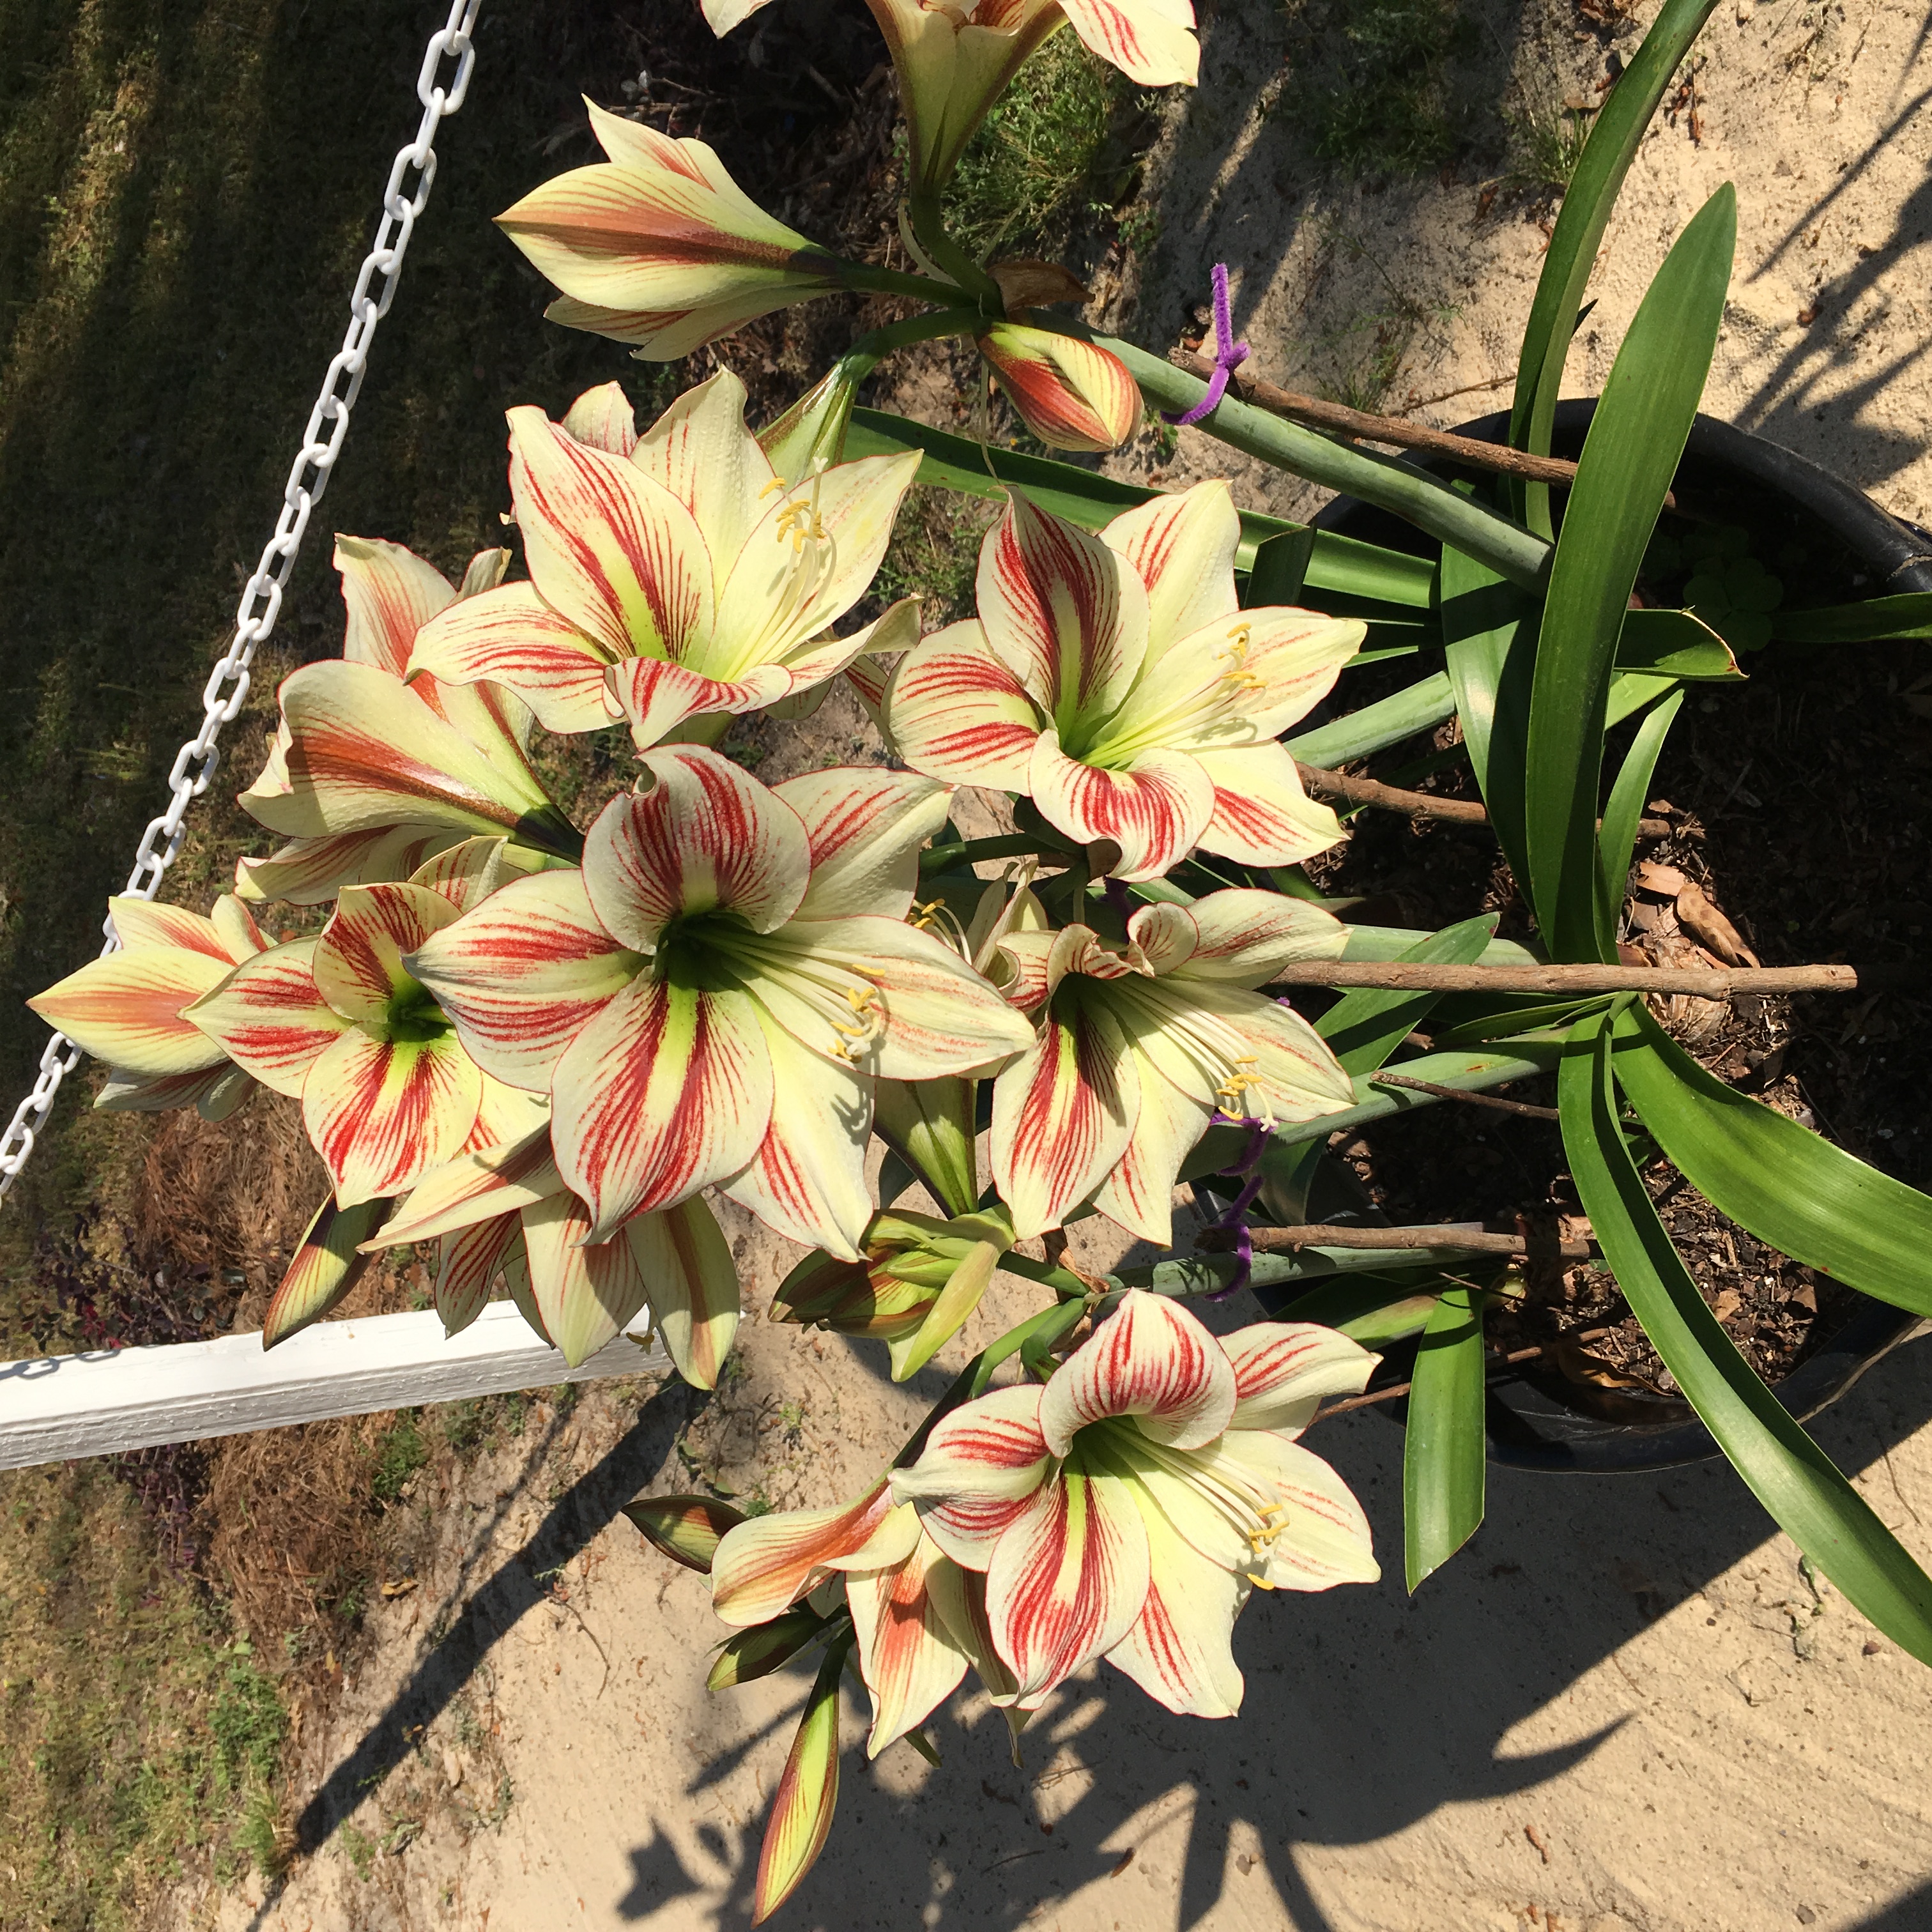
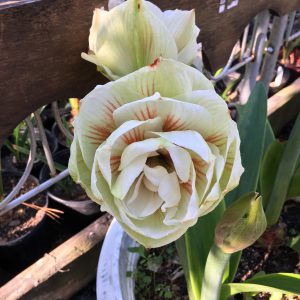
In the late winter, bulbs will eventually produce one to three leafless stalks, or scapes, that will each have two or more trumpet-shaped flowers. Flowers come in a variety of forms and shapes: from single and double, miniature or large. Flower colors can be red, bright pink, shades of pink, orange, white, rose, or even salmon. It does not stop there! The flowers may even be striped and multi-colored. Amaryllis can create a striking focal point when they are planted in clusters of 10 or more of similar color.

Double flowers of amaryllis. Photo by Logan Boatwright.
Amaryllis may be planted anytime of the year, but winter is best. They are sun- and shade-tolerant, but planting in light shade is best since leaves will yellow in full sun and plants bloom poorly in heavy shade. Amaryllis prefer well-drained sites to prevent bulb and root rots.
For the best amaryllis performance, till and amend the soil with a 3- to 4-inch layer of organic matter and 2 to 3 pounds of 6-6-6, or a comparable amount of other complete fertilizer per 100 square feet. Plant 12 to 15 inches apart. Amaryllis can greatly benefit from at least one fertilizer application in the early spring and two to three applications during the growing season.
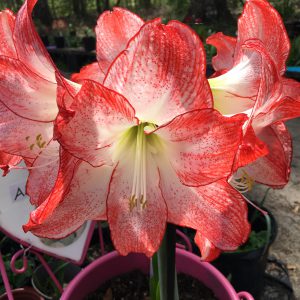
Many blooms from multiple amaryllis bulbs. Photo by Logan Boatwright.
After flowering it’s a good practice to remove the stalks, unless seeds for planting are desired. If the bulbs become crowded, dig and separate them out. Doing this will encourage large, uniform flowers.
Go out, plant a few amaryllis plants today, and be ready to. To learn more about Amaryllis, please follow this link.
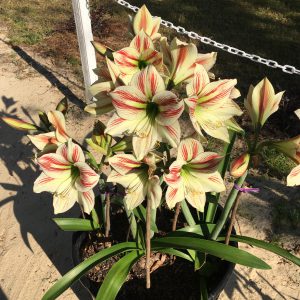
Blooming amaryllis plant. Photo by Logan Boatwright.