by Daniel J. Leonard | Aug 6, 2020
I know this is going to come as a shock to some readers, but not all bugs are bad. In fact, while there are over 1 million species of insects worldwide, less than 1% are problem pests! This problem 1%, composed of common garden pests, including aphids, stinkbugs, nuisance caterpillars, and scales, get all the attention and for good reason; they can be extremely destructive to home and commercial crops. However, the good guys, beneficial predatory insects, are out there too, providing valuable pest control day and night and should be considered in part of a quality garden pest management strategy.
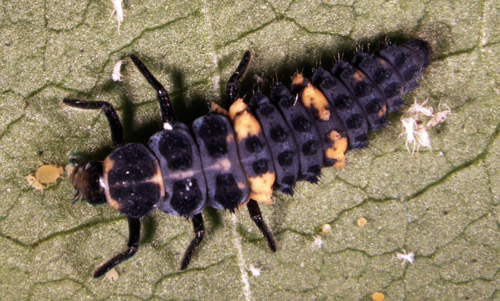
 Beneficials come in many shapes and sizes. Some are commonly known predators, such as spiders, Lady Beetles and Praying Mantids, while others are lesser known pest nemeses, like Paper Wasps, Pirate Bugs, and Lacewings. Regardless, gardeners should do their homework and be able to identify beneficials when they see them and allow them to do their jobs. The presence, or not, of a handful of Lady Beetles or Lacewings on the attack can be the difference between needing to treat with insecticides for an aphid outbreak or just letting nature take its course. Studies have shown that just one individual Lady Beetle in the larval stage can consume as many as 500 aphids; adult Lady Beetles are even hungrier aphid eaters! Paper Wasps, you know the ones who make the large “papery” nests around eaves of house and other structures, play an important beneficial role, frequently preying on caterpillars. If their nests aren’t near highly trafficked areas around your home and you don’t have family members allergic to wasp stings, your garden will thank you for leaving a few paper wasp colonies as caterpillar insurance!
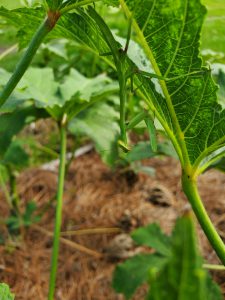
Lacewing eggs on a Jade plant in close proximity to the author’s vegetable garden.
In many instances, beneficial insects can keep pest insect infestations at bay, allowing gardeners to spot treat outbreaks when they get out of hand or even prevent the problem from needing chemical intervention altogether.
As helpful as they are, beneficial insects in the garden won’t totally negate the need for chemical treatment entirely. From time to time, garden pest populations outpace the beneficials’ abilities to kill them and intervention from humans is needed. In these times, it is advisable to use a couple of best practices to limit exposure to beneficial insects. First, try to use selective insecticides that only target specific pests and are nontoxic to other bugs, like the product Bt for caterpillar pests (sold under many brands like Dipel, Garden Safe Bt Worm and Caterpillar Killer, Thuricide, etc). However, if a nonselective, general insecticide, like the Pyrethroids (many common homeowner insecticide brands) and carbamates (Sevin and others), is needed, timing these broad spectrum sprays for early in the morning and late in the evening when many beneficials are not very active can help reduce friendly fire casualties. Care should also be taken to only spot treat infested plants and not the entire garden, this helps reduce beneficial exposure to these broadly toxic pesticides.
Every gardener should have a plan for pest control and beneficials can play an important role in this overall strategy. Gardeners can help ensure that nature pulls its weight in controlling problem pests by taking a little time to scout for beneficial insect populations, keeping a close eye on developing pest outbreaks, using selective insecticides when you can, and only spraying broad spectrum products as spot treatments when necessary and timing those applications for very early or late in the day. If you have a question about whether or not a garden insect is a good guy or a pest or want more information on garden pest control strategies, contact your local UF/IFAS County Extension Office! Happy Gardening!
The following resources were used in the development of this article:
https://gardeningsolutions.ifas.ufl.edu/care/florida-friendly-landscapes/beneficial-insects.html
https://sfyl.ifas.ufl.edu/sarasota/gardening-and-landscaping/horticulture-commercial/integrated-pest-management/beneficial-insects/
http://www.missouribotanicalgarden.org/gardens-gardening/your-garden/help-for-the-home-gardener/advice-tips-resources/pests-and-problems/other/beneficial-insects.aspx
by Gary Knox | Jul 30, 2020
The dog days of summer are here with high temperatures and humidity. While this sultry weather forces humans to retreat to air conditioning, our gardens suffer because the high night temperatures cause temperate plants to stop flowering, lose vigor and pause growth. By August, many plants in the garden look as bedraggled and wilted as we feel after mowing the grass or trying to weed.
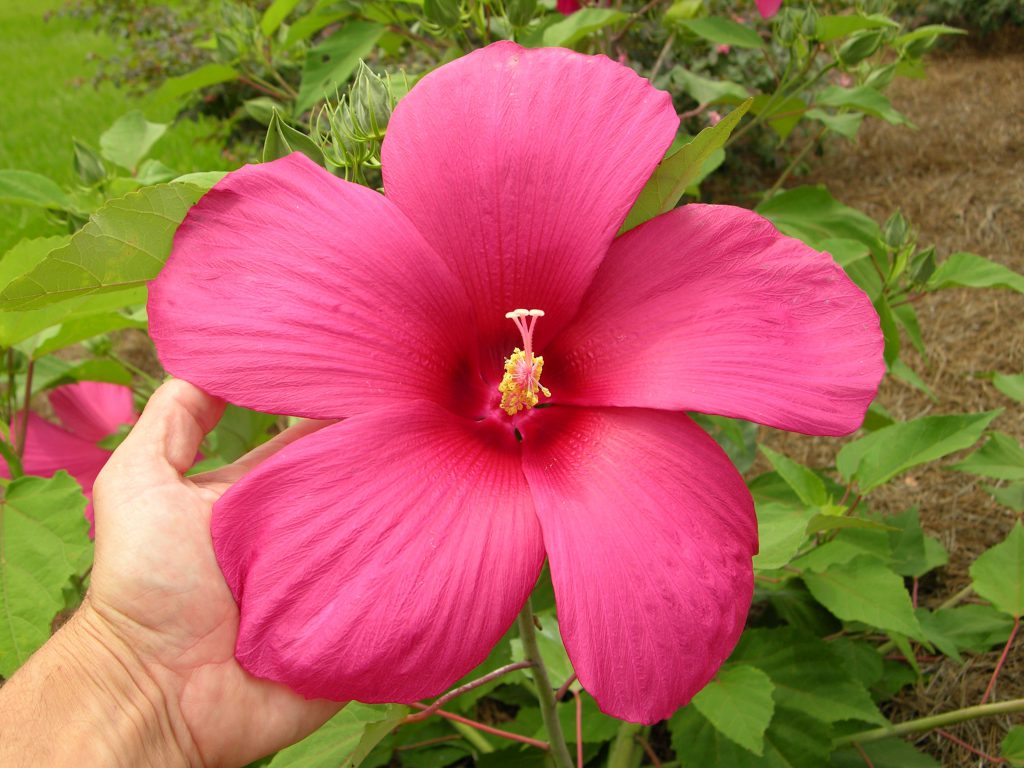
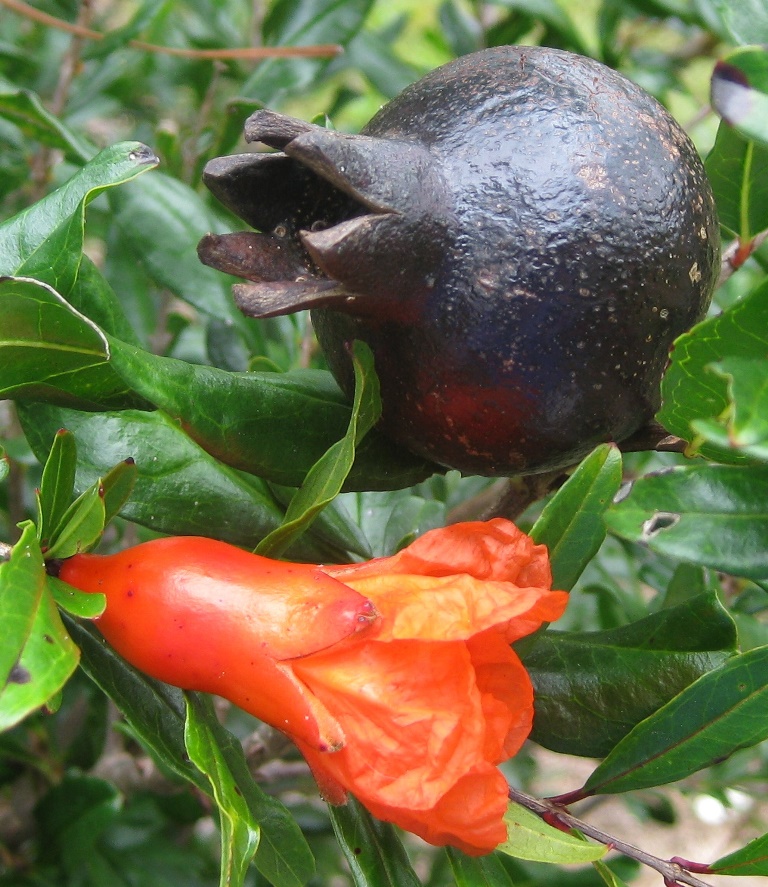
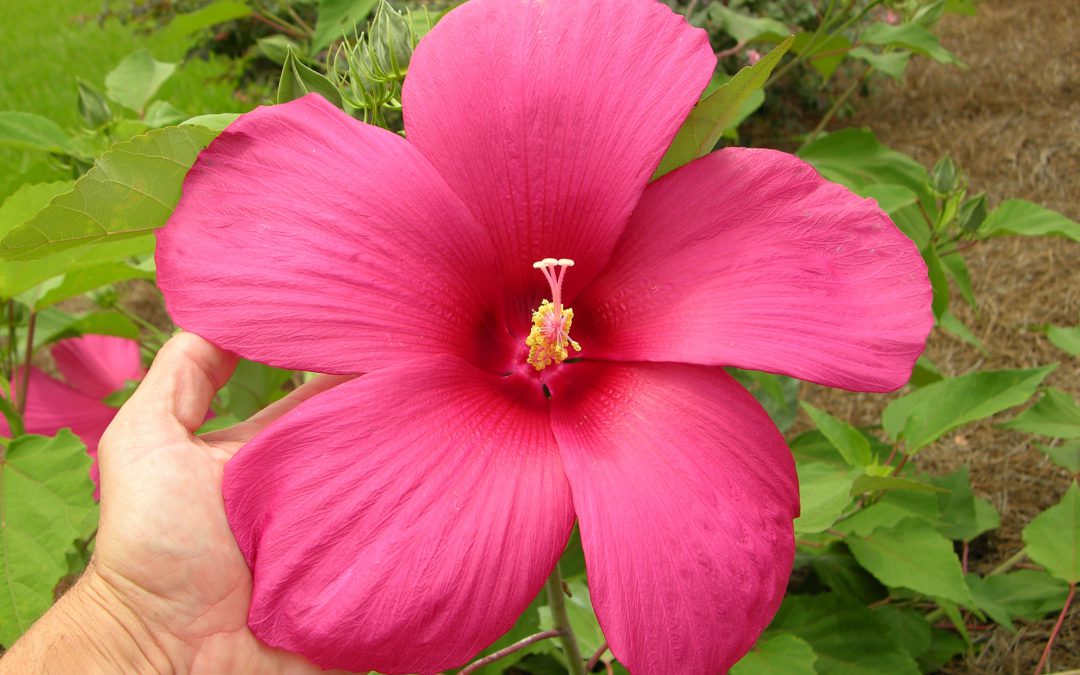
‘Moy Grande’ Hardy Hibiscus (Hibiscus spp.)
All is not lost: the fading flowers and fizzling foliage of traditional garden plants can give way to heat-loving tropicals! Plants that are native to tropical and subtropical climates are naturally adapted to heat, humidity and rain, easily standing up to the worst that our north Florida summers can throw at them. Tropicals offer bright flowers, bold texture and exuberant growth just when the rest of your garden melts in the heat. Tropical plants include trees, shrubs, vines, perennials, groundcovers or annuals, and there are tropicals for full sun, part sun or shade.
Tropical Plants for North Florida
Top tropicals for north Florida gardens are palms, bananas, hibiscus, and gingers. Palms are the iconic symbol of the Tropics. Native subtropical palms can give you the palm vibe without the worry of cold hardiness. These include cabbage palm and related palmettos in the genus Sabal, paurotis palm (Acoelorrhaphe wrightii), saw palmetto (Serenoa repens) and needle palm (Rhapiophyllum hystrix). Non-native European fan (Chamaerops humilis), jelly (Butia spp.), windmill (Trachycarpus spp.), date (Phoenix spp.), Washington (Washingtonia spp.) and other palms also grow well and are cold hardy in north Florida. Most palms grow best in full to part sun but palmettos, saw palmetto and needle palm can handle more shade. Saw palmetto, needle palm and most palmettos grow 3 to 6 ft. tall. European fan, jelly, paurotis and windmill palms grow 10 to 20 ft. tall, while cabbage, Washington and date palms often exceed 40 ft. For best appearance, palms often require special fertilizer (https://edis.ifas.ufl.edu/ep261).
Hardy Yunnan Banana (Musa yunnanensis)
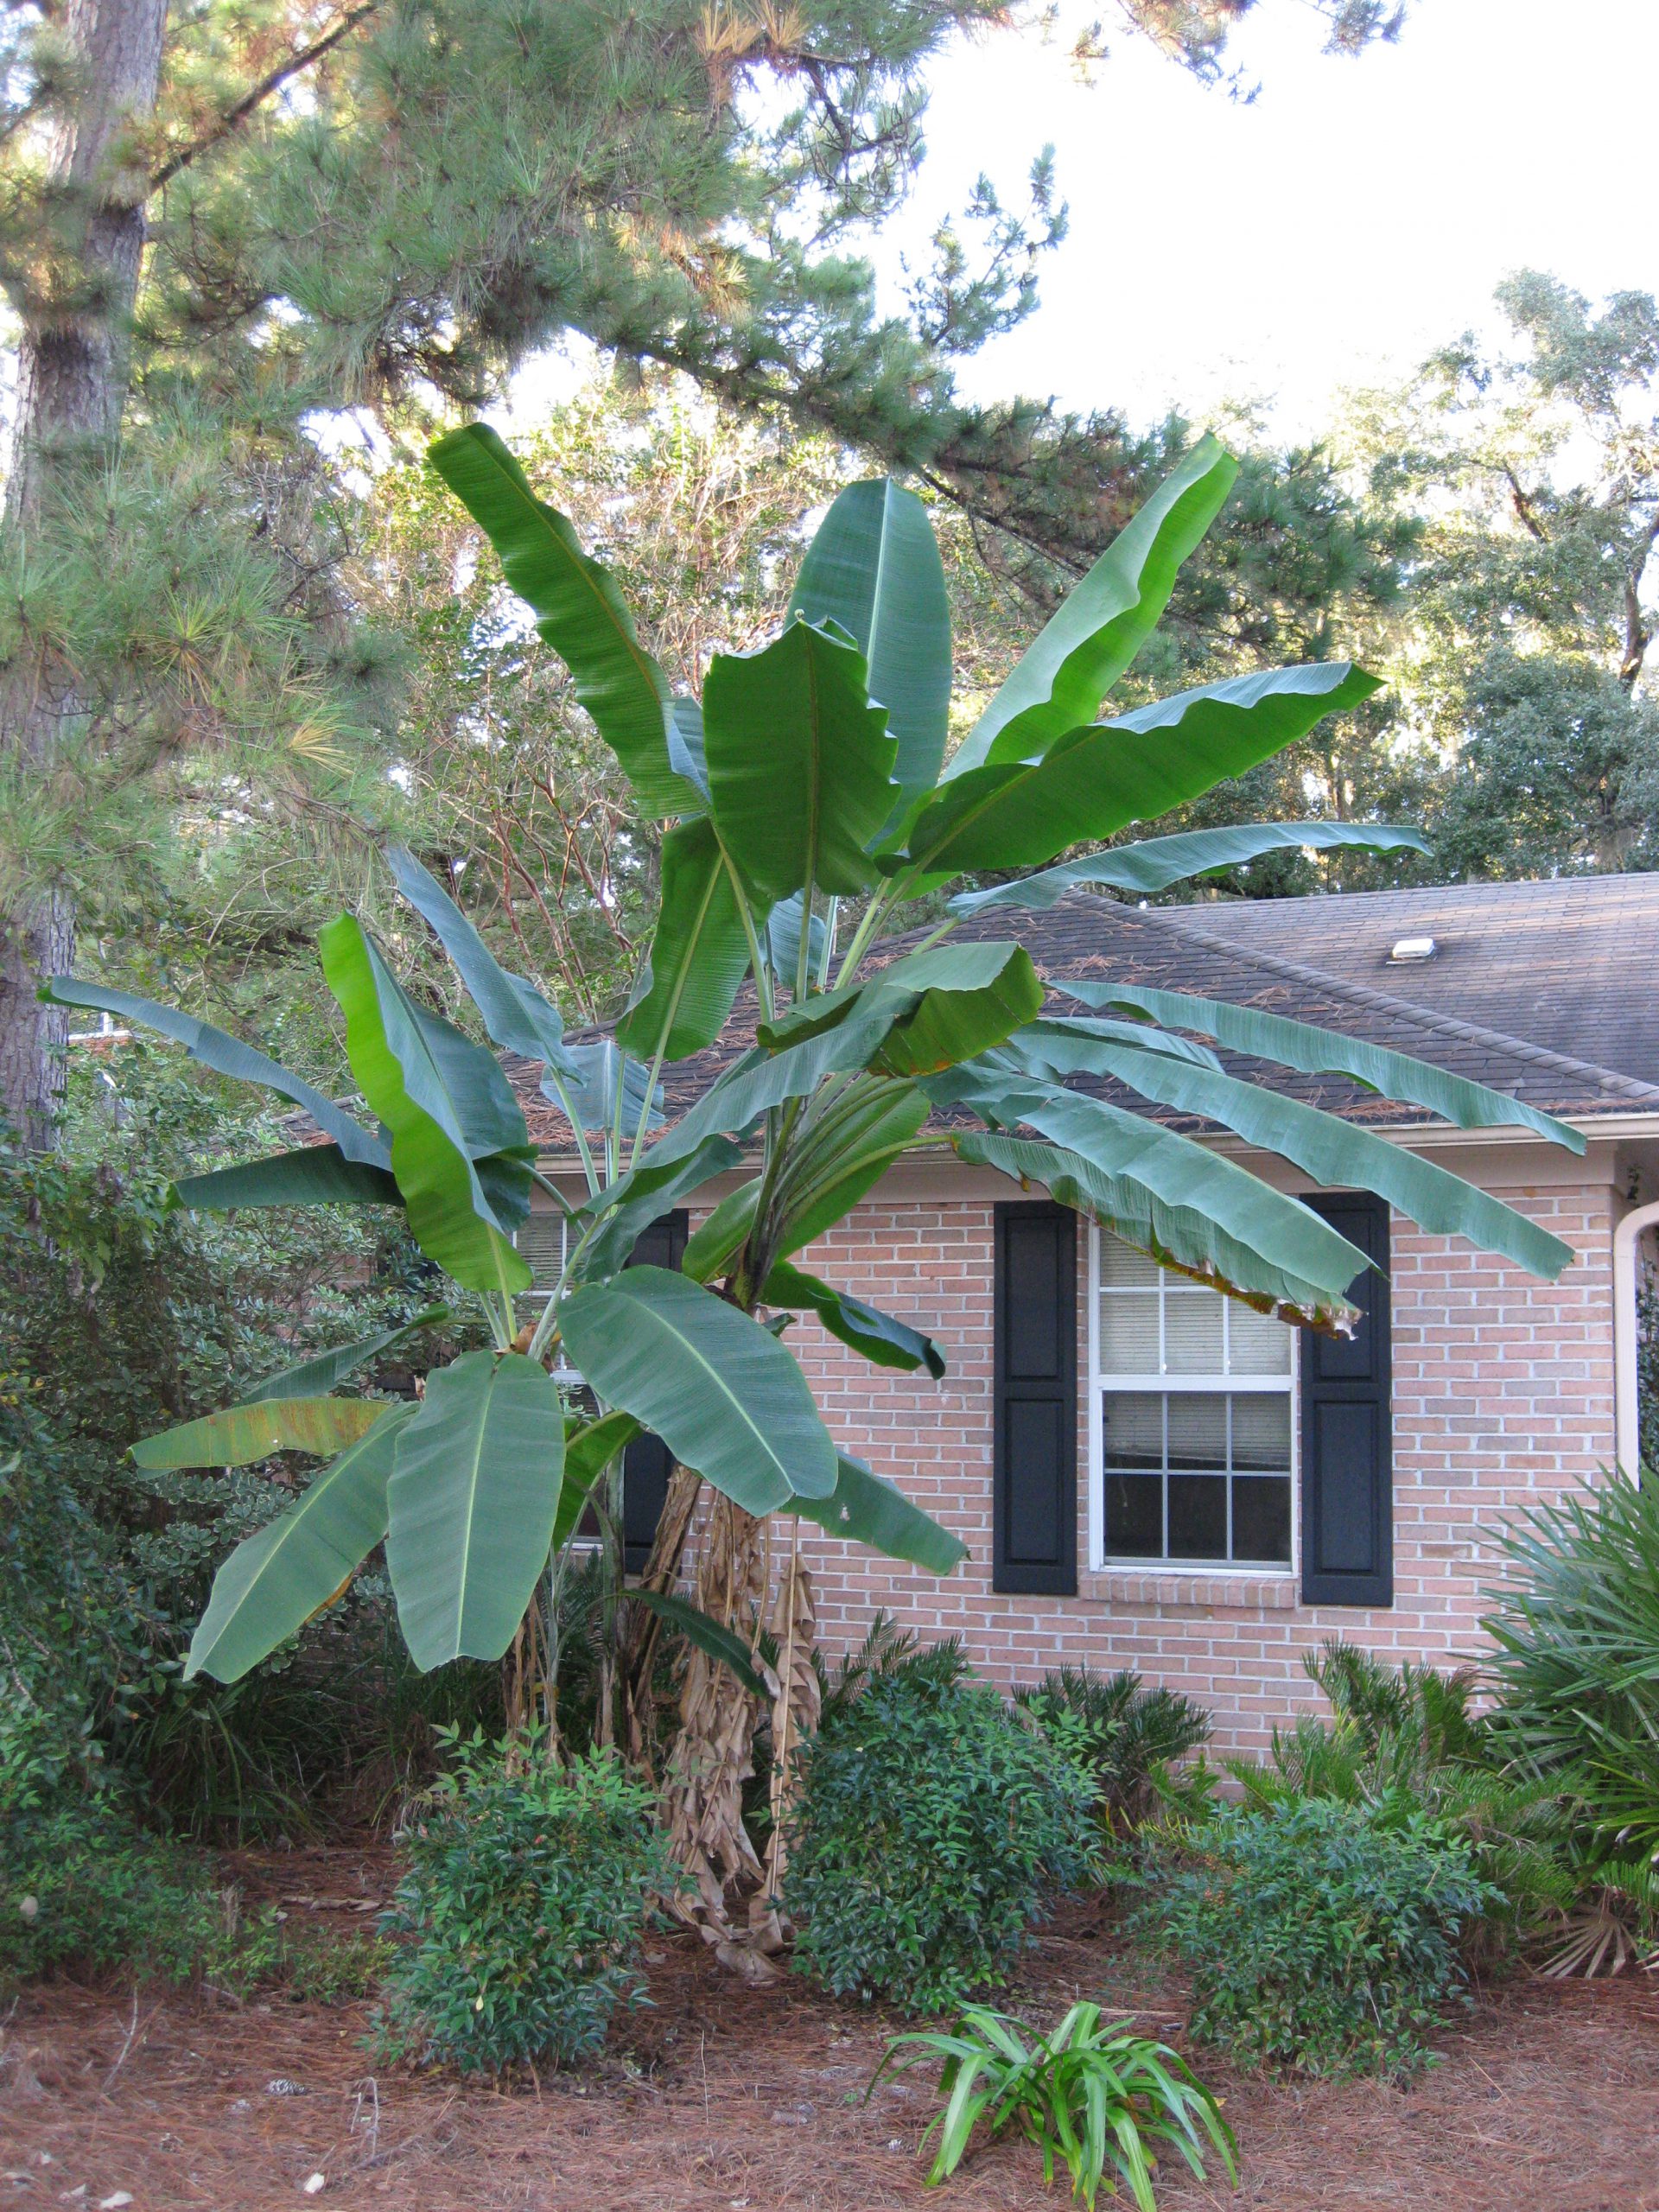
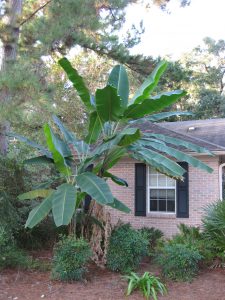
Characterized by their large, bold leaves, bananas are another plant group associated with tropical weather and full sun. Hardier forms of banana that thrive here include Chinese yellow (Musella lasiocarpa), pink (M. velutina), basjoo (Musa basjoo), Yunnan (M. itinerans), and hardy Yunnan (M. yunnanensis). Chinese yellow and pink bananas grow about 5 ft. or more in height, whereas the others have mature heights of 20 ft. or more. Bananas benefit from planting in a location that blocks strong winds so as not to shred the leaves. Depending on the severity of our winter, these bananas may lose some or all leaves but they usually regrow in late spring once warm weather arrives.
The large, colorful and exotic-looking flowers of tropical hibiscus (Hibiscus rosa-sinensis) are associated with the tropics, though this hibiscus is less cold hardy here and is perhaps best enjoyed as a container plant. Other notable hibiscus for north Florida include Confederate rose (H. mutabilis), rose-of-sharon or althea (H. syriacus), and hardy hibiscus (many hybrids of H. moscheutos and other native species). Varying in height from 3 (hardy hibiscus) to 12 ft. (confederate rose), hibiscus thrives in full sun and moist, even wet, soil. Their summer flowers come in colors of white, lavender, pink and red and range in size from a few inches (althea) to the size of dinnerplates (hardy hibiscus)! Except for rose-of-sharon, these hibiscus die back in winter and re-emerge again in late spring.

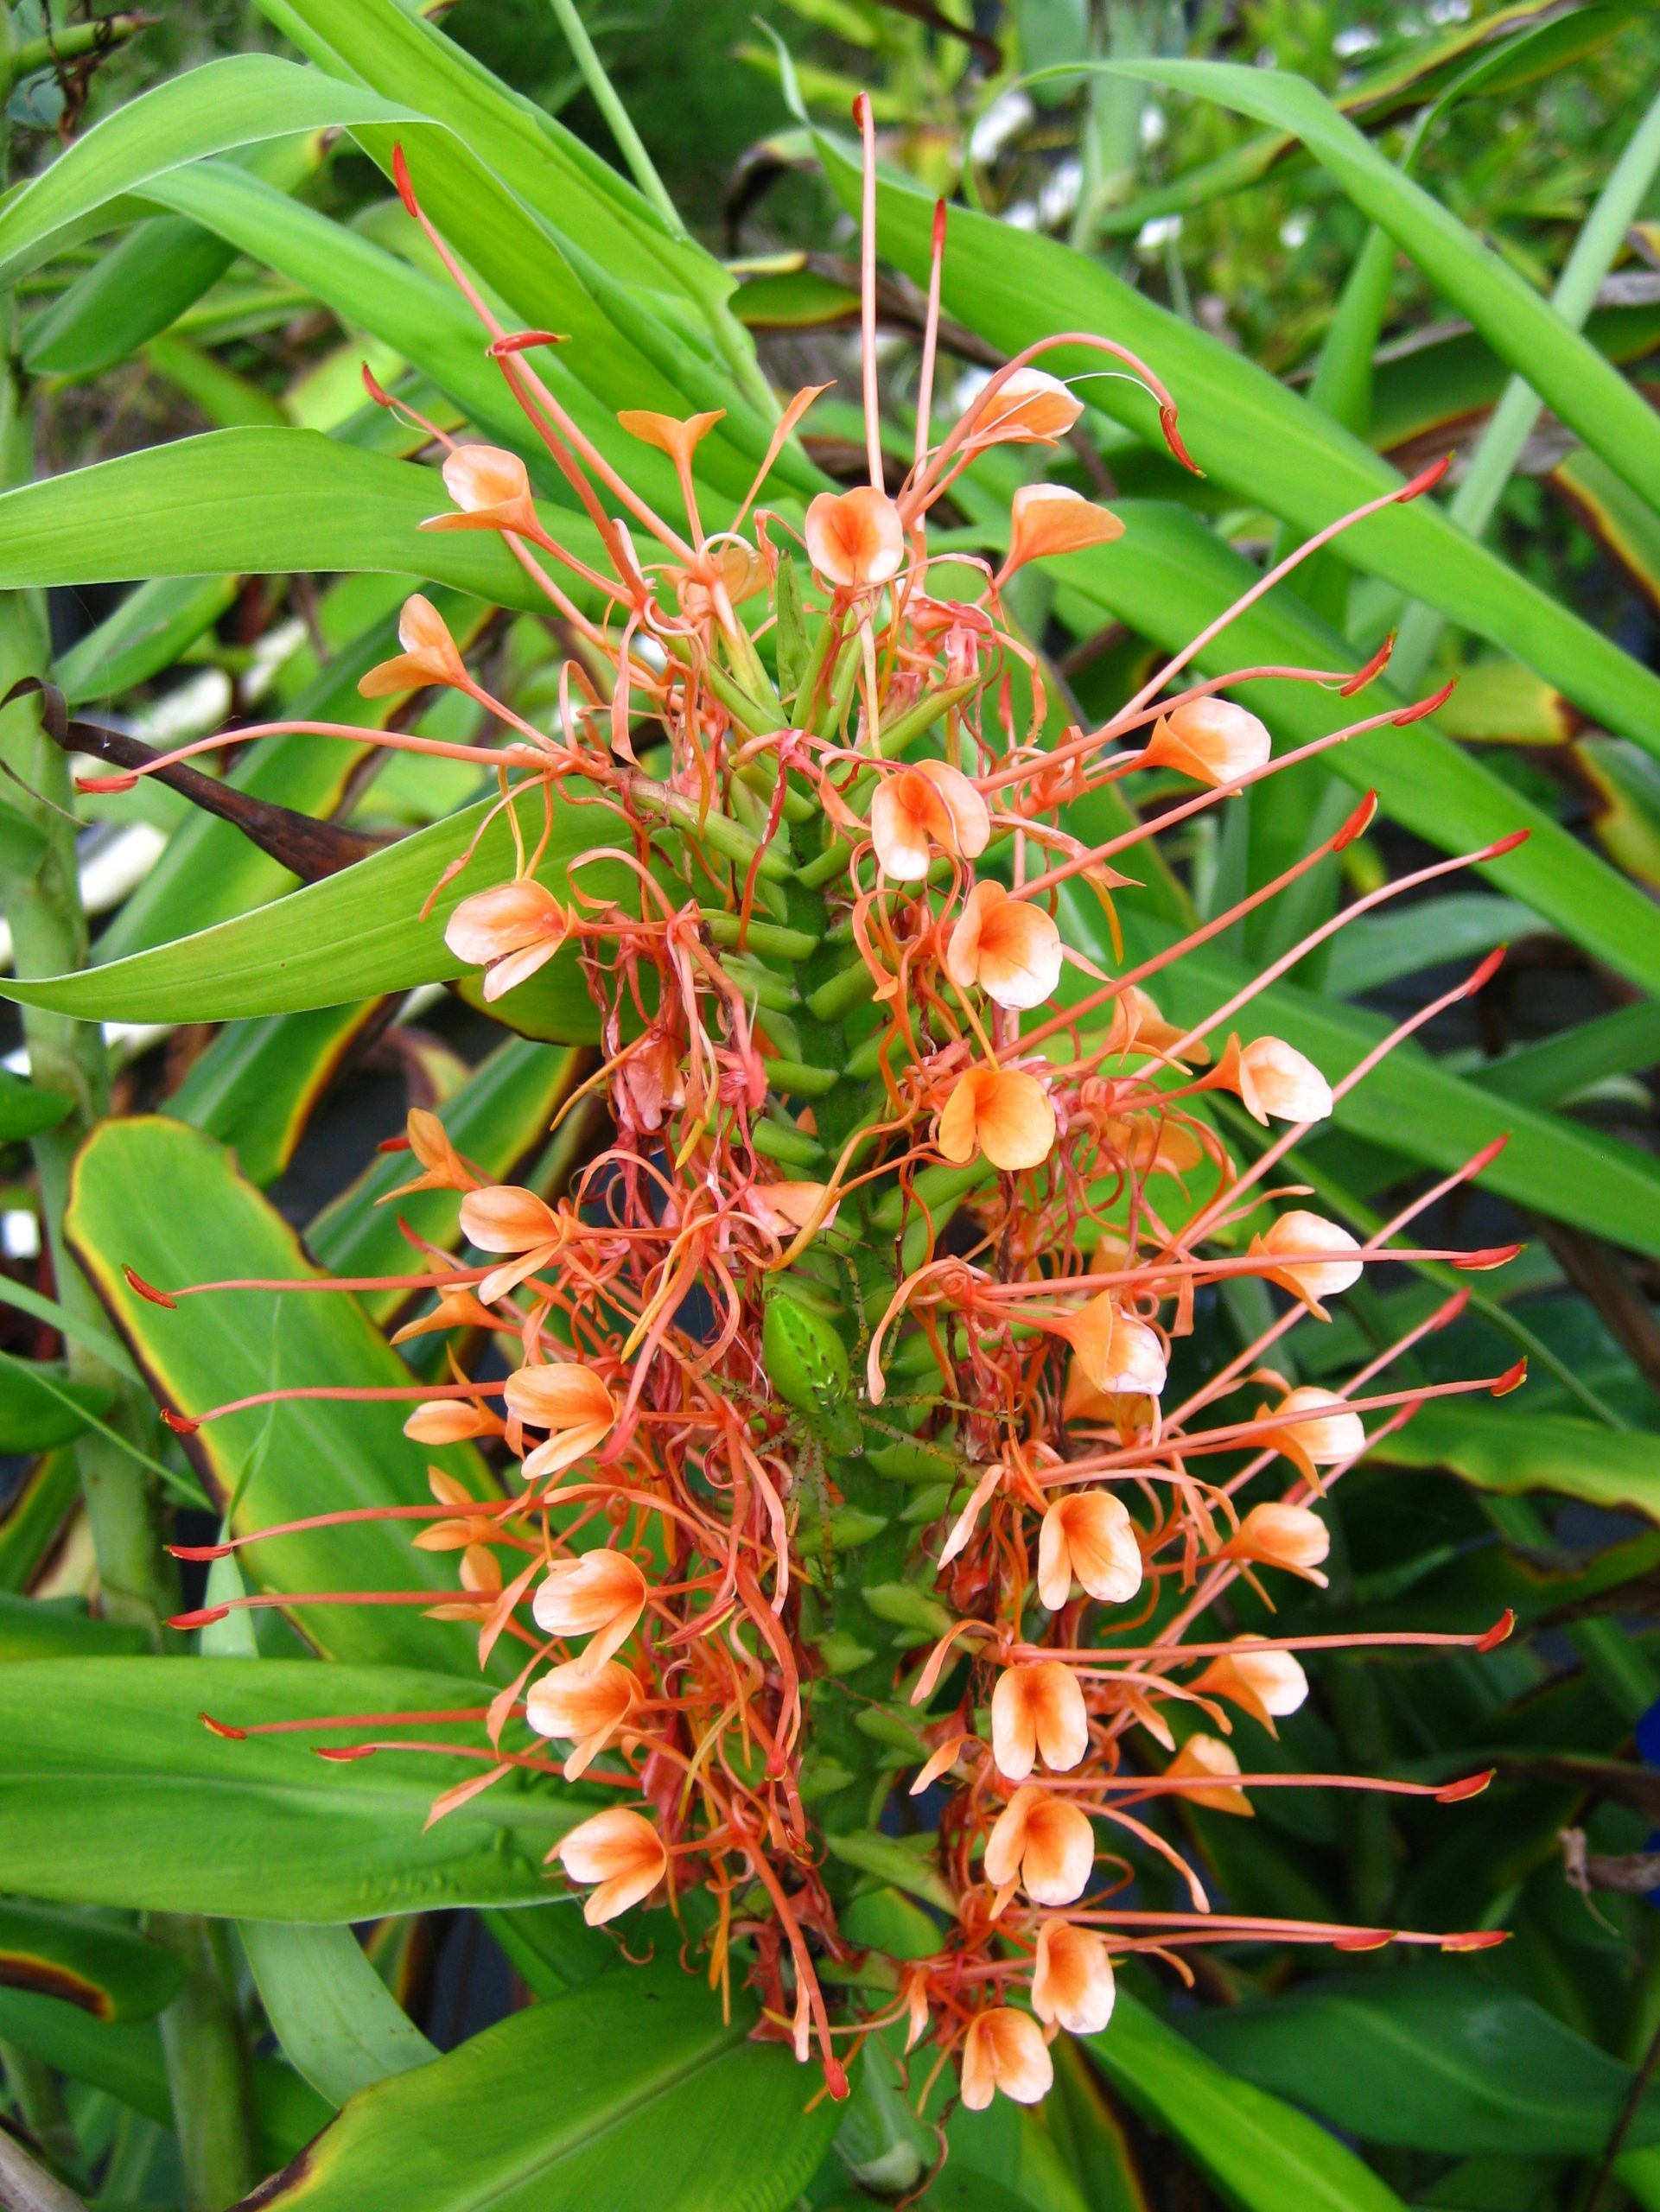
‘Disney’ Ginger Lily (Hedychium coccineum)
Gingers are also symbolic of the tropics. Many produce complex or colorful flowers and often flowers or other plant parts are aromatic. Ginger lily (Hedychium spp.), spiral ginger (Costus spp.) and shell ginger (Alpinia spp.) have fragrant and colorful racemes or spikes of flowers that appear at the tops of stems 4 ft. to 6 ft. or more tall. Hidden ginger (Curcuma spp.) and true ginger (Zingiber spp.) are lower growing with flowers appearing in “cones” on tops of separate, short stems. Finally, the patterned leaves of peacock ginger (Kaempferia spp.) make a beautiful summer groundcover. Gingers grow best in part sun to part shade.
There are many other tropical plants including coral tree (Erythrina × bidwillii and E. crista-galli), pride-of-barbados (Caesalpinia pulcherrima), fatsia (Fatsia japonica), selloum philodendron (Thaumatophyllum bipinnatifidum), canna lily (the non-invasive Canna × generalis hybrids), peregrina (Jatropha integerrima), elephant ear (non-invasive Alocasia spp. types), Begonia spp. (annual, angelwing and rhizomatous types) and Caladium selections. Bamboos have a tropical look, but many grow aggressively and may be invasive in north Florida. Two recommended clumping bamboos are common bamboo (Bambusa vulgaris; growing 15 ft or more tall) and Chinese garden bamboo (Drepanostachyum falcatum; growing 12 ft. or more tall).
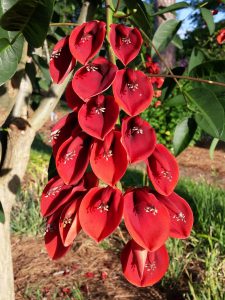
Cockspur Coral Tree (Erythrina crista-galli)
“Tropical” does not necessarily mean “non-native” as there are many Florida natives that provide summer color or texture and are heat loving yet cold hardy in north Florida. These include some palms (cabbage, palmetto, paurotis), ashe magnolia (Magnolia ashei), switchcane (Arundinaria gigantea, a native bamboo), hardy hibiscus (Hibiscus grandiflorus, H. moscheutos and others), golden canna (Canna flaccida), and maypop passionflower (Passiflora incarnata).
Disadvantages of Tropicals
Use of tropicals in your garden does have a downside. Most tropicals are water hogs and need regular irrigation. This isn’t a problem if our area experiences the normal patterns of summer thunderstorms. However, if we don’t receive regular rainfall, tropical plants create the burden of having to water them regularly or else their flowers wilt and leaves droop.
Another disadvantage of tropicals is the “off-season” appearance. Though they thrive in summer heat, they grow slowly during the cooler temperatures of spring and fall and some disappear altogether in winter. Some tropicals are not winter hardy in north Florida and must be replanted each year or undergo elaborate cold protection strategies to help them survive. Other tropicals will over-winter, but often are burned back by frosts, requiring labor to cut back the dead foliage and stems. Finally, tropicals usually require warm weather for growth to resume, and tropicals that die back will produce gaps in your landscape during winter, spring and early summer.
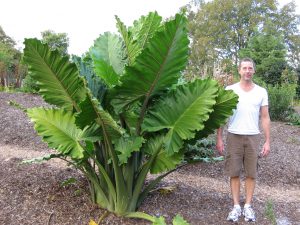
‘Portora’ Giant Elephant Ear (Alocasia sp.)
At the other extreme, some tropicals have such exuberant growth that they are invasive in north Florida. For example, almost all running types of bamboo and many clumping bamboos are invasive, other than those mentioned previously. Also avoid non-native canna (Canna indica), elephant ears (Colocasia and Xanthosoma spp.), Lantana (sterile forms are OK), and some non-native passionvines (Passiflora spp.). If you have questions about a plant’s invasiveness, check the UF/IFAS Assessment of Non-Native Plants in Florida’s Natural Areas, https://assessment.ifas.ufl.edu/.
Using Tropicals in North Florida
Tropicals are best used as accent plants to draw attention in summer when they look their best and the rest of the garden looks its worst. When used as accents, place them throughout the landscape so that winter damage or absences aren’t noticed. Concentrations of tropicals in one area will look great in summer but could look like a mass of dead foliage in winter! To create an entirely tropical-looking planting in north Florida, combine tropical plants with cold-hardy tropical lookalikes (a topic for another time!).
Plant tropicals in late spring once temperatures warm because they will grow slowly or even experience damage at temperatures below 50°F. Best practices for tropicals are to place them in the appropriate exposure for the particular plant (sun, part sun or shade) and keep them mulched. One common characteristic of tropicals is their need for soil moisture, necessitating irrigation to supplement rain. A rich soil or applications of organic mulches or compost can provide nutrients for growth, or light fertilizer applications in summer can boost growth.
Tropicals come alive in the heat of summer. When used in north Florida gardens, tropical plants provide pops of color, luxuriant growth and big, bold, dramatic texture that rescue our gardens from the doldrums of summer!
by Molly Jameson | Jul 23, 2020
Join us via Zoom on Saturday, August 8, for our Leon County Seed Library Virtual Workshop. Graphic by Molly Jameson.
Leon County’s Seed Library Program Continues On
The COVID-19 pandemic has changed many aspects of our lives. In Extension, we have learned new ways to be innovative in our programs, and we have made adaptations to continue to reach the community through technology. While these technologies have allowed us the opportunity to connect with clientele and continue to allow important discussions related to the life sciences, there is no substitute for hands-on learning.
For this reason, I am thankful that the Leroy Collins Leon County Public Library System is proceeding with the Leon County Seed Library Program this fall. Since the spring of 2015, the Leon County Public Library has provided Leon County community members with sample vegetable seed packets to take home and plant in their gardens. While many aspects of the Seed Library Program will be altered this season, seeds will still be available to be “checked-out” from all Leon County library branches.

While face coverings and other safety precautions will be required, Leon County residents can still “check-out” seeds starting August 8. Photo by the Leon County Public Library.
As we continue to strive to keep ourselves and our community safe, many of us have used gardening as a way to relax and find some peace during these turbulent times. Planting vegetable seeds is a great way to learn about agriculture and our natural environment and gives us an opportunity to spend some time outdoors.
As an Extension Agent in Leon County, I have had the pleasure of partnering with the Leon County Library to help pick out the Seed Library Program seed selections, plan kickoff events, and provide hands-on workshops at various library branches. While “checking-out” seeds at the library this season will be a socially distanced activity, we still want to provide an opportunity for the community to engage with UF/IFAS Extension and learn about planting seeds, growing vegetables, and how to incorporate vegetables into snacks and meals to stay healthy.
Whether you are located in Leon County or not, everyone is welcome to join us Saturday, August 8, from 10:00 a.m. to 12:00 p.m., our Leon County Seed Library Virtual Workshop. Via Zoom, agents with UF/IFAS Extension Leon County will discuss vegetable gardening techniques and the importance of eating healthfully. We will also be doing a live virtual cooking demonstration featuring vegetables available in the Fall 2020 Seed Library Program.
For more information about the Leon County Seed Library Virtual Workshop, please visit our Eventbrite page: https://seedlibraryworkshop2020.eventbrite.com. There is no cost to attend the workshop, but registration is required.
If you are a resident of Leon County, all you need is your Leon County library card to check-out the vegetable seeds. Don’t have a library card? No problem! Leon County residents can apply online at the LeRoy Collins Leon County Public Library online card application page here: https://lcpl.ent.sirsi.net/custom/web/registration/.
Here is the list of the vegetable seeds that will be available starting August 8: Calabrese Broccoli, Cosmic Purple Carrots, Georgia Green Collards, Lacinato Kale, Buttercrunch Bibb Lettuce, Giant of Italy Parsley, Easter Egg Radishes, and Silverbeet Swiss Chard.
by Daniel J. Leonard | Jul 23, 2020
I enjoy starting my garden from seeds. Ordering seed opens so many more options relative to the limited old-fashioned seed and transplant selections that line garden shelves. Picking newer, improved varieties has several other advantages as well, including increased disease resistance, earlier fruiting, unusually colored/shaped fruit, and generally more vigorous plants. One of the most exciting days of the year in my house is when the cardboard box full of the season’s seed packets comes in the mail! However, I garden exclusively in small, 4’x8’ raised beds and only need a couple of plants of each veggie variety to fill the fridge with fruit; meaning I always have leftover seeds in the packets! In the past, I’ve thrown the excess seed away and chalked it up to the cost of gardening in small spaces, but this spring, as seeds became somewhat hard to come by and several of the varieties I normally grow were out of stock, I started saving and storing my leftover seed packets for future seasons to ensure I have what I want! You can save and store seeds too, here’s how.
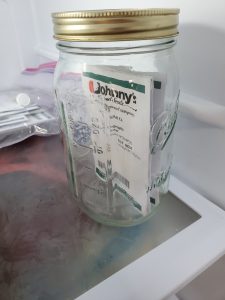
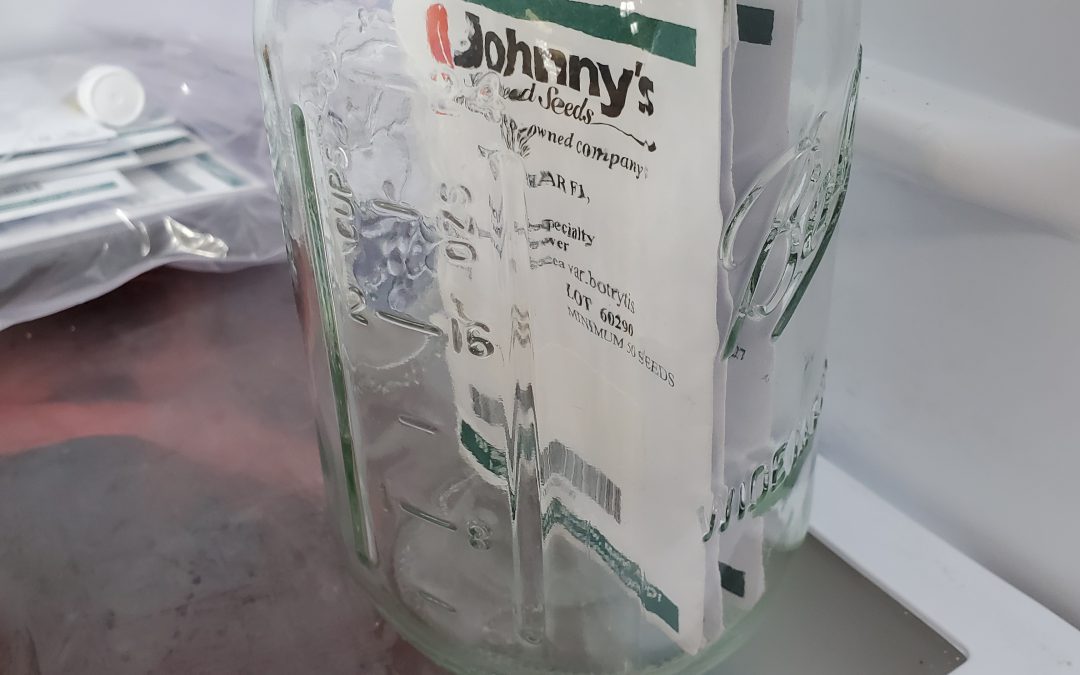
Cauliflower seed waiting for the fall garden in the author’s refrigerator.
Properly storing your leftover seeds is a relatively simple process. While seed longevity definitely varies somewhat according to species, regardless of how they are treated by you, remembering the following few tips can help improve the stored seeds’ viability and vigor for the next season.
- Store Cool. Seeds like to be stored in a refrigerator around 40 degrees F. Seeds stored warmer, near room temperature, or colder, as in a freezer, will decline much more rapidly than those in the fridge.
- Keep it Dry. Humidity or moisture in the seed storage area is a sure way to reduce the shelf life of seeds. Store dry in plastic bags or glass containers and add a dessicant. Dessicants help keep storage containers dry and can be found for around $1 each from various online purveyors, making them a cheap insurance policy for your home seed bank!
- Don’t Store Pelleted Seed. These days, you can buy pelleted seed for many of the smaller seeded vegetable varieties, like lettuce and carrots. The pelleting process and materials used, while making it easier for old eyes and those of us with fumbling fingers to plant, reduces seed longevity. Do your best to plant all the pelleted seed you purchase. If you store pelleted seed, don’t say you weren’t warned when next season’s germination is poor!
- Plant All Stored Seed the Next Season if Possible. Remember, that while most non-pelleted vegetable species’ seed can remain viable in storage for more than a year, it’s best to only store seeds until the next season and use them up. Regardless of how well you store them, seed germination percentage (how many in the lot will sprout when planted) and vigor (how strong the germinating seedlings are) decline in direct proportion to time spent in storage.
- Plant Old Seed Heavy. As germination rates in storage may have declined, it’s best to plant stored seed a little thicker than you normally might. If you need a squash plant in a certain spot, instead of just planting one seed, put three or four in the hole to ensure you get a plant. You can always thin extras later, but time lost replanting cannot be regained.
By following these few simple tips, you can waste a lot less seed and ensure that you have what you want to plant for the following year! As always, if you have any questions about saving and storing seed or any other agriculture or horticultural topic, please contact us at the UF/IFAS Calhoun County Extension Office. Happy Gardening!
The following resources were used as references when writing this piece and may prove helpful to you also, check them out:
- Johnny’s Selected Seeds Seed Storage Guide: https://www.johnnyseeds.com/growers-library/tools-supplies/seed-storage-guide.html
- Seeding the Garden EDIS Publication: https://edis.ifas.ufl.edu/vh026#:~:text=Storing%20Leftover%20Seeds,better%20than%20in%20the%20refrigerator.
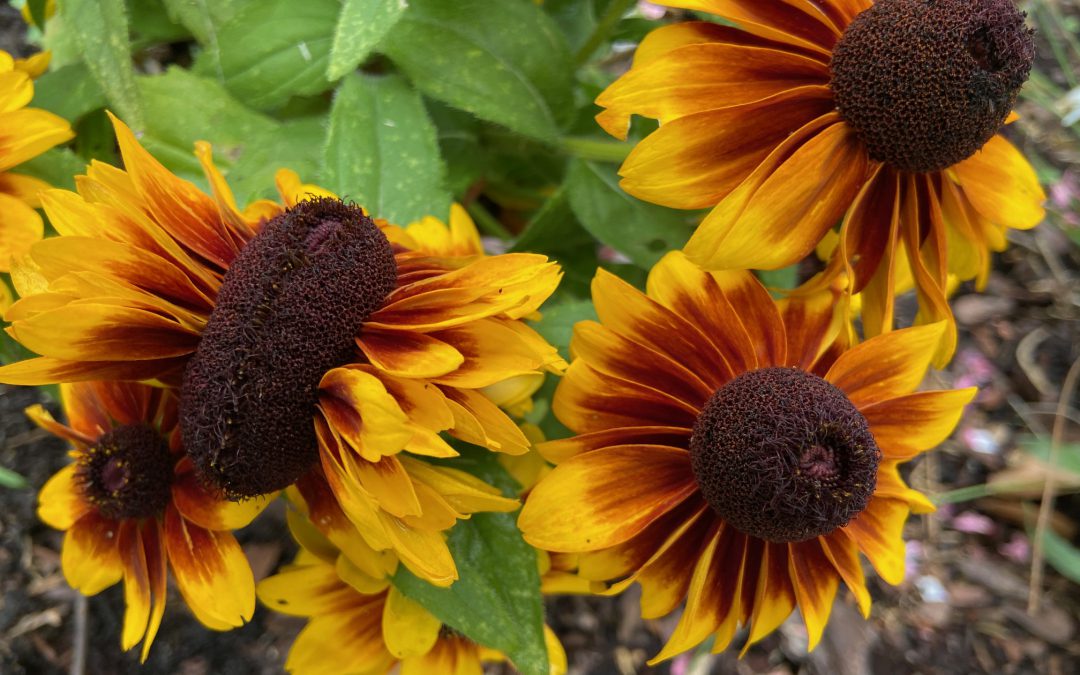
by Mary Salinas | Jul 16, 2020
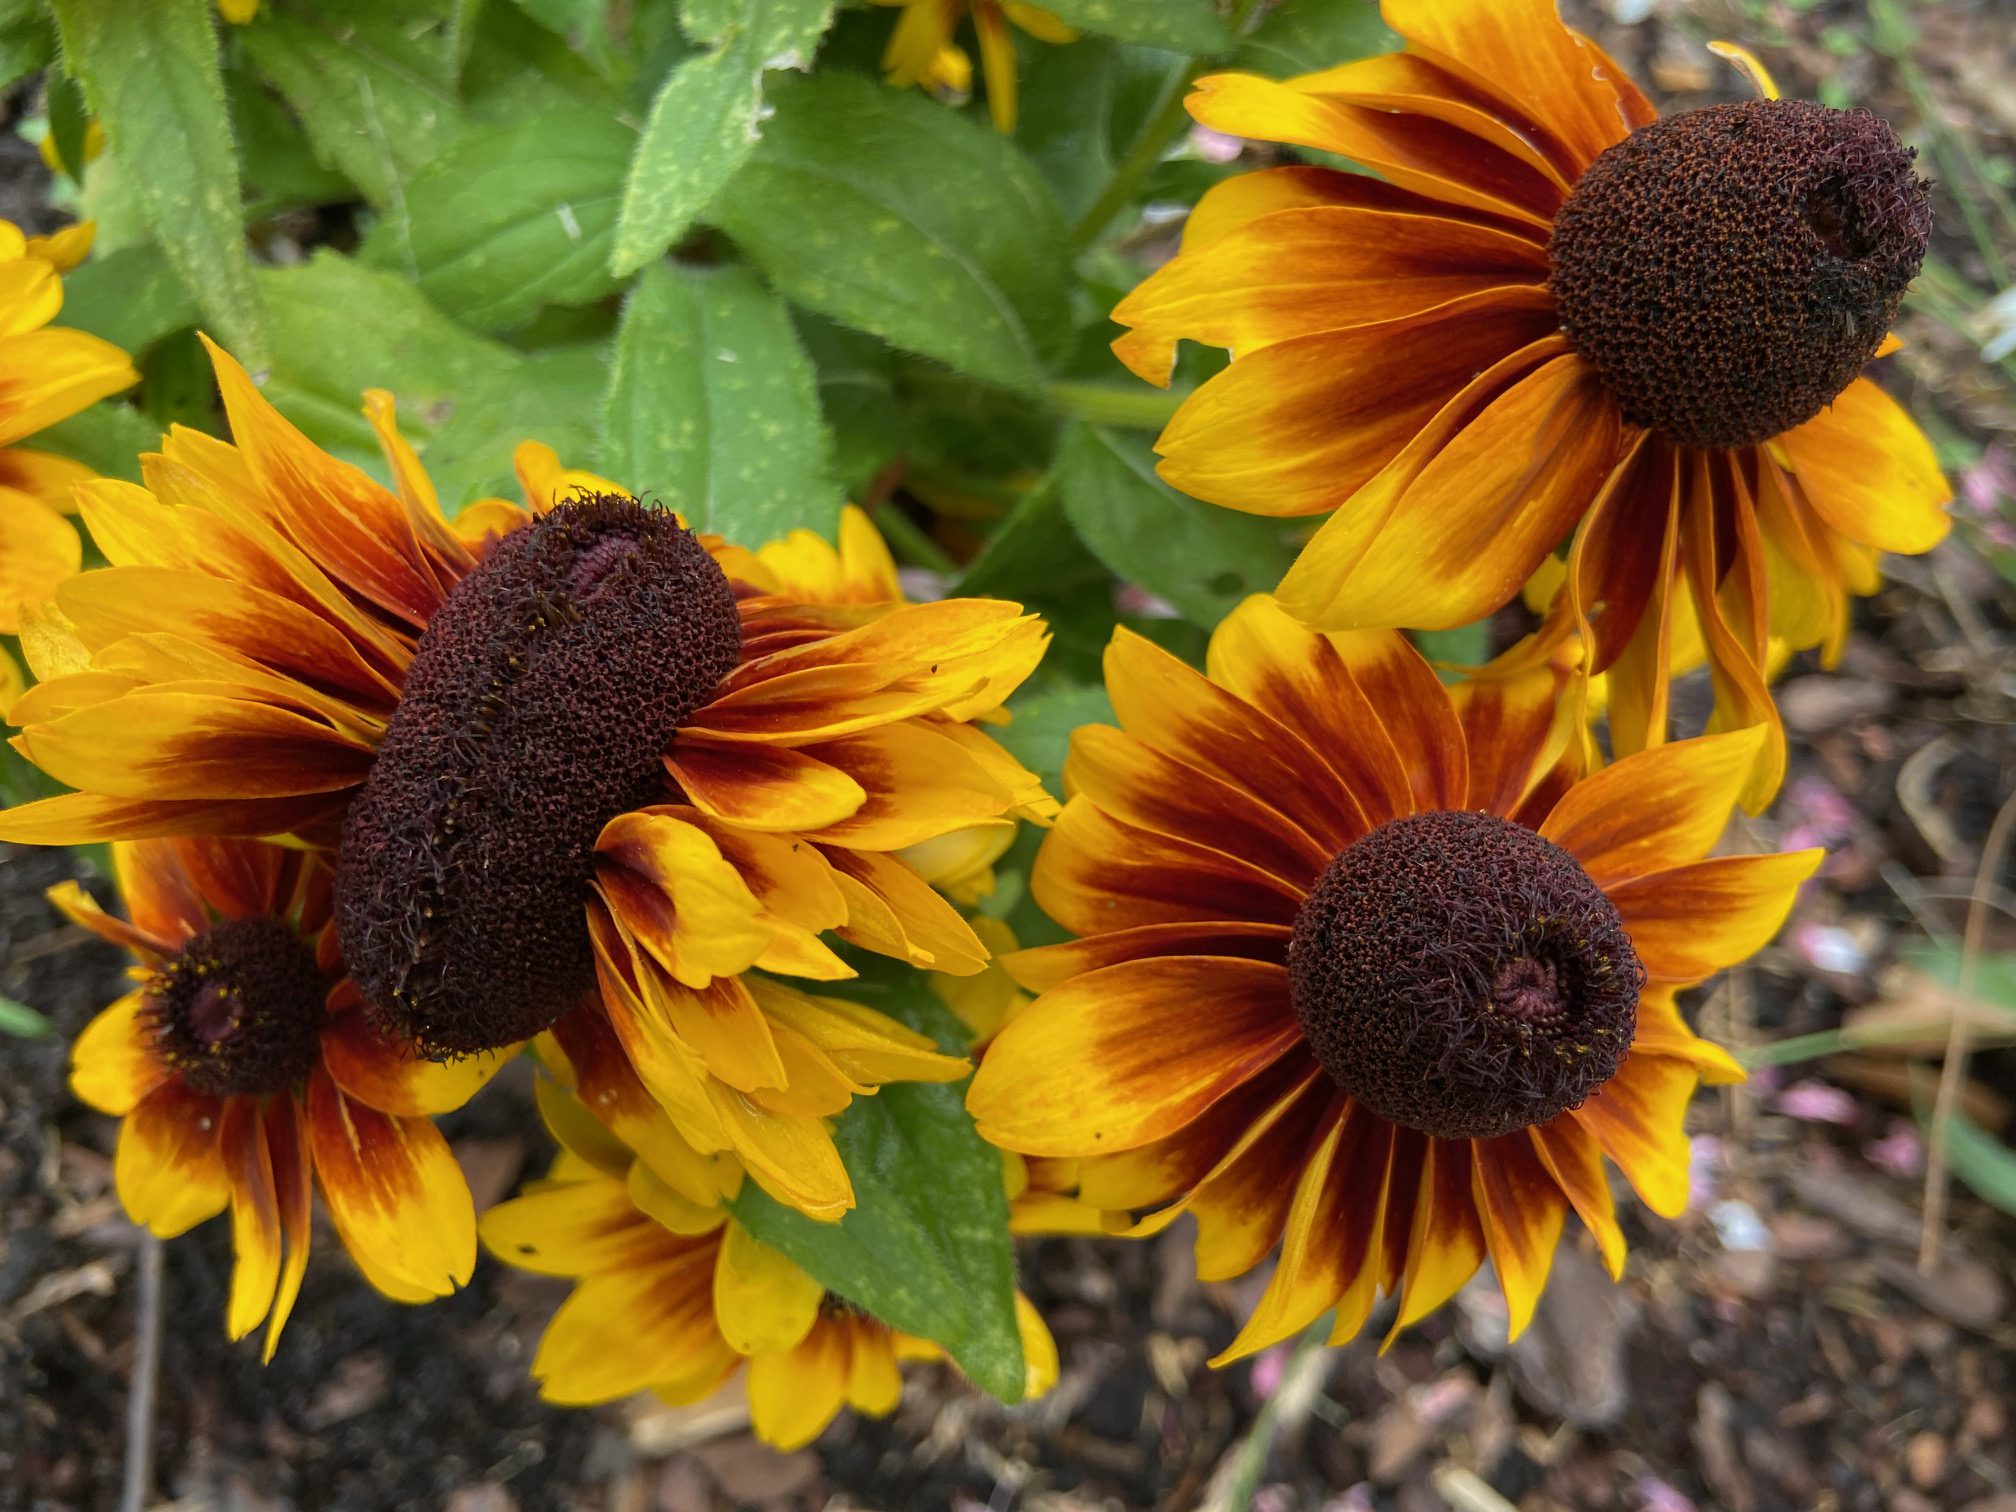
Fasciation of Rudbeckia hirta ‘Toto Rustic’. Photo credit: Mary Salinas, UF IFAS Extension.
You never know what surprises are looming in your flower gardens.
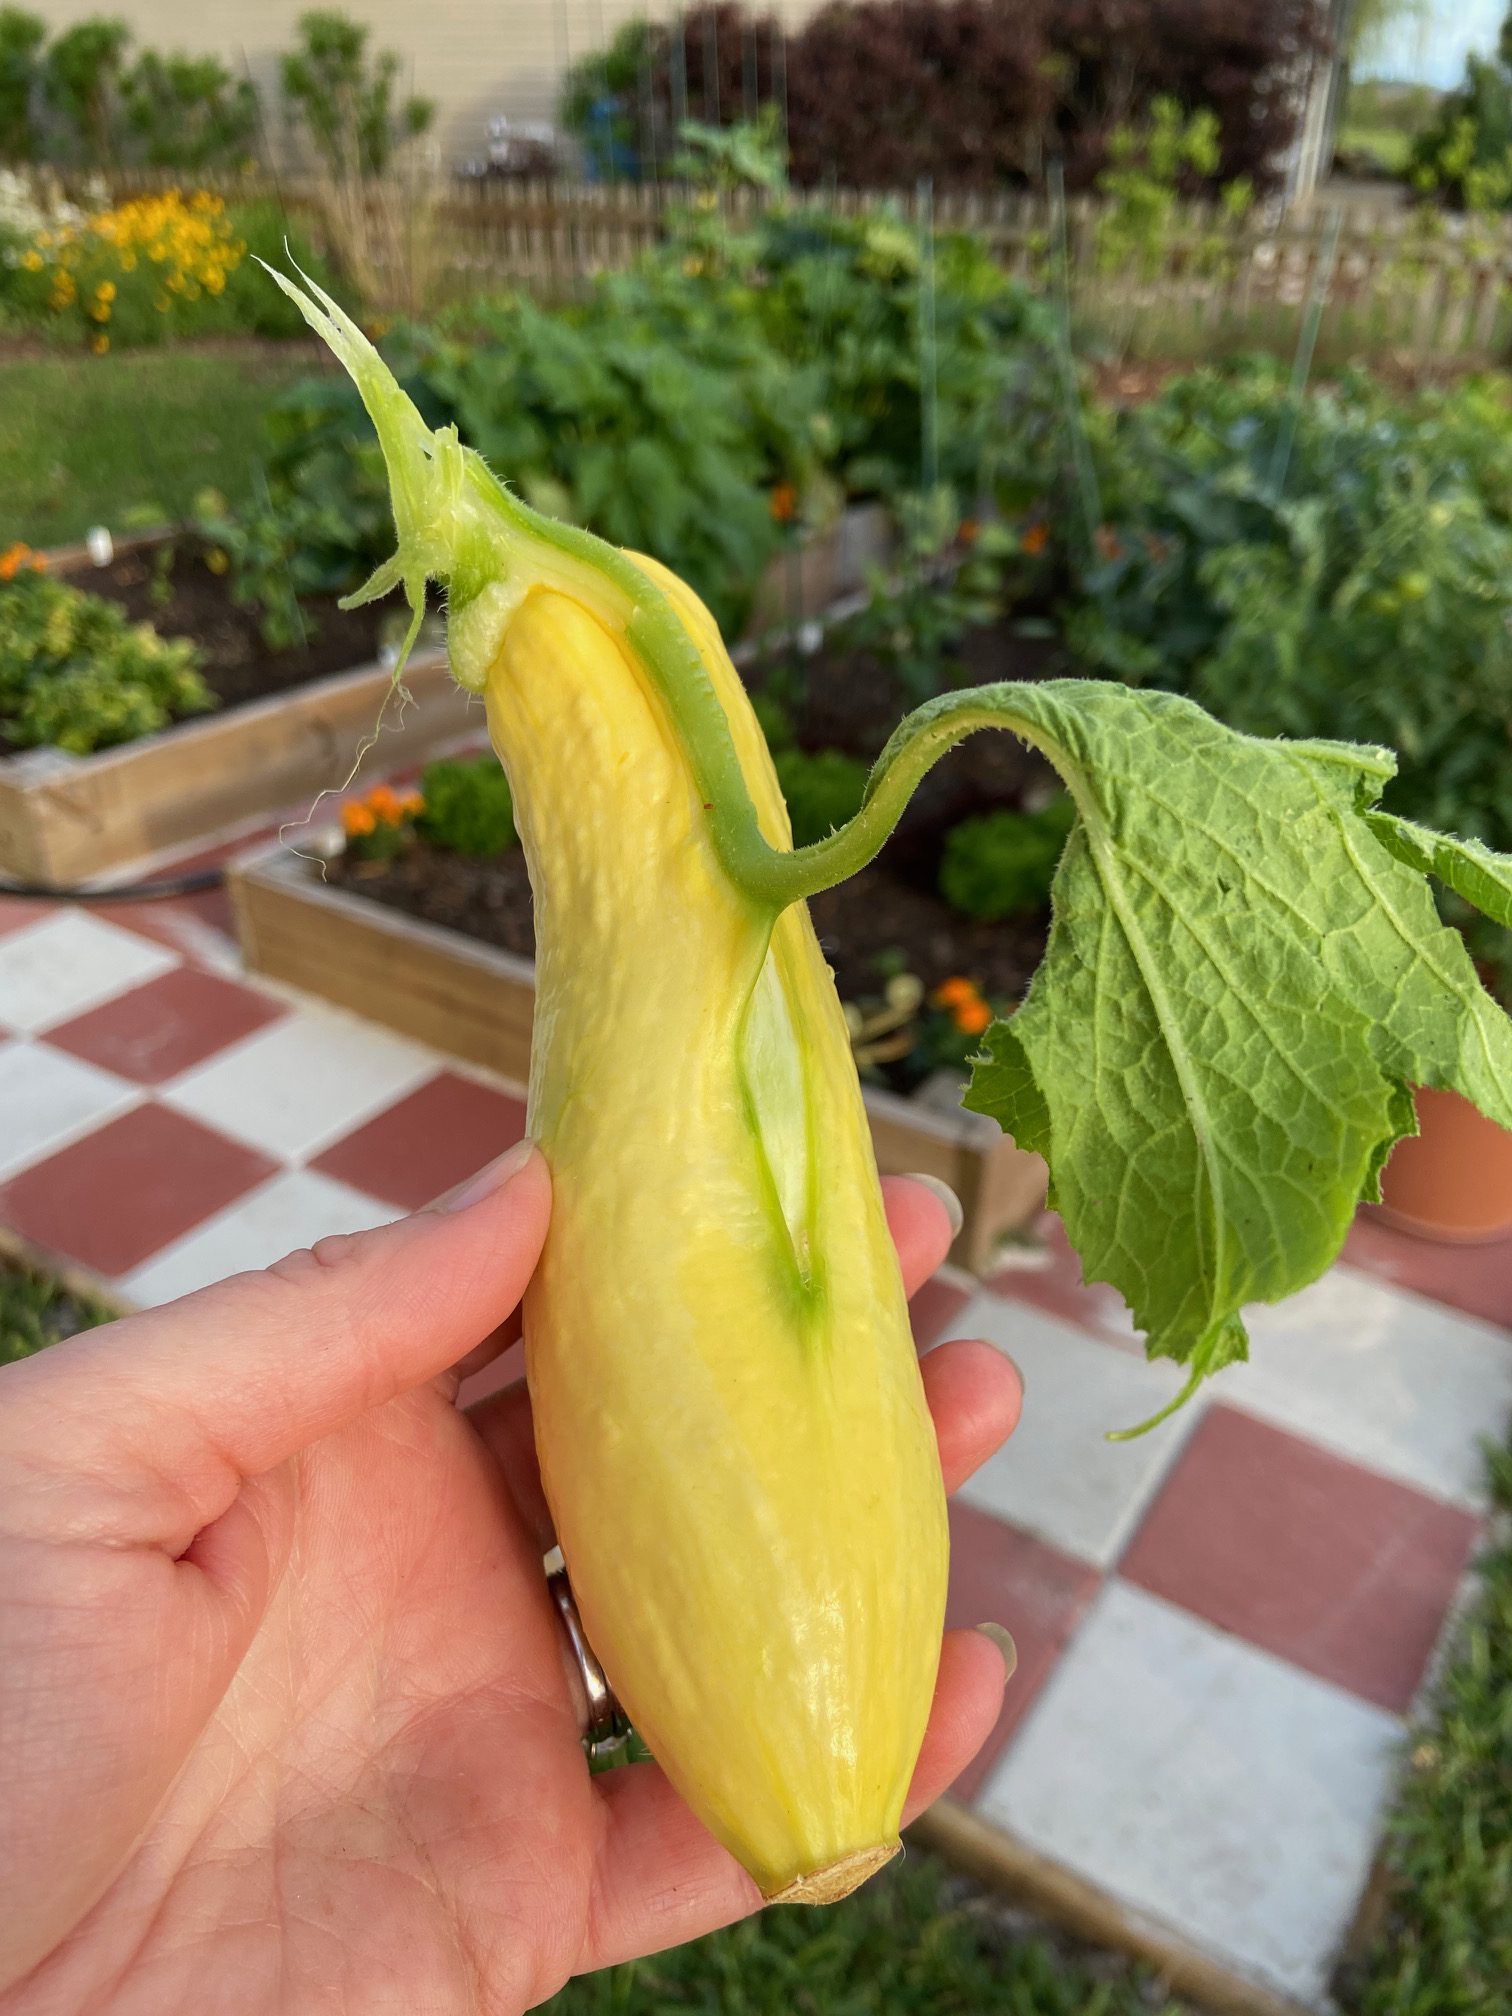
This Rudbeckia in the photo to the left sported one bloom that was so different from all the others. The disk or central portion of the inflorescence was elongated and curved back on itself and created a contorted, crazy looking bloom. And then there was a yellow squash in my garden that had a leaf growing down the length of the squash. What caused these things to happen?

Fasciation in yellow summer squash. Photo credit: Mary Salinas, UF IFAS Extension.
This is a mutation, often genetic, but also could be caused by outside influences such as pathogens, injuries, or chemicals. Plant hormones may also play a role in this phenomenon. This mutation expresses itself as a malformation or cresting at the tip or growing point of the plant, also known as the meristem. We call this fasciation and it begins when the cells at a growing point of a plant start dividing in an uneven or asymmetrical fashion instead of the normal symmetrical pattern.
A gerbera daisy affected by fasciation. Photo credit: Mary Salinas, UF IFAS Extension.
There are some plants we embrace for their fasciation. A common one is cockscomb celosia that is prized for its showy crested inflorescence. Cacti and succulents more commonly exhibit fasciation and we can see it in some of the crested cacti.
Take a close look at what is happening in your garden and landscape. Plant biology is fascinating!
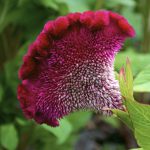
Cockscomb Celosia inflorescence. Photo credit: Lee Terilla 2008, some rights reserved.

 Beneficials come in many shapes and sizes. Some are commonly known predators, such as spiders, Lady Beetles and Praying Mantids, while others are lesser known pest nemeses, like Paper Wasps, Pirate Bugs, and Lacewings. Regardless, gardeners should do their homework and be able to identify beneficials when they see them and allow them to do their jobs. The presence, or not, of a handful of Lady Beetles or Lacewings on the attack can be the difference between needing to treat with insecticides for an aphid outbreak or just letting nature take its course. Studies have shown that just one individual Lady Beetle in the larval stage can consume as many as 500 aphids; adult Lady Beetles are even hungrier aphid eaters! Paper Wasps, you know the ones who make the large “papery” nests around eaves of house and other structures, play an important beneficial role, frequently preying on caterpillars. If their nests aren’t near highly trafficked areas around your home and you don’t have family members allergic to wasp stings, your garden will thank you for leaving a few paper wasp colonies as caterpillar insurance!