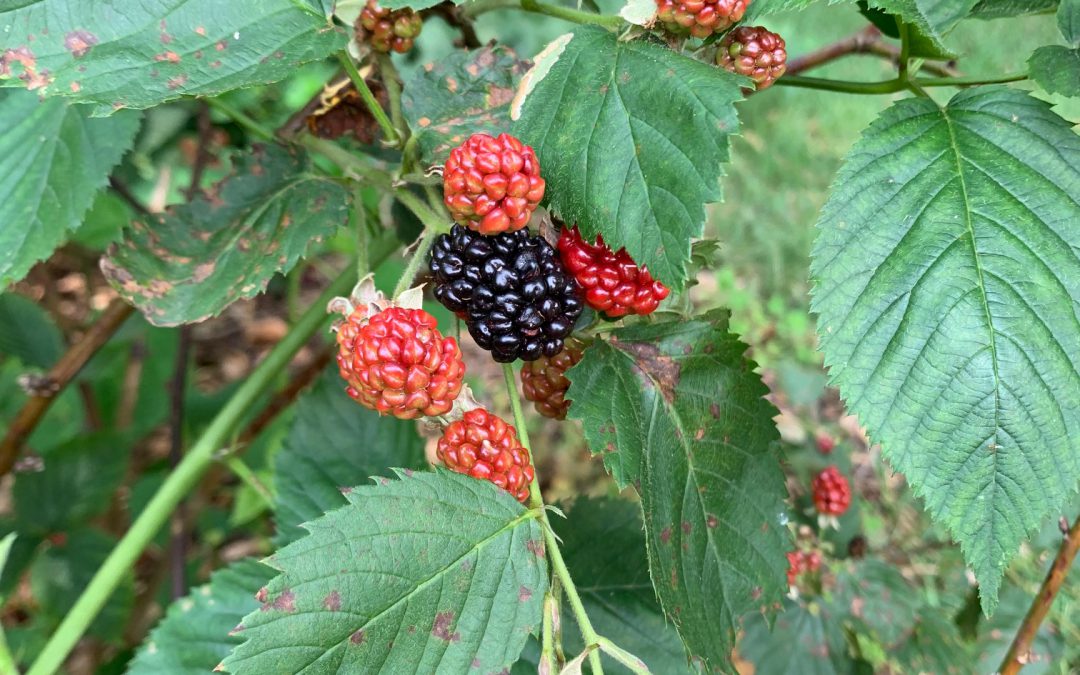
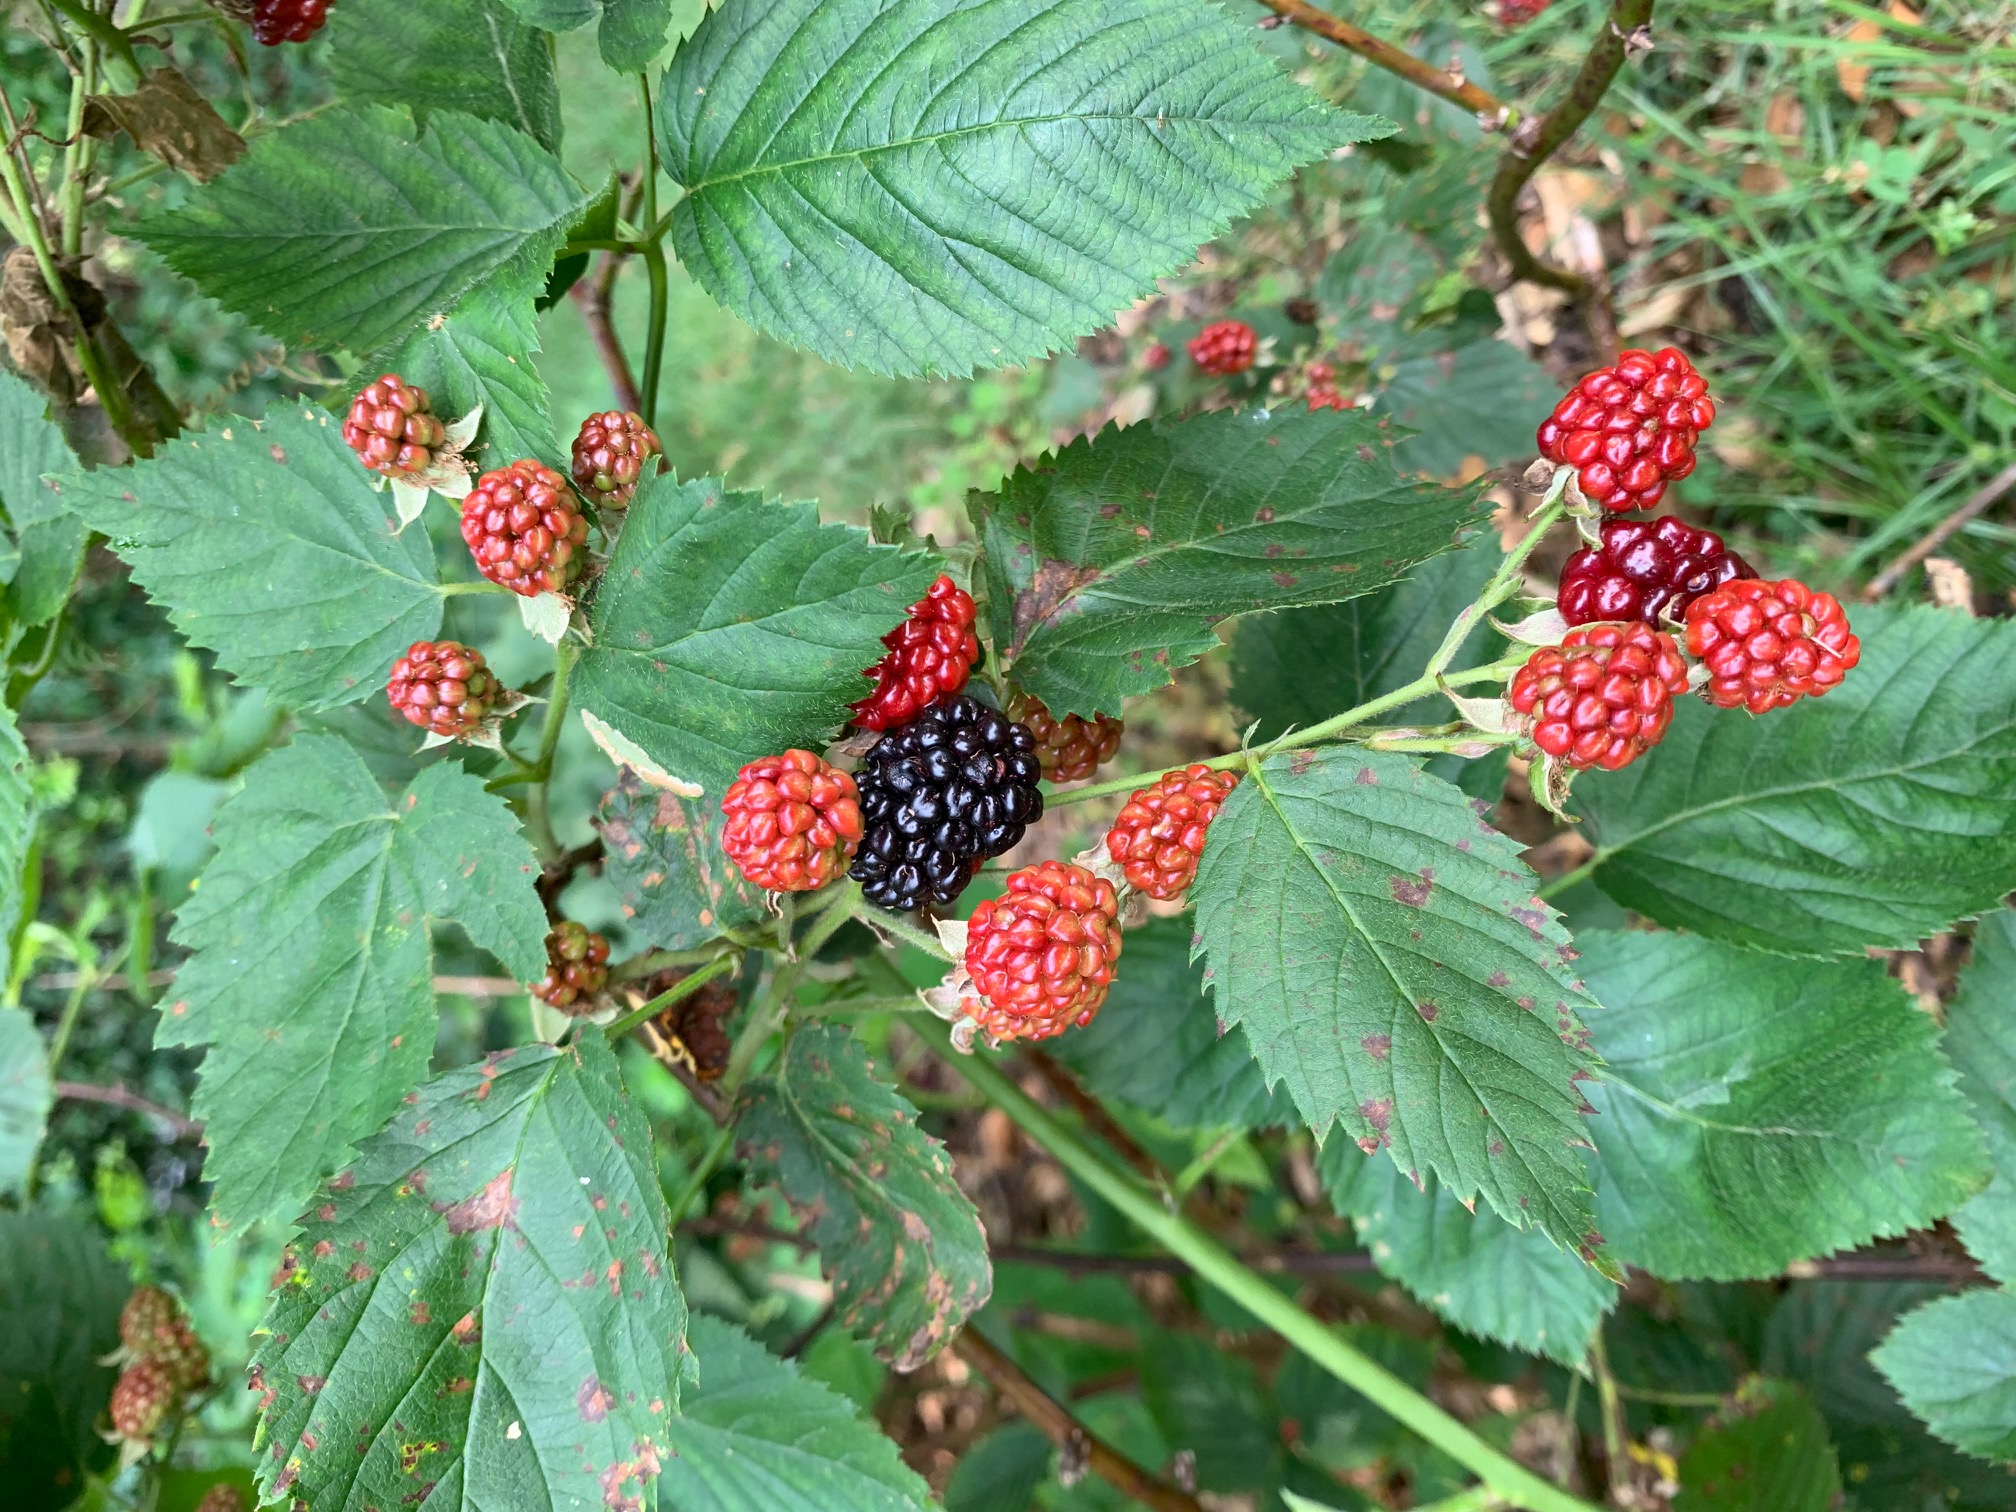
Ripening thornless blackberries. Photo credit: Mary Salinas, UF/IFAS Extension.
To everyone’s delight, the blackberries are ripening in the Santa Rosa County Extension demonstration garden. The blackberry patch is a reliable perennial that continues to provide fresh berries year after year. Before you decide against them because you don’t want a thorny and painful hazard in your landscape, remember that there are thornless blackberry cultivars with fruit just as tasty as the old-fashioned thorny blackberry varieties. However, it is important to take care and make sure that the variety or cultivar you choose is adapted to our Florida climate and chill hours.
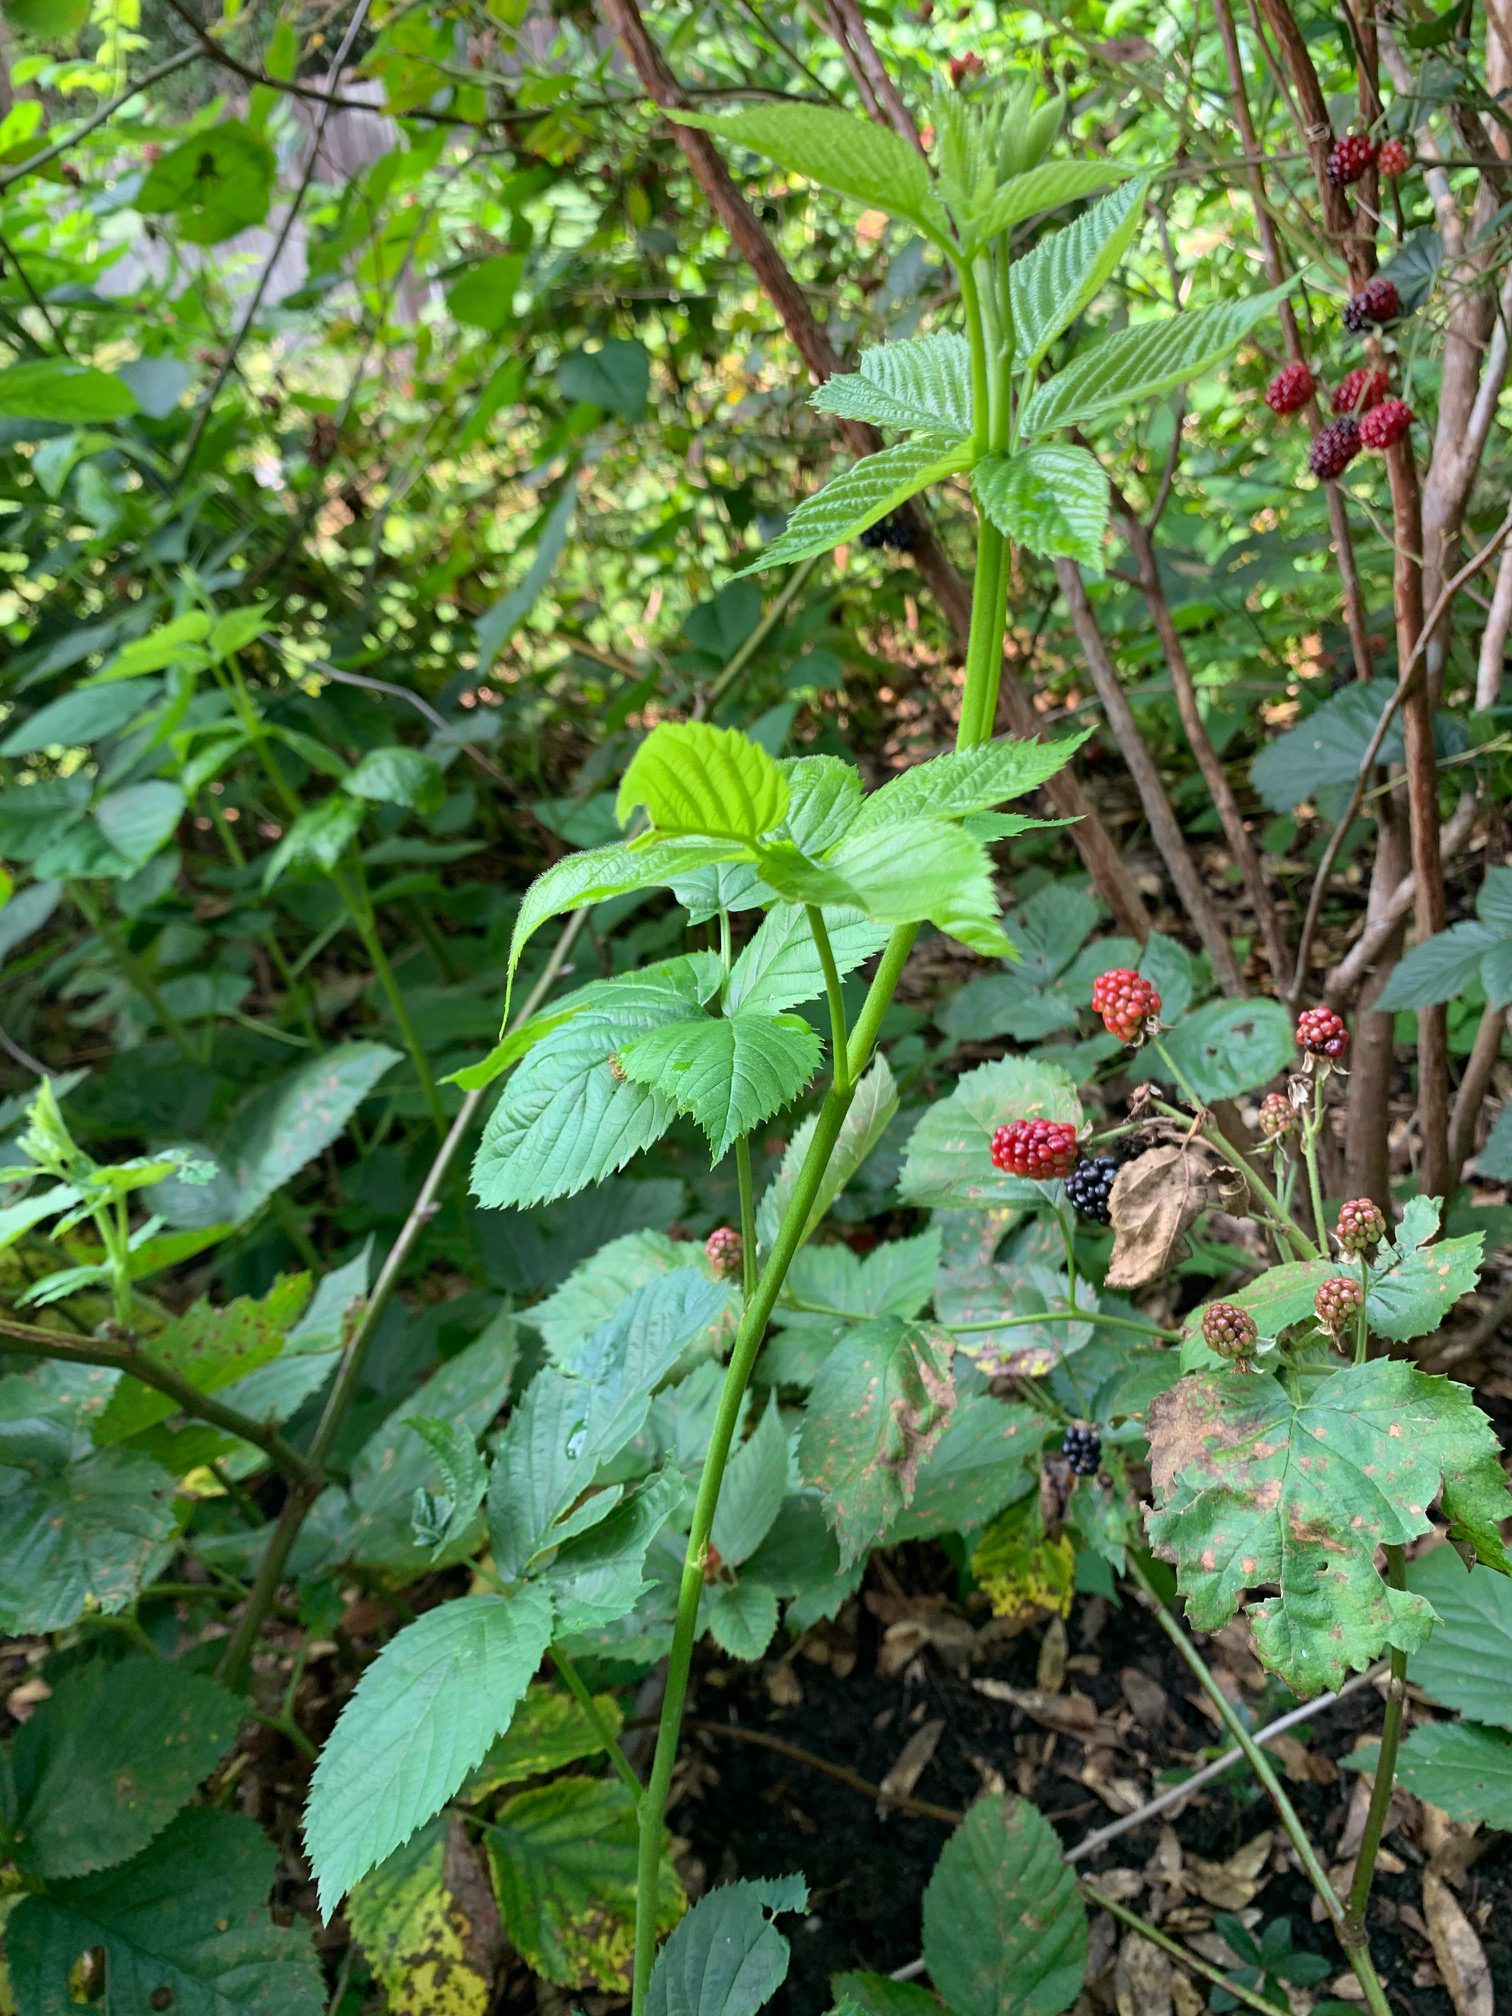
Blackberries bloom and produce fruit on last year’s canes. This year’s growth (the bright green shoot in the front center) will produce next year. Photo credit: Mary Salinas, UF/IFAS Extension.
You can choose a blackberry variety from your local nursery or propagate some plants from a favorite blackberry grown by a friend or neighbor (with permission, of course). Methods of propagation include stem cuttings, root cuttings, tip layering and removing the suckers that arise from the roots.
Plant when the weather is cooler in winter and choose a sunny spot with good soil. Frequent irrigation is crucial during the establishment period and when the fruit is produced. Weed control with organic or plastic mulches is also important to the success of your blackberry patch.
For more information on blackberry cultivars, propagation and growing success please see the University of Florida publication The Blackberry.
My obsession with plants started with the purchase of my first house in Waverly, Alabama in the late 90s. I bought a house with seven acres and of that about 1.5 acres was a fenced yard. The landscape was not very appealing, so I was on a mission to make it beautiful yet functional for my dogs. The only problem was, as a new homeowner, I had very little expendable income for my burgeoning plant habit. This dilemma forced me to be a resourceful gardener.
Shop the discount rack at garden centers
Many retail garden centers (especially mixed use stores with limited plant space) will discount plants simply because they are no longer flowering. Plants look perfectly healthy but are just not considered “retail ready” anymore, so rather than hold them over until they bloom again and appeal to most shoppers the stores tend to mark them down.
Plants are either growing or they are dead, so it is common to find some outgrowing their container and are getting “potbound” which means the root system is outgrowing the pot. Potbound plants are hard to keep watered without wilting and the solutions are to transition to a larger pot or plant in the ground. Most garden centers are not equipped to pot up overgrown plants to larger containers, so the easier solution is to sell them quickly. If you purchase a plant with circling roots be sure to trim the bottom and score (slice) the root ball to encourage roots to spread laterally.
Avoid plants that appear diseased (leaf spots, brown stems, mushy parts, rotting odor) or have active feeding insect activity.
Compliment other gardeners’ plants
When you get gardeners together, they inevitably start swapping plants. I really don’t have an explanation for this other that good old southern hospitality, but I’ve noticed over the years that when you express appreciation of plants to other people they tend to end up in your own yard. Ask if you can take a pinch (for cuttings) or offer to divide a clump of crowded perennials and you are on your way to a trunk full of plant babies.
I can’t recommend this for multiple safety reasons, but I have been known to photographs plants in my travels then strike up a conversation with a homeowner who insisted I take one home.
Experiment with basic propagation techniques
Grow flowers from seed. Either purchase seeds (usually under $2/pack) or collect seed heads from spent flowers in your own garden. After flowers fade, allow them to set seed then either crush and distribute in other parts of your garden or store in a cool, dry place until you can swap with friends.
Division – clumping perennials such as daylilies, cast iron plant, iris or liriope can be dug up and cut into smaller pieces with a shovel or machete. You only need to be sure to have buds on top and roots on the bottom to make a new plant. Other plants create offshoots that can be removed from the parent plant. Examples of these are agave, cycads, and yucca.
Cuttings – the list of plants that can be propagated from stem cuttings is endless but a few that are very easy are crape myrtle, hydrangea, and coleus.
Homeowners are always looking for methods to manage one of our most difficult pests in the vegetable garden. Learn about the science of how to properly use marigolds to deter nematodes against one our our favorite summer fruits In the Garden with UF IFAS Extension Escambia County.
Talk to nearly any Panhandle gardener and one of the first things brought up in conversation is the difficulty growing large, beefsteak/slicing tomatoes (Solanum lycopersicum) in their home garden. Large tomatoes are indeed among the more challenging garden vegetables in North Florida, affected by myriad pests, pathogens and abiotic issues. However, giving up growing this garden favorite is unwarranted as success can be had by following a couple of often overlooked, simple steps to ward off potential problems.
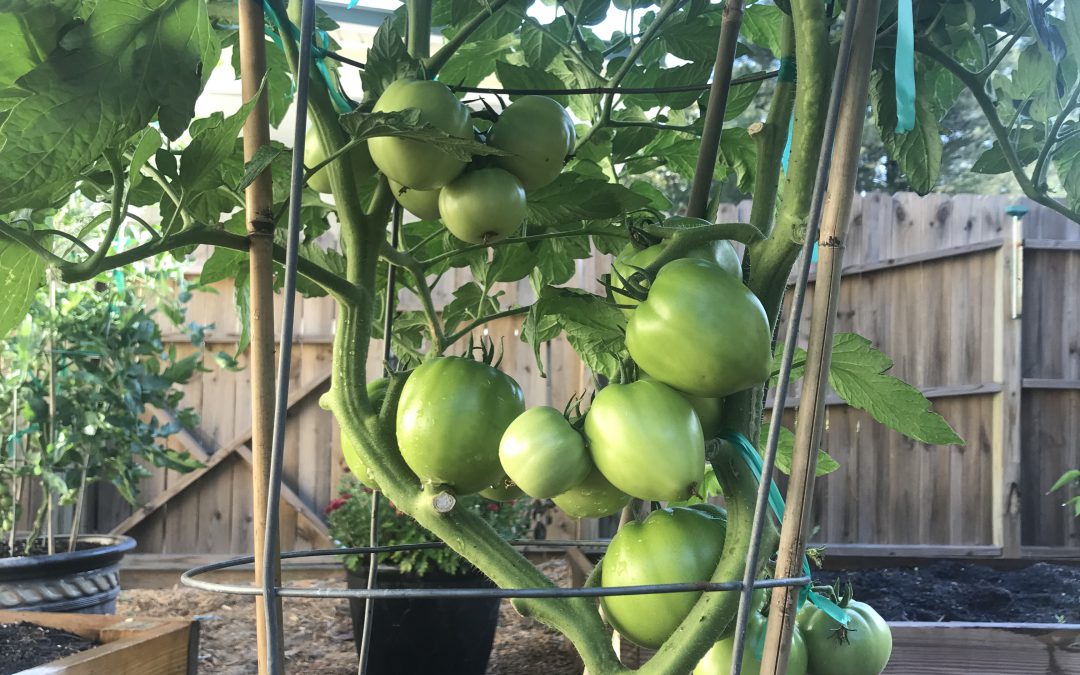
Choose Resistant Cultivars – One of the major recent gardening trends is the rise of heirloom veggies, particularly heirloom tomatoes. While many of these varieties certainly are interesting and often possess superior flavor/texture, heirlooms are, as a group, extraordinarily susceptible to disease in our climate. Fortunately for gardeners, there are a number of excellent varieties available with large resistance profiles to many common diseases and a similar taste profile to heirloom favorites! ‘Big Beef’ (pictured), ‘Better Boy’, ‘Celebrity’, and ‘Skyway’ are just a few of the many great cultivars with extensive disease resistance available as transplants at garden centers or as seed from quality online seed vendors.
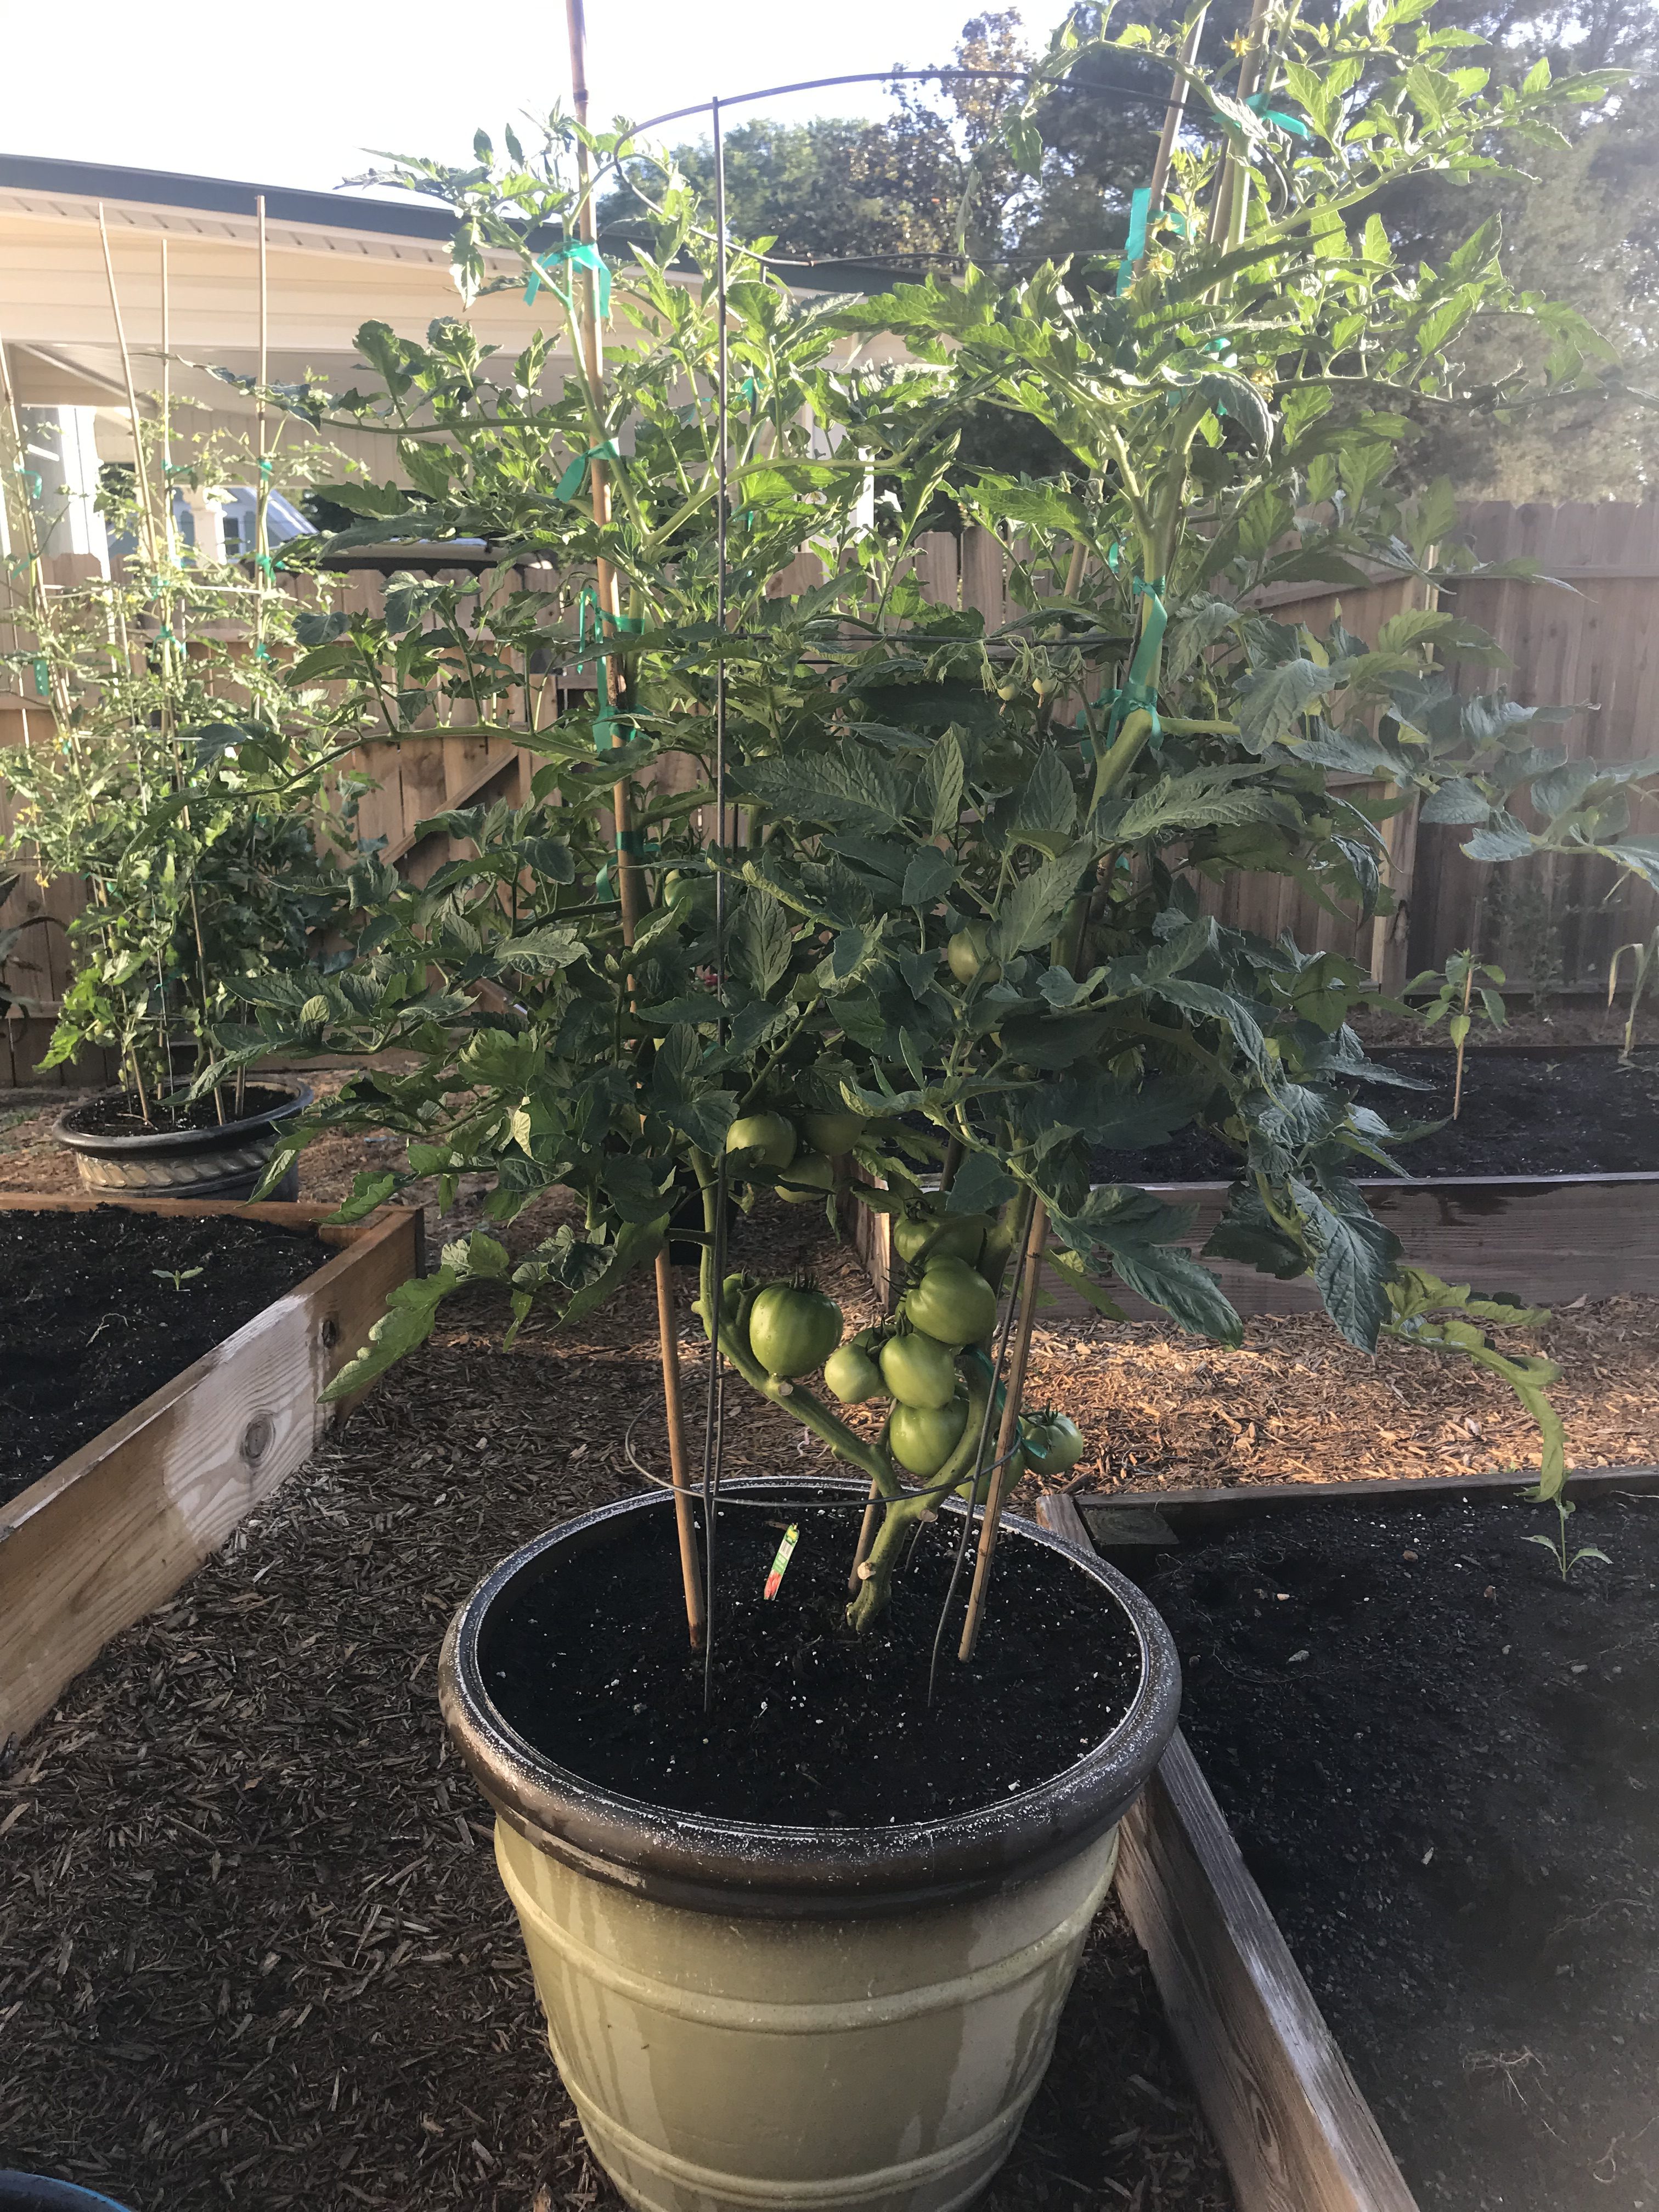
Tomato ‘Big Beef’ in 15 gallon decorative container
Start Early – Once, you’ve selected the proper cultivar, the next key is to get them in the ground early! I’m convinced one of the primary reasons folks fail with tomatoes is waiting for “traditional” garden planting dates. For instance, an old tradition in the South is to plant your garden on Good Friday before Easter. However, according to Johnny’s Selected Seeds Southeast Sales Representative Blake Thaxton, tomatoes should be germinated and growing in the garden no later than March 15. Mr. Thaxton notes two primary reasons for this, the most important being pest/disease avoidance. Beefsteak tomato varieties take around 70 days from planting to harvest, so a March 15th planting date yields ripe tomatoes around the third or fourth week of May, when pest/disease pressure is still manageable. Pests and disease occurrence becomes exponentially worse in the Panhandle as May trickles into June and July, therefore it is critical that your fruit begin ripening prior to this onslaught. An important second motivation to plant early is that tomatoes stop setting fruit when nighttime temperatures rise above 75°F. At these temperatures, tomato pollen is rendered sterile and though the plant will continue flowering, no fruit will be set.
Mulch – Another overlooked best management practice in backyard veggie gardening is mulching! Those of us who tend flower beds already know many benefits of mulch like soil temperature moderation, weed prevention, and moisture conservation. But for tomato growers, mulch has another benefit – disease prevention! Several serious diseases that affect tomato are soil-borne pathogens (i.e. Early Blight, Late Blight, Bacterial Spot, etc.). These pathogens find their way onto plants either indirectly via water splashing from soil onto leaves or direct contact from leaves and fruit resting on the soil. To prevent these pathogens from infecting plant tissue, apply an organic mulch (preferably wheat straw or tree leaves) under and around plants. This simple step goes a long way toward season-long, yield-saving disease prevention.
Consistent Watering – Everyone knows plants need water but what you might not know is that irrigation consistency makes a huge difference in plant health, particularly tomatoes. Consistent watering is key in helping ward off one of the most frustrating tomato maladies, blossom end rot (BER) – you know, the one where the bottom end of your perfectly good tomato fruit turns to a brownish mush! Though BER is caused by calcium deficiency, the condition is commonly induced by creation of distinct wet and dry periods from non-regular watering, interfering with calcium uptake and availability to the plant. So, while you may have adequate soil calcium, if you don’t water correctly, the condition will happen anyway! It’s also good to keep in mind that mature tomato plants use large quantities of water daily, so during the heat of summer, plants in containers may need to be watered multiple times daily to maintain consistently moist soil. Think about it, you don’t drink 8 glasses of water when you wake up and then never drink again throughout a hot day. A tomato is no different. Allowing your plants to wilt down before providing additional water ruins productivity and can induce BER.
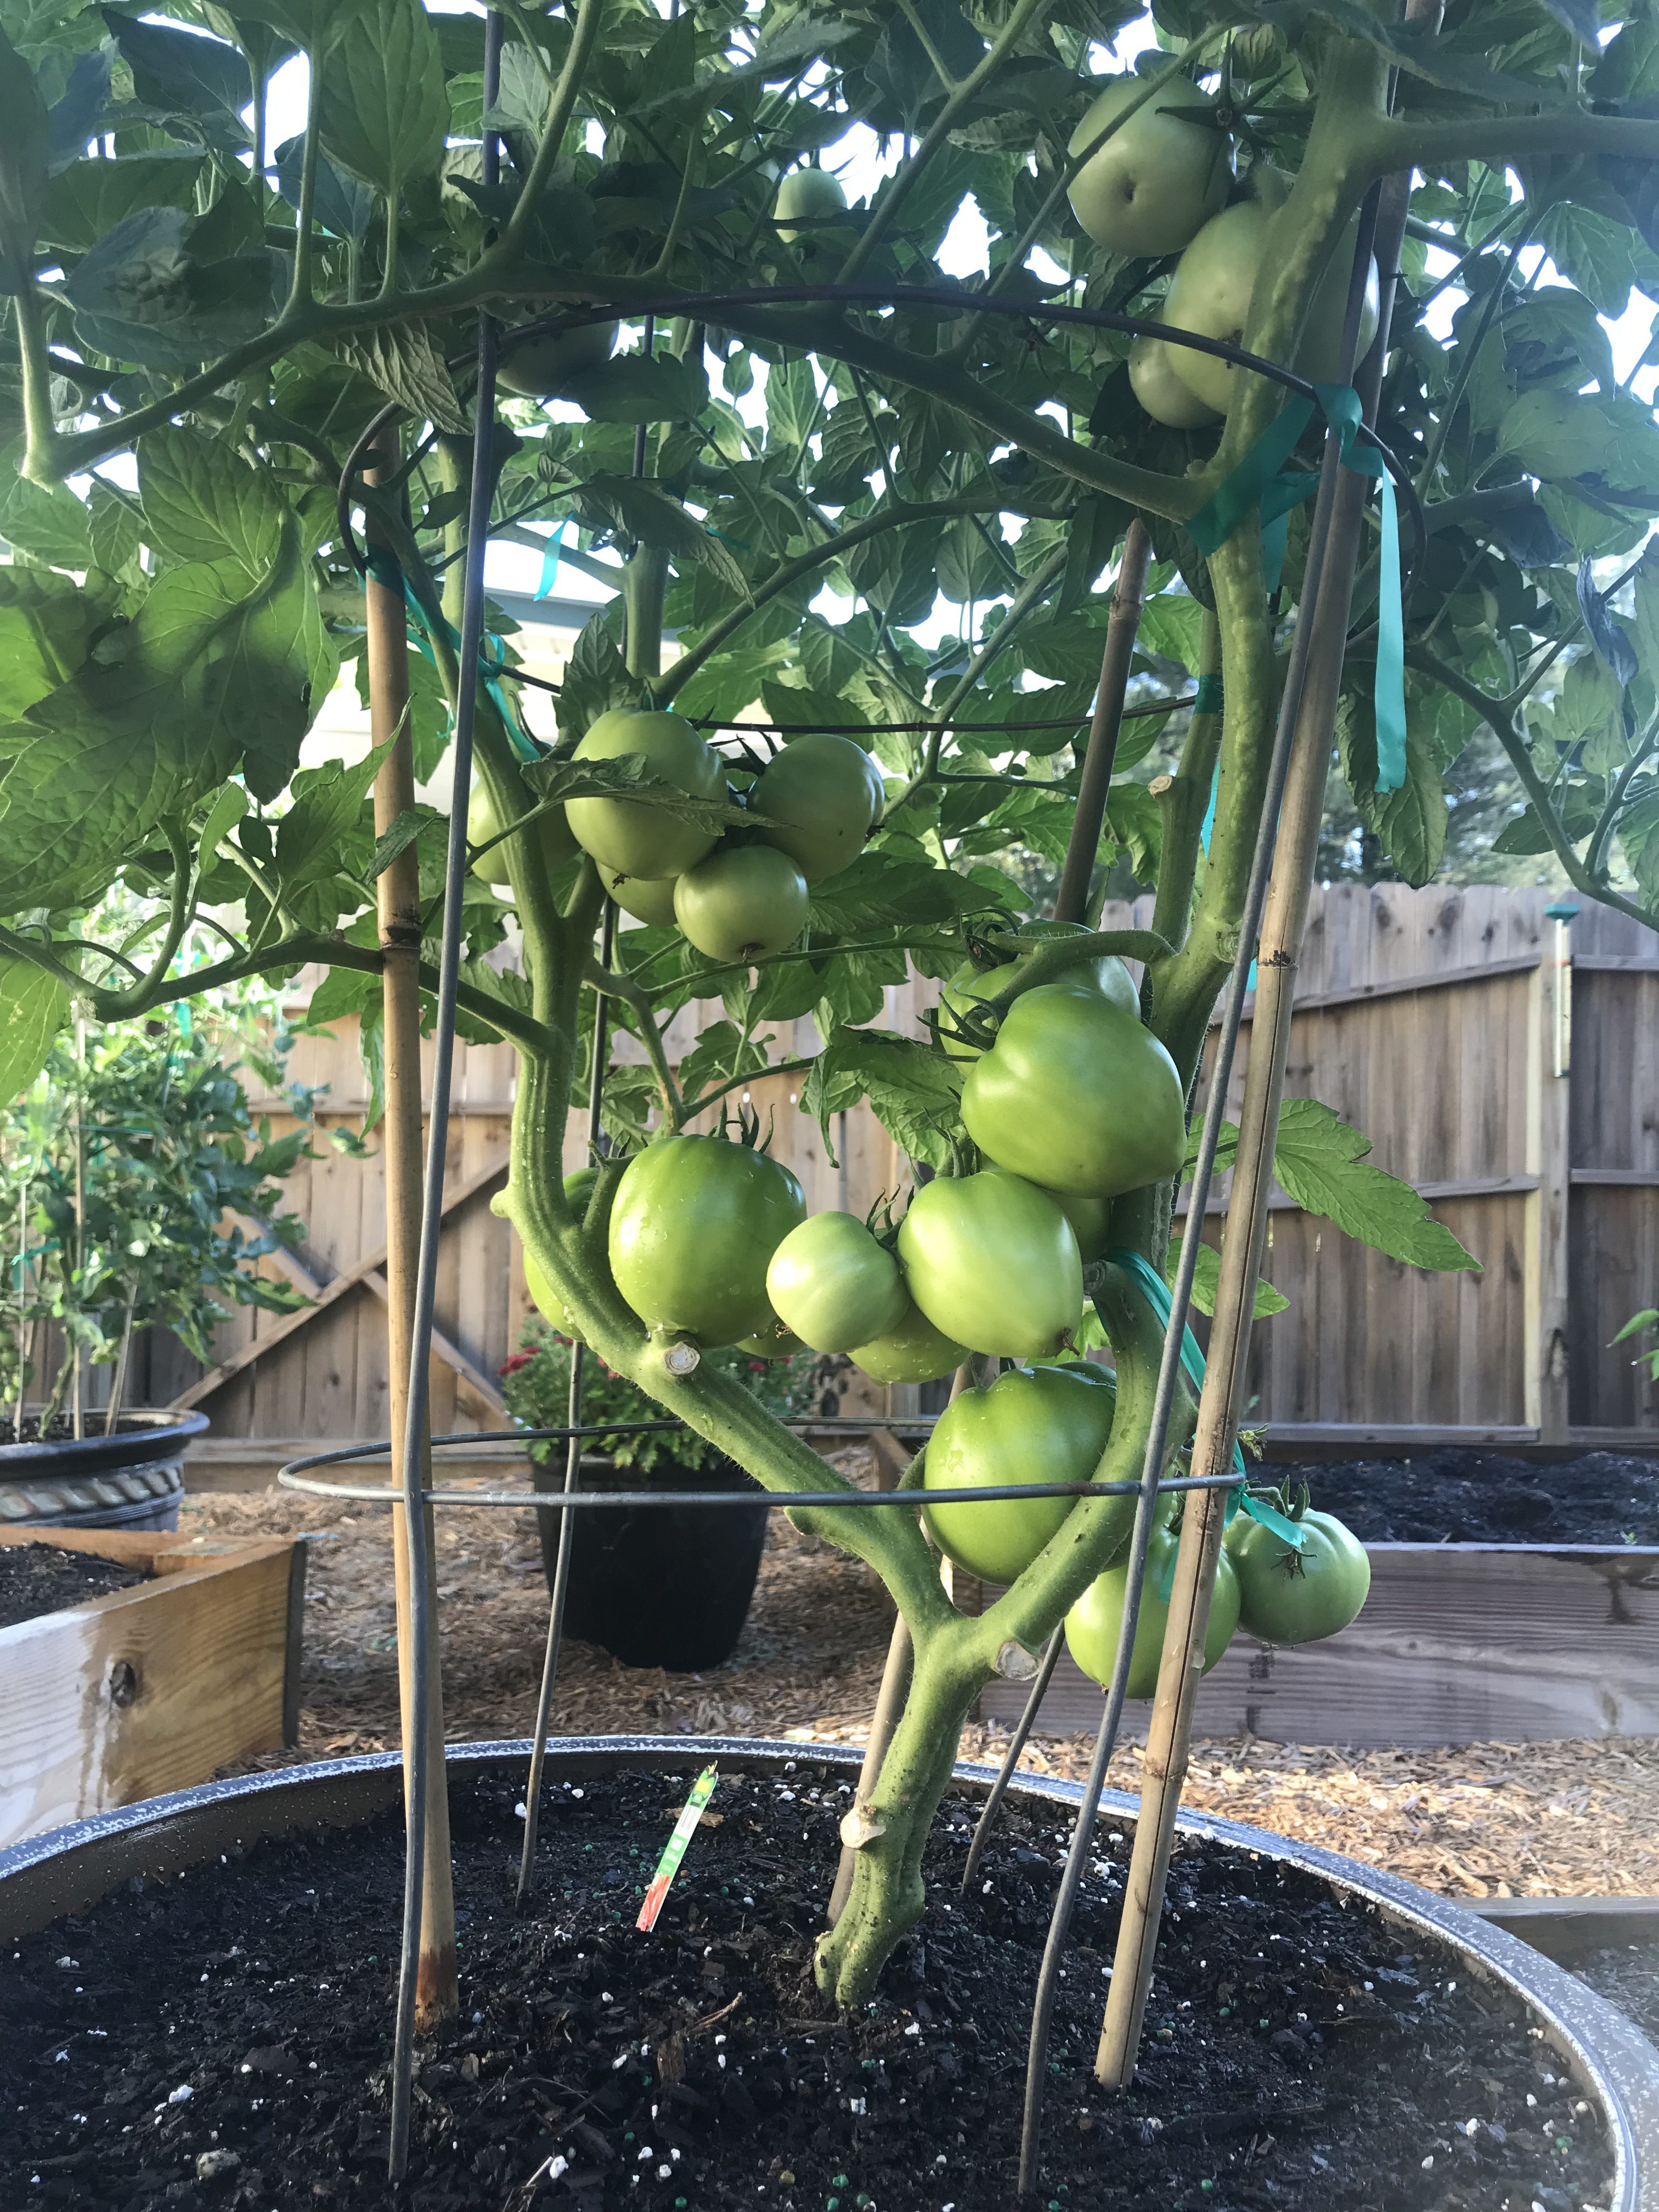
Tomato ‘Big Beef’ demonstrating pruning for soil clearance and airflow.
Pruning – I get it. Once you’ve nursed your baby tomato from a wee transplant or seed into a rapidly growing and flowering plant, it seems counter-intuitive to break out the pruners, but to keep your tomato plant as healthy as possible for as long as possible, that is what you must do! Pruning tomatoes should accomplish two things. First, remove the bottom layer of foliage from the plant base, so that water will not readily splash onto the lowest remaining leaves. (I tend to remove all leaves up to the second set of flowers 8-12” from the soil’s surface.) As with mulching, this prevents bacterial and fungal pathogens from spreading easily from the soil surface onto your plant. Second, tomato plants, especially the vigorous indeterminate varieties, often grow more foliage than is necessary for fruit production. This excess foliage can prevent airflow and trap moisture in the canopy of the plant, promoting disease. To open up the canopy and allow for more airflow, I prune off leaves that grow from the primary stems inward to the center of the plant. The idea is to keep the inside of the plant open while allowing enough leaves to power photosynthesis and shade the developing fruit below.
Tomatoes are notoriously hard to grow, but by following a few easy preventative practices, gardeners can greatly increase their chances of realizing harvestable fruit come summer. Please keep in mind that this is not an exhaustive list that will ensure disease-free plants over the entire growing season (you should also get a soil test to make sure your pH and soil fertility are correct and ideally you’d never work in your tomatoes when they are wet, etc., but this is a good place to start!). However, a little bit of planning and prevention early in the season can make growing tomatoes a lot less frustrating! As always, if you have questions regarding tomatoes or any other horticultural topic, please contact your local UF/IFAS Extension Office. Happy gardening!
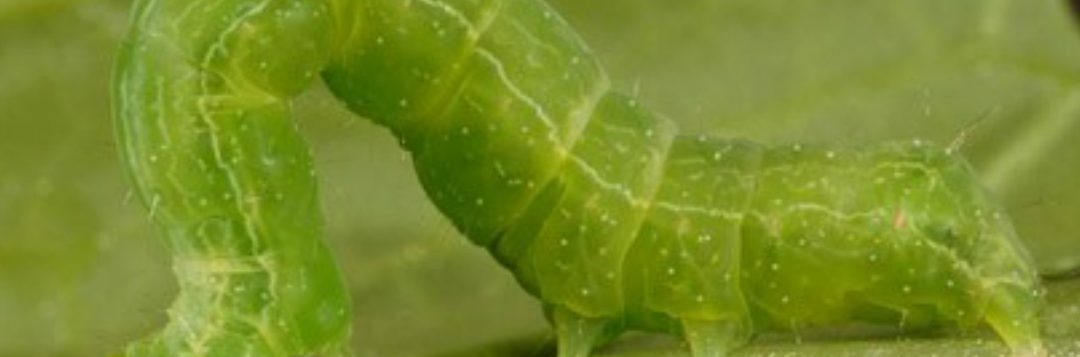
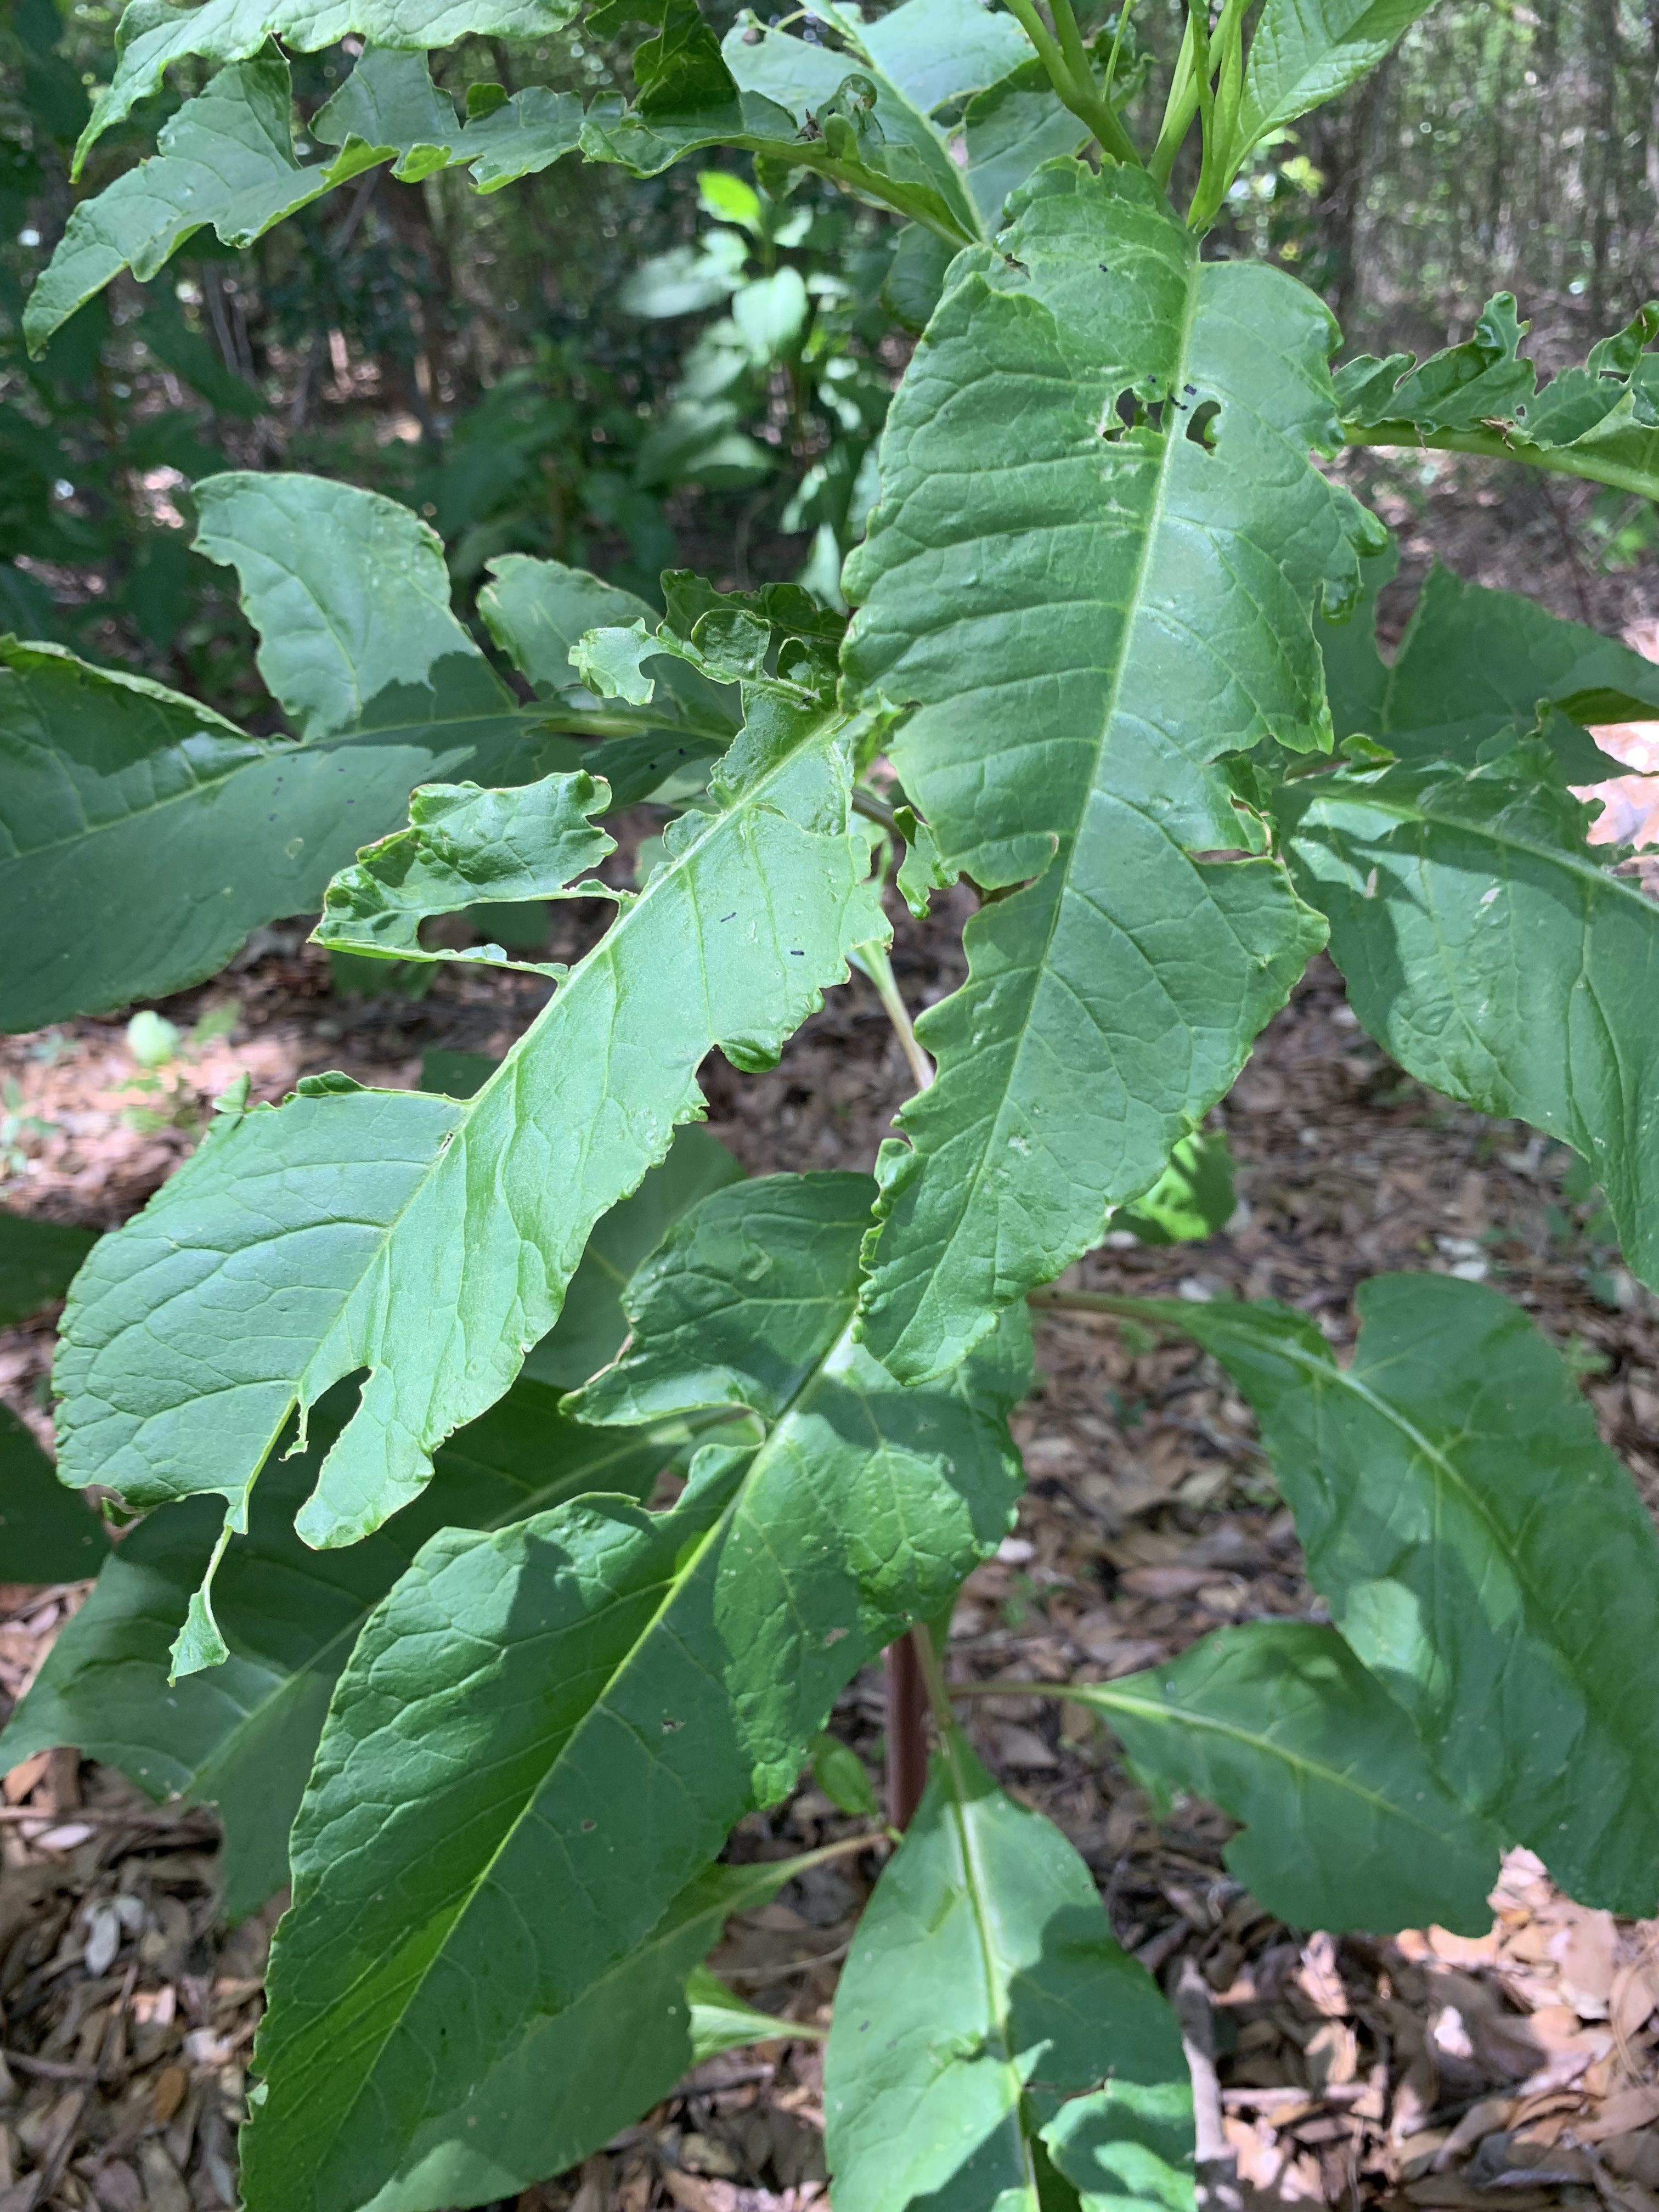
Nobody likes weeds in their garden. Weeds are not only ugly, they can host insects and diseases that later spread to your garden. This situation commonly occurs when weeds belong to the same plant family as the desired landscape or vegetable species, but some insects and diseases have diverse palettes. For example, I recently witnessed a looper caterpillar on a pokeweed plant.
Looper damage on a pokeweed plant. Photo Credit: Matt Lollar, University of Florida/IFAS Extension at Santa Rosa County
Loopers are common pests of vegetable gardens and in the landscape. Probably the most common loopers found in North Florida gardens are cabbage loopers (Trichoplusia ni) and soybean loopers (Chrysodeixisincludens). Cabbage loopers can be found feeding on cabbage, of course, as well as leafy greens, cucumbers, tomatoes, chrysanthemums, and snapdragons. Weeds that attract this looper are lambsquarters, dandelions, and curly dock. Soybean loopers like to feed on sweet potatoes, tomatoes, watermelons, geraniums, and sunflowers. They can also be found feeding on oxalis, kutzu, and lantana.
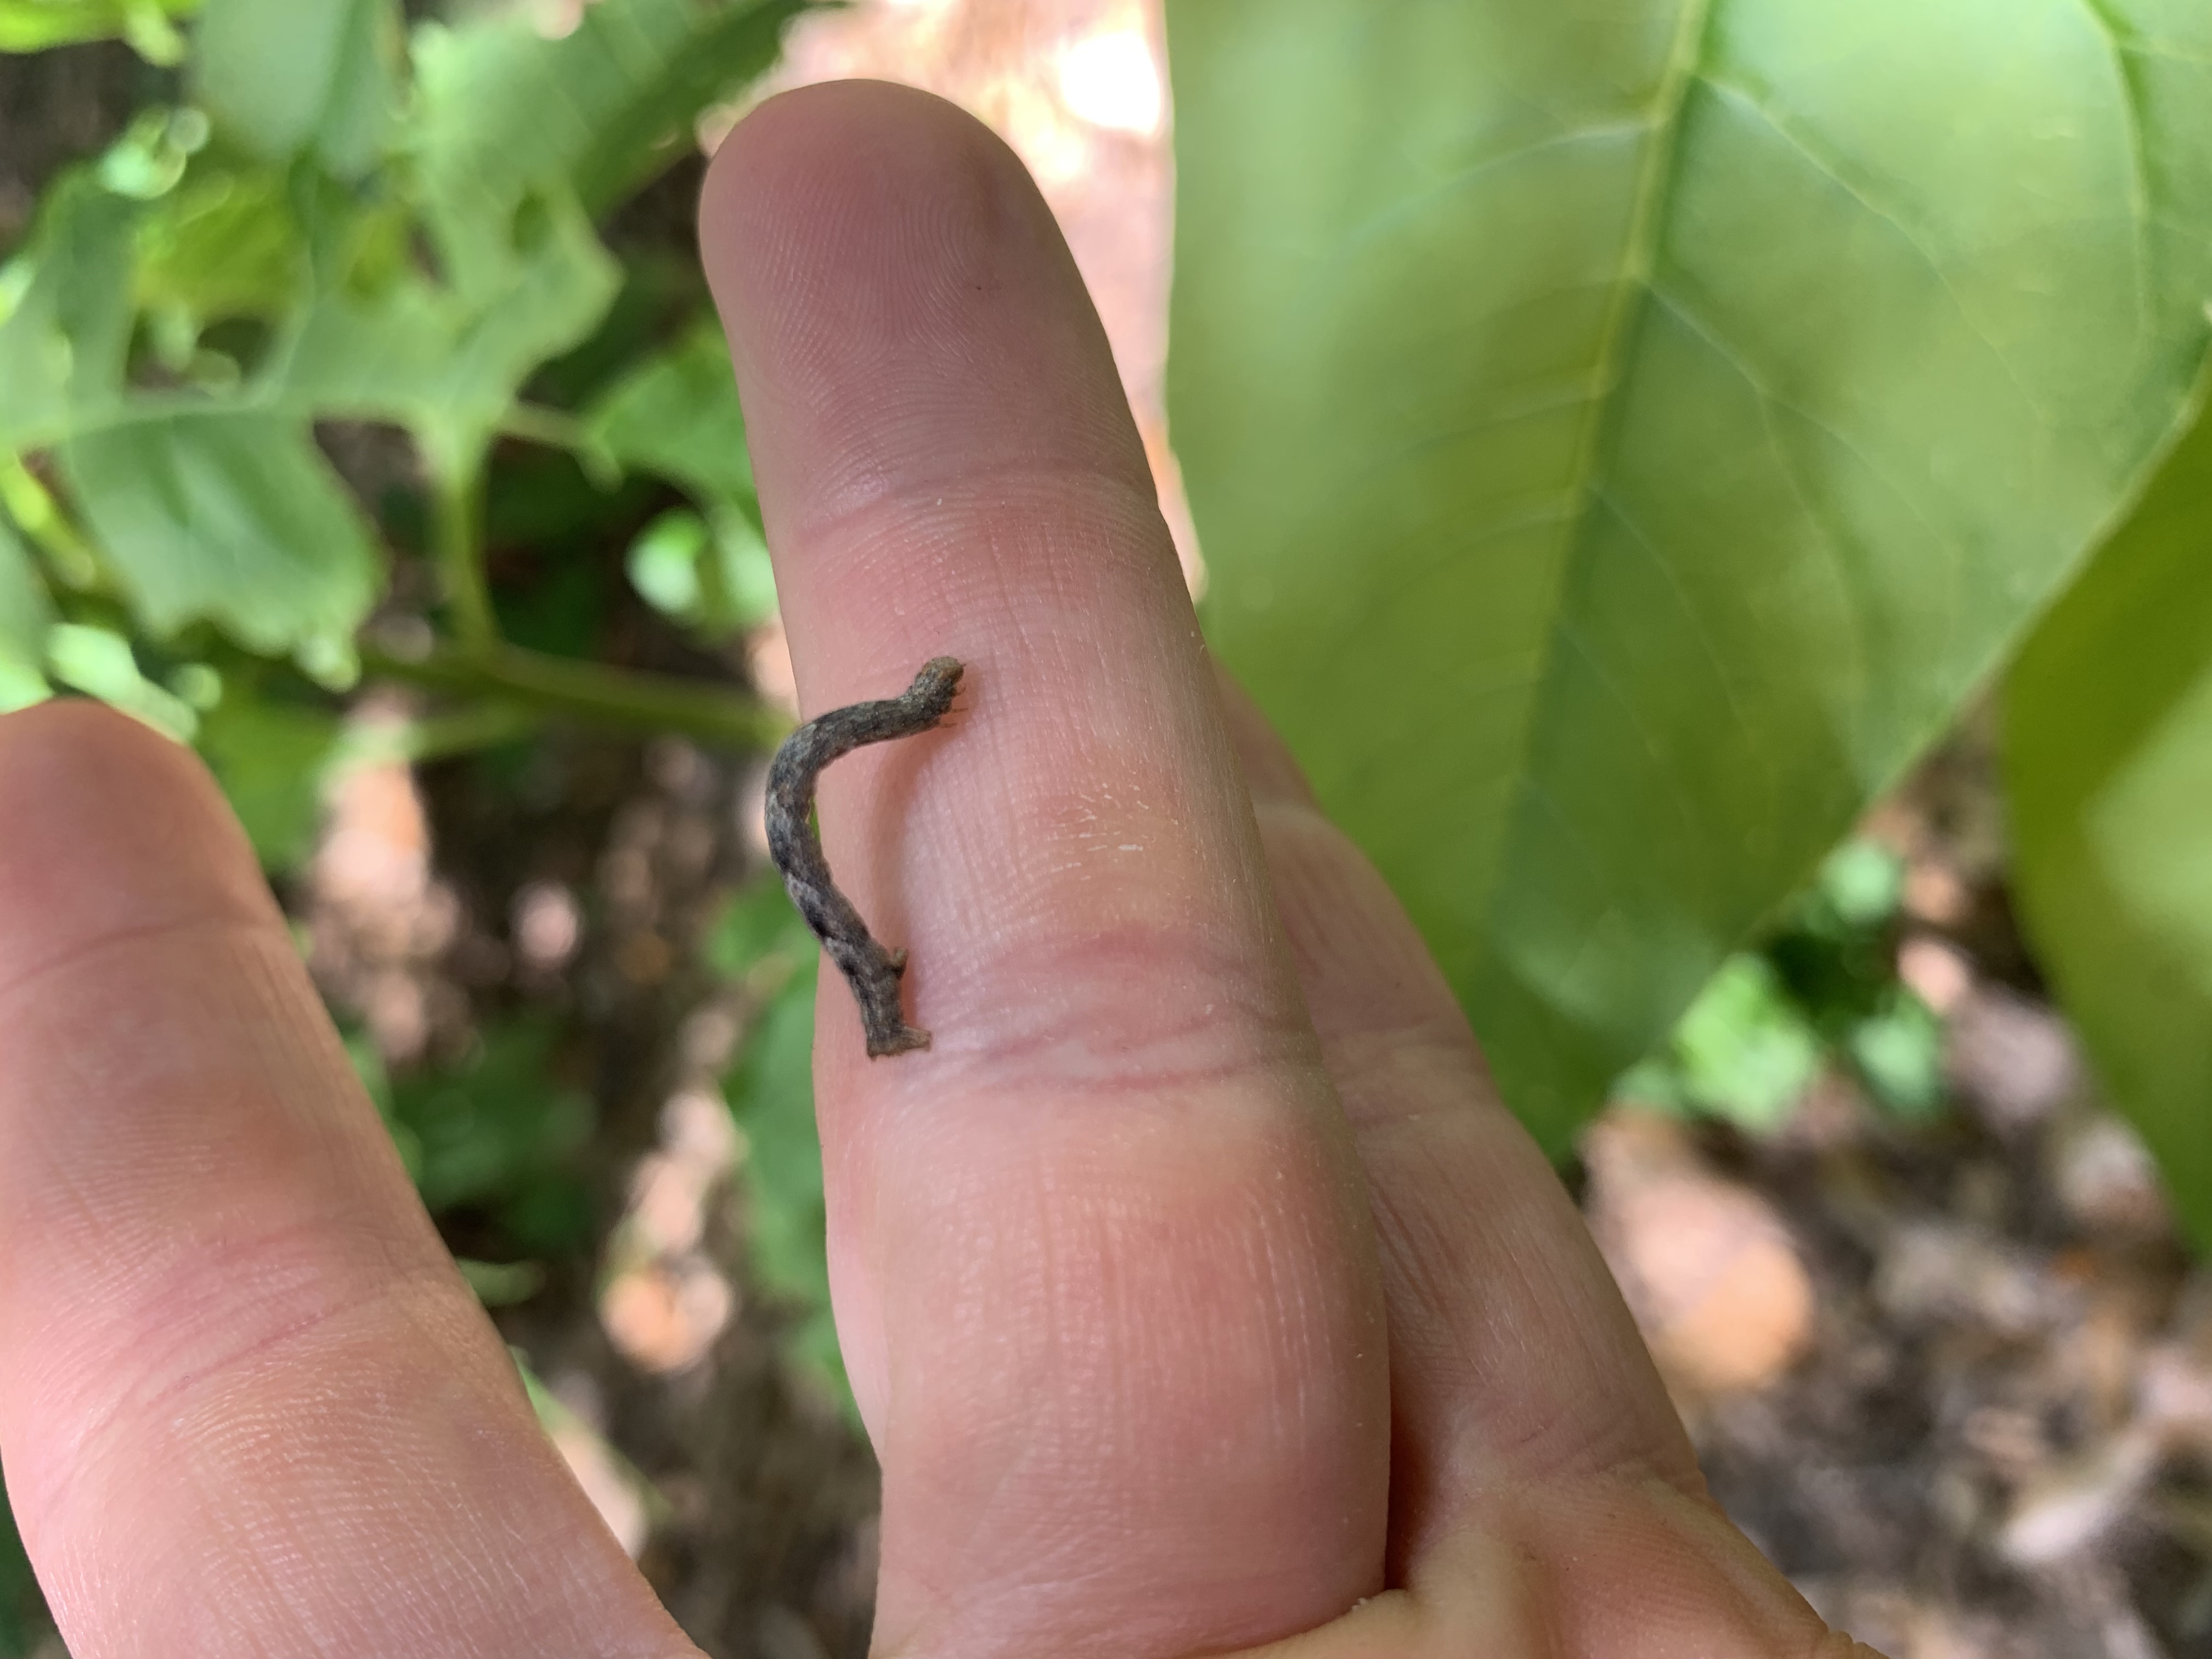
Looper found on pokeweed plant. Photo Credit: Matt Lollar, University of Florida/IFAS Extension at Santa Rosa County
Although weeds can be hosts for pests, they may be used advantageously. Trap crops can be planted at a garden’s perimeter or windward portion to attract pests away from the desired crop. A trap crop draws the pest crop away from the main crop. The trap crop is then destroyed or sprayed with insecticide when the pest insect is found feeding on it. This allows for a reduction or elimination of insecticidal use on the desired crop. However, it is important that both the trap crop and the desired food crop or ornamental crop are regularly scouted to keep track of pest populations.
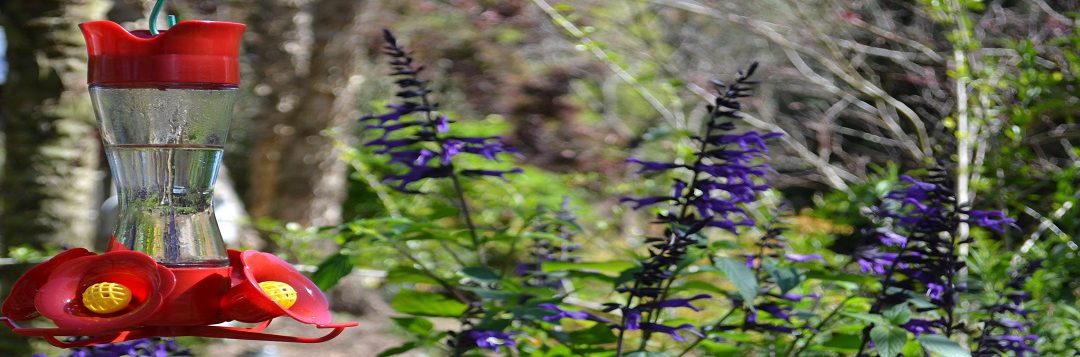
Our landscapes are becoming important spaces for many animals to find food, water, and shelter. You can enjoy many beautiful plants while supplementing the diet of a favorite garden visitor, the hummingbird. Learn about a couple of nectar plants for hummingbirds and how to properly install your hummingbird feeder In the Garden with UF IFAS Extension Escambia County.