by Mary Salinas | Jan 14, 2019

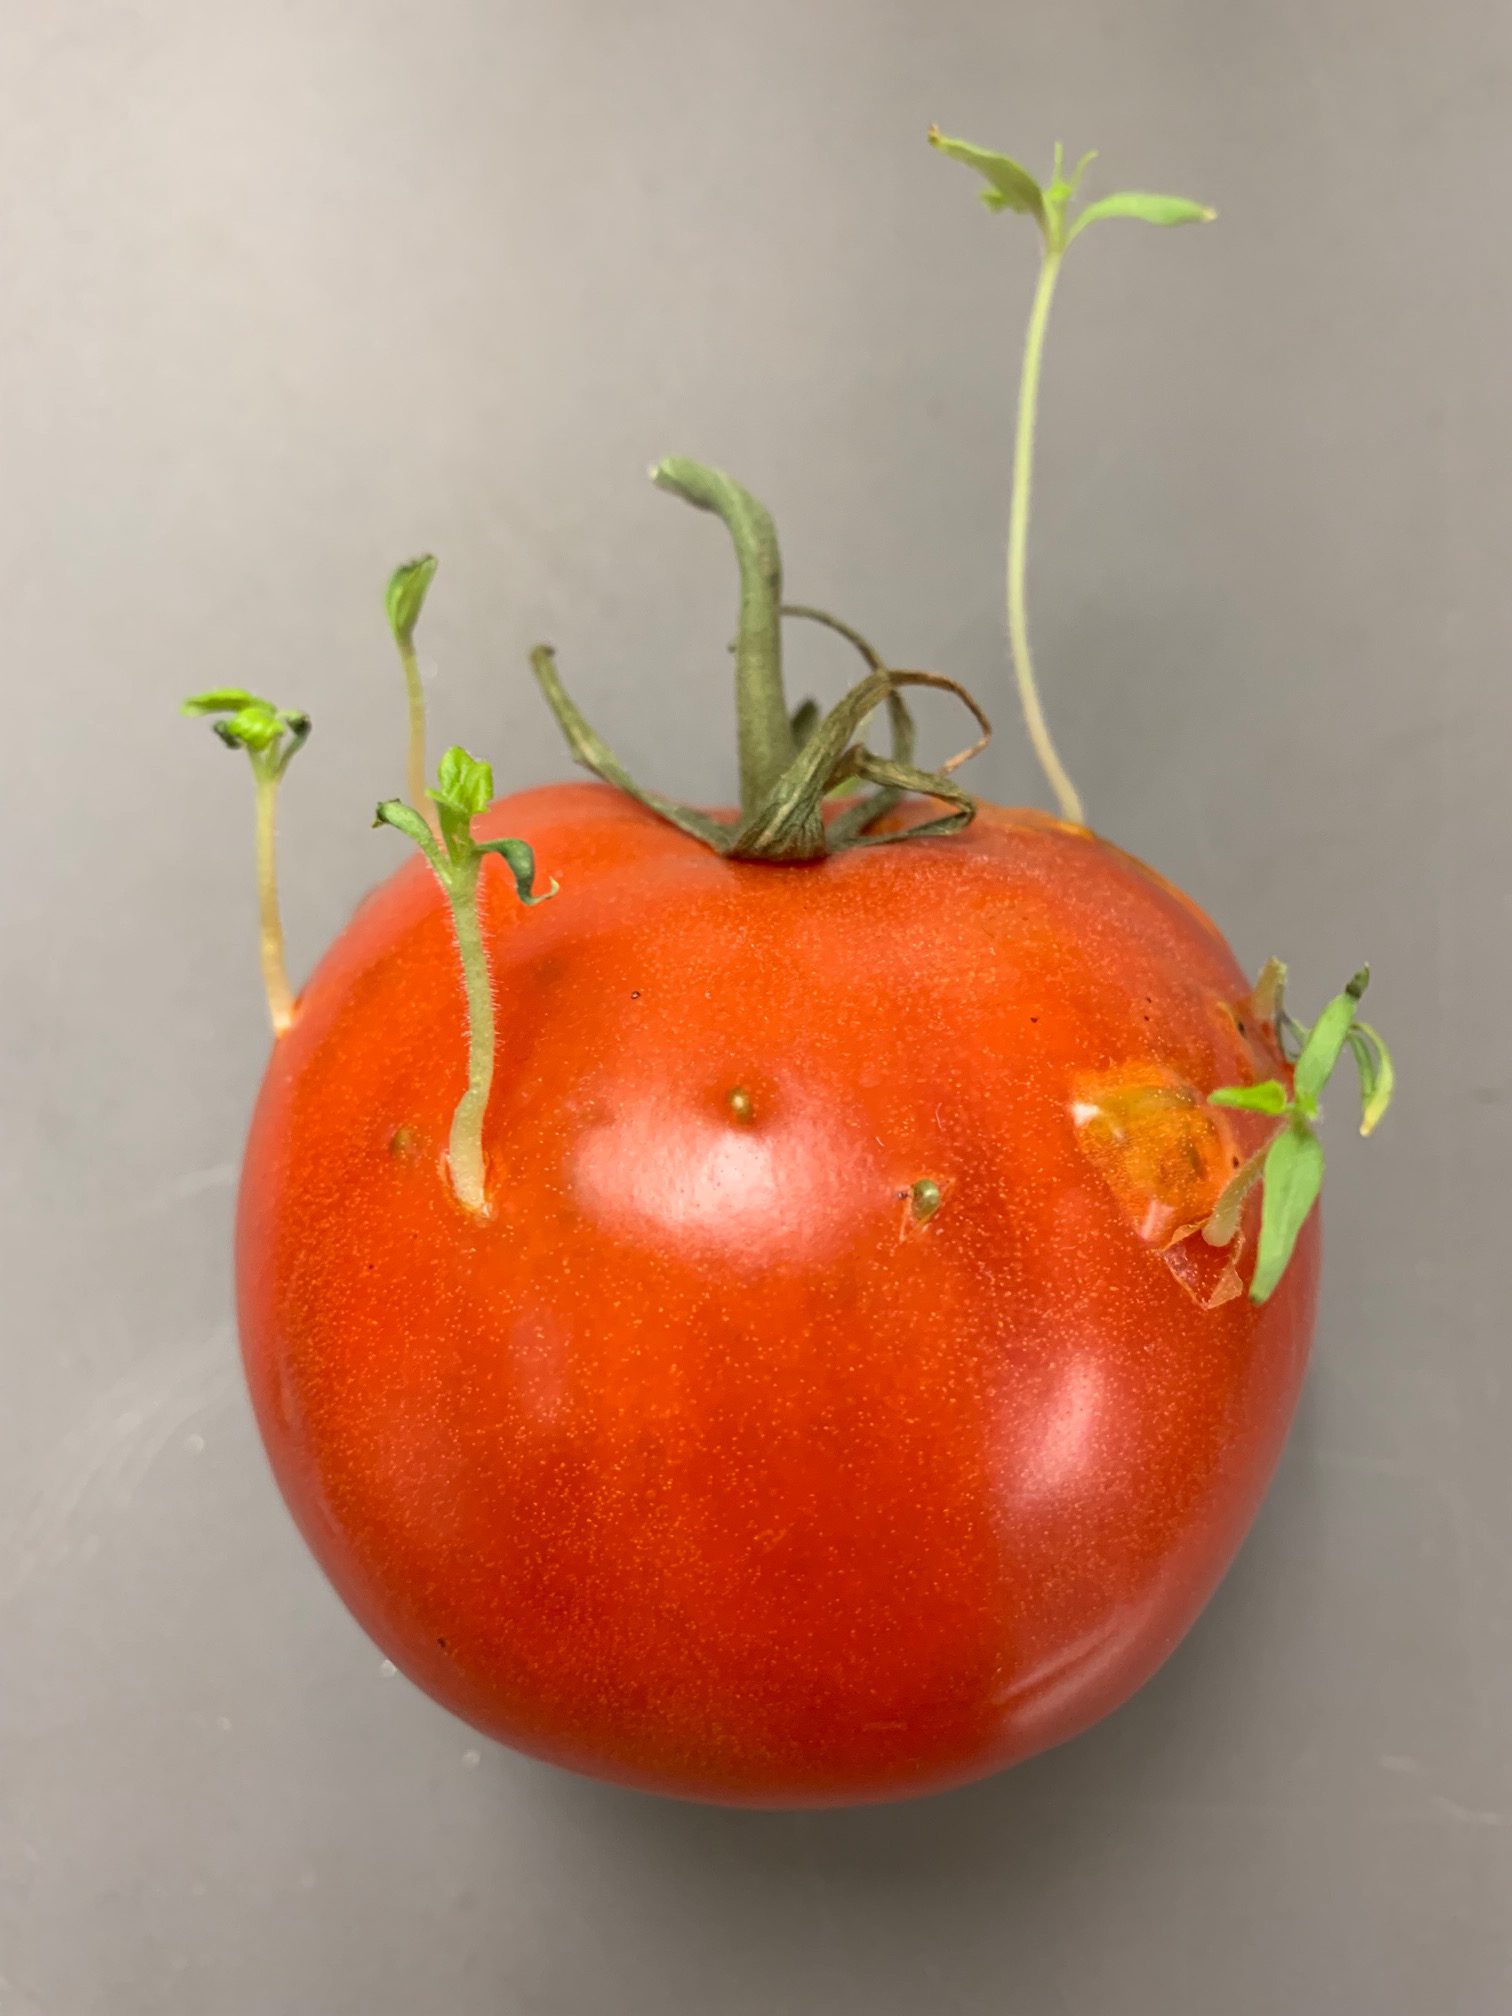
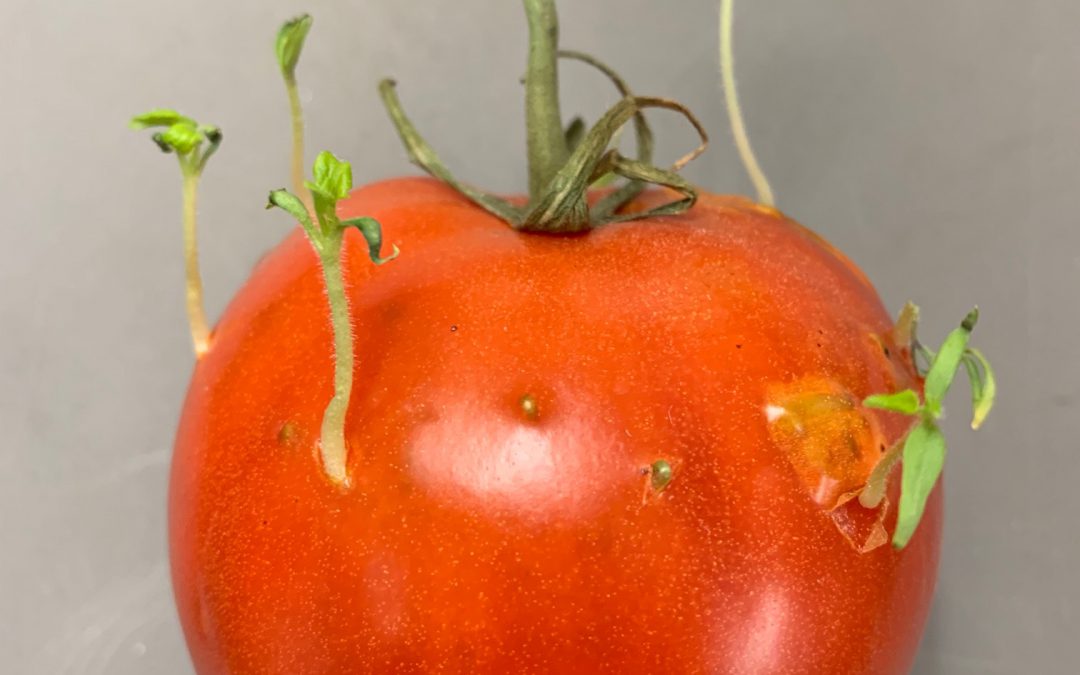
Tomato with sprouts. Photo credit: Mary Salinas, UF/IFAS Extension.
What in the world is happening to the tomato in this photograph? Are those hostile parasitic plants taking over the tomato?
No, nothing so sinister. You are just seeing anxious new tomato plants sprouting from the seeds inside the tomato.
A naturally-occurring plant hormone normally prevents seed inside of fruit from sprouting too soon. But sometimes the piece of fruit is hanging around a bit longer than nature planned and the hormone that prevents the seed sprouting is depleted. So, the seeds start to sprout and look like squiggly white worms inside the tomato. With enough time, they pop through the skin and emerge as little tomato plants.

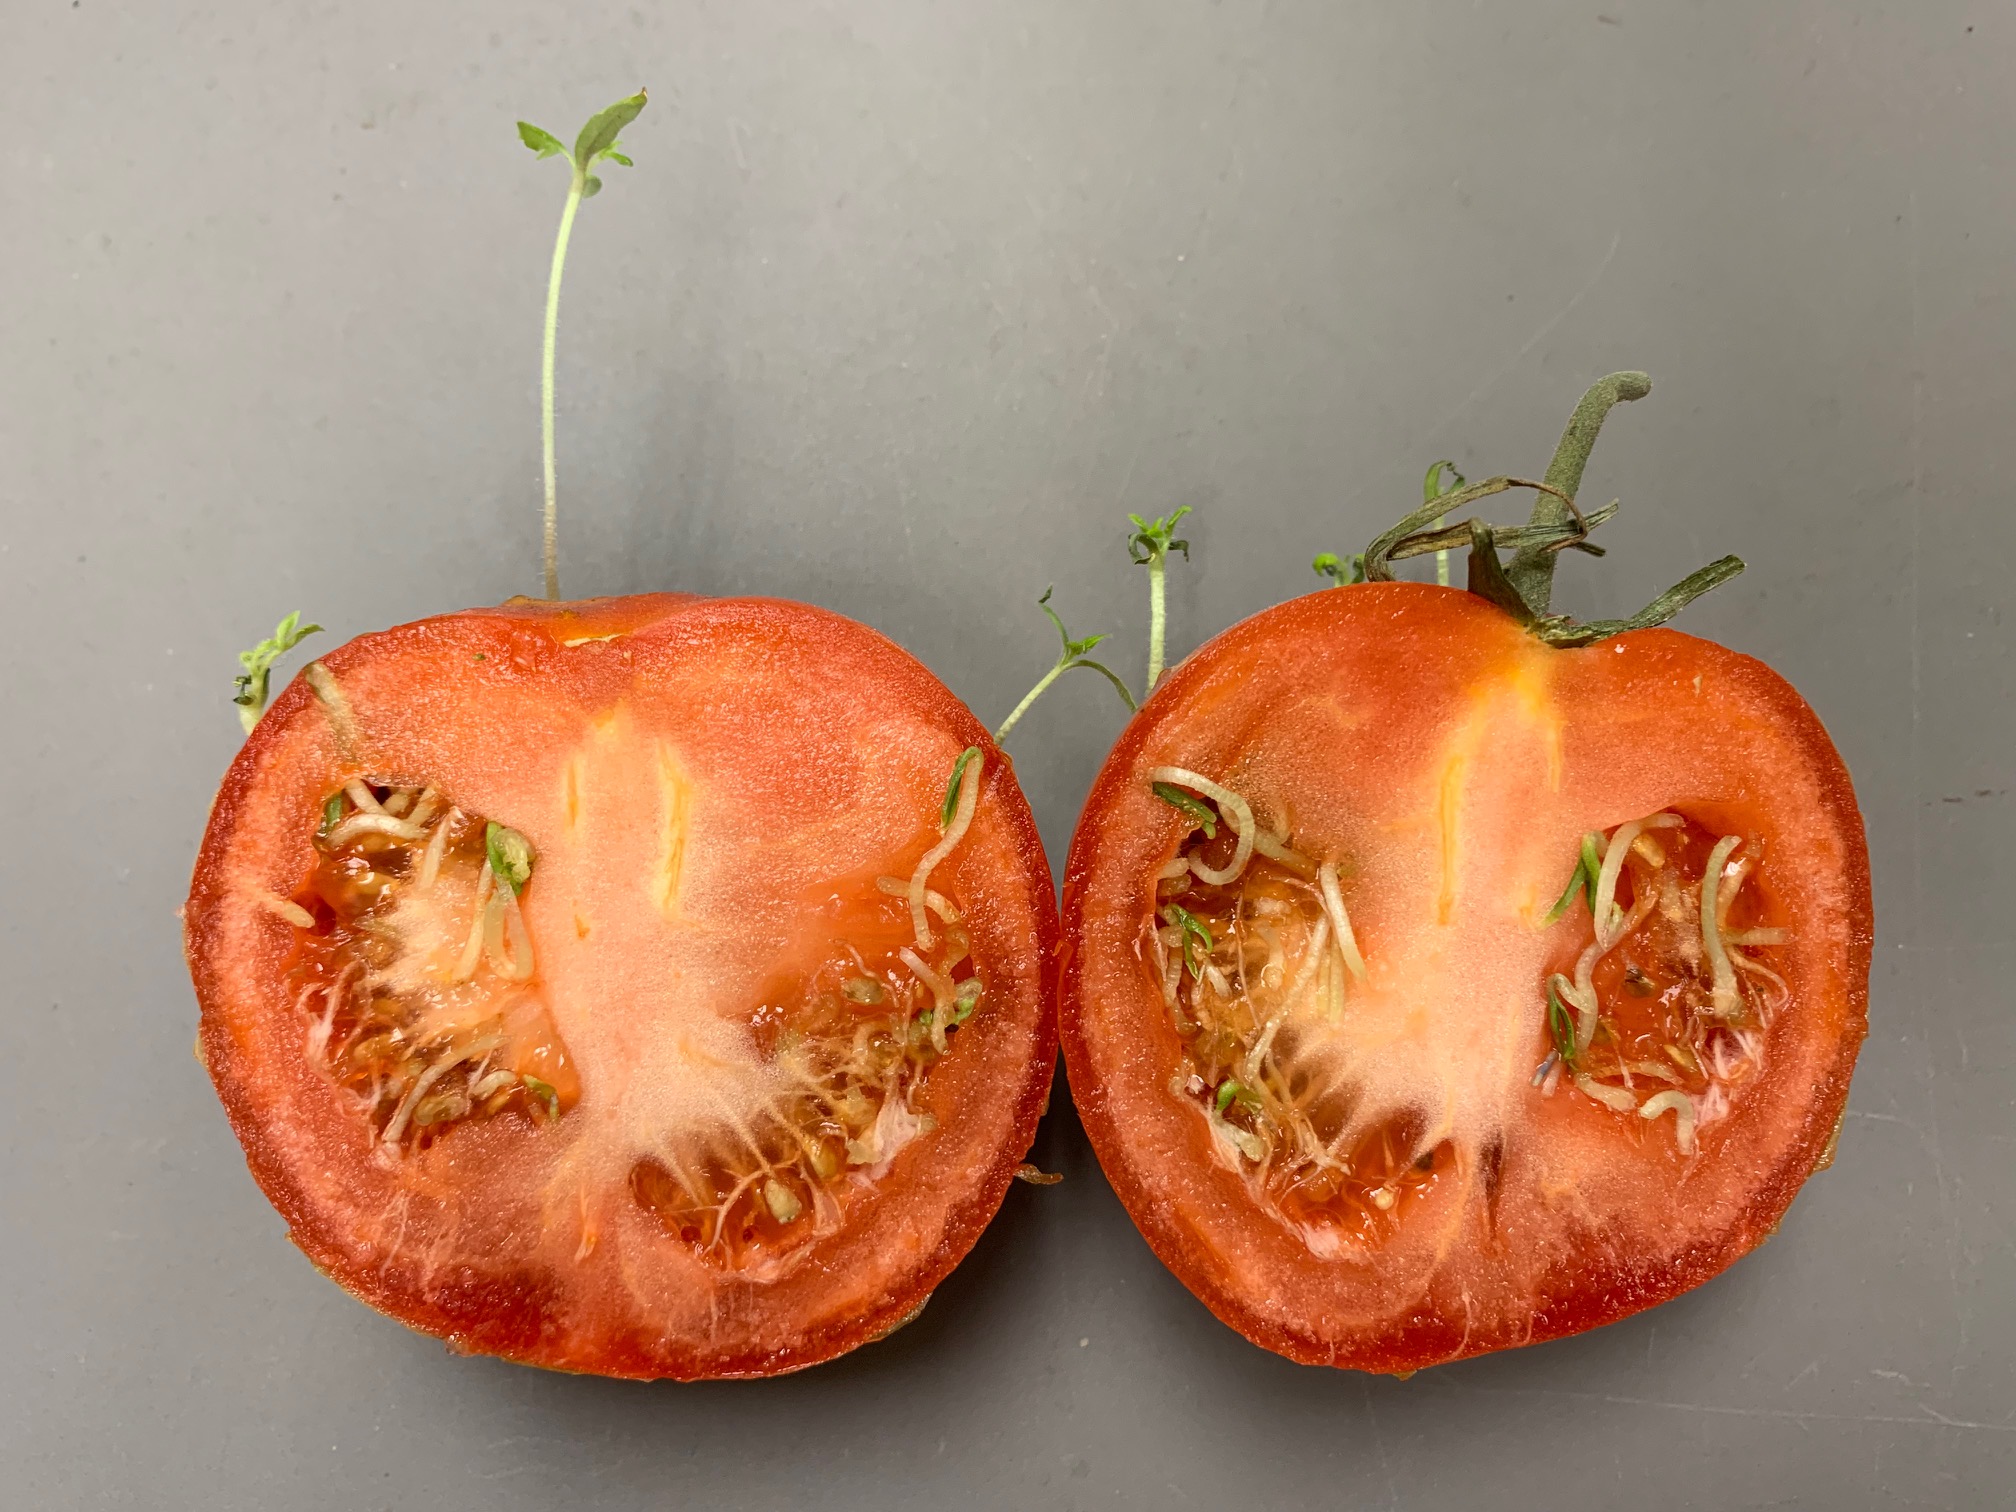
Halved tomato with interior sprouts. Photo credit: Mary Salinas, UF/IFAS Extension.
This phenomenon also commonly happens in pepper, citrus, apple, jackfruit, avocado and pear.
Yes, you can separate the little plants and plant them on their own if you would like.
For more information on growing tomatoes:
Tomatoes in the Florida Garden
Florida Vegetable Gardening Guide
by Beth Bolles | Jan 3, 2019
Shrubs can serve many purposes in a landscape and have been used in both mass plantings and as accent features. They can include plants that offer colorful blooms, food for pollinators, and screens for less than favorable views.
We tend to think that shrubs will be permanent feature in our landscapes, because many are hardy and adapted to our climate. Like any other plant you may choose for your yard, shrubs may not live forever and there are a wide variety of reasons a shrub may need replacement after years of solid performance.
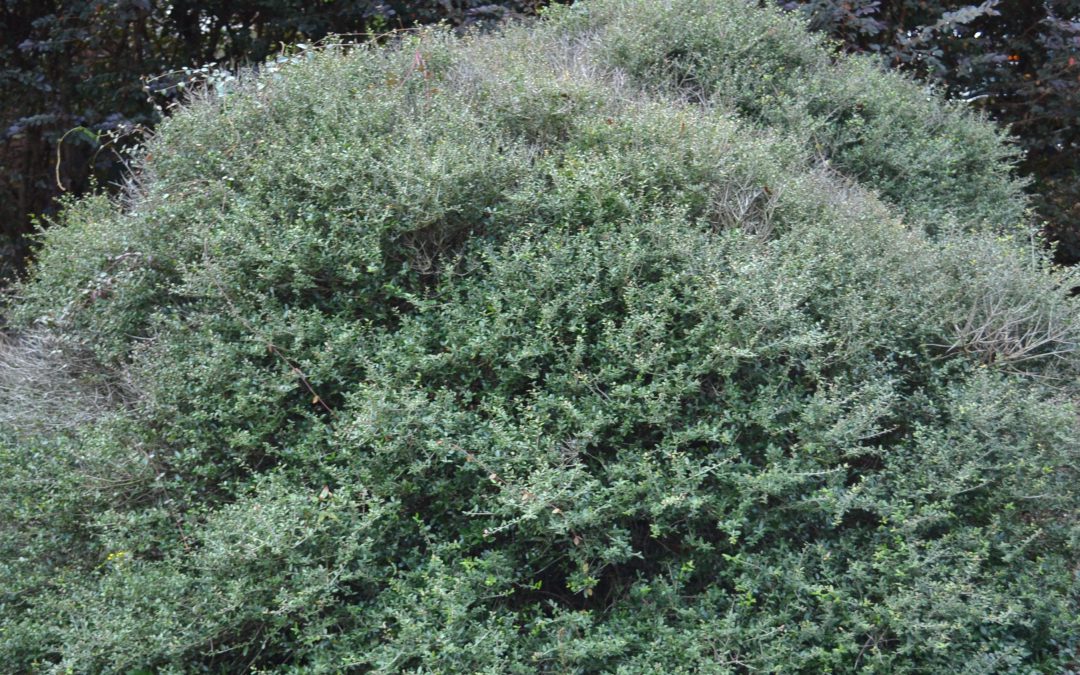
Let’s use any example from my own yard of the Dwarf yaupon holly, Ilex vomitoria ‘Nana.’ Back in 2001, I planted three hollies, spaced with plenty of room to grow, in a border area of my landscape. The plants grew well forming mounds about 3.5 feet high and 4 feet wide. Since the ‘Nana’ holly is a naturally mounding shrub, it did not require pruning and once established, rainfall supplied needed water.
Yaupon holly with dieback after 17 years in a landscape. Photo by Beth Bolles, UF IFAS Extension Escambia County
Over the past year, several areas of branch dieback have developed in all plants. After finally deciding that the dieback was unattractive enough to warrant plant removal, I began cutting the plants back. I discovered dead interior branches, girdling roots, and some internal stem discoloration. In other words, there are many factors that have led to poor plant performance. Another issue is a large Loropetalum hedge (planted by my neighbor) that shades one side of the plant.

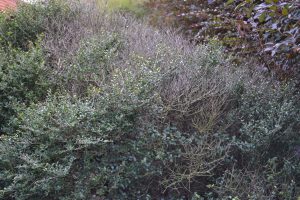
Girdling roots often develop when rootballs have not been properly prepared during installation. Photo by Beth Bolles, UF IFAS Extension Escambia County
What could I have done to help these plants stay healthier for many more years? I could have prepared the rootball better for planting by shaving off the edges or supplied a little fertilizer on occasion in my sandy soil. These practices may have extended the life of the plants for several more years, but they may not have made a difference. Sometimes shrubs decline and die. I am accepting that not everything performs at an outstanding level in our climate. Also, there is an end point for some of my favorite plants in the yard. Some may outlive me while others thrive for a few years or a decade or so.
The bright side of loss of my Yaupon hollies is that I get to plan for a feature for the new year. Maybe something for pollinators and birds to last the next 17 years.
by Matt Lollar | Dec 17, 2018
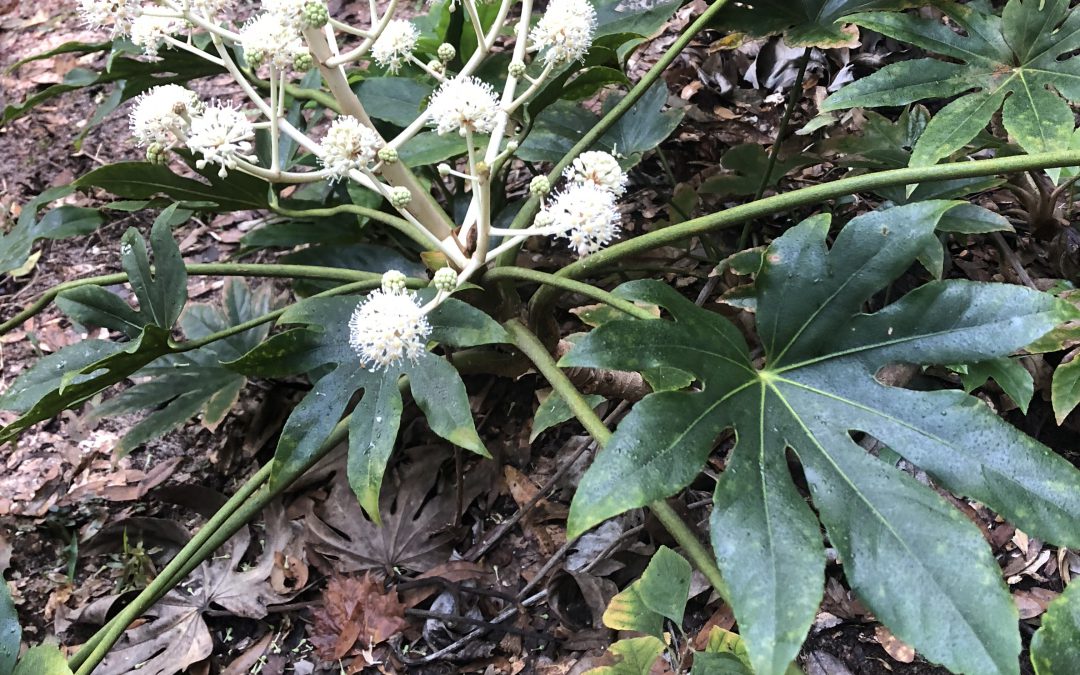
Fatsia japonica, common name Japanese aralia, provides tropical texture to your landscape. That coarse texture is attributed to its large (nearly a foot wide) leaves that are deeply lobed (maple leaf shaped). This shade-loving plant performs well in moist (not soggy) locations. Upright stems originate near ground level usually near the base of older stems. The stems grow to about eight feet tall before bending toward the ground under their own weight.
Even though the foliage of this species is enough to make you want it in your own garden, you will absolutely fall in love with its blooms. Upright clusters of showy, creamy white flowers begin to appear in fall. These little snowballs provide wonderful color to your garden. The shiny, black fruits appear in winter and are prominent for several weeks. The fruit are know to attract birds to the landscape.
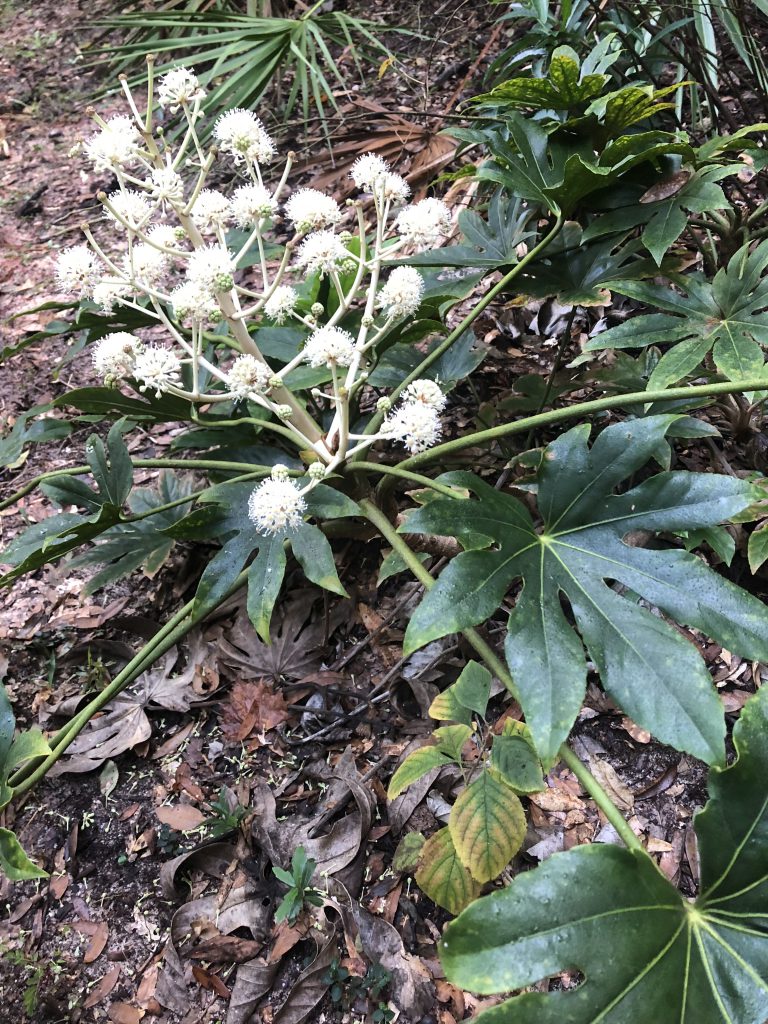
A Fatsia japonica specimen in full bloom. Photo Credit: Matt Lollar, University of Florida/IFAS Extension
Fatsia japonica thrives in the shade in slightly acidic, nutrient-rich, moist soil. Older stems become leggy and can be cut back to encourage branching. In the right place, Fatsia japonica is low-maintenance and not typically bothered by pests. It is also known to perform well in coastal landscapes. It fits well in entryways, in containers, or in mass plantings spaced three feet apart.

by Molly Jameson | Nov 21, 2018
Arugula is a pungent, peppery leafy green native to the Mediterranean. It is in the Brassica or crucifer family, which also contains vegetables such as broccoli, kale, radishes, and cabbage, but is perhaps less common in the edible garden landscape. Although arugula is typically considered a fall vegetable, it can be seeded all year long with a little bit of protection from extreme cold or heat.
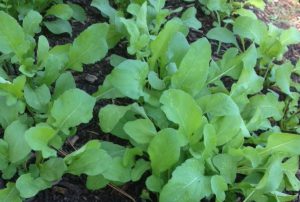
Arugula is an easy green to grow and adds pungent, peppery flavor to salads, pizzas, and many other dishes. Photo by Turkey Hill Farm.
Matter of fact, you can plant arugula every few weeks year-round to enjoy young tender leaves anytime. Since arugula has a compact root system, sow seeds one to two inches apart, thin out young whole plants as they fill in, and add them to salads for some extra dinner pizazz. Once plants are four to six inches apart, begin to harvest just arugula leaves, leaving the plants to grow taller in height. Leaves make great toppings on a sandwich or pizza, can be tossed in pasta just before serving, or can be steamed, stir-fried, or pureed and added to a plethora of dishes.
Although arugula is not as flashy as many of its fall garden counterparts, it is often the easiest to manage and last to get pest and disease problems. While your lettuce is attacked by slugs, kale crawling with aphids, and cabbage chewed up by armyworms, arugula often shines unblemished. And in late fall and winter, arugula will only need cold protection if we have a hard freeze (temperatures below 28 degrees for more than four hours). In these cases, cover your plants with frost cloth, bed sheets, or simply buckets, if your arugula patch is small. Just remember to secure your cover to the ground, such as using bricks to pin the cloth, to prevent gaps for air to escape. If done correctly, you can raise air temperatures eight degrees.
From June to September it will be helpful to plant your arugula in partial shade or use shade cloth with 40 to 60 percent density to cut the intensity of the heat. Spring and summer planted arugula may go to seed faster than in fall or winter, but because it is such an easy plant to sow and manage, you can be planting your next round just as your previous crop begins to senesce.
Throughout the life cycle of arugula, you will notice changes in the intensity of the plant’s complex flavor. This is due to fluctuations in sulfur compounds called glucosinolates, which increase as the plant matures.
So be brave, clear some space in your garden plot, and give this spicy cabbage cousin a try!
by Matt Lollar | Nov 8, 2018

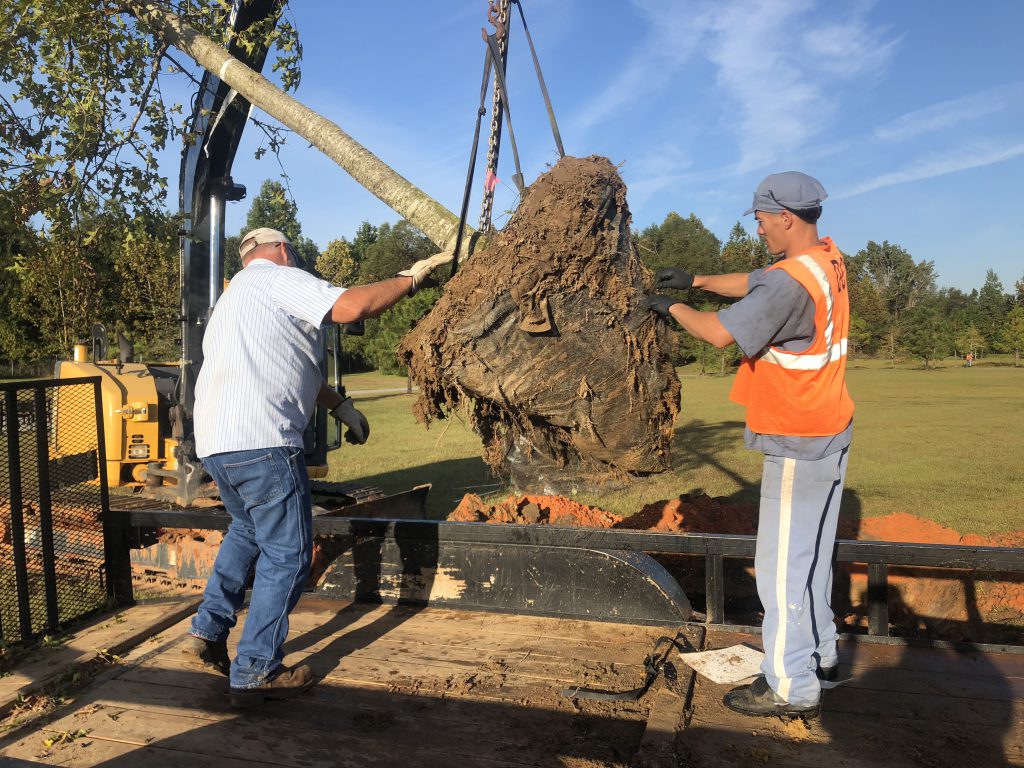
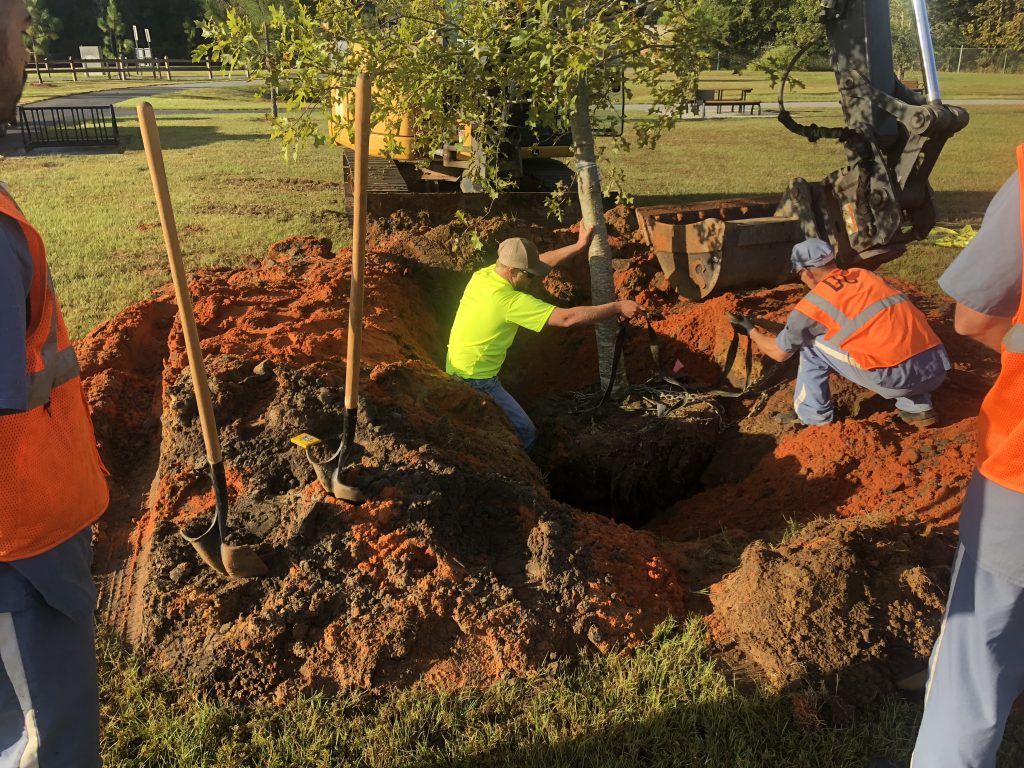
A planted tree with water retention berm. Photo Credit: Matt Lollar, University of Florida/IFAS Extension – Santa Rosa County
Often, Extension agents are tasked with evaluation of unhealthy plants in the landscape. They diagnose all sorts of plant problems including those caused by disease infection, insect infiltration, or improper culture.
When evaluating trees, one problem that often comes to the surface is improper tree installation. Although poorly installed trees may survive for 10 or 15 years after planting, they rarely thrive and often experience a slow death.
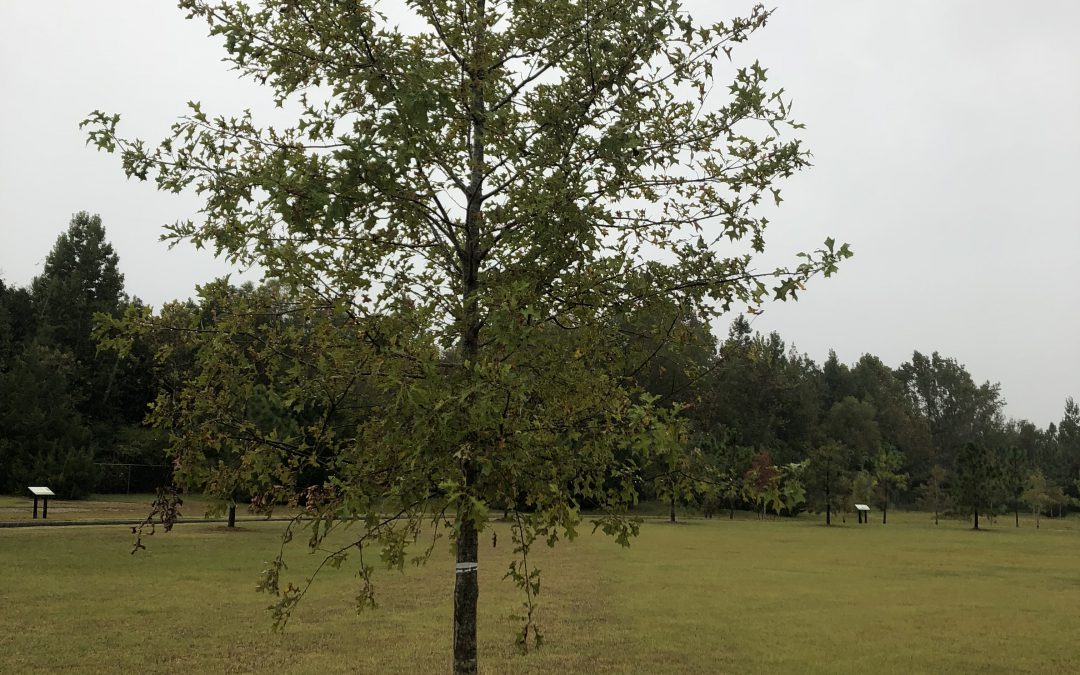
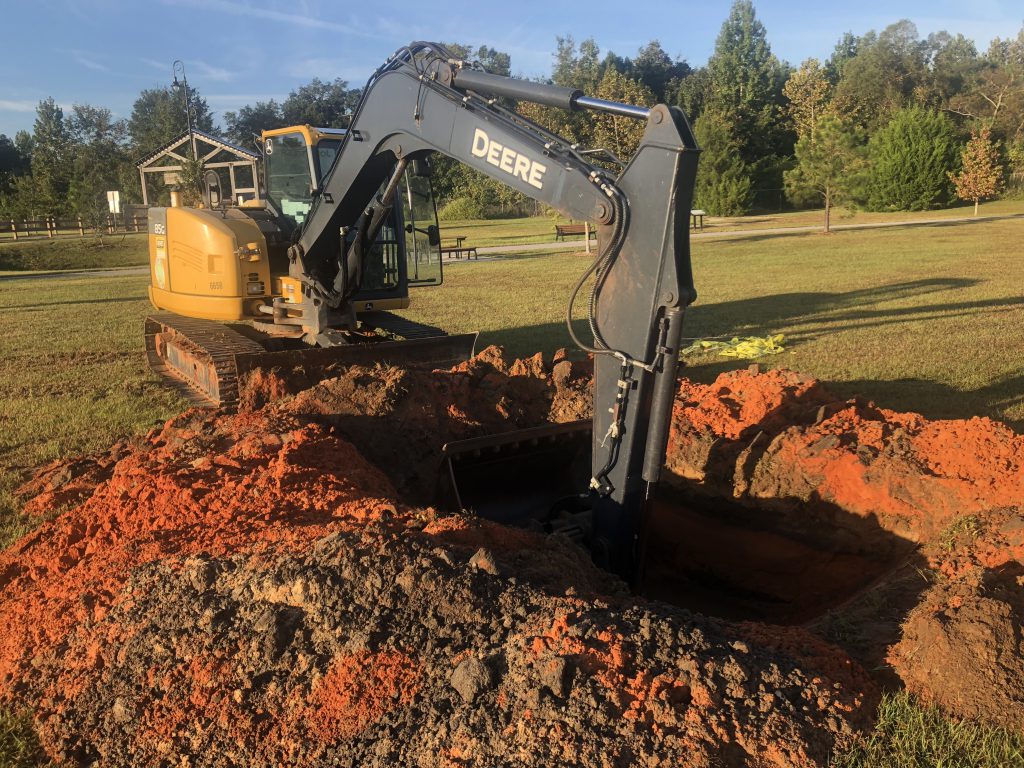
Fall is an excellent time to plant a tree in Florida. A couple of weeks ago beautiful Nuttal Oak was planted at Bagdad Mill Site Park in Santa Rosa County, FL. Here are 11 easy steps to follow for proper tree installation:
- Look around and up for wire, light poles, and buildings that may interfere with growth;
- Dig a shallow planting hole as wide as possible;
- Find the point where the top-most root emerges from the trunk;
- Slide the tree carefully into the planting hole;
- Position the point where the top-most root emerges from the trunk slightly above the landscape soil surface;
- Straighten the tree in the hole;
- Remove synthetic materials from around trunk and root ball;
- Slice a shovel down in to the back fill;
- Cover the exposed sides of the root ball with mulch and create water retention berm;
- Stake the tree if necessary;
- Come back to remove hardware.
Digging a properly sized hole for planting a tree. Photo Credit: Matt Lollar, University of Florida/IFAS Extension – Santa Rosa County
Removing synthetic material from the root ball. Photo Credit: Matt Lollar, University of Florida/IFAS Extension – Santa Rosa County
Straightening a tree and adjusting planting height. Photo Credit: Matt Lollar, University of Florida – Santa Rosa County
For more detailed information on planting trees and shrubs visit this UF/IFAS Website – “Steps to Planting a Tree”.
For more information Nuttall Oaks visit this University of Arkansas Website.
by Mary Salinas | Oct 29, 2018
When there is so much to do in cleaning up after a storm, sometimes we tend to do too much so that it can all get done. Be safe, don’t add to the disaster.
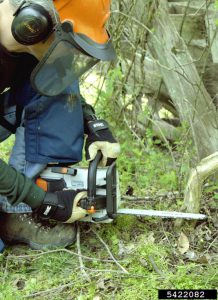
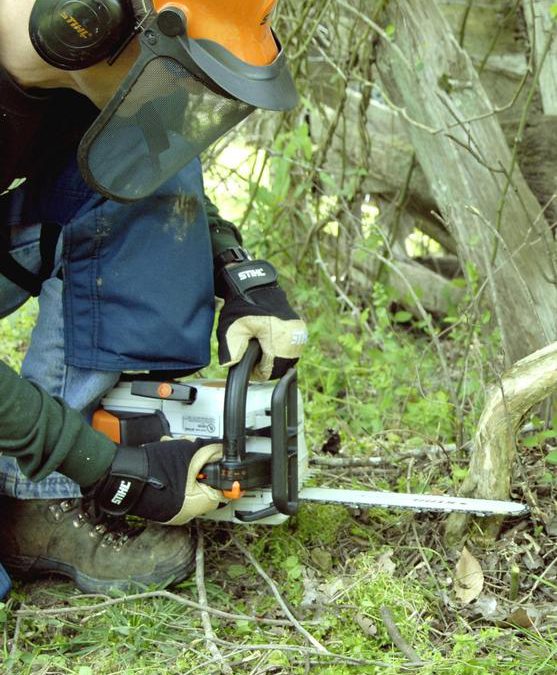
Be careful with that chainsaw! Photo credit: James H. Miller, USDA Forest Service, Bugwood.org.
Here are some suggestions:
- Take breaks and rest often. Mistakes happen when people are exhausted.
- Only lift what you can comfortably handle, lifting with your legs and not your back. Get a buddy to help with heavier objects or wait until a team or equipment can assist.
- Make sure you are adequately hydrated. Always keep water nearby and take a long drink during your breaks.
- Protect yourself against biting pests such as mosquitoes with insect repellent.
- Wear protective gloves, sturdy closed toe shoes and long pants.
- Have a first-aid kit available for minor injuries.
- Make sure ladders are stable and locked into position.
- If you are using any type of power equipment, especially a chainsaw, make sure someone else is around. And protective gear is a must. Read about details in this article.