by Julie McConnell | Sep 2, 2014

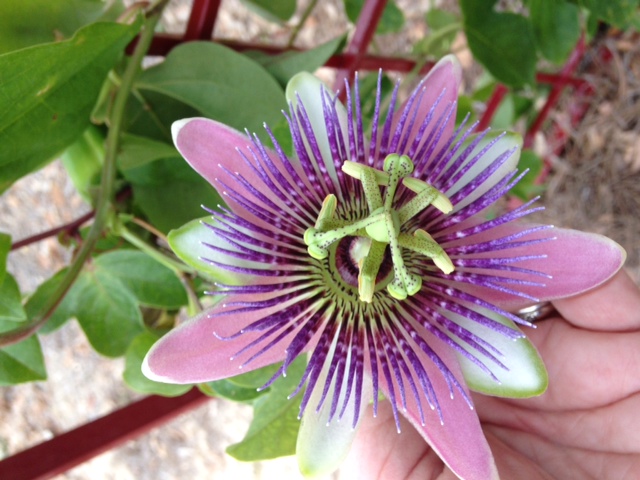
Purple passionflower
Gulf Fritillary caterpillars have a voracious appetite for purple passionflower vine Passiflora incarnata! This native vine is a host for the Gulf Fritillary Butterfly Agraulis vanilla larvae, is easy to grow, and readily available in garden centers.
Like any other vine, it grows quickly and may spread across your garden, so keep this in mind when choosing a location. It prefers full sun, is drought tolerant, adapts to many soil types, and should be given support for twining tendrils. Purple passionflower has intricate purple flowers that are followed by the fruit called a maypop, which is another common name for this vine.
Gulf fritillary butterflies are primarily orange with some black and white markings. They prefer sunny areas and adults will feed on nectar from many different flowering plants. However, they are more specific about where they will lay eggs because the diet of the caterpillar is more selective than adults.
If you have purple passionflower in your landscape, look for tiny yellow eggs and orange caterpillars with black spikes to see if you have a backyard Gulf fritillary nursery. Plants may be totally defoliated by the hungry caterpillars, but healthy plants can tolerate the damage and should flush back out without difficulty.

by Julie McConnell | Aug 12, 2014
 Most people appreciate a colorful landscape, but may not have a lot of time or money to invest into keeping it looking good. Add to that the low nutrient soils that do not hold water that are common in the western Panhandle and keeping an attractive yard becomes even more challenging, especially if irrigation is not available.
If you are looking for plants that require minimal maintenance beyond watering until establishment here are a few you might want to try.
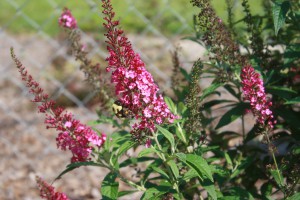
Butterfly Bush Buddleia spp.
There are many different mature sizes and colors, but if you have a small space consider a dwarf like CranRazz or the Lo & Behold® series. Butterfly bush blooms throughout the warm season and if it slows down, just deadhead or prune heavily and it will flush out with new foliage and blooms. As the name suggests, butterflies are attracted to the blooms.
Hyssop
Another plans that is very heat tolerant with low water requirements is Hyssop Agastache rupestris. Fine textured foliage and flowers that bloom all summer and thrive on neglect. These come in hot colors including orange, pink and bicolor varieties.
Sedum
Sedum love hot, dry spots and Sedum rupestre “Angelina’ is a groundcover type with showy yellow foliage. It performs great in containers or sprawling over beds. Evergreen with a bronzy winter color, it stands out all year. Tiny yellow flowers appear to float above the foliage in the early summer, but do turn brown and need to be snipped off to keep plants looking tidy.
by Sheila Dunning | Jul 28, 2014

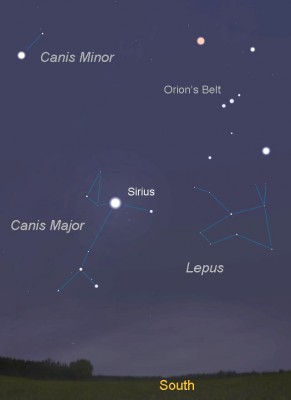
The “Dog Days” are the hottest, muggiest days of summer. In the northern hemisphere, they usually fall between early July and early September. The actual dates vary greatly from region to region, depending on latitude and climate.
In ancient times, when the night sky was un-obscured by artificial lights, the Romans used the stars to keep track of the seasons. The brightest constellation, Canis Major (Large Dog), includes the “dog star”, Sirius. In the summer, Sirius used to rise and set with the sun, leading the ancient Romans to believe that it added heat to the sun. Although the period between July 3 and August 11 is typically the warmest period of the summer, the heat is not due to the added radiation from a far-away star, regardless of its brightness. The heat of summer is a direct result of the earth’s tilt.
Spending time outdoors this time of year is uncomfortable, potentially dangerous, due to the intense heat. However, the chinch bugs are very active in St. Augustine grass, and the summer flowers need water. So, take care of those tasks early in the day and then retreat to the air conditioning to plan your fall planting.
Plant tomato plants in August for tomatoes in October. Varieties such as Phoenix, Florida 91, Solar Set and Heat Wave II are good selections for setting fruit in high temperatures, should summer temperatures continue. Otherwise, try some of the newer UF/IFAS recommended varieties for fall planting in North Florida such as Bella Rosa, Tribute or Finishline. For more information on tomato selection refer to Tomato Cultivars for Production in Florida. For information on other vegetables for fall gardening refer to the Florida Vegetable Gardening Guide. Plan to attend the Fall Gardening program at the Extension office this September.
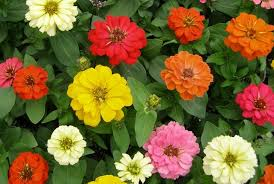 Many bedding plants flower quickly and can add color to the fall landscape. These include pentas, African marigolds, torenia, zinnias, melampodium and scaevola. Other can be planted in October for blooms all winter-long. Plan spaces and color themes for calendulas, pansies, snapdragons and violas. Add in ornamental cabbage or kale and some dusty miller to accent the garden. They too will perform through the cold. For more information on Annuals for the Florida Garden refer to Gardening with Annuals in Florida.
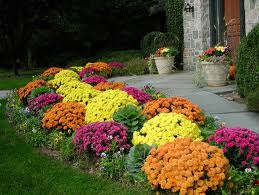
Dependable fall blooming perennials include lion’s ear (Leonotis leonurus), pineapple sage (Salvia elegans), firebush (Hamelia patens), cigar plant (Cuphea micropetala), yellowbells (Tecoma stans) and firespike (Odontonema strictum). Also, garden mums (Chrysanthemum sp.) and many different Irises will add color again in the spring. To gain information on perennials for Florida refer to Gardening with Perennials in Florida.
Webster’s second definition of “dog days” is a period of stagnation or inactivity. But, even when the heat forces you to slow down on the labor-intensive work, there is plenty of gardening “activity” to do. Stay in the air conditioning and plan that spectacular fall and winter yard.

by Mary Salinas | Jul 15, 2014
We all seem to have this dilemma: A desire to re-landscape or just add a few plants to an area, but not knowing what would be the best choice. Plants need to be compatible with their location. The right plant should be chosen for the right place. Many have particular light, moisture and zone requirements in order to do their best. The ultimate size of the plant is also an important consideration; if you want to avoid constant pruning, choose plants that only grow to size you would like to ultimately have. Some great resources are provided below to get you the information you need.
UF IFAS Extension has a brand new app for your mobile device or web! The app contains a database of over 400 Florida-friendly plants is searchable by plant name, type, shape, native status, light requirements and more. The yearly subscription is only $1.99 to have great info on the go.
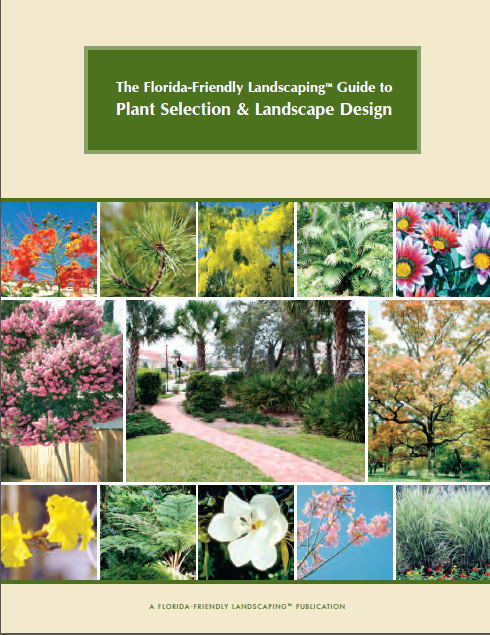
The downloadable 104-page Florida-friendly Landscaping Guide to Landscape Design and Plant Selection not only has photos and detailed information about plants by category, it also has great ideas on how to improve your landscape design! 
UF’s Florida Yards & Neighborhoods maintains a searchable Florida-friendly Plant Database. Make choices based on region, plant type, light and moisture quantity, soil texture salt tolerance.
For native plants, the Florida Association of Native Nurseries has two websites where you can find plants for your particular zone, plant community (like at the beach or in pine flatwoods), plant type and by wildlife usage. There is a site designed for nursery professionals that lets you find local wholesale growers and also a similar site for homeowners that has resources on where to find desired plants at local nurseries.
Speaking of native plants, the Florida Native Plant Society also has a searchable list of plants appropriate for your particular needs.
Gardening Solutions has lots of great information for lawn, landscape and garden by category, and it is easily accessed.
Happy Gardening!
by Roy Carter | Jul 8, 2014
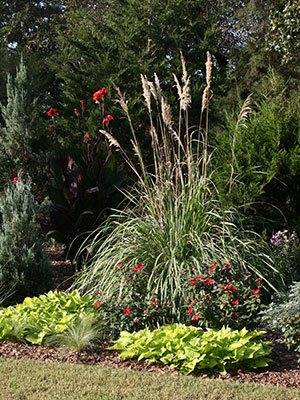
You don’t have to pamper pampas grass! This attractive perennial, which is native to Latin America – Brazil, Argentina, and Chile, is practically trouble-free. It’s well adapted to all areas of Florida. Pampas grass grows in large clumps, eight to ten feet high. In late summer, it produces showy silver –white or pinkish silken plumes, which may reach a height of 12 feet.
Pampas grass can be very eye-catching when used as a specimen plant in the landscape. Since it grows very rapidly into a massive plant, pampas grass can provide an excellent screen for sunny locations. Unfortunately, it is often used improperly as a foundation plant. In such cases, it usually is purchased from a nursery when it’s small and planted very near the home. At first, it will look fine, but, after several years, it will have reached such a large size that it will be difficult to find the house for the old pampas grass.
“This vigorous ornamental grass is widely used as a lawn specimen but its quick growth rate and large size make it unsuitable for all but large home landscapes. However, it is ideal for barrier or windbreak plantings and has a place in larger areas such as along highways or in commercial or industrial landscapes.” FPS145
There are many ornamental forms of pampas grass. The plum-like blooms differ between male and female plants. The female plumes are broad and full, due to the silky hairs covering the tiny flowers. The male plumes look narrow and short, because of the absence of hair on the flowers. Also, there is considerable variation among seedlings in growth habit, period of flowering, and size and shape of plumes. If uniformity is desired, pampas grass should be propagated by dividing clumps, rather than by seed.
The plumes of pampas grass are highly prized for indoor decorations. Plumes used for this purpose should be cut as soon as they have fully emerged. If mature plumes are brought indoors, they will fill the home with delicate fluffy flowers which can be a bigger problem than a shedding dog or cat. This shedding can be prevented by spraying mature plumes with hair spray.
When selecting planting site for pampas grass, special attention should be paid to the potential danger or injury to passersby from contact with the very sharp, saw-like edges of the leaves. Pampas grass should be planted where it will receive full sun for most of the day. In shady locations, it will grow very slowly and produce few, if any, plumes.
Pampas grass suffers from practically no pest or disease problems. It has good salt tolerance, and will grow in almost any soil. Once it’s established, about all you need to do is give it adequate fertilizer. For healthy growth and good plume production, pampas grass should be fertilized four times a year with a balanced fertilizer, such as an 8-8-8, applied at the rate of two pounds per 100 square feet.
In North Florida, pampas grass leaves are often killed by freezing temperatures. But, new leaves will sprout in the spring. Before spring growth begins, you should prune away brown leaves and other dead material that has accumulated at the base of your plants. When working around pampas grass, it’s a good ideas to wear long pants, a longs sleeve shirt, and gloves to protect you from the sharp leaf blades mentioned earlier.
The striking, feathery plumes and large, graceful clumps of foliage make pampas grass a very desirable addition to a landscape. Since it so trouble-free, perhaps you’d like to try some around your home.
by Roy Carter | Jun 23, 2014
Summertime is vacation time for people, not plants! While getting ready for that long awaited trip, it’s easy to forget about your lawn, landscape, vegetable garden and house plants. A little time spent preparing your leafy friends for your absence could save you needless worry and hours of extra work when you get back.
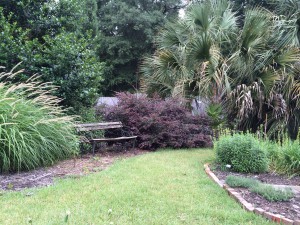
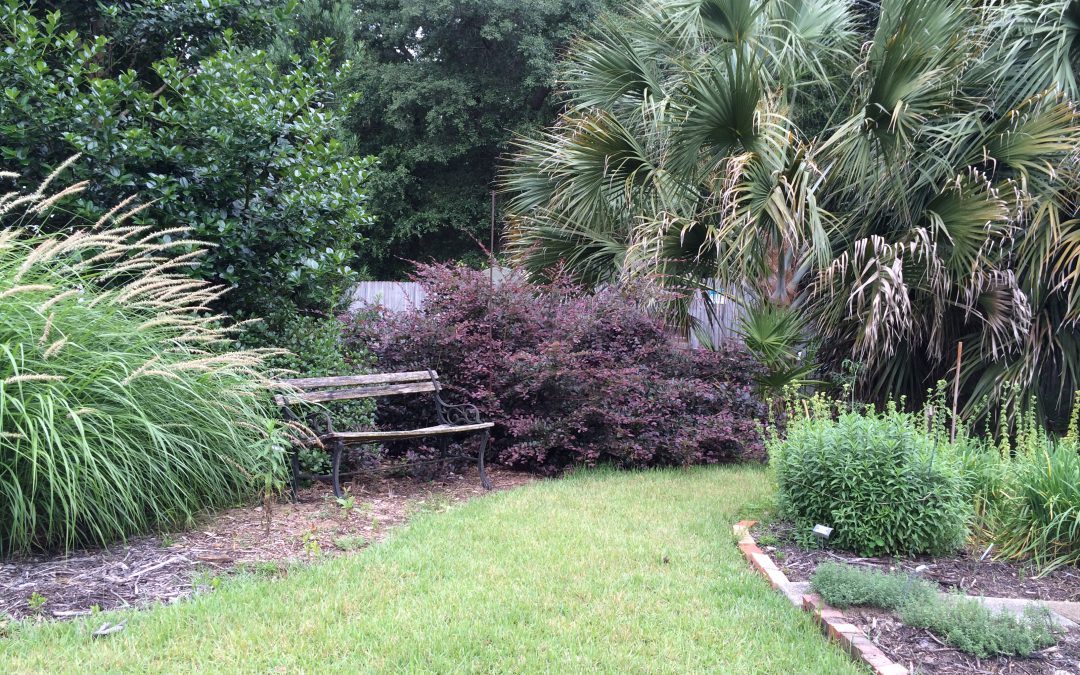
Prepare your landscape for your absence.
Photo by Mary Derrick, UF IFAS
A vacation may be relaxing and rejuvenating for you and your family, but it can be hazardous, even deadly, for your plants. Unless you make adequate preparations before leaving, you could return to vegetable disaster.
One of the first things you might do before leaving home is ask a neighbor to check your plants periodically while you’re gone. All plants need some care. During an extended vacation container grown plants require special attention and different species have different needs. Be sure you give your friend specific instructions for the care of each type.
If you can’t find someone to personally look after your plants while you’re away, there’s plenty you can do prior to departure to make sure you don’t come home to a limp landscape and sickly house plants. Outdoor container plants should be placed in a shady area to conserve moisture. Under a tree or on the north side of a building are good locations. A thick layer of mulch will help conserve moisture for landscape plantings. Mow your lawn just before leaving, cutting the grass a little closer than usual. An unkept lawn can encourage disease, and it’s a tell-tale sign that no one’s home.
Give lawn and landscape plants a heavy watering – especially recently planted beds, which will need extra moisture. Also, thoroughly spray or dust your plants to protect them from insects and diseases while you’re away. If you have flowering annuals, cut the blossoms before departing. If you don’t, they’ll soon stop blooming. Harvest all ripe or nearly ripe fruits and vegetables. Like flowers, they will continue to produce only if they’re picked frequently. Otherwise, they’ll go to seed.
Do a thorough job of weeding. If weeds are allowed to go to seed while you’re away, you can expect to encounter much more difficult problems later in the season – even next year – when the seeds sprout. Weeding eliminates a major source of competition for your landscape plants’ food and water which may be in short supply during your absence.
Plants kept indoors require special consideration. Before leaving home, place your house plants in a room which receives indirect sunlight. Direct exposure to the sun will dry the soil too quickly. Of course, you don’t want to put your plants in a room that’s too dark, either. Too little light will almost always result in leaf drop. And, just before you depart, be sure to water your house plants thoroughly. This is especially vital, because – unlike lawn grass and landscape ornamentals – house plants cannot benefit from any rain that may fall while you’re gone.
You’ll enjoy your vacation more by making sure your plants are well prepared for your absence.