Vegetative plant propagation is a way for one plant to create another plant without the need for pollination to occur. This process is often much faster in achieving a new plant than growing from seed. The genetics of the parent plant can be carried on through this vegetative propagation method. There are many methods to propagate plants and the one covered in this article was taught to me by my grandmother many years ago – layering. Layering is a science and an art and has been performed by humans for over four thousand years.
Propagating plants by layering can be accomplished in several ways, including simple, tip, air, mound, compound, and runner production layering methods. Many plants in nature propagate by layering accidentally when long, low-lying limbs contact the soil around the plant and are eventually covered by leaves from other surrounding trees and shrubs. This creates an organic cover over a part of the limb and keeps the area moist. This creates the situation for adventitious roots to develop at the soil contact area. This occurrence is called simple layering and is often mimicked by gardeners in the landscape. Not all plants respond to this type of propagation, but several common species that do are azaleas, jasmine, viburnum, climbing rose, and grapevines.
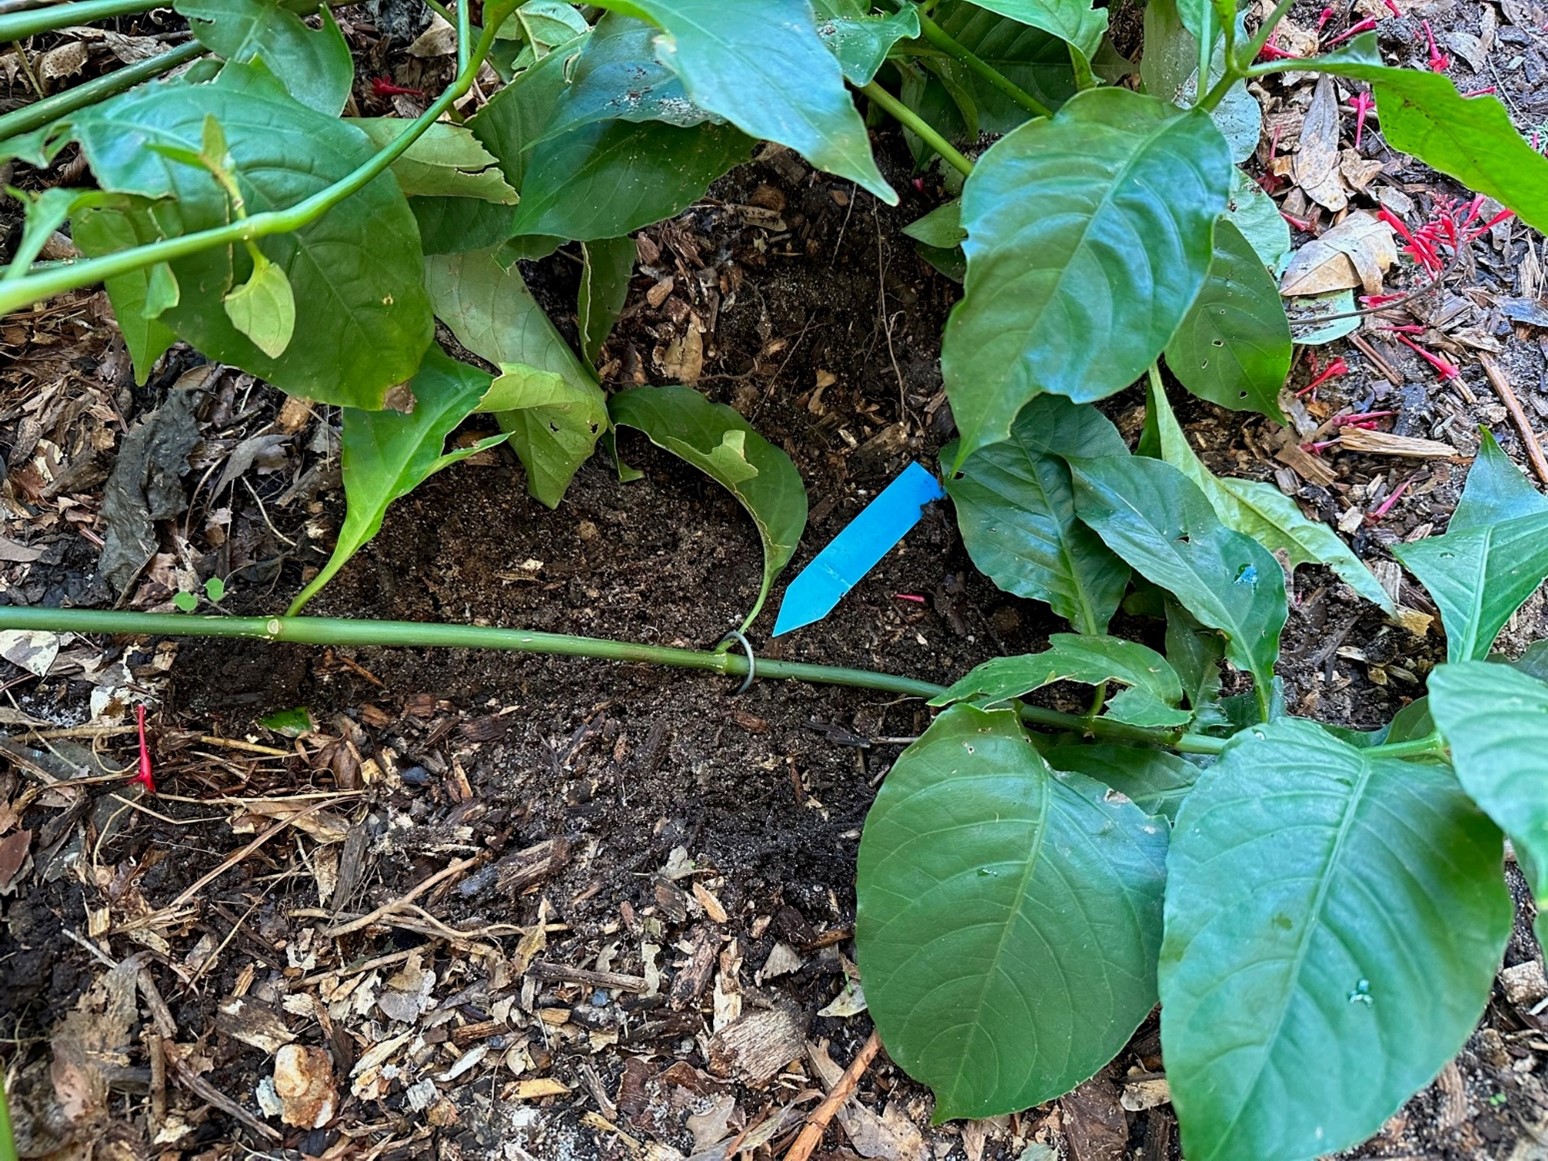
Unlike simple layering, tip layering involves digging out a shallow 3–4″ hole, which will allow space to bend the end of the branch down into the hole with the tip out the other side. Then, simply cover the hole to keep the branch in the ground. It may take something with a little weight placed over the covered hole to keep the branch from popping out. A brick or rock may be all that is needed. Both methods will take months for enough roots to develop before clipping the branch with a new plant ready to be dug and set somewhere new. For best results with both simple and tip layering, begin either in early spring with last seasons growth or late summer, utilizing that current year’s growth.
Simple layering. Photo Credit: Stephen Greer, University of Florida/IFAS – Santa Rosa County
Air layering is a fun adventure to rooting a new plant and can be used with both outdoor and indoor plants. It can be used on outdoor plants like camellia, azalea, maples, and magnolia, or indoor plants including weeping fig, rubber tree, and dieffenbachia. This type of layering requires a bit more planning and preparation than simple or tip layering. If the plant has a bark layer surrounding the cambium layer (this is the growing part of the limb and trunk and appears green) this area will need to be removed with a sharp clean knife. Choose a 1- ½ inch long area of the limb and scrape this area to remove the cambium layer located just beneath the bark. This is done to prevent the outside limb area from reconnecting back to the limb portion connected to the plant. Sphagnum moss will be needed to wrap around the wound site to create a rooting zone. Be sure to soak the moss with water by immersing it in a bucket of water, then squeeze it out. Wrap the moss with plastic wrap, making sure the moss is fully covered and tucked inside of the plastic. Both ends of the plastic wrap need to be secured tightly with twist ties or string. Make sure it remains tight throughout the 2 – 4 months needed for rooting to occur. If this process takes place in a sunny location, cover the plastic wrap with tin foil to block out the light.
Air layering a camelia. Photo Credit: Stephen Greer, University of Florida/IFAS – Santa Rosa County
There are other methods to layering plants and if you are interested, search online through the University of Florida IFAS EDIS site or contact your local UF IFAS Extension office in your local county. Enjoy growing your new plants.
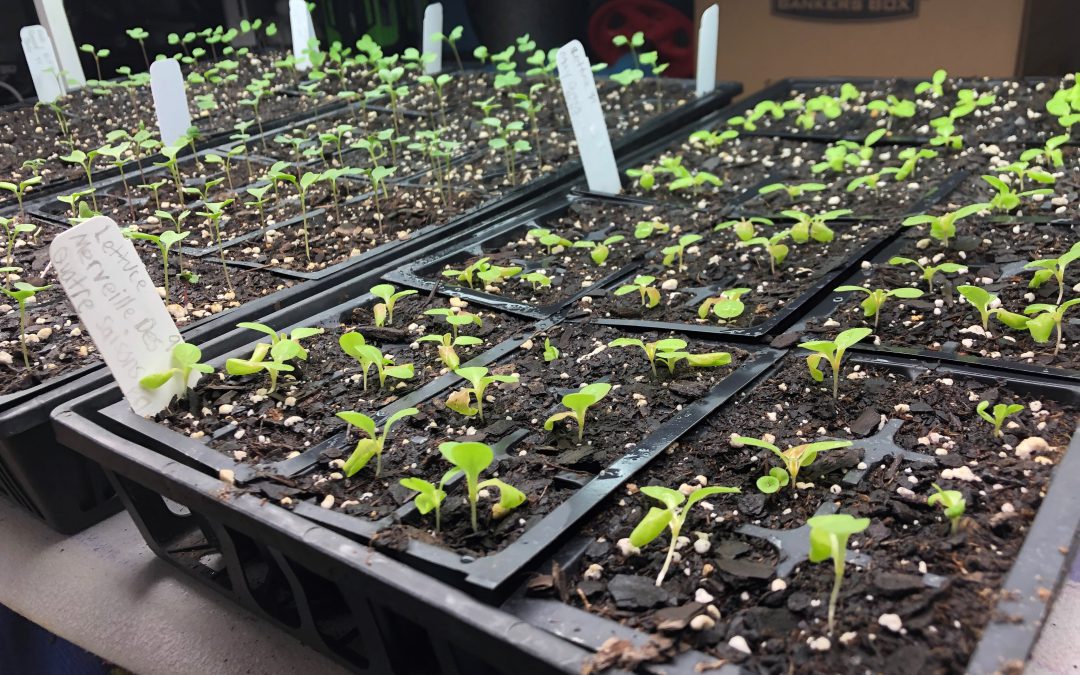
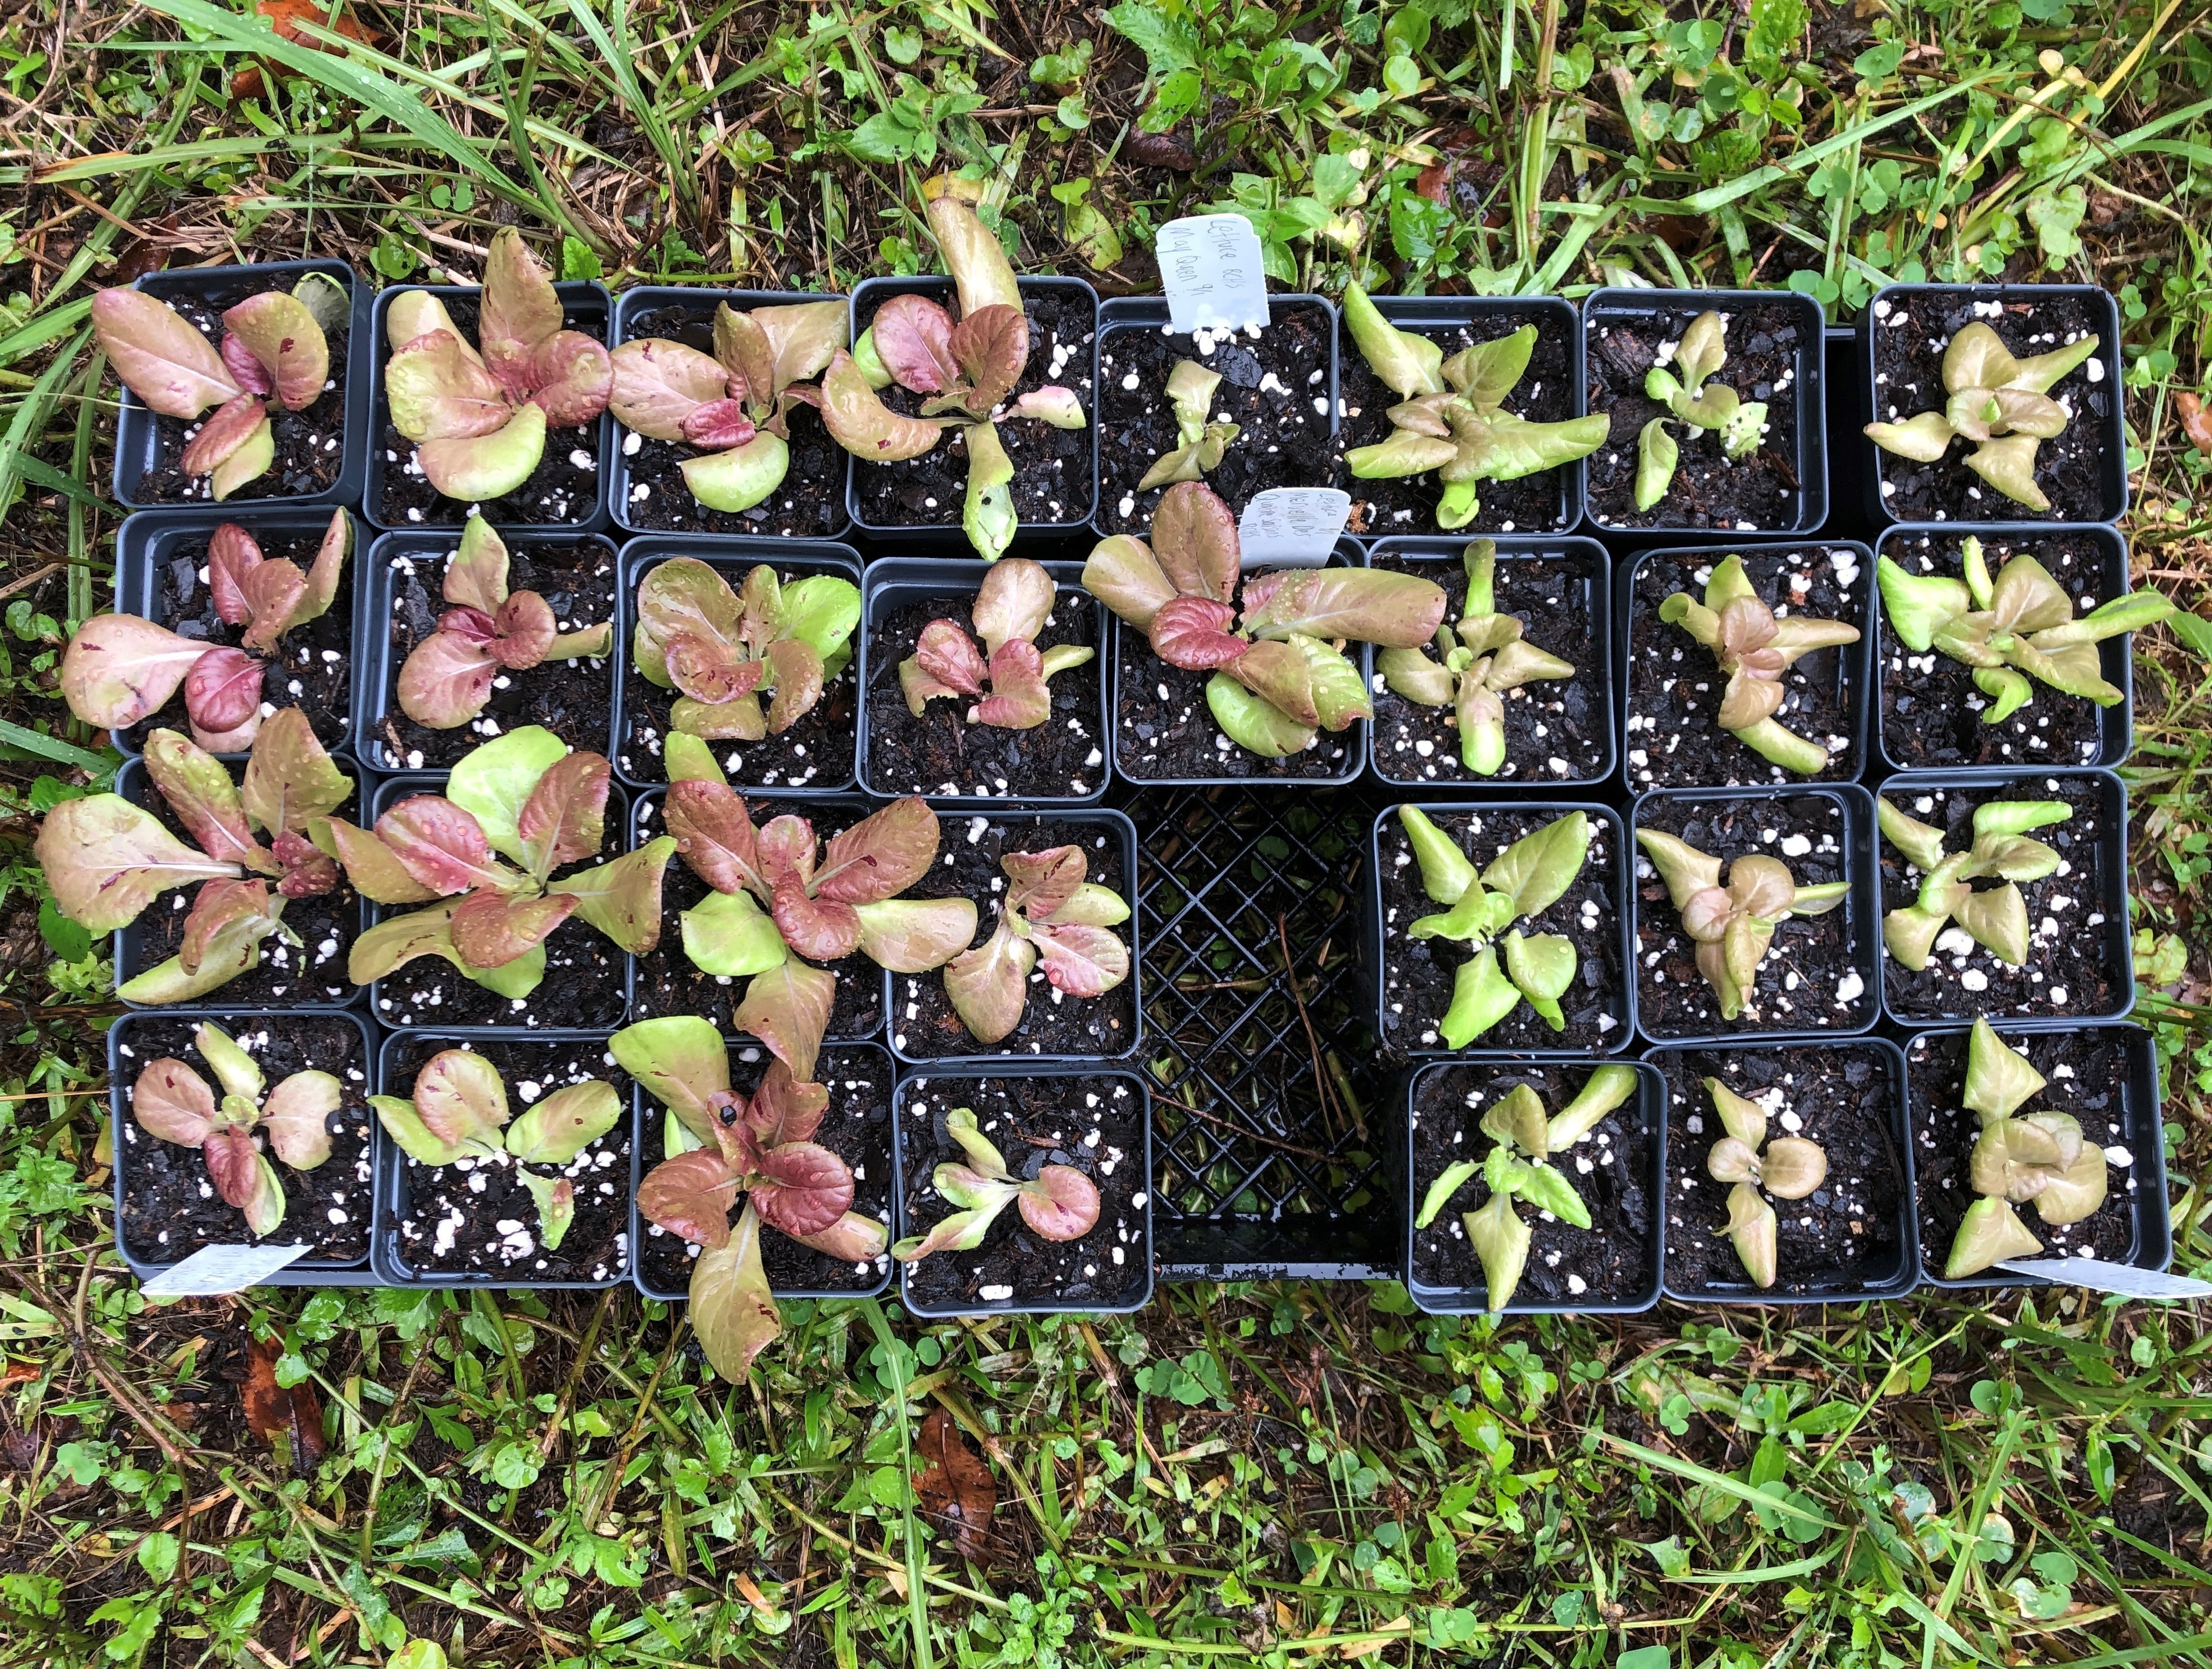
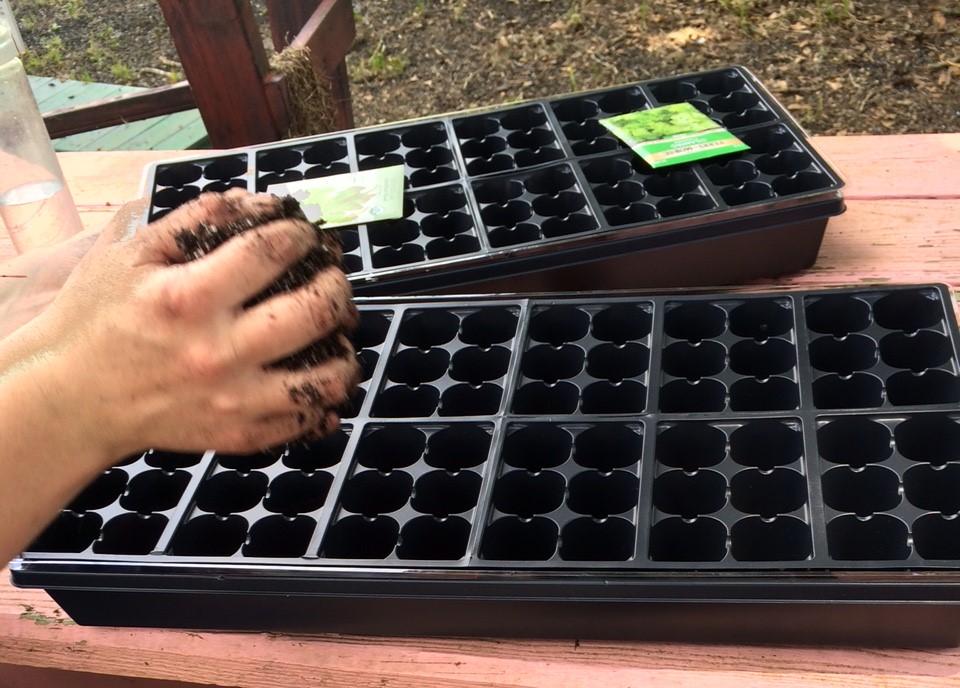
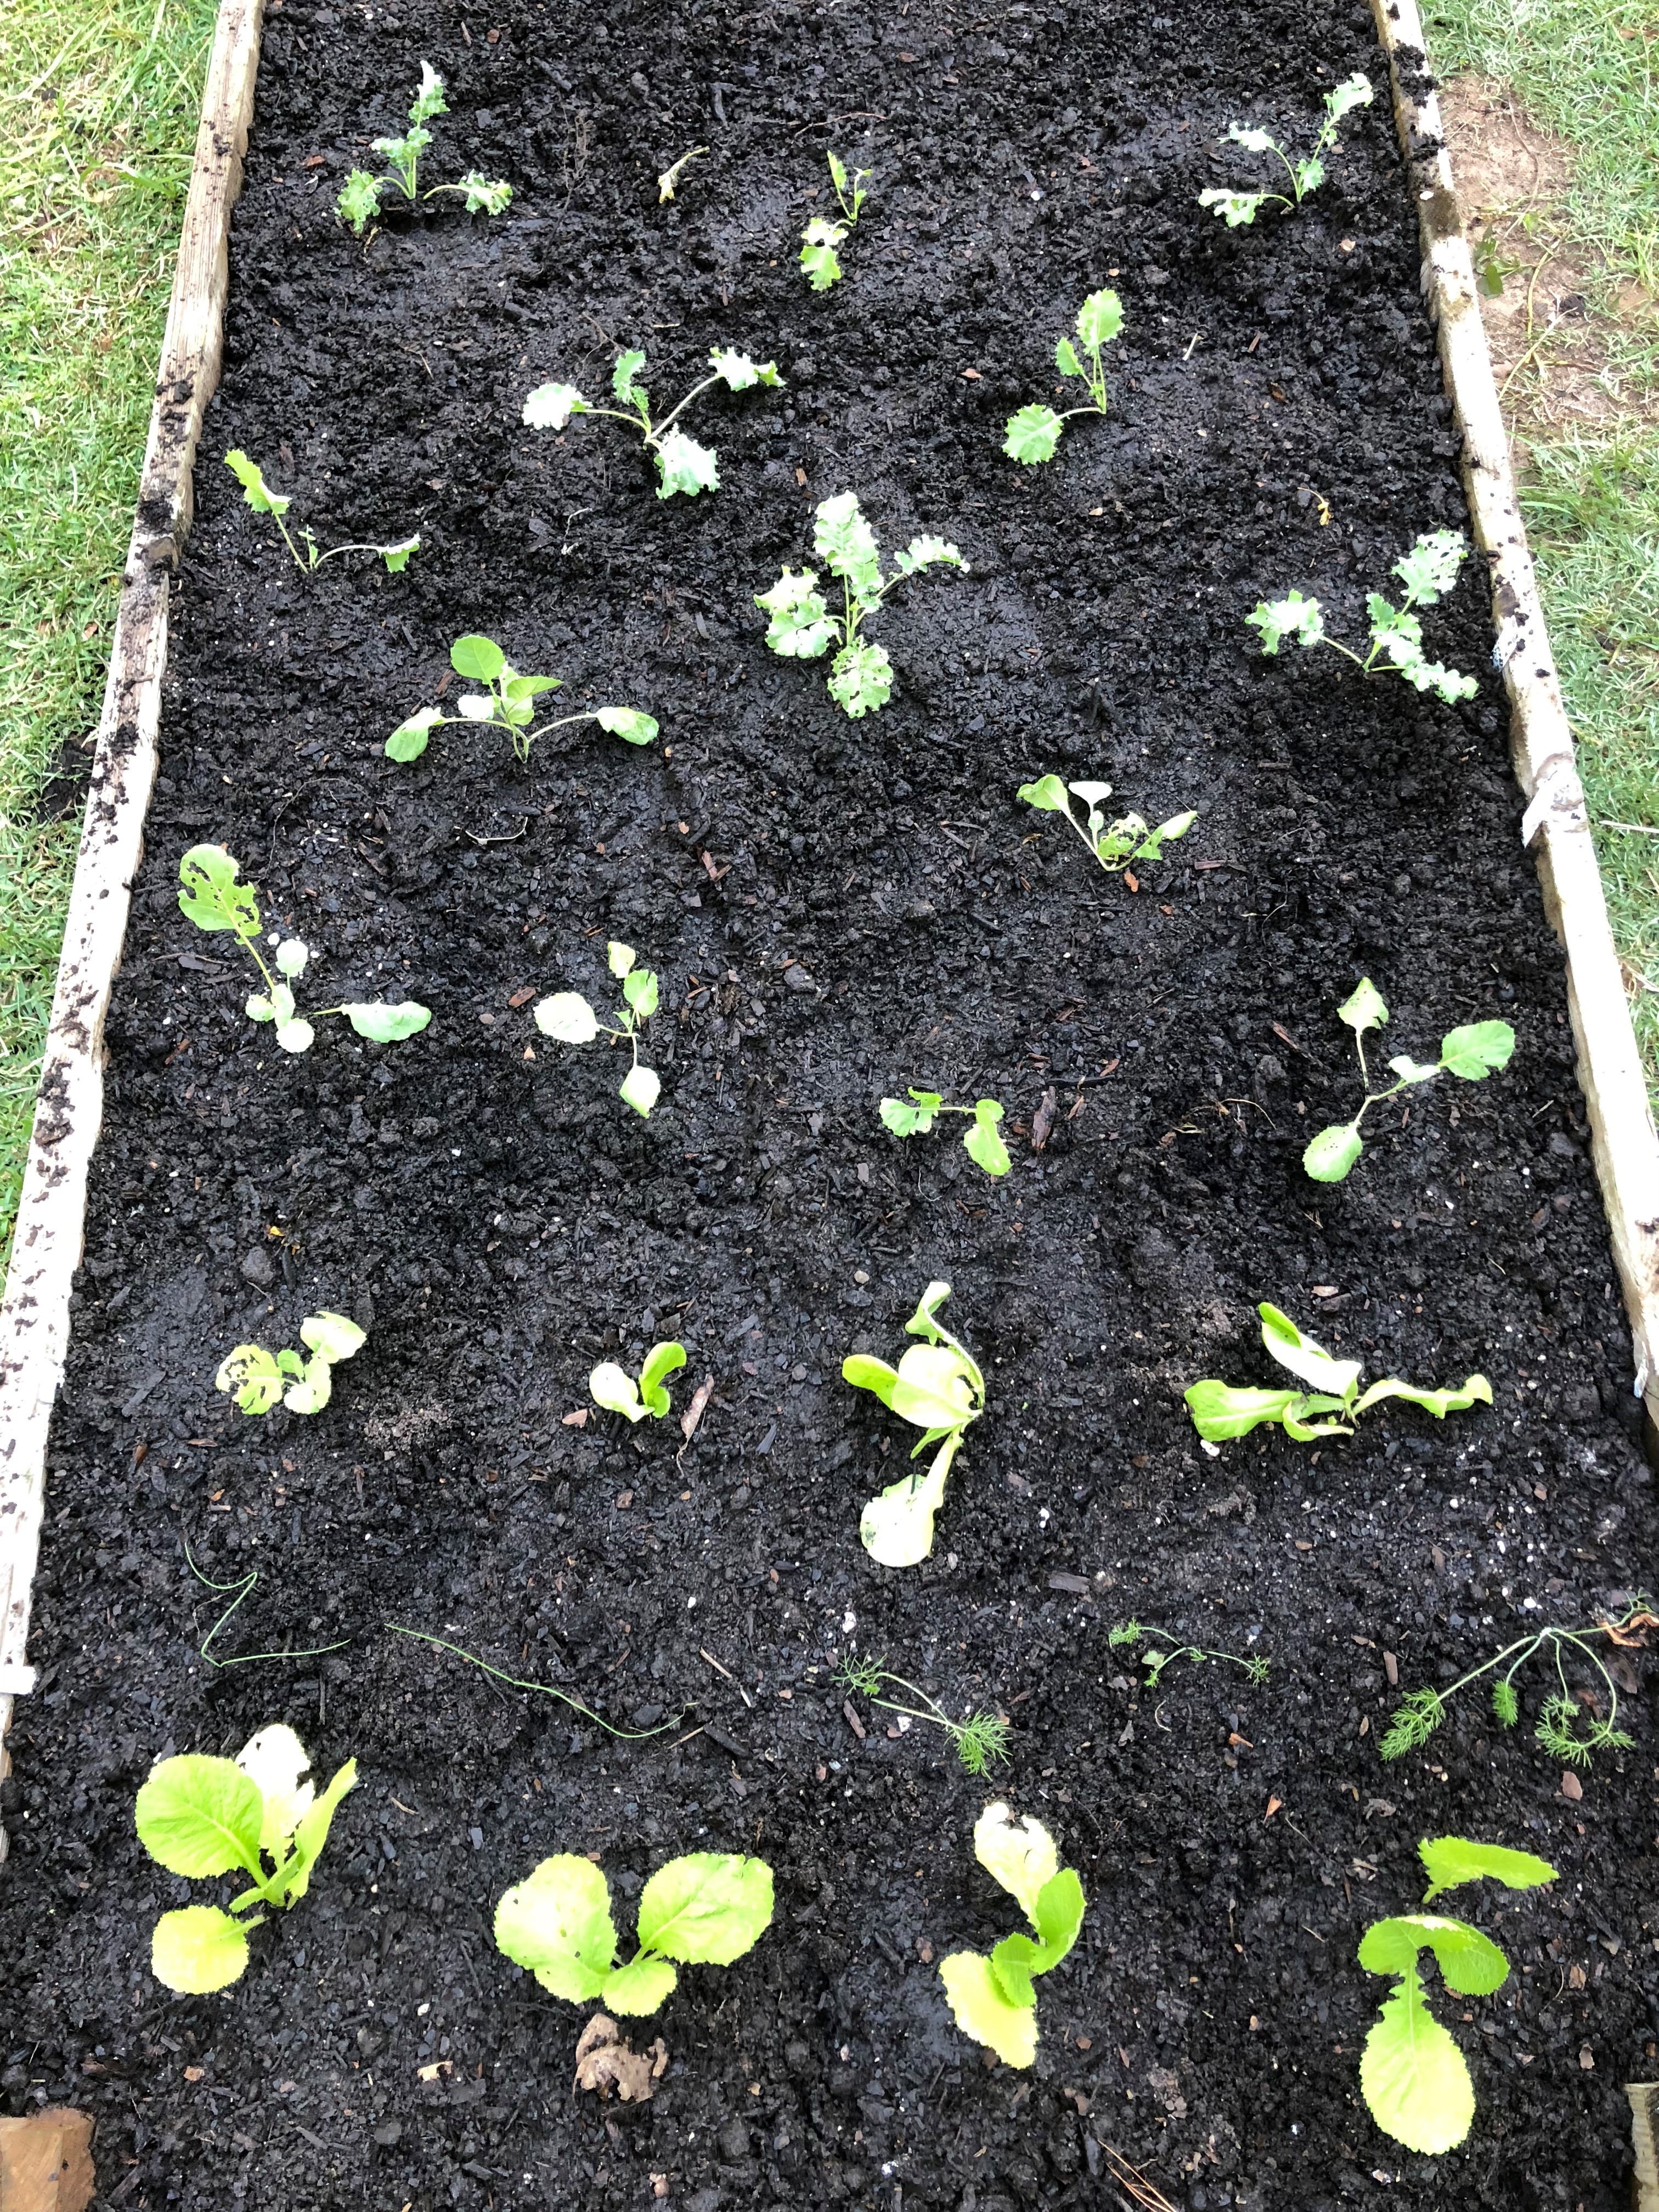
Start your fall garden seeds in containers to give them a healthy head start. Photo by Molly Jameson.Seed veggies into starter cell flats using a fine-textured growing medium designed to support seed germination and early seedling development. Photo by Molly Jameson.
Step-by-Step Instructions: Indirect Seeding Fall Veggies
While summer gardens offer a variety of intriguing fruiting crops, I have a special fondness for gardening during the fall season. This preference stems from the reduced pest pressure, decreased need for watering, fewer weeds, and the more favorable cooler temperatures for completing gardening tasks. Although it generally offers a more straightforward gardening experience, achieving success with your fall garden still hinges on applying the right techniques, with one crucial aspect being the care for seeds and young seedlings.
Indirect seeding allows you to nurture your seedlings before they establish their permanent residence in your garden, ensuring their growth into robust, mature plants. Below, you’ll discover a step-by-step guide to indirect seeding and planting for fall vegetables. By following these instructions, you’ll get a head start in cultivating a thriving fall garden that will delight your taste buds.
Seeding into Starter Cells:
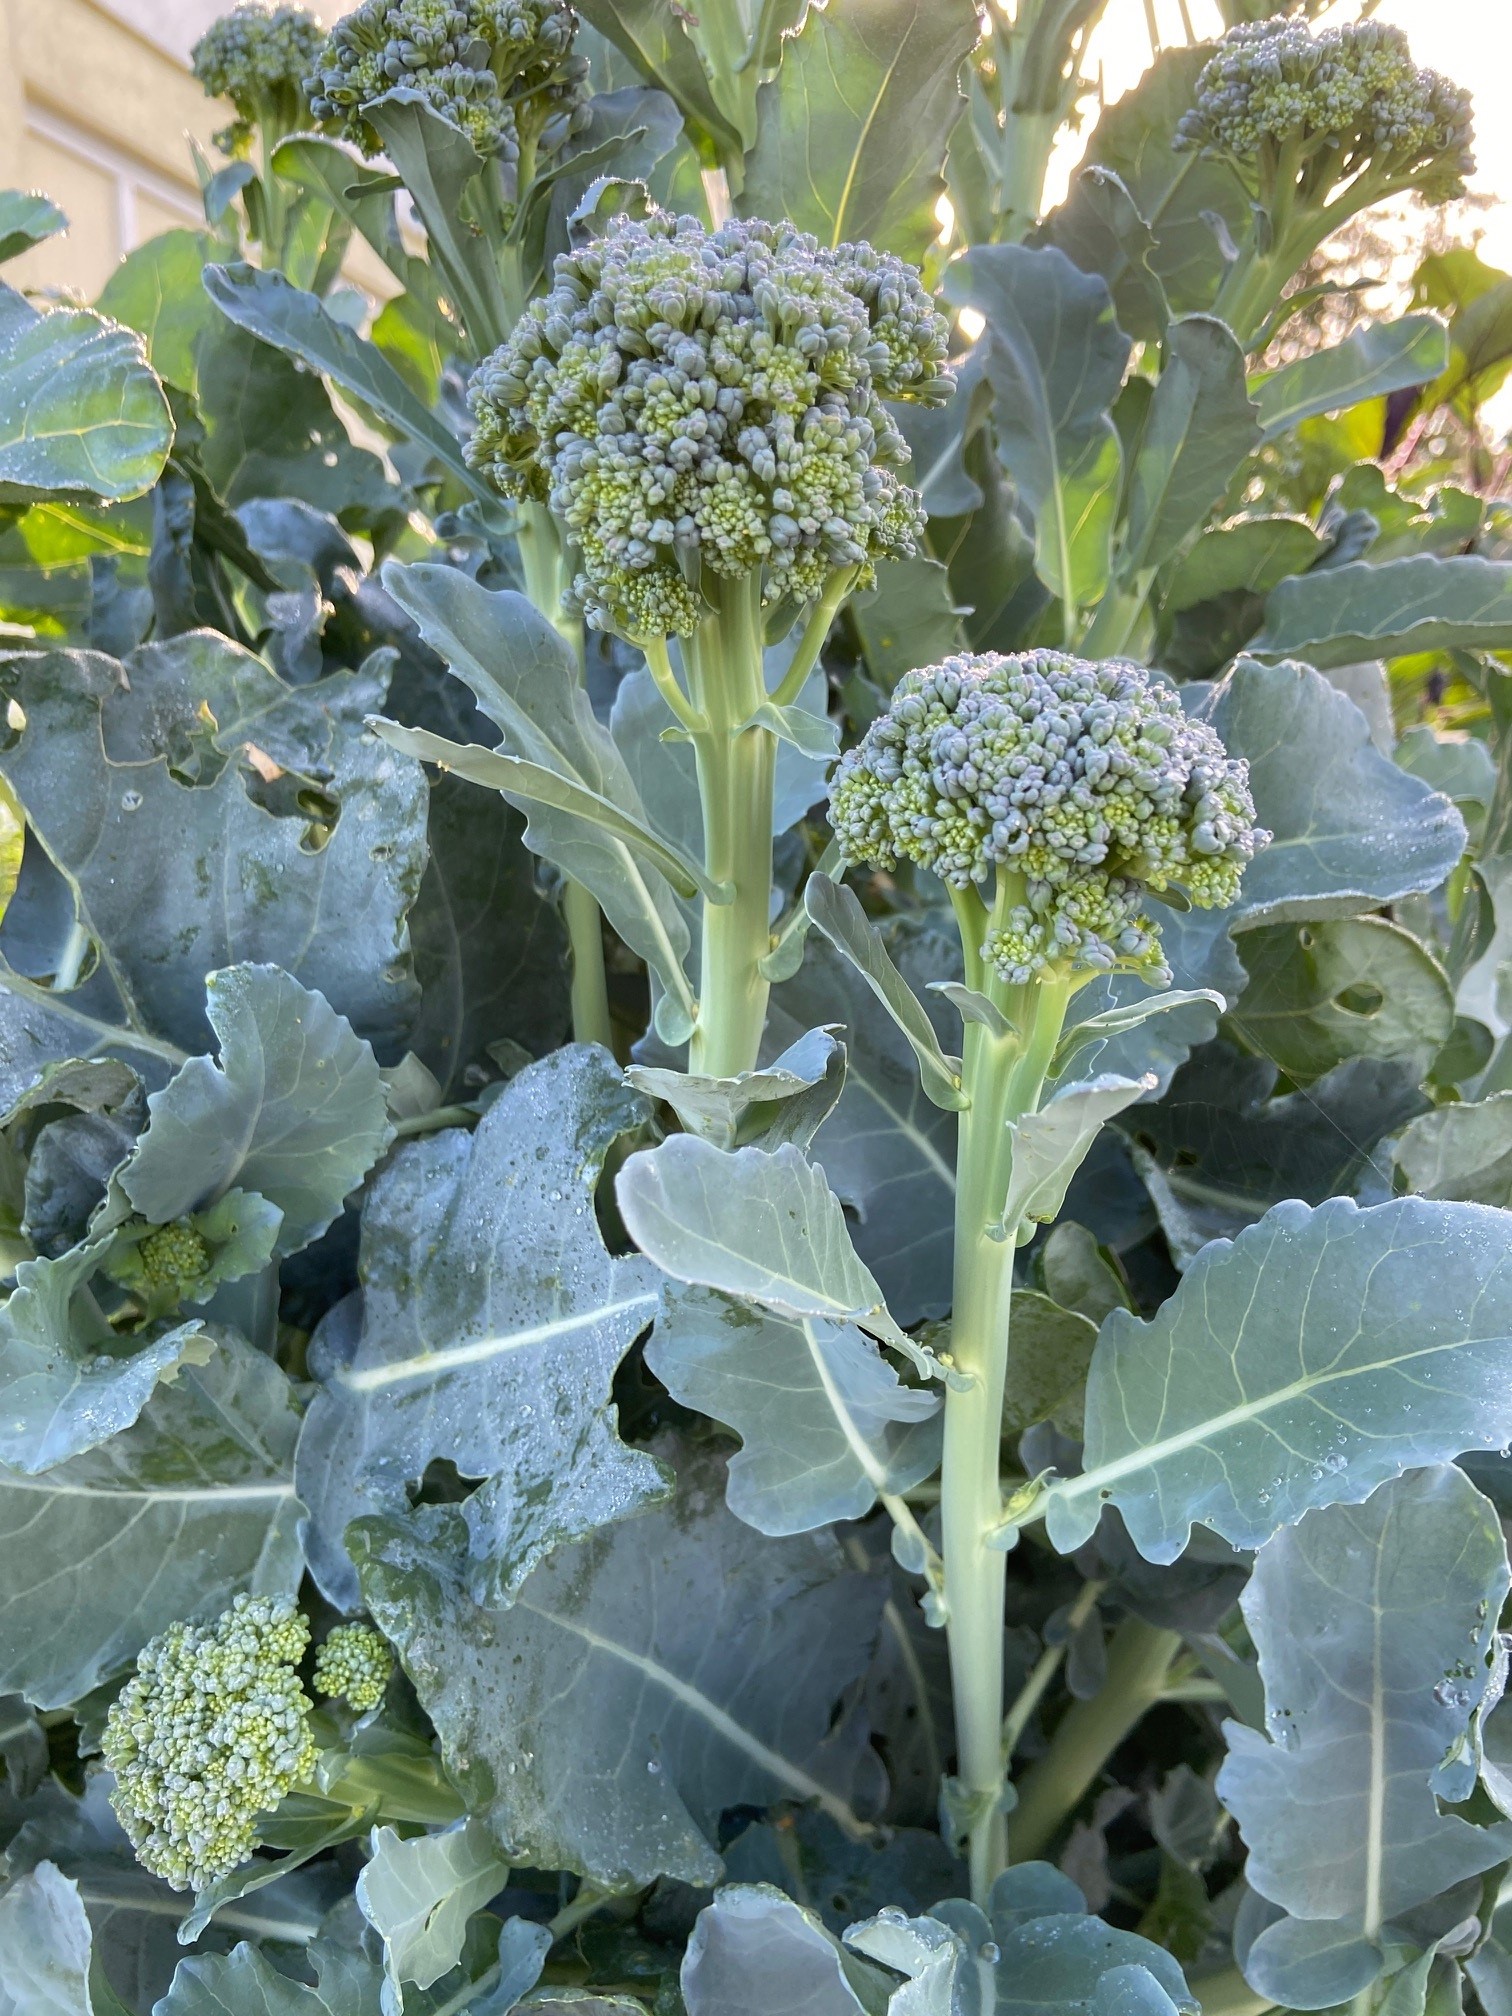
While many crops can be started indirectly in starter cells, it’s important to note that root vegetables (such as beets, carrots, radishes, turnips, etc.), peas, and beans are exceptions due to their delicate root systems, which do not transplant well. These particular crops thrive when directly seeded into the garden. Conversely, fall crops that typically benefit from indoor seeding include Brussels sprouts, broccoli, cabbage, cauliflower, cilantro, kale, lettuce, mustards, parsley, spinach, and Swiss chard. For Florida planting dates, transplant ability, and other detailed planting information, see Table 1 in the UF/IFAS publication Florida Vegetable Gardening Guide.
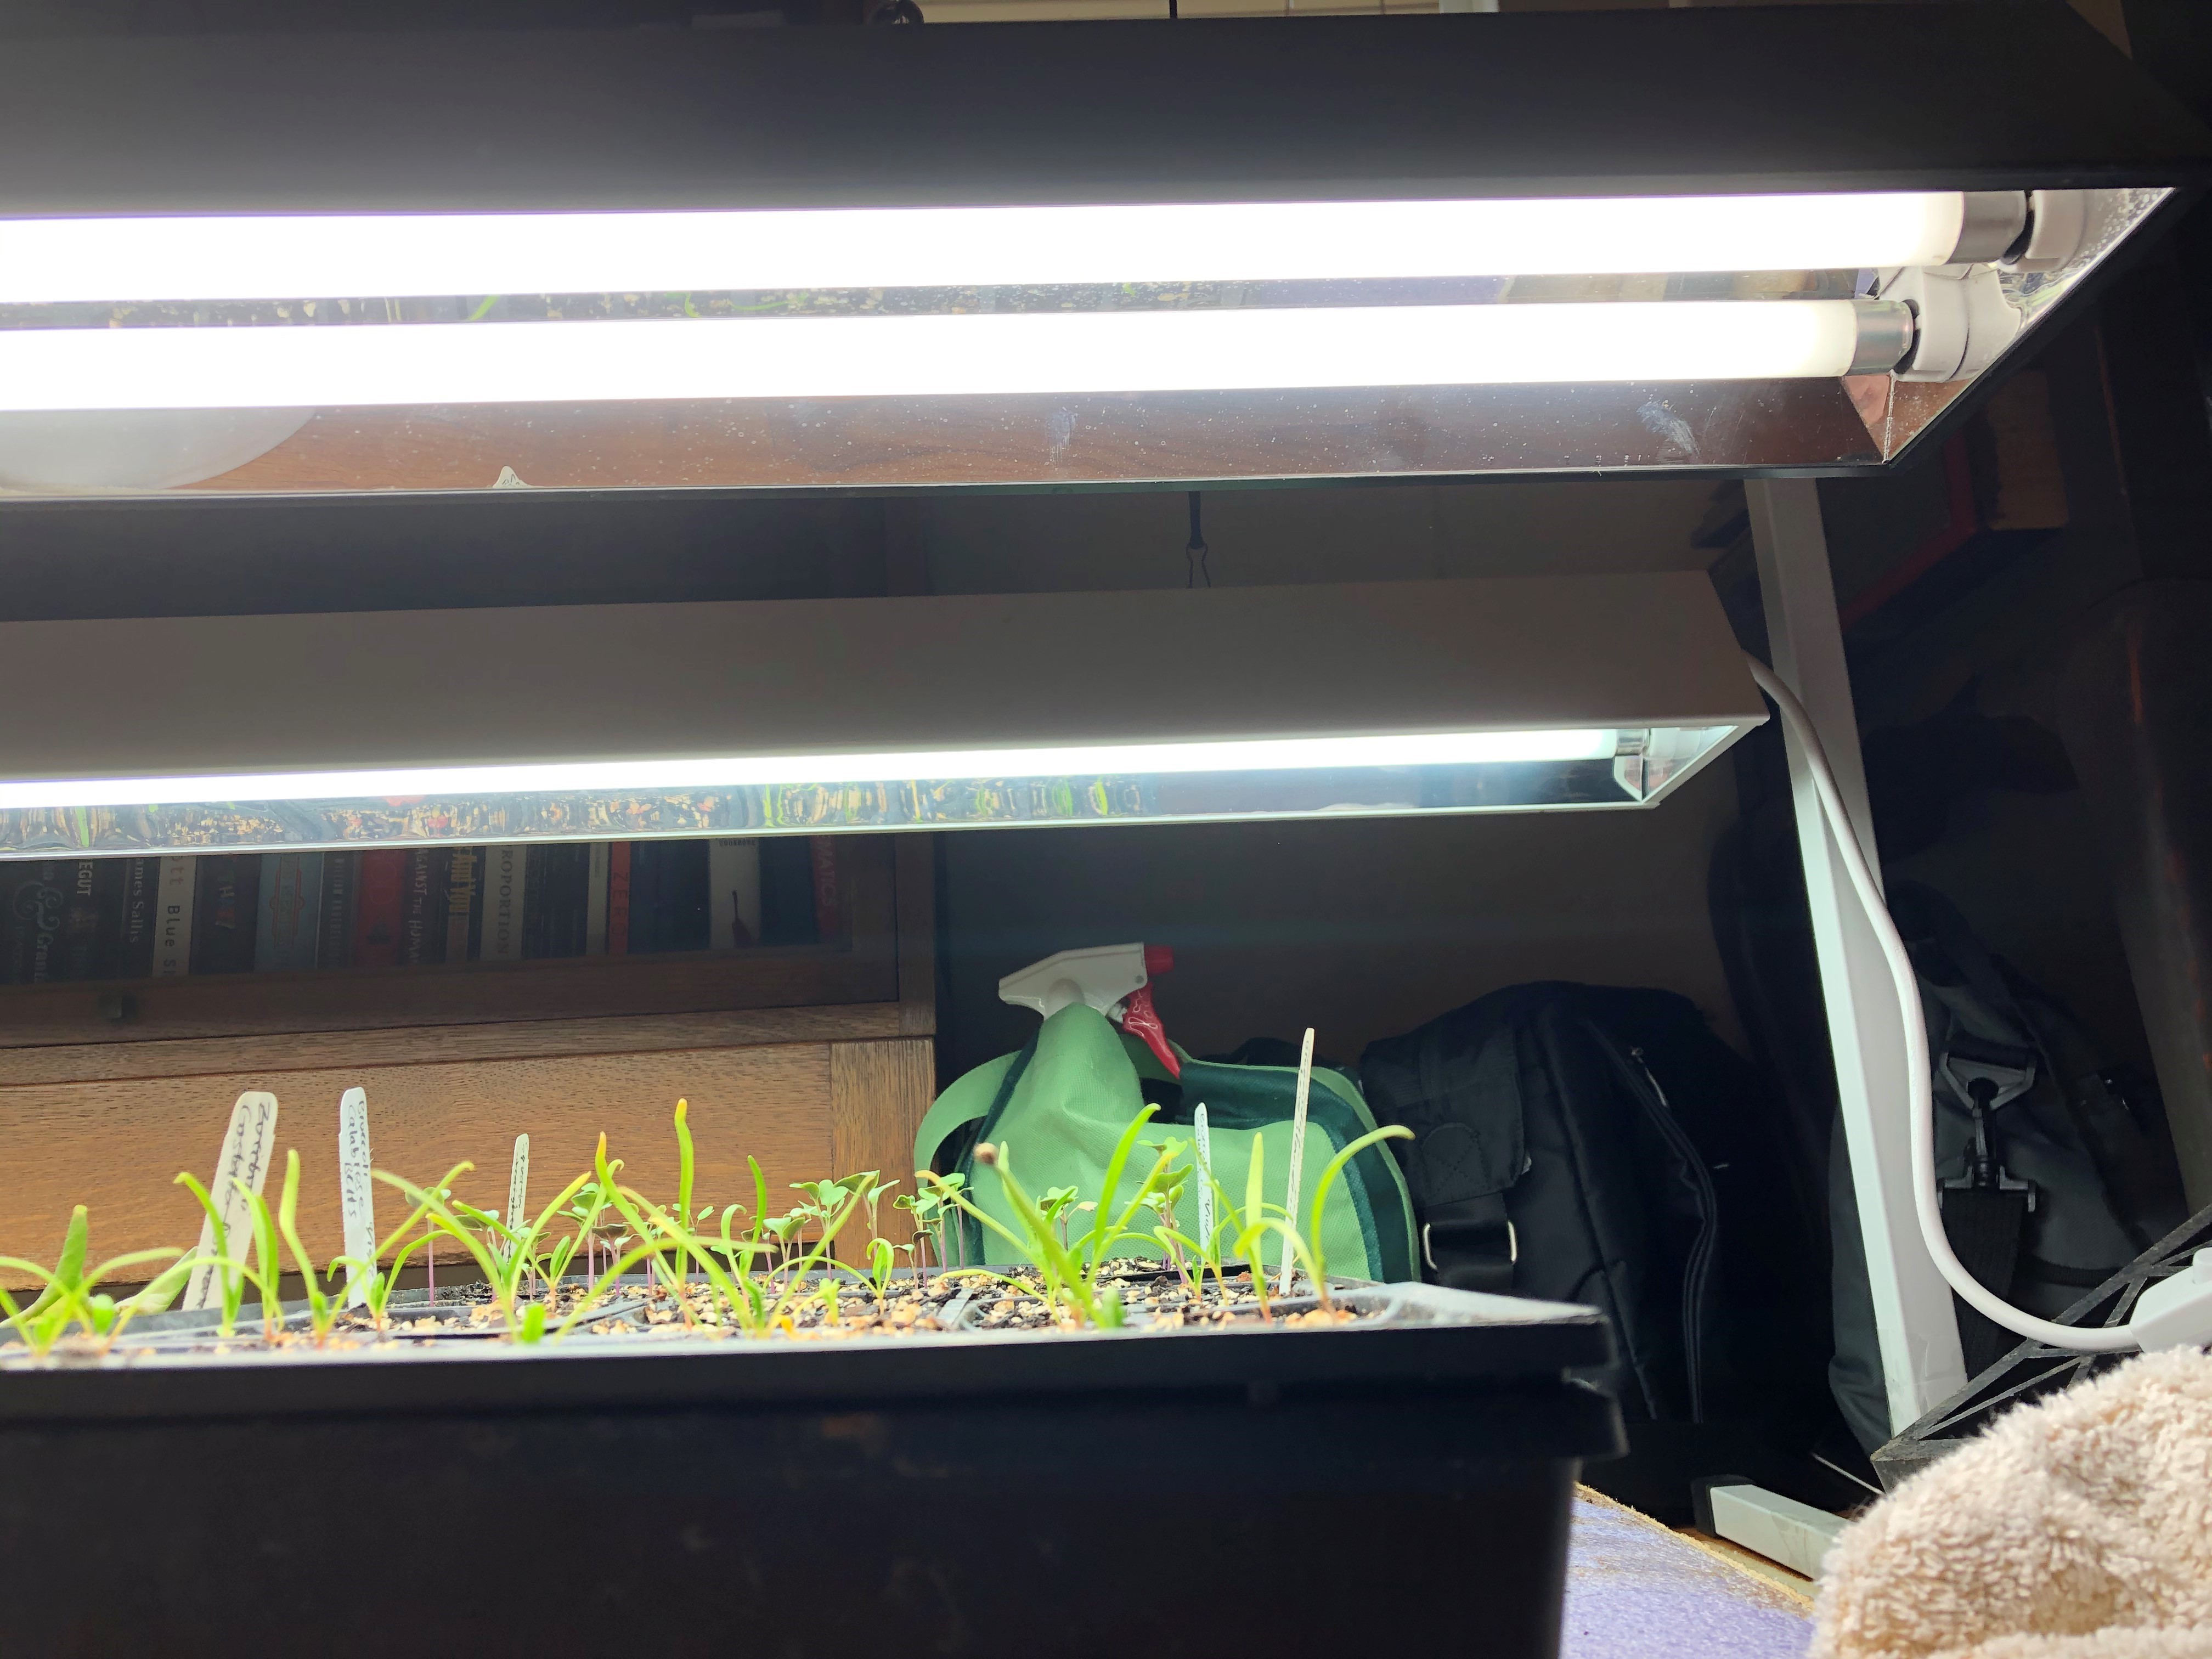
If you use fluorescent grow lights, maintain 2 to 4 inches between the top of the seedlings’ canopy and the fluorescent bulbs. Photo by Molly Jameson.
Begin by moistening a starting mix, which is any fine-textured growing medium designed to support seed germination and early seedling development. Fill seed starter cells with this prepared mix, ensuring a level, flat surface.
Create shallow indentations (2-3 times the diameter of the seed) in the starting mix in each starter cell using your finger and place 1-2 seeds in each cell. (Remove all but the strongest seedling if multiple seeds germinate in the same cell.)
To ensure even coverage and prevent clumping, lightly sprinkle dry starting mix over the seeds.
Label with the crop name, variety, and date.
Mist the surface with water from a spray bottle, pump sprayer, or a hose spray nozzle. Maintain moisture levels, avoiding waterlogging.
Before the seeds germinate, keep them in a temperature-controlled room or out of direct sunlight. Germination time varies, but typically takes 5 to 14 days, depending on the crop, environmental conditions, and seed quality. (For fall varieties, germination is best between 50-80°F.)
As soon as seedlings emerge, move them to a sunny location with more than 6 hours of direct sunlight. If temperatures exceed 85°F, provide afternoon shade to protect them from intense heat. If using full spectrum grow lights indoors (such as a T5 fluorescent light fixture), place seed starter cells at a distance of 2 to 4 inches between the top of the seedlings’ canopy and the fluorescent bulbs for 14 to 16 hours a day.
Continue to keep the starting mix moist but not waterlogged.
Up-potting into Larger Pots:
Up-potting refers to transplanting a young plant or seedling from a smaller container or pot into a larger one. While up-potting most seedling crop varieties into larger pots before transplanting into the garden is beneficial, you can skip this step and directly transplant seedlings from the starter cells into the garden if conditions are favorable (maximum air temperature is less than 86°F). However, keep in mind that young seedlings may be more vulnerable to rain, wind, insects, and animal disturbances. Up-potting into larger pots with nutrient-rich potting mix offers better protection and more time for root development.
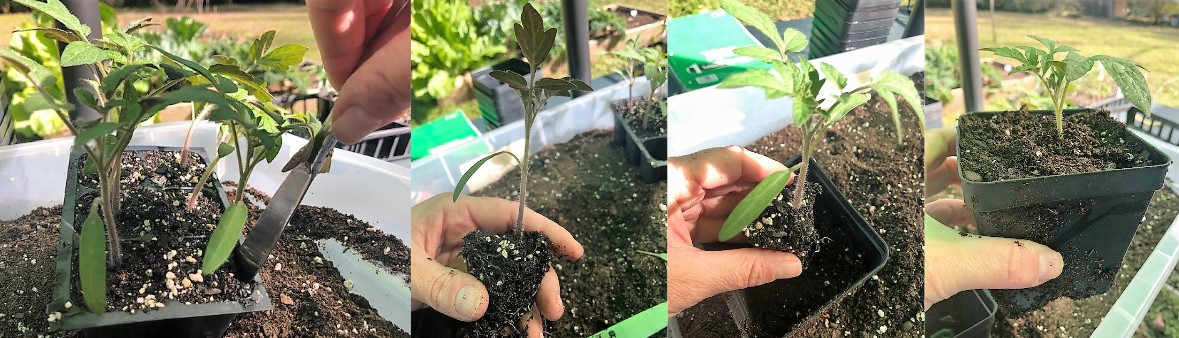
When up-potting, carefully extract each seedling using a butter knife to avoid disturbing the roots. Photos by Molly Jameson.
When seedlings develop “true leaves” (the second set of leaves after the initial seedling leaves), it is time to transfer them into larger pots (2″-4″ wide).
To start, fill the larger pots about halfway with pre-moistened, nutrient-rich potting mix designed for vegetables, ensuring good drainage.
After thoroughly watering the small seedlings, carefully extract each from the starter cells, using a butter knife for gentle and precise removal to avoid disturbing the roots.
Being careful not to disturb the roots, place each seedling gently into their halfway-filled pot and add more potting mix until the seedling is secure, standing upright, with all roots covered. There should only be one seedling per pot.
Keep seedlings in a sunny location with more than 6 hours of direct sunlight. If temperatures exceed 85°F, provide afternoon shade to protect them from intense heat. If using full spectrum grow lights indoors (such as a T5 fluorescent light fixture), place seedlings at a distance of 4 to 6 inches between the top of the seedlings’ canopy and the fluorescent bulbs for 12 to 14 hours a day.
Continue to keep the potting soil moist but not waterlogged.
Transplanting into the Garden:
When the time is right, dig a small hole in the garden bed and place the plant, along with the potting mix, in the hole, following the crop-specific spacing requirements. Photo by Molly Jameson.
Once the plants have developed strong roots and reach about the height of their pots, they are ready for transplantation into the garden.
If the plants have been indoors under grow lights, allow them to “harden-off” by gradually exposing them to outdoor conditions for a week. This helps them adjust to wind, direct sunlight, and varying temperatures.
Prepare the garden bed with compost and other soil amendments.
Water the plants thoroughly before carefully removing them from their pots, ensuring minimal disruption to the roots.
For each plant, dig a small hole in the garden bed and place the plant, along with the potting mix, in the hole, following the crop-specific spacing requirements (see Table 1 in the UF/IFAS publication Florida Vegetable Gardening Guide).
Cover the roots and maintain consistent soil moisture, avoiding waterlogging.
In summary, mastering the art of indirect seeding and planting fall vegetables can greatly improve your chance of a successful harvest. From carefully sowing your seeds in starter cells to up-potting and ultimately transplanting into your garden, each step is a vital component of the process. So, roll up your sleeves, get your hands dirty, and witness your fall garden flourish. Happy gardening!
Bright color is sometimes hard to come by in landscapes, especially in those areas where not much likes to grow. In particularly sandy areas along our coastlines, it can be a challenge to find plants that can both tolerate extremely dry conditions with heavy salt spray and provide an aesthetic boost. Luckily, there is at least one flower out there that goes above and beyond when it comes to beauty.
Gaillardia pulchella, or blanket flower, Indian blanket flower, firewheel, or sundance is a relatively low growing (up to 1.5 feet tall) plant that favors conditions that would make most plants wither. It grows as an annual or short-lived perennial and though it goes dormant in the winter, during warm weather, it’s bright and colorful! It is native to the United States, but probably never spread farther east than Texas until assisted by humans. It grows well throughout Florida, and can often be seen along roadsides.
Gaillardia on the beach
Spreading to around two feet wide, each individual plant may not blanket the ground, but it readily produces seed which is easy to germinate. Flowers are produced throughout the growing season. Varieties are available with different appearances, though all tend to be some combination of bright yellow and dusky red. The blossoms can be used as cut flowers, or left in the landscape to attract pollinators.
Blanket flower prefers well-drained soil, even growing out into beach dunes. As stated previously, it may be propagated easily by seed; either let dried seed heads remain on the plant long enough to drop seeds or harvest them to plant elsewhere. Sow seeds in the spring and enjoy low-maintenance color for months after!
Residents of North Florida are no doubt familiar with camellias, the large, glossy-green-leaved shrub that flowers during the cooler seasons. Common varieties include Camellia sasanqua, which blooms from October through December (depending on variety), and Camellia japonica, which blooms January through March. Both make huge, showy blossoms that demand attention, with forms that range from wild-rose-like to stunning geometric formal patterns.
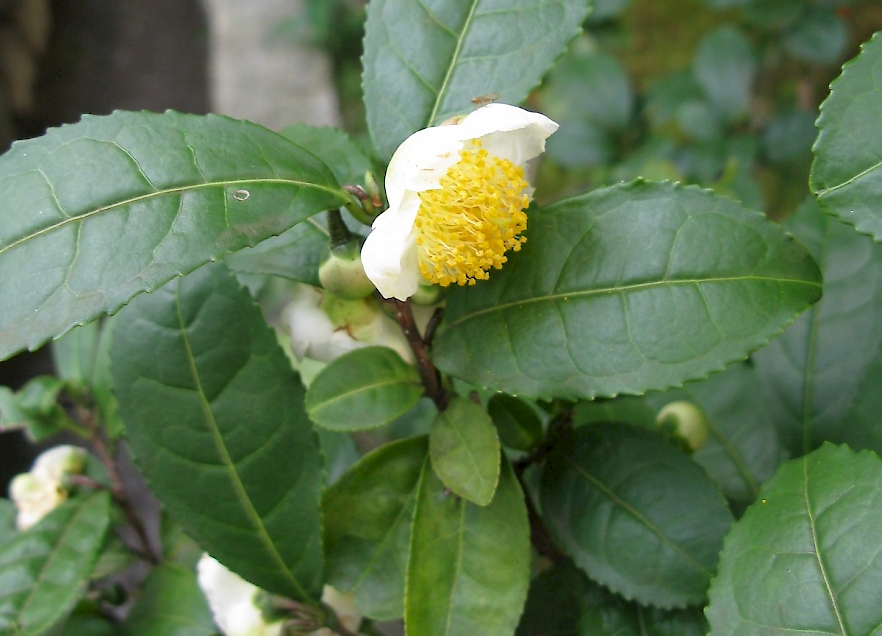
The popularity of these shrubs is not in doubt, but a cousin of theirs takes the prize as one of the most popular plants in the world. Not due to its flowers: this variety of camellia does bloom, but the leaves are most interesting to humans. It is grown in dozens of countries worldwide and global production is estimated at over $17 billion worth of these leaves. The primary product made from this plant is a beverage that is consumed more than any other drink except water. It is, of course, tea.
Camellia sinensis or “Tea Plant”. Photo courtesy of UF/IFAS.
Camellia sinensis was named by botanist Carl Linnaeus, “Camellia” to honor another botanist, Rev. Georg Kamel, who really had nothing to do with the plant at all, and “sinensis”, which means “from China”. You may be able to deduce where tea is native to.
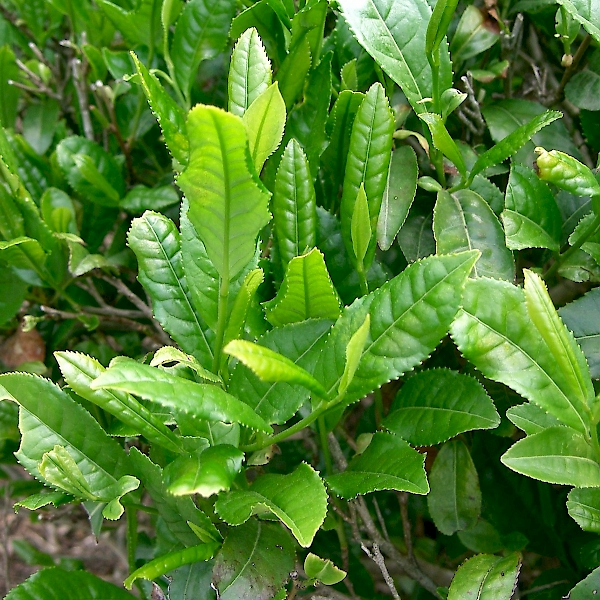
The tea plant prefers temperatures from 65 to 86 degrees Fahrenheit, doing well in zones 7-9. It can survive freezing or slightly-below-freezing temperatures, though leaves may be damaged by frost. It enjoys moist conditions, needing around 50 inches of rainfall per year. China tea (variety sinensis), which produces smaller, more serrated leaves, prefers more light than Assam types (variety assamica), which have larger, less serrated leaves. Either variety can be grown as a shrub or small tree.
Propagation may be accomplished either by seed or cuttings; cuttings are the preferred method for reproduction, as seeds must be germinated before the seed coat hardens for best results. Caring for tea plants once established involves more frequent but light fertilization, mulching, and regular scouting for pests. Camellia sinensis is susceptible to mites, thrips, scale insects, and aphids, all of which are present in large numbers in our area. Luckily, most of these problems can be solved with an application of either insecticidal soap or horticultural oil, if control is even necessary.
Once a tea plant is large enough to harvest leaves from, it is the new growth which is plucked. The top 2-3 leaves are used either fresh or fermented for a period of time before they are brewed. Green tea comes from the fresh leaves of China type tea plants, while either China or Assam types may be used to make black tea. Black tea leaves are picked, wilted or crushed, and allowed to ferment. Fermentation darkens the leaves and is halted by heating, which also serves to dry the leaves for storage.
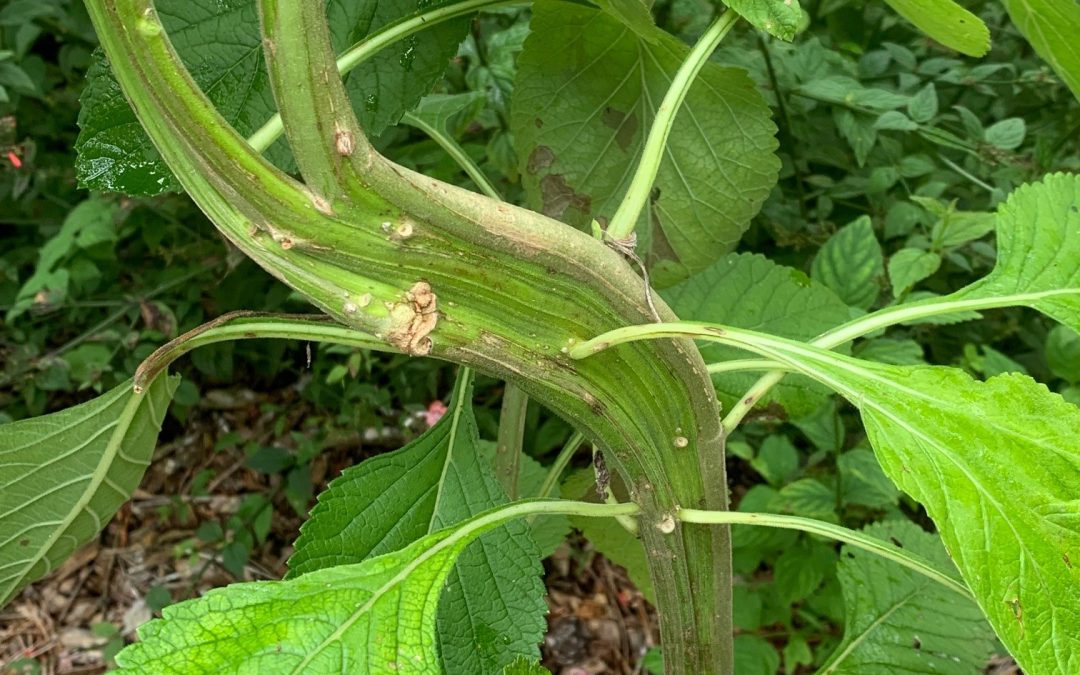
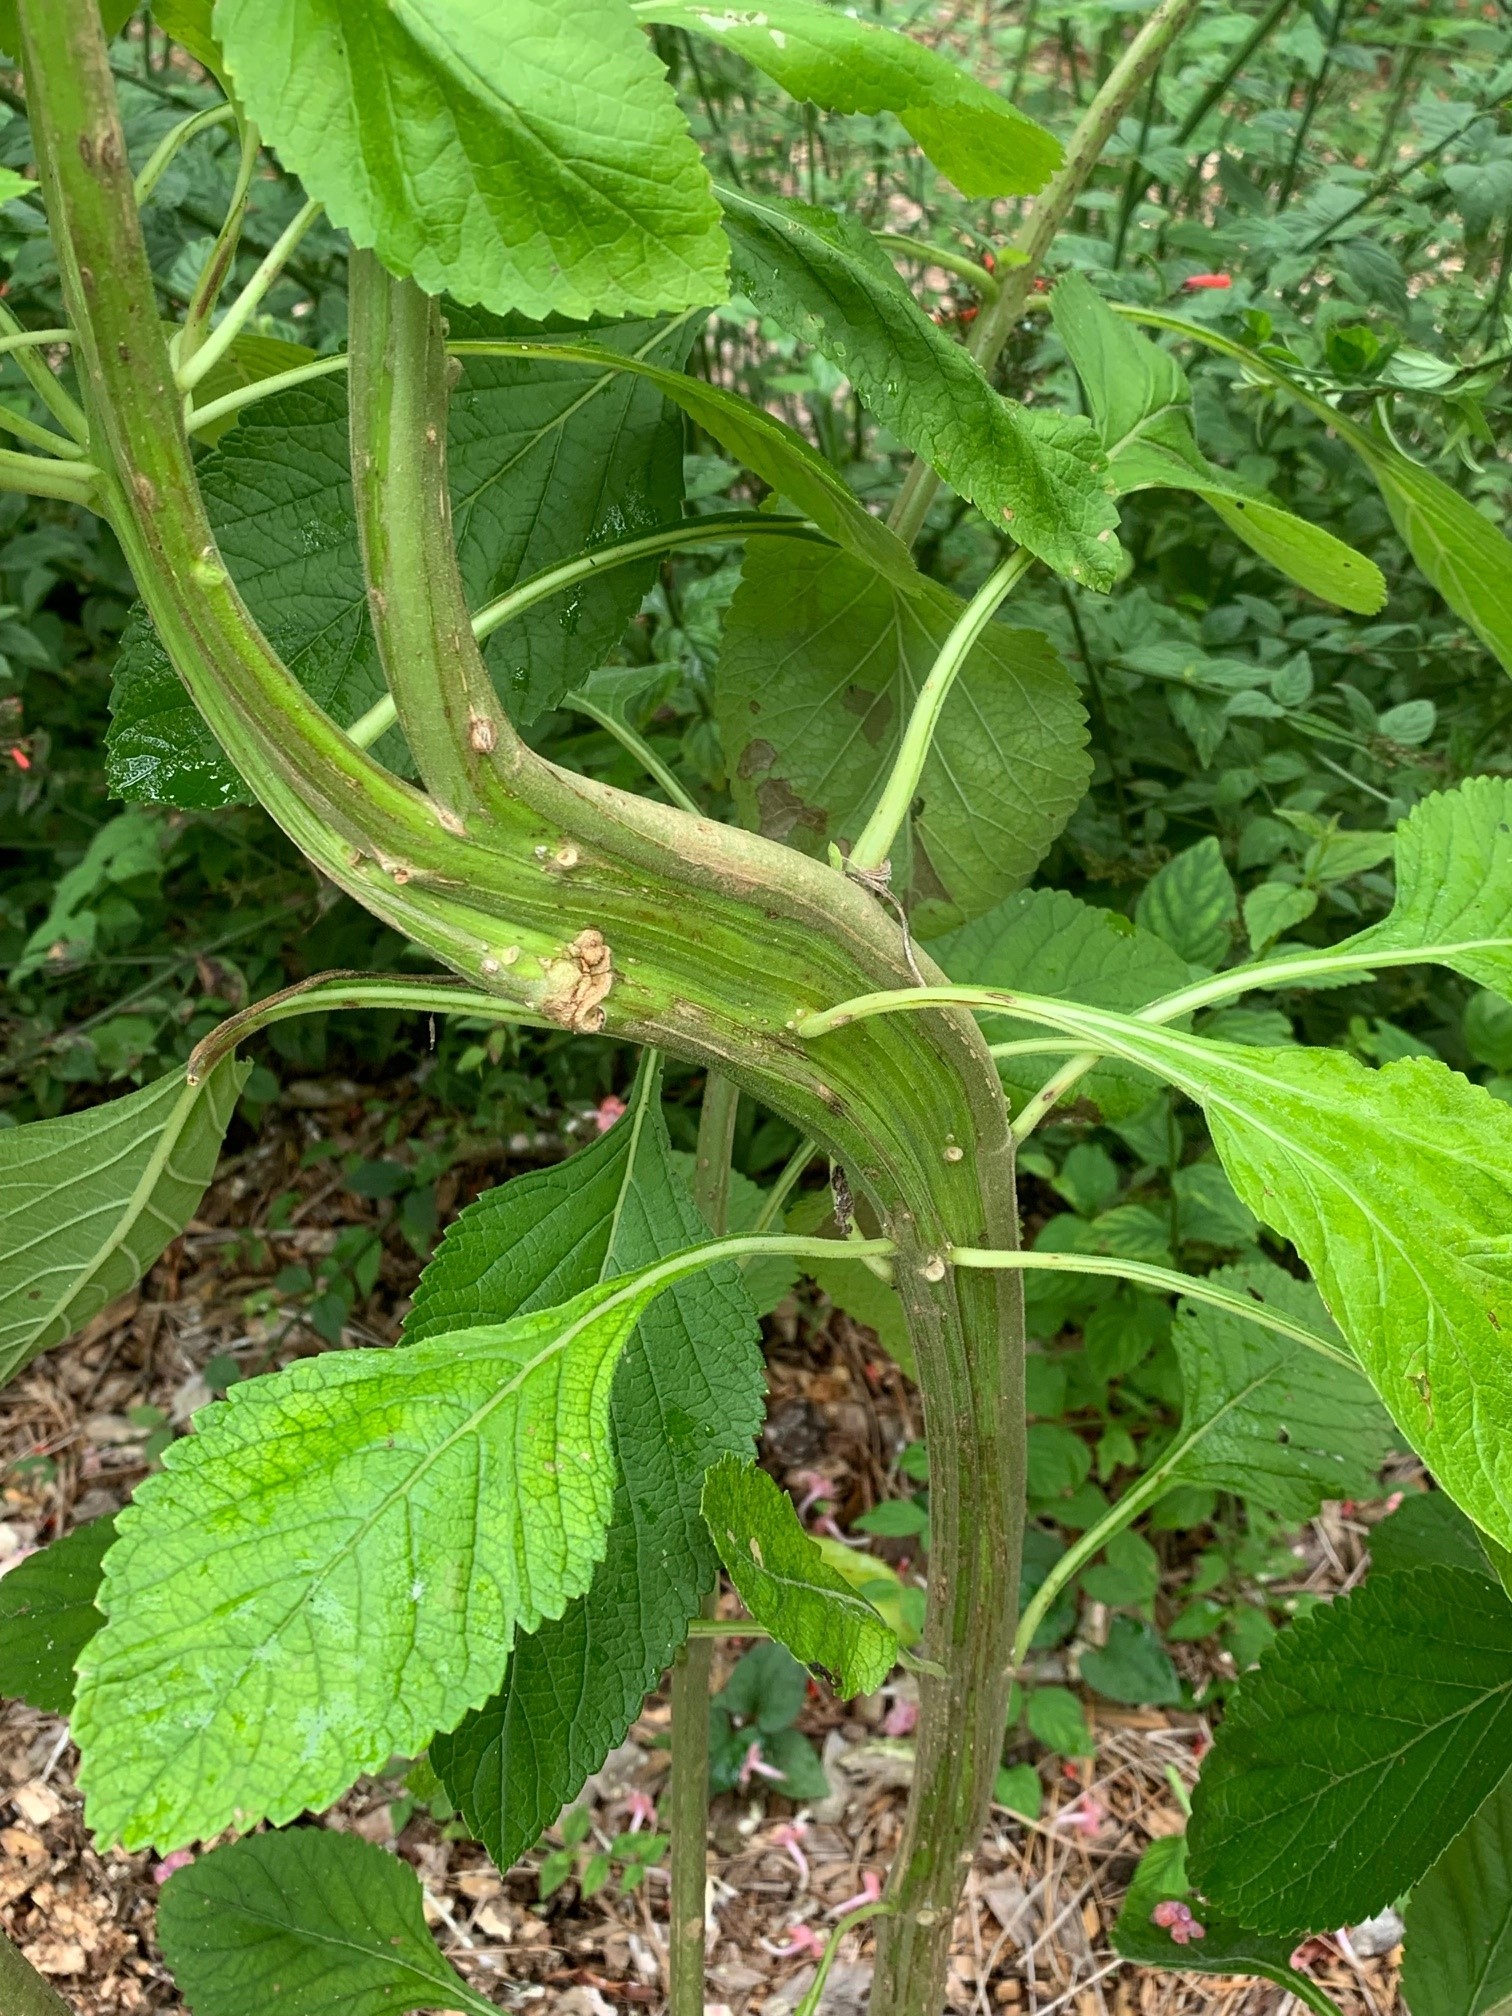
Every so often while I am enjoying a walk through the garden, I notice a growth pattern on a plant that is just not normal. One of the more interesting patterns I see is called fasciation. This is a distortion of plant tissue that often causes flattened, curved, or the thinning of plant tissues. I recently noticed this on the stem of a Coral Porterweed in the Escambia County Demonstration Garden. The leaves were a normal shape but several inches of the stem were flattened and curved.
The distorted stem tissue of a Coral porterweed. Photo by Beth Bolles, UF IFAS Extension Escambia County.
So what is causing this type of growth pattern?
The most common cause of fasciation is usually some type of genetic mutation in the growing points of the plant. The other possible causes could be a physical injury to new tissues, a bacterial infection, chemical injury, or even an insect injury. Fasciation will be random in its occurrence and many gardeners may never have it occur on a plant in their yard. I have seen it on both woody and herbaceous plants in my own yard and in the demonstration gardens.
If you see a plant exhibiting this distortion of growth, you don’t need to take any action. If the growth is unsightly to you, prune out the affected plant tissue. It is probably best that you not propagate material from an affected plant just to prevent any transfer of the distortion to a new plant if the cause is genetic or from a living organism.