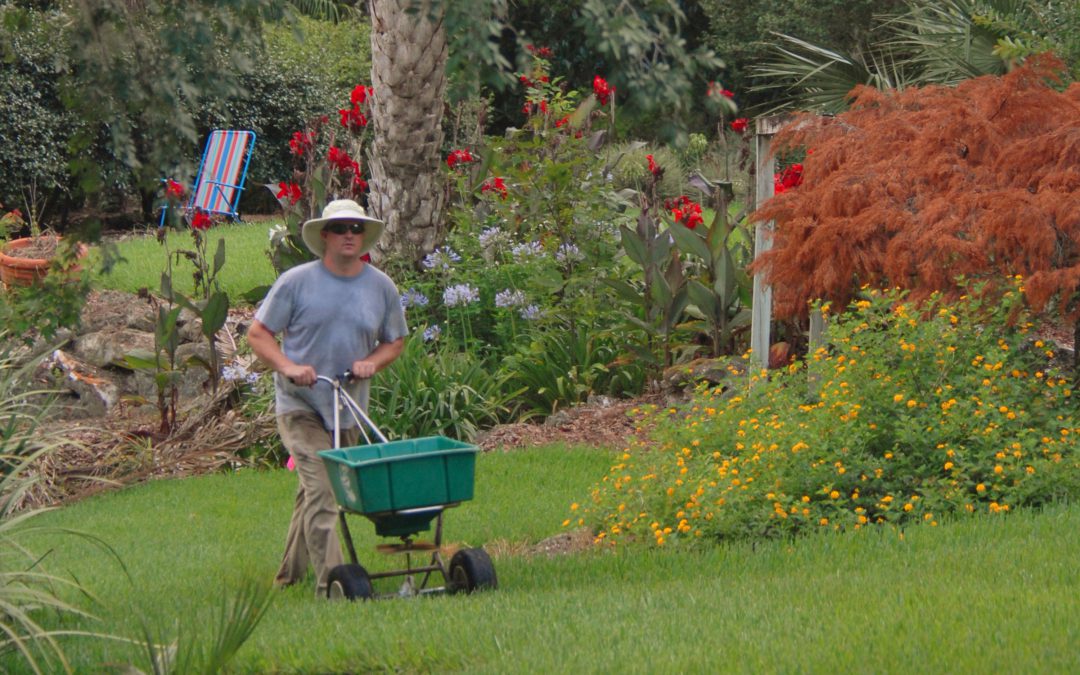
Video Feature: Home Lawn Fertilization
Check out this short video from Leon County Horticulture Agent Mark Tancig on how to fertilize your summer lawn in a Florida-Friendly manner!

Check out this short video from Leon County Horticulture Agent Mark Tancig on how to fertilize your summer lawn in a Florida-Friendly manner!
For a state that receives around 60” of rainfall a year, it is sure dry in Florida right now! In the Panhandle, the majority of our annual rainfall occurs in in bunches during winter and early spring via near-weekly cold fronts, in the mid-summer as a result of afternoon thunderstorms, and periodically in late summer/early fall if a tropical system crosses our path. Mixed in, however, are two distinct, historically dry periods: the first one in April through mid-May (contrary to popular myth, if we have May flowers, they’re gonna have to make it without April showers) and the second right now in September and October. The prolonged second dry period that we’re experiencing now makes it difficult to manage the mostly unirrigated, low-input turfgrass common in rural Panhandle lawns and pastures. It is critical to enter these expected droughts with healthy turf and remembering to employ 3 simple management tips when it quits raining (although you should follow them year-round ideally) can greatly increase your turf’s resiliency!

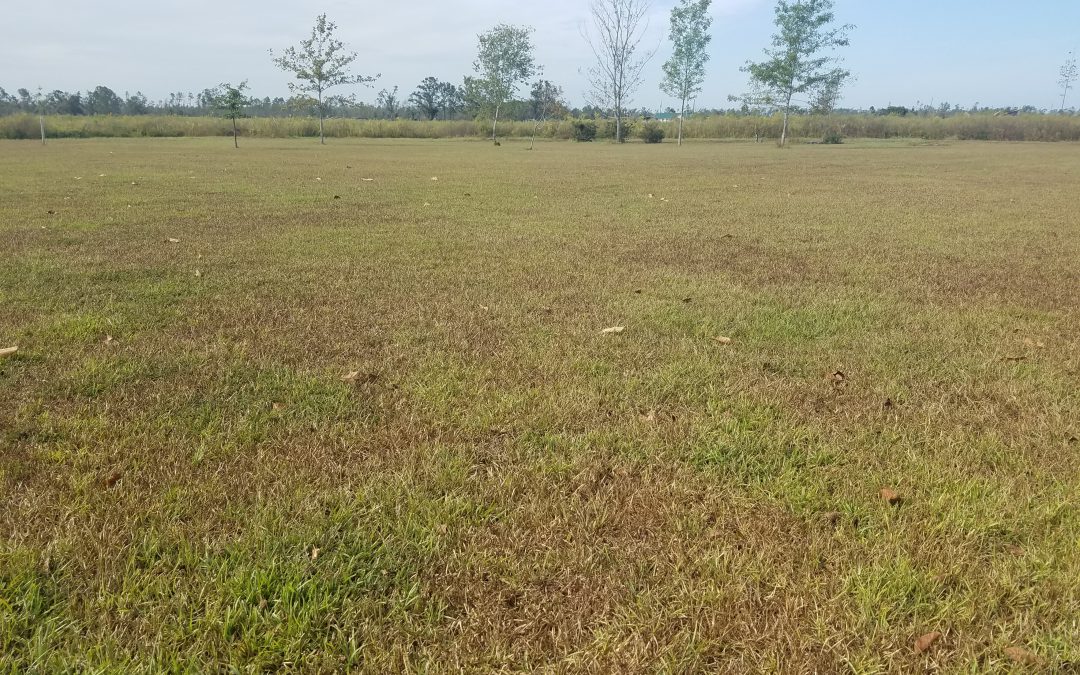
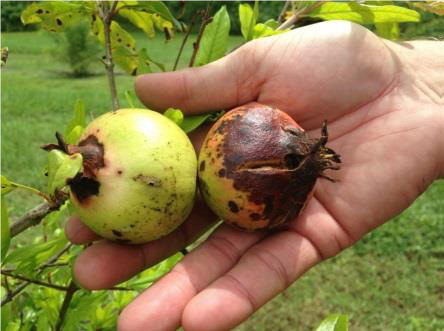
Unirrigated Centipdedegrass turf showing drought stress- Photo courtesy of the author.
Water Wisely – The average Florida turfgrass requires ¾-1” of water per week and we generally achieve that through rainfall. However, in our droughty months, supplemental irrigation can be a lawn saver, particularly in high traffic or more stressed areas of the yard. I realize that many of you, myself included, maintain large lawns without irrigation systems and it’s impossible to keep all your lawn well-watered during drought, but you can maintain the areas around your home, hardscapes and landscaped beds with the highest impact/visibility nicely! In these areas, put down no more than ¾” of water per irrigation event, a ballpark number that ordinarily allows the turf root zone to become saturated. Measuring your sprinkler’s water output is easily done by setting several straight-sided cans (tuna or cat food containers work great) under the sprinkler and timing how long it takes to achieve 3/4”. You might be surprised how much water you waste by leaving a sprinkler running for an hour or more!
Apply Herbicides Appropriately – Herbicides are a great item to have in the turf care toolbox, but if used incorrectly can be a waste of time and money at best, harmful to your turf at worst! Once turf and associated weeds become drought stressed (turning bluish gray, obvious wilting, leaves curling, etc.), it is too late for weed control with herbicides. There are a couple of reasons for this. First, when plants get stressed, they slow or stop their growth and focus on survival. This survival response prevents herbicides from being taken up properly and ultimately causes ineffectual weed control. Also, many herbicides specifically state on the product label that they should not be applied during certain conditions (drought, temperatures above 85-90 degrees, etc.). It is critical that one adhere to these label directions as applying the incorrect product in hot and dry conditions can cause volatility, drift to non-target plants, and in some cases, toxicity to turf you’re treating in. When it’s droughty like it is now, leave the herbicides in the chemical shed to prevent wasting your time and money and potentially damaging non-target plants!

Unirrigated Centipedegrass turf showing drought stress – photo courtesy of the author
Raise that Deck – Finally, one of the most important turf management strategies during an extended drought is to reduce mowing and raise your mower’s cutting height when/if you do mow. As mentioned above, plants are already stressed during a drought and physically chopping off a chunk of the turf plant stresses it further, causing an energy-intensive wound response when the plant is actively conserving resources for survival. Therefore, if you just HAVE to mow, raise the cutting height as high as possible to make the smallest injury possible on the grass and keep your mower blades sharp to ensure a clean cut, which will heal easier and require a smaller energy response from the plant.
During droughts like the one we’re currently in, there isn’t one silver bullet to keep your non-irrigated turf looking good. However, there are several strategies you can use throughout the year to get your lawn through dry times. Remember to water ¾”-1” per week when you can, where you can. Before you water, calibrate your sprinkler to ensure you put out enough water and don’t waste your time and inflate your utility bill by putting out too much! Reduce or eliminate use of herbicides as they are ineffective during stress periods and can harm your turfgrass. Finally, reduce or eliminate mowing and if you must mow, raise the deck! If you have any questions about getting your turf through the drought or other horticultural or agronomic topics, please contact your local UF/IFAS Extension Office!
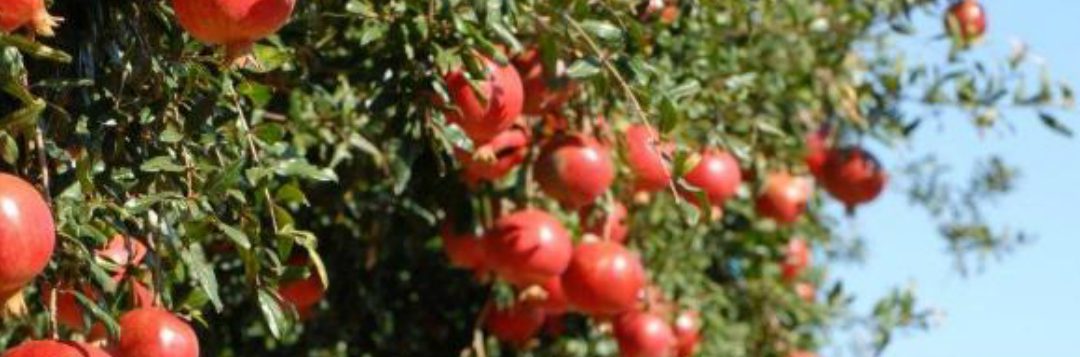
Last week at the Panhandle Fruit and Vegetable Conference, Dr. Ali Sarkhosh presented on growing pomegranate in Florida. The pomegranate (Punica granatum) is native to central Asia. The fruit made its way to North America in the 16th century. Given their origin, it makes sense that fruit quality is best in regions with cool winters and hot, dry summers (Mediterranean climate). In the United States, the majority of pomegranates are grown in California. However, the University of Florida, with the help of Dr. Sarkhosh, is conducting research trials to find out which varieties do best in our state.
In the wild, pomegranate plants are dense, bushy shrubs growing between 6-12 feet tall with thorny branches. In the garden, they can be trained as small single trunk trees from 12-20 feet tall or as slightly shorter multi-trunk (3 to 5 trunks) trees. Pomegranate plants have beautiful flowers and can be utilized as ornamentals that also bear fruit. In fact, there are a number of varieties on the market for their aesthetics alone. Pomegranate leaves are glossy, dark green, and small. Blooms range from orange to red (about 2 inches in diameter) with crinkled petals and lots of stamens. The fruit can be yellow, deep red, or any color in between depending on variety. The fruit are round with a diameter from 2 to 5 inches.
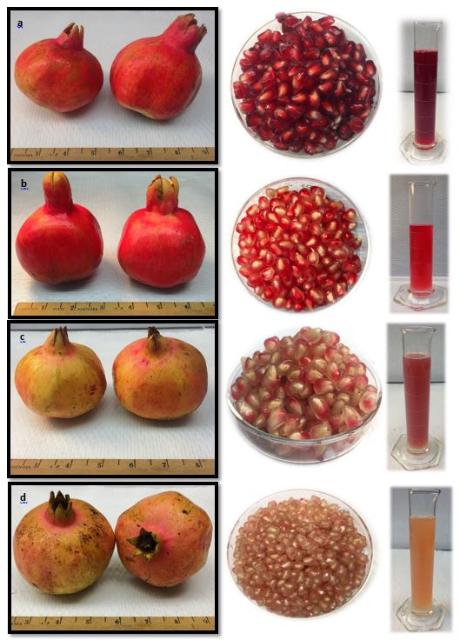
Fruit, aril, and juice characteristics of four pomegranate cultivars grown in Florida; fruit harvested in August 2018. a) ‘Vkusnyi’, b) ‘Crab’, c) ‘Mack Glass’, d) ‘Ever Sweet’. Photo Credit: Ali Sarkhosh, University of Florida/IFAS
A common commercial variety, ‘Wonderful’, is widely grown in California but does not perform well in Florida’s hot and humid climate. Cultivars that have performed well in Florida include: ‘Vkusnyi’; ‘Crab’; ‘Mack Glass’; and ‘Ever Sweet’. Pomegranates are adapted to many soil types from sands to clays, however yields are lower on sandy soils and fruit color is poor on clay soils. They produce best on well-drained soils with a pH range from 5.5 to 7.0. The plants should be irrigated every 7 to 10 days if a significant rain event doesn’t occur. Flavor and fruit quality are increased when irrigation is gradually reduced during fruit maturation. Pomegranates are tolerant of some flooding, but sudden changes to irrigation amounts or timing may cause fruit to split.

Two pomegranate training systems: single trunk on the left and multi-trunk on the right. Photo Credit: Ali Sarkhosh, University of Florida/IFAS
Pomegranates establish best when planted in late winter or early spring (February – March). If you plan to grow them as a hedge (shrub form), space plants 6 to 9 feet apart to allow for suckers to fill the void between plants. If you plan to plant a single tree or a few trees then space the plants at least 15 feet apart. If a tree form is desired, then suckers will need to be removed frequently. Some fruit will need to be thinned each year to reduce the chances of branches breaking from heavy fruit weight.
Anthracnose caused by Colletotrichum sp. to pomegranate fruit. Photo Credit: Gary Vallad, University of Florida/IFAS
Anthracnose is the most common disease of pomegranates. Symptoms include small, circular, reddish-brown spots (0.25 inch diameter) on leaves, stems, flowers, and fruit. Copper fungicide applications can greatly reduce disease damage. Common insects include scales and mites. Sulfur dust can be used for mite control and horticultural oil can be used to control scales.
The Irrigation Association (IA) kicks off the official start of this year’s campaign on Tuesday, July 9, 2019. The initiative promotes the social, economic and environmental benefits of efficient irrigation technologies, products and services in landscape, turf and agricultural irrigation.
Irrigation (agricultural and turf/landscape) accounts for 65-70% of total freshwater use in the United States. According to the Environmental Protection Agency’s (EPA) WaterSense program, the average American family household uses more than 300 gallons of water per day; roughly 30% of this occurs outdoors. Efficient landscape irrigation systems and practices dramatically reduce water being lost or wasted.
The starting point for improving the efficiency of a home landscape sprinkler system is to calibrate each zone (http://ufdc.ufl.edu/IR00003389/00001) and make adjustments and repairs. That includes the rain shut-off device.
Florida is one of the few states with a rain sensor law. The most recent version of the statute (2010) states the following: “Any person who operates an automatic landscape irrigation system shall properly install, maintain, and operate technology that inhibits or interrupts operation of the system during periods of sufficient moisture.” (Florida Statute 373.62). Regardless of the water source or age of the system, all in-ground irrigation systems must be connected to a functioning rain sensor of some kind.
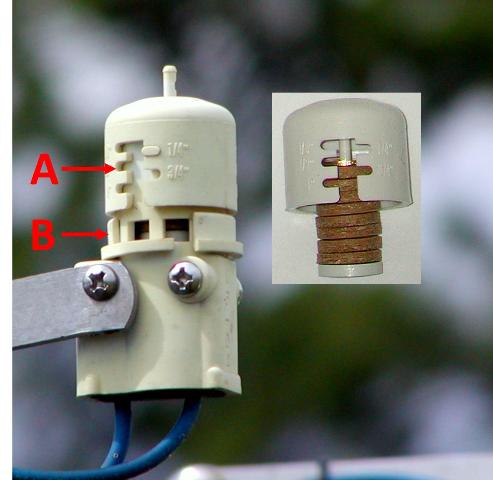
Expanding disk Rain Sensor
Expanded disk devices are the most popular rain sensor due to their low cost, ease of installation, and low maintenance. Traditionally, they are wired into the controller, but a wireless version allows for quicker installation and mounting up to 300 feet from the controller. These “mini-click” sensors contain disks made of cork that absorb rainfall and expand, triggering a pressure switch. The disk cover is rotated to adjust for the predetermined amount of rainfall required to trigger the switch. It should be set on ½ – ¾ inch, depending on soil type and rooting depth of irrigated plants. The switch continues to interrupt the scheduled controller as long as the disks are swollen. When the rain stops, the disks begin to dry out. Once they have contracted, the switch closes and the regularly scheduled irrigation cycle begins where it left off before the interruption. These small cork disks wear out in Florida’s heat and need to be replaced. By checking and repairing the sensor parts, the sprinkler system will operate much more efficiently. We have all seen irrigation systems running in pouring rain. Keep yours maintained to avoid this needless waste of water.
So, join the kids this summer. Go outside and play in the water. Turn on the sprinkler system and check it out. July is Smart Irrigation Month. Let’s see how efficient you can make your system and reduce the water waste in Florida.
Spring is in the air, and that means temperatures are warming up and tank-tops, shorts, and flip-flops will soon be your preferred attire. Once those highs are steadily in the 80s and 90s, any outdoor activity will become coupled with a bottle of water and the occasional ice-cold glass of lemonade.
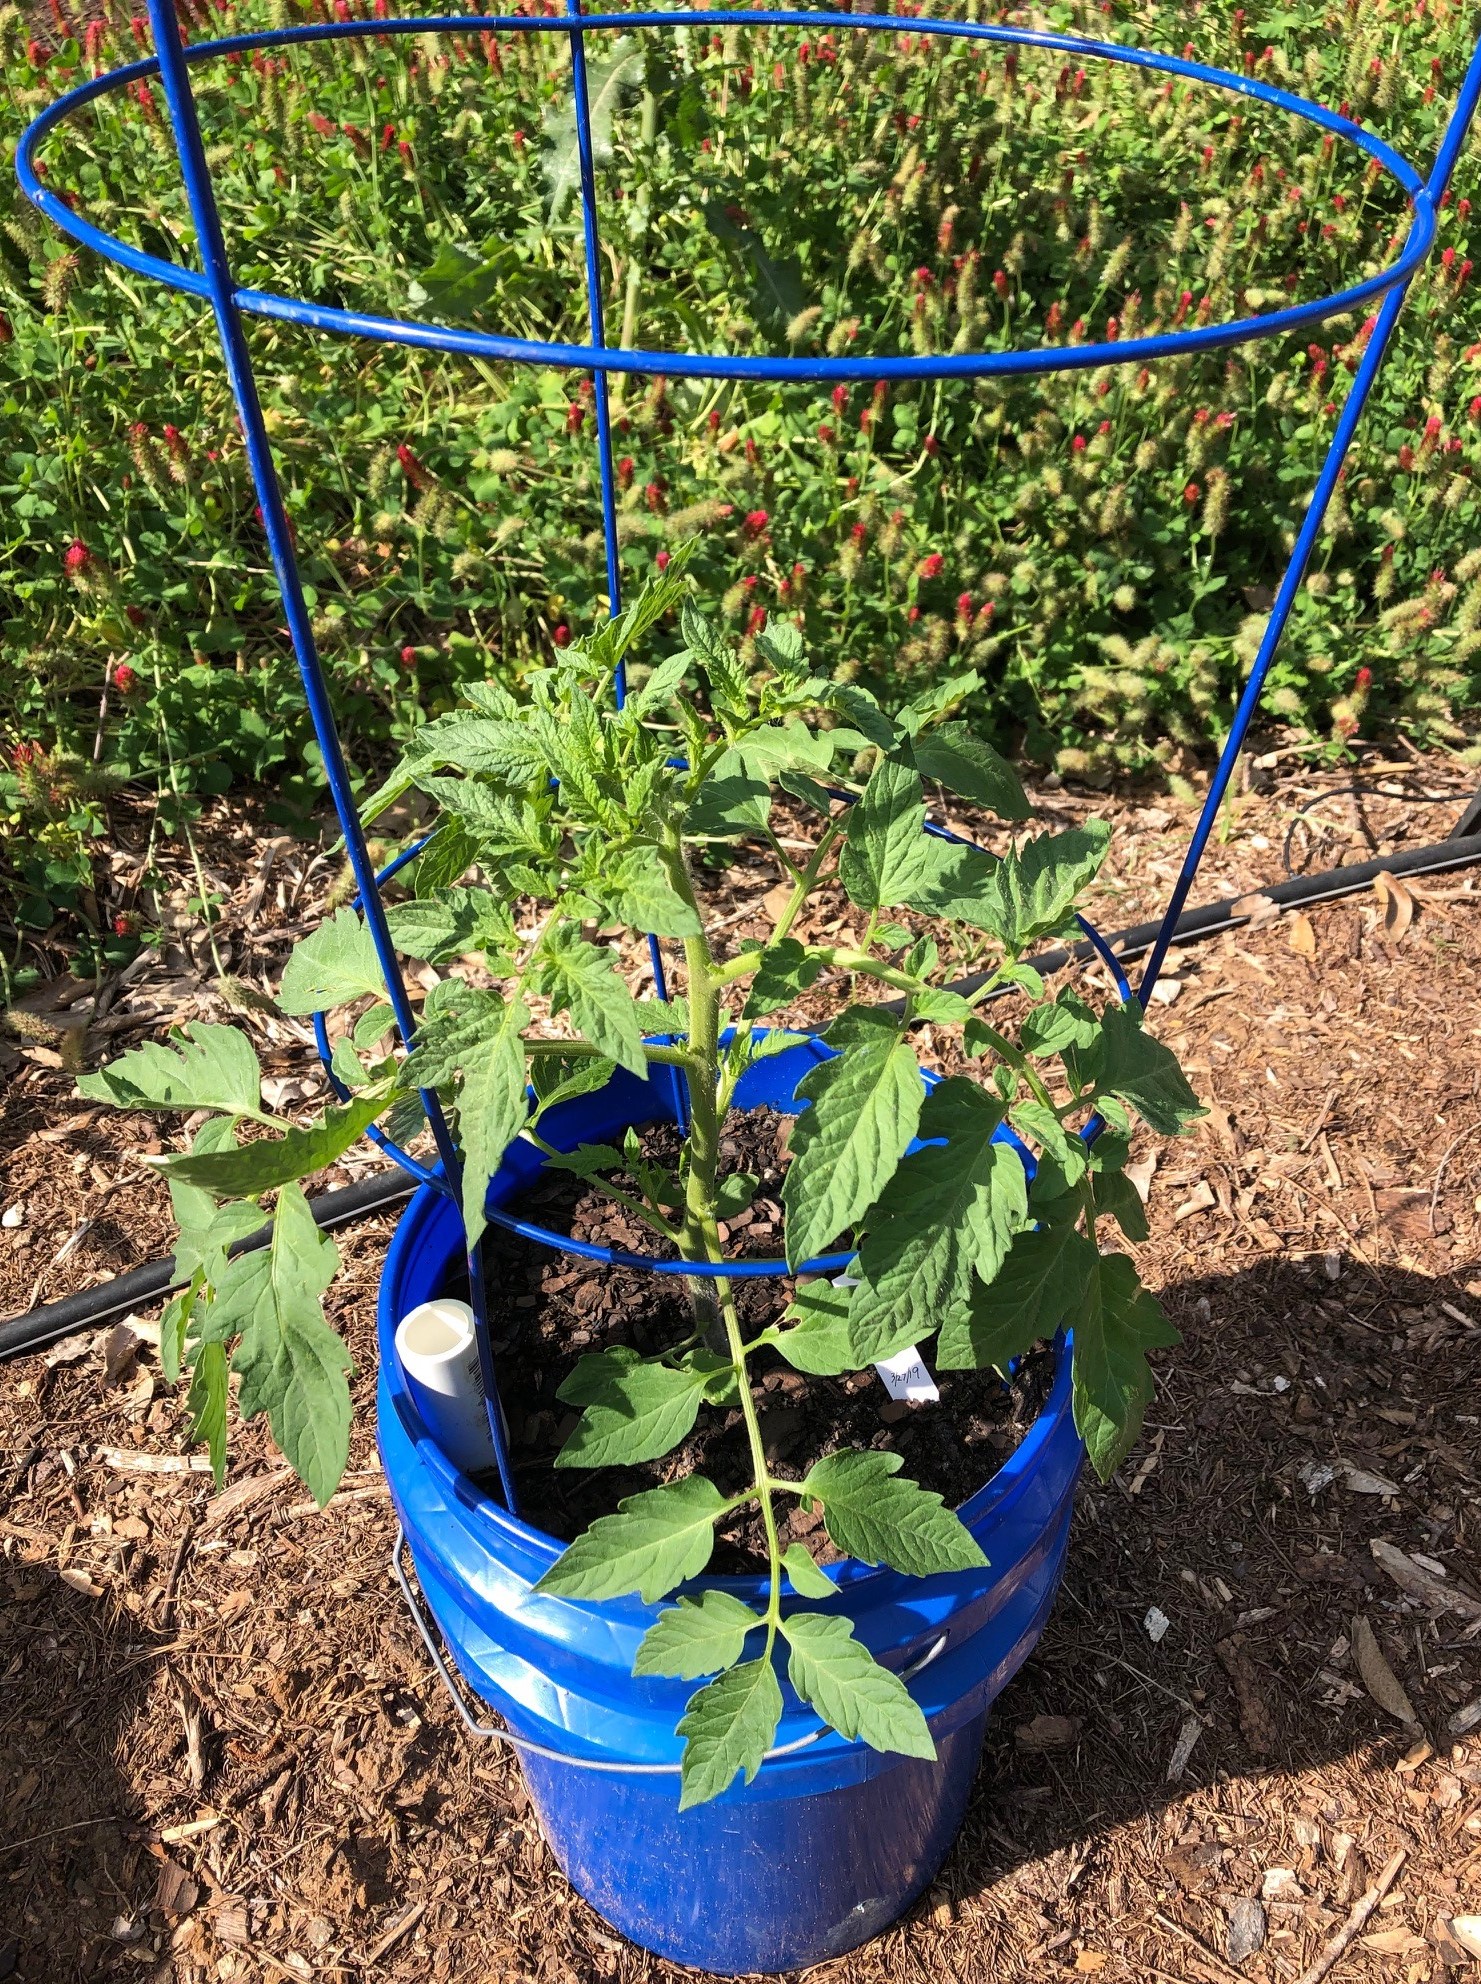
Self-watering containers allow you to continue gardening even if you plan on going on vacation this summer. Photo by Molly Jameson.
If you’re a gardener, you will notice the hot sun doing its best to dehydrate not only you, but your spring vegetable and flower beds too. And although April showers bring May flowers (and Mayflowers bring pilgrims) in many parts of the country, spring is historically one of the driest periods for the Florida Panhandle.
While spring in the Florida Panhandle can be quite dry, it is the relentless heat of summer that really drives up transpiration and evaporation rates. And herein lies the dilemma: the kids are soon to be on summer break, family vacations are on the horizon, and all your favorite summer veggies are on the brink of delivering their bounties.
If you do not have a reliable irrigation system and timer or the fortune of a very generous green-thumbed neighbor, you risk your hard work in the garden succumbing to the heat while you are away. If you find yourself sacrificing a summer garden in place of a vacation, don’t despair. There is a low-cost, homemade solution that can step in while you are away: a self-watering container garden.
Self-watering containers use the process of capillary action, where water molecules are pulled upward from a water reservoir into soil above and then into and through plant roots. The forces of cohesion, in which water molecules stay close together, and adhesion, in which water molecules “stick” to other substances, create this important phenomenon.
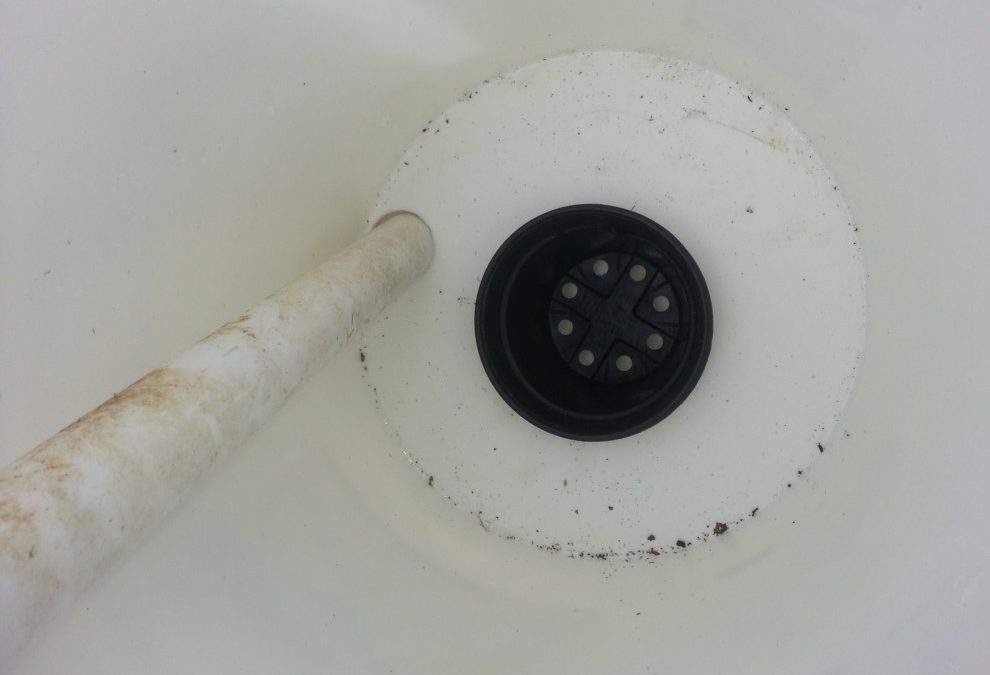
A wicking basket uses capillary action to pull water molecules up from the water reservoir and into the soil. Photo by Trevor Hylton.
While store-bought versions can be costly, you can make a self-watering container for less than $10 with just a few materials and tools. There are multiple designs for creating a self-watering container at home. Typically, designs include two five-gallon food-grade plastic buckets to hold the soil and plant; a knife or hole saw to access the water reservoir; a wicking basket or strips of cotton from an old towel, pants, or shirt to generate the capillary movement of water; a drill and drill bit for drainage; and a plastic pipe for easy filling of the water reservoir.
To make your own, view these Extension-produced self-watering container garden resources and follow the step-by-step instructions that work best for you:
Each time I travel to central and south Florida and observe the wonderfully flamboyant tropical flora, I am reminded of the unique and frustrating climatic characteristics of Northwest Florida. Our weather is tropical enough through the summer to sustain virtually everything our friends to the south grow, but winters north of the Big Bend are just cold enough to prevent long-term success with most tropical species. However, the genus that is maybe most synonymous with tropical color, the Hibiscus (it even has its own texting emoji!), contains several species that are hardy through our winters. The best landscape plant of these hardy Hibiscus species is creatively (sarcasm) called Hardy Hibiscus or Giant Rose Mallow (Hibiscus moscheutos) and is an absolute star in the Panhandle, bringing the beauty of the tropics to your yard!
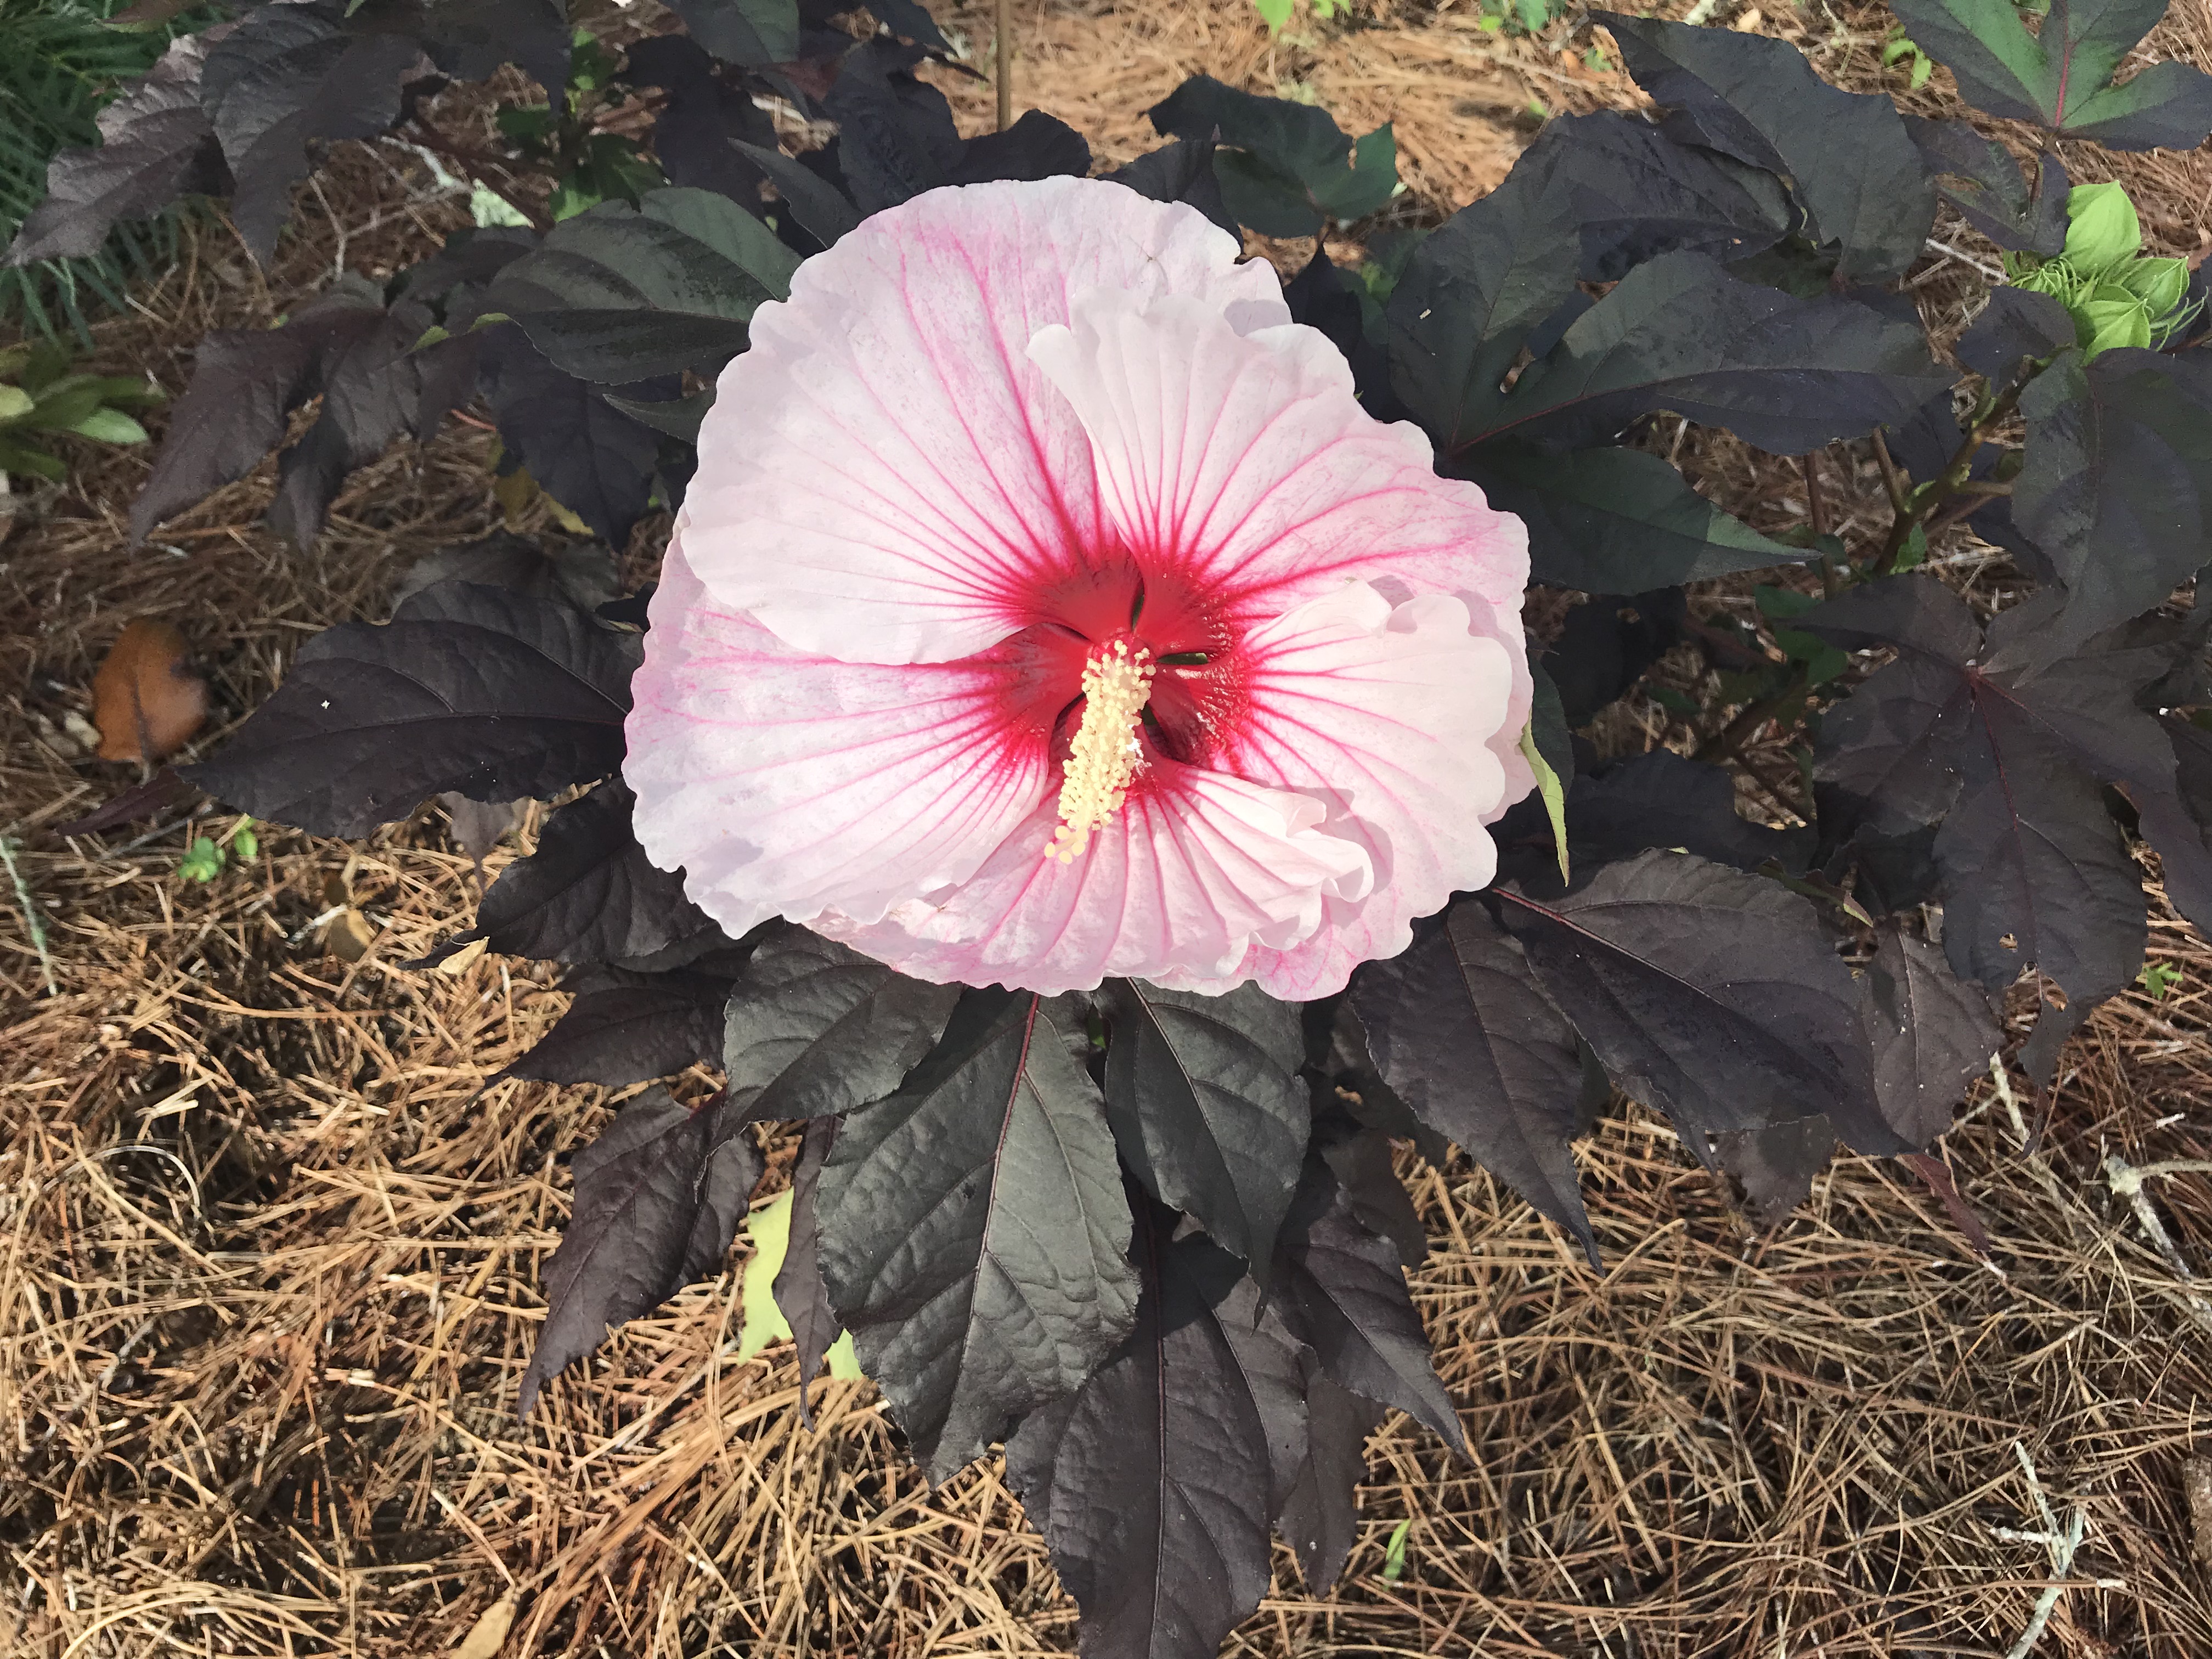
Hibiscus ‘Starry Starry Night’ – Photo courtesy Daniel Leonard
Rose Mallow is a native perennial species that occurs in sunny wetlands across the eastern U.S. This species can grow 7-8’ in height in its natural, unimproved state and possesses the largest flowers of any hardy perennial, some varieties easily eclipse 12” in diameter. Rose Mallows bloom through the heat of our long summers and return reliably each winter unfazed by frost. The flowers also happen to be a favorite of butterflies and hummingbirds and bring beneficial wildlife to the landscape. These characteristics and the trend towards the use of pollinator friendly, low-maintenance native perennials in landscapes quickly made Rose Mallow a jewel for plant breeders and now virtually all major horticultural brands have a line of Hardy Hibiscus available at garden centers, in varying sizes, flower color and leaf color/form. Recent breeding efforts have focused on introducing plants with enormous, richly colored flowers held on compact plants with attractive foliage. The results have yielded two series and three individual cultivars that I consider superior selections and are more than worthy of inclusion in your garden:

Hibiscus ‘Luna Pink Swirl’ – Photo courtesy Daniel Leonard
In addition to being gorgeous plants, Rose Mallows are extremely versatile in the landscape and could not be easier to grow. Because the size varies so greatly (from the diminutive 30” tall ‘Luna’ series to the 8’ tall unimproved species), there really is a place for one in every garden. I like to use the smaller cultivars in large containers to facilitate moving them around where their floral display has the greatest impact or to create a tropical effect where in ground plantings are not an option (pool decks, patios, etc). The larger cultivars make spectacular specimen plantings in perennial and shrub beds and even make a really dense, striking hedge (just know they disappear in the winter). Be sure to give them as much sun as possible, as this will enhance the number of flowers on each plant and darken the foliage on the cultivars with purplish/black leaves. Too little sun will result in fewer flowers and lighter green foliage. As wetland plants, Rose Mallows enjoy regular water, either from rainfall or irrigation; they will let you know when they need it – their large leaves readily wilt under drought stress, somewhat like Hydrangea.
For low-maintenance, native, pollinator friendly, cold-hardy tropical color, you need look no further than Rose Mallow. These perennial shrubs come in all sizes and colors and fit any landscape! Look for the above listed series and cultivars at better garden centers and online retailers and enjoy the oohs and ahhs elicited when people first get a glimpse of Hardy Hibiscus in your landscape! Happy Gardening!