
by Carrie Stevenson | Oct 28, 2015
Dirt, earth, humus, terra firma, soil—no matter what you call it, the ground below us is one of the most important substances on, well, Earth. As children, most of us stomped in mud puddles, dug holes, and played in sand boxes—the tactile experience of moving dirt around seems to appeal to humans innately. Just last weekend a local charity raised thousands of dollars by setting up an obstacle course for adults (and kids) called the “Mud Run,” with participants exiting the race completely covered in mud.

Kids have an innate appreciation for soil! Photo credit: Carrie Stevenson
Despite how much fun it can be to play in, the humble soil often gets overlooked. Mixtures of clay, sand, and loam seem less exciting when competing for attention with more charismatic natural phenomena such as colorful flowering plants or powerful top predator animals. Partially because of this status, soil scientists and agronomists declared 2015 the “International Year of Soils” with the goal of educating the general public on soil’s importance.
While most of us don’t think about soil on a regular basis, it is the literal foundation for producing healthy food and much of our clothing, along with fuel sources and many medicinal products. Without the small organisms and insects living in the soil to break things down, everything that ever died could still be slowly decaying on the surface of the earth. Soil is the primary player in recycling and making crucial nutrients such as phosphorus, nitrogen, and potassium available to plants. If you’ve ever tried to grow vegetables in the Panhandle, you know the high sand content and low nutrient levels of many of our native soils leave much to be desired. Gardeners know that a mix of organic materials is necessary to give soil enough structure, water-holding capacity, and nutrient sources to provide plant roots a healthy growing environment.
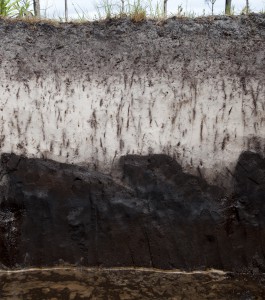
Soil profile. Photo courtesy UF/IFAS.
Soils are crucial to agricultural production, but they also play important environmental roles. On a global scale, soils are a “sink” for carbon and help combat climate change. At the same time, soils help reduce pollution through filtration and store water to recharge our drinking water aquifers. The water absorbed within healthy soils can help protect communities from both drought and flooding.
Pollution and erosion are among the biggest threats to healthy soil, and governmental agencies at all levels devote considerable funds and staff to protecting this life-giving limited natural resource. To learn more about soil and how to test for soil nutrients and pH, talk to your local Extension agent. There are many great online resources devoted to soil science, such as the Natural Resource Conservation Service’s new “Unlock the Secrets in the Soil” campaign, the USDA’s online soil surveys, and the UF IFAS Soil & Water Science Department newsletter, “Myakka.”
by Molly Jameson | Oct 6, 2015
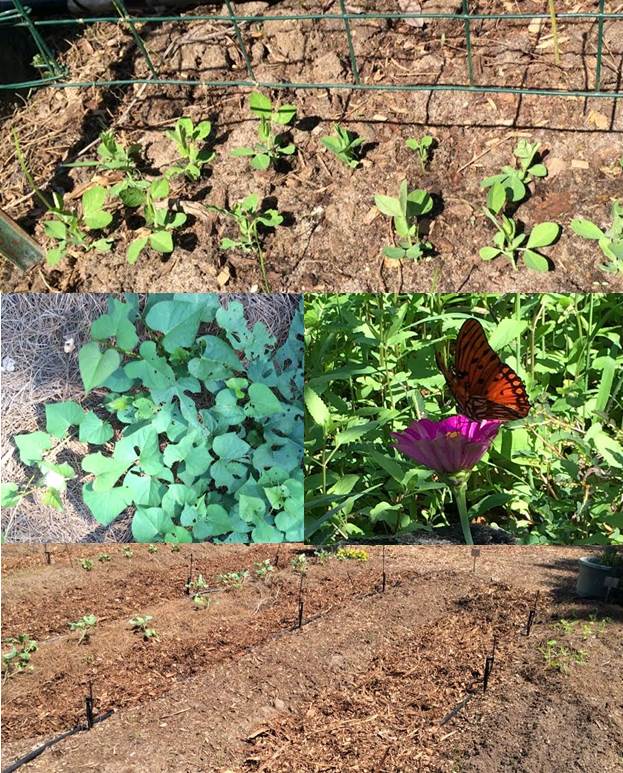
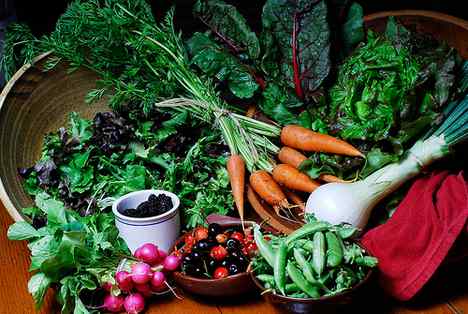
A diverse garden attracts pollinators and helps balance soil fertility. Photo by Molly Jameson.
The kids are back to school and you know what that means – everyone in the house will soon come down with the sniffles and a sore throat. But what if when the kids came home, Jack went straight to his room, Susie to her room, Dad went to work in the garage, and Mom read in the office? This separation – along with good hand washing techniques – may be what prevents the entire house from turning into a sick ward. Since humans are very closely related genetically, we are susceptible to many of the same diseases. Well, believe it or not, plant families operate very similarly. If you keep planting crops together that are in the same plant family, they will be susceptible to the same diseases.
Although it can be challenging to keep your family from getting sick, there are certain practices in the garden that can go a long way in keeping your vegetable plants disease free and healthy. One easy step you can take is implementing a crop rotation. By separating crops that are in the same family during the season and not planting the same plant families in the same locations year after year, you not only help prevent diseases, but it will also help control insects, balance nutrients, and improve the condition of your soil.
Probably the most important reason to use a crop rotation system is to prevent plant diseases. For example, if you grow tomatoes in the same section of your garden year after year, certain pathogens that attack tomatoes, such as some bacterial spots and blights, can overwinter in your garden, and will have an easily accessible host (next year’s tomatoes) the following spring. Tomatoes are in the nightshade family, along with crops such as potatoes, peppers, and eggplants. If these crops are planted in the same location, they then become susceptible to the same pathogens, and the cycle continues.
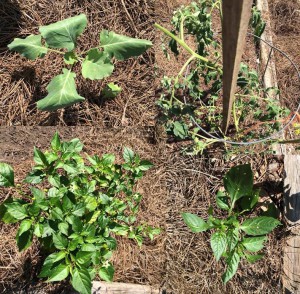
Turn your garden into a revolving collage. Photo by Molly Jameson.
Many pests in the garden are also attracted to many of the same crops. For instance, the mustard or brassica family, which includes vegetables such as broccoli, kale, collards, and turnips, easily attract aphids. By regularly rotating your brassicas, you can help break the life cycles of these garden pests.
Another important aspect of crop rotation is considering the fertility and health of your soil. Different crops require different types and amounts of nutrients to grow. Legumes, such as peas and beans, actually “fix” nitrogen from the atmosphere, which can increase the nitrogen in your soil, reducing your need to add fertilizers. You would then want to follow legumes with plants that require a lot of nitrogen, such as lettuce or broccoli. Subsequently, follow heavy feeders with light feeding root vegetables, such as onions or carrots, which are good nitrogen “scavengers.”
Root crops also help break up the soil, which is then advantageous to legumes, which thrive in loose soil. Growing leguminous “cover crops,” such as clovers and alfalfa, is an excellent way to improve the fertility and organic matter content of your soil. Incorporate the biomass of the cover crops into your soil prior to seed production for optimum benefits.
Remember that the key to both a healthy garden and a healthy diet is diversity! Incorporating many different botanical families into your garden will help break disease life cycles, attract beneficial insects, effectively utilize soil nutrients, and improve soil composition. In turn, eating many different types of vegetables will ensure that you are getting the full spectrum of vitamins and minerals. Which, by the way, will help keep your family healthy and strong and able to combat those pesky colds!
by Eddie Powell | Feb 17, 2015

Correct way to pull a soil sample is the use of a soil probe
Photo Credit : Eddie Powell
Many home gardeners ask, why take soil samples? Soil sampling must be done prior to the planting of crops to determine the correct amount of nutrients and lime to add to the soil.
It is best to take soil samples late in the fall or early winter of each year because certain additives, such as lime, require several fallow months before fully activated in the soil. Thus the 2-3 months lead time will allow lime, if needed, to react with the soil in time for spring planting.
Soil testing also determines proper fertilization rates support good plant growth, based on what is being grown. A soil test does not specify when and how often fertilizer should be applied, just what quantity. Additionally, soil tests do not test for nitrogen.
Information about timing fertilization is available at your local Extension Office. It is best to consult with your local extension agent once you have received your soil results so that he or she can advise you on the proper steps to take as to when and how to apply these items to the soil.
Soil testing will save you money and is probably the most important step that is taken in preparing your soils for good plant support. If this step is left out of the soil preparation stage, then it will be impossible to determine the proper amounts of nutrients to add to the soil to support a healthy plant.
Remember now is the time to do your soil testing for the spring. Contact your Local Extension office for any questions on getting a soil test.
by Taylor Vandiver | Jan 22, 2015
You’re digging up a ridiculously stubborn patch of Florida betony when an earthworm crawls across your path. As you break apart the soil in your hands a world of active organisms is being sifted through your fingers. Fertile soil is teeming with beneficial microbes. It is estimated that there can be billions of microbes in a single gram of soil.
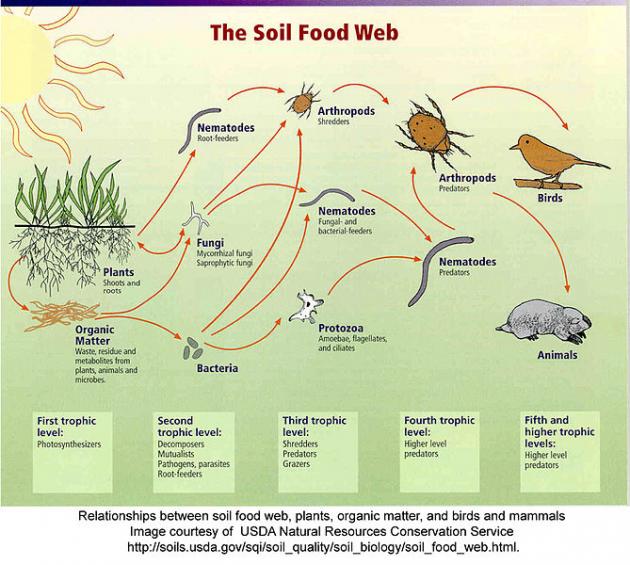
Bacteria, fungi, and protozoa are major players in soil microbial processes. They perform a variety of functions beneficial to soil and the plants growing in that soil. Other soil organisms of importance are nematodes, arthropods, and earthworms.
Soil Food Web. Photo courtesy USDA-NRCS.
Rather than being an inert material, soil houses a dynamic living ecosystem. Most soil organisms are too small to be seen, however they are still performing a great service to gardeners in many ways. These organisms are vitally important to improving the health of our soils. They also play a key role in making nutrients available to plants.
Soil organisms are naturally active during certain times of the year. Most are active during late spring and early summer when the soil is warm and moist. If the soil dries out during the summer months, soil organism activity will decline. During fall months, if there is rain or snow that moistens the soil while it is still warm, soil organisms may resume partial activity. As the soil cools in the fall, many organisms go dormant. It is important for gardeners to note that soil organisms help breakdown certain fertilizers and during the cool, dry months these fertilizers, if applied, will be less available for plants to take up.
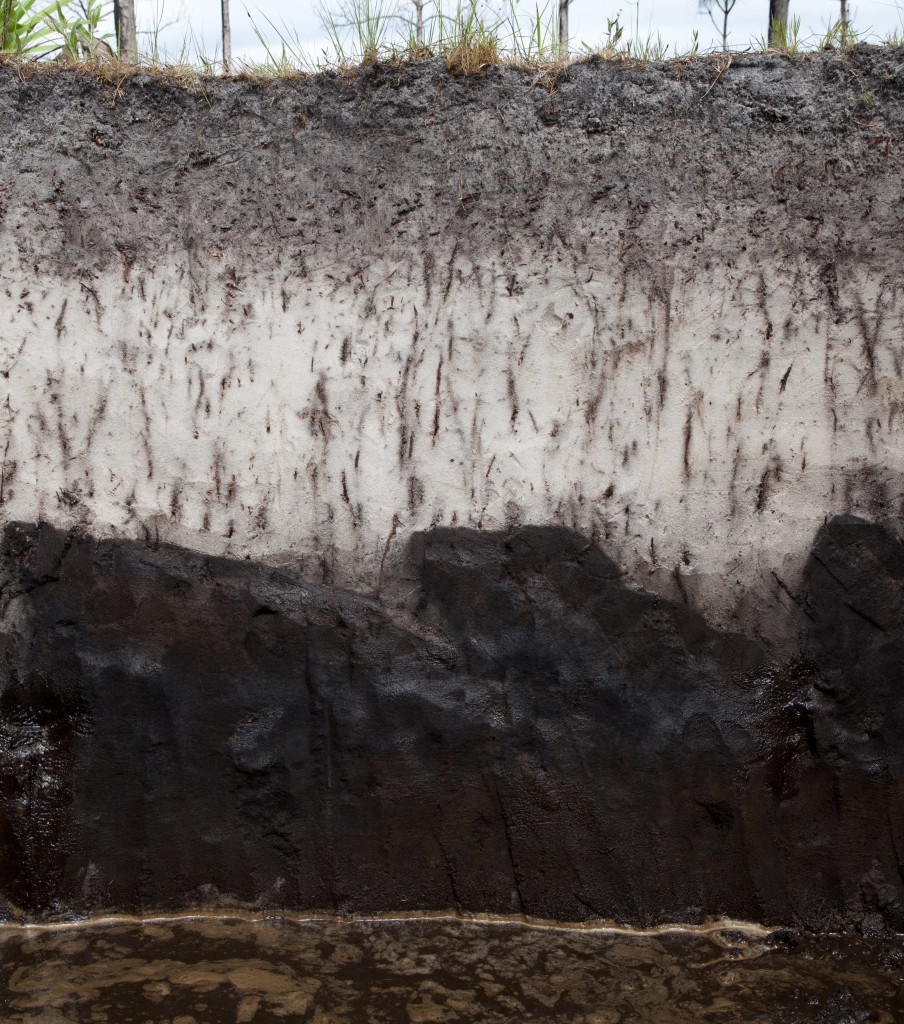
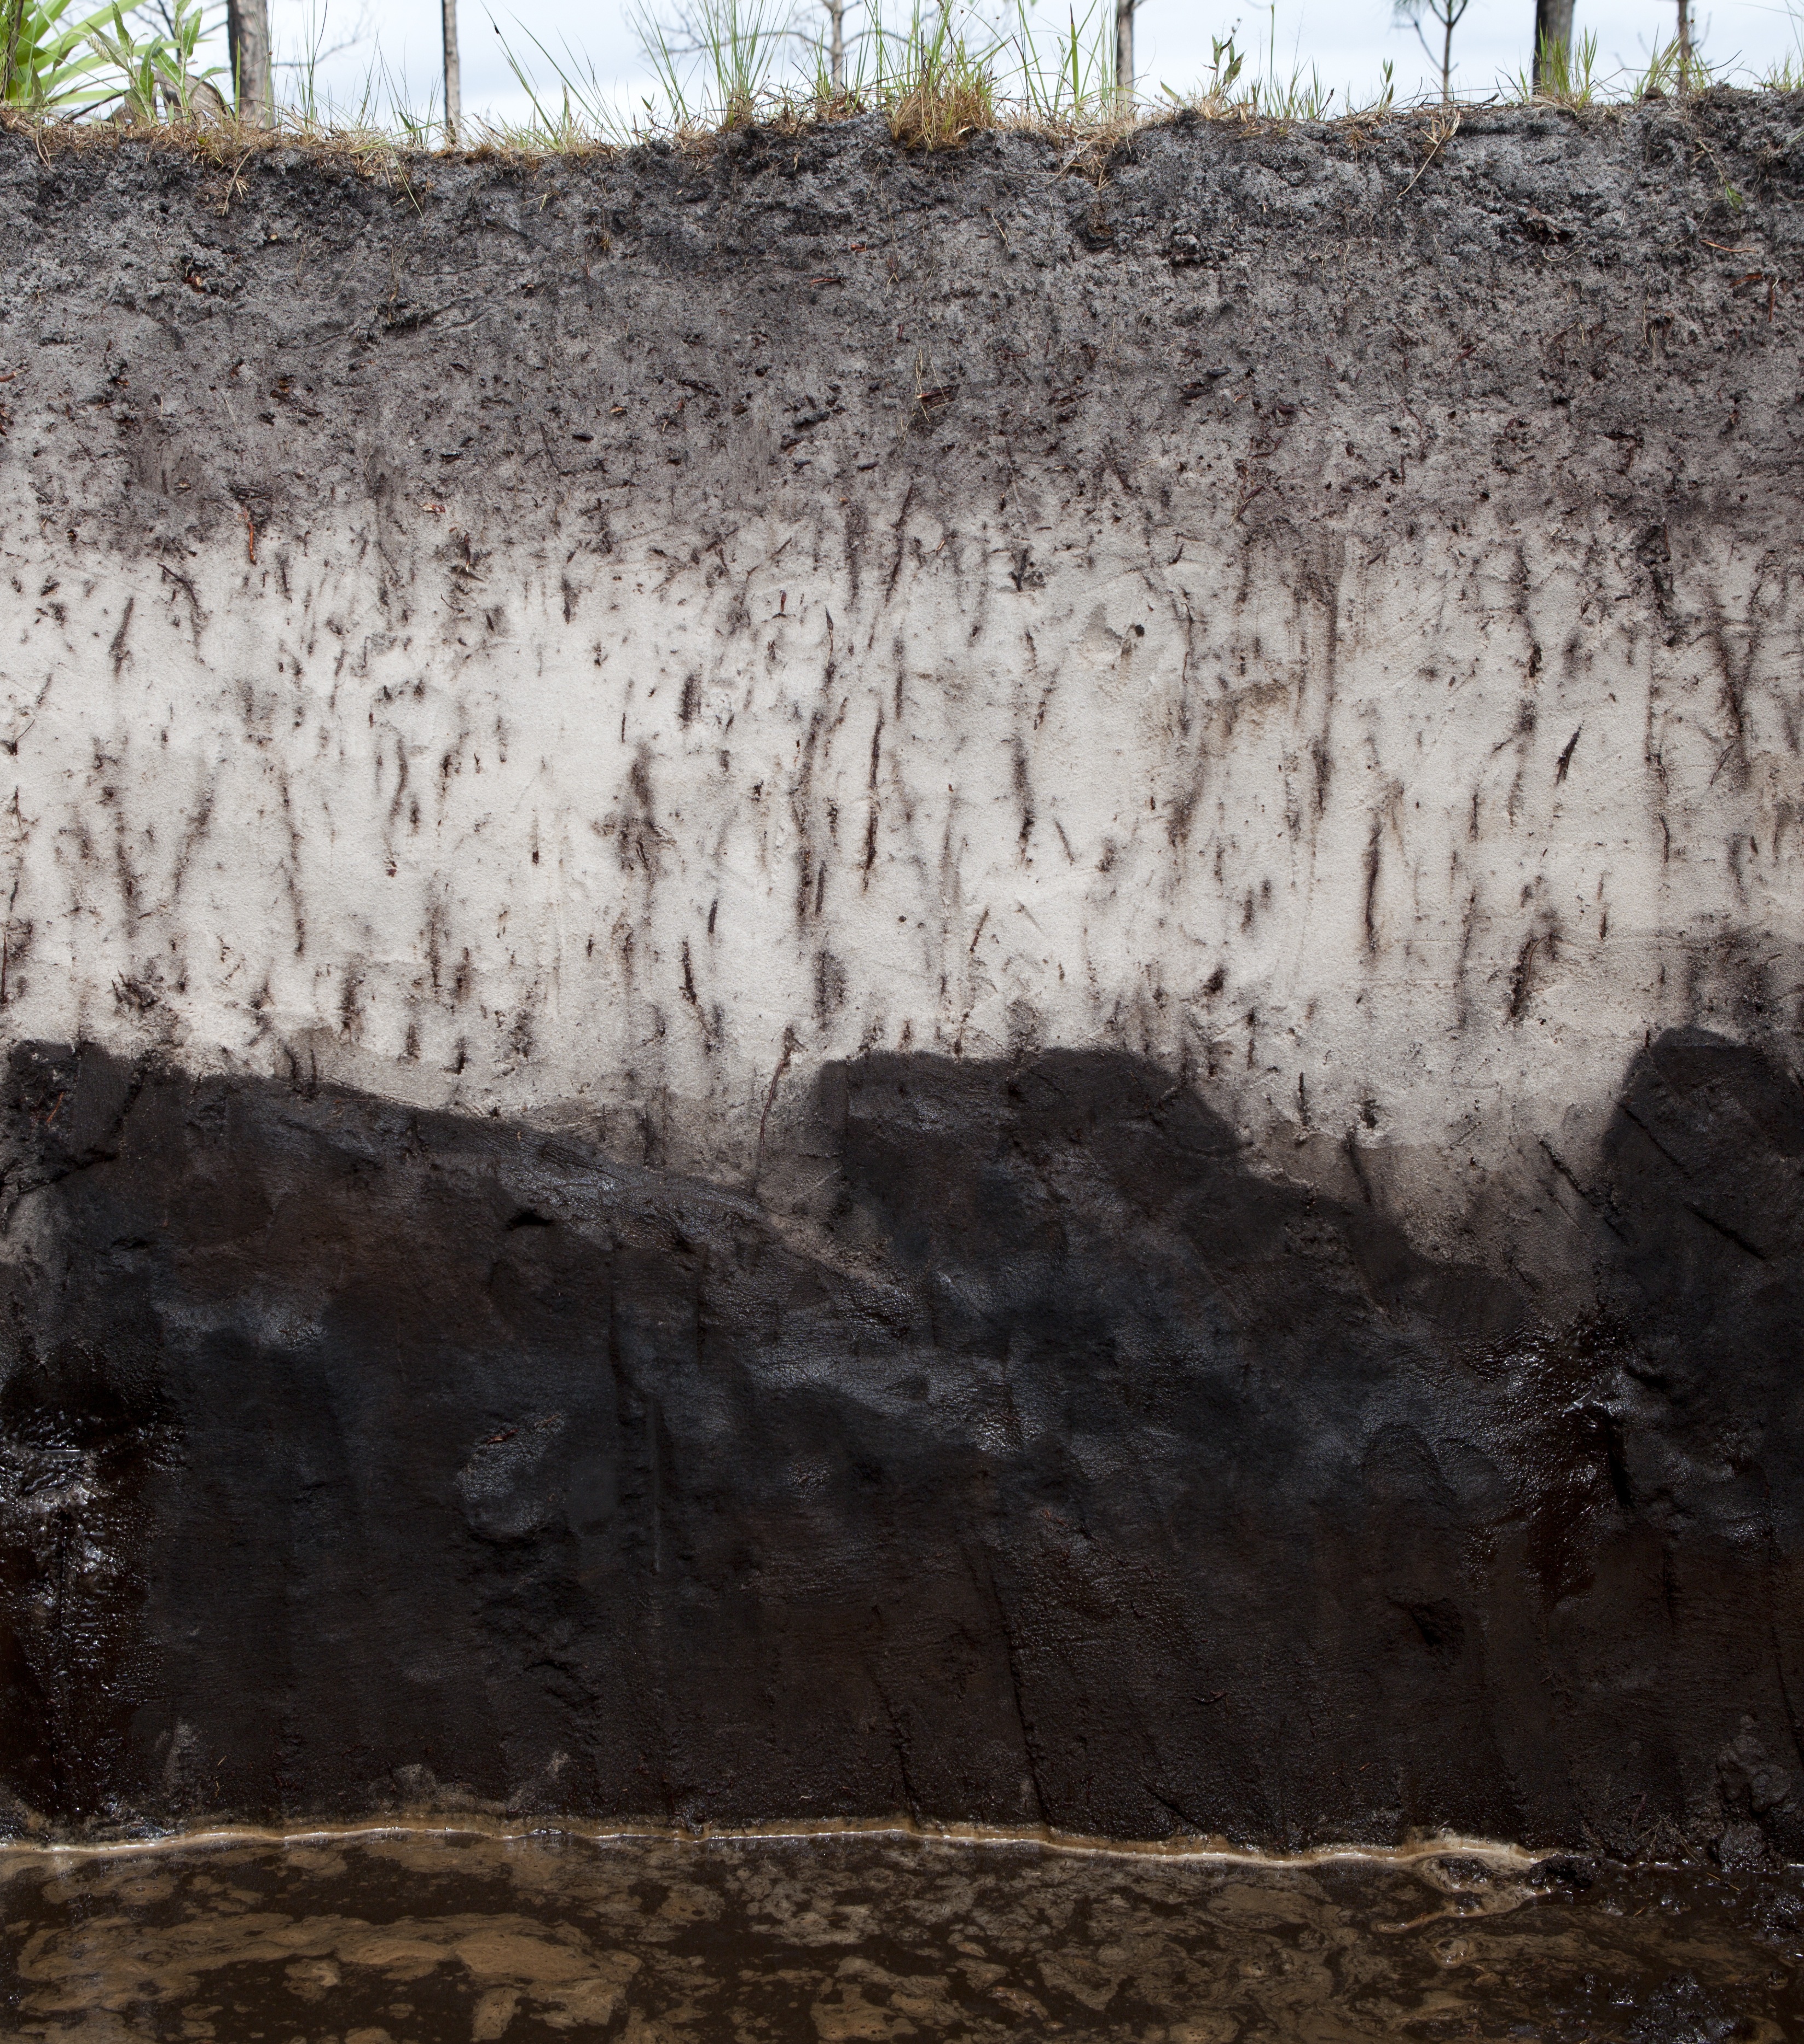
Soil profile. Photo courtesy UF/IFAS.
Soil organisms are generally placed within three categories: organisms that are beneficial to plants, organisms that play a neutral role in plant growth, and organisms that are harmful to plants. Creating a favorable environment for beneficial soil organisms can improve plant growth and reduce garden maintenance. Encouraging their efforts is key to building a healthy fertile soil. Here are some ways you can encourage beneficial organisms in your soil:
- Add organic matter to the soil. Soil organisms require a food source from soil amendments (compost, crop residues) and/or mulch.
- Water effectively. Soil organisms are happiest in an environment that is damp, but not soggy. (Avoid over-irrigation because waterlogged soils will be harmful to beneficial soil organisms)
- Avoid unnecessary tilling, as it can destroy the mycorrhizae and soil structure. Instead of tilling, mulch for weed control.
- Avoid pesticide applications that aren’t necessary. Some fungicides, insecticides and herbicides are harmful to various types of soil organisms.
by Mary Salinas | Dec 16, 2014
This is the time of year when leaves are turning shades of yellow and red and falling from the trees. And this spurs homeowners to get out there with their rakes and rid them from their lawns. This is a good practice as too many leaves will shade out the grass and decrease the quality of the lawn come next spring. So, go ahead and rake them up. However, think about using as many as you can as mulch in other parts of your yard.

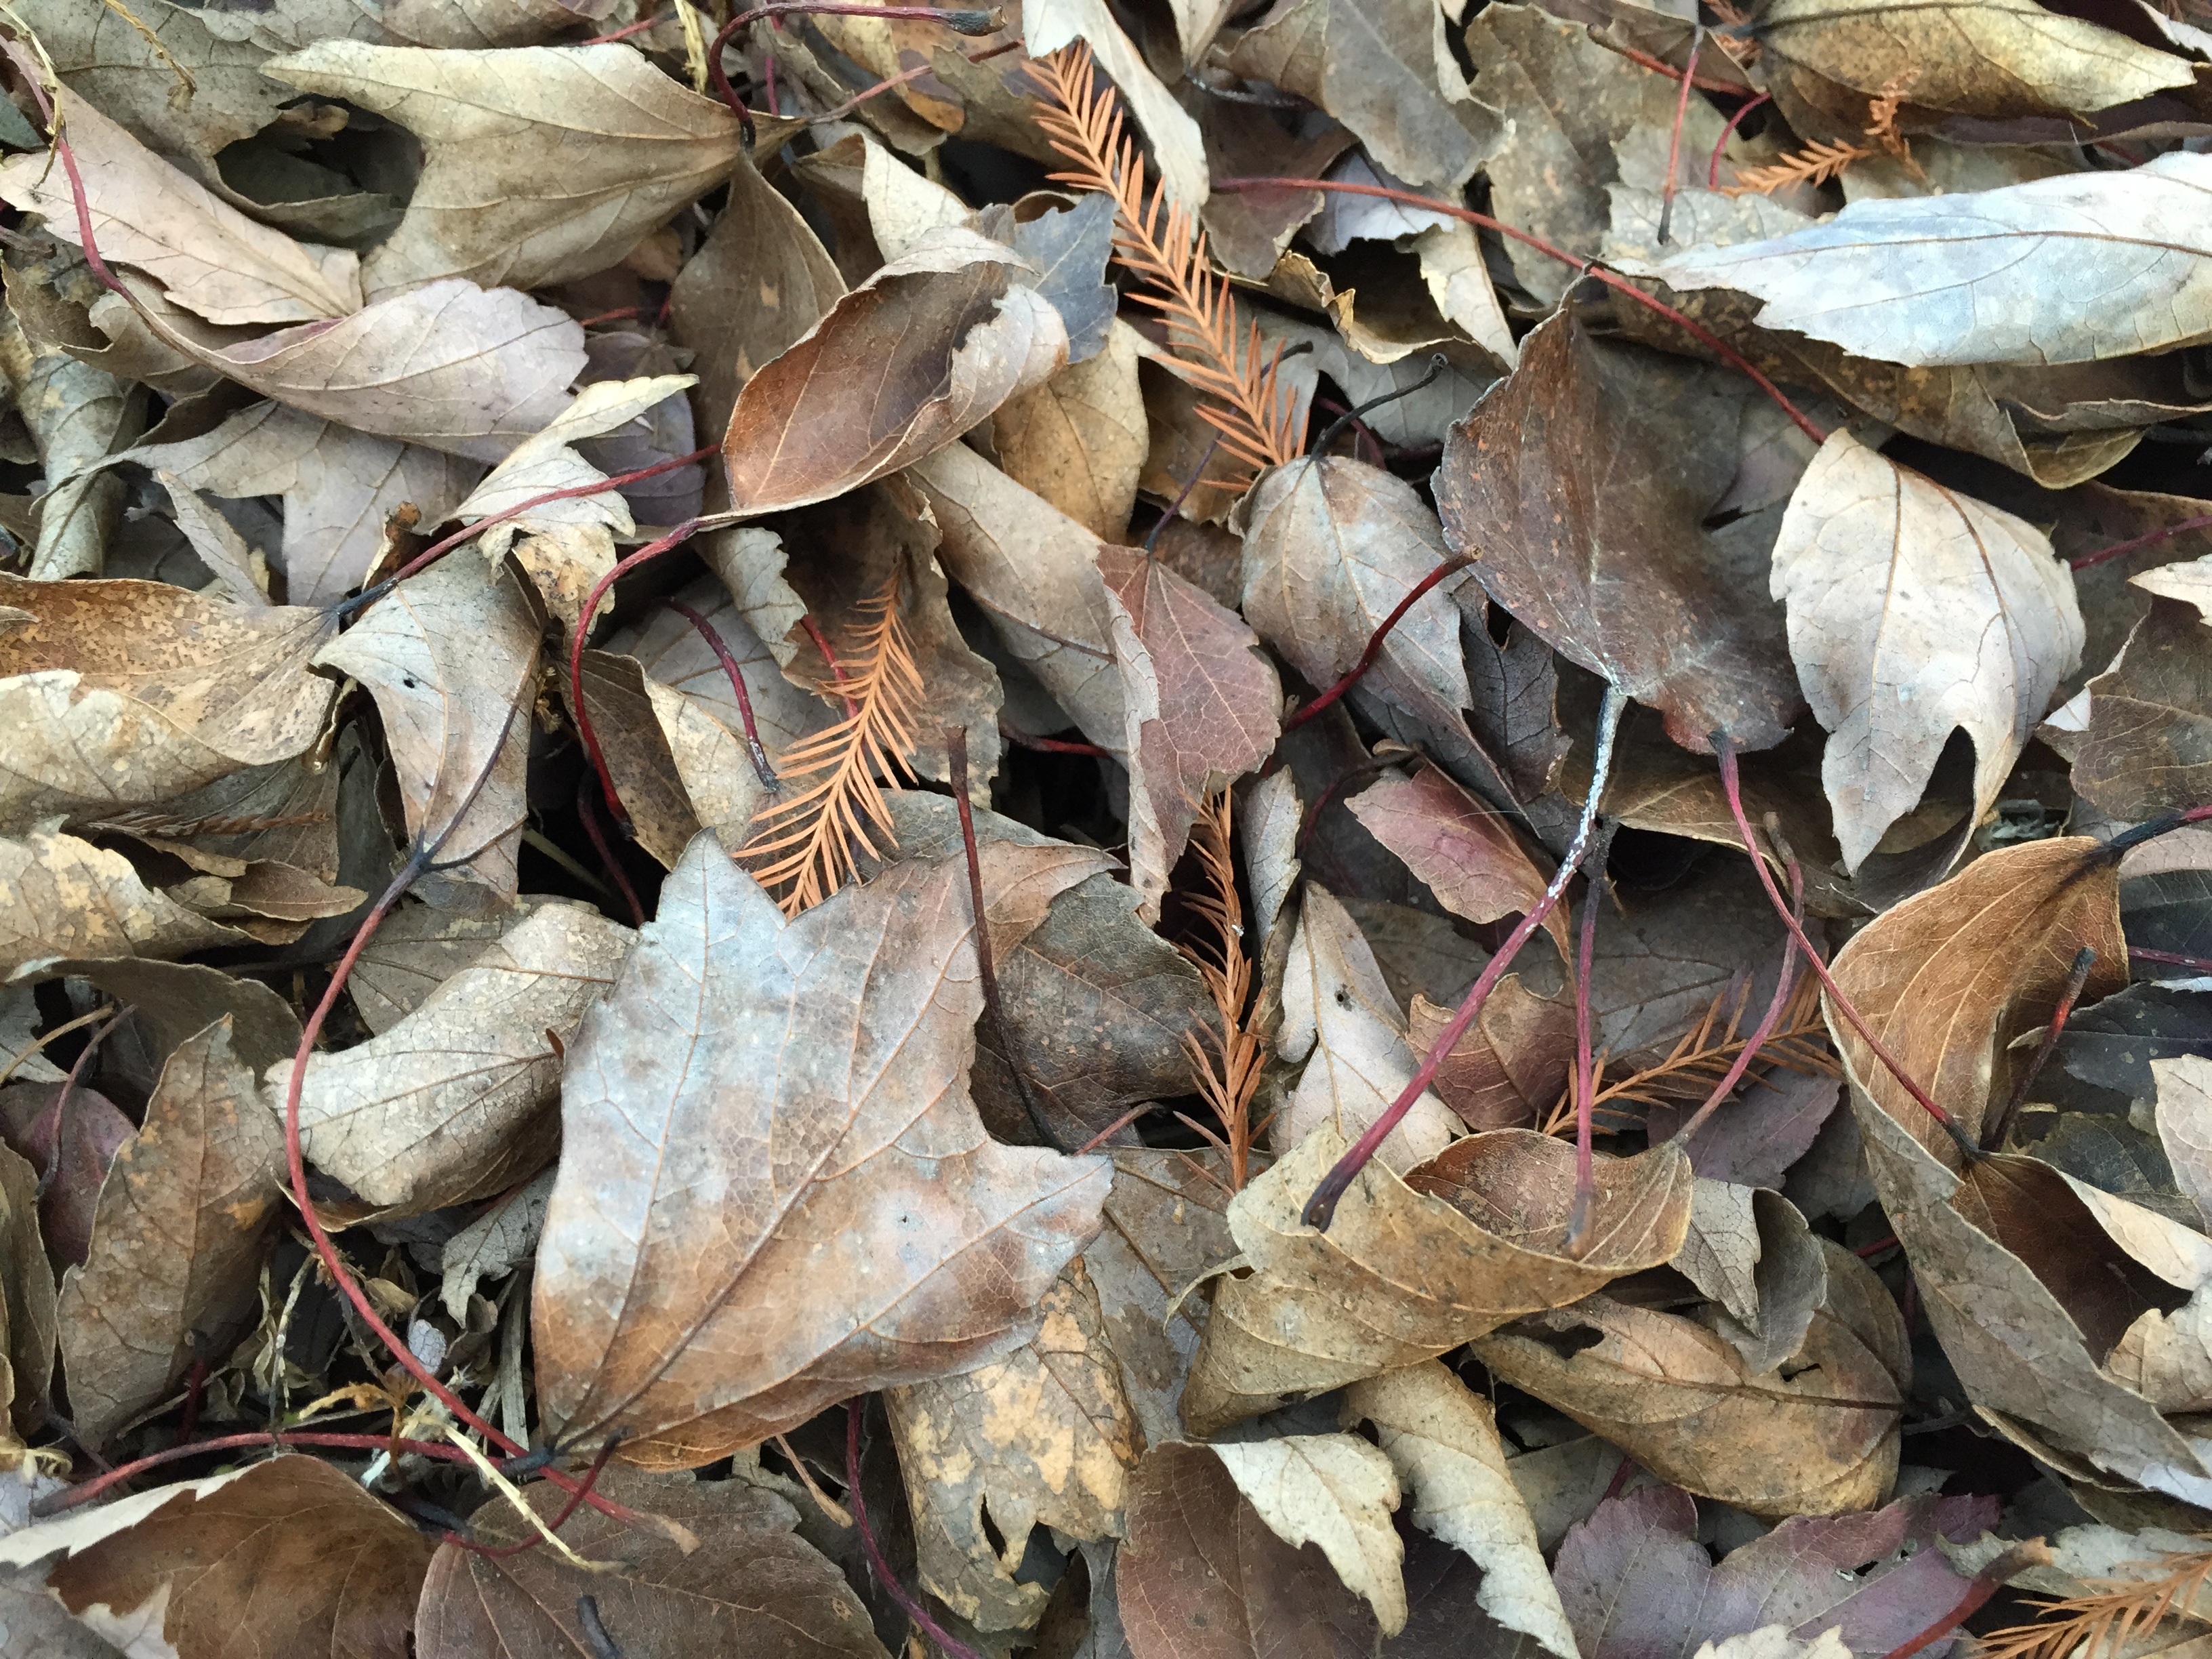
Leaves as mulch. Photo credit: Mary Derrick UF/IFAS Extension.
Leaves can be placed as mulch in landscape beds “as is” or chopped up with your mower or shredder into finer pieces and then spread around perennials, shrubs and trees. When chopped up or shredded, they tend to stay in place much better and don’t blow around when it gets windy. As the leaves break down over time, their nutrients are released and become available; that’s free fertilizer for your landscape plants. Leaves as mulch do have a natural look in the landscape, so if you prefer a more formal or polished look, you can spread a thin one-inch layer of a commercial mulch over the leaves.
Organic mulches (those made from plants) offer many benefits. They add organic matter and improve soil fertility as they decompose, thus reducing the need for added fertilizers. Mulch helps to maintain soil moisture so less frequent irrigation may be needed. Soil-borne disease can also be prevented as the soil does not splash up on the bottom leaves of plants during periods of rain. One of the favored reasons to use mulch is to prevent weeds in your landscape beds. And, of course, mulch is much prettier to look at than bare ground!
So how deep should you apply mulch? University of Florida experts advise a 3 to 4 inch layer of mulch around shrubs and trees. However, keep mulch from setting against the stems and trunks as that can cause moisture and pests to adversely affect them. Place just a thin one-inch layer of mulch over the rootballs of your plants.
Using leaves as mulch recycles a natural resource and saves you money, enriches your soil, fertilizes your plants and keeps them out of the local landfill.
For more information:
Landscape Mulches: What Are The Choices in Florida?
Mulch Recommendations
by Roy Carter | Sep 23, 2014
Healthful outdoor exercise, a feeling of accomplishment, and potential saving on the family food bill are good reasons why more and more Floridians are turning to home vegetable gardening.
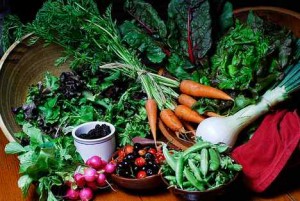
Image Credit: FAMU
Usually, the most physically challenging part of a vegetable gardening project is to get the soil ready for planting. However, whatever you do, don’t give in to the temptation to cut corners on this phase of the operation. If you do a poor job of preparing the soil, you can expect poor results from your garden, even if you work hard on planting and cultivation. If you’re planning a large garden, you may want to rent a rototiller or even a small tractor and plow, to use in preparing the soil. But, for a small backyard garden, you can do the work with a spade or shovel.
The time to begin soil preparation depends to some extent on what’s growing on your garden site now. If you have heavy weeds, or a cover crop, you intend to turn under; you should start a month to six weeks before planting. This also is the time to add lime, if needed.
If you’ve kept the garden site fallow, or you plan to remove all vegetation and no lime is required, you could prepare the soil and plant within two or three days. However, if you plan to work extra organic matter into the soil before planting, you should start two or three weeks ahead of time.
To prepare the soil, dig down six to eight inches, and turn each shovelful completely over. If you’re turning in weeds, or a cover crop, you should remove all the woody plant material as it won’t decompose very well.
After the soil is turned, break clods and level with a rake. Do this as soon as you can, to prevent excess drying of the soil, and to keep good soil texture. This is important, because a finely pulverized soil surface will make planting easier, give you better seed germination and help insure a more even stand of vegetables. It’s especially important to have fine textured soil when planting small-seeded crops, like carrots.
In some soil, it’s also necessary to add some kind of liming material well before planting at the same time you turn the soil. Lime reduces soil acidity. Without going into a chemistry lesion, lime adds calcium to the soil and makes minor elements move available to plants. The most commonly used form of lime is dolomite. Besides calcium, dolomite provides magnesium another important plant nutrient. [important]You should add lime only when a soil test indicates the need for it. Too much can be as bad as too little. [/important]
If a soil test indicates your soil is too sweet, or alkaline, you may need a special fertilizer program. The best thing to do before liming or adding sulfur to reduce soil pH is consult your local County Extension Office.
To summarize briefly, to have a good garden, you need to prepare the soil properly. Be sure to start far enough ahead of planting to allow organic matter to decompose fairly well. Turn the soil to a depth of six or eight inches. Make sure you have a level, finely textured surface before planting. If a soil test indicates lime is needed to give your garden plot the right acid level, it should be applied when your turn the soil.
For more information on garden plot preparation:
Florida Vegetable Gardening Guide
Soil Preparation and Liming for Vegetable Gardens


