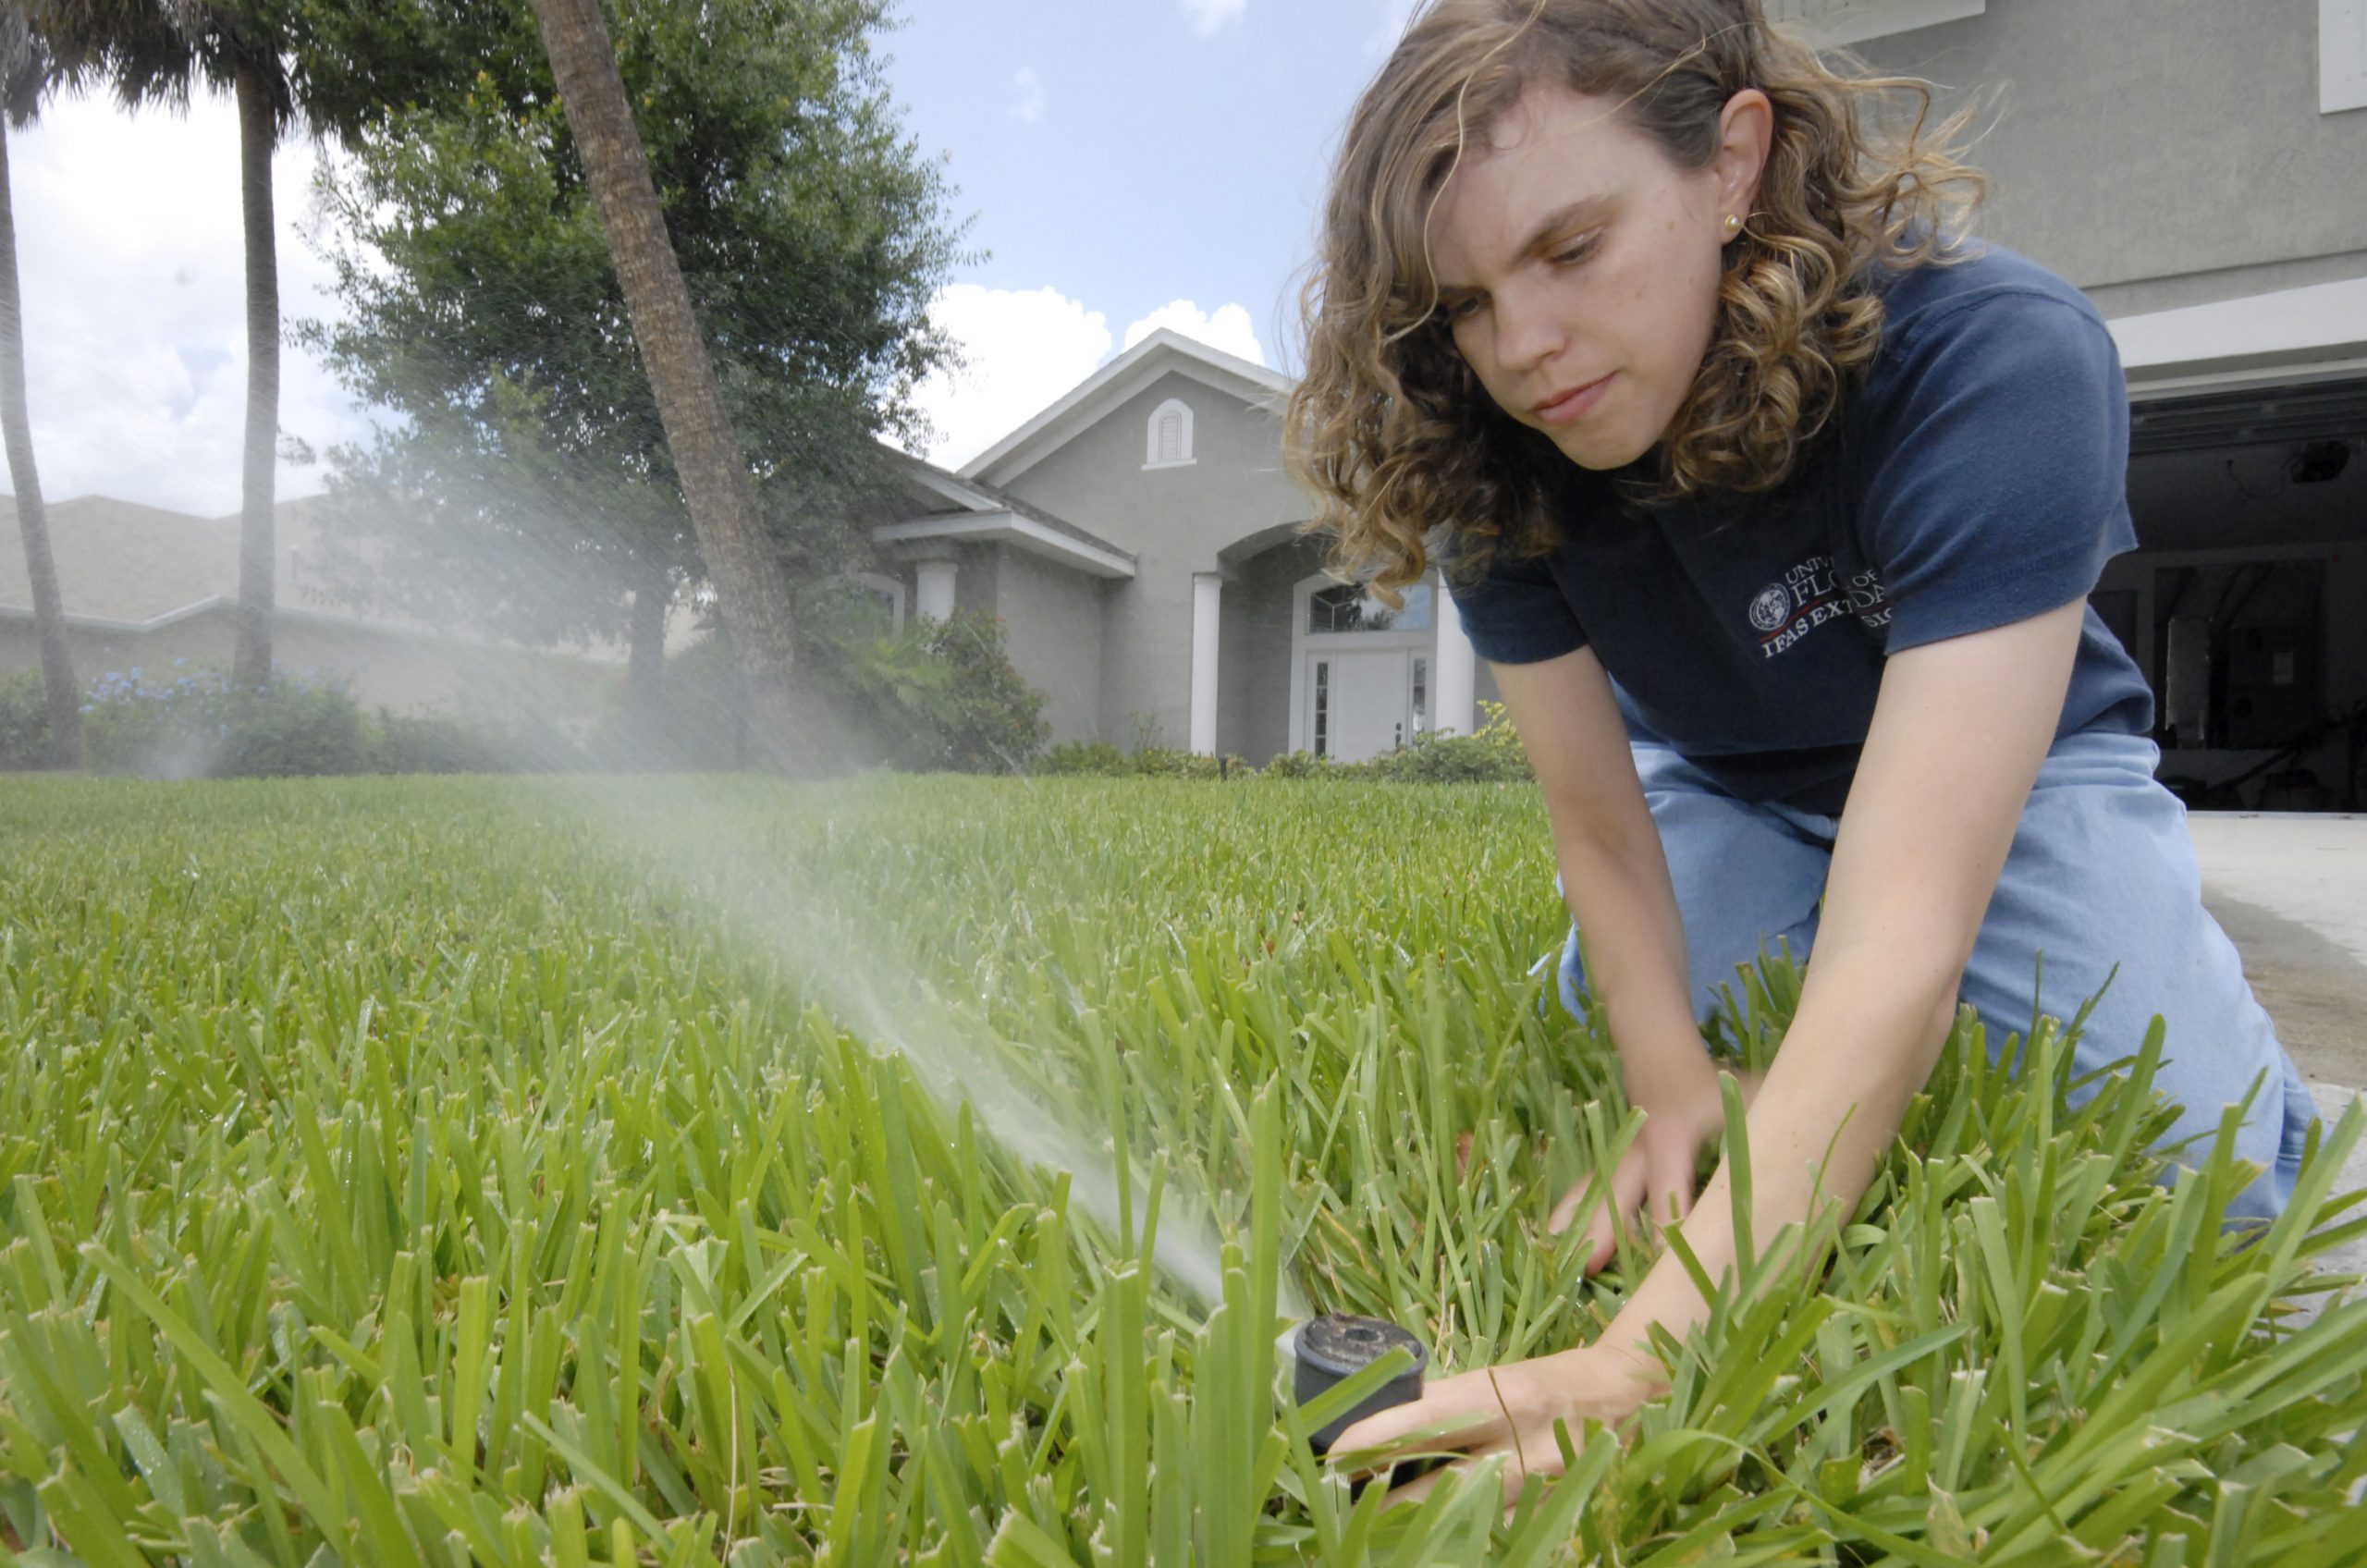
Your lawn will likely need supplemental water during the growing season. Instead of setting your irrigation system to come on every few days, learn exactly when your grass needs water with Turfgrass Talk from your UF IFAS Extension Panhandle Horticulture Team. You may then apply water when it is needed by the grass, helping to prevent turf issues from overwatering.
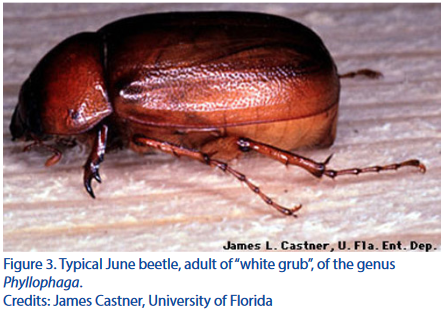
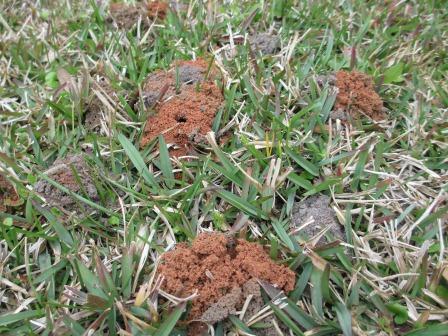
Members of the Phyllophaga genus are found throughout Florida and most of North America. One of them is the May/June beetle. Adults are most active during the rainy season. So in parts of the country where the wetter months are May or June, the common name of this insect makes common sense. But, when an area experiences extra rain earlier in the spring, the May/June beetle may emerge from the ground in March or April. That is what has happened in the western Panhandle this spring. May/June beetles have been leaving the soil and flying to the lights of people’s homes.
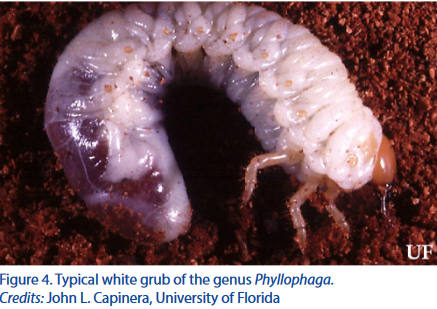
The life cycle of these beetles varies from one to four years. Eggs are laid in soil each spring by females. In 3 to 4 weeks, small grubs (larvae) hatch from eggs and develop through three stages (instars), with the first two stages lasting about 3 weeks. The larvae will move closer to the surface and back deeper in the soil as the soil temperature changes. While close to the surface, larvae feed on grass roots about one inch below the soil surface. Damaged grass turns brown and increases in size over time. Heavy infested turf feels spongy and moves when walked upon. The last larval stage remains in the soil from the fall through spring. The cool soil temperatures drive the larvae deeper in the soil where they remain relatively inactive. Typically, on the third year, white grubs pupate 3 to 6 inches deep in the soil and emerge as adults.
Larvae, called grubs, vary in length from ¾ to 1 ¾ inches depending on the stages. Grubs are white with a C-shaped body with a brown head and three pairs of legs near the head. Adults have ½ to 1 inch long, shiny bodies that are dark yellow to brownish-red in color. Adults do feed on the foliage of several species of ornamental plants, but the damage is typically only aesthetic; not causing long-term harm.
Monitoring of and managing emerging adults can help with deciding on the need for insecticide control for the grubs. To catch and remove adult beetles, place white buckets containing soapy water near plants that have chew marks or areas with lights at night. Leave it overnight. The beetles can easily be disposed of the next day. If there are more than 12 in the bucket be prepared to monitor the lawn for grubs. Extra rain or frequent irrigation during the adult flight time may attract more egg-laying females.
To inspect for grubs, turn over sod to a depth of at least two-inches. If there are an average of three or more per square foot, an insecticide treatment may be needed. To confirm that they are May/June beetles inspect the darkened rear of the grub. Locate the anal slit. It should be Y-shaped with two rows of parallel bristles that point toward each other. This is referred to as the raster pattern. All grub species can be identified using their unique “butt” features.
The most effective time to control this pest is summer or early fall when the larvae are small. Remove as much thatch as possible before applying an insecticide. Spot treat the off-colored area plus the surrounding 10 feet with products containing imidacloprid or halofenozide in early summer. Follow up in the fall with insecticides such as trichlorfon, bifenthrin or carbaryl if grubs persist.
With our warm weather, many homeowners are looking to create a beautiful lawn for the year. There are so many products in the home improvement stores and nurseries that promise to make your lawn into a green paradise. What to choose?
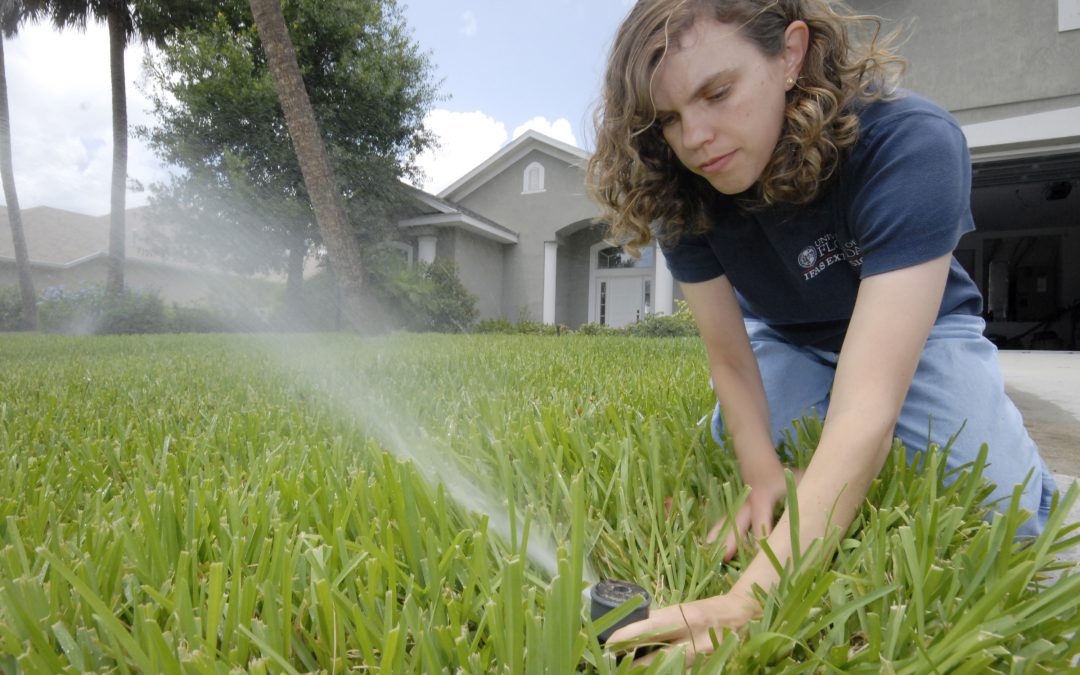
Photo UF/IFAS Extension. Spring is a good time to check the water flow and direction of a pop-up irrigation system and make adjustments as necessary.
UF/IFAS Extension provides advice based on scientific research. This is what the science says:
Wait to apply lawn fertilizer in north Florida until mid-April. Lawn grasses don’t have sufficient root growth and capabilities to use the fertilizer until then. Applying fertilizer earlier in February and March feeds the winter weeds or is lost to leaching down into the soil below the grass roots. Here’s more detail on fertilizing your lawn.
Weed and feed products are not recommended. Instead, spot treat weeds when they are small before they mature and set seed. Consult our Weed Management Guide.
Preemergence herbicide, if applied correctly, can cut down on the weeds. Apply in late February or first of March for summer weeds and October 1 for winter weeds. Now in late March – Early April is still a good time to use a preemergence herbicide for those weeds that have not yet sprouted. It is crucial to apply the product correctly, following all label directions. Measure your lawn and make sure the right amount of product is applied. This is a convenient way to measure your lawn from your armchair.
Sharpen your mower blades! A clean cut on the grass blade cuts down on lawn stress and diseases setting in.
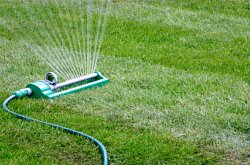
Water efficiently. We see more damage to lawns from overwatering than underwatering. Overwatering leads to increased weeds, disease, insect pests and weakens grass roots. Lawns need ½” to ¾“ of water and this will tell you how to determine when to water. The root system is healthier and stronger when watered deeply only when it needs it. Learn how long it takes your sprinkler system to deliver that amount.
The University of Florida provides more advice and information at:
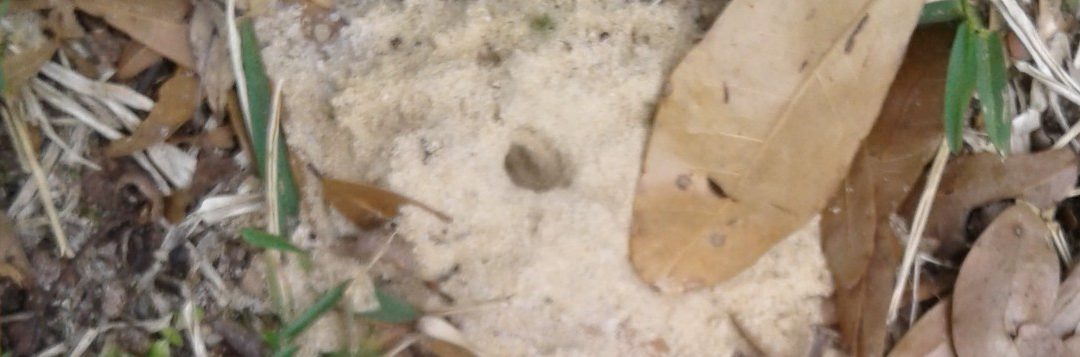
Ground-dwelling bees get a lot of attention in late winter and spring as they create large numbers of small mounds in local lawns and landscapes.
Many people become concerned as they see these bees hovering close to the ground out in their lawns and landscapes. But these bees are interesting, docile, beneficial and are unlikely to sting.
These bees are known as andrenid bees or mining bees. Andrenid bees are solitary. As the name implies, they live alone. However, they may nest in close proximity to one another but they do not form a colony or hive. They produce individual mounds with a small entrance hole. The bees are approximately ½ inch in length with a black body.
Richard Sprenkel, retired UF/IFAS Entomologist, explains their biology in today’s article.
“After mating in late winter and early spring, the female selects a site that has dry, loose soil with sparse vegetation. She excavates a vertical shaft in the soil that is approximately the diameter of a pencil and up to eighteen inches deep. Off of the main shaft, the female will construct several brood chambers that she lines with a waterproof material. The female bee provisions each brood chamber with pollen and nectar on which she lays an egg. The pollen and nectar sustain the larva until fall when the overwintering adult is formed. Early the following spring, adult bees emerge from the ground to begin the cycle again. There is one generation per year.”
The small mound of soil that is excavated from each burrow brings additional attention to the activity of the bees. As males continue to hover in the area of the burrows looking for unmated females, the bees appear more menacing than they actually are. Andrenid bees have a tendency to concentrate their nests in a relatively small area. The openings to the underground burrows may be no more than three to four inches apart.
The threat of being stung by these bees is usually highly overrated. The males cannot sting and the females are docile and not likely to sting unless stepped on, handled or threatened. While entrances to the tunnels and excavated soil may appear disruptive to the lawn, they usually are not damaging. It may appear that the grass is thin because of the bees but it is more likely that the bees are in the area because the grass was already thin. Control is usually not necessary. Because the andrenid bees forage to gather pollen and nectar, they are actually beneficial. They serve as pollinators this time of the year.
**** Photo Credited to UF / IFAS Extension Jackson County courtesy of Josh Thompson****
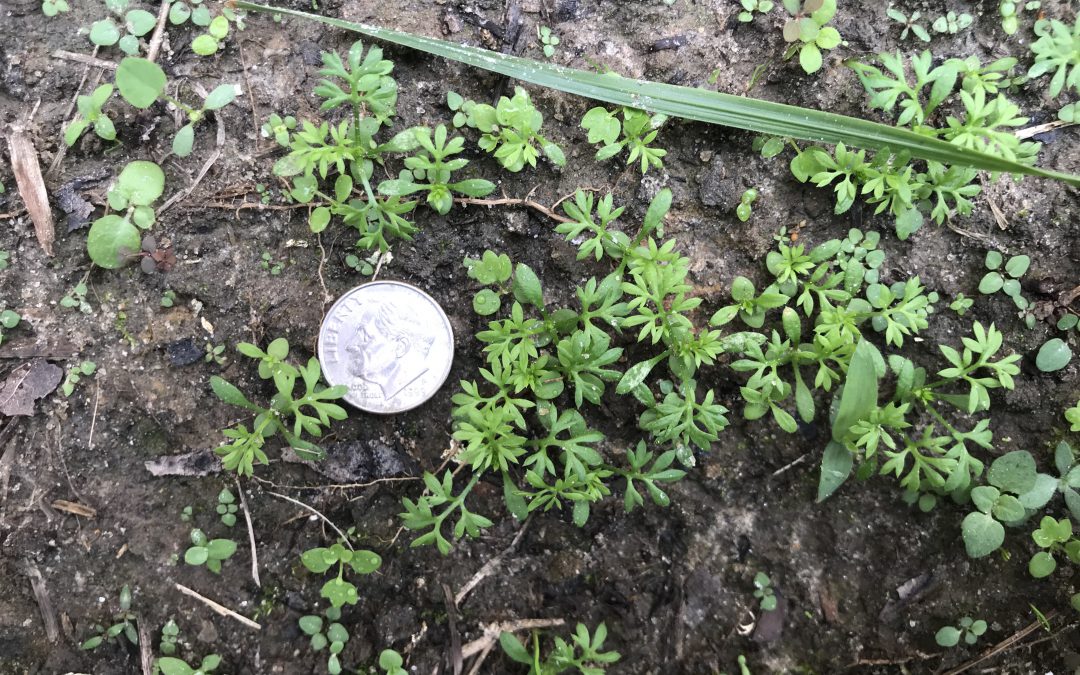
Most lawn weeds are annoying, appearing in unwanted places and numbers, but few actually cause physical harm like the pest plant Lawn Burweed (Soliva sessilis)! This infamous small, spreading winter weed’s seeds generally germinate when temperatures begin to cool in the fall (late October-November). Burweed then grows mostly unnoticed through the winter until spring, when it then produces the hard, spiny burs that contain the plant’s seeds and the plants finally die. Once the burs have formed, Burweed’s presence makes walking on newly greened-up spring turf extremely painful for pets and people (barefoot of course, the burs aren’t large enough to puncture shoe soles). At this point of the plant’s life, once it has made its unwanted presence known, control is not feasible as the Burweed plants have set seed, ensuring a new crop next year, and killing the remaining foliage doesn’t remove the burs. What is a homeowner to do?
Newly germinated Lawn Burweed. Photo courtesy of the author.
Fortunately, Lawn Burweed is relatively easy to control chemically if one pays close attention to seasonal changes and uses herbicides (either pre-emergent or post-emergent herbicides) effectively.
Pre-emergent Herbicide Options: The first chemical control option for Lawn Burweed is a timely application of the pre-emergent herbicide Isoxaben (sold under various brand names at most farm or garden stores) to prevent Burweed seeds from germinating, greatly reducing plant populations. However, pre-emergent Isoxaben applications must be made before the plants sprout and begin to grow to be effective. For Burweed, this generally means application in October, once nighttime temperatures dip into the 55-60 degrees F range for several nights in a row, as consistent temperatures in this range give Burweed seeds the signal to germinate. Though we’re already past the point of pre-emergent herbicides being an option for control this year, homeowners should plan to include this method in their Lawn Burweed control plan for fall 2020!
Post-Emergent Herbicide Options: If you haven’t already used a pre-emergent herbicide this fall for Burweed control, you must turn to post-emergent options. Like pre-emergent herbicides, timing is critical if you want your post-emergent applications to work! These herbicides are most effective when Burweed plants are young, small, vigorously growing, and haven’t set burs yet. Successful post-emergent applications may be made from December-early February before burs harden. Unlike pre-emergents, where there is only one strong option for Burweed control, many post-emergent herbicides exist that are extremely effective! When shopping, look for products containing the following active ingredients:
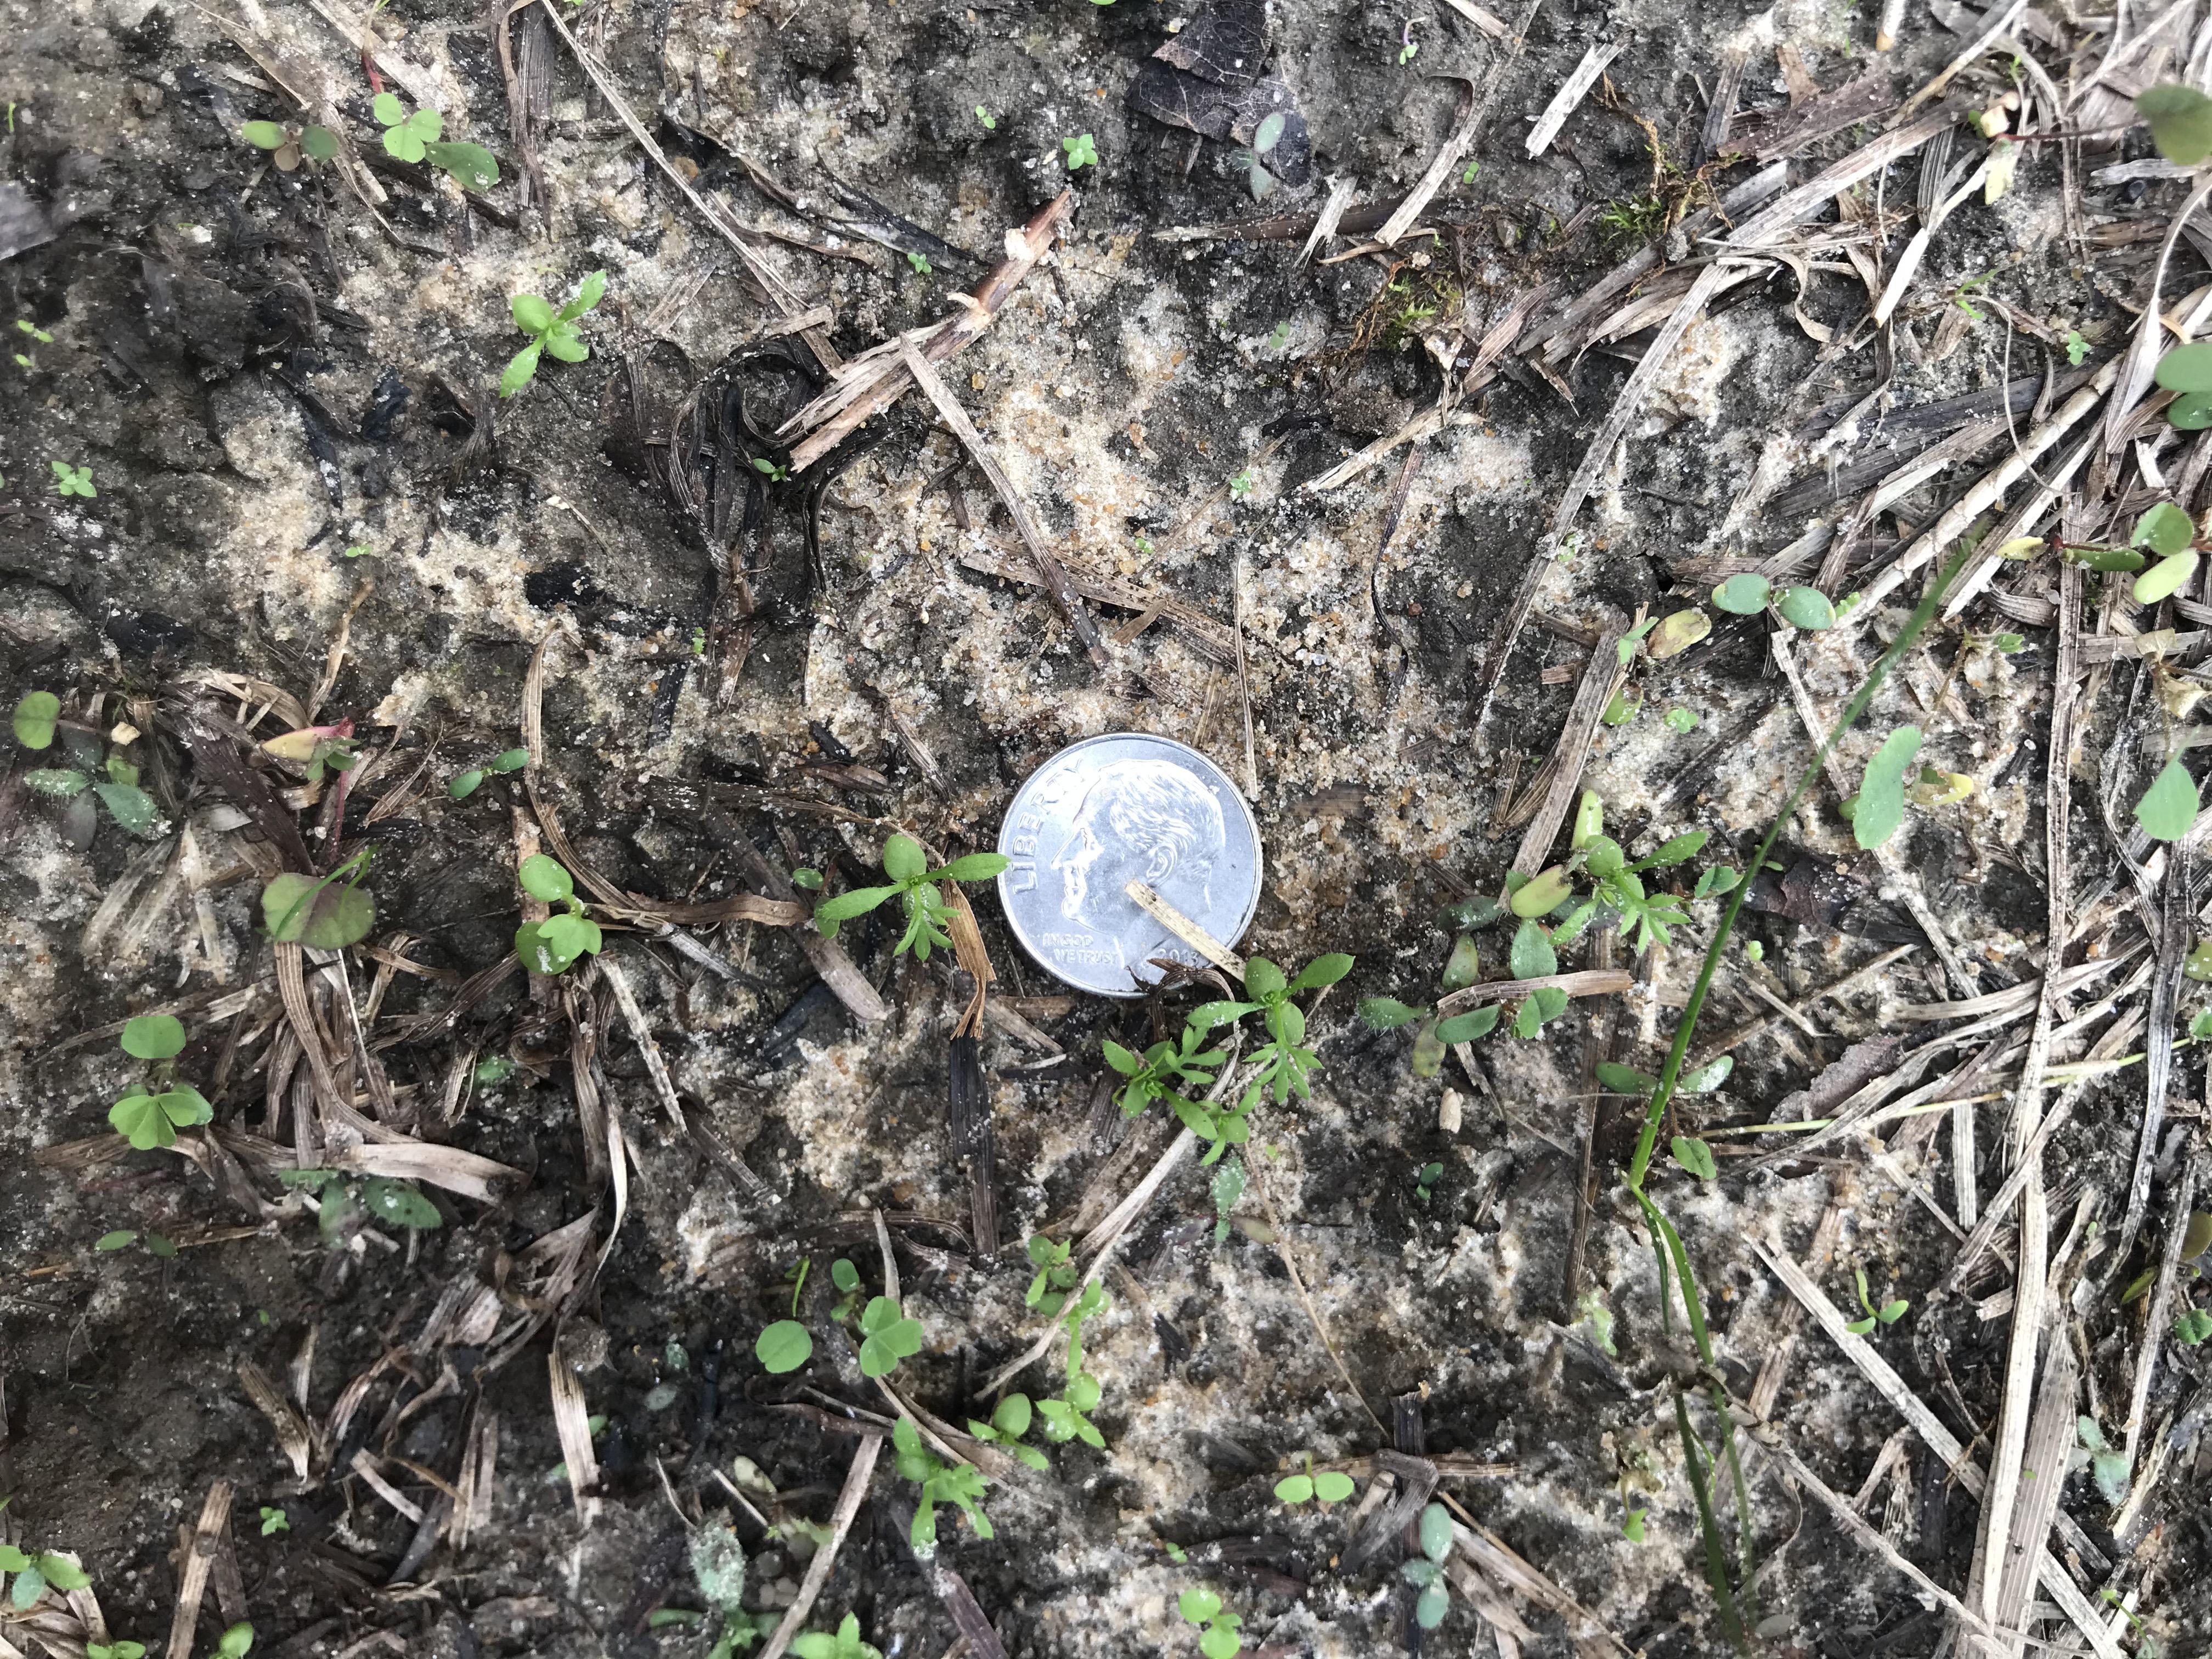
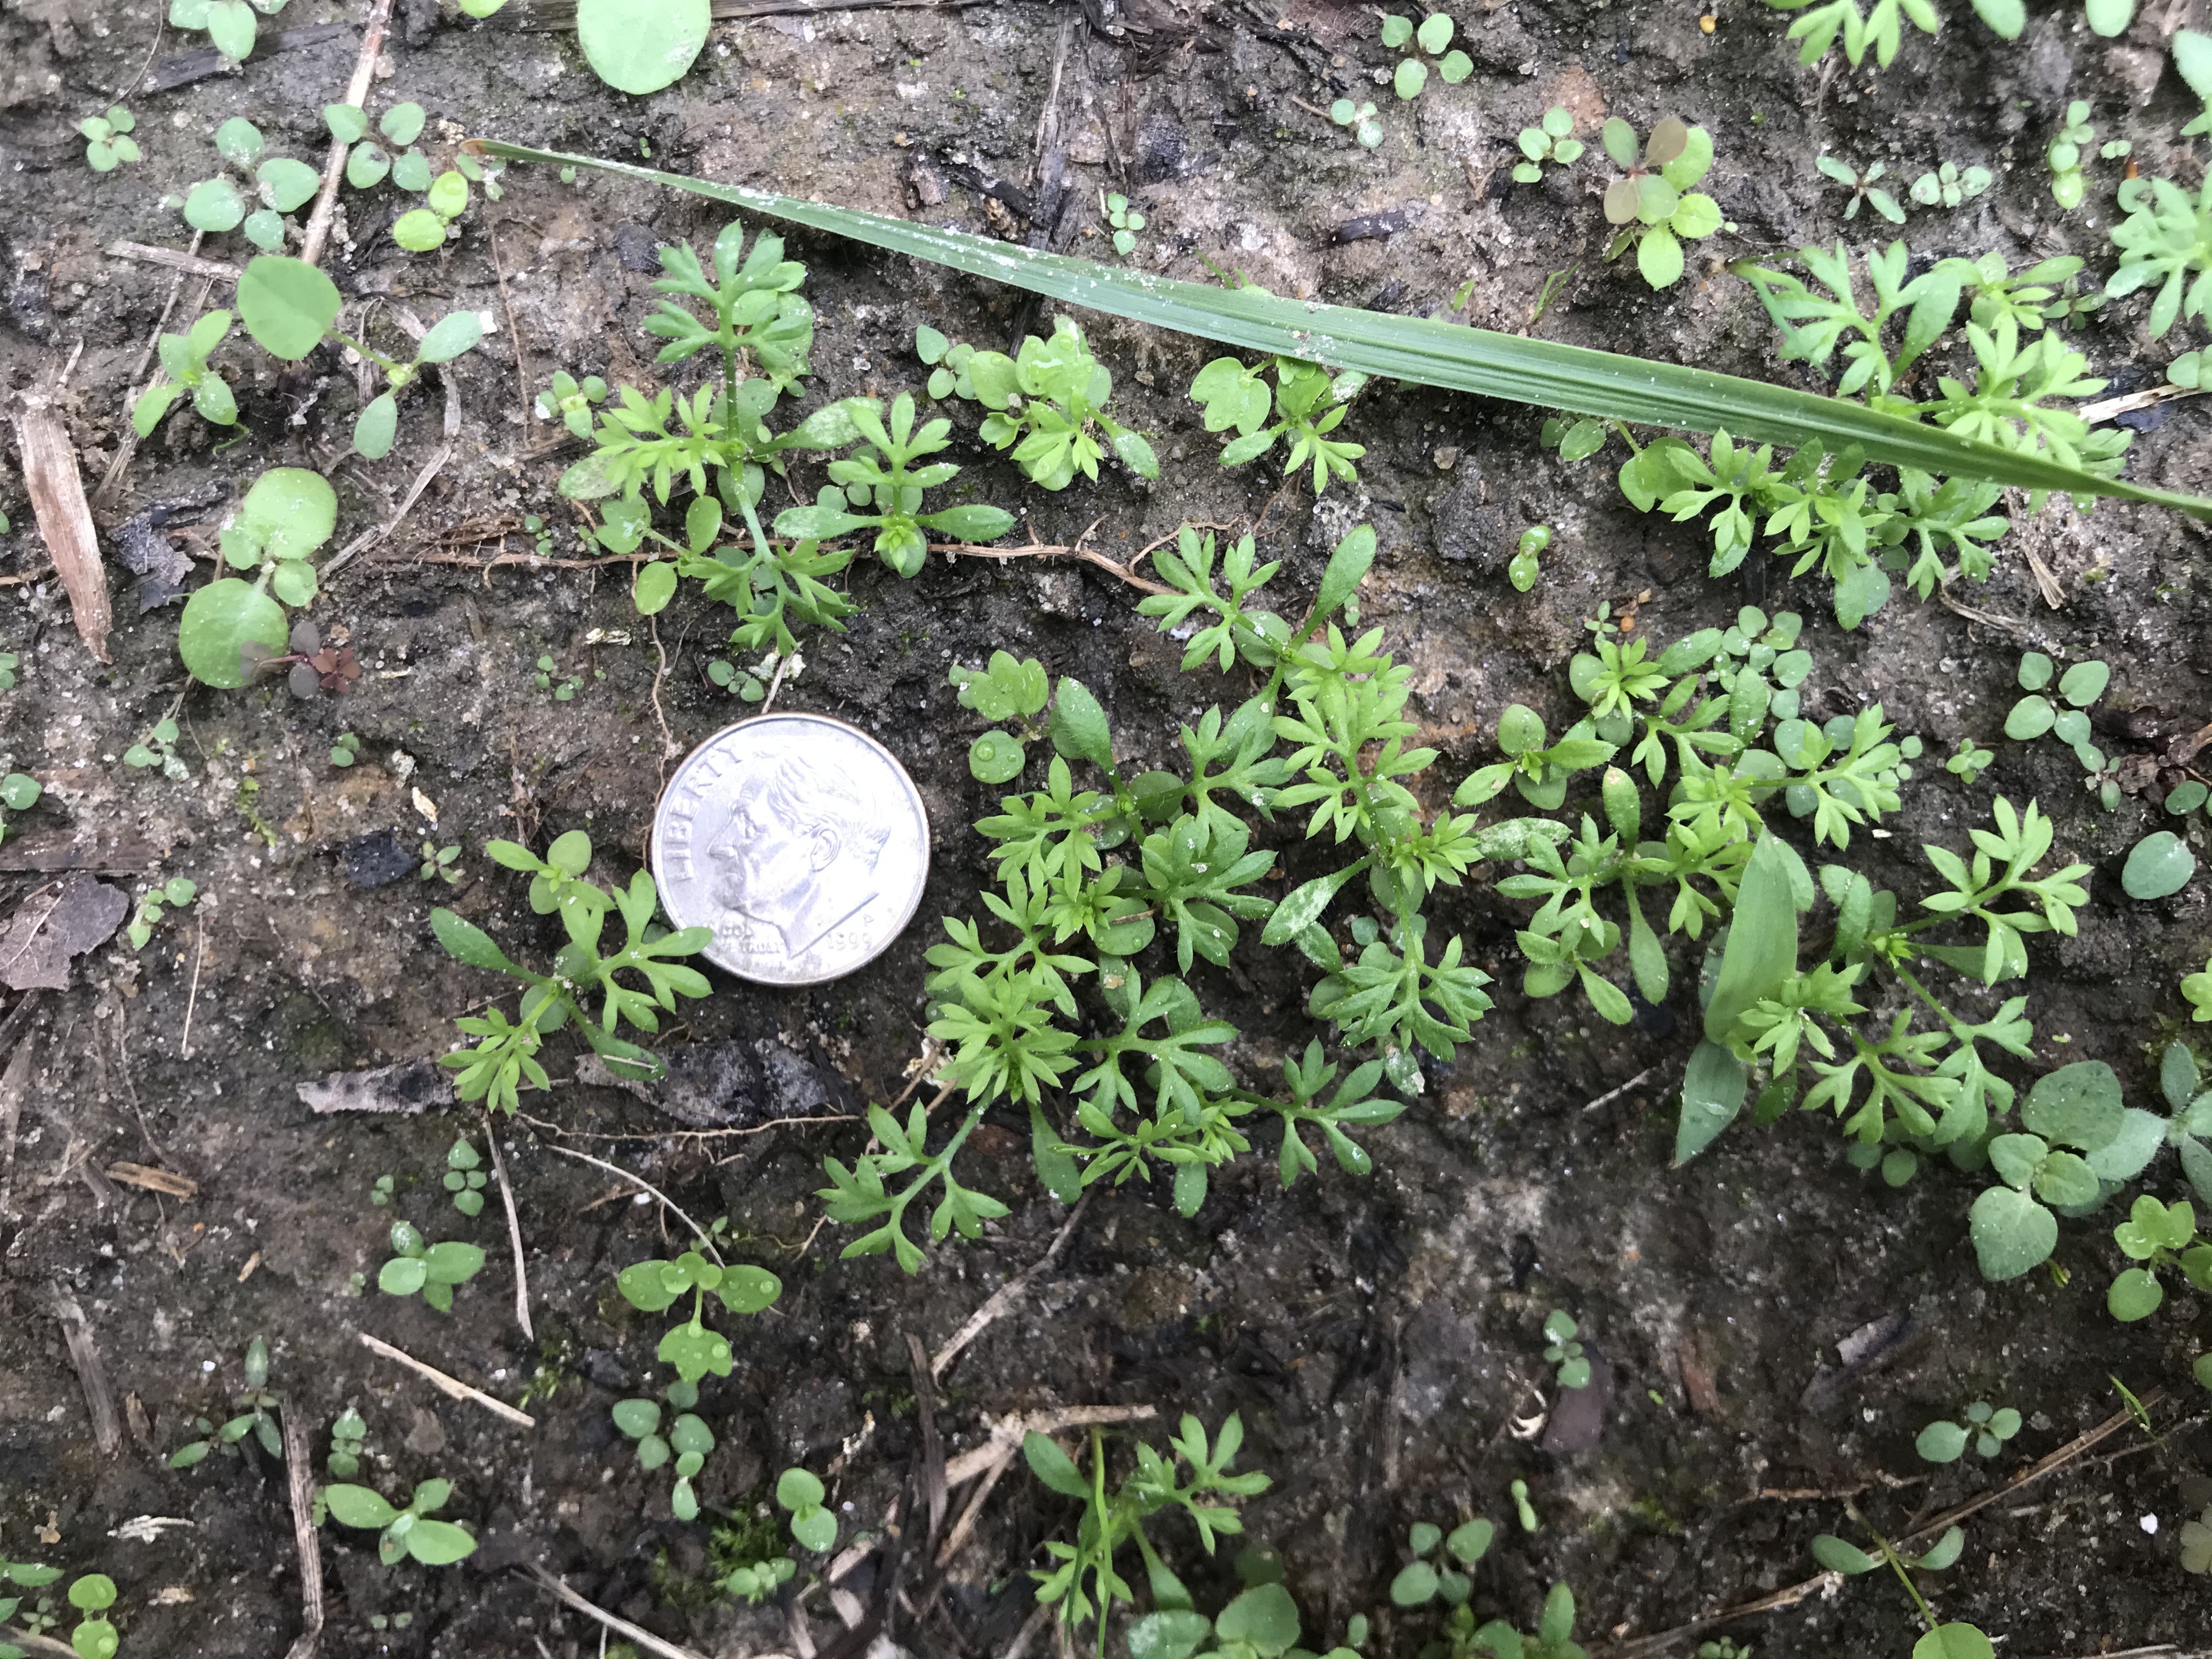
Lawn Burweed around 10 days after emergence. Photo courtesy of author.
Atrazine – sold under many brand names and safe in Centipede, St. Augustine, & Bermudagrass. Do not use in Zoysia or Bahiagrass lawns.
Dicamba, Mecoprop, 2,4-D – commonly sold in three-way formulations through many brand names. Generally safe in Centipede, St. Augustine, Bermuda, Zoysia, & Bahiagrass lawns.
Metsulfuron – sold under several brand names and safe in Centipede, St. Augustine, Zoysia & Bermudagrass. Do not use in Bahiagrass. Be careful if used around ornamentals.
Thiencarbazone, iodosulfuron, dicamba – sold as Celsius WG from Bayer. Safe in Centipedegrass, Zoysiagrass, Bermudagrass, and St. Augustinegrass. Do not use in Bahiagrass.
Lawn Burweed control with of all the above-listed herbicides will be most effective with a follow-up application 10-14 days later.
Note: With the exception of the Thiencarbazone, iodosulfuron & dicamba mixture (Celsius), do not apply any of these post-emergent herbicides during spring turf green up.
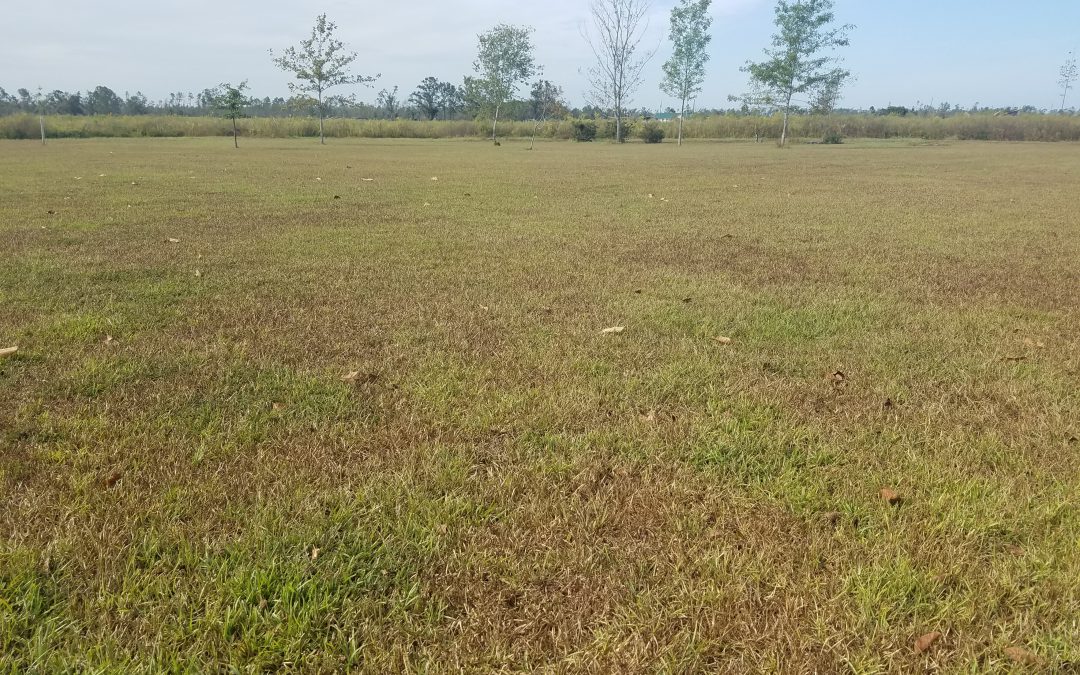
For a state that receives around 60” of rainfall a year, it is sure dry in Florida right now! In the Panhandle, the majority of our annual rainfall occurs in in bunches during winter and early spring via near-weekly cold fronts, in the mid-summer as a result of afternoon thunderstorms, and periodically in late summer/early fall if a tropical system crosses our path. Mixed in, however, are two distinct, historically dry periods: the first one in April through mid-May (contrary to popular myth, if we have May flowers, they’re gonna have to make it without April showers) and the second right now in September and October. The prolonged second dry period that we’re experiencing now makes it difficult to manage the mostly unirrigated, low-input turfgrass common in rural Panhandle lawns and pastures. It is critical to enter these expected droughts with healthy turf and remembering to employ 3 simple management tips when it quits raining (although you should follow them year-round ideally) can greatly increase your turf’s resiliency!
Unirrigated Centipdedegrass turf showing drought stress- Photo courtesy of the author.
Water Wisely – The average Florida turfgrass requires ¾-1” of water per week and we generally achieve that through rainfall. However, in our droughty months, supplemental irrigation can be a lawn saver, particularly in high traffic or more stressed areas of the yard. I realize that many of you, myself included, maintain large lawns without irrigation systems and it’s impossible to keep all your lawn well-watered during drought, but you can maintain the areas around your home, hardscapes and landscaped beds with the highest impact/visibility nicely! In these areas, put down no more than ¾” of water per irrigation event, a ballpark number that ordinarily allows the turf root zone to become saturated. Measuring your sprinkler’s water output is easily done by setting several straight-sided cans (tuna or cat food containers work great) under the sprinkler and timing how long it takes to achieve 3/4”. You might be surprised how much water you waste by leaving a sprinkler running for an hour or more!
Apply Herbicides Appropriately – Herbicides are a great item to have in the turf care toolbox, but if used incorrectly can be a waste of time and money at best, harmful to your turf at worst! Once turf and associated weeds become drought stressed (turning bluish gray, obvious wilting, leaves curling, etc.), it is too late for weed control with herbicides. There are a couple of reasons for this. First, when plants get stressed, they slow or stop their growth and focus on survival. This survival response prevents herbicides from being taken up properly and ultimately causes ineffectual weed control. Also, many herbicides specifically state on the product label that they should not be applied during certain conditions (drought, temperatures above 85-90 degrees, etc.). It is critical that one adhere to these label directions as applying the incorrect product in hot and dry conditions can cause volatility, drift to non-target plants, and in some cases, toxicity to turf you’re treating in. When it’s droughty like it is now, leave the herbicides in the chemical shed to prevent wasting your time and money and potentially damaging non-target plants!
Unirrigated Centipedegrass turf showing drought stress – photo courtesy of the author
Raise that Deck – Finally, one of the most important turf management strategies during an extended drought is to reduce mowing and raise your mower’s cutting height when/if you do mow. As mentioned above, plants are already stressed during a drought and physically chopping off a chunk of the turf plant stresses it further, causing an energy-intensive wound response when the plant is actively conserving resources for survival. Therefore, if you just HAVE to mow, raise the cutting height as high as possible to make the smallest injury possible on the grass and keep your mower blades sharp to ensure a clean cut, which will heal easier and require a smaller energy response from the plant.
During droughts like the one we’re currently in, there isn’t one silver bullet to keep your non-irrigated turf looking good. However, there are several strategies you can use throughout the year to get your lawn through dry times. Remember to water ¾”-1” per week when you can, where you can. Before you water, calibrate your sprinkler to ensure you put out enough water and don’t waste your time and inflate your utility bill by putting out too much! Reduce or eliminate use of herbicides as they are ineffective during stress periods and can harm your turfgrass. Finally, reduce or eliminate mowing and if you must mow, raise the deck! If you have any questions about getting your turf through the drought or other horticultural or agronomic topics, please contact your local UF/IFAS Extension Office!

 Richard Sprenkel, retired UF/IFAS Entomologist, explains their biology in today’s article.